

Page 1
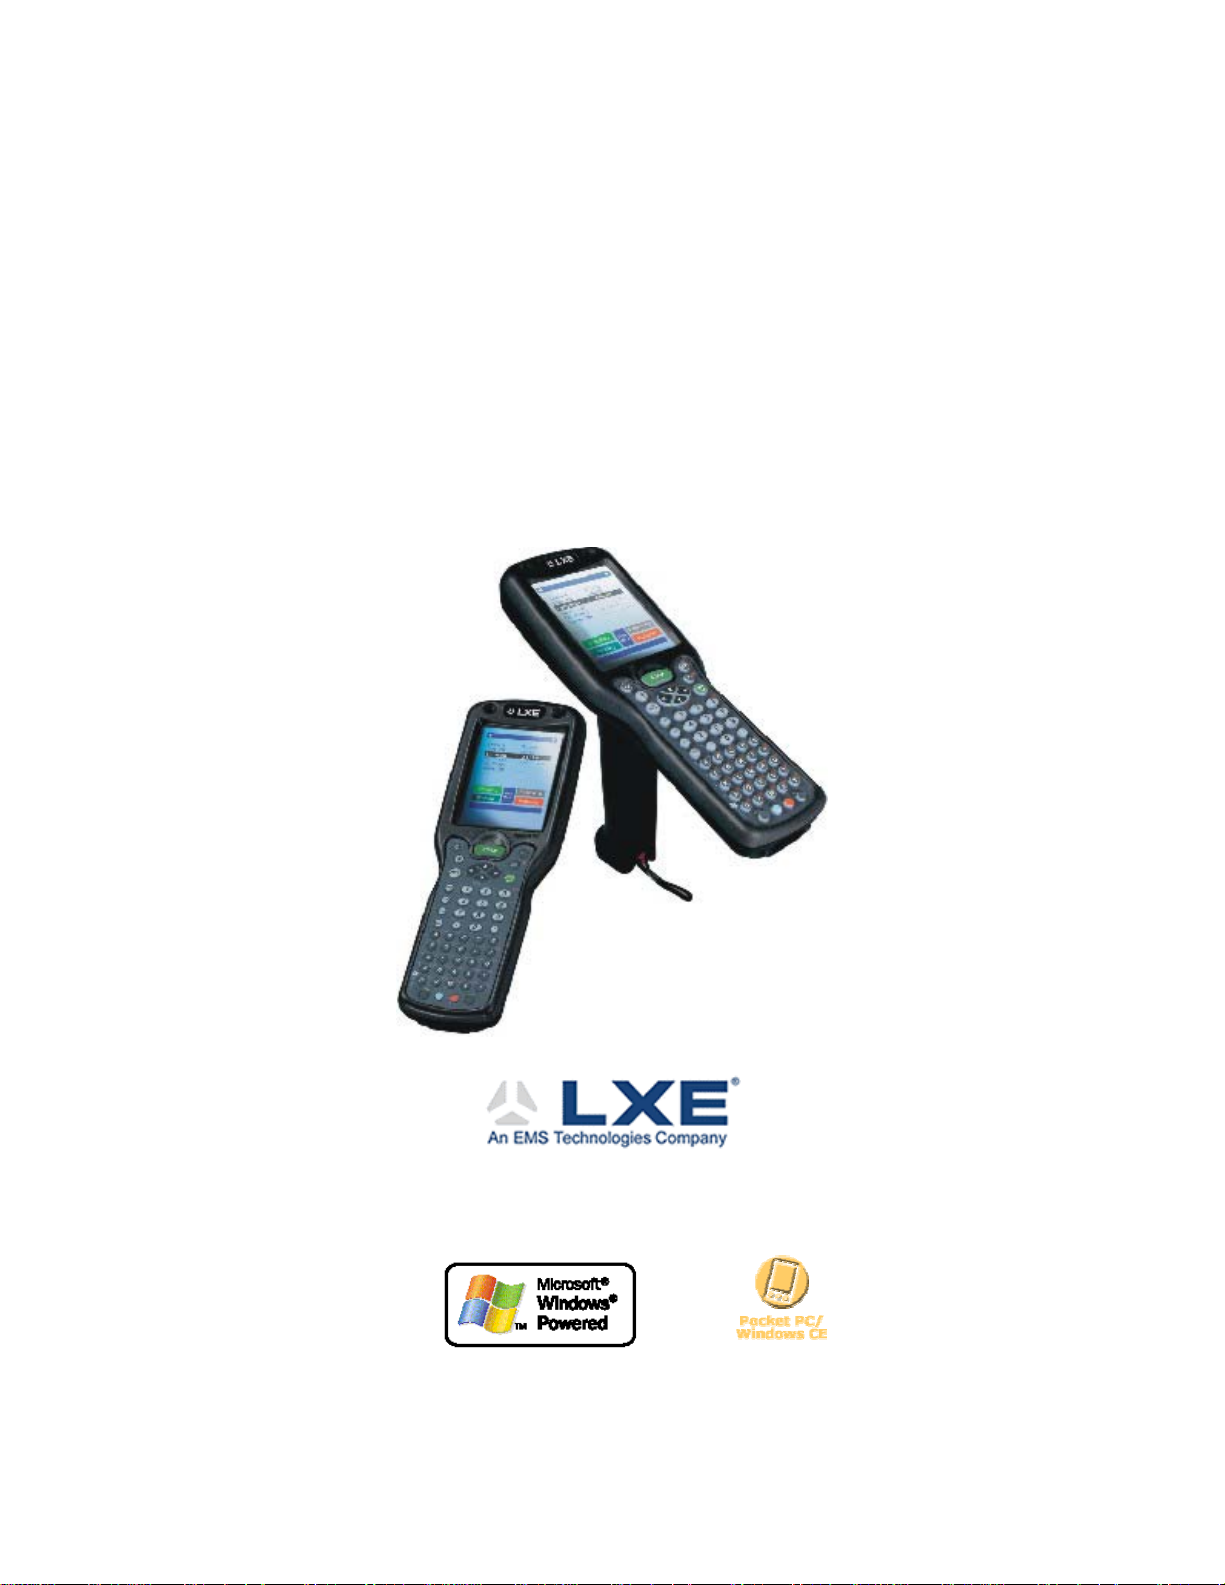
Note: This is the full User's Guide.
Please download the LXEbook version
of this guide to the MX6, not this one.
MX6 User’s Guide
Copyright © December 2003 by LXE Inc.
All Rights Reserved
E-EQ-MX6OGWW-A
Page 2

LANGUAGE : ENGLISH
Notices
Notice:
LXE Inc. reserves the right to make improvements or changes in the products described in this manual at any time
without notice. While reasonable efforts have been made in the preparation of this document to assure its accuracy,
LXE assumes no liability resulting from any errors or omissions in this document, or from the use of the
information contained herein. Further, LXE Incorporated, reserves the right to revise this publication and to make
changes to it from time to time without any obligation to notify any person or organization of such revision or
changes.
Copyright Notice:
This manual is copyrighted. All rights are reserved. This document may not, in whole or in part, be copied,
photocopied, reproduced, translated or reduced to any electronic medium or machine-readable form without prior
consent, in writing, from LXE Inc.
Copyright © 2003 by LXE Inc. An EMS Technologies Company.
125 Technology Parkway, Norcross, GA 30092 U.S.A. (770) 447-4224
Trademarks:
LXE® is a registered trademark of LXE Inc. Microsoft®, ActiveSync®, MSN, Outlook®, Windows®, the
Windows logo, and Windows Media are either registered trademarks or trademarks of Microsoft Corporation in the
United States and/or other countries. All other brand or product names are trademarks or registered trademarks of
their respective companies or organizations. When this manual is in PDF format: “Acrobat ® Reader Copyright ©
1987-2001 Adobe Systems Incorporated. All rights reserved. Adobe, the Adobe logo, Acrobat, and the Acrobat
logo are trademarks of Adobe Systems Incorporated.” applies.
Note: The original equipment’s User Manuals are copyrighted by Hand Held Products® Incorporated (HHP).
This manual has been amended by LXE® Inc., for the MX6 and Cradles with HHP’s express permission.
The user is strongly encouraged to read Appendix B, “Regulatory Notices and Safety
Information”. Important safety cautions, warnings and regulatory information is
contained in Appendix B.
Initial Release Dec 2003
Page 3

Table of Contents
NTRODUCTION 1
I
Overview.................................................................................................................... 1
Important Battery Information..................................................................................................1
Document Conventions ............................................................................................................2
MX6 Environmental Specifications .........................................................................................2
Q
UICK START 3
In General .................................................................................................................. 3
Components .............................................................................................................. 4
Insert Fully Charged Battery.................................................................................... 7
Low Battery Condition .............................................................................................................7
Power Key.................................................................................................................. 8
Reset or Reboot.........................................................................................................................8
Soft Reset ...............................................................................................................................8
Hard Reset ..............................................................................................................................8
Using the Stylus........................................................................................................ 9
General Windows Keyboard Shortcuts................................................................. 10
Align the Touchscreen ........................................................................................... 11
Cleaning the Touch Screen and Scan Aperture ......................................................................11
Set the Date and Time ............................................................................................ 12
Setting Display Backlight Action........................................................................... 13
Backlight Intensity..................................................................................................................14
Set the Power Off Timer ......................................................................................... 14
Accessing Files in Flash Memory.......................................................................... 15
The Storage Card ....................................................................................................................15
The IPSM Folder ....................................................................................................................15
Connect the Audio Jack (Optional) ....................................................................... 16
Set the Audio Speaker Volume .............................................................................. 16
Connect External Power Supply (Optional).......................................................... 17
Adjust the Handstrap.............................................................................................. 18
SING THE MX6 19
U
Enter Data................................................................................................................ 19
Keypad Entry ..........................................................................................................................19
Stylus Data Entry....................................................................................................................19
The Integrated Imager.............................................................................................................20
Preparation ...........................................................................................................................20
Using the Imager ..................................................................................................................20
Distance from Label .............................................................................................................20
E-EQ-MX6OGWW-A MX6 User’s Guide
Page 4

ii Table of Contents
Successful Scan ....................................................................................................................20
Unsuccessful Scan................................................................................................................21
Aiming the Barcode Imager .................................................................................................21
Touch Screen Display............................................................................................. 22
System Tray Icons .................................................................................................. 22
Soft Input Panel....................................................................................................... 23
Entering Text ..........................................................................................................................24
Repeating Keystrokes .............................................................................................................24
International Characters..........................................................................................................24
Keypads ................................................................................................................... 25
Special Keys ...........................................................................................................................26
SCAN Key............................................................................................................................26
Power Key ............................................................................................................................26
Shift (SFT)............................................................................................................................26
Enter (ENT)..........................................................................................................................26
Escape (ESC)........................................................................................................................26
Tab........................................................................................................................................26
Backlight ..............................................................................................................................26
Alpha Lock (ALPHA)..........................................................................................................26
Backspace (BKSP) ...............................................................................................................26
Delete (DEL) ........................................................................................................................26
Arrow Keys ..........................................................................................................................27
Modifier Keys.........................................................................................................................27
The IR Serial Port .................................................................................................... 28
Power Modes........................................................................................................... 29
On Mode .................................................................................................................................29
The Display ..........................................................................................................................29
The MX6 ..............................................................................................................................29
Suspend Mode ........................................................................................................................30
The MX6 ..............................................................................................................................30
Off Mode ................................................................................................................................30
Batteries................................................................................................................... 31
About Lithium-Ion Batteries ..................................................................................................31
Main Battery ...........................................................................................................................31
Backup Battery .......................................................................................................................31
Battery Chargers..................................................................................................... 32
Four Bay Charger/Analyzer (Optional)..................................................................................32
Charging a Battery Using the Desktop Docking Cradle.........................................................32
Docking Cradles...................................................................................................... 33
Indicators and LEDs ...............................................................................................................33
Powered Desktop Cradle......................................................................................................33
Powered Vehicle Cradle.......................................................................................................34
Getting Help............................................................................................................. 35
User Guides ............................................................................................................................35
Accessories .............................................................................................................................35
MX6 User’s Guide E-EQ-MX6OGWW-A
Page 5

Table of Contents iii
APPENDIX A KEY MAPS 37
35-Key Numeric-Alpha Keypad.............................................................................. 37
Inactive Keys on the 35-key Keypad......................................................................................41
56-Key Full Alpha Numeric Keypad....................................................................... 42
APPENDIX B REGULATORY NOTICES AND SAFETY INFORMATION 47
INDEX 53
Illustrations
Figure 1 Front of MX6.........................................................................................................................................4
Figure 2 Back of MX6 ......................................................................................................................................... 5
Figure 3 Trigger Handle Installed........................................................................................................................6
Figure 4 RS-232/USB Communications and Charging Port................................................................................6
Figure 5 Stylus Storage Locations ....................................................................................................................... 9
Figure 6 Align the Touchscreen......................................................................................................................... 11
Figure 7 Set the Date and Time .........................................................................................................................12
Figure 8 Audio Jack Location............................................................................................................................16
Figure 9 AC/DC 12V External Power Supply Kit.............................................................................................17
Figure 10 Handstrap...........................................................................................................................................18
Figure 11 Scan and Decode LEDs .....................................................................................................................20
Figure 12 Scan Beam.........................................................................................................................................21
Figure 13 Tapping with the Stylus.....................................................................................................................22
Figure 14 System Tray Icons ............................................................................................................................. 22
Figure 15 Soft Input Panel .................................................................................................................................23
Figure 16 The 35-key and 56-key Keypads.......................................................................................................25
Figure 17 Modifier Keys....................................................................................................................................27
Figure 18 IR Port Location ................................................................................................................................28
Figure 19 Power Modes – On, Suspend and Off ...............................................................................................29
Figure 20 Multicharger / Analyzer.....................................................................................................................32
E-EQ-MX6OGWW-A MX6 User’s Guide
Page 6

iv Table of Contents
MX6 User’s Guide E-EQ-MX6OGWW-A
Page 7

Overview
Introduction
The MX6 is a lightweight hand-held computer that uses Microsoft® Windows® for Pocket PC
2002 software and a powerful, battery-saving Xscale™ processor. The MX6 can transmit
information using a 2.4 GHz radio (with an internally mounted antenna) and it can store
information for later transmission through an RS-232, InfraRed or communication port.
The MX6 is vertically oriented and features backlighting for the display and the keypad. The
touch-screen display supports graphic features and icons that the Pocket PC operating system
supports.
The MX6 is powered by a 2000 mAh Lithium-Ion main battery pack and an internal backup
battery. A stylus is attached to the MX6 to assist in entering data and configuring the unit.
The MX6 with a 35-key keypad is slightly different from the MX6 with a 56-key keypad creating
differences in keymapping. Portions of this guide will be split between the the 35-key device and
the 56-key device. Sections that do not differentiate between one or the other contain instructions
or information that is applicable to both devices.
Important Battery Information
• Until the Main Battery and Backup Battery are completely depleted, the MX6 is always
drawing power from the batteries (On).
• New batteries must be fully charged prior to use.
• When a new battery is installed in the MX6 for the first time (or when the Backup battery is
completely depleted), the Time and Date must be re-set.
Li-Ion Battery
When disposing of the MX6 Main Battery, the following precautions should be observed:
The battery should be disposed of properly. The battery should not be disassembled or crushed.
The battery should not be heated above 212°F (100°C) or incinerated.
The “MX6 Reference Guide” contains MX6 technical information and advanced functions.
Please refer to the reference guide when preparing to dock the MX6 or communicate with
the host.
Please refer to the “MX6 Dock Reference Guide” when using the MX6 with a desktop or vehicle
mounted docking cradle.
E-EQ-MX6OGWW-A MX6 User’s Guide
Page 8
2 Overview
Document Conventions
ALL CAPS All caps are used to represent disk directories, file names, and application names.
Start | Programs
"Quotes"
ATTENTION
Note: Keyword that indicates immediately relevant information.
CAUTION
WARNING
DANGER
Rather than use the phrase "tap the Start icon then select Programs", this guide uses the convention
"tap Start | Programs".
Indicates the title of a book, chapter or a section within a chapter (for example, "Document
Conventions").
Indicates a reference to other documentation.
Keyword that indicates vital or pivotal information to follow.
Attention symbol that indicates vital or pivotal information to follow. Also, when marked on product,
means to refer to the user’s guide.
International fuse replacement symbol. When marked on the product, the label includes fuse ratings
in volts (v) and amperes (a) for the product.
Keyword that indicates a potentially hazardous situation which, if not avoided, may result in minor
or moderate injury.
Keyword that indicates a potentially hazardous situation which, if not avoided, could result in death
or serious injury.
Keyword that indicates a imminent hazardous situation which, if not avoided, will result in death or
serious injury.
MX6 Environmental Specifications
Operating Temperature
Storage Temperature -22°F to 176°F (-40°C to 80°C) [non-condensing]
Rating IP64
Operating Humidity 5% to 95% non-condensing
Shock Multiple 5 ft (1.2cm) drops to concrete
14°F to 122°F (10°C to 50°C) [non-condensing]
MX6 User’s Guide E-EQ-MX6OGWW-A
Page 9

In General
Quick Start
This section’s instructions are based on the assumption that your new MX6 is pre-configured and
the trigger handle or handstrap (optional) are installed.
First – charge the Main Battery pack and the internal backup battery completely. A main battery
pack charge takes four hours and the backup battery charges takes 8 hours (new batteries only).
The main battery can be charged in one of three ways –
• either while in the MX6 in a powered docking cradle, or
• with the main battery in a powered MX6 battery charger, or
• in-unit battery charging using the Communications cable with power supply.
The sequence of events for a new MX6 is:
1. Insert a fully charged battery. (Always put a fully charged battery in the MX6 at the
beginning of the shift or work day.)
2. Turn the MX6 on by pressing the Power key.
3. Align (calibrate) the touchscreen.
4. Complete the simple exercise showing how to use the stylus and pop-up menus.
5. Set the time zone for your location. Please wait while programs install.
6. When the Today screen is displayed, tap the Clock icon and set the correct date and time.
7. Set the wireless radio parameters, if necessary. Refer to the MX6 Reference Guide.
8. Edit the terminal emulation parameters, if necessary. Refer to the RFTerm Reference Guide.
9. Tap Start | HHP Utils | RegBackup to permanently save your settings.
If you remove the battery or the battery fails, there is a 30 minute window in which to insert a
charged main battery before the backup battery fails and the contents of the Flash memory are
lost.
E-EQ-MX6OGWW-A MX6 User’s Guide
Page 10
4 Components
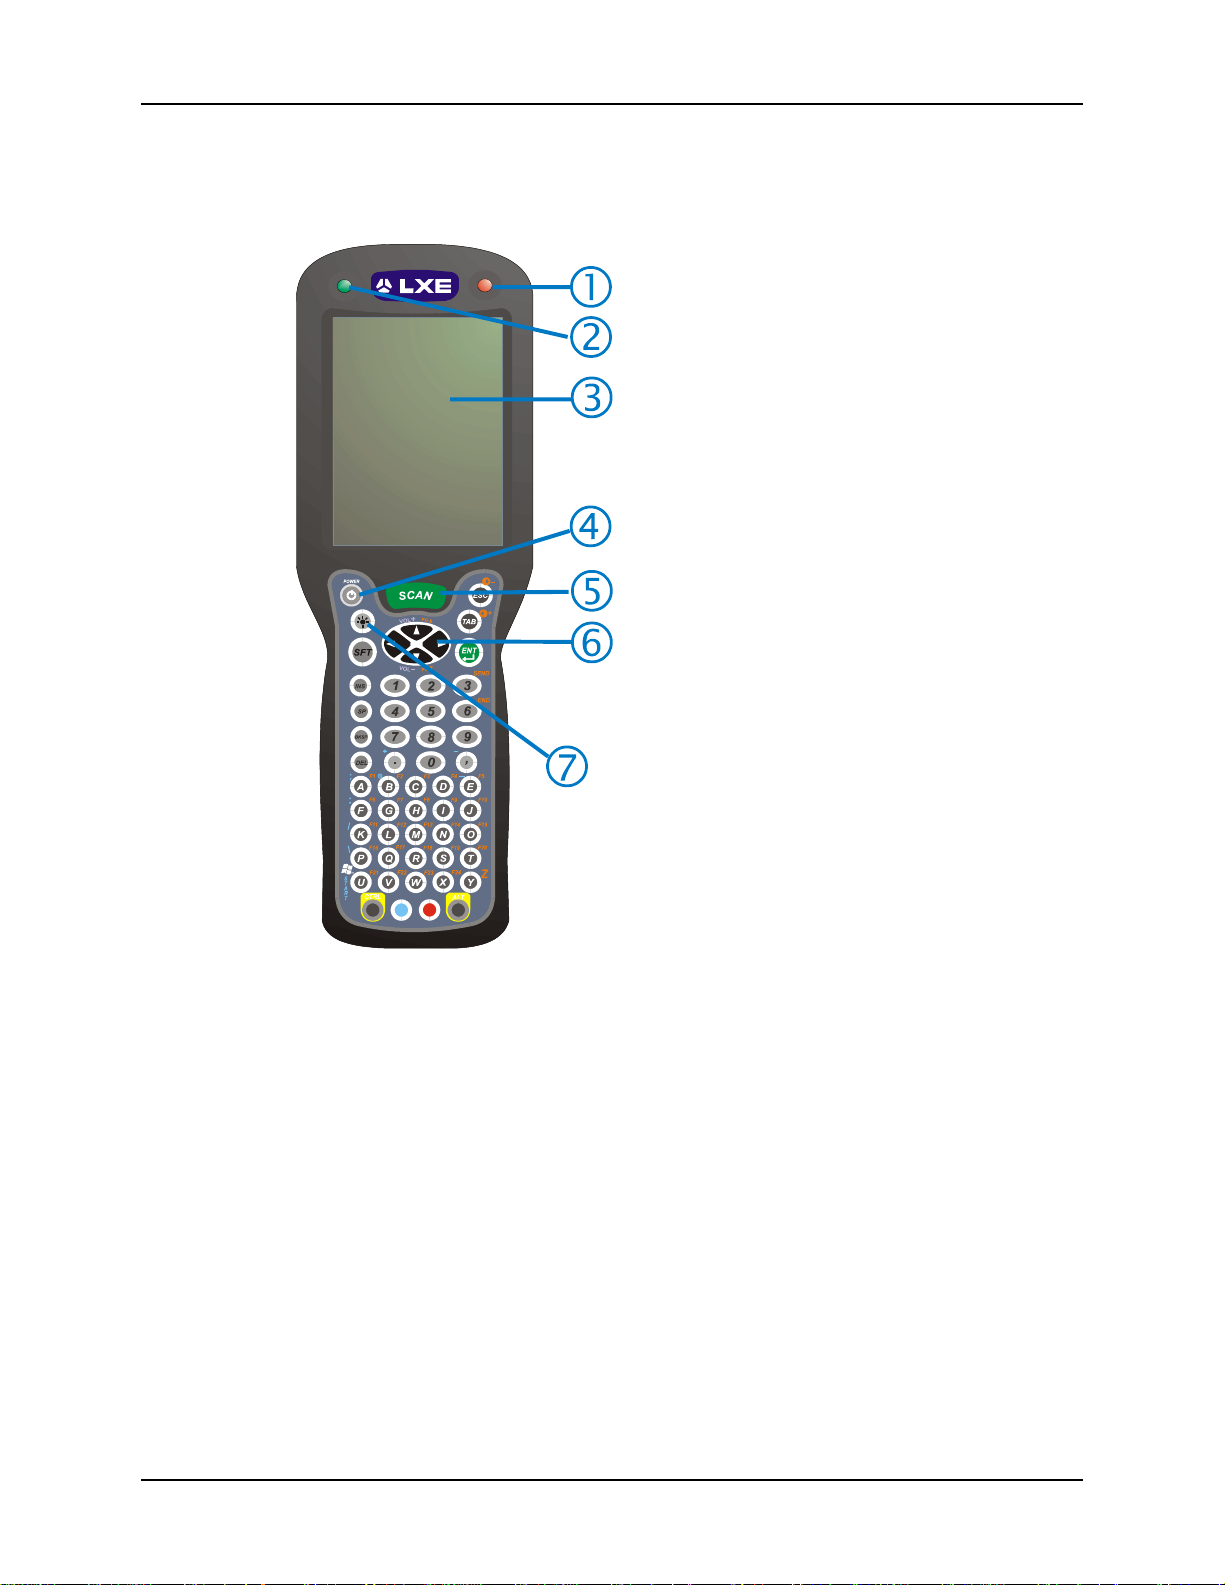
Components
1. Scan LED
2. Decode LED
3. Touchscreen Display
4. Power key
5. Scan key
6. Cursor keys
7. Backlight Toggle key on the
56-key keypad
Figure 1 Front of MX6
MX6 User’s Guide E-EQ-MX6OGWW-A
Page 11
Components 5
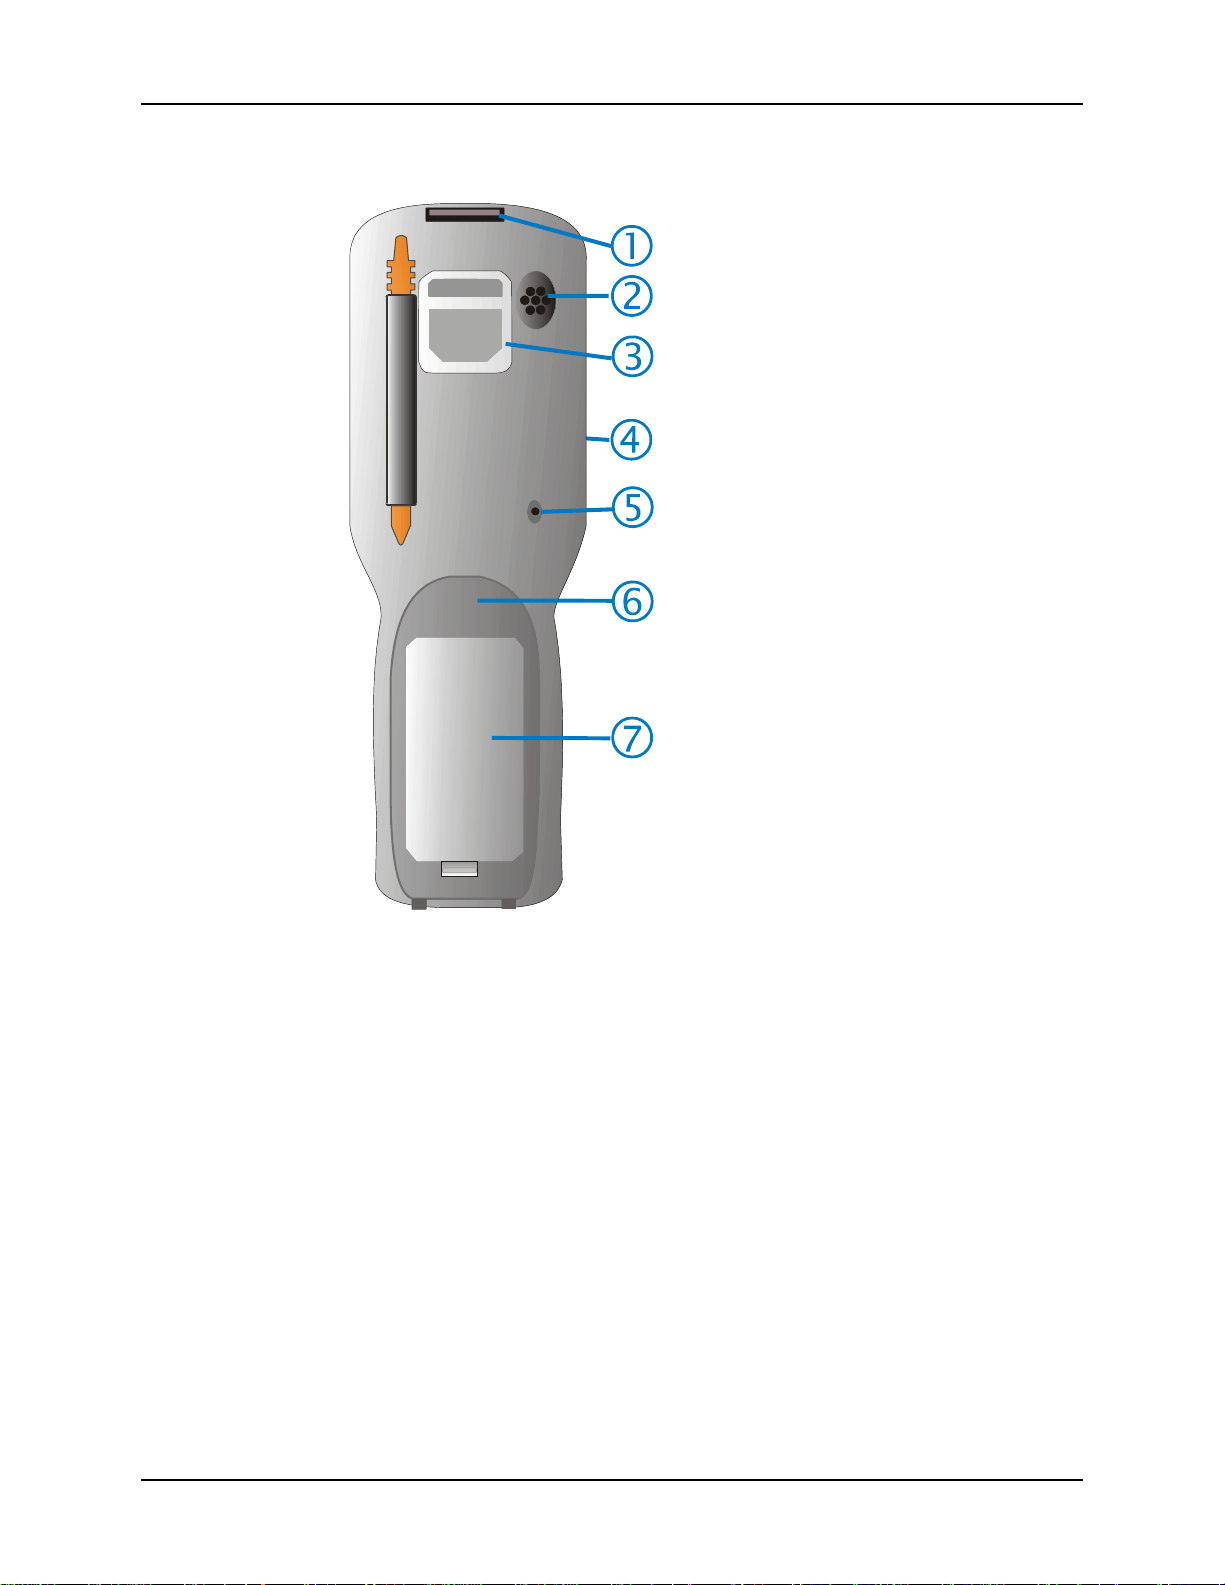
1. Image Aperture
2. Speaker
3. Handstrap Connector
4. Stylus (No Trigger Handle)
5. Microphone
6. Battery Well
7. Battery
Figure 2 Back of MX6
E-EQ-MX6OGWW-A MX6 User’s Guide
Page 12
6 Components
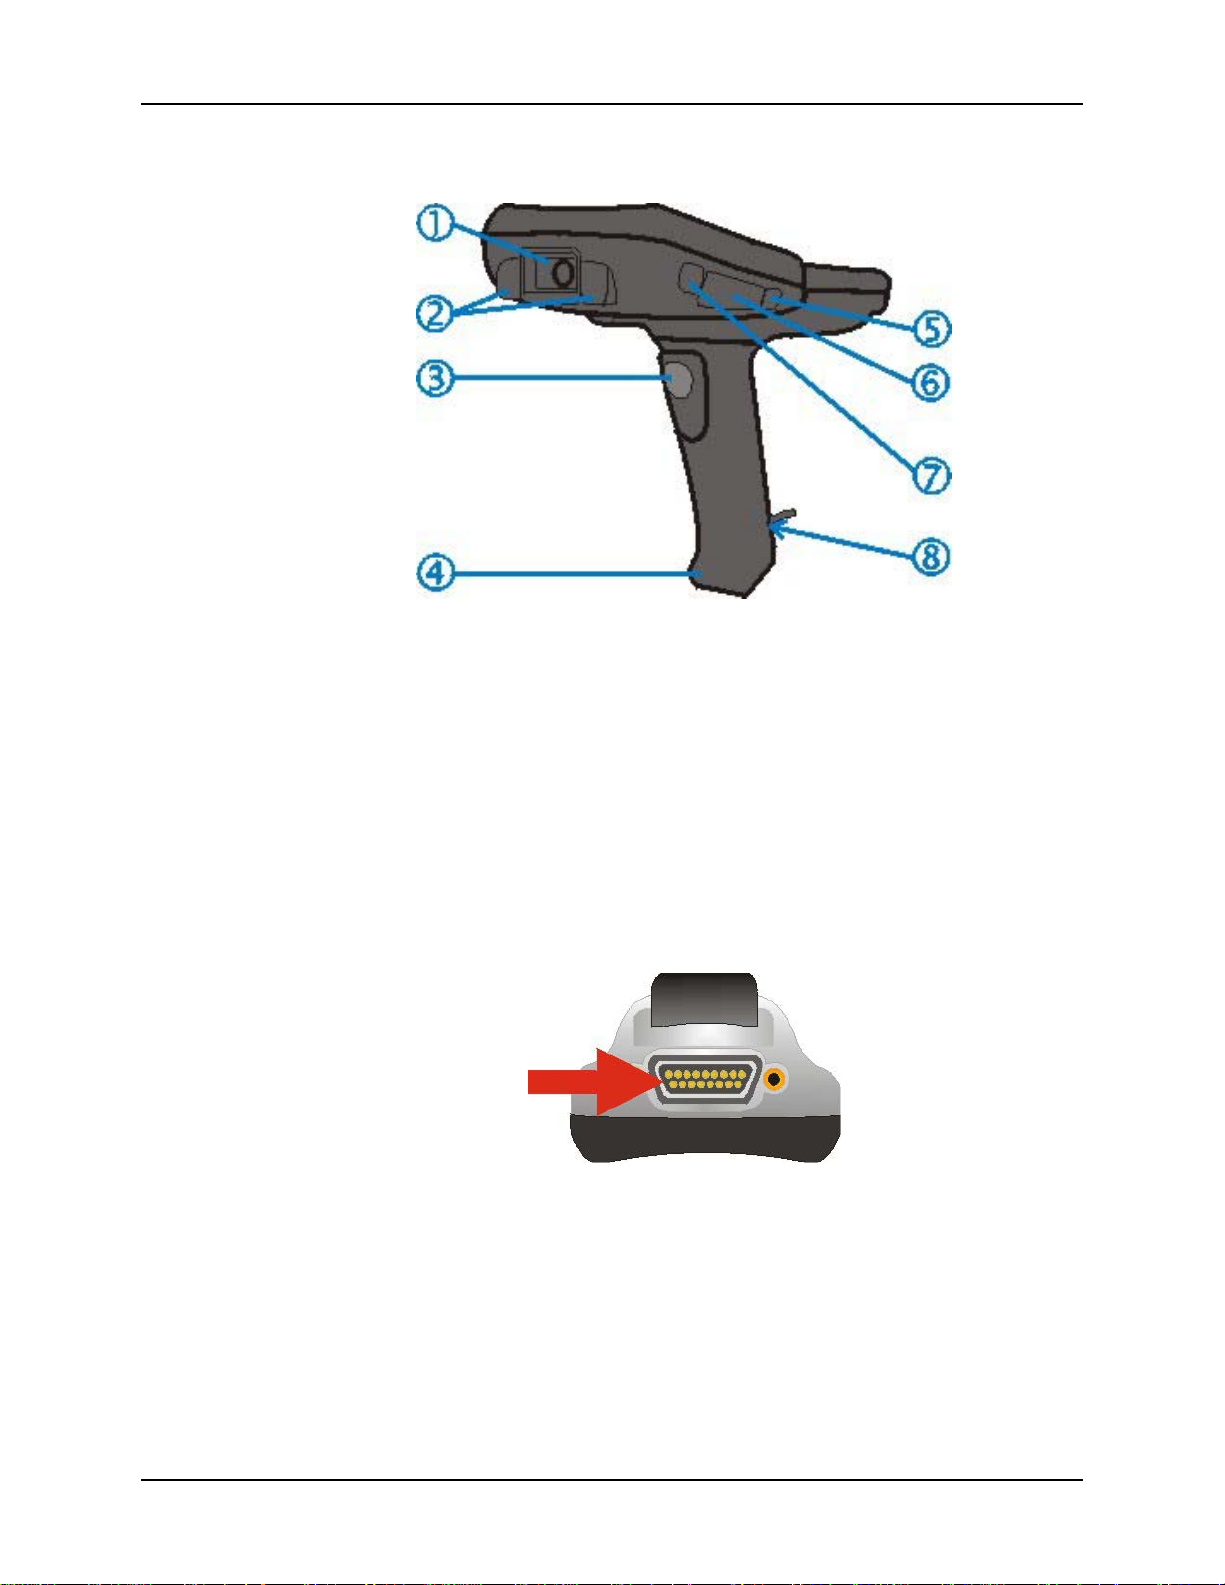
Figure 3 Trigger Handle Installed
1. Scan Aperture
2. Rubber Nose Bumpers
3. Scan Trigger
4. Rubber Bumper
5. Headphone Jack
6. Secure Digital Access Door
7. IrDA Port
8. Stylus and Tether (storage inside base of handle)
Figure 4 RS-232/USB Communications and Charging Port
MX6 User’s Guide E-EQ-MX6OGWW-A
Page 13
Insert Fully Charged Battery 7
Insert Fully Charged Battery
Note: The unit will not function unless the battery compartment cover is in place and securely
latched. Be sure to place the unit in suspend before removing the battery. If you don’t,
you may lose all unsaved data.
The main battery is located in a compartment on the back of the unit. To insert or replace the
battery, complete the following steps:
1. Turn the MX6 off.
2. Detach the bottom hook of the elastic handstrap (if installed).
3. Press the battery locking tab up to release the Main Battery pack. The battery case serves
as the back cover for the battery well for the MX6.
4. Pull the battery up and out of the battery well with a hinge motion. Place the discharged
battery pack in a powered charging cradle or charger.
5. Tilt the end (without the latch) of the fully charged battery pack into the upper end of the
battery compartment, and firmly press the other end (with the latch) until it is fully
inserted into the battery compartment.
6. Push down on the battery pack until it clicks into place.
7. Replace the handstrap hook in its holder.
Note: The battery should not be replaced in a dirty or harsh environment. When the battery is
out of the MX6, any dust or moisture that enters the battery compartment can get into the
main unit, potentially causing damage.
Low Battery Condition
When the Main Battery is low, a dialog box pops up and alerts the user to charge the battery. The
user may close the window, but the dialog box will continue to pop up before the battery reaches
the Battery Dead/Off condition.
Main Low
Main Very
Low
When the battery reaches the Battery Dead condition, the battery sensor initiates a shutdown of all
applications and closes the RF network connection. When the battery is replaced with a fully
charged battery, the MX6 will resume as before.
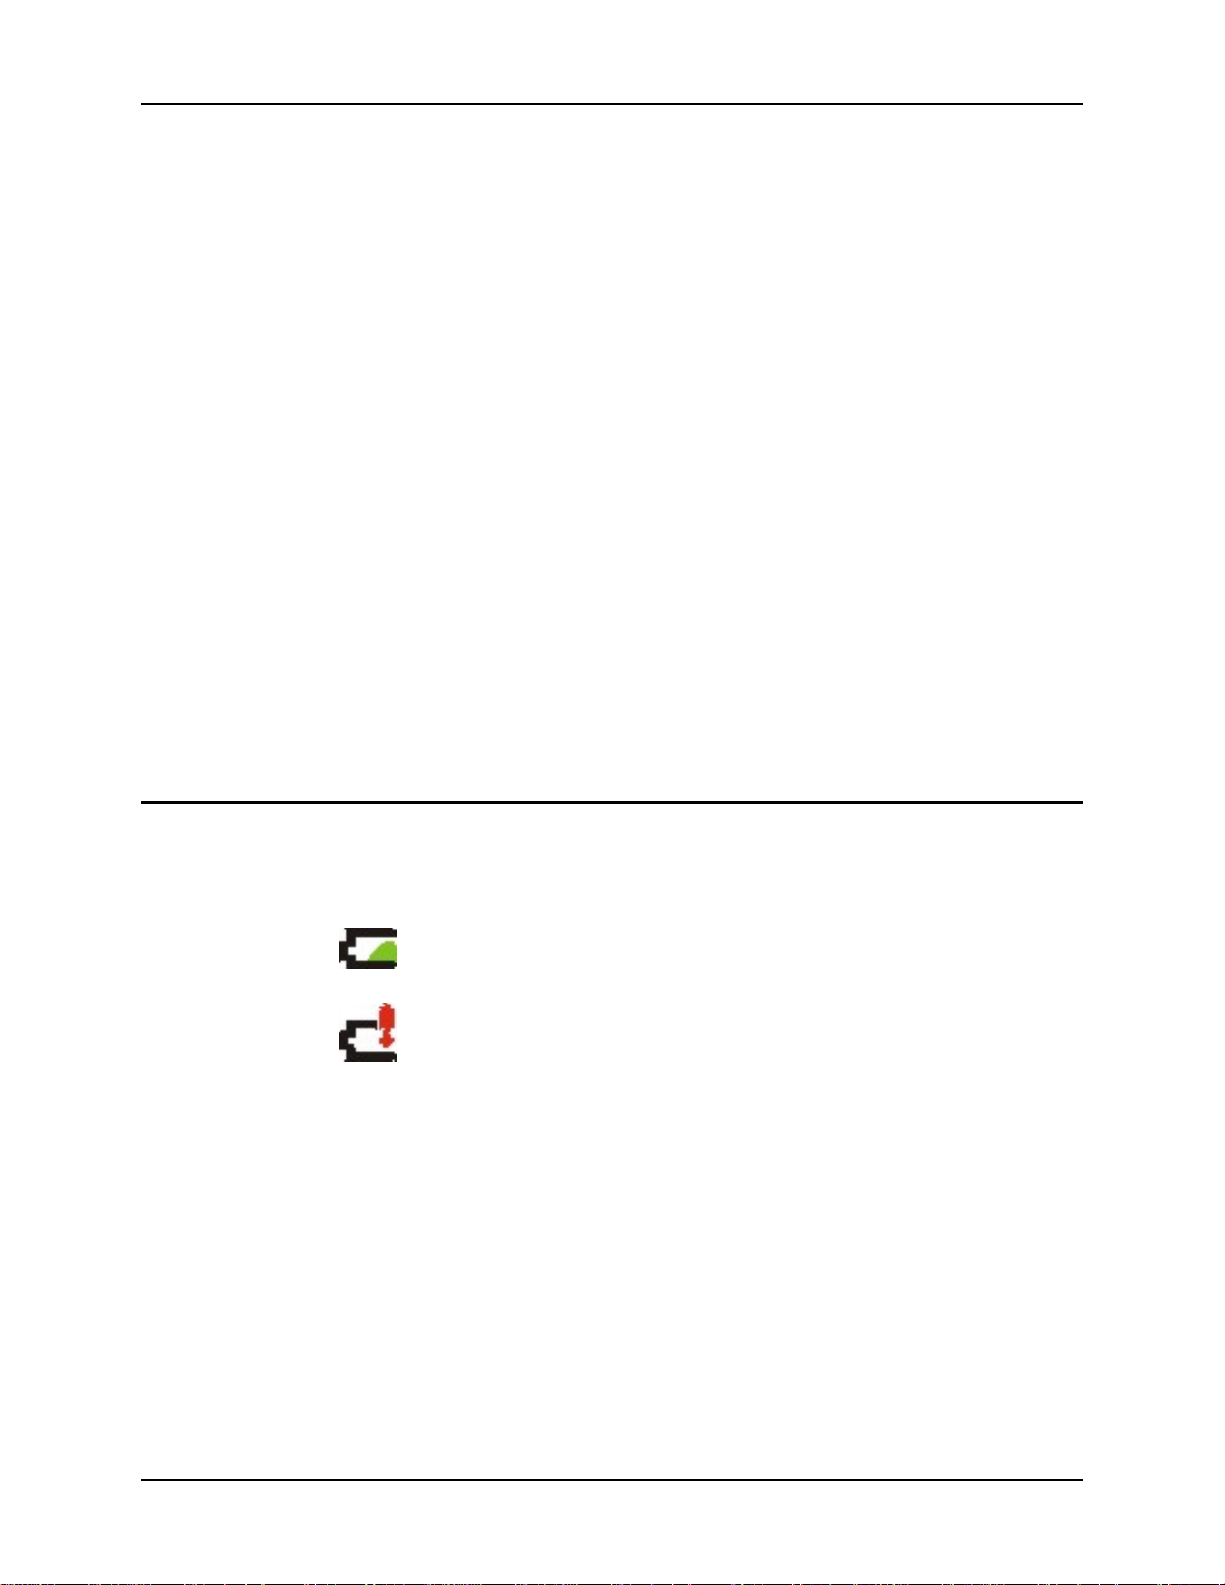
Icons are visible in the taskbar indicating battery strength.
E-EQ-MX6OGWW-A MX6 User’s Guide
Page 14

8 Power Key
Power Key
The Power key is located in the top left corner of the keypad. Press the Power key to
turn the MX6 on, place it into Suspend or to wake it from Suspend modes.
You can also use the Scan key (or trigger if installed) to wake the MX6 from
Suspend.
Reset or Reboot
Soft Reset
Hard Reset
CAUTION
A warm (soft) reset closes all applications, clears the working RAM, and preserves the file
system.
To initialize a soft reset press and hold the Control
seconds.
Release the keys and the MX6 resets. The red and green LEDs blink for approximately three
seconds.
After a Warm Reset
The Today screen appears. The custom settings in the registry are persistent. An installed RF
Network PC Card connects to the network system.
A hard reset is a complete reset in which all applications are forcibly closed and working RAM
and files are cleared.
To perform a hard reset, press and hold the Control CTRL key and the Escape ESC key for
approximately 10 seconds.
LXE recommends that you always attempt a Warm reset before initiating a
Cold reset. Once you initiate a hard reset, all applications are forcibly
closed and working RAM and files are cleared. It is a good idea to store
important data in the MX6’s Flash memory for this reason.
CTRL and Shift SFT keys for approximately 10
Note: The Start Menu will repeatedly appear and disappear and the keys will click repeatedly.
This is intended to alert the user that a drastic action is about to occur.
Release the key and the MX6 resets. The red and green LEDs blink for approximately three
seconds.
When the MX6 power key is pressed, to turn the unit on, it will need to be configured once again.
See the section titled “Quick Start”.
Caution: A hard reset erases all the data stored in RAM memory and all RAM installed
applications.
See the section titled “The IPSM Folder”for a list of files that are saved over a hard reset.
MX6 User’s Guide E-EQ-MX6OGWW-A
Page 15
Using the Stylus 9
Using the Stylus
Note: Always use the point of the stylus for tapping or making strokes on the display. Never use
an actual pen, pencil or sharp object to write on the touch screen. Use only the supplied
stylus or plastic-tipped pens intended for use with a touchscreen display.
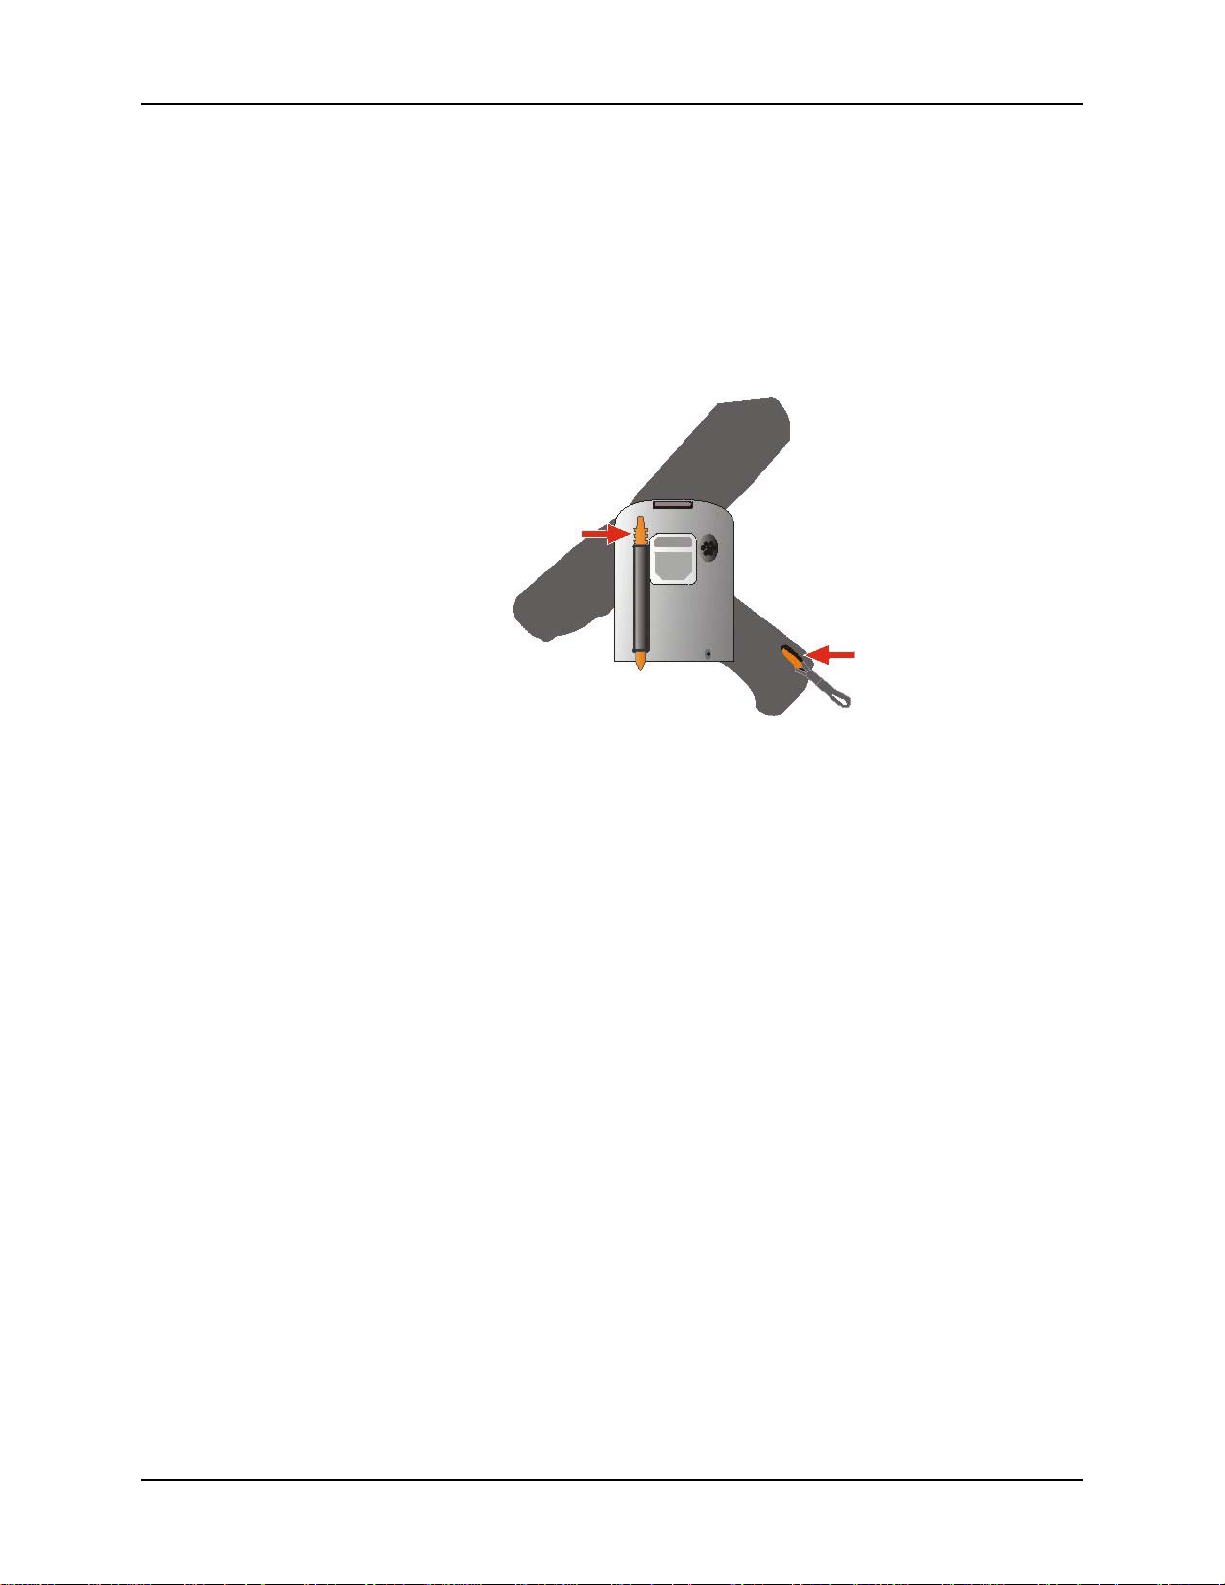
The stylus is located on the back of an MX6 without a handle, and in the back of the handle of an
MX6 with a handle. A tether is connected to the stylus in the handle.
Figure 5 Stylus Storage Locations
Pull the stylus straight out of the Stylus holder and hold the stylus as if it were a pen or pencil.
Touch an element on the screen with the tip of the stylus then remove the stylus from the screen.
Slide the stylus into the stylus holder on the MX6 when the stylus is not in use.
Like using a mouse to left-click icons on a desktop computer screen, using the stylus to tap icons
on the MX6 display is the basic action that can:
• Open applications
• Choose menu commands
• Select characters in the Soft Input Panel
• Select options in dialog boxes or drop-down boxes
• Drag the slider in a scroll bar
• Select text by dragging the stylus across the text
• Place the cursor in a text box prior to typing in data or retrieving data using the
integrated imager or an input/output device connected to the serial port.
An extra or replacement stylus can be ordered from LXE. See the section titled "Accessories" for
the stylus part number.
E-EQ-MX6OGWW-A MX6 User’s Guide
Page 16

10 General Windows Keyboard Shortcuts
General Windows Keyboard Shortcuts
Use the keyboard shortcuts in the chart below to navigate the 35 and 56-key keypads. These are
standard keyboard shortcuts for WIndows applications.
Press these keys … To …
CTRL + C Copy
CTRL + X Cut
CTRL + V Paste
CTRL + Z Undo
DELETE Delete
SHIFT with any of the arrow keys
CTRL+A Select all.
ALT+ESC Cycle through items in the order they were opened.
CTRL+ESC 1 Display the Start menu.
ALT+Underlined letter in a menu
name
Underlined letter in a command
name on an open menu
ESC Cancel the current task.
Select more than one item in a window or on the
desktop, or select text within a document.
Display the corresponding menu.
Carry out the corresponding command.
1
Holding this key sequence (CTRL+ESC) down longer than needed to display the Start menu
will cause a Hard Reset.
MX6 User’s Guide E-EQ-MX6OGWW-A
Page 17
Align the Touchscreen 11
Align the Touchscreen
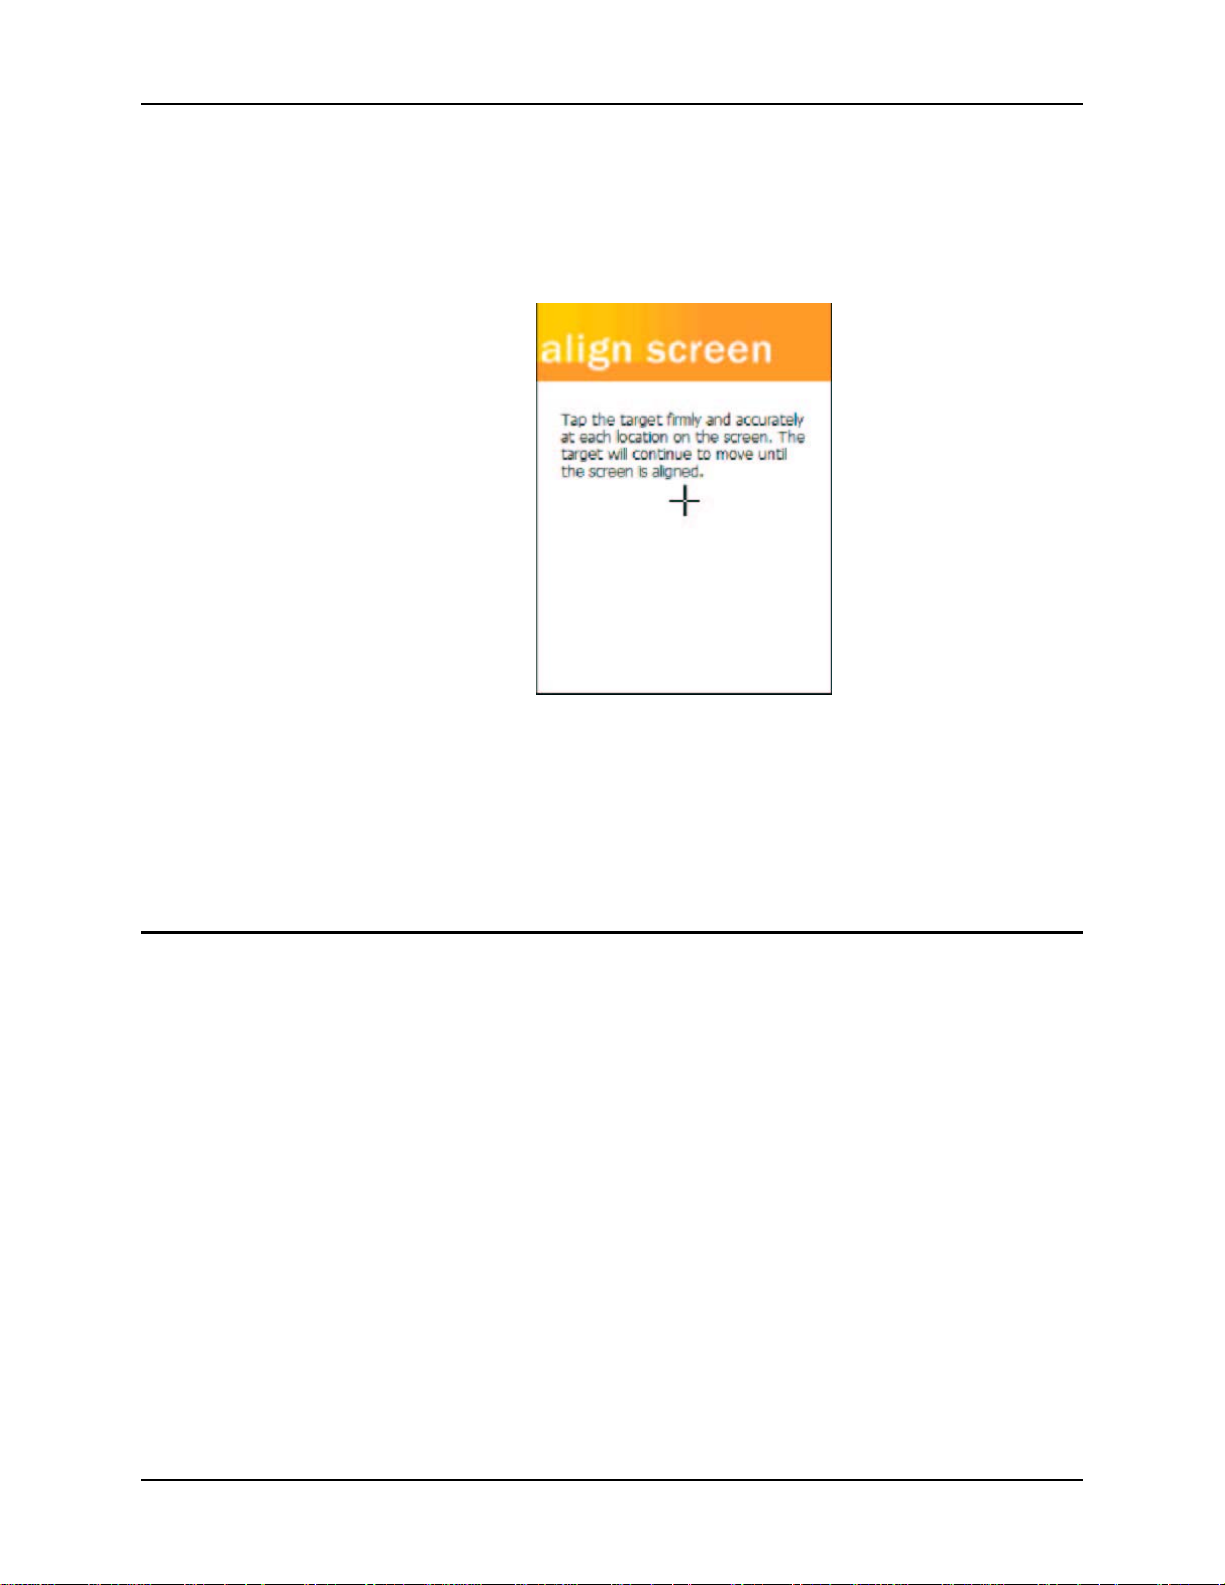
Access: Start | Settings | System tab | Screen | Align Screen
Figure 6 Align the Touchscreen
To start, tap the target ( + ) with the stylus.
Follow the instructions on the screen. Carefully press and briefly hold the stylus on the center of
the target (+) as the target moves around the screen.
When alignment is complete, press the Enter key (or tap the OK icon) to save the new alignment
settings. You can also press the Esc key sequence to cancel or quit.
Cleaning the Touch Screen and Scan Aperture
Keep fingers and rough or sharp objects away from the scan aperture and display. If the glass
becomes soiled or smudged, clean only with a standard household cleaner such as Windex®
without vinegar or use Isopropyl Alcohol. Do not use paper towels or harsh-chemical-based
cleaning fluids since they may result in damage to the glass surface. Use a clean, damp, lint-free
cloth. Do not scrub optical surfaces. If possible, clean only those areas which are soiled.
Lint/particulates can be removed with clean, filtered canned air.
E-EQ-MX6OGWW-A MX6 User’s Guide
Page 18
12 Set the Date and Time
Set the Date and Time
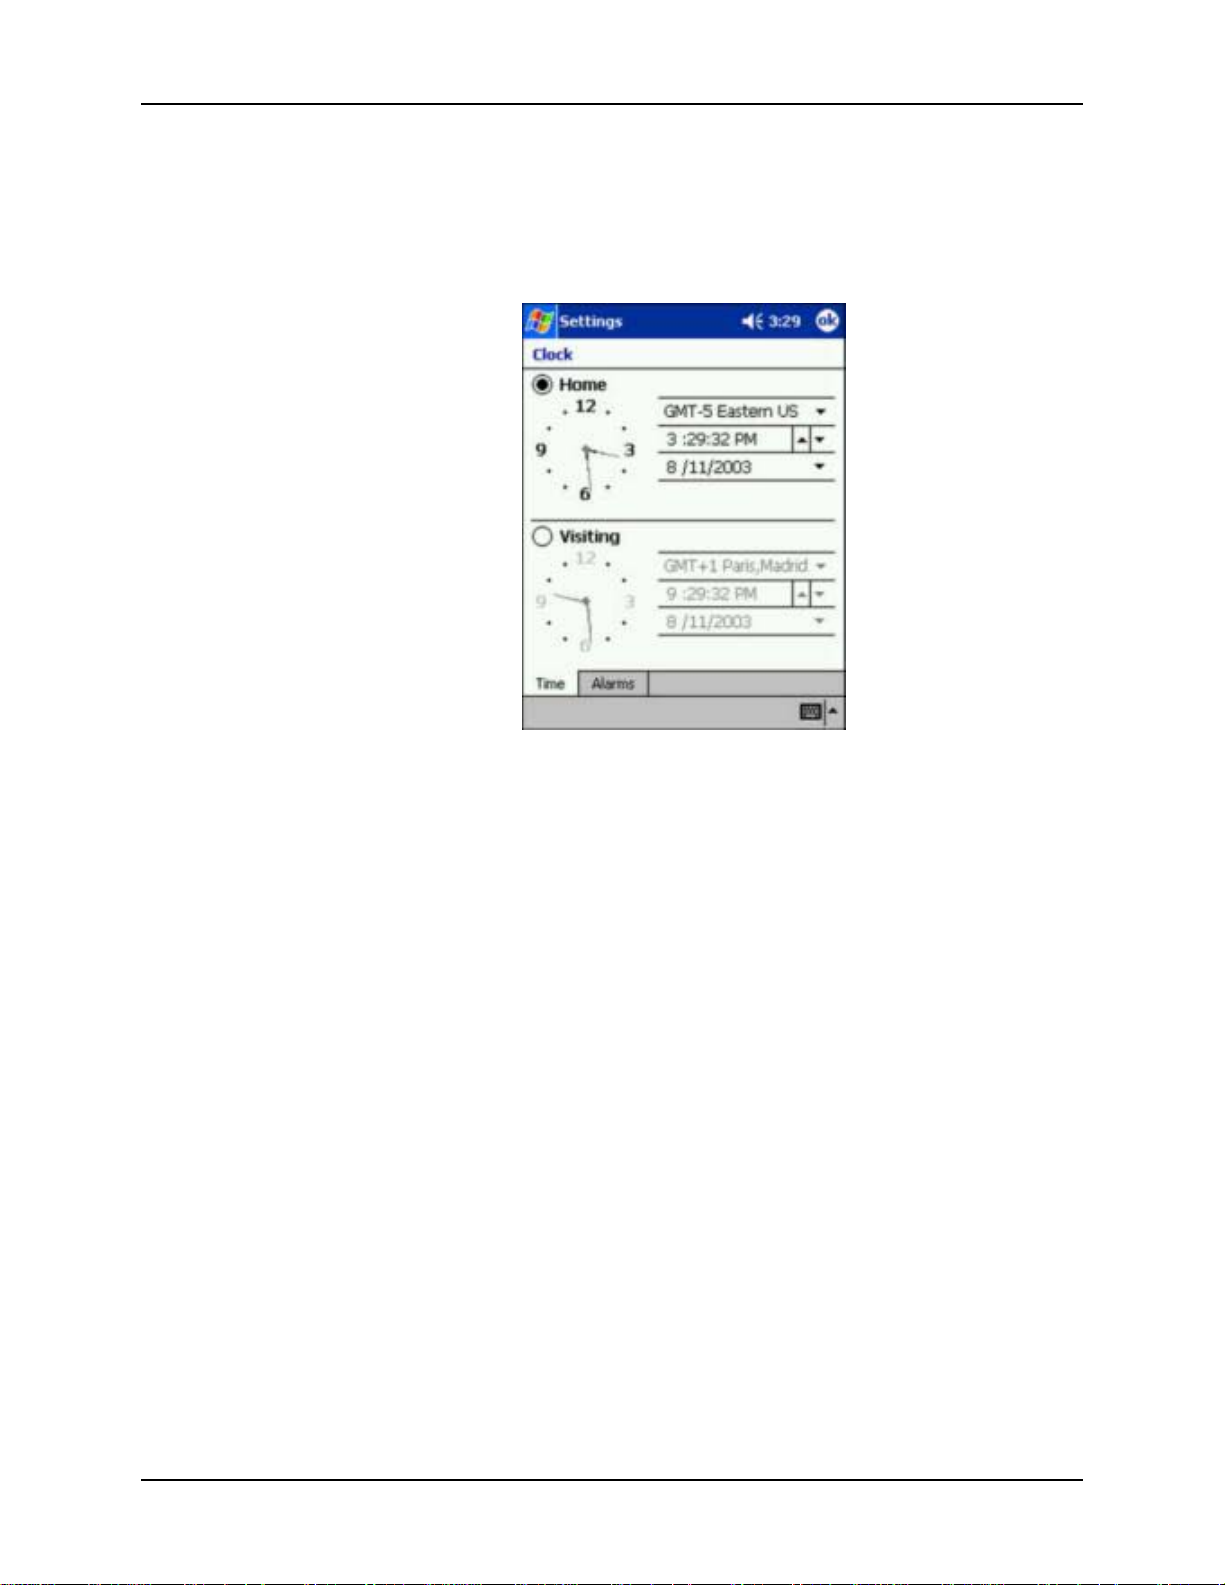
Access: Start | Settings | Systems tab | Clock
Figure 7 Set the Date and Time
1. Select your correct time zone from the pull-down list.
2. To change the time, select the hour, minute, seconds, or AM/PM and select the up arrow
to increase the value; select/tap the down arrow to decrease the value. Or you can type a
new time value in the field.
3. To change the month, tap the month to open a calendar. Tap the month again and choose
from the drop down list. Or select the left and right arrows to select the month and year.
Or you can type a new month value in the field.
4. To change the year, tap the year to open a calendar. Tap the year again and select the up
arrow to increase the value; select/tap the down arrow to decrease the value. Or select the
left and right arrows to select the month and year. Or you can type a new year value in
the field.
• Select OK and select Yes to save your changes or select No to exit without saving
your changes and exit Clock.
• Select Cancel to return to Clock Properties.
MX6 User’s Guide E-EQ-MX6OGWW-A
Page 19

Setting Display Backlight Action 13
Setting Display Backlight Action
Access: Start | Settings | System | Backlight tab
The parameter settings in Start | Settings | System | Backlight tab establish when the display
backlight is turned on and off. The Keypad Backlight key (located at the lower right of the 35-key
keypad and below the Power key on the 56 key keypad) has no effect on display backlight
settings. The display backlight settings have no effect on the keypad Backlight setting.
Exit and save any changes by tapping OK on the command bar, or pressing Enter on the keypad.
When the MX6 is not in the Suspend state, and the display backlight is off, the display backlight
is toggled on when any key, including the keypad backlight key, is tapped (if “Turn on backlight
when a button is pressed or the screen is tapped” is checked).
If the MX6 is in Suspend, pressing the keypad backlight key has no effect – the MX6 remains in
the Suspend state.
Dim Backlight if device is not used for:
When “Dim Backlight if device is not used for:” is checked and a time delay is set, the backlight
on the display dims to the minimum value in Backlight Intensity when the timer expires.
• Tapping the screen after the time delay timer expires, undims the screen backlight.
• Tapping any key after the time delay timer expires, turns the screen backlight on if
“Turn on backlight when a button is pressed or the screen is tapped” is checked.
When unchecked, the display backlight does not dim to the minimum level.
If the unit is in the Suspend state, pressing any key (other than the Power key) or tapping the
screen have no effect. Wake the MX6 from Suspend by tapping the Power key, pressing the
trigger on the handle or by pressing the Scan button.
Turn off backlight if device is not used for:
When “Turn off backlight if device is not used for:” is checked and a time delay is set, the display
backlight turns off when the timer expires.
• Tapping the screen after the time delay timer expires, turns the screen backlight on.
• Tapping any key after the time delay timer expires, turns the screen backlight on if
“Turn on backlight when a button is pressed or the screen is tapped” is checked..
When unchecked, the display backlight does not turn off.
If the unit is in the Suspend state, pressing any key (other than the Power key) or tapping the
screen have no effect. Wake the MX6 from Suspend by tapping the Power key, pressing the
trigger on the handle or by pressing the Scan button.
Turn on backlight when a button is pressed or the screen is tapped
When this option is unchecked, the MX6 backlight utility ignores key taps and screen taps. If the
backlight is allowed to go off, the backlight remains off until the unit returns from the Suspend
state. If the backlight is not allowed to go off, the backlight remains on.
Note: Refer to the section titled "Power Modes" later in this guide for information relating to
the power states of the MX6.
E-EQ-MX6OGWW-A MX6 User’s Guide
Page 20

14 Set the Power Off Timer
Backlight Intensity
You can set a different level for the intensity of the display backlight when the MX6 is running on
battery power and a different level to use when the MX6 is running on external power.
Backlight intensity has no effect on the keypad backlight.
Set the Power Off Timer
Note: Refer to the section titled "Power Modes" later in this guide for information relating to
the power states of the MX6.
Tap the Start | Settings | System | Power icon.
On battery power:
Turn off device if not used for
Change the parameter value and tap OK to save the change.
The default is 3 minutes. Selections are 1, 2, 3, 4, or 5 minutes.
On external power:
Turn off device if not used for
Change the parameter value and tap OK to save the change.
The default is 5 minutes. Selections are 1, 2, 5, 10, 15, or 30 minutes.
Note: When the Power Off timer expires, the computer enters Suspend Mode.
MX6 User’s Guide E-EQ-MX6OGWW-A
Page 21

Accessing Files in Flash Memory 15
Accessing Files in Flash Memory
The Storage Card
Access: Start | Programs | Storage Card
Select the file with the stylus and double-tap to run the file. Secure Digital (SD) cards are neither
installed nor supported by LXE.
The IPSM Folder
Access: Start | Programs | File Explorer | My Device | IPSM
Programs and files located in the IPSM folder are saved through a hard reset.
CAB files stored in the AutoInstall folder within the IPSM folder are automatically unpacked
following a hard reset.
Backed up registry settings are automatically restored after a hard reset.
To restore default registry settings, delete the RegBackup file in the IPSM folder and perform a
hard reset.
E-EQ-MX6OGWW-A MX6 User’s Guide
Page 22
16 Connect the Audio Jack (Optional)
Connect the Audio Jack (Optional)
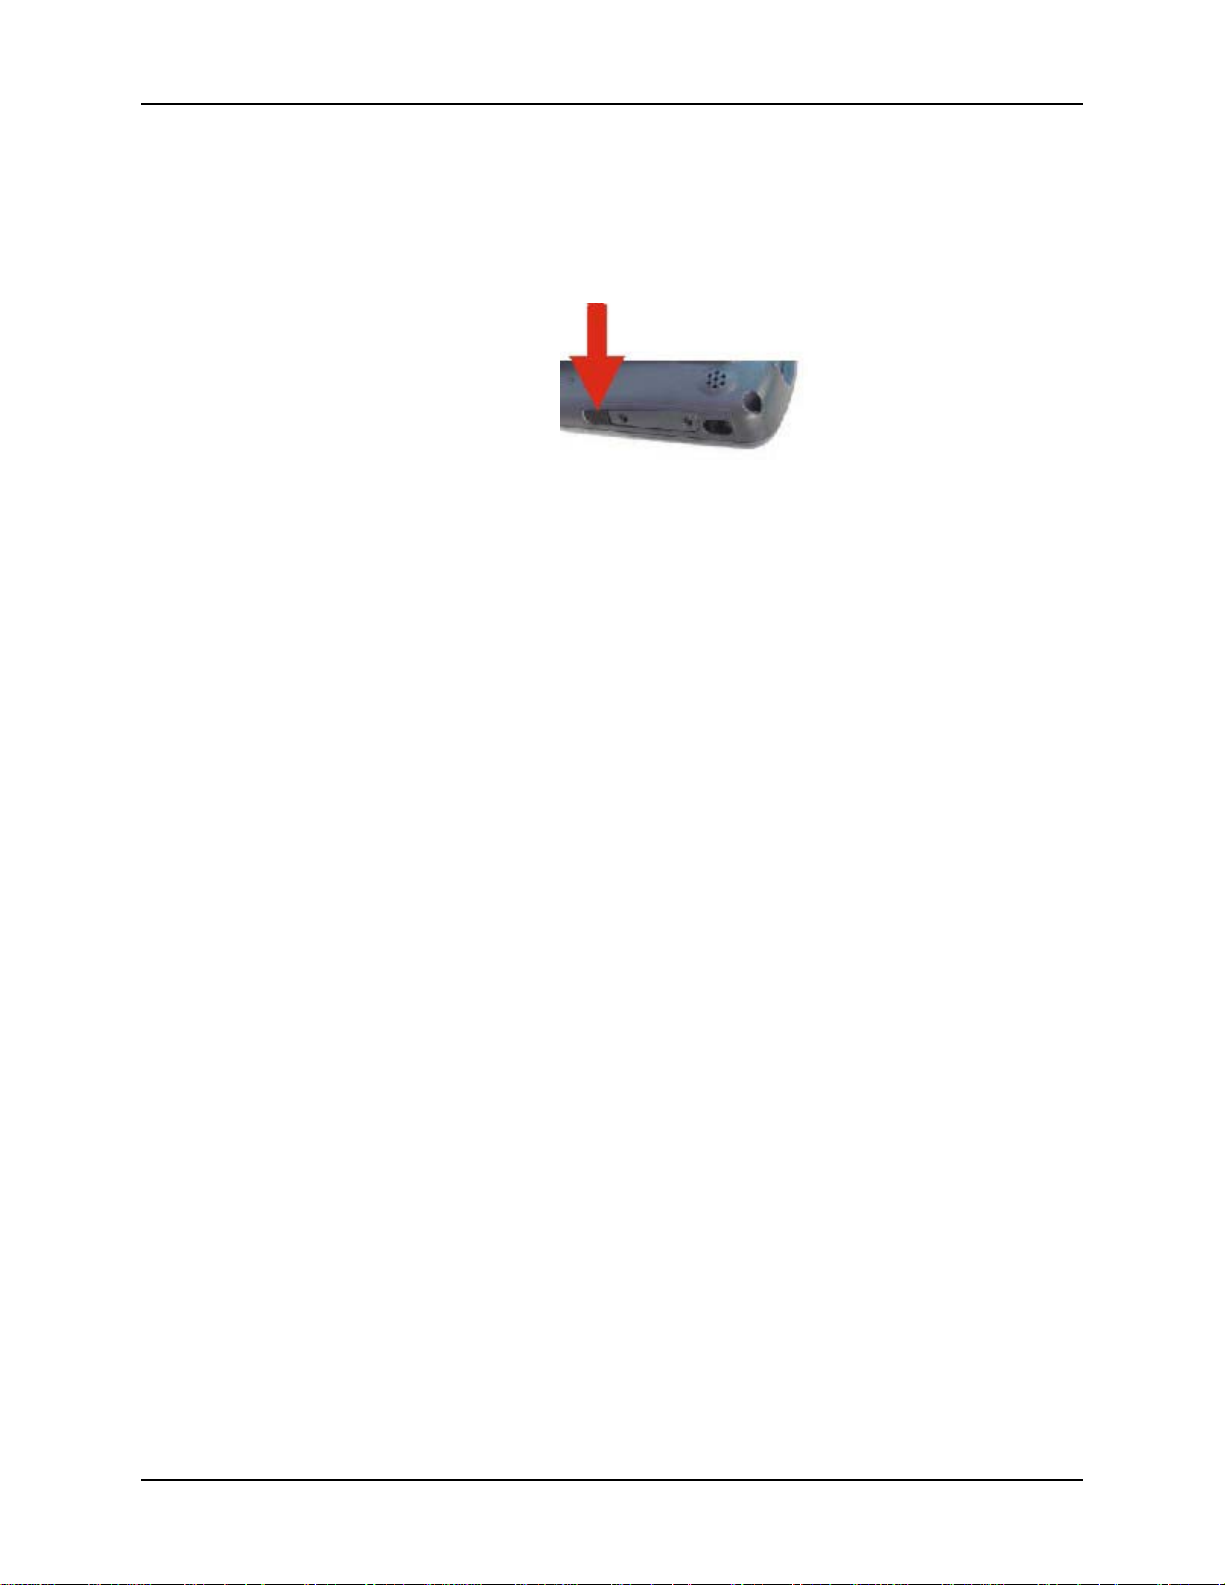
The MX6 audio jack is located on the side of the unit next to the scan aperture and the SDA door
(Secure Digital Access). The internal speaker is disabled when the audio jack is connected.
Figure 8 Audio Jack Location
Lift up the protective audio jack cover and insert the barrel end of the connector into the MX6
audio jack and push in firmly.
Note: The audio option draws power from the Main Battery Pack.
Set the Audio Speaker Volume
Note: An application may override the control of the speaker volume. Turning off sounds saves
power and prolongs battery life.
The audio volume can be adjusted to a comfortable level for the user. The MX6 has an internal
speaker and a jack for an external headset.
The volume is adjusted using Start | Settings | Personal tab | Sounds & Notifications icon then
select the Notifications tab.
Change the setting and tap OK to save the change. You can also select / deselect sounds for key
clicks and screen taps and whether each is loud or soft.
Sounds specific to primary events are selected using the options on the Sounds tab.
Reminder/Notifications tones are selected using the options on the
Reminders/Notifications tab.
As the volume scrollbar is moved between Loud and Silent, the computer beeps each time the
volume increases or decreases in decibel range. The Volume icon in the system bar can also be
used to adjust the system sound volume.
MX6 User’s Guide E-EQ-MX6OGWW-A
Page 23
Connect External Power Supply (Optional) 17
Connect External Power Supply (Optional)
The MX6 connector is located at the base of the MX6. The Main Battery recharges when the
MX6 is connected to an external power source and the “Main Batteries are Charging” icon is
displayed in the toolbar.
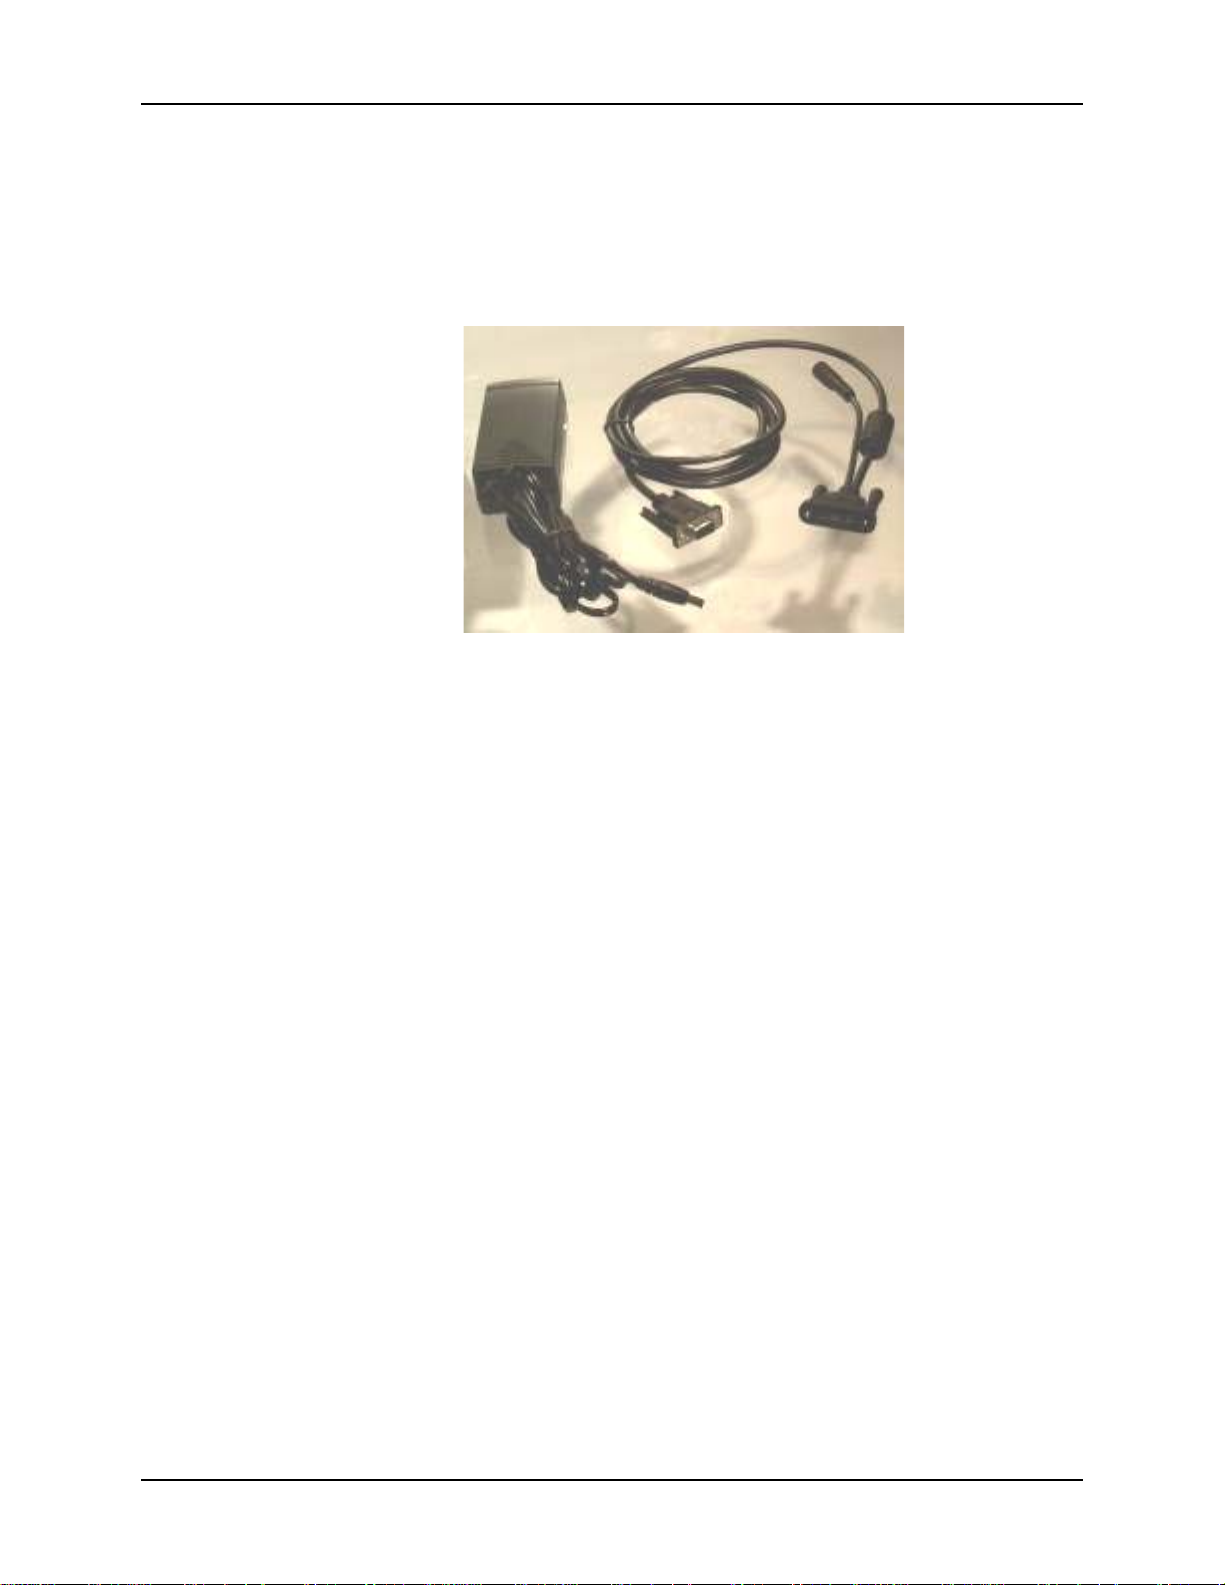
Figure 9 AC/DC 12V External Power Supply Kit
Push the 17-pin power cable connector into the MX6 serial port. When the connector is seated
over the pins, twist the cable fasteners to the right to secure the cable to the MX6. Twist to the left
to loosen and remove the cable. Insert the barrel end of the AC/DC Power adapter into the short
cable end on the power cord connected to the MX6.
E-EQ-MX6OGWW-A MX6 User’s Guide
Page 24
18 Adjust the Handstrap
Adjust the Handstrap
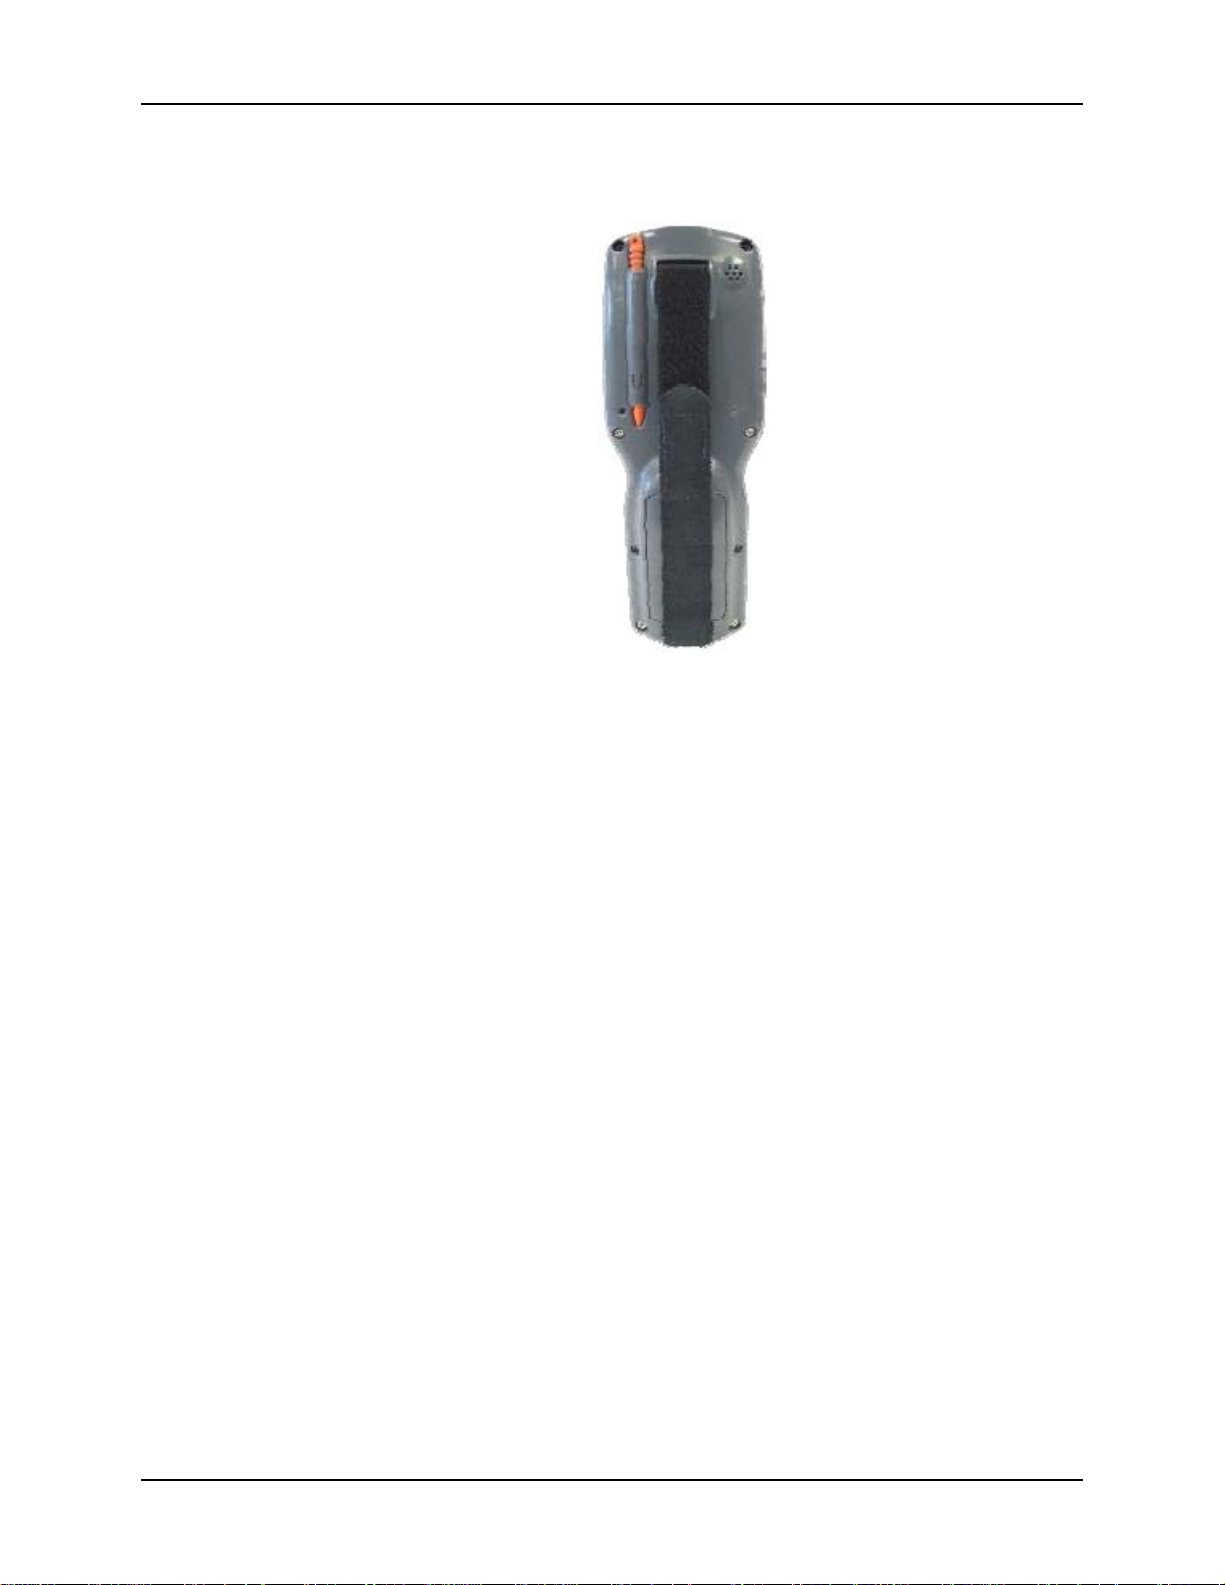
Figure 10 Handstrap
The MX6 has an integrated elastic hand strap that provides a comfortable, secure grip on the unit.
It is attached to the MX6 with a clip on the bottom panel. The handstrap should be disconnected
from the bottom clip when the Main Battery is to be removed or replaced. The handstrap can be
removed from the MX6 if desired.
Prior to adjusting the handstrap, pull down on the handstrap and insert the bottom assembly into
the slot at the bottom of the MX6. Insure that both ends of the bottom assembly are secure.
Open the closed loop fastener tabs and adjust the handstrap for a comfortable, secure fit. Press the
closed loop fastener ends together.
MX6 User’s Guide E-EQ-MX6OGWW-A
Page 25

Enter Data
You can enter data into the MX6 through several different methods. The Scanner aperture
provides barcode data entry, the RS232 or the IR port are used to input/output data, and the
keypad provides manual entry.
MX6's with a touch screen and Microsoft Pocket PC software can use a stylus to input data, the
COM ports and/or the keypad. A virtual keyboard is available in applications that expect keyed
input.
Keypad Entry
The keypad is used to manually input data that is not collected otherwise. Almost any function
that a full sized computer keyboard can provide is duplicated on the keypad but it may take a few
more keystrokes to accomplish a keyed task.
Using the MX6
Almost every key has two or three different functions. The primary alpha or numeric character is
printed on the key.
The Red or Blue keys are pressed when you want to use a 2
you press a Blue or Red key (the 2
key. The specific 2
Please refer to “Appendix A - Key Maps” for instruction on the specific keypresses to access all
keypad functions.
Stylus Data Entry
Note: Always use the point of the stylus for tapping or making strokes on the display. Never use
The stylus performs the same function as the mouse that is used to point to and click elements on
a desk top computer. The stylus is used in the same manner as a mouse – single tap or double tap
to select menu options, drag the stylus across text to select, hold the stylus down to activate slider
bars, etcetera.
Hold the stylus as if it were a pen or pencil. Touch an element on the screen with the tip of the
stylus then remove the stylus from the screen. The touch screen responds to an actuation force
(touch) of 4 oz. (or greater) of pressure.
The stylus can be used in conjunction with the keyboard, integrated imager and an input/output
device connected to the MX6's serial port.
nd
nd
nd
character is printed above the corresponding key in either Red or Blue.
an actual pen, pencil or sharp object to write on the touch screen.
• Touch the stylus to the field of the data entry form to receive the next data feed.
key), then press the key that has the desired second-function
key function. For example, when
• The cursor begins to flash in the field.
• The unit is ready to accept data from either the physical keypad, virtual keyboard,
and the integrated imager.
E-EQ-MX6OGWW-A MX6 User’s Guide
Page 26
20 Enter Data
The Integrated Imager
Use the MX6 imager to scan, decode, and store information from barcodes. The barcoded data
must be “read” into an application or field or the imaged data will be lost.
Do not pour, spray, or spill any liquid on the imager. The Integrated Imager contains the
circuitry, scanning motor and imager. Handle with appropriate care.
Read all cautions, warnings and labels before using the imager.
Preparation
Note: If you are NOT using LXE’s RFTerm application to manage barcode scanning, select
Start | Programs | HHP Utils | ScanWedge before scanning a barcode.
When the barcode reader program is active, an icon resembling a barcode is located in the
Toolbar.
Using the Imager
To use the imager, aim the top of the MX6 at a barcode and press the Scan key or press the trigger
on the handle. The imager scans as long as the key or the trigger is held down before the 10
second timeout occurs.
The imager turns off automatically when a barcode is read successfully.
Distance from Label
Large barcodes can be scanned at the maximum distance. Hold the imager closer to small
barcodes (or with bars that are very close together).
Successful Scan
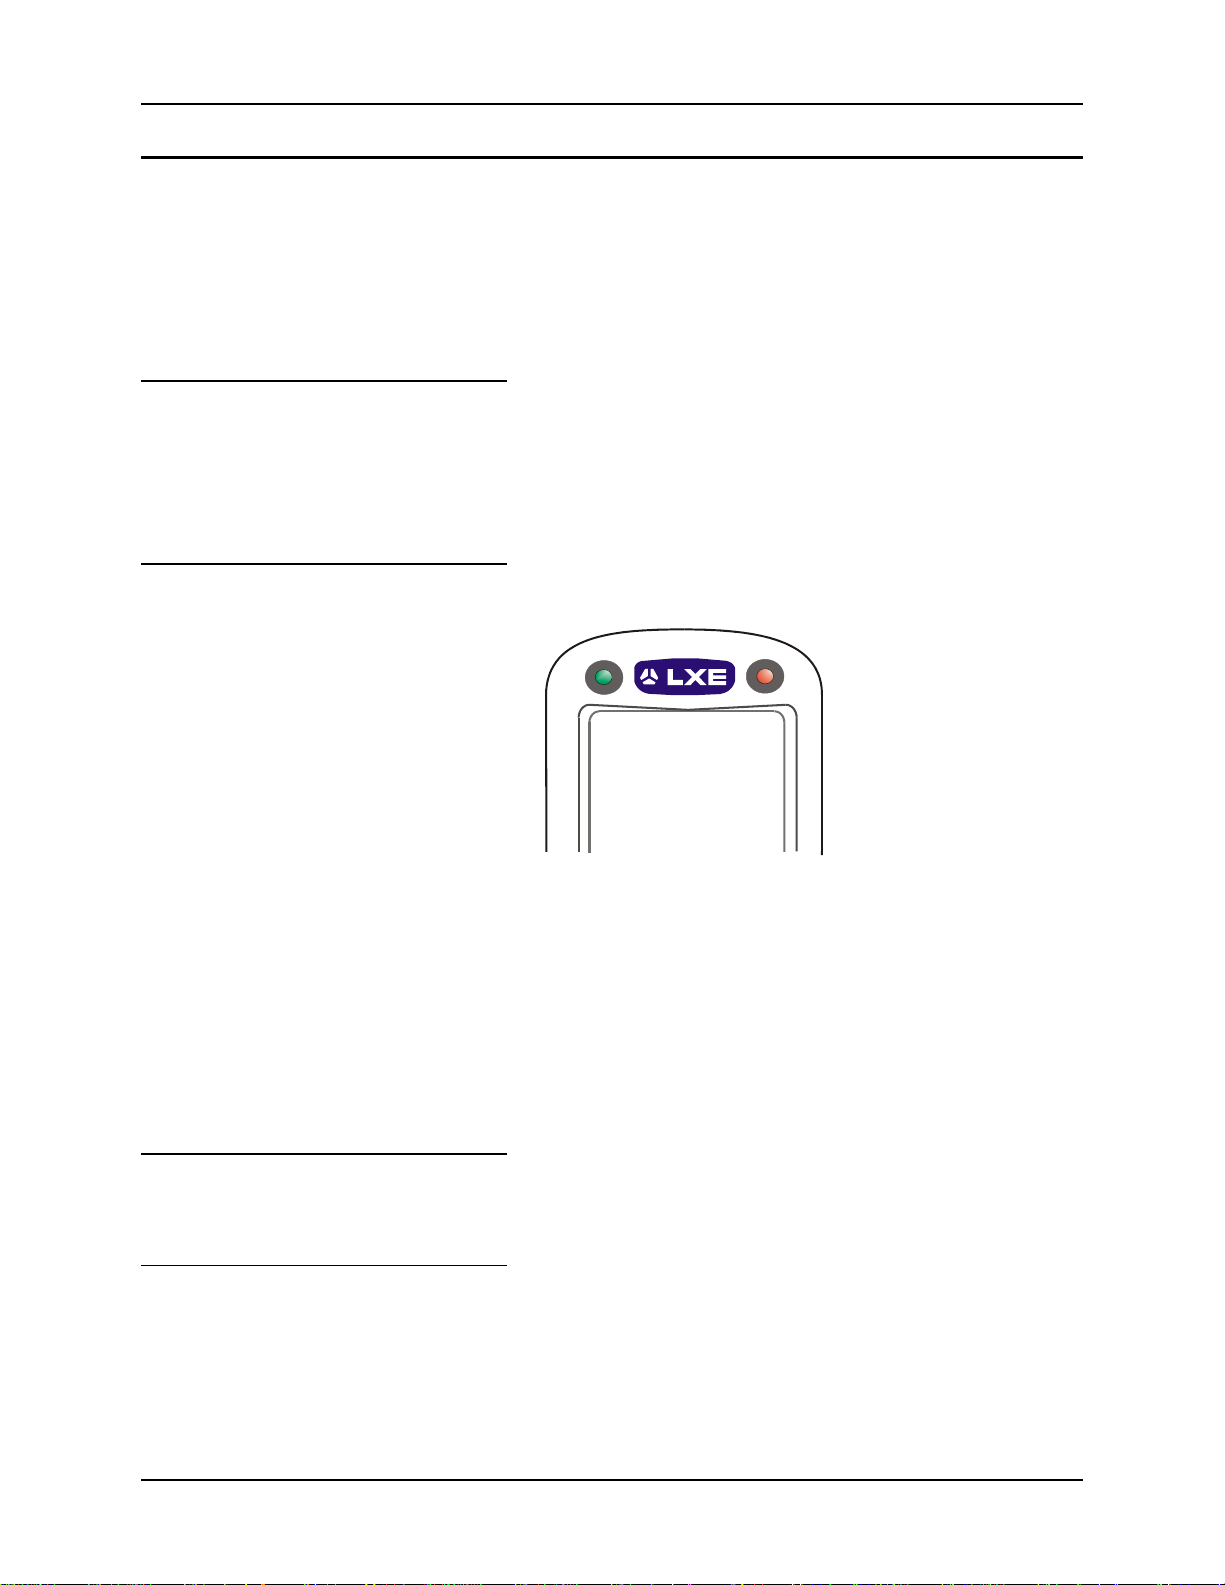
When the scan is successful, the Scan LED turns green, then switches off, and the currently
running application may produce a distinctive audible tone.
Figure 11 Scan and Decode LEDs
• Scan LED is on the right. When illuminated red, the MX6 is scanning a barcode.
• Decode LED is on the left When illuminated green, the MX6 scan algorithm accepts
the barcode as a “good scan”.
MX6 User’s Guide E-EQ-MX6OGWW-A
Page 27
Enter Data 21
Unsuccessful Scan
When the scan is unsuccessful, the Scan LED remains red until the 10 second timeout occurs or
the Scan key/trigger is released. The currently running application may produce distinctive
audible tones. Check the following:
• Check the barcode for marks or physical damage e.g. ripped label, missing section, etc.
• Try scanning test symbols of the same code type at different distances and angles.
• Is the imager aperture unscratched and unsoiled?
Aiming the Barcode Imager
Aim the imager away from you, direct it at the barcode and press the trigger or button (as
applicable) to scan. The Scan LED (scan indicators are located above the display) turns red to
indicate the imager is on.
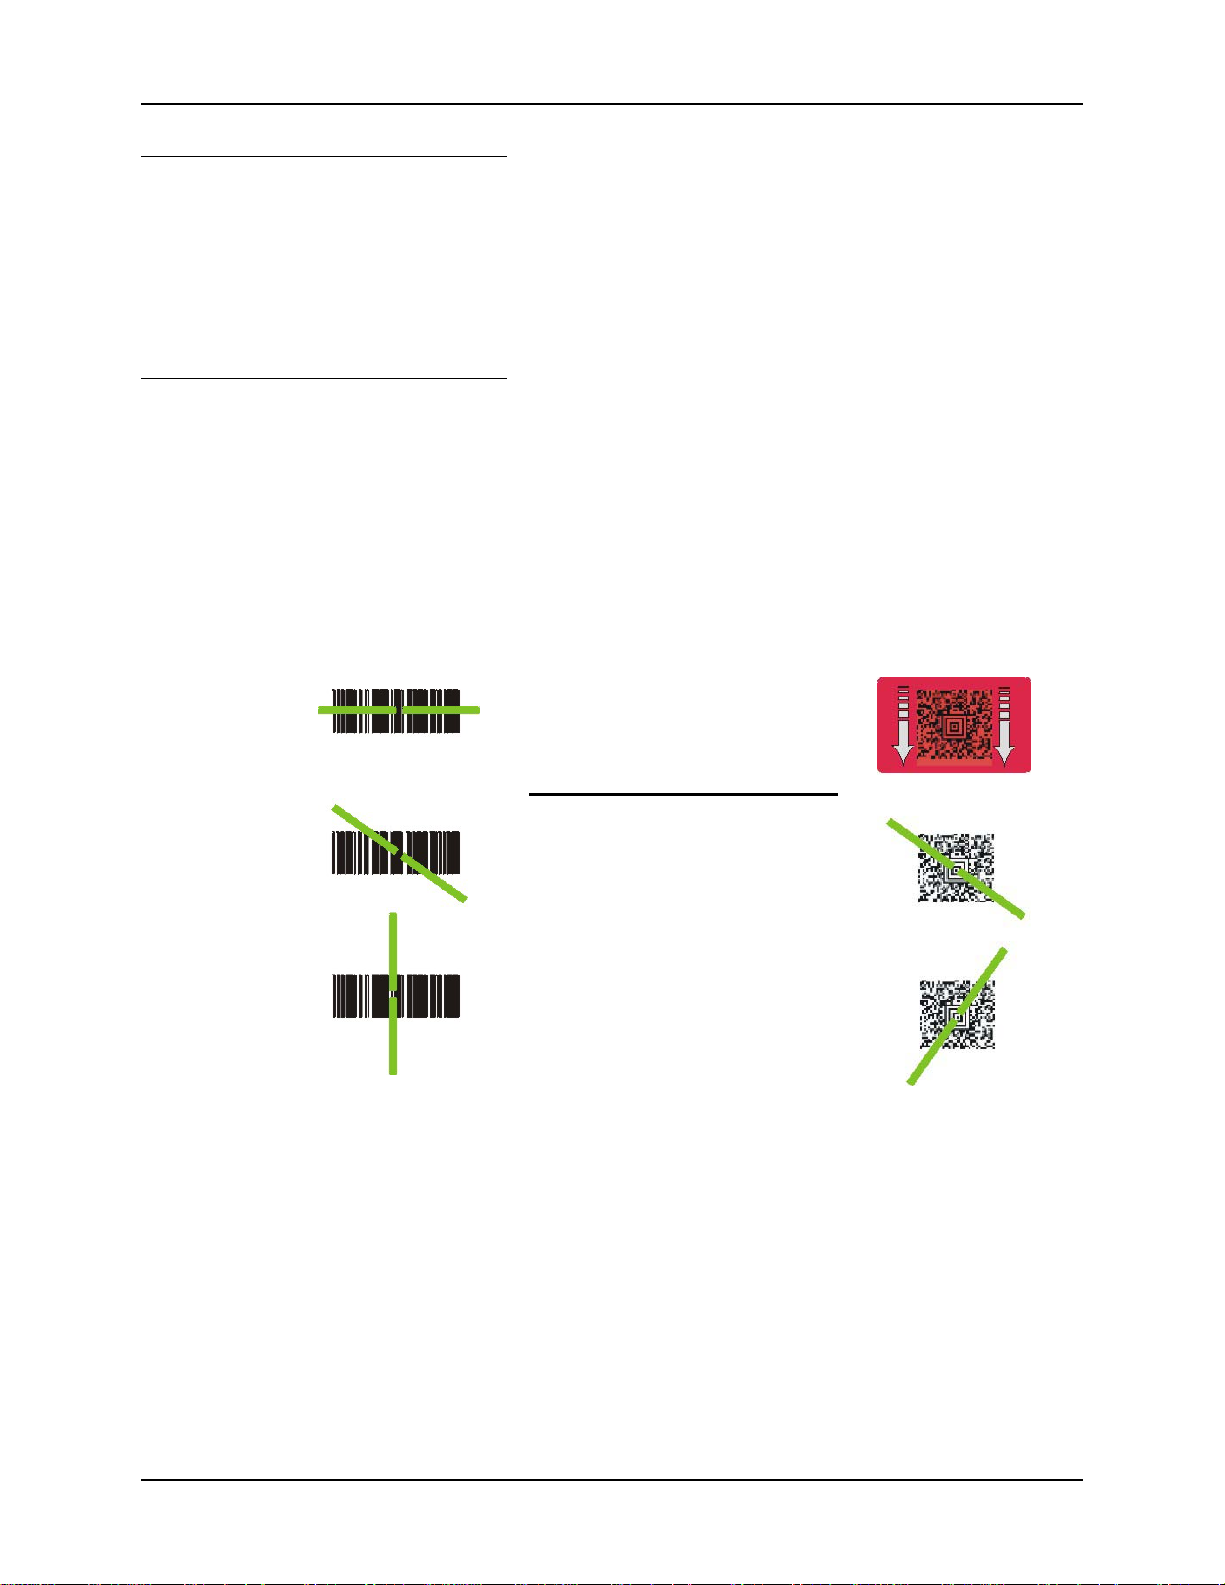
Adjust the aim so that the green aiming beam is centered on the barcode.
The scan beam emitted from the imager must cover every bar and space on the barcode.
When scanning a 2D Matrix barcode, the scan beam must cover the entire barcode.
Linear Barcode
2D Matrix Barcode
Correct Scan Angle
Incorrect Scan Angles
Figure 12 Scan Beam
Make sure the barcode is within the scanning range.
The range of a imager is dependent upon many outside influences including size of the barcode,
quality of the barcode printing, material the barcode is printed on, and angle of the imager beam
relative to the barcode label. Any of these factors may result in having to re-scan the label from a
different distance or angle.
E-EQ-MX6OGWW-A MX6 User’s Guide
Page 28
22 Touch Screen Display
Touch Screen Display
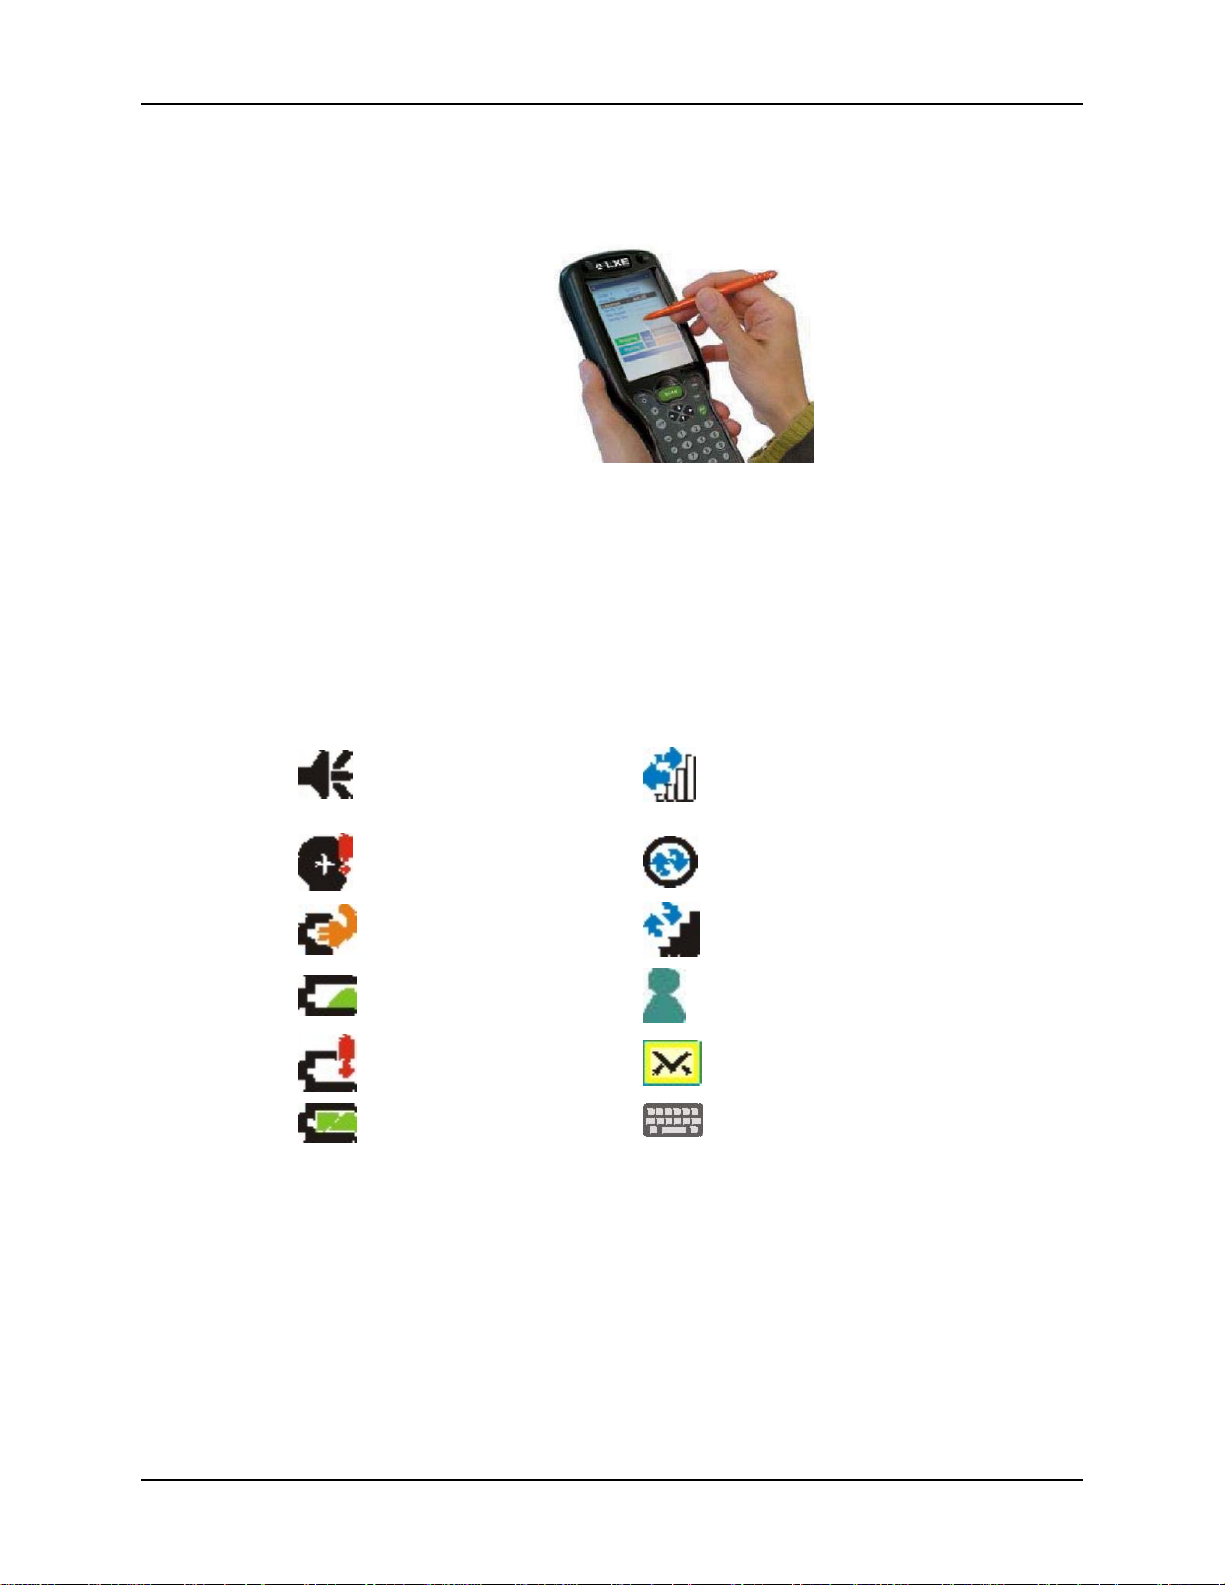
Figure 13 Tapping with the Stylus
The MX6 Touch Screen Display is a color TFT VGA display with a user programmable
backlight.
Display size is 320 x 240 pixels in portrait orientation. The display covering is designed to resist
stains. The touch screen allows signature capture and touch input. A pen stylus is included.
System Tray Icons
Turns system sounds on and
off and is used to
adjust the volume of
system sounds.
Backup battery is low.
Main batteries are charging.
Main batteries are low.
Main batteries very low.
Main batteries are full.
Connection is active.
Synchronization is beginning or ending.
Synchronization is occuring.
One or more instant messages are
Figure 14 System Tray Icons
waiting acknowledgment.
One or more e-mail messages are
waiting acknowledgment.
Soft Input Panel. Tap to show the Panel.
MX6 User’s Guide E-EQ-MX6OGWW-A
Page 29
Soft Input Panel 23
Soft Input Panel
The Soft Input Panel (SIP) is always available by tapping the SIP icon in the system tray when the
MX6 is powered On. It is always available with one exception – when the Today screen is
displayed.
To show or hide the input panel, tap the Input Panel button (the icon looks like a keyboard and is
shown in the System tray). Tap the arrow next to the SIP icon to see the soft input panel Choices
menu.
When you use the input panel, the word completion program anticipates the word you are typing
or writing and displays it above the input panel. When you tap the displayed word, the word is
inserted into your text at the insertion point.
To change word suggestion options, such as the number of words suggested at one time, tap Start
| Settings | Personal | Input | Word Completion tab.
Use the input panel to enter information in any program. You can either type on the soft keyboard
or write on the touch screen using Letter Recognizer or Block Recognizer. In either case, the
characters appear as typed text on the screen.
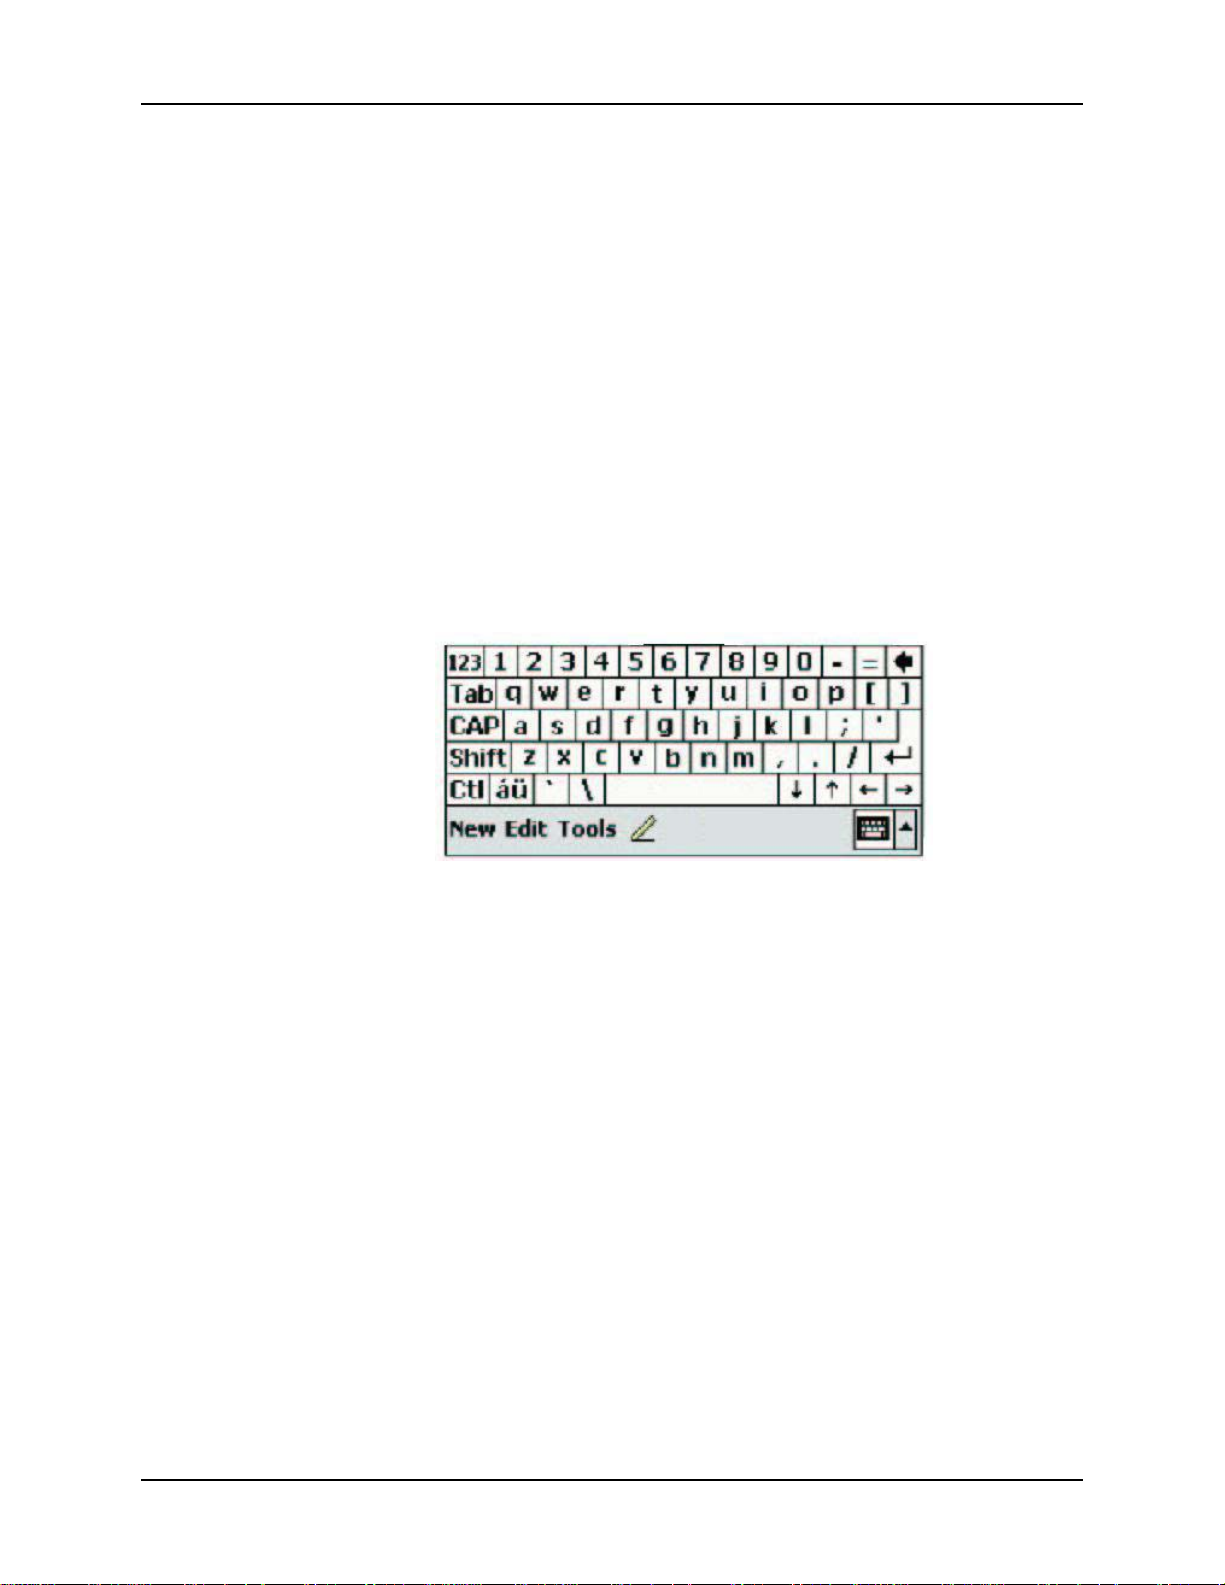
Figure 15 Soft Input Panel
• Tap the 123 key to display either an alphanumeric keyboard or a numeric keyboard
with characters usually accessed by capitalizing alphanumeric keys on a physical
keyboard.
• Tap the Shift key to type one capital letter.
• Tap the CAP key to type all capital letters.
• Tap the au key to access symbols.
E-EQ-MX6OGWW-A MX6 User’s Guide
Page 30

24 Soft Input Panel
Entering Text
Use the input panel to enter information in any program. You can either type on the soft keyboard
or write on the touch screen using Letter Recognizer or Block Recognizer. In either case, the
characters appear as typed text on the screen.
To show or hide the input panel, tap the Input Panel button (the icon looks like a keyboard and is
shown in the System tray). Tap the arrow next to the Input Panel button to see the soft input panel
Choices menu.
When you use the input panel, the word completion program anticipates the word you are typing
or writing and displays it above the input panel.
When you tap the displayed word, it is inserted into your text at the insertion point.
To change word suggestion options, such as the number of words suggested at one time, tap
Start> Settings>Personal >Input> Word Completion tab.
Repeating Keystrokes
The Soft Input Panel does not support repeating keystrokes. The MX6 keypads allow repeating
keystrokes.
International Characters
Use the Soft Input Panel and the stylus to add International Characters to data entries. Open the
Soft Input Panel by tapping the Input Panel icon in the system tray.
Tap the áü key on the Soft Input Panel to enable international characters.
MX6 User’s Guide E-EQ-MX6OGWW-A
Page 31
Keypads 25
Keypads
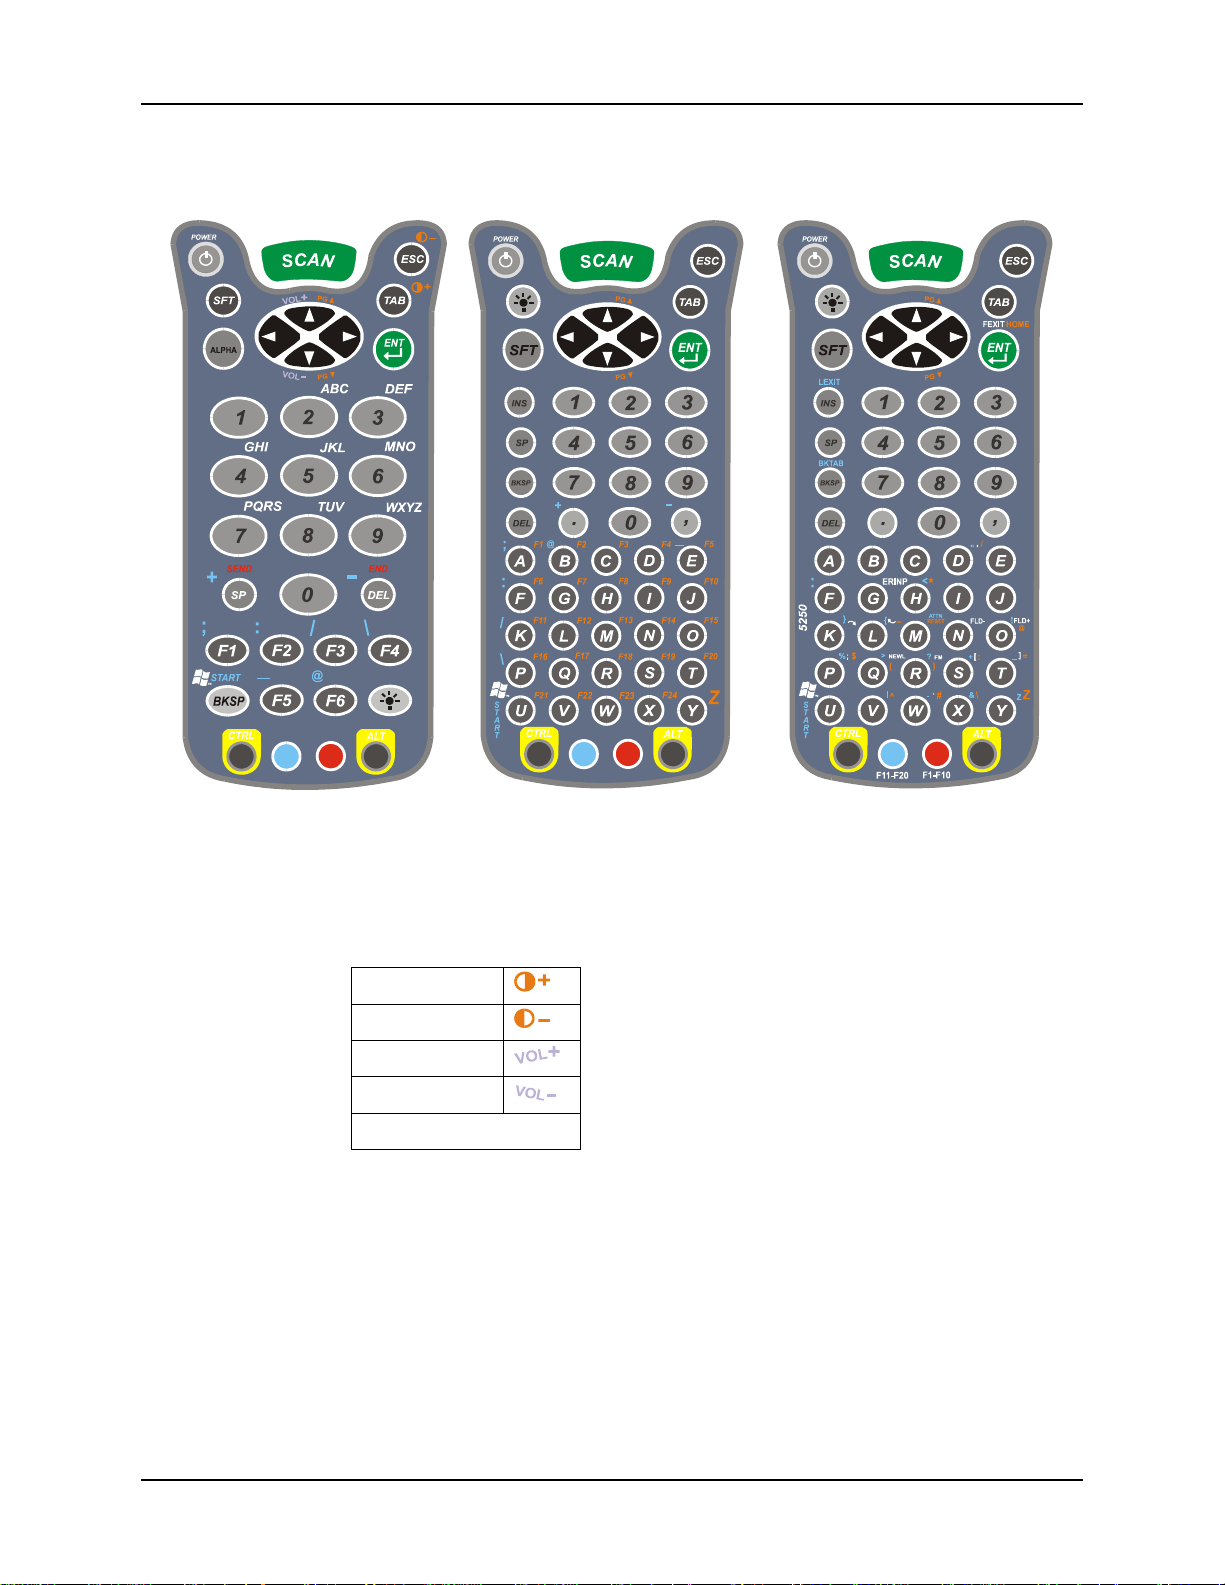
35-key Keypad 56-key Keypad 56-key 5250 Keypad
Figure 16 The 35-key and 56-key Keypads
See also: Appendix A “Key Maps”.
Keys shown on the 35-key keypad that are inactive:
Contrast Up
Contrast Down
Volume Up
Volume Down
Send and End
E-EQ-MX6OGWW-A MX6 User’s Guide
Page 32

26 Keypads
Special Keys
SCAN Key
The SCAN key activates the image-taking and/or barcode decoding scan engine. It also “wakes”
the MX6 from sleep mode.
Power Key
The Power key puts the MX6 into and wakes the MX6 from suspend mode.
Shift (SFT)
The Shift key toggles the keypad from upper case alphabet mode to lower case alphabet mode and
back. Caps Lock may also be toggled by pressing the red modifier key followed by the Shift key
or by double-tapping the Shift key. When Caps Lock is toggled on, the Shift key makes characters
upper case; when it is toggled off, the Shift key makes keys lower case.
Enter (ENT)
The Enter key confirms data entry.
Escape (ESC)
The Escape key performs a cancel action.
Tab
The Tab key moves the cursor to the next tab stop or the next control on a form.
Backlight
Alpha Lock (ALPHA)
This key is included only on the 35-key keypad. Alpha defaults to numeric mode. The Alpha key
toggles between the numeric and alphabetic modes.
Backspace (BKSP)
The Backspace key moves the cursor back one space for each time the key is pressed. To delete a
single character, press Red key + SP. To delete multiple characters, press Red key + SP and hold
down the SP key.
The Keypad Backlight key turns the keypad backlight on and off. The keypad
backlight turns off after 5 seconds if there is no keypad or touch screen
activity. The Backlight key is located at the lower right of the 35-key keypad.
It is located below the Power key on the 56 key keypad. The keypad backlight
key is the only keypress used to turn the keypad backlight on and off.
Delete (DEL)
The Delete key deletes one character for each time the key is pressed.
MX6 User’s Guide E-EQ-MX6OGWW-A
Page 33
Keypads 27
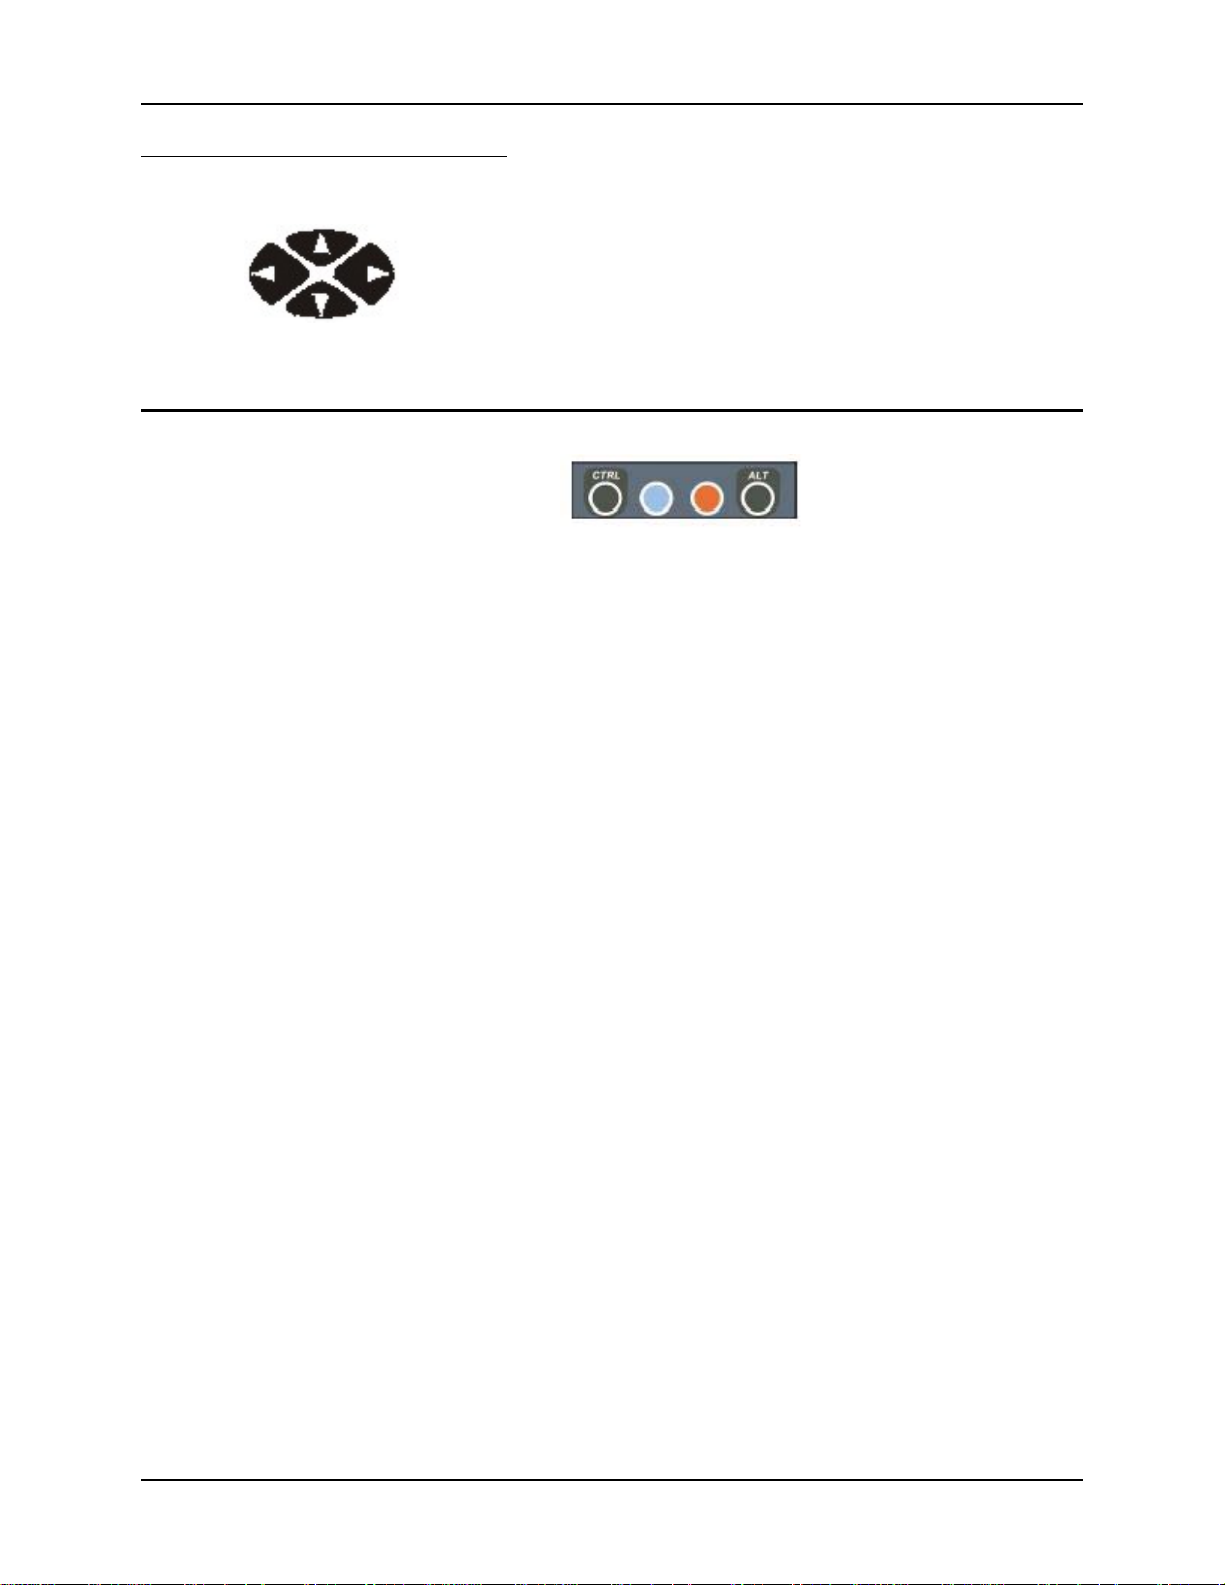
Arrow Keys
Press the arrow (or cursor key) to move the cursor or highlighted text entry
during a menu/list selection. In Normal mode:
• The Up arrow moves the cursor up one row or line.
• The Right arrow moves the cursor to the right one character.
• The Down arrow moves the cursor down one line or row.
• The Left arrow moves the cursor to the left one character.
Modifier Keys
Figure 17 Modifier Keys
The Ctrl and Alt keys are located on the bottom row of the keypad. Functions of the Ctrl and Alt
keys depend on the software application in use.
The blue and red keys (blue is to the left and red is to the right) are used in conjunction with other
keys to type the corresponding color-coded characters and functions. The Red and Blue keys
modify only the next key pressed; these keys must be pressed and released before each key to be
modified to the Blue or Red case.
E-EQ-MX6OGWW-A MX6 User’s Guide
Page 34
28 The IR Serial Port
The IR Serial Port
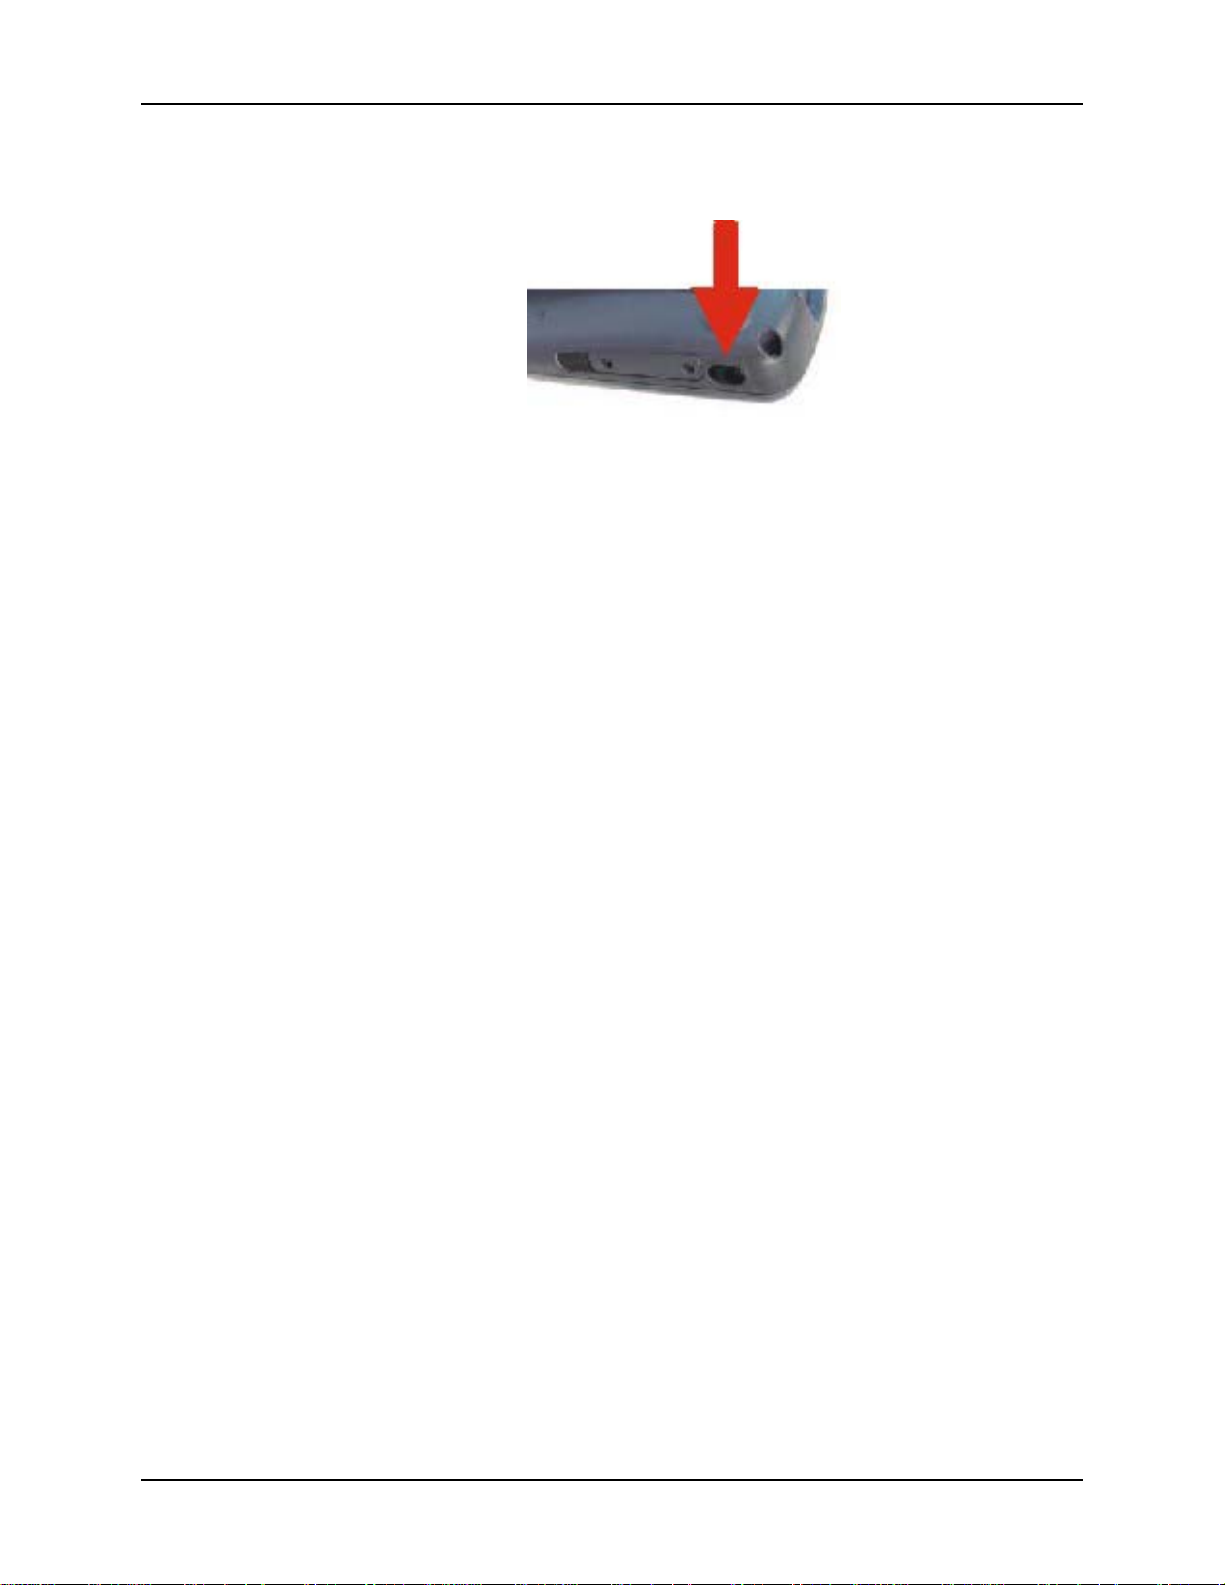
Figure 18 IR Port Location
The serial port is a half duplex IR (Infrared) port. Through software commands, the port may be
set up for IR or a modified RS-232 serial communication.
In general, the IR mode is used when communicating to other IR devices (printers, computers,
etc.) and the modified RS-232 mode is used to communicate with the dock for host
communications.
In IR mode, all physical communications meet the IrDA physical layer specification. In the
modified RS-232 serial mode, the IR port is used to transmit RS-232 level data out the IR port.
The third pin along the bottom of the MX6 is used to receive RS-232 level data while in the dock.
When transferring files using the IR port, flow control must be the same on both sides of the
transmission (specifically, with Zmodem: both must use Xon/Xoff).
MX6 User’s Guide E-EQ-MX6OGWW-A
Page 35
Power Modes 29
Power Modes
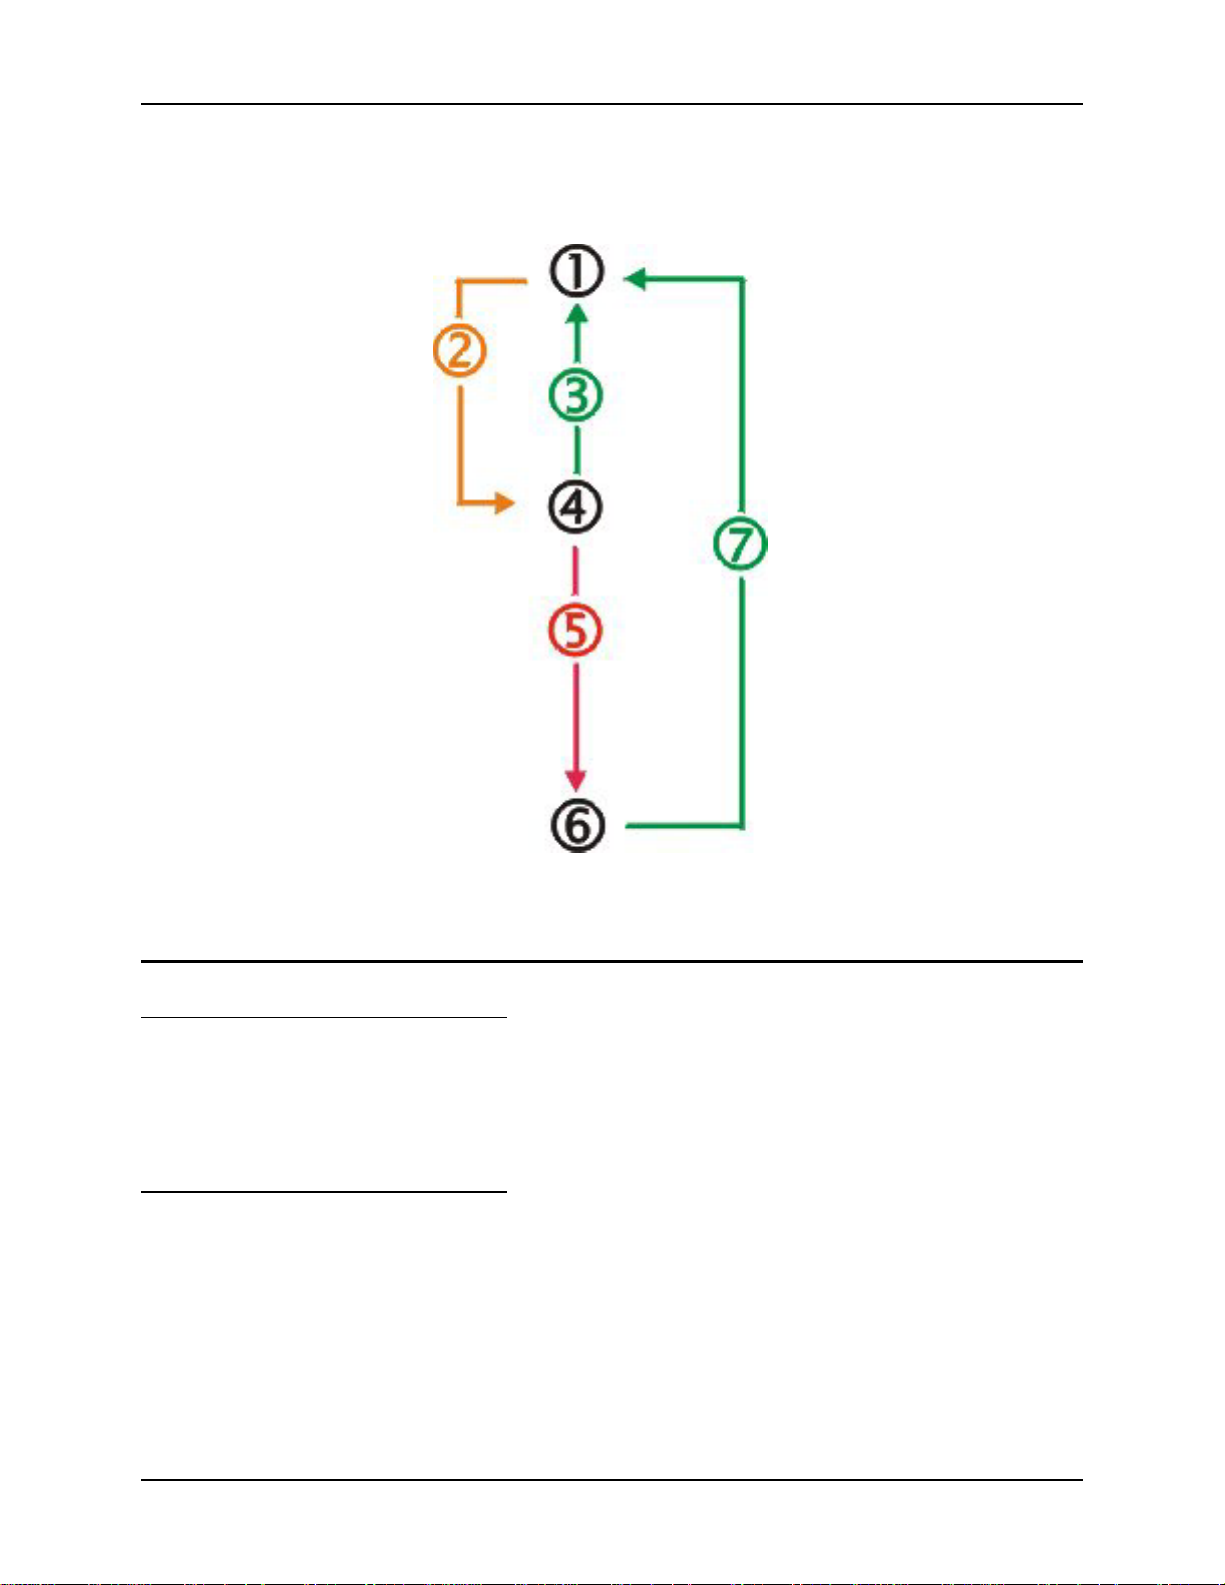
1. On
2. Tap Power key or the
power has failed
3. Power key tap, placed
in powered docking
cradle, Scan key tap or
trigger press
4. Suspend
5. Backup battery and
main battery depleted
On Mode
The Display
The MX6
6. Off
7. Power On
Figure 19 Power Modes – On, Suspend and Off
When the display is On:
• the keyboard, touchscreen and all peripherals function normally
• the display backlight is on until the Backlight timer expires
• when the Main Battery is hot-swapped, the display is turned Off.
New Unit
After a new MX6 has been received, a charged Main Battery inserted, and the Power key tapped,
the MX6 is always On until both batteries are drained completely of power.
Both Batteries Dead
When the Main Battery and Backup Battery are drained completely, the unit is in the Off mode.
The unit transitions from the Off mode to the On mode when a charged Main Battery is inserted,
E-EQ-MX6OGWW-A MX6 User’s Guide
Page 36

30 Power Modes
the MX6 is placed in a powered docking cradle, or external power is applied to the MX6. The unit
performs a Hard Reset upon receiving power from a charged Main Battery pack.
Main Battery Hot-swapped
The MX6 automatically enters Suspend mode when the Main Battery is removed while the
backup battery has adequate power to maintain the MX6 operating system. To wake the unit after
the Main Battery has been replaced, press the Power key or the Scan key.
Suspend Mode
The MX6
The Suspend mode is entered when the unit is inactive for a predetermined period of time or the
user taps the Power key. The MX6 does not enter Suspend when it is connected to AC power or
when it is connected via ActiveSync unless it has been configured to do so. When connected to
ActiveSync, the unit will enter Suspend if the Power key is tapped.
MX6 Suspend timers are set using Start | Settings | System | Power tab.
A Power key tap wakes the unit and resets the display backlight timers.
A touch screen tap or any key tap wakes the unit and resets the display backlight timers.
Off Mode
Placing the MX6 in a powered dock wakes the unit and resets the display backlight timers.
When the unit wakes up, the Display Backlight and the Power Off timers begin the countdown
again. When any one of the above events occurs prior to the Power Off timer expiring, the timer
starts the countdown again.
The unit is in Off Mode when the Main Battery and the Backup Battery are depleted. Insert a fully
charged Main Battery and press the Power key to turn the MX6 On.
MX6 User’s Guide E-EQ-MX6OGWW-A
Page 37

Batteries 31
Batteries
When the main battery has lost most of its charge, an icon of an “empty” or “half-empty” battery
appears.
The MX6 also may be programmed to emit a beep at intervals when the battery is low. When you
see the empty-battery icon or hear the warning beeps, you should turn the unit off and recharge or
replace the battery as soon as possible. The backup battery will retain all data in memory for 30
minutes while the main battery is out of the unit.
After you recharge or replace the battery and turn the unit back on, it returns to wherever you
were in your application when you turned it off.
About Lithium-Ion Batteries
Li-Ion batteries (like all batteries) gradually lose their capacity over time (in a linear fashion) and
never just stop working. This is important to remember -- the MX6 is always 'on' even when in the
Suspend state and draws battery power at all times. Tap Start | Settings | System | Power tab to
check the battery status and power reading.
The following chart is an approximation. Actual battery capacity will vary based on usage,
ambient temperature and peripherals drawing power from the MX6:
Deciding when to put a fully charged battery in the MX6 is difficult to quantify because it is very
application specific. 1600 mAh may be the cutoff for one customer who uses the computer
frequently, while 500 mAh may be perfectly fine for a customer who occasionally uses the
computer. You need to determine the point at which battery life becomes unacceptable for your
business practices and replace the battery before that point.
Main Battery
The MX6 uses a 2000 mAh Li-Ion battery. The main battery is a rugged plastic enclosure that is
designed to withstand the ordinary rigors of an industrial environment. Exercise care when
transporting the battery making sure it does not come in contact with excessive heat or any power
source other than the LXE MX6 dock. This product is not designed to use alkaline batteries.
Backup Battery
The MX6 has a rechargeable lithium battery installed to maintain time, date and setup
information. It is charged off the main battery. The lithium battery is not user serviceable and
should last five years with normal use before it requires replacement.
Note: This battery should only be changed by authorized service personnel.
Caution:
!
100% capacity 2000 mAh minimum
80% capacity 1600 mAh minimum
This product contains a lithium battery. There is a danger of explosion if battery
is incorrectly replaced. Replace only with the same or equivalent type
recommended by the manufacturer. Dispose of used batteries according to
the battery manufacturer's instructions.
E-EQ-MX6OGWW-A MX6 User’s Guide
Page 38
32 Battery Chargers
Battery Chargers
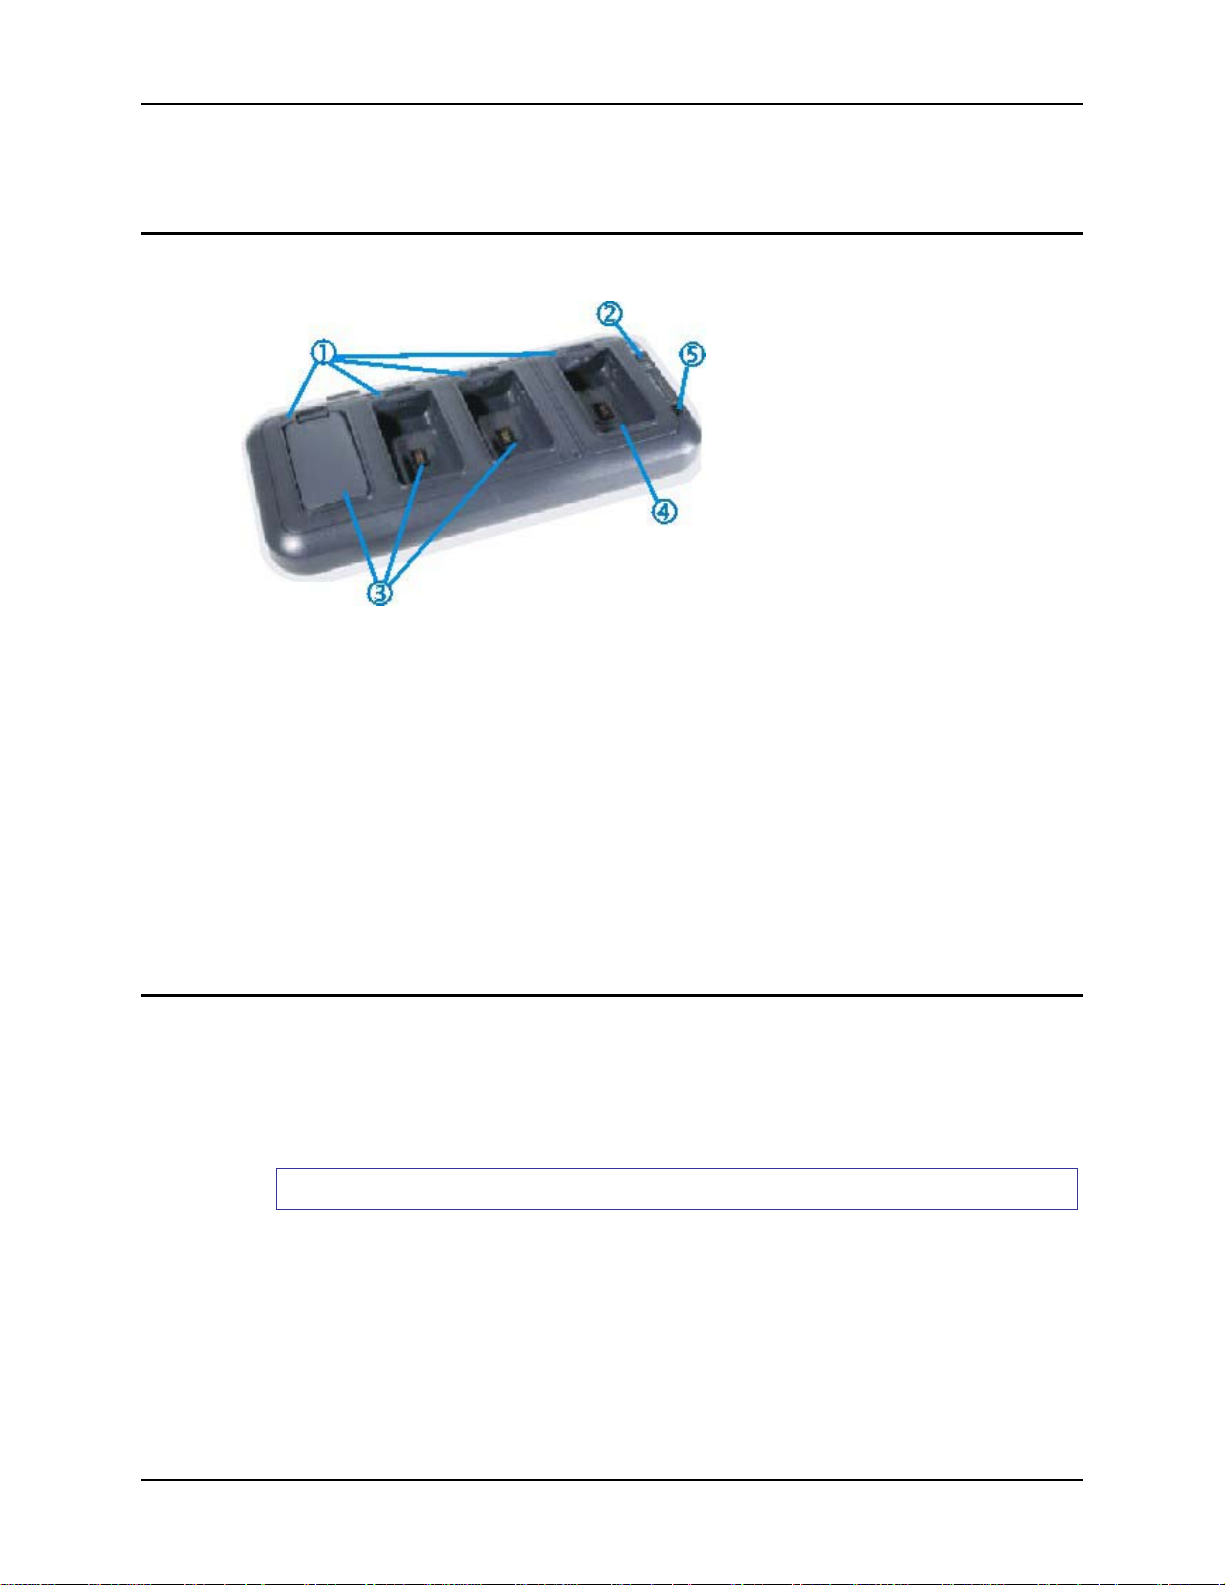
Four Bay Charger/Analyzer (Optional)
1. Status LEDs
2. Battery Capacity Indicator
LED
3. Charging Slots
4. Charge/Analyze Slot
5. Analyze Button
Figure 20 Multicharger / Analyzer
Use the multicharger to charge battery packs outside of the MX6. A complete single battery
charge using the charger takes three (3) hours. As soon as the battery is placed in the slot,
charging begins.
The multicharger must be connected to AC power before charging can begin. The
Charge/Analyze slot begins charging a battery as soon as it is inserted. Pressing the Analyze
button starts the battery analyze cycle on the battery in the Charge/Analyze slot.
The Status LED indicates the charge status of the battery in the slot. Green: has completed
charging. Orange: charging. Red: encountered an error (battery pack may be outside temperature
range).
Lower the battery pack straight into the battery charger pocket and push it down firmly. Do not
"slam" the battery into the charging bay or drop it into the bay. Failure to follow these instructions
can result in damage to the main battery or the charger.
Charging a Battery Using the Desktop Docking Cradle
The Desk Mount Cradle has an Auxiliary Battery Well that is used to charge a single Li-Ion
battery in the charged desk mount docking cradle. The MX6 unit does not have to be in the main
charging well because each charger operates independently of the other. The spare battery will
charge in four hours. The cradle senses when a battery pack is fully charged and automatically
switches to maintain the battery at full capacity indefinitely.
How To Charge a Spare Battery Pack
1. Insert the end of the battery without the locking tab into the bottom of the auxiliary well
opening.
2. Snap the battery into place with a hinging motion.
3. Once the battery is inserted, observe the Aux Battery LED to monitor the charging process.
See the following section titled “Docking Cradles” for further information.
MX6 User’s Guide E-EQ-MX6OGWW-A
Page 39

Docking Cradles 33
Docking Cradles
Note: The “MX6 Cradle Reference Guide” contains docking cradle installation and further
information.
The docking cradles give the MX6 the ability to communicate with a host computer and other
equipment. The MX6 can be either On or in Suspend mode while in the cradles.
Using wall AC adapters the desktop docking cradle transfers power to the internal charging
circuitry of the MX6 and, in turn, the MX6 recharges the Main Battery. The desktop docking
cradle recharges both the MX6 Main Battery and an Auxiliary Battery at the same time.
The vehicle docking cradle uses a 12V cigarette lighter adapter or a bare wire 12-48V power
supply to transfer power to the internal charging circuitry of the MX6 and, in turn, the MX6
recharges the Main Battery. A powered vehicle docking cradle gives the MX6 the ability to
communicate with a host computer and other equipment.
A complete battery charge of the Main Battery pack and an extra battery pack using the desktop
docking cradle takes less than four hours. The vehicle cradle completely charges the Main Battery
in the MX6 is less than four hours.
The cradles require an external power source, before communications or battery charging is
available.
When the desktop cradle is receiving external power, and the MX6 is properly seated in the
charging bay, the DOCK LED is green.
Indicators and LEDs
Powered Desktop Cradle
Label Color Explanation
DOCK Solid Green MX6 is properly seated in the charging bay and the
AUX Battery Orange The spare battery is charging.
Green The spare battery has completed charging and is ready
COMM w/serial port Red Serial data is being sent to the MX6 from the host.
Green Serial data is being sent from the MX6 to the host.
Orange Serial data is being sent at high data rates.
COMM w/USB port Green USB connection is established with the host. (using
Main Battery in the MX6 is charging.
for use.
ActiveSync)
E-EQ-MX6OGWW-A MX6 User’s Guide
Page 40

34 Docking Cradles
Powered Vehicle Cradle
Label Color Explanation
DOCK Solid Green MX6 is properly seated in the charging bay and the
Main Battery in the MX6 is charging.
COMM w/serial port Red Serial data is being sent to the MX6 from the host.
Green Serial data is being sent from the MX6 to the host.
Orange Serial data is being sent at high data rates.
MX6 User’s Guide E-EQ-MX6OGWW-A
Page 41

Getting Help 35
Getting Help
LXE user guides are now available on CD and they can also be viewed/downloaded from the LXE
website. Contact your LXE representative to obtain the LXE Manuals CD.
You can also get help from LXE by calling the telephone numbers listed on the LXE Manuals
CD, in the file titled “Contacting LXE”. This information is also available on the LXE website
www.lxe.com.
Explanations of terms and acronyms used in this manual are located in the file titled "Glossary" on
the LXE Manuals CD and on the LXE website.
User Guides
The following guides are available on the LXE Manuals CD:
• MX6 Reference Guide
• MX6 Dock Reference Guide
• RFTerm Reference Guide
Accessories
Batteries and Battery Charger/Analyzers
Main Battery, Lithium Ion MX6A380BATT
4 Unit Main Battery Charger (US power cord), Includes analyzing
capabilities
4 Unit Main Battery Charger (no power cord), Includes analyzing
capabilities
Carrying Cases, Holsters, Hand Straps
Replacement MX6 Hand Strap MX6A411HANDSTRP
Holster for MX6 without handle MX6A409HOLSTER
Holster for MX6 with handle MX6A410HOLSTERHAND
Case for MX6 without handle, Includes a protective plastic covering
over keyboard
Case for MX6 without handle, No protective plastic covering MX6A408CASE2
Case for MX6 with handle MX6A409CASEHANDLE
Wrist Strap/lanyard for MX6 with handle MX6A412WRISTSTP
Holster belt 9200L67
Vehicle Mount Cradles
MX6 Vehicle Cradle, For use with a Standard MX6 MX6A007VMCRADLE
MX6 Vehicle Cradle, For use with Handle MX6A008WHVMCRADLE
12V Vehicle Cradle Power Supply, Cig Lighter Adapter MX6A382PSVEHMT12V
24-48V Vehicle Cradle Power Supply MX6A383PSVEHMT24V
Desktop Cradles
MX6 Single Unit Desktop Cradle, USB/RS232, Includes a single unit
battery charging slot, US
MX6 Single Unit Desktop Cradle, USB/RS232 Includes a single unit
battery charging slot, WW (No Power Cable)
MX6 4-Bay Docking Cradle, US (Power Cord Included) MX6A012MULTIDOCKUS
MX6 4-Bay Docking Cradle, WW (No Power Cable) MX6A013MULTIDOCKWW
MX6A383CHGR4US
MX6A384CHGR4WW
MX6A407CASE1
MX6A005DESKCRADLEUS
MX6A006DESKCRADLEWW
E-EQ-MX6OGWW-A MX6 User’s Guide
Page 42

36 Getting Help
MX6 4-Bay Comms Docking Cradle, US (Power Cord Included),
Includes Ethernet capabilities
MX6 4-Bay Comms Docking Cradle, WW (No Power Cable), Includes
Ethernet Capabilities
USB Cradle to PC Interface Cable, 6ft MX6A057CBL6USB
RS-232 Cradle to PC Interface Cable, 6ft MX6A059CBL6RS232
Interface Cables
MX6 Charge/Comm Interface Cable, RS232 MX6A054CBLD17RS232
MX6 Charge/Comm Interface Cable, USB MX6A055CBLD17USB
Charge/Comm Cable Power Supply, Includes US Power Cable MX6A307PSACUS
Charge/Comm Cable Power Supply, No Power Cable Included MX6A308PSACWW
Miscellaneous Accessories
Replacement Stylus Kit, 3-pack MX6A510STYLUS
Replacement Stylus Kit, w/ Tether, 3-Pack, For with MX6 w/ Handle MX6A511STYLUS
Universal Vehicle Docking Cradle Mounting Bracket – Clamp Style MX6A015MTGBRCKT
MX6 Desk Top Cradle Replacement Power Supply (No Power Cord) MX6A310PSACWW
Replacement US Power Cord MX6A067CBLPWRAC
MX6 Software Development Kit (HHP Branded) P9500049-01
MX6A010NETCRADLEUS
MX6A011NETCRADLEWW
MX6 User’s Guide E-EQ-MX6OGWW-A
Page 43

Appendix A Key Maps
35-Key Numeric-Alpha Keypad
Use the soft keypad to enter characters that are not available using the 35-key keypad.
To Get This Key / Function
Blue Red Ctrl Alpha Sft
Power / Suspend Power
Windows Start Menu x Bksp
Keypad Backlight Toggle Backlight
Blue Mode Blue
Press These Keys and Then …
Caps
Lock
Press This Key
Red Mode Red
Shift Sft
Alt Alt
Ctrl Ctrl
Scan Scan
Esc Esc
Space Space
Enter Ent
x
CapsLock (Toggle)
Back Space Bksp
Tab Tab
BackTab N/A
Break N/A
Pause N/A
Up Arrow Up Arrow
x
double-tap the Sft
OR
key
Down Arrow Down Arrow
Right Arrow Right Arrow
Left Arrow Left Arrow
Insert N/A
Delete Del
E-EQ-MX6OGWW-A MX6 User’s Guide
Page 44

38 35-Key Numeric-Alpha Keypad
Press These Keys and Then …
To Get This Key / Function
Home N/A
Page Up x Up Arrow
Page Down x Down Arrow
F1 F1
F2 F2
F3 F3
F4 F4
F5 F5
F6 F6
a x 2
b x 2,2
c x 2,2,2
Blue Red Ctrl Alpha Sft
Caps
Lock
Press This Key
d x 3
e x 3,3
f x 3,3,3
g x 4
h x 4,4
i x 4,4,4
j x 5
k x 5,5
l x 5,5,5
m x 6
n x 6,6
o x 6,6,6
p x 7
q x 7,7
r x 7,7,7
s x 7,7,7,7
t x 8
u x 8,8
v x 8,8,8
w x 9
x x 9,9
y x 9,9,9
MX6 User’s Guide E-EQ-MX6OGWW-A
Page 45

35-Key Numeric-Alpha Keypad 39
Press These Keys and Then …
To Get This Key / Function
z x 9,9,9,9
Blue Red Ctrl Alpha Sft
Caps
Lock
Press This Key
A
B x x 2,2
C x x 2,2,2
D x x 3
E x x 3,3
F x x 3,3,3
G x x 4
H x x 4,4
I x x 4,4,4
J x x 5
K x x 5,5
L x x 5,5,5
M x x 6
N x x 6,6
O x x 6,6,6
P x x 7
Q x x 7,7
x 2
x 2
R x x 7,7,7
S x x 7,7,7,7
T x x 8
U x x 8,8
V x x 8,8,8
W x x 9
X x x 9,9
Y x x 9,9,9
Z x x 9,9,9,9
1 1
2 2
3 3
4 4
5 5
6 6
2
Either press SFT or activate CapsLock when capital letters are needed.
E-EQ-MX6OGWW-A MX6 User’s Guide
Page 46

40 35-Key Numeric-Alpha Keypad
Press These Keys and Then …
To Get This Key / Function
7 7
8 8
9 9
0 0
< Use Soft Keypad
[ Use Soft Keypad
] Use Soft Keypad
> Use Soft Keypad
= Use Soft Keypad
{ Use Soft Keypad
} Use Soft Keypad
/ x F3
Blue Red Ctrl Alpha Sft
Caps
Lock
Press This Key
- x Del
+ x Space
: (colon) x F2
; (semicolon) x F1
. (period) Use Soft Keypad
? Use Soft Keypad
` Use Soft Keypad
_ (underscore) x F5
, (comma) Use Soft Keypad
‘ (apostrophe) Use Soft Keypad
~ (tilde) Use Soft Keypad
\ x F4
| Use Soft Keypad
“ Use Soft Keypad
! x 1
@ x 2 or Blue+F6
# x 3
$ x 4
% x 5
^ x 6
& x 7
* x 8
MX6 User’s Guide E-EQ-MX6OGWW-A
Page 47
35-Key Numeric-Alpha Keypad 41
Press These Keys and Then …
To Get This Key / Function
( Use Soft Keypad
) Use Soft Keypad
Blue Red Ctrl Alpha Sft
Caps
Lock
Press This Key
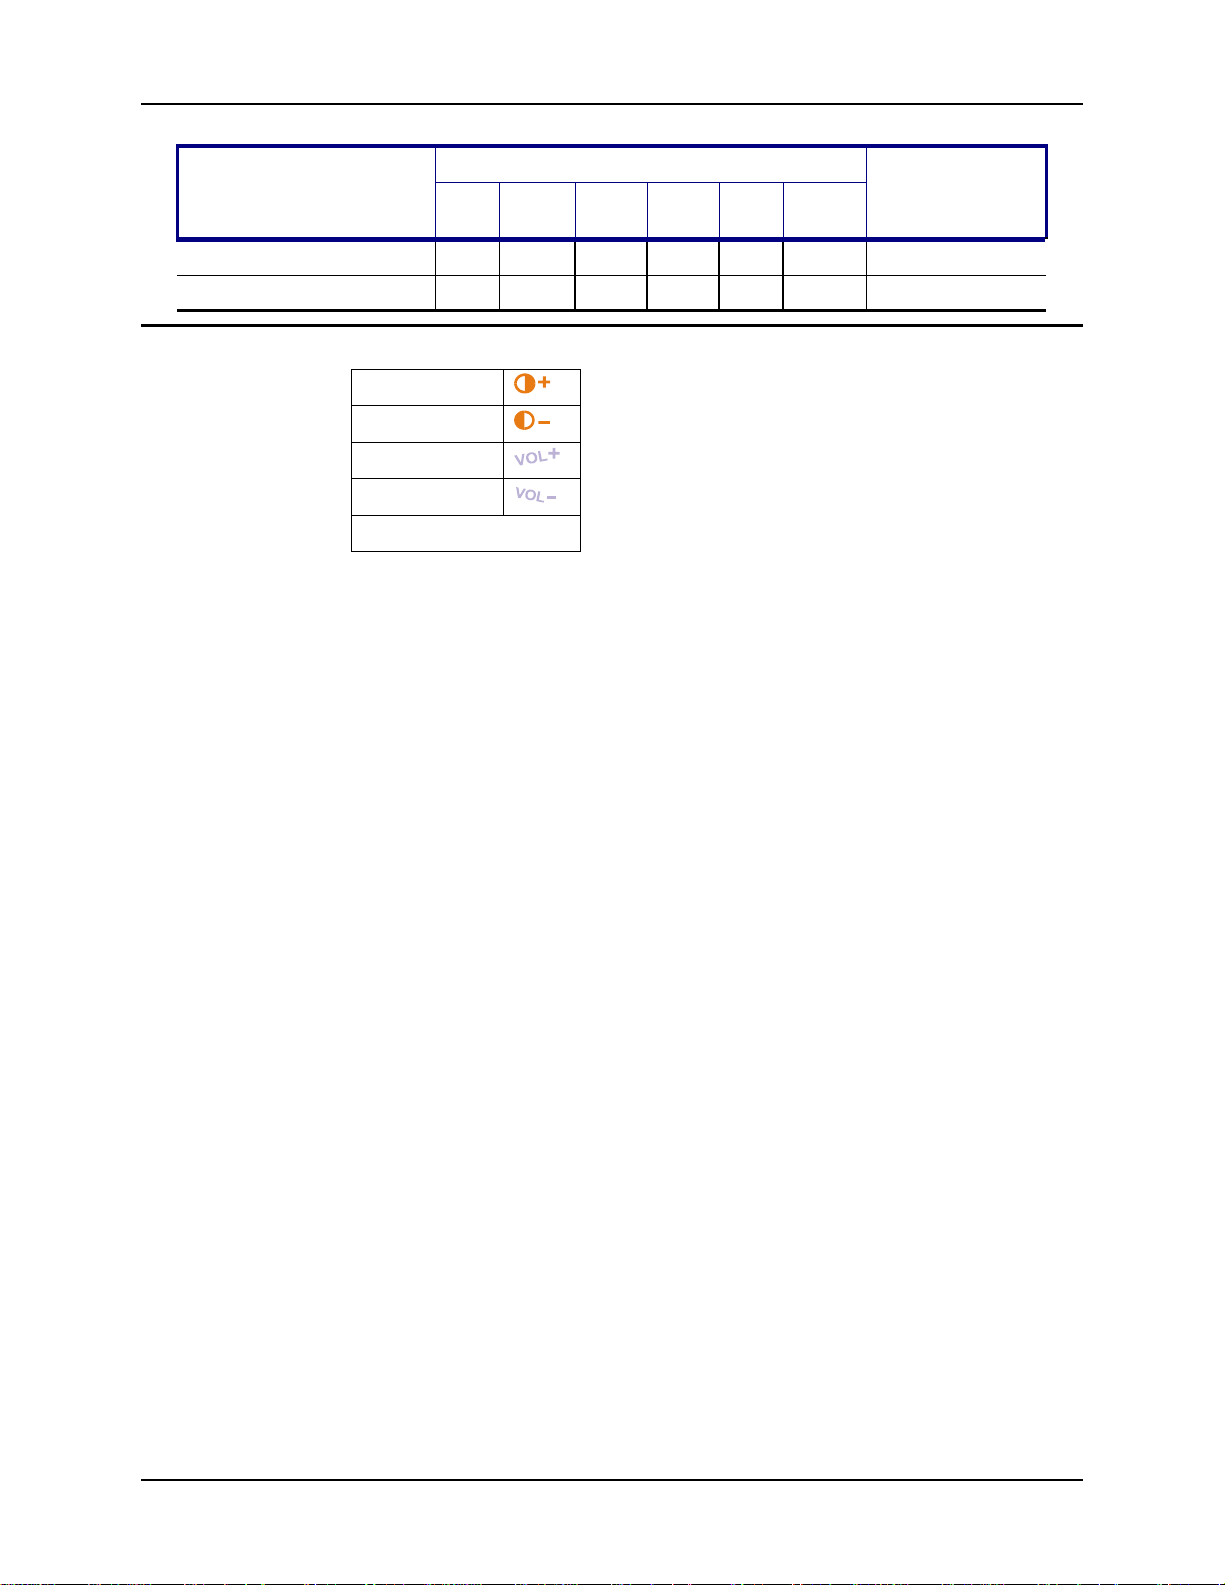
Inactive Keys on the 35-key Keypad
Contrast Up
Contrast Down
Volume Up
Volume Down
Send and End
E-EQ-MX6OGWW-A MX6 User’s Guide
Page 48
42 56-Key Full Alpha Numeric Keypad
56-Key Full Alpha Numeric Keypad
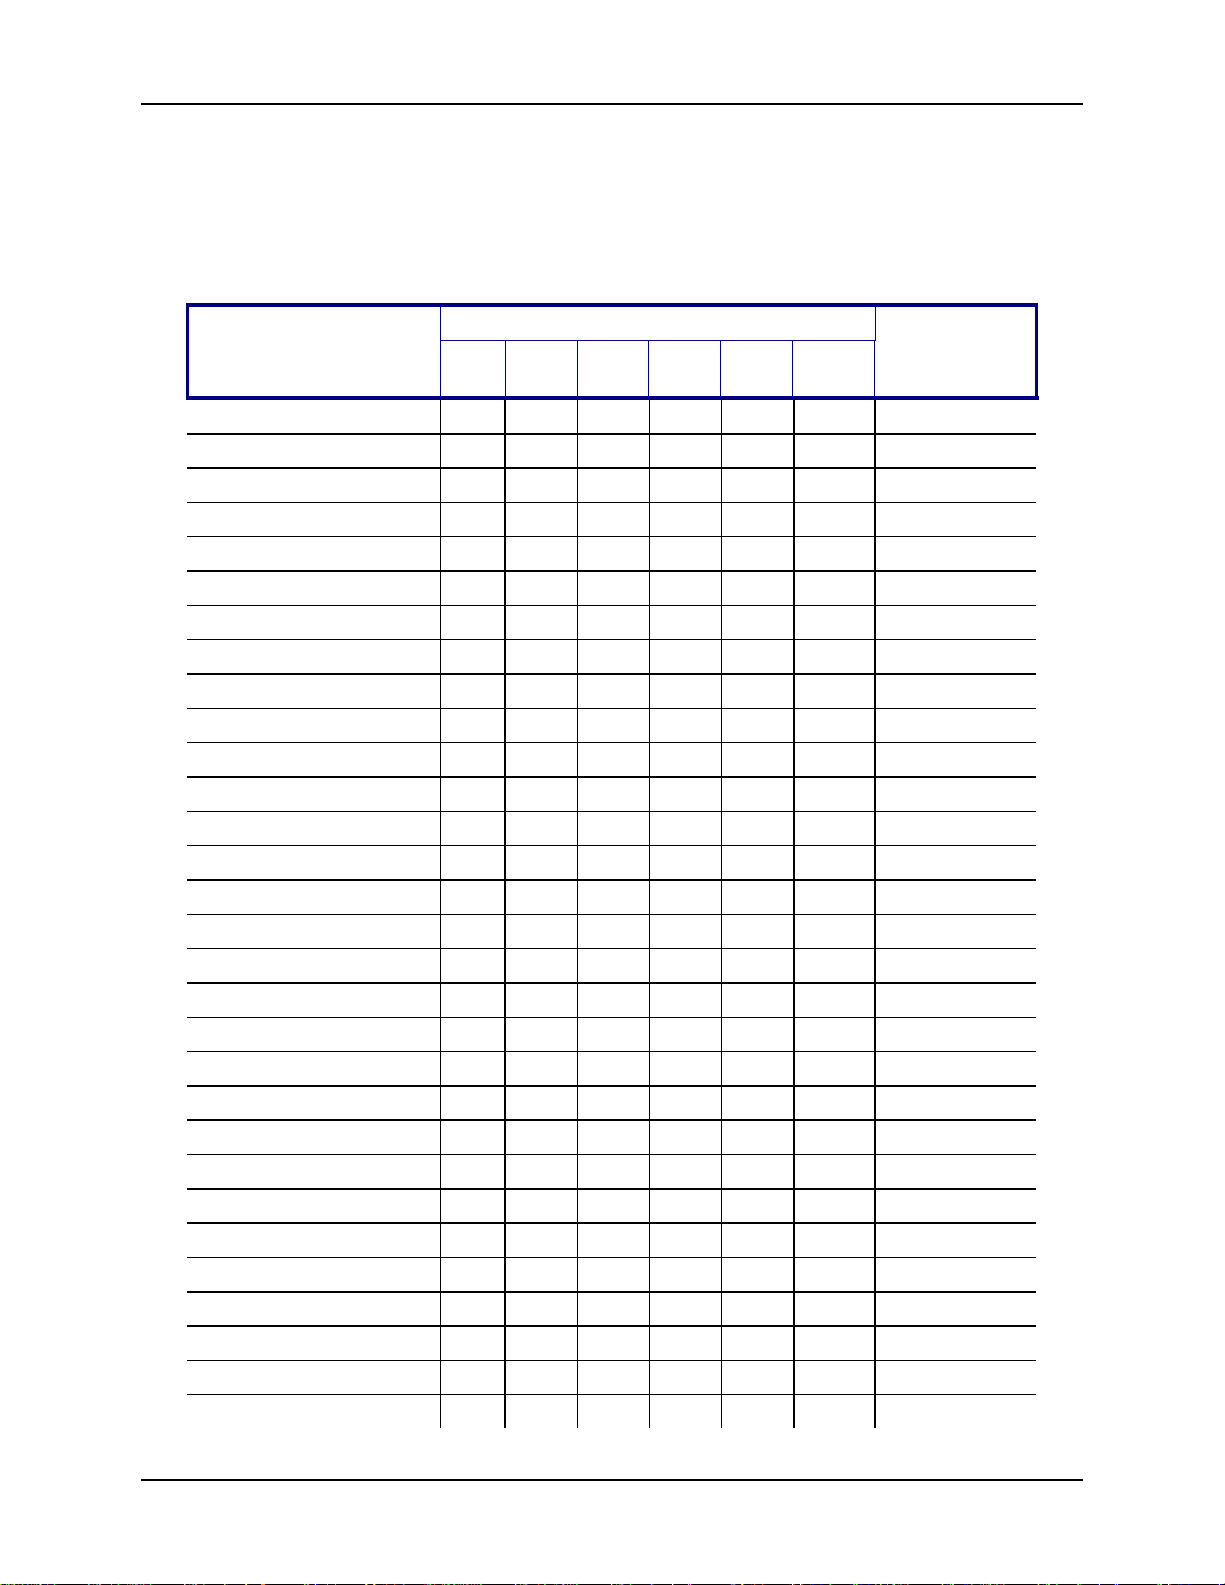
Use the soft keypad to enter characters that are not available using the 56-key keypad. Keypress
Sequences for Batch Units
Press These Keys and Then … Press This Key
To Get This Key / Function
Blue Red Ctrl Alt Shift
Power / Suspend Power
Windows Start Menu x U
Keypad Backlight (Toggle) Backlight
Blue Mode Blue
Red Mode Red
CapsLock (Toggle) x Sft
Shift Sft
Alt Alt
Caps
Lock
Ctrl Ctrl
Scan Scan
Esc Esc
Space Sp
Enter Ent
Back Space Bksp
Tab Tab
BackTab N/A
Break N/A
Pause N/A
Print Screen N/A
Scroll Lock N/A
Up Arrow Up Arrow
Down Arrow Down Arrow
Right Arrow Right Arrow
Left Arrow Left Arrow
Insert Ins
Delete Del
Home N/A
Page Up x Up Arrow
Page Down x Down Arrow
F1 x A
MX6 User’s Guide E-EQ-MX6OGWW-A
Page 49

56-Key Full Alpha Numeric Keypad 43
Press These Keys and Then … Press This Key
To Get This Key / Function
Blue Red Ctrl Alt Shift
F2 x B
F3 x C
F4 x D
F5 x E
F6 x F
F7 x G
F8 x H
F9 x I
F10 x J
F11 x K
F12 x L
F13 x M
Caps
Lock
F14 x N
F15 x O
F16 x P
F17 x Q
F18 x R
F19 x S
F20 x T
F21 x U
F22 x V
F23 x W
F24 x X
a A
b B
c C
d D
e E
f F
g G
h H
i I
j J
k K
E-EQ-MX6OGWW-A MX6 User’s Guide
Page 50

44 56-Key Full Alpha Numeric Keypad
Press These Keys and Then … Press This Key
To Get This Key / Function
Blue Red Ctrl Alt Shift
l L
m M
n N
o O
p P
q Q
r R
s S
t T
u U
v V
w W
Caps
Lock
x X
y Y
z
3
A x A
B x B
C x C
D x D
E x E
F x F
G x G
H x H
I x I
J x J
K x K
L x L
M x M
N x N
x x Y
O x O
P x P
Q x Q
R x R
3
Press Sft, then Red, then “y”
MX6 User’s Guide E-EQ-MX6OGWW-A
Page 51

56-Key Full Alpha Numeric Keypad 45
Press These Keys and Then … Press This Key
To Get This Key / Function
S x S
T x T
U x U
V x V
W x W
X x X
Y x Y
Z
4
1 1
2 2
3 3
4 4
Blue Red Ctrl Alt Shift
x Y
Caps
Lock
5 5
6 6
7 7
8 8
9 9
0 0
. (DOT) DOT
< Use Soft Keypad
[ Use Soft Keypad
] Use Soft Keypad
> Use Soft Keypad
= Use Soft Keypad
{ Use Soft Keypad
} Use Soft Keypad
/ Use Soft Keypad
- x , (comma)
+ x . (DOT)
* x 8
: (colon) x F
; (semicolon) x A
. (period) . (DOT)
4
Caps Lock must be On.
E-EQ-MX6OGWW-A MX6 User’s Guide
Page 52
46 56-Key Full Alpha Numeric Keypad
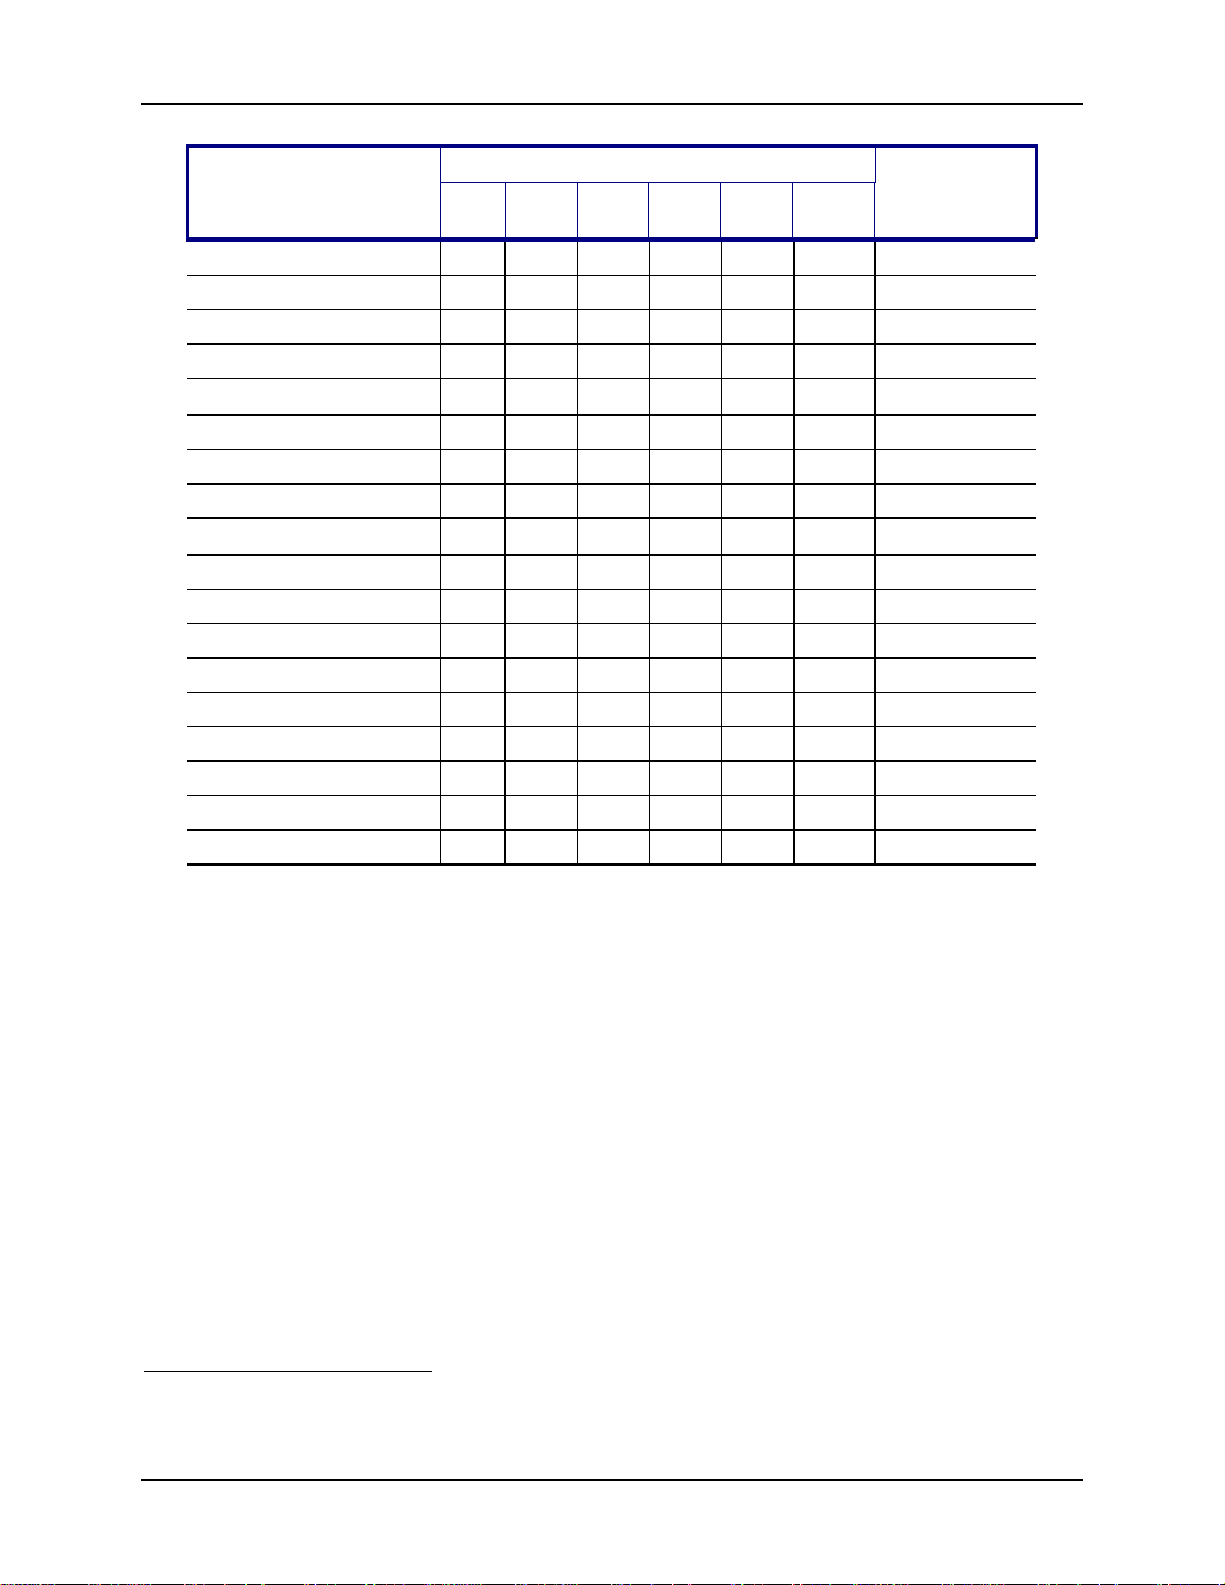
Press These Keys and Then … Press This Key
To Get This Key / Function
Blue Red Ctrl Alt Shift
? Use Soft Keypad
` Use Soft Keypad
_ (underscore) x E
, (comma) Comma key
Caps
Lock
‘ (apostrophe)
~ (tilde) Use Soft Keypad
\ Use Soft Keypad
| Use Soft Keypad
“
! x 1
@ x B or Sft + 2
# x 3
$ x 4
% x 5
^ x 6
& x 7
( x 9
) x 0
Alt+39 5
Alt+34
6
5
Hold down the Alt key while typing 39
6
Hold down the Alt key while typing 34
MX6 User’s Guide E-EQ-MX6OGWW-A
Page 53
Appendix B Regulatory Notices and Safety Information
FCC Information:
This device complies with FCC Rules, part 15. Operation is subject to the following conditions:
1. This device may not cause harmful interference
and
2. This device must accept any interference that may be received, including interference that may cause
undesired operation.
Note: In accordance with FCC 15.21, changes or modifications not expressly approved by the party responsible for
compliance could void the user’s authority to operate the equipment. This equipment has been tested and found to
comply with the limits for a Class B digital device pursuant to Part 15 of the FCC Rules. These limits are designed
to provide reasonable protection against harmful interference in a residential installation. This equipment generates,
uses, and can radiate radio frequency energy and, if not installed and used in accordance with the instructions, may
cause harmful interference to radio communications. If this equipment does cause harmful interference to radio or
television reception, which can be determined by turning the equipment off and on, the user is encouraged to try to
correct the interference by one or more of the following measures:
• Reorient or relocate the receiving antenna.
• Increase the separation between the equipment and receiver.
• Connect the equipment into an outlet on a circuit different from that to which the receiver is connected.
• Consult the dealer or an experienced radio/TV technician for help.
Warning: Changes or modifications to this device not expressly approved by LXE, Inc., could void the user’s
authority to operate this equipment.
RF Safety Notice
Caution
!
Industry Canada:
This Class B digital apparatus complies with Canadian ICES-003. Operation is subject to the following two
conditions: 1. Devices may not cause harmful interference. 2. Devices must accept any interference received,
including interference that may cause undesired operation. To prevent radio interference to the licensed service, this
device is intended to be operated indoors and away from windows to provide maximum shielding. Equipment (or its
transmit antenna) that is installed outdoors is subject to licensing.
Cet appareil numérique de la Classe B est conforme à la norme NMB-003 du Canada.
This device and its antenna must not be co-located or operating in conjunction with any other
antenna or transmitter. For body worn operation, to maintain compliance with the FCC RF
exposure guidelines, use only accessories that contain no metallic components and provide
a separation distance of 15mm (.06 inches) to the body. Use of other accessories may
violate FCC RF exposure guidelines and should be avoided.
E-EQ-MX6OGWW-A MX6 User’s Guide
Page 54
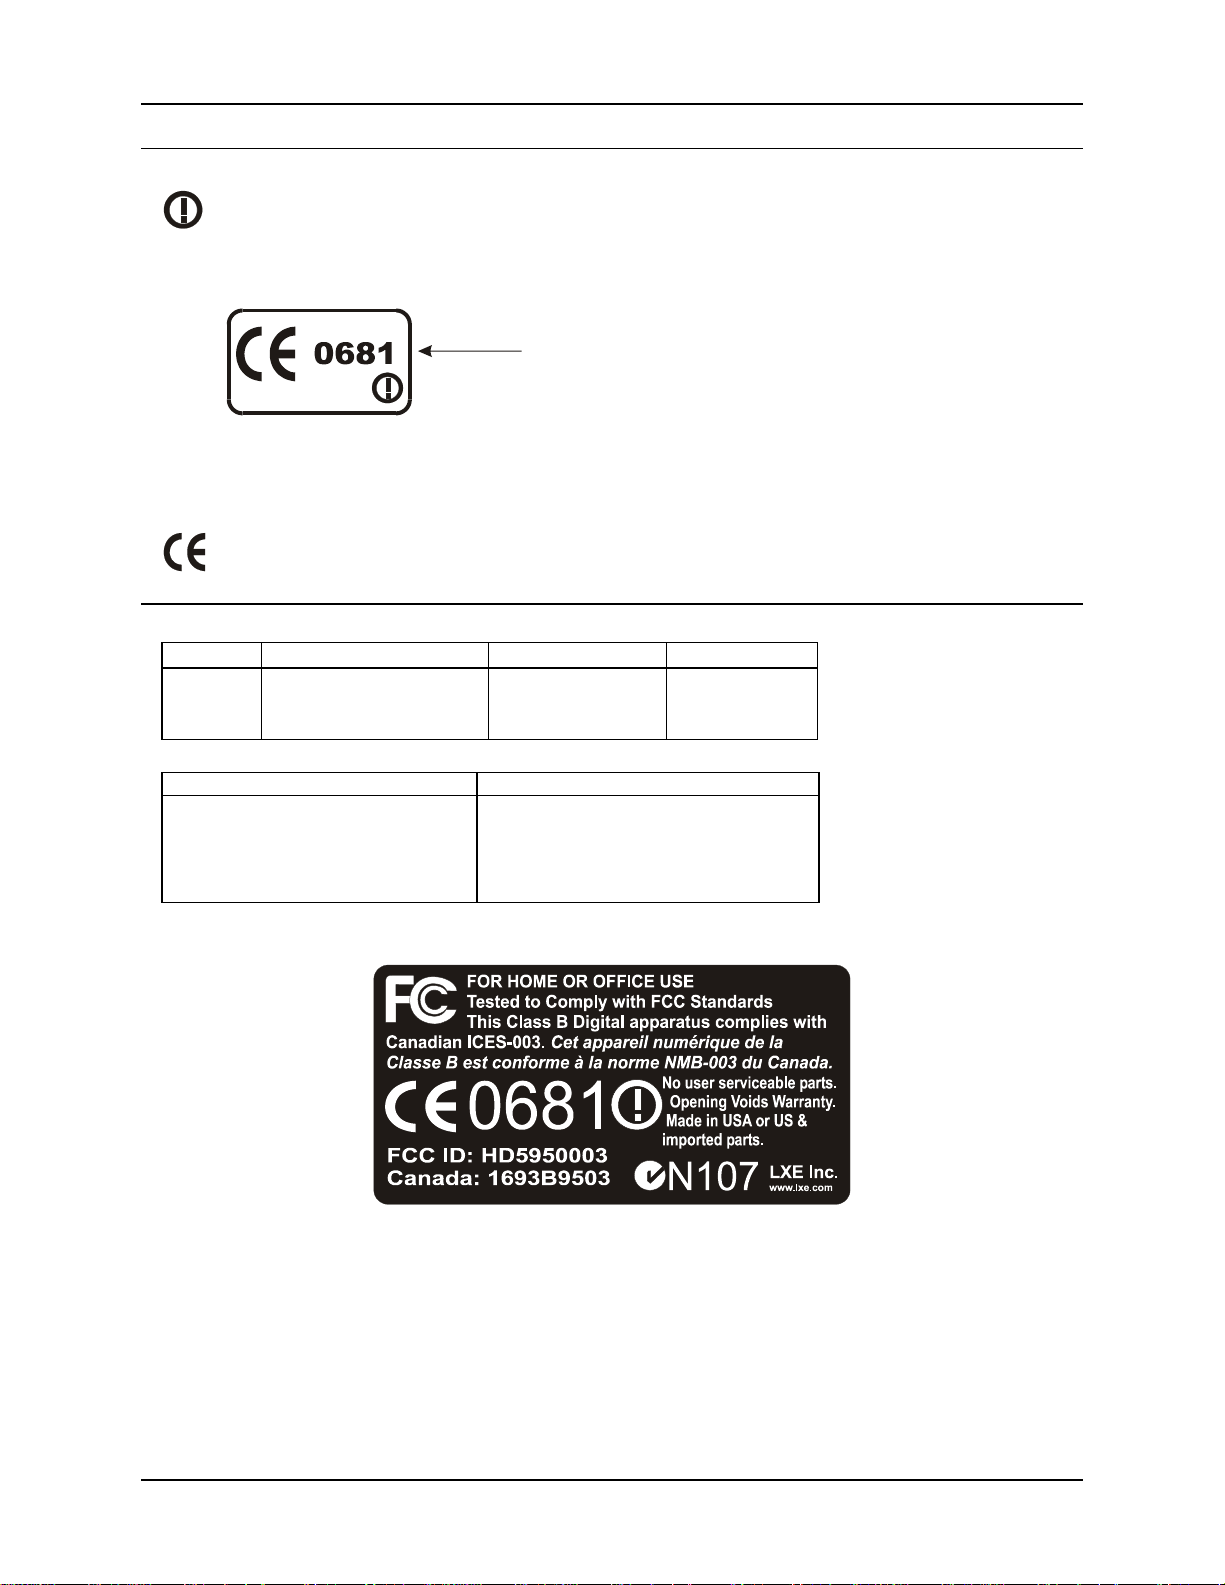
48 Regulatory Notices and Safety Information
R&TTE Directive Requirements (Applies only to equipment operated within the EU/EFTA)
Information to User
A label on the exterior of the device should resemble the label shown below. The product is marked
with the label below in accordance with the Class II product requirements specified in the R&TTE
Directive, 1999/5/EC.
LXE Part
Number
Use of this device is permitted in EU/EFTA.
The equipment is intended for use throughout the European Community. Its authorization for use in
France is restricted as follows:
PAN European Frequency Range: 2.402 – 2.480 GHz
Restricted Frequency Range for use in France: 2.448 – 2.480 GHz
The CE mark on this product indicates that the system has been tested to and conforms with the
provisions noted with the 89/336/EEC Electromagnetic Compatibility Directive and the
73/23/EEC Low Voltage Directive.
Approvals:
Product EMI / EMC Standards Safety Standards RF Standards
MX6 FCC Part 15 Subpart B
EN 55022 Class B
EN55024
EN60950
FCC 15.247
RSS 210
ETS 300 328
Transceiver
Transceiver Specifications
MX6 with 802.11b EN 300 328-2:2000
EN 301 489-1:2000
EN 301 480-17:2000
EN 60950:2000
EN 50361:2001
The following is the required safety label that appears on the back panel of the MX6 RF terminal equipped with an 802.11 radio.
MX6 User’s Guide E-EQ-MX6OGWW-A
Page 55
Regulatory Notices and Safety Information 49
LXE MX6 Declaration of Conformity
DECLARATION OF CONFORMITY
according to:
The Low Voltage Directive; 73/23/EEC
The EMC Directive; 89/336/EEC
and the Marking Directive; 93/68/EEC
Type of Equipment: Hand Held Computer
Brand Name or Trademark: LXE
Type Designation: MX6
Manufacturer: LXE Inc.
Address: 125 Technology Parkway
The following harmonized European Standards, technical specifications, or other normative documents
have been applied:
EMC Standards:
EN 55022: 1998 Limits and methods of measurement of radio disturbance
EN 55024: 1998 Information Technology Equipment – Immunity characteristics –
Safety Standards:
EN60950: 2000
The product carries the CE Mark:
characteristics of information technology equipment
Limits and methods of measurement
Safety of information technology equipment, including electrical
business equipment
Norcross, GA 30092 USA
We, LXE Inc., declare that the equipment specified above complies with all Essential Health
and Safety Requirements of the above Directives and Standards, as amended.
Date of issue: October 20, 2003
Cyril A. Binnom Jr.
EMC Approvals Engineer
LXE Inc. 125 Technology Parkway Norcross, GA 30092-2993 USA
ph. 770/447-4224 fax 770/447-6928
E-EQ-MX6OGWW-A MX6 User’s Guide
Page 56
50 Regulatory Notices and Safety Information
LXE 802.11b WLAN Declaration of Conformity
DECLARATION OF CONFORMITY
according to:
the R&TTE Directive; 99/5/EEC
The EMC Directive; 89/336/EEC
The Low Voltage Directive; 73/23/EEC
and the Marking Directive; 93/68/EEC
Type of Equipment: DSSS 2.4GHz WLAN
Brand Name or Trademark: LXE
Type Designation: MX6 with 802.11b WLAN
Manufacturer: LXE Inc.
Address: 125 Technology Parkway
The following harmonized European Norms have been applied:
EMC Standards:
EN 301 489-1: 07-2000 Electromagnetic compatibility and Radio spectrum Matters (ERM); ElectroMagnetic
EN 301 489-17:07-2000 Electromagnetic compatibility and Radio spectrum Matters (ERM); ElectroMagnetic
EN 55022: 1998 Limits and methods of measurement of radio disturbance characteristics of
Radio Standards:
EN 300 328-1 and -2: 2000-7
Safety Standard:
EN60950: 2000 Safety of information technology equipment, including electrical business equipment
The product carries the CE Mark:
Compatibility (EMC) standard for radio equipment and services; Part 1: Common
technical requirements
Compatibility (EMC) standard for radio equipment and services; Part 17: Specific
conditions for Wideband data and HIPERLAN equipment
information technology equipment
Radio Equipment and Systems (RES);
Wideband transmission systems;
Technical characteristics and test conditions for data transmission equipment
operating in the 2.4 GHz ISM band and using spread spectrum modulation
techniques
Norcross, GA 30092 USA
We, LXE Inc., declare that the equipment specified above complies with all Essential Health
and Safety Requirements of the above Directives and Standards, as amended.
Cyril A. Binnom Jr.
Date of issue: October 20, 2003
LXE Inc. 125 Technology Parkway Norcross, GA 30092-2993 USA
ph. 770/447-4224 fax 770/447-6928
EMC Approvals Engineer
MX6 User’s Guide E-EQ-MX6OGWW-A
Page 57

Regulatory Notices and Safety Information 51
!
Caution:
Lithium battery inside. Danger of explosion if battery is incorrectly replaced. Replace only with same or equivalent
type recommended by battery manufacturer. (US)
Attention:
Contient une pile de lithium. Risque d’explosion dans le cas où la pile ne serait pas correctement remplacée.
Remplacer uniquement avec une pile semblable ou equivalente au type de pile recommandé par le fabricant. (FR)
Forsigtig:
Indeholder lithiumbattterier. Risiko for eksplosion, hvis batteriet udskiftes forkert. Må kun udskiftes med samme
eller tilsvarende type, som anbefalet af fabikanten. (DK)
Varoitus:
Tämä tuote käyttää laservaloa. Skannerissa on jokin seuraavista tarroista. Lue Huomio-kohta. (FI)
Vorsicht:
Enthält Lithium-Batterie. Bei unsachgemäßem Ersatz besteht Explosionsgefahr. Nur durch gleichen oder vom
Hersteller empfohlenen Typ ersetzen. (DE)
Attenzione:
Batteria al litio. Pericolo di esplosione qualora la batteria venga sostituita in maniera scorretta. Sostituire solo con lo
stesso tipo o equivalente consigliato per il fabbricante. (IT)
Atenção:
Contém pilha de lítio. Há perigo de explosão no caso de uma substituição incorreta. Substitua somente pelo mesmo
tipo, ou equivalente, recomendado pelo fabricante. (PT)
Lithium Battery Safety Statement
!
Varning:
Innehåller litiumbatteri. Fara för explosion om batteriet är felaktigt placerat eller av fel typ. Använd endast samma
eller motsvarande typ batterier rekommenderade av tillverkaren. (SE)
Advarsel:
Innmontert Lithium batteri. Eksplosjonsfare ved feil montering av batteri. Benytt kun batteri anbefalt av produsent.
(NO)
Cuidado:
Pila de litio adentro. Peligro de explosión si la pila se reemplaza incorrectamente. Reemplace solamente con el
mismo tipo o equivalente recomendado por el fabricante. (ES)
Oppassen:
Bevat Lithium-batterij. Incorrrecte plaatsing van batterij kan leiden tot explosiegevaar. Alleen vervangen door
hetzelfde of door fabrikant aanbevolen gelijkwaardig type. (NL)
E-EQ-MX6OGWW-A MX6 User’s Guide
Page 58
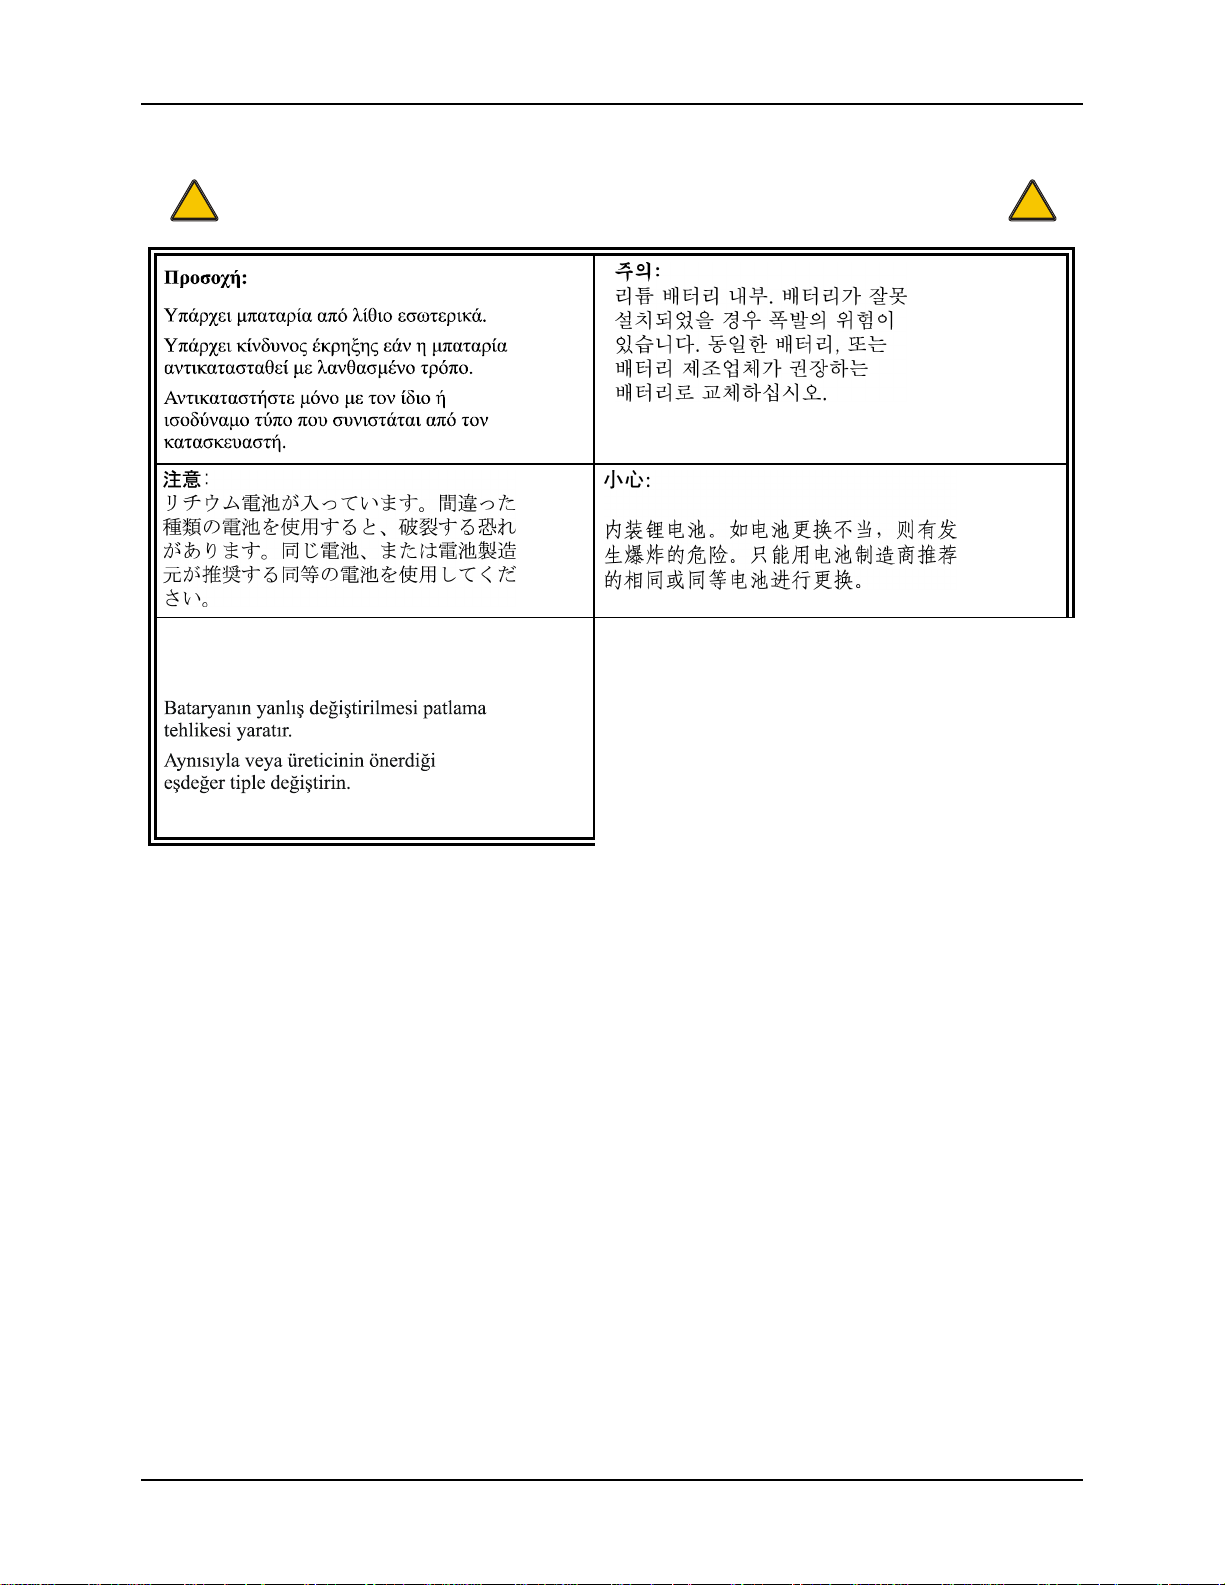
52 Regulatory Notices and Safety Information
at:
İ
.
!
Dikk
çinde lityum bataryası bulunur
Lithium Battery Safety Statement
(KR)
(GR)
(JP)
!
(CN)
(TR)
Legend:
Chinese CN Italian IT
Danish DK Japanese JP
Dutch NL Korean KR
English US Norwegian NO
Finnish FI Portuguese PT
French FR Spanish ES
German DE Swedish SE
Greek GR Turkish TR
MX6 User’s Guide E-EQ-MX6OGWW-A
Page 59

30 minute delay .......................................................3
A
Accessories............................................................ 35
Aim scan beam ......................................................21
alkaline batteries.................................................... 31
Audio jack, How to ...............................................16
Index
F
Features ...................................................................1
Flash files ..............................................................15
Flow Control, Serial Port....................................... 28
G
B
Backlight, Display ................................................. 13
Backlight, Keypad ................................................. 26
Barcode images .....................................................20
Battery
Backup .............................................................. 31
Main .................................................................. 31
Battery, replace........................................................ 7
C
Calibrate the touchscreen....................................... 11
Caution, Backup Battery........................................ 31
Change the date and time...................................... 12
check the battery status and power reading ........... 31
Cleaning
Scan Aperture ...................................................11
Cold reset................................................................. 8
Components, described............................................ 4
D
Data entry ..............................................................19
Date and time ........................................................12
Display
Features............................................................. 22
Pixels................................................................. 22
Display Backlight .................................................. 13
Display Backlight and the Power Off timers.........30
Getting Help ..........................................................35
Getting Started......................................................... 3
H
handstrap hook ........................................................7
Help ....................................................................... 35
I
Images and screen captures ................................... 20
International Characters......................................... 24
IP64 .........................................................................2
IR Port ...................................................................28
K
keyboard shortcuts................................................. 10
Keypad and entering data ...................................... 19
Keypad Backlight .................................................. 26
Keystroke, repeating..............................................24
L
Li-Ion..................................................................... 31
Lithium battery warning .......................................... 1
M
Manuals, reference ..................................................1
E
Entering Data......................................................... 19
Environmental Specifications.................................. 2
E-EQ-MX6OGWW-A MX6 User’s Guide
O
Off Mode ............................................................... 30
ON Mode characteristics .......................................29
Operating Temperature............................................ 2
Page 60

54 Index
P
Pen Stylus ................................................................ 9
Pen Stylus and data entry ......................................19
Power key, location ................................................. 8
Power Off Timer, How to...................................... 14
Q
Quick Start Instructions........................................... 3
R
Reboot .....................................................................8
Regulatory Notices and Safety Information ..........47
Reset, cold ...............................................................8
Reset, warm ............................................................. 8
Run a program ....................................................... 15
S
Scan Aperture
Cleaning ............................................................ 11
ScanWedge ............................................................20
Single and Four Bay Docks................................... 33
Soft Input Panel ..................................................... 24
Soft Input Panel (SIP)............................................ 23
Speaker volume, How to .......................................16
Stylus and data entry .............................................19
Stylus holder............................................................9
Suspend mode........................................................ 30
T
Touch Screen......................................................... 22
Touch Screen and data entry .................................19
Touchscreen calibration......................................... 11
Touchscreen, How to............................................... 9
Troubleshooting
Unsuccessful scan ............................................. 21
U
Use the imager.......................................................20
V
View
Display .............................................................. 22
Volume
adjust audio volume .......................................... 16
W
Warm reset...............................................................8
warning beeps........................................................31
MX6 User’s Guide E-EQ-MX6OGWW-A
 Loading...