

Page 1
Instatllation manual
Product-No:78007
Z-Wave Gateway
This is a short introduction how to connect the Z-Wave®
Gateway with the Delock socket (78010) switch by the
Z-Butler-App. All screenshot are based on Android OS, iOS will
look a bit different.
Note: This APP is not developed by Delock and we only advise
how you can use the Gateway.
1. APP download
1. Switch on a QR code app on your smartphone. Scan one of
the QR-codes below to download and install the app
automatically.
for Android for iOS
2. As soon as the Z-Buter app is installed you have to switch
on the Gateway. Put the power supply of the Gateway into a
power outlet and connect it with the Gateway. Then open the
WLAN connections on your smartphone. There you will find
the Gateway „FG3200R1“. Connect it and enter the
password 89191200. After that the Gateway is connected with
the smartphone. Then open the „Z-Butler“ app to integrate
devices.
2. Start Z-Butler APP
Home screen
Open the app and there are the following options:
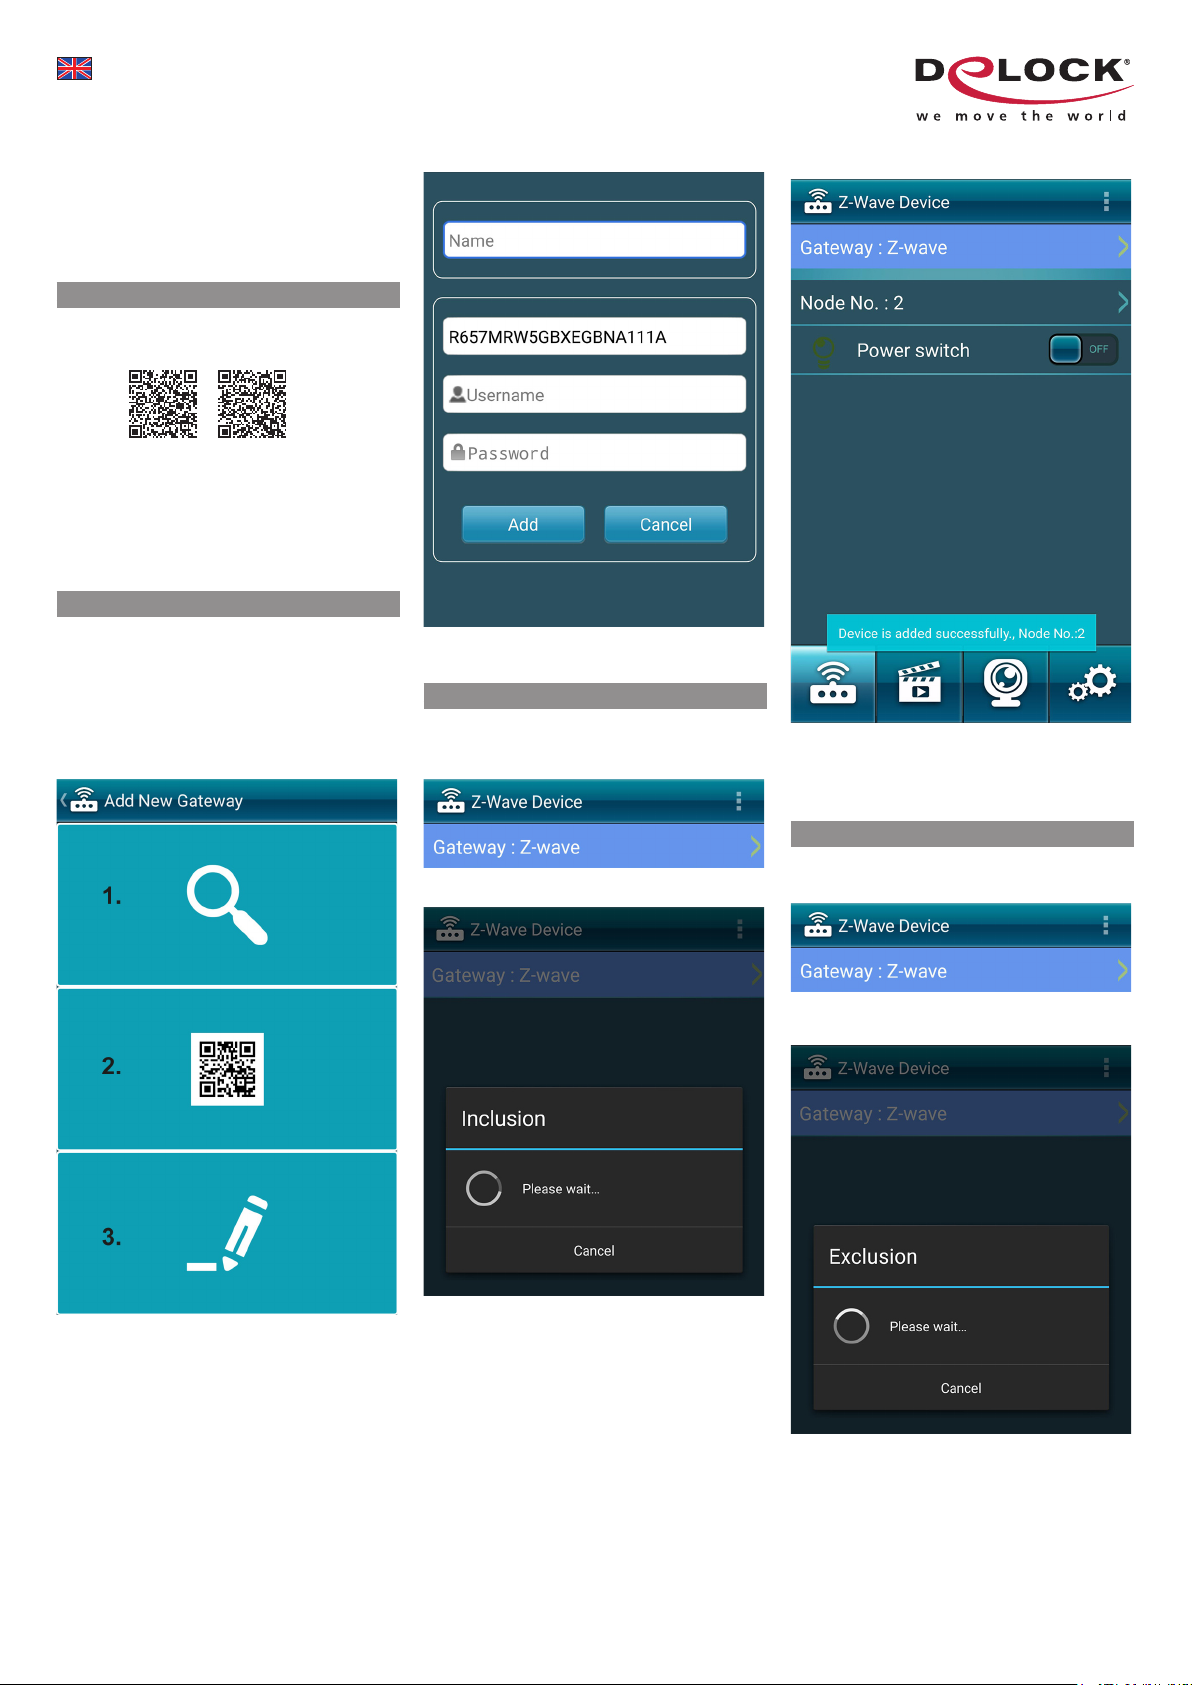
1. Automatic search for the Gateway
2. QR code scanner to scan the device code
3. Manual entry
If you click 1. the FG3200 Gateway appears. With 2. you have
to scan the QR code, which is placed on the back side of the
device. 3. Or you insert the 20 digit code manually.
The Gateway is integrated now and you can connect your
devices.
3. Connect device
We use the Delock power switch (78010) as an example. Put
it in a power outlet. After that the LED should blink blue which
indicates the readiness to include it. If that is the case, click on
the home screen of the Gateway on the green arrow:
Choose log in the device and push the button on the power
switch three times in quick succession.
Note
If you can not include a device, you first have to remove the
device and then add the device again.
It is the same procedure with every new device.
4. Remove device
You remove a device just like you add it.
In the main menu of the Gateway click on the green arrow:
Click on manual entry, then the search result FG3200 Gateway
appears. Click on FG3200 and enter a name, e.g. Gateway,
the user name admin and the password 1234. After that click
on add.
Now the power switch is included. From the main menu you can
turn the switch on and off.
Just like that you can also assign other Z-Wave® products to
your Gateway.
Choose remove Z-Wave® device and push the button on the
power switch three times in quick succession.
Afterwards the power switch is excluded.
Just like that you can also remove other Z-Wave® products.
Page 2
5. Scenes
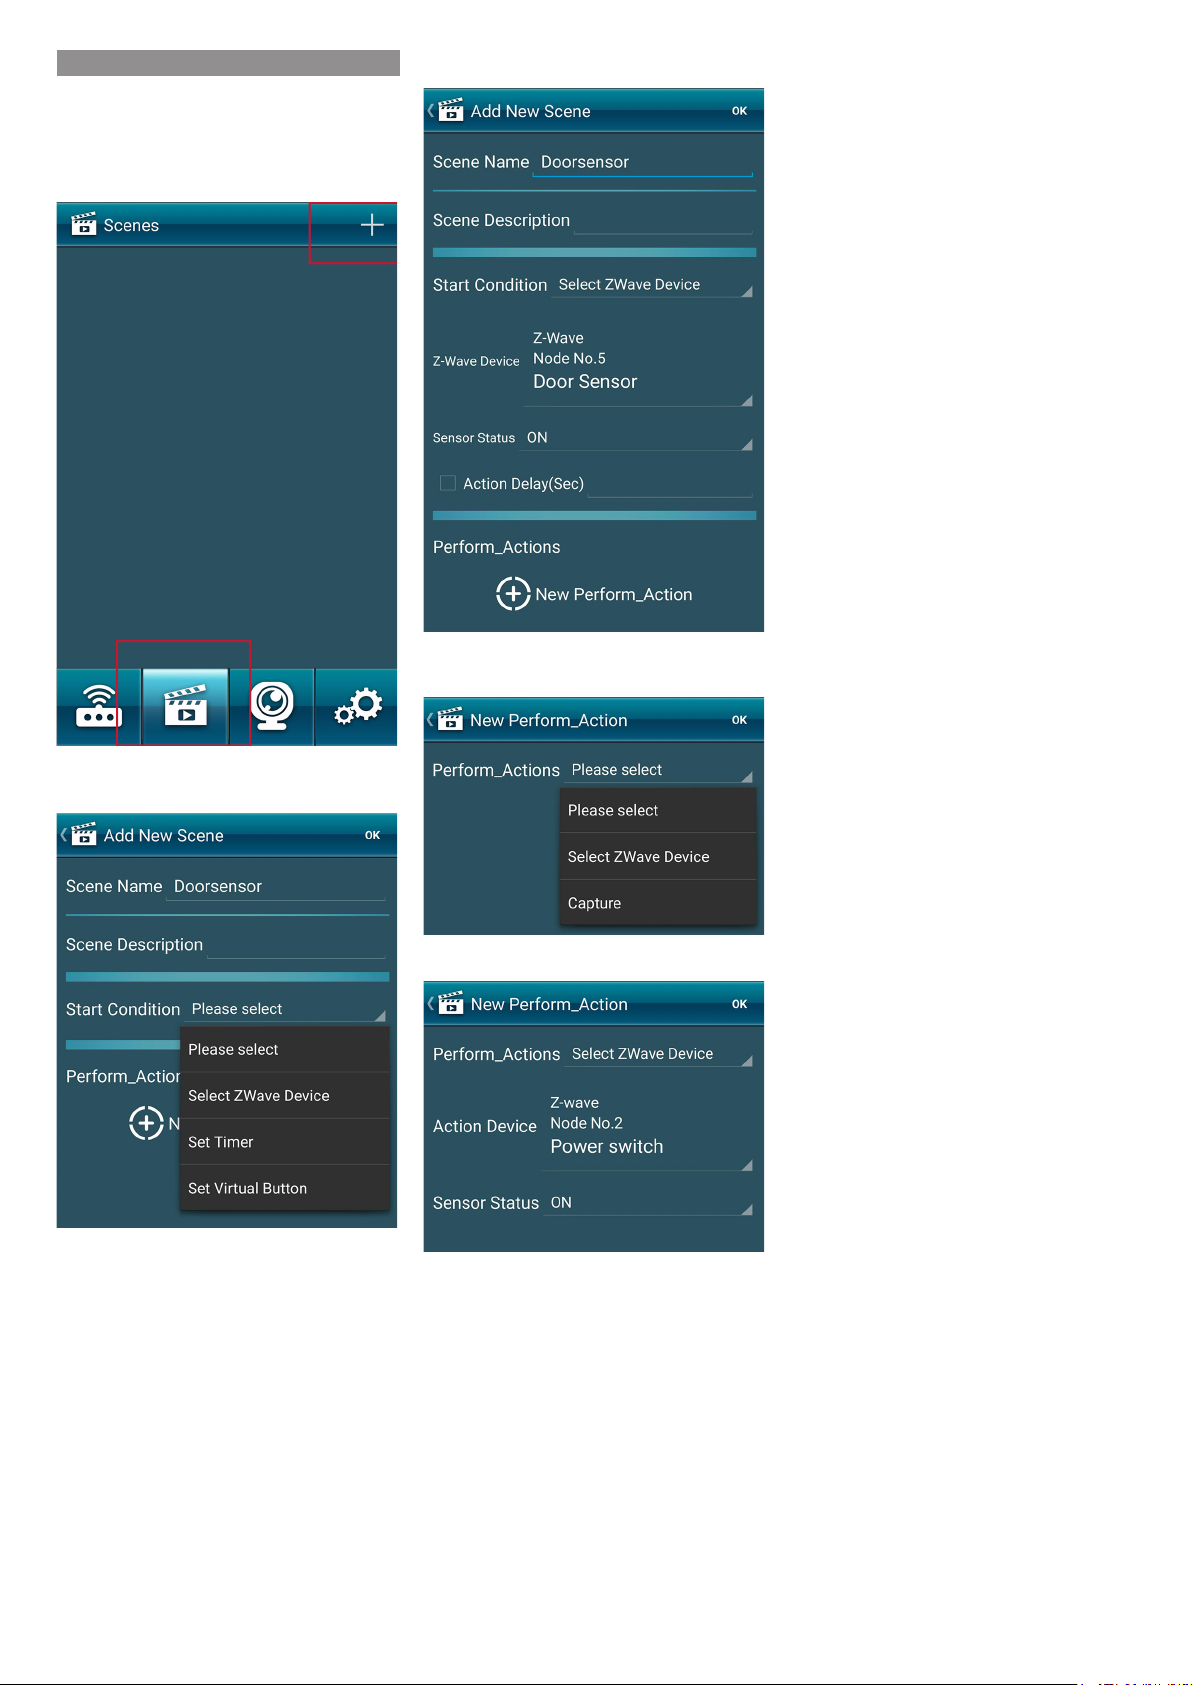
To start a particular scene, you need at least two Z-Wave
products to create this process. In our example we use the
Delock Door / Window Contact Sensor 78008.
It is simulated that, for example, the light will be turned on, as
soon as you open the door to the basement.
1. First click on Scene below in the APP. Now click on the plus
sign to start a new scene.
4. Choose the Sensor Status, in our case ON.
5. After that click on Plus (New Perform_Action).
2. Choose a name for the scene, e.g. door sensor.
3. At Start Condition choose the Z-Wave device.
6. Choose the Z-Wave device, which shall start the action.
7. Determine the Sensor Status and click on OK.
To switch off the light again, for example when the door is being
closed, you have to create a new scene with the same
chronology, only the Sensor Status would be OFF then.
 Loading...