

Luma LUM-500-DVR-4CH, LUM-500-DVR-8CH, LUM-500-NVR-16CH, LUM-500-DVR-16CH, LUM-500-NVR-4CH Hard Drive Installation
...Page 1
Technical Bulletin
Installing Hard Drives
Your Luma recorder comes with a hard drive already installed, but you can add additional hard drives (and/or
replace the existing one) to expand your recording capability.
Since these drives run 24/7, we recommend using hard drives that are rated for surveillance, like Western Digital’s
Purple drives, which we sell on our website as a convenience to our valued installers.
Warning! Do not use a powered screwdriver when installing or removing a hard drive. Doing so may result in
damage to the equipment, which is not covered by your warranty.
Warning! Use a grounded anti-static mat and wrist band to ground yourself before servicing the recorder. Failure to
ground yourself may result in damage to the equipment, which is not covered by your warranty.
Recorder Capacity
Model HDD Included
LUM-500-DVR-4CH 1TB 0 Additional 4TB per bay 4TB
LUM-500-DVR-8CH 1TB 3 Additional 4TB per bay 16TB
LUM-500-DVR-16CH 2TB 3 Additional 4TB per bay 16TB
LUM-500-NVR-4CH 1TB 1 Additional 4TB per bay 8TB
LUM-500-NVR-8CH 1TB 3 Additional 4TB per bay 16TB
LUM-500-NVR-16CH 2TB 3 Additional 4TB per bay 16TB
8-channel and 16-channel recorders also have an eSATA port on the back that can attach an additional hard drive.
Additional Bays Size Limit
Max. Storage
Important Note
We recommend installing the drives before powering the recorder up for the first time. If a hard drive has been
initialized in the recorder, you should not change its SATA port. Once a hard drive has been initialized in a given
port (this includes the hard drive that comes with the unit), the recorder remembers that hard drive’s location. If
the hard drive cabling is swapped this will cause errors, even if you re-initialize the hard drive in its new location.
Prepare the Recorder
In the local interface, click on the Settings
icon , then choose Shutdown >
Shutdown. The unit powers down.
Turn the power switch (located on the back
of the unit) to the off position. Unplug the
power cord from the rear of the unit.
If necessary, disconnect all cabling and
remove the recorder from the rack.
Warning! Moving the recorder while it is
powered can damage the hard drive.
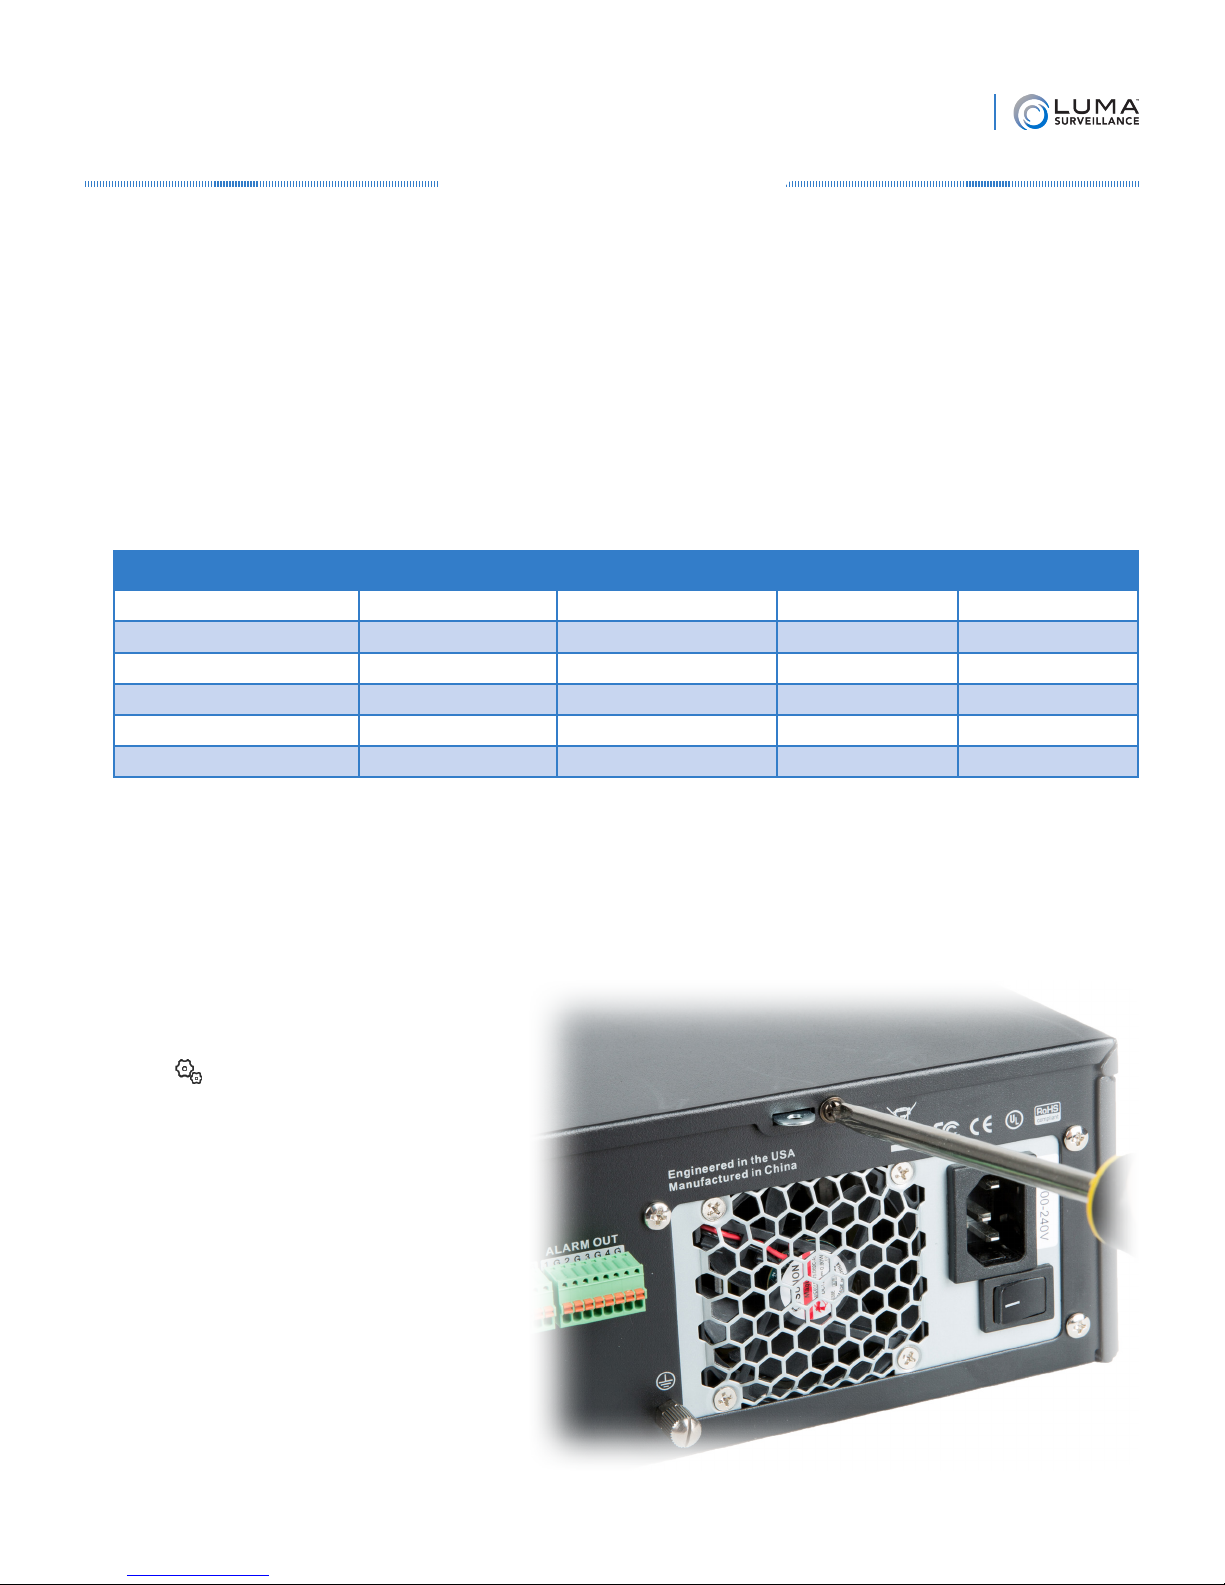
Remove the Cover
Remove the two small black screws located
along the top of the rear panel of the recorder.
(Do not remove the larger silver screws
around the fan.)
Version 160128-1126
Page 2
Using the thumb notch on the top of the
unit, gently slide the cover about an inch to
the rear of the unit, then lift it up. Once it is
off, set the lid aside in a safe place where it
won’t get scratched.
Technical Bulletin
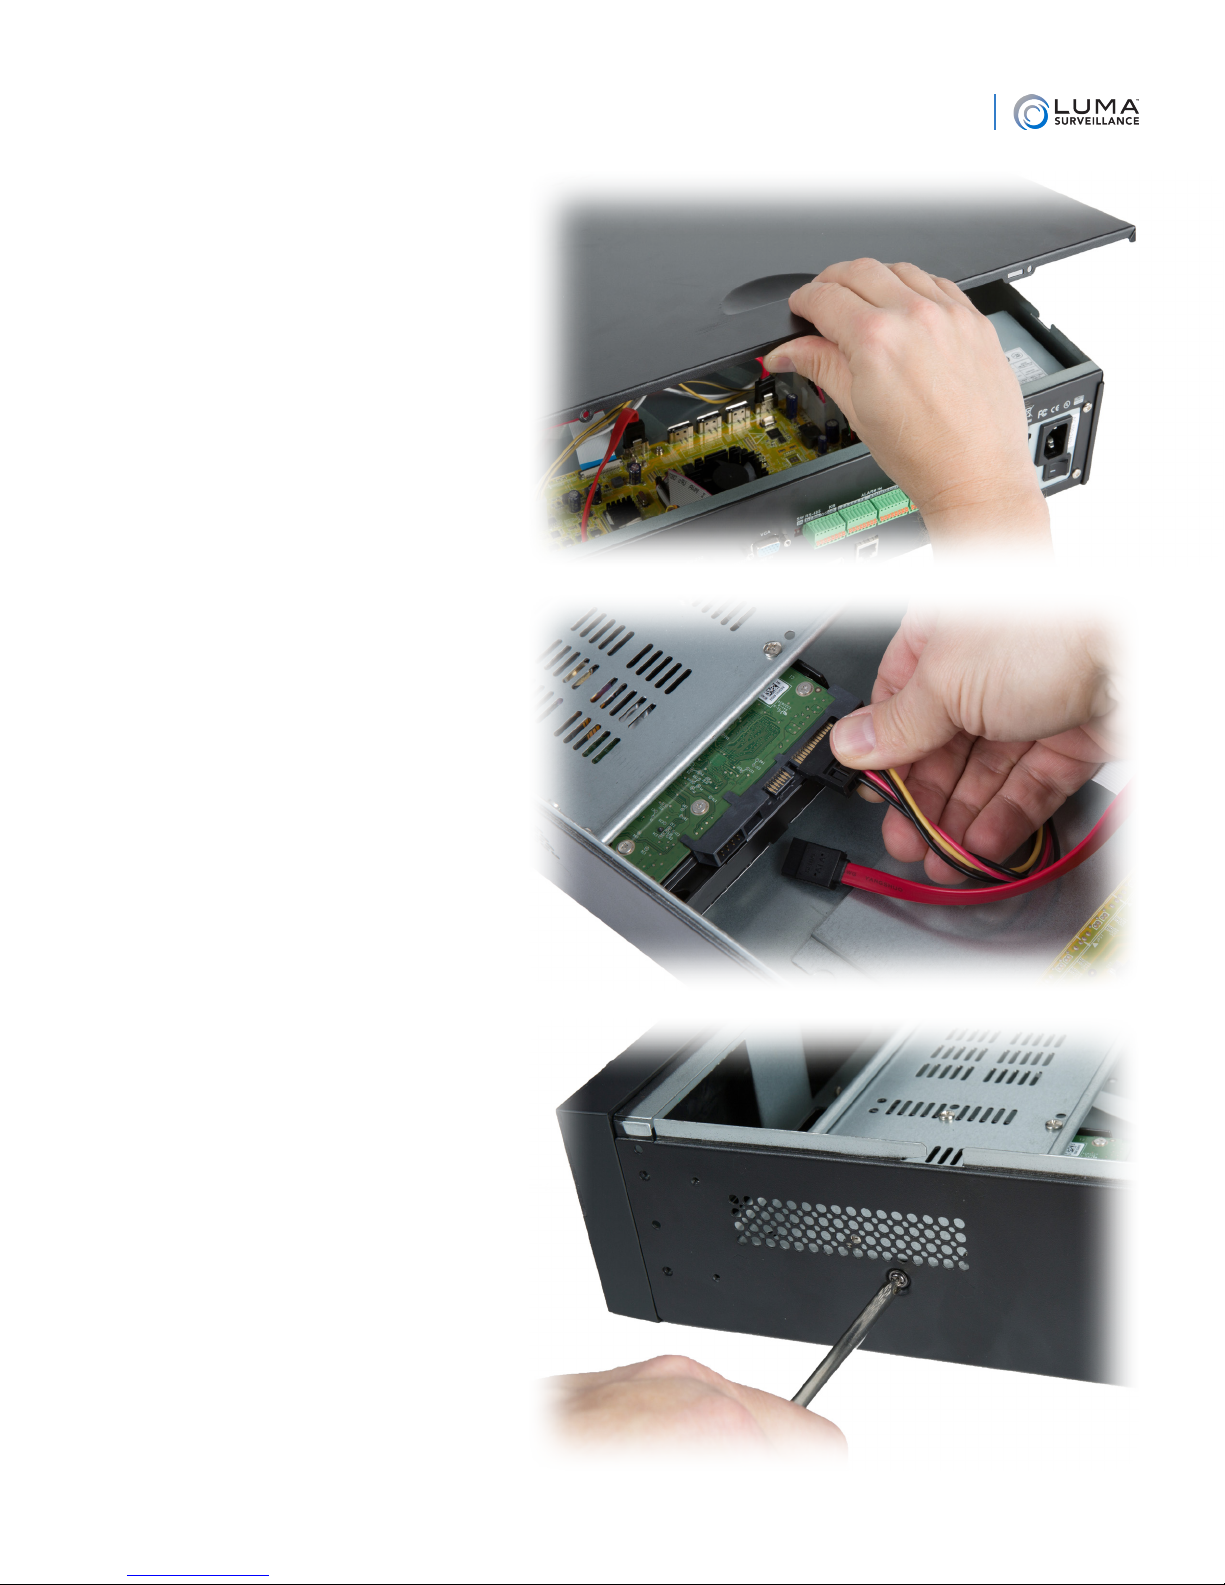
Toward the front of recorder is the mounting
bar, a ventilated strip of metal. One hard
drive is already installed. Disconnect the
SATA and power cables from that hard drive.
Remove the Mounting Bar
Remove the two black screws that hold the
mounting bar in place. They are on the
exterior of the unit, one at each side of the
recorder.
Version 160128-1126
Page 3

Remove the mounting bar by lifting the rear
side, then pulling the entire bar away from
the front of the recorder.
Detach the power cable from the mounting
bar by removing the strap that keeps them
in place.
Optional: Remove the Hard Drive
If you are replacing the drive that came with
the unit, remove the four silver screws that
attach it to the mounting bar.
Install the New Hard Drives
Technical Bulletin
Lay the new hard drives to be installed side
by side on a flat surface with the power and
SATA ports facing the same direction and
the circuit board on top.
Place the mounting bar on top of the drives,
orienting it so the new drives face the same
direction as the pre-installed drive.
If you removed the old hard drive, look at
the side of the mounting bar. The groove that
points down should be at the end with the
power and data ports, toward the rear of the
recorder.
Line up the holes in the mounting bar over
the drives, then use four of the screws
supplied with the recorder to secure each
drive in place.
Data & power ports
ê
ç Front of recorder • Rear of recorder è
You may wish to use a permanent marker to
number each of the drive bays in case you
replace a hard drive at a later date.
Version 160128-1126
Page 4

Technical Bulletin
Reinsert the Mounting Bar
Replace the mounting bar with the drives in the recorder. First insert the front of the mounting bar by angling it
downward and sliding over the notches in the support pegs, then set the rear end of the bar down.
Re-install the screws on the outside left and right of the case to lock the mounting bar in place.
Connect the Drives
Using the extra SATA cables provided with
the recorder, connect each hard drive to the
mother board.
Be sure to connect them in the correct order.
Looking at the recorder from the front of the
unit, the SATA ports are numbered 1–4 from
left to right. Looking closely at the board,
you can actually read the numbers beside
each port after the letters JPS.
Once the SATA cables are connected, attach
the power cable to each hard drive. Unlike
the SATA cables, the power cable jumpers
have no fixed order.
Format the Drives
Remember to format your new hard drive once the recorder has been powered up.
You’re good to go!
Optional Fast-Install Approach
If you are only inserting one additional drive
and are working with a larger recorder case,
you might be able to install the new hard
drive(s) without removing the mounting bar.
Carefully slide the drive into the bay. Hold it
steady while inserting the screws that secure
it in place.
Version 160128-1126
 Loading...