

Page 1

Beta Draft Confidential
B-STDX, CBX, and GX Network Management
Station Installation Guide
For NavisCore Release 09.00.00.00
Product Code: 80200
Revision 001
July 2004
Page 2

Beta Draft Confidential
Copyright© 2004 Lucent Technologies. All Rights Reserved.
This material is protected by the copyright laws of the United States and other
countries. It may not be reproduced, distributed, or altered in any fashion by any entity
(either internal or external to Lucent Technologies), except in accordance with
applicable agreements, contracts or licensing, without the express written consent of
Lucent Technologies.
For permission to reproduce or distribute, please contact: Technical Publications,
Integrated Network Solutions/Core Switching Division at 978-692-2600.
Notice. Every effort was made to ensure that the information in this document was
complete and accurate at the time of printing. However, information is subject to
change.
Trademarks. NavisXtend and NavisCore are trademarks of Lucent Technologies.
IP Navigator, Navis, CBX 500, GX 550, and B-STDX 9000 are registered trademarks
of Lucent Technologies. Other trademarks and trade names mentioned in this
document belong to their respective owners.
Limited Warranty. Lucent Technologies provides a limited warranty to this
product. For more information, see the software license agreement in this document.
Ordering Information. To order copies of this document, use the online ordering
instructions presented later in this guide.
Support Telephone Numbers. For technical support and other services, see the
customer support contact information in the “About This Guide” section of this
document.
ii7/12/04 B-STDX, CBX, and GX Network Management Station Installation Guide
Page 3

Beta Draft Confidential
LUCENT TECHNOLOGIES END-USER LICENSE AGREEMENT
LUCENT TECHNOLOGIES IS WILLING TO LICENSE THE ENCLOSED SOFTWARE
AND ACCOMPANYING USER DOCUMENTATION (COLLECTIVELY, THE
“PROGRAM”) TO YOU ONLY UPON THE CONDITION THAT YOU ACCEPT ALL OF
THE TERMS AND CONDITIONS OF THIS LICENSE AGREEMENT. PLEASE READ
THE TERMS AND CONDITIONS OF THIS LICENSE AGREEMENT CAREFULLY
BEFORE OPENING THE PACKAGE(S) OR USING THE LUCENT SWITCH(ES)
CONTAINING THE SOFTWARE, AND BEFORE USING THE ACCOMPANYING USER
DOCUMENTATION. OPENING THE PACKAGE(S) OR USING THE LUCENT
SWITCH(ES) CONTAINING THE PROGRAM WILL INDICATE YOUR ACCEPTANCE
OF THE TERMS OF THIS LICENSE AGREEMENT. IF YOU ARE NOT WILLING TO BE
BOUND BY THE TERMS OF THIS LICENSE AGREEMENT, LUCENT IS UNWILLING
TO LICENSE THE PROGRAM TO YOU, IN WHICH EVENT YOU SHOULD RETURN
THE PROGRAM WITHIN TEN (10) DAYS FROM SHIPMENT TO THE PLACE FROM
WHICH IT WAS ACQUIRED, AND YOUR LICENSE FEE WILL BE REFUNDED. THIS
LICENSE AGREEMENT REPRESENTS THE ENTIRE AGREEMENT CONCERNING
THE PROGRAM BETWEEN YOU AND LUCENT, AND IT SUPERSEDES ANY PRIOR
PROPOSAL, REPRESENTATION OR UNDERSTANDING BETWEEN THE PARTIES.
1. License Grant. Lucent hereby grants to you, and you accept, a non-exclusive,
non-transferable license to use the computer software, including all patches, error
corrections, updates and revisions thereto in machine-readable, object code form only
(the “Software”), and the accompanying User Documentation, only as authorized in
this License Agreement. The Software may be used only on a single computer owned,
leased, or otherwise controlled by you; or in the event of inoperability of that
computer, on a backup computer selected by you. You agree that you will not pledge,
lease, rent, or share your rights under this License Agreement, and that you will not,
without Lucent’s prior written consent, assign or transfer your rights hereunder. You
agree that you may not modify, reverse assemble, reverse compile, or otherwise
translate the Software or permit a third party to do so. You may make one copy of the
Software and User Documentation for backup purposes. Any such copies of the
Software or the User Documentation shall include Lucent’s copyright and other
proprietary notices. Except as authorized under this paragraph, no copies of the
Program or any portions thereof may be made by you or any person under your
authority or control.
2. Lucent’s Rights. You agree that the Software and the User Documentation are
proprietary, confidential products of Lucent or Lucent's licensor protected under US
copyright law and you will use your best efforts to maintain their confidentiality. You
further acknowledge and agree that all right, title and interest in and to the Program,
including associated intellectual property rights, are and shall remain with Lucent or
Lucent's licensor. This License Agreement does not convey to you an interest in or to
the Program, but only a limited right of use revocable in accordance with the terms of
this License Agreement.
B-STDX, CBX, and GX Network Management Station Installation Guide 7/12/04iii
Page 4

Beta Draft Confidential
3. License Fees. The license fees paid by you are paid in consideration of the license
granted under this License Agreement.
4. Term. This License Agreement is effective upon your opening of the package(s) or
use of the switch(es) containing Software and shall continue until terminated. You
may terminate this License Agreement at any time by returning the Program and all
copies or portions thereof to Lucent. Lucent may terminate this License Agreement
upon the breach by you of any term hereof. Upon such termination by Lucent, you
agree to return to Lucent the Program and all copies or portions thereof. Termination
of this License Agreement shall not prejudice Lucent's rights to damages or any other
available remedy.
5. Limited Warranty. Lucent warrants, for your benefit alone, for a period of 90
days from the date of shipment of the Program by Lucent (the “Warranty Period”) that
the program diskettes in which the Software is contained are free from defects in
material and workmanship. Lucent further warrants, for your benefit alone, that during
the Warranty Period the Program shall operate substantially in accordance with the
User Documentation. If during the Warranty Period, a defect in the Program appears,
you may return the Program to the party from which the Program was acquired for
either replacement or, if so elected by such party, refund of amounts paid by you under
this License Agreement. You agree that the foregoing constitutes your sole and
exclusive remedy for breach by Lucent of any warranties made under this Agreement.
EXCEPT FOR THE WARRANTIES SET FORTH ABOVE, THE PROGRAM IS LICENSED
“AS IS”, AND LUCENT DISCLAIMS ANY AND ALL OTHER WARRANTIES,
WHETHER EXPRESS, IMPLIED OR STATUTORY, INCLUDING, WITHOUT
LIMITATION, ANY IMPLIED WARRANTIES OF MERCHANTABILITY OR FITNESS
FOR A PARTICULAR PURPOSE AND ANY WARRANTIES OF NONINFRINGEMENT.
6. Limitation of Liability. Lucent’s cumulative liability to you or any other party
for any loss or damages resulting from any claims, demands, or actions arising out of
or relating to this License Agreement shall not exceed the greater of: (i) ten thousand
US dollars ($10,000) or (ii) the total license fee paid to Lucent for the use of the
Program. In no event shall Lucent be liable for any indirect, incidental, consequential,
special, punitive or exemplary damages or lost profits, even if Lucent has been
advised of the possibility of such damages.
iv7/12/04 B-STDX, CBX, and GX Network Management Station Installation Guide
Page 5

Beta Draft Confidential
7. Proprietary Rights Indemnification. Lucent shall at its expense defend you
against and, subject to the limitations set forth elsewhere herein, pay all costs and
damages made in settlement or awarded against you resulting from a claim that the
Program as supplied by Lucent infringes a United States copyright or a United States
patent, or misappropriates a United States trade secret, provided that you: (a) provide
prompt written notice of any such claim, (b) allow Lucent to direct the defense and
settlement of the claim, and (c) provide Lucent with the authority, information, and
assistance that Lucent deems reasonably necessary for the defense and settlement of
the claim. You shall not consent to any judgment or decree or do any other act in
compromise of any such claim without first obtaining Lucent’s written consent. In any
action based on such a claim, Lucent may, at its sole option, either: (1) obtain for you
the right to continue using the Program, (2) replace or modify the Program to avoid
the claim, or (3) if neither (1) nor (2) can reasonably be effected by Lucent, terminate
the license granted hereunder and give you a prorata refund of the license fee paid for
such Program, calculated on the basis of straight-line depreciation over a five-year
useful life. Notwithstanding the preceding sentence, Lucent will have no liability for
any infringement or misappropriation claim of any kind if such claim is based on: (i)
the use of other than the current unaltered release of the Program and Lucent has
provided or offers to provide such release to you for its then current license fee, or (ii)
use or combination of the Program with programs or data not supplied or approved by
Lucent to the extent such use or combination caused the claim.
8. Export Control. You agree not to export or disclose to anyone except a United
States national any portion of the Program supplied by Lucent without first obtaining
the required permits or licenses to do so from the US Office of Export Administration,
and any other appropriate government agency.
9. Governing Law. This License Agreement shall be construed and governed in
accordance with the laws and under the jurisdiction of the Commonwealth of
Massachusetts, USA. Any dispute arising out of this Agreement shall be referred to an
arbitration proceeding in Boston, Massachusetts, USA by the American Arbitration
Association.
10. Miscellaneous. If any action is brought by either party to this License
Agreement against the other party regarding the subject matter hereof, the prevailing
party shall be entitled to recover, in addition to any other relief granted, reasonable
attorneys’ fees and expenses of arbitration. Should any term of this License
Agreement be declared void or unenforceable by any court of competent jurisdiction,
such declaration shall have no effect on the remaining terms hereof. The failure of
either party to enforce any rights granted hereunder or to take action against the other
party in the event of any breach hereunder shall not be deemed a waiver by that party
as to subsequent enforcement of rights or subsequent actions in the event of future
breaches.
B-STDX, CBX, and GX Network Management Station Installation Guide 7/12/04v
Page 6

Beta Draft Confidential
vi7/12/04 B-STDX, CBX, and GX Network Management Station Installation Guide
Page 7

Beta Draft Confidential
Contents
About This Guide
What You Need to Know...........................................................................................xiii
Reading Path ..............................................................................................................xiv
NMS Documentation........................................................................................... xiv
Documentation for New Modules ....................................................................... xiv
How to Use This Guide..............................................................................................xiv
Conventions ................................................................................................................ xv
Related Documents ...................................................................................................xvii
Lucent.................................................................................................................xvii
Third Party.........................................................................................................xviii
Ordering Printed Manuals Online............................................................................xviii
Customer Comments................................................................................................xviii
Technical Support ....................................................................................................xviii
Chapter 1 Overview
General Requirements................................................................................................1-1
NMS System Configuration Requirements ...............................................................1-1
SCSI Device Addresses.......................................................................................1-6
NMS Software Requirements ....................................................................................1-6
Solaris Operating System ....................................................................................1-6
Solaris 8 Patch Cluster ........................................................................................1-7
Sybase 12.5.0.1....................................................................................................1-7
Open Client 12.5..................................................................................................1-7
HP OpenView 6.2................................................................................................1-7
HP OpenView 6.2 Patches ..................................................................................1-8
NavisCore 09.00.00.00........................................................................................1-8
Installation Scripts .....................................................................................................1-9
Installation Sequence ...............................................................................................1-10
xiii
xiv
xiv
xiv
xiv
xv
xvii
xvii
xviii
xviii
xviii
xviii
1-1
1-1
1-6
1-6
1-6
1-7
1-7
1-7
1-7
1-8
1-8
1-9
1-10
Chapter 2 Installing Solaris 8
Before You Begin ......................................................................................................2-1
Solaris 8 Installation ..................................................................................................2-2
Installing Solaris 8...............................................................................................2-2
Completing the Installation .................................................................................2-9
B-STDX, CBX, and GX Network Management Station Installation Guide rvii
2-1
2-2
2-2
2-9
Page 8

Contents
Beta Draft Confidential
Installing the Solaris 8 Patch Cluster.......................................................................2-10
Chapter 3 Sybase Prerequisite Tasks
Before You Begin ......................................................................................................3-1
Partitioning the Disk(s) to be Used for Sybase Using Raw Partitions.......................3-3
Defining Partitions 1 and 7..................................................................................3-5
Defining Partition 2.............................................................................................3-6
Creating a Master Device on Partition 0 .............................................................3-7
Creating a Tempdb Device on Partition 3...........................................................3-8
Creating a Sysprocsdev device on Partition 4 .....................................................3-8
Creating a NavisCore Data Device on Partition 5...............................................3-9
Creating a NavisCore Log Device on Partition 6..............................................3-10
Defining Partition 7 (Optional) .........................................................................3-11
Verifying Partition Sizes ...................................................................................3-11
Partition Table Examples ..................................................................................3-12
Loading the Lucent-supplied Sybase 12.5.0.1 CD-ROM........................................3-13
Setting Up the System..............................................................................................3-15
Using Raw Partitions for the Master Device.....................................................3-20
Using File System Files for the Master Device
(Lab Configurations Only) ................................................................................3-22
Chapter 4 Installing Sybase 12.5.0.1
2-10
3-1
3-3
3-5
3-6
3-7
3-8
3-8
3-9
3-10
3-11
3-11
3-12
3-13
3-15
3-20
3-22
Before You Begin ......................................................................................................4-1
Installing Sybase 12.5.0.1 ..........................................................................................4-2
Chapter 5 Installing HP OpenView 6.2
Before You Begin ......................................................................................................5-1
Script File Installation Method ..................................................................................5-2
Setting Up the System .........................................................................................5-2
Installing HP OpenView 6.2 ...............................................................................5-5
Disabling IP Discovery .....................................................................................5-13
Verifying the HP OpenView Installation ..........................................................5-14
Applying HP OpenView 6.2 Patches ................................................................5-15
Chapter 6 Installing NavisCore
Before You Begin ......................................................................................................6-1
Script File Installation Method ..................................................................................6-2
Setting Up the System .........................................................................................6-2
Installing NavisCore............................................................................................6-4
Defining a Static Route to the NMS ........................................................................6-11
Chapter 7 Backup Procedures
First-time Backup to the Local Backup Server..........................................................7-2
Subsequent Backups to the Local Backup Server......................................................7-4
Backing Up HP OpenView Databases.......................................................................7-7
Saving Sybase 12.5.0.1 and HP OpenView Databases to Tape.................................7-8
Restoring HP OpenView Databases ..........................................................................7-9
4-1
4-2
5-1
5-2
5-2
5-5
5-13
5-14
5-15
6-1
6-2
6-2
6-4
6-11
7-2
7-4
7-7
7-8
7-9
viii7/12/04 B-STDX, CBX, and GX Network Management Station Installation Guide
Page 9

Beta Draft Confidential
Contents
Maintaining Backup Data in OV Databases ............................................................7-10
Recreating database file.....................................................................................7-10
Changing the System Administrator (SA) Password...............................................7-13
Chapter 8 Installing a Two-system Configuration
Two-System Installation Outline ...............................................................................8-1
NMS Post-Installation Sequence ...............................................................................8-2
Sybase Server (System 1)....................................................................................8-2
HP OpenView Server (System 2)........................................................................8-3
Verifying That HP OpenView Services Are Running (System 2) ...............8-3
Adding the Sybase Server Hostname (System 2) .........................................8-4
Copying the Interfaces File (System 2) ........................................................8-6
Appendix A Installing a New Remote Backup Server
Adding the Remote Backup Server Hostname .........................................................A-2
Installing the Remote Backup Server .......................................................................A-4
Adding the Remote Backup Server’s Interfaces File Contents ................................A-8
Configuring the Remote Backup Server................................................................... A-9
Appendix B Backing up to the Remote Backup Server
First-time Backup to the Remote Backup Server ..................................................... B-2
Subsequent Backups to the Remote Backup Server ................................................. B-4
Backing Up HP OpenView Databases......................................................................B-6
Saving Sybase 12.5.0.1 and HP OpenView Databases to Tape................................B-7
7-10
7-10
7-13
8-1
8-2
8-2
8-3
8-3
8-4
8-6
A-2
A-4
A-8
A-9
B-2
B-4
B-6
B-7
Appendix C IP Discovery
Enabling IP Discovery ..............................................................................................C-2
Script File Method..............................................................................................C-2
Disabling IP Discovery............................................................................................. C-3
Script File Method..............................................................................................C-3
Appendix D Integrating NavisCore with HP OpenView
Script File Method ....................................................................................................D-1
Appendix E NMS Startup and Shutdown Procedures
Starting Up the NMS ................................................................................................ E-1
Shutting Down the NMS........................................................................................... E-3
C-2
C-2
C-3
C-3
D-1
E-1
E-3
B-STDX, CBX, and GX Network Management Station Installation Guide ix
Page 10

Contents
Appendix F Sybase Worksheet
Beta Draft Confidential
Prerequisites ........................................................................................................F-1
Using Raw Partitions for the Sybase Devices.....................................................F-2
Using File System Files for the Sybase Devices (For Lab Only) .......................F-2
Remote Backup Server Parameters .....................................................................F-2
Acronyms
Index
F-1
F-2
F-2
F-2
x7/12/04 B-STDX, CBX, and GX Network Management Station Installation Guide
Page 11

Beta Draft Confidential
List of Figures
Contents
Figure 3-1. Format Menu .................................................................................. 3-4
Figure 3-2. Partition Menu ................................................................................ 3-5
Figure 3-3. Partition Table for 8.49-GB Drive................................................ 3-12
Figure 3-4. Partition Table for 4.01-GB Drive................................................ 3-12
Figure 3-5. Sybase Installation Menu.............................................................. 3-14
Figure 3-6. Device Installation Menu.............................................................. 3-18
Figure 3-7. Sybase Master Device Menu ........................................................ 3-19
Figure 3-8. Warning Window.......................................................................... 3-22
Figure 3-9. Disk Space Report Window.......................................................... 3-23
Figure 4-1. Sybase Installation Menu................................................................ 4-3
Figure 4-2. Raw Partition Parameters ............................................................... 4-4
Figure 5-1. NavisCore/UX Installation Menu................................................... 5-3
Figure 5-2. HP OpenView Installation Menu.................................................... 5-3
Figure 5-3. NavisCore/UX Installation Menu................................................... 5-6
Figure 5-4. HP OpenView Installation Menu.................................................... 5-6
Figure 5-5. HP OpenView 6.2 Window.......................................................... 5-14
Figure 6-1. Sybase Server Messages................................................................. 6-2
Figure 6-2. HP OpenView Services window .................................................... 6-3
Figure 6-3. NavisCore/UX Installation Menu................................................... 6-4
Figure 6-4. NavisCore Installation Menu.......................................................... 6-5
Figure 6-5. Static Route Connection Example................................................ 6-11
Figure 7-1. Bulk Copy Output........................................................................... 7-6
Figure 8-1. Showserver Window....................................................................... 8-3
Figure 8-2. HP OpenView Services Window.................................................... 8-4
Figure 8-3. Admintool: Users Dialog Box ........................................................ 8-5
Figure 8-4. Admintool: Hosts Dialog Box ........................................................ 8-5
Figure 8-5. Admintool: Add Host Dialog Box.................................................. 8-5
Figure A-1. Admintool: Users Dialog Box ....................................................... A-2
Figure A-2. Admintool: Hosts Dialog Box ....................................................... A-3
Figure A-3. Admintool: Add Host Dialog Box................................................. A-3
Figure A-4. Sybase Backup Server Installation Parameters Window............... A-6
Figure A-5. Interfaces File Window.................................................................. A-9
Figure A-6. Showserver Window (Remote Backup Server)........................... A-11
Figure B-1. Bulk Copy Output.......................................................................... B-6
Figure D-1. NavisCore/UX Installation Menu.................................................. D-2
Figure E-1. HP OpenView 6.2 Window ........................................................... E-2
3-4
3-5
3-12
3-12
3-14
3-18
3-19
3-22
3-23
4-3
4-4
5-3
5-3
5-6
5-6
5-14
6-2
6-3
6-4
6-5
6-11
7-6
8-3
8-4
8-5
8-5
8-5
A-2
A-3
A-3
A-6
A-9
A-11
B-6
D-2
E-2
B-STDX, CBX, and GX Network Management Station Installation Guide 7/12/04xi
Page 12

Contents
Beta Draft Confidential
List of Tables
Table 1-1. NavisCore System Configuration Requirements.............................1-2
Table 1-2. SCSI Device Addresses ...................................................................1-6
Table 1-3. Single-System NMS - Installation Sequence.................................1-10
Table 1-4. Two-System NMS - Installation Sequence on System 1............... 1-11
Table 1-5. Two-System NMS - Installation Sequence on System 2............... 1-11
Table 2-1. Single-system NMS With Two Drives............................................2-5
Table 2-2. Two-system NMS (Sybase Server) .................................................2-6
Table 2-3. Two-system NMS (HP Server)........................................................2-7
Table 2-4. Single-system NMS With One Drive (Lab Configurations Only) ..2-8
Table 3-1. Partition Settings..............................................................................3-3
Table 4-1. Sybase Configuration Parameters....................................................4-5
1-2
1-6
1-10
1-11
1-11
2-5
2-6
2-7
2-8
3-3
4-5
xii7/12/04 B-STDX, CBX, and GX Network Management Station Installation Guide
Page 13

Beta Draft Confidential
About This Guide
The B-STDX, CBX, and GX Network Management Station Installation Guide provides
software installation instructions for setting up your UNIX Network Management
Station (NMS) platform. This task-oriented guide describes, step-by-step, the process
for installing the required software for configuring Lucent switches.
This guide supports the following NMS software release:
™
•NavisCore
Note – This guide is intended to be used for fresh installations of NMS software. It
should not be used for upgrading existing networks. This guide provides basic NMS
installation guidelines but does not provide network/configuration-specific
information that will be necessary for production environments. With the introduction
of Sybase 12.5.0.1, using default settings during the Sybase installation is no longer an
appropriate path and will result in degradation of performance on the Sybase server.
Contact the Technical Support organization for specific tuning information that is
needed based upon network configuration and usage. See “Technical Support” on
page xviii.
, Release 09.00.00.00
What You Need to Know
As a reader of this guide, you should be familiar with UNIX and HP OpenView. You
should also know about relational databases to properly maintain Sybase, which is
used by NavisCore.
This guide assumes that you have already installed the Lucent switch hardware. See
the “Related Documents” section (page xvii) for a list of documents that describe
these and other tasks.
Be sure to read the Software Release Notice (SRN) that accompanies each product.
The SRN contains the most current feature information and requirements.
B-STDX, CBX, and GX Network Management Station Installation Guide xiii
Page 14
About This Guide
Reading Path
This section describes all of the documents that support the NavisCore NMS and
switch software.
NMS Documentation
Read the following documents to install and operate NavisCore Release 09.00.00.00.
Be sure to review the NavisCore Software Release Notice for any changes not
included in these guides.
Beta Draft Confidential
This guide describes how to configure and manage
NavisCore, network maps, and Lucent switches. It also
describes how to add third-party objects to the map and access
them through NavisCore.
Getting Started
User’s Guide
Documentation for New Modules
The following guides provide information about hardware installation and switch
software configuration for specific modules.
• CBX 1-Port Channelized STM-1/E1 IMA I/O Module User’s Guide
(Product Code: 80170)
• GX BIO-C, OC-48c/STM-16c, and SF2 Modules Users’ Guide
(Product Code: 80199)
How to Use This Guide
Before you read this guide, read the Lucent Technologies Software Release Notices
for Sybase 12.5.0.1, HP OpenView 6.2, and NavisCore 09.00.00.00. The following
table highlights the chapters and contents of this guide.
xiv7/12/04 B-STDX, CBX, and GX Network Management Station Installation Guide
Page 15

Beta Draft Confidential
Read To Learn About
Chapter 1 Installation prerequisites, and system, hardware, and software requirements
Chapter 2 The Lucent-recommended instructions for installing Solaris 8 and Common
Desktop Environment (CDE) on your UNIX NMS platform
Chapter 3 Preparing to install Sybase 12.5.0.1
Chapter 4 Installing Sybase 12.5.0.1
About This Guide
Chapter 5
Chapter 6 Installing NavisCore
Chapter 7 Backup procedures
Chapter 8 Installing a two-system configuration
Appendix A Installing a remote backup server
Appendix B Sybase 12.5.0.1 backups to the remote backup server
Appendix C Enabling/Disabling IP Discovery
Appendix D Re-integrating NavisCore with HP OpenView
Appendix E NMS startup/shutdown procedures
Appendix F Sybase 12.5.0.1 worksheet
Conventions
This guide uses the following conventions, when applicable:
• Preparing to install HP OpenView 6.2
• Installing HP OpenView 6.2
Convention Indicates Example
Courier Regular
System output, filenames, and
Please wait...
command names.
<Courier Bold
Italics>
Variable text input; user
supplies a value.
Enter
<cdrompath>
atmcfg.pdf
/docs/
to
display...
<Courier Italics>
Courier Bold
B-STDX, CBX, and GX Network Management Station Installation Guide 7/12/04xv
Variable text output.
User input. > show ospf names
<
cdrompath
atmcfg.pdf
>/docs/
Page 16

About This Guide
Beta Draft Confidential
Convention Indicates Example
Menu => Option A selection from a menu. NavisCore => Logon
Italics Book titles, new terms, and
emphasized text.
A box around text A note, caution, or warning. See examples below.
Note – Notes provide additional information or helpful suggestions that may apply to
the subject text.
Caution – Cautions notify the reader to proceed carefully to avoid possible equipment
!
damage or data loss.
B-STDX, CBX, and GX
Network Management
Station Installation Guide
xvi7/12/04 B-STDX, CBX, and GX Network Management Station Installation Guide
Page 17

Beta Draft Confidential
Related Documents
This section lists the related Lucent and third-party documentation that may be helpful
to read.
Lucent
• B-STDX 8000/9000 Multiservice WAN Switch Hardware Installation Guide
(Product Code: 80005)
• CBX 500 Multiservice WAN Switch Hardware Installation Guide
(Product Code: 80011)
• GX 550 Multiservice WAN Switch Hardware Installation Guide
(Product Code: 80077)
• GX 550 ES Hardware Installation Guide (Product Code: 80149)
• B-STDX, CBX, and GX Getting Started User’s Guide (Product Code: 80195)
• B-STDX, CBX, and GX Switch Module Configuration Guide
(Product Code: 80196)
About This Guide
• CBX and GX Switch Software Upgrade Guide (Product Code: 80198)
• B-STDX and CBX Frame Relay Services Configuration Guide
(Product Code: 80193)
• B-STDX, CBX, and GX ATM Services Configuration Guide
(Product Code: 80191)
• B-STDX and CBX IP Services Configuration Guide (Product Code: 80194)
• B-STDX, CBX, and GX Switch Diagnostics User’s Guide (Product Code: 80192)
• B-STDX, CBX, and GX Switch Troubleshooting Guide User’s Guide
(Product Code: 80197)
• B-STDX, CBX, and GX Console Command User’s Reference
(Product Code: 80190)
All manuals for Core Switching Division and the Master Glossary are available on the
Core Switching Division Technical Publications Documentation Library CD-ROM
(Product Code: 80025).
B-STDX, CBX, and GX Network Management Station Installation Guide 7/12/04xvii
Page 18

About This Guide
Beta Draft Confidential
Third Party
• Solaris 8 Advanced Installation Guide
• Solaris 8 (SPARC Platform Edition) Release Notes
• Solaris 8 Sun Hardware Platform Guide
• Installation Guide Sybase Adaptive Server
• Quick Start Installation Guide for HP OpenView Network Node Manager and HP
OpenView Customer Views for NNM on Solaris
• HP OpenView 6.2 Release Notes
• HP OpenView Managing Your Network
Ordering Printed Manuals Online
You can order Core Switching manuals online. Use the following URL to access the
Lucent Bookstore:
™
Enterprise on Sun Solaris
http://www.lucentdocs.com
Customer Comments
Customer comments are welcome. Please respond in one of the following ways:
• Fill out the Customer Comment Form located at the back of this guide and return
it to us.
• E-mail your comments to cspubs@lucent.com.
• FAX your comments to 978-692-1510, attention Technical Publications.
Technical Support
The Lucent Technical Assistance Center (TAC) is available to assist you with any
problems encountered while using this Lucent product. Log on to our Customer
Support web site to obtain telephone numbers for the Lucent TAC in your region:
http://www.lucent.com/support
xviii7/12/04 B-STDX, CBX, and GX Network Management Station Installation Guide
Page 19

Beta Draft Confidential
Overview
The Network Management Station (NMS) is a dedicated Sun system on which you run
software programs to configure, monitor, and control a Lucent switch network. This
chapter describes the recommended hardware and required software to install the
NMS.
1
General Requirements
Lucent requires that you use a dedicated Sun system for network management. Lucent
does not support any other UNIX operating system.
NMS System Configuration Requirements
You can configure your NMS in the following ways:
Single-system NMS Configuration — Sybase and one Lucent product (NavisCore,
Statistics Server, or CNM Proxy Agent) reside on one workstation.
Two-system NMS Configuration — HP OpenView and NavisCore reside on one
workstation, and Sybase resides on another. This type of configuration enables Sybase
to support multiple Sybase databases (NavisCore, Statistics Server, and CNM Proxy
Agent).
Large-system NMS Configuration — Sybase, Statistics Server, and one other
Lucent product (NavisCore or CNM Proxy Agent) all reside on one workstation.
Sybase can support all Lucent server products that reside on remote systems. For this
configuration, Lucent recommends the Sun
page 1-2
).
™
Enterprise™4500 (see Table 1-1 o n
B-STDX, CBX, and GX Network Management Station Installation Guide 1-1
Page 20

Overview
NMS System Configuration Requirements
Tabl e 1-1 lists the system configuration specifications required by the NMS for
optimal performance.
In addition, your workstation(s) must be equipped with the following:
•CD-ROM drive
• Tape drive
Note – You do not need the tape drive for the NMS installation because the NMS
software comes on CD-ROM. However, you need the tape drive for Sybase database
backups. The tape drive does not need to be directly connected to either the HP
OpenView/NavisCore or Sybase NMS Servers. However, to perform Sybase backups,
the database must be saved to tape and the tape drive needs to be accessible from the
Sybase Server.
Beta Draft Confidential
Note – Lucent recommends that you use a 21-inch monitor for optimal appearance of
windows and fonts in the HP OpenView/NavisCore graphical user interface.
Table 1-1. NavisCore System Configuration Requirements
Environment System Role System Type CPUs RAM Disk(s)
Single-system Configuration (See “Single-system NMS” on page 1-10)
Small Network:
• 15-60 switches
• 1-15 users
Medium Network:
• 61-300 switches
• 16-50 users
System 1:
NavisCore /
HP OpenView /
Provisioning
Server /
Sybase
System 1:
NavisCore /
HP OpenView /
Provisioning
Server /
Sybase
Sun Enterprise 450 Four 400
MHz
Sun Enterprise 3500 Six to
Eight
400 MHz
4 GB
8 GB
• 9 GB Disk
• 9 GB Disk
• 9 GB Disk
• 9 GB Disk
(NavisCore /
HP OpenView /
Provisioning
Server)
(Sybase)
(NavisCore /
HP OpenView /
Provisioning
Server)
(Sybase)
1-2 B-STDX, CBX, and GX Network Management Station Installation Guide
Page 21

Beta Draft Confidential
NMS System Configuration Requirements
Table 1-1. NavisCore System Configuration Requirements (Continued)
Environment System Role System Type CPUs RAM Disk(s)
Two-system Configuration (See “Two-system NMS” on page 1-11)
Overview
Small Network:
• 15-60 switches
• 1-15 users
Medium Network:
• 61-300 switches
• 16-50 users
System 1:
NavisCore /
HP OpenView /
Provisioning
Server /
Sybase Open
Client
System 2:
Sybase
System 1:
NavisCore /
HP OpenView /
Provisioning
Server /
Sybase Open
Client
Sun Enterprise 250 Two 400
MHz
Sun Enterprise 250 Two 400
MHz
Sun Enterprise 450
or Enterprise 3500
Four 400
MHz
2 GB
2 GB Each device below
4 to 8
GB
• 9 GB Disk
requires space on a
separate (9 GB
minimum) disk:
• 1 GB Data
•1 GB Log
• 9 GB Disk
System 2:
Sybase
Sun Enterprise 450
or Enterprise 3500
Four 400
MHz
4 GB Each device below
requires space on a
separate (9 GB
minimum) disk:
• 2 GB Data
•2 GB Log
B-STDX, CBX, and GX Network Management Station Installation Guide 7/12/041-3
Page 22

Overview
Beta Draft Confidential
NMS System Configuration Requirements
Table 1-1. NavisCore System Configuration Requirements (Continued)
Environment System Role System Type CPUs RAM Disk(s)
Large System Configuration
Large Network:
• 301-700 switches
• 51-100 users
System 1:
NavisCore /
HP OpenView /
Provisioning
Server /
Sybase Open
Client
System 2:
NavisCore /
HP OpenView /
Provisioning
Server /
Sybase Open
Client
System 3:
NavisCore /
HP OpenView /
Provisioning
Server /
Sybase Open
Client
Sun
Enterprise 4500
Sun
Enterprise 4500
Sun
Enterprise 4500
Four 400
MHz
Six to
Eight 400
MHz
Six to
Eight 400
MHz
8 GB
8 GB
8 GB
• 9 GB Disk
• 9 GB Disk
•6 Disk Fibre
Array
• Two 9 GB Disks:
NavisCore /
Provisioning
Server
System 4:
Sybase
1-4 B-STDX, CBX, and GX Network Management Station Installation Guide
Sun
Enterprise 4500
Eight 400
MHz
8 GB
• 9 GB Data Disk
• 9 GB Log Disk
Page 23

Beta Draft Confidential
Overview
NMS System Configuration Requirements
Table 1-1. NavisCore System Configuration Requirements (Continued)
Environment System Role System Type CPUs RAM Disk(s)
The following constraints and assumptions apply to these recommendations:
• Each system requires an OS disk.
• The requirements above apply to NavisCore 05.01.00.00 or greater.
• NavisCore / Provisioning Server includes Access Control Server (ACS) requirements.
• Recommendations assume Lucent NavisCore and Provisioning Server only; additional software on a system
will increase system requirements.
• Recommendations assume an average of provisioning up to 10,000 circuits a day per Provisioning Server.
Note: if you share a database, the larger the number of circuits provisioned a day, the greater the load on the
Sybase database.
• Support for higher densities will increase resource requirements.
• Users include a combination of applications and end-users accessing the system; the more intensive the
application or user access, and the larger the number of simultaneous logins, the greater the load on the system.
• Two-disk database installation is the default. Four disk database installation is recommended if the customer
has the extra disks: it will increase performance.
• Lucent recommends using a two- or large-system NMS configuration for optimized network performance.
• Users should be shared across NavisCore / Provisioning Server installations where multiple servers are
recommended.
• These recommendations are based upon performance of NavisCore software within Lucent lab environments.
Customer-specific requirements may require additional resources to provide the level of expected
performance.
• Call Lucent Professional Services for quotes on custom installations and network planning.
Note – For specific system requirements for NavisXtend™ applications, see the
appropriate NavisXtend SRN.
Note – If you need help determining which system(s) best fits your NMS
configuration, contact Lucent Professional Services through your Account
representative.
Note – You cannot run Sybase 12.5.0.1 with less than 512-MB RAM.
B-STDX, CBX, and GX Network Management Station Installation Guide 7/12/041-5
Page 24

Overview
Beta Draft Confidential
NMS Software Requirements
SCSI Device Addresses
Verify that the Small Computer System Interface (SCSI) device addresses (on the
back of each device) are set as follows:
Table 1-2. SCSI Device Addresses
SCSI Device Address
CD-ROM drive 6
Tape d r ive 4
NMS Software Requirements
The NMS requires that you install the following minimum software:
• Solaris 8 and Common Desktop Environment 1.4
• Solaris 8 Patch Cluster
• Sybase 12.5.0.1
• Open Client Server 12.5
• HP OpenView 6.2
• HP OpenView 6.2 Patches
• NavisCore 09.00.00.00
Note – For any additional Lucent-recommended patches, see the Software Release
Notice for NavisCore Release 09.00.00.00.
The sections that follow describe these software packages in more detail.
Solaris Operating System
The Solaris operating system consists of the following:
Sun Microsystems Solaris 8 Operating Environment — Operating system
environment that includes advanced technologies for multithreading, symmetric
multiprocessing, integrated TCP/IP-based networking, and centralized network
administration tools.
Common Desktop Environment (CDE) — Provides users with a desktop graphical
interface on a Sun workstation running Solaris 2.4 or later. This desktop provides
windows, workspaces, controls, menus, and a front panel.
1-6 B-STDX, CBX, and GX Network Management Station Installation Guide
Page 25

Beta Draft Confidential
Solaris 8 Patch Cluster
Before you install the NMS software programs, you must obtain the file
8_Recommended.zip. Additional Solaris 8 patch(es) may also be needed.
To obtain the patch(es), do one of the following:
• Contact Sun at 1-800-USA-4SUN.
Access these files from Sun MicroSystems’ SunSolve Web site at
http://sunsolve.sun.com/pub-cgi/show.pl?target=patches/patch-access.
After you install the Solaris 8 operating system, you need to install the patch cluster.
Note – For additional Lucent-recommended Solaris patch(es), see the Software
Release Notice for NavisCore Release 09.00.00.00.
Overview
NMS Software Requirements
Sybase 12.5.0.1
Sybase Adaptive Server Enterprise (ASE) 12.5.0.1, which will be referred to simply
as Sybase 12.5.0.1 in this guide, is a relational database software program used to
store database information and provide backup and recovery of database files.
Note – For details on the Lucent-recommended Sybase 12.5.0.1 patches, see the
Software Release Notice for Sybase 12.5.0.1.
Open Client 12.5
Open Client 12.5 is a programming interface that allows transparent access to any data
source, information application, or system service.
HP OpenView 6.2
HP OpenView Network Node Manager (NNM) 6.2, which will be referred to simply
as HP OpenView 6.2 in this guide, is a graphical Simple Network Management
Protocol (SNMP) management application that provides fault, configuration, and
performance management for multivendor Transmission Control Protocol/Internet
Protocol (TCP/IP) networks. In addition, HP OpenView 6.2:
• Manages custom SNMP devices and objects
• Performs trap formatting and actions
• Performs remote diagnostics and automatic status propagation
B-STDX, CBX, and GX Network Management Station Installation Guide 7/12/041-7
Page 26

Overview
NMS Software Requirements
HP OpenView Windows is the graphical user interface for HP Openview 6.2, which
permits extensive customization. This includes the definition of icons, maps,
background graphics, symbols, and application representations.
HP OpenView 6.2 Patches
The patches for HP OpenView 6.2 must be installed on Solaris 8 systems after
installing HP OpenView 6.2.
The required patches will be provided on a Lucent-supplied CD-ROM. You can also
access the latest patches through HP OpenView’s Web site at
http://ovweb.external.hp.com/cpe/patches
Note – For details on the Lucent-recommended HP OpenView patches, see the
Software Release Notice for HP OpenView 6.2.
Beta Draft Confidential
.
NavisCore 09.00.00.00
NavisCore provides the Lucent-specific configuration and monitoring tools needed to
configure, monitor, and control a Lucent network. NavisCore configuration and
monitoring tools are fully integrated within the HP OpenView graphical user
interface.
Combined, these software programs present an easy-to-use graphical user interface
that enables you to configure and maintain a Lucent network. NavisCore enables you
to create several network maps and configure multiple networks from a single source
(the NMS). HP OpenView provides the interface to add, modify, and delete nodes,
trunks, and switch configurations from the network map and database.
1-8 B-STDX, CBX, and GX Network Management Station Installation Guide
Page 27

Beta Draft Confidential
Installation Scripts
Lucent provides an installation script to facilitate installing Sybase software.
Sybase Installation Script (install_sybase)
Run this script to:
• Set up the system for a new Sybase installation
• Install Sybase 12.5.0.1 software on the system
• Install the local Backup Server
Lucent provides an installation script to install HP OpenView and NavisCore.
HP OpenView/NavisCore Installation Script (install_cvux)
Run this script to:
• Install HP OpenView 6.2
Overview
Installation Scripts
• Apply HP OpenView 6.2 patches
• Install NavisCore
B-STDX, CBX, and GX Network Management Station Installation Guide 7/12/041-9
Page 28

Overview
Installation Sequence
Installation Sequence
The NMS installation sequence varies according to NMS configuration setups.
Note – Lucent recommends using a two- or large-system NMS configuration for
optimized network performance.
Single-system NMS
Tabl e 1-3 provides a navigation path to install NMS software on a single-system
configuration.
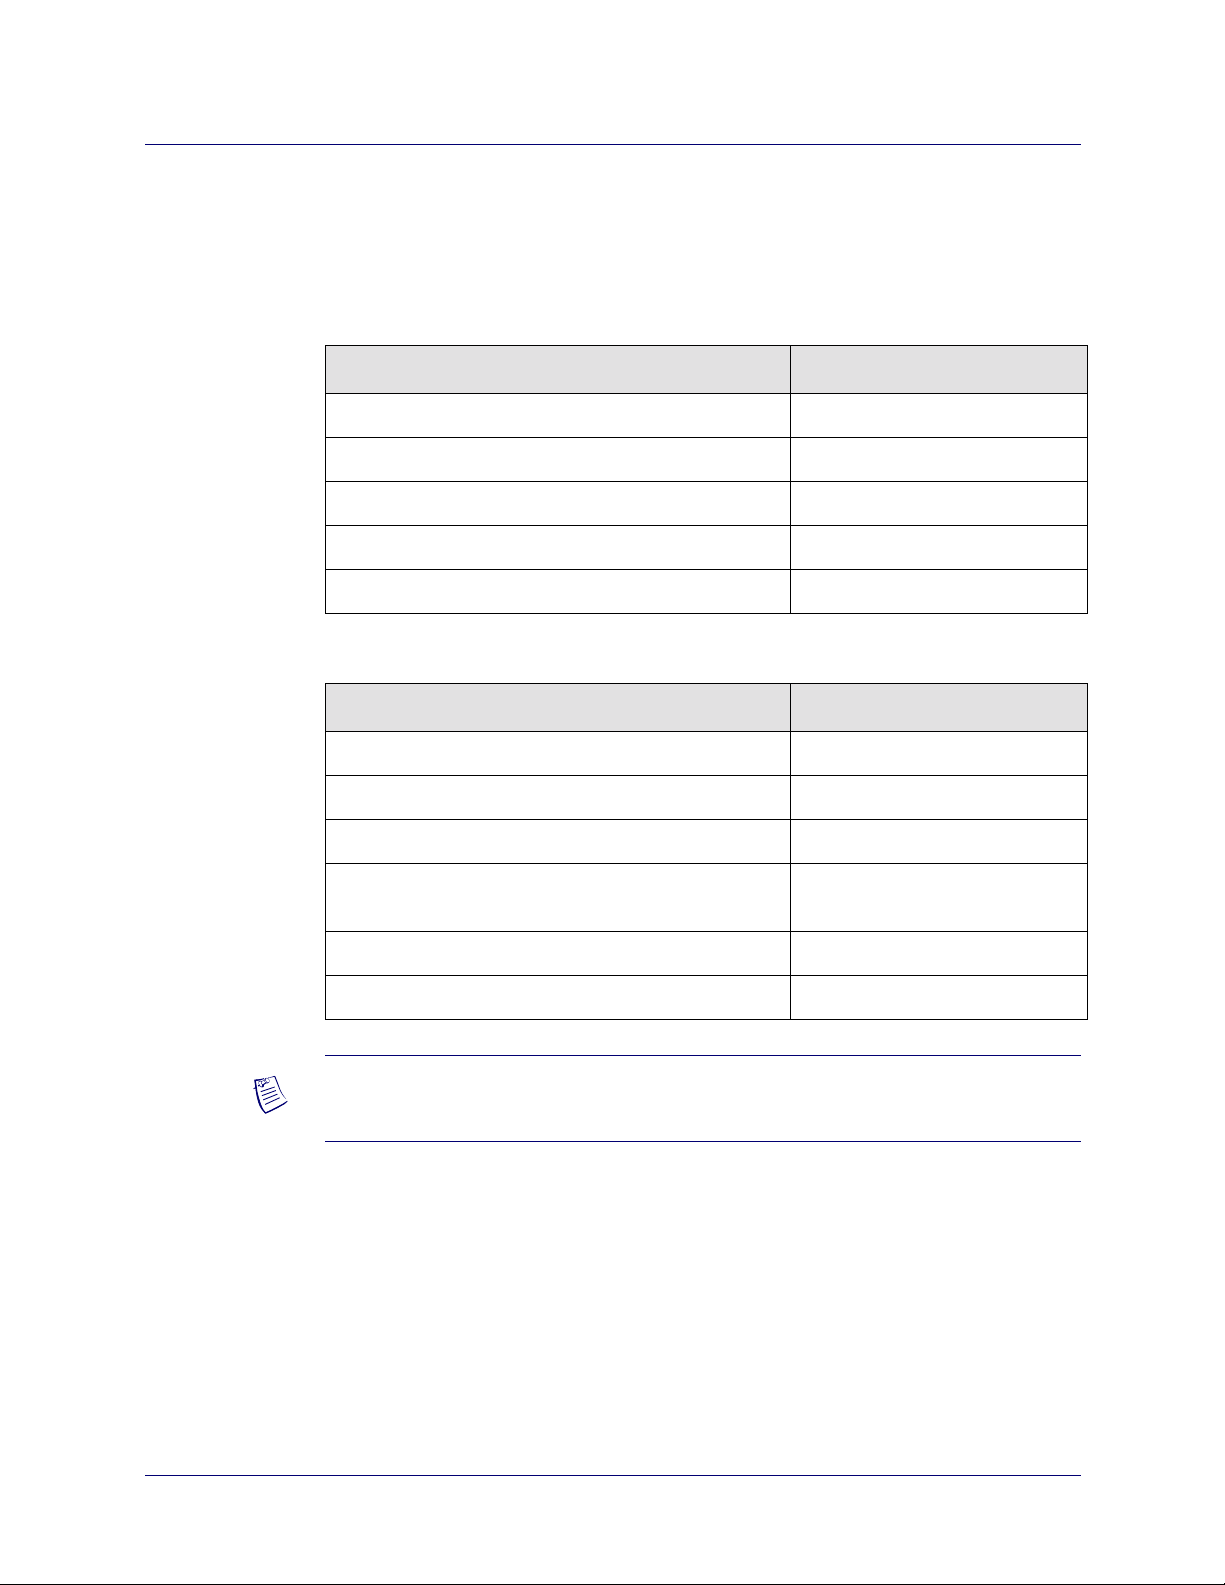
Table 1-3. Single-System NMS - Installation Sequence
Install Solaris 8 Chapter 2
Beta Draft Confidential
Action Described In
Install Solaris 8 patch cluster Chapter 2
Perform Sybase prerequisite tasks Chapter 3
Install Sybase 12.5.0.1 Chapter 4
Install HP OpenView 6.2 Chapter 5
Install HP OpenView 6.2 patches Chapter 5 and Software Release
Notice for HP OpenView 6.2
Install NavisCore Chapter 6
1-10 B-STDX, CBX, and GX Network Management Station Installation Guide
Page 29
Beta Draft Confidential
Two-system NMS
Tabl e 1-4 and Tab le 1-5 provides a navigation path to install NMS software on a
two-system configuration.
Table 1-4. Two-System NMS - Installation Sequence on System 1
Action Described In
Install Solaris 8 Chapter 2
Install Solaris 8 patch cluster Chapter 2
Perform Sybase prerequisite tasks Chapter 3
Install Sybase 12.5.0.1 Chapter 4
Install a two-system configuration Chapter 8
Overview
Installation Sequence
Table 1-5. Two-System NMS - Installation Sequence on System 2
Action Described In
Install Solaris 8 Chapter 2
Install Solaris 8 patch cluster Chapter 2
Install HP OpenView 6.2 Chapter 5
Install HP OpenView 6.2 patches Chapter 5 and Software Release
Notice for HP OpenView 6.2
Install a two-system configuration Chapter 8
Install NavisCore Chapter 6
Note – Before you install NMS software, fill out the Sybase worksheet (Appendix F).
It provides parameter information you will need for the NMS installation.
B-STDX, CBX, and GX Network Management Station Installation Guide 7/12/041-11
Page 30

Overview
Installation Sequence
Beta Draft Confidential
1-12 B-STDX, CBX, and GX Network Management Station Installation Guide
Page 31

Beta Draft Confidential
Installing Solaris 8
This chapter describes how to install Solaris 8 software on a SPARC-based system
from a local CD-ROM drive using the Solaris 8 Interactive Installation Program.
The Solaris 8 operating system environment includes advanced technologies for
multithreading, symmetric multiprocessing, integrated TCP/IP-based networking, and
centralized network administration tools.
2
This chapter describes how to install the following software:
•Solaris 8
• Solaris 8 patch cluster
Note – Certain Sun Microsystems hardware is shipped pre-installed with Version 8 or
greater of the Solaris operating system software.
Note – Common Desktop Environment (CDE) is automatically installed during the
Solaris 8 installation.
Before You Begin
Before you install Solaris 8, verify that you:
• Are following the correct NMS installation sequence (See “Installation Sequence”
on page 1-10)
• Have read the general requirements for network management
• Have read the NMS hardware and software requirements
• Have obtained the Solaris 8 patch cluster
B-STDX, CBX, and GX Network Management Station Installation Guide 2-1
Page 32

Installing Solaris 8
Solaris 8 Installation
Solaris 8 Installation
Sun Microsystems Solaris, Version 8 (Solaris 8) is the operating system software you
install on the NMS Sun system. Although you can follow the installation instructions
provided in the Solaris 8 Advanced Installation Guide, this chapter provides the
Lucent-recommended settings for installing and running NavisCore.
Note – Prior to installing Solaris 8, you need to obtain an Internet Protocol (IP)
address and verify the given Subnet Mask from your network administrator. (This IP
address must be registered as a valid address on your network.)
Installing Solaris 8
To install Solaris 8 on your Sun system as the initial operating system:
Note – If your workstation has access to network configuration information, you may
not receive all of the prompts that are documented in the following steps. Consult your
system administrator for assistance if this is the case.
Beta Draft Confidential
1. Power on the Sun system.
2. When the system comes up, insert the CD labeled Solaris 8 Software 1 of 2
SPARC Platform Edition into the CD-ROM drive.
a. Hold down the Stop key and press the A key. The system displays the
prompt.
b. At the
The system boots the operating system from the CD-ROM drive. After several
seconds, the system displays the following:
Select a language
0. English
1. French
2. German
3. Italian
4. Japanese
5. Korean
6. Simplified Chinese
ok prompt, enter:
boot cdrom
ok
7. Spanish
8. Swedish
2-2 B-STDX, CBX, and GX Network Management Station Installation Guide
Page 33

Beta Draft Confidential
9. Traditional Chinese
Please make a choice (0-9), or press h or ? for help.
Installing Solaris 8
Solaris 8 Installation
3. Enter <
display installation prompts and messages
(For example, <
number that corresponds to the language in which to
>.
0
> for English.)
A menu of locales is displayed.
4. Enter
<
number that corresponds to the locale you want to use
for the installation
(For example, <
The OpenWindows
0
> for English (C - 7-bit ascii).)
™
desktop starts. An empty desktop and the Solaris Install
>.
Console window is displayed with the message:
The system is coming up. Please wait.
The Solaris Installation Program dialog box is displayed.
5. At the Solaris Installation Program dialog box, choose Continue.
6. At the Identify This System dialog box, choose Continue.
7. At the Network Connectivity dialog box, select Yes and choose Continue.
8. At the DHCP dialog box, select No and choose Continue.
9. A Primary Network Interface dialog box is displayed if your network has more
than one network interface. At the Primary Network Interface dialog box, select
the primary network interface and choose Continue.
(For example, <hme0>.)
10. At the Host Name dialog box, enter
(For example,
<nms01>
.)
11. At the IP Address dialog box, enter
(For example,
<152.148.56.131>
<
your host name
<
your IP address
.)
> and choose Continue.
> and choose Continue.
Note – Depending on your configuration, you may not be prompted for Subnet and
Netmask information (step 12 and step 13) until after step 19.
12. At the Subnets dialog box, select Yes to make this system part of a subnet. Choose
Continue.
13. At the Netmask dialog box, enter
<
your netmask
> (or leave the default
netmask) and choose Continue.
(For example,
<255.255.248.0>
.)
14. At the IPv6 dialog box, select No and choose Continue.
15. At Confirm Information dialog box, review the displayed information. If it is
correct, choose Continue. To change any information, choose Change.
B-STDX, CBX, and GX Network Management Station Installation Guide 7/12/042-3
Page 34

Installing Solaris 8
Solaris 8 Installation
Beta Draft Confidential
16. At the Configure Security Policy dialog box, select No and choose Continue.
17. At the Confirm Information dialog box, choose Continue.
Once you confirm information, the Name Service dialog box is displayed.
Note – Consult your system administrator for assistance if you are using a name
service.
18. At the Name Service dialog box, select None and choose Continue.
19. At the Confirm Information dialog box, review the displayed information. If it is
correct, choose Continue. To change any information, choose Change.
20. At the Time Zone dialog box, select Geographic Region and choose Set.
21. At the Geographic Region dialog box, select a region from the list on the left, and
a time zone from the list on the right. Choose Continue.
(For example,
22. At the Date and Time dialog box, accept the default date and time or enter new
values. Choose Continue.
23. At Confirm Information dialog box, review the displayed information. If it is
correct, choose Continue. To change any information, choose Change.
After a couple of seconds, a Solaris Interactive Installation dialog box is
displayed.
24. At the Solaris Interactive Installation dialog box, choose Initial.
25. At the next Solaris Interactive Installation dialog box, choose Continue.
26. At the Select Geographic Regions dialog box, select Canada-English (ISO8859-1)
and choose Continue to select the default.
27. At the Select Software dialog box, select Entire Distribution Plus OEM Support
and choose Continue.
28. At the Select Disks dialog box, select the disk(s) for installing Solaris software by
selecting it in the Available Disks window and moving it to the Selected Disks
window and choose Continue.
29. At the Preserve Data dialog box, choose Continue.
30. At the Automatically Layout File Systems dialog box, choose Manual Layout.
<United States>
region and
<Eastern>
time zone.)
31. At the File System and Disk Layout dialog box, choose Customize.
2-4 B-STDX, CBX, and GX Network Management Station Installation Guide
Page 35

Beta Draft Confidential
32. At the Customize Disks dialog box, lay out files systems (based on guidelines
provided in Table 2-1 on page 2-5, Table 2-2 on page 2-6, Table 2-3 on page 2-7,
and Table 2-4 on page 2-8) and choose Ok.
Note – Do not partition the disk(s) to be used for Sybase at this time. That procedure
is covered in Chapter 3, “Sybase Prerequisite Tasks.”
Use Table 2-1 if you are installing a single-system NMS that has two drives.
Note – The second drive uses raw devices for the Sybase database. The installation
requires you to partition the second drive later in Chapter 3, “Sybase Prerequisite
Task s.”
Note – The recommended partition settings are only a guideline. The examples in the
table assume a 9-GB drive. If you are installing the operating system on a different
size drive, consult your UNIX System Administrator or call the Technical Assistance
Center. See “Technical Support” on page xviii.
Installing Solaris 8
Solaris 8 Installation
Table 2-1. Single-system NMS With Two Drives
File Systems Drive 1 (9-GB Drive)
Slice Mount Point Size
Slice 0 / 1000-MB
Slice 1 swap
Slice 2 DO NOT CHANGE
Slice 3 DO NOT CHANGE
Slice 4 DO NOT CHANGE
Slice 5 /usr 1000-MB
Slice 6 /opt Remaining unallocated space on drive after all
Slice 7 DO NOT CHANGE
a
For swap space, 1000-MB is a minimum. 2 x RAM is recommended.
1000-MB
other settings have been configured; for
example, 6-GB for a 9-GB drive
a
B-STDX, CBX, and GX Network Management Station Installation Guide 7/12/042-5
Page 36

Installing Solaris 8
Solaris 8 Installation
Beta Draft Confidential
Use Table 2-2 if you are installing the Sybase Server in a two-system NMS
configuration.
Note – This system has two drives, and the second drive uses raw devices for the
Sybase database. The installation requires you to partition the second drive later in
Chapter 3, “Sybase Prerequisite Tasks.”
Note – The recommended partition settings are only a guideline. The examples in the
table assume a 9-GB drive. If you are installing the operating system on a different
size drive, consult your UNIX System Administrator or call the Technical Assistance
Center. See “Technical Support” on page xviii.
Table 2-2. Two-system NMS (Sybase Server)
File Systems Drive 1 (Internal) (9-GB Drive, 1-GB Memory)
Slice Mount Point Size
Slice 0 / 1000-MB
Slice 1 swap
Slice 2 DO NOT CHANGE
Slice 3 DO NOT CHANGE
Slice 4 DO NOT CHANGE
Slice 5 /usr 1000-MB
Slice 6 /opt Remaining unallocated space on drive after all
Slice 7 DO NOT CHANGE
a
For swap space, 1000-MB is a minimum. 2 x RAM is recommended.
1000-MB
other settings have been configured; for
example, 6-GB for a 9-GB drive
a
2-6 B-STDX, CBX, and GX Network Management Station Installation Guide
Page 37

Beta Draft Confidential
Use Tab le 2- 3 if you are installing the HP Server in a two-system NMS configuration.
This system has two drives.
Note – The recommended partition settings are only a guideline. The examples in the
table assume a 9-GB drive using a raw partition. If you are installing the operating
system on a different size drive, consult your UNIX System Administrator or call the
Technical Assistance Center. See “Technical Support” on page xviii.
Table 2-3. Two-system NMS (HP Server)
Installing Solaris 8
Solaris 8 Installation
File Systems Drive 1 (internal)
(9-GB Drive, 1-GB Memory)
Slice Mount
Point
Slice 0 / 1000-MB Slice 0
Slice 1 swap
Slice 2 DO NOT CHANGE Slice 2 DO NOT CHANGE
Slice 3 DO NOT CHANGE Slice 3 DO NOT CHANGE
Slice 4 DO NOT CHANGE Slice 4 DO NOT CHANGE
Slice 5 /usr Remaining
Slice 6 DO NOT CHANGE Slice 6 DO NOT CHANGE
1000-MB
unallocated space on
drive after all other
settings have been
configured; for
example, 7-GB for a
9-GB drive
Size Slice Mount
a
Slice 1 swap
Slice 5 /opt Remaining
File Systems Drive 2
(9-GB Drive, 1-GB Memory)
Point
1000-MB
unallocated space on
drive after all other
settings have been
configured; for
example, 8-GB for a
9-GB drive
Size
a
Slice 7 DO NOT CHANGE Slice 7 DO NOT CHANGE
a
For swap space, 1000-MB is a minimum. 2 x RAM is recommended for the whole
system.
B-STDX, CBX, and GX Network Management Station Installation Guide 7/12/042-7
Page 38

Installing Solaris 8
Solaris 8 Installation
Beta Draft Confidential
Use Table 2-4 if you are installing a single-system NMS that has one drive. This drive
uses File Systems for the Sybase database. The partition settings are for lab
configurations only.
Note – The recommended partition settings are only a guideline. The examples in the
table assume a 9-GB drive using a file system database (lab configurations only). If
you are installing the operating system on a different size drive, consult your UNIX
System Administrator or call the Technical Assistance Center. See “Technical
Support” on page xviii.
Table 2-4. Single-system NMS With One Drive (Lab Configurations Only)
File System Files Using One Drive (9-GB Drive, 1-GB memory)
Slice Mount Point Size
Slice 0 / 1000-MB
Slice 1 swap 1000-MB
Slice 2 DO NOT CHANGE
Slice 3 DO NOT CHANGE
Slice 4 DO NOT CHANGE
Slice 5 /usr 1000-MB
Slice 6 /opt Remaining unallocated space on drive after all other settings
have been configured; 6-GB minimum recommended
Slice 7 DO NOT CHANGE
33. At the File System and Disk Layout dialog box, choose Continue.
34. At the Mount Remote File Systems dialog box, choose Continue.
35. At the Profile dialog box, review the displayed profile. If it is correct, choose
Begin Installation. To change any information, choose Change.
A dialog box with two buttons on it is displayed: Auto Reboot and Manual
Reboot.
36. Choose Auto Reboot.
The Installing Solaris Software - Progress status window is displayed, indicating
the progress of the installation. This can take up to 2 hours depending on the
software you’ve selected and the speed of the network or local CD-ROM.
37. Proceed to “Completing the Installation” on page 2-9.
2-8 B-STDX, CBX, and GX Network Management Station Installation Guide
Page 39

Beta Draft Confidential
Completing the Installation
When Solaris software is completely installed, the message “Installation
complete” will be displayed.
The system automatically reboots. When the system comes back up, you will be
prompted to enter your root password.
Installing Solaris 8
Solaris 8 Installation
1. At the root password prompt, enter <
your root password
>. Your password
does not appear on the screen. When prompted, re-enter your root password.
The following is displayed:
System Identification is completed.
=============================================
This system is configured to conserve energy.
=============================================
After 30 minutes of idle time on this system, your system
state will automatically be saved to disk, and the system
will power-off. Later, when you want to use the system again,
and you turn the power back on, your system will be restored
to its previous state, including all the programs that you
were running.
Do you want this automatic power-saving shutdown?
2. Enter n.
The following message is displayed:
Autoshutdown has been disabled.
Do you want the system to ask about this again, when you next
reboot? (This gives you the chance to try it before deciding
whether to keep it.) [y, n, ?]
3. Enter n.
The Specify Media dialog box is displayed.
4. At the Specify Media dialog box, select CD and choose Next.
The Solaris 8 Software 1 of 2 CD is ejected.
5. Insert the CD labeled Solaris 8 Software 2 of 2 SPARC Platform Edition into the
CD-ROM drive.
6. At the Insert CD dialog box, choose Ok.
An Installing... status window is displayed with the following message:
Installing Solaris 8 Software 2
7. At the Installation Summary dialog box, choose Next.
The Solaris 8 Software 2 of 2 CD is ejected.
B-STDX, CBX, and GX Network Management Station Installation Guide 7/12/042-9
Page 40

Installing Solaris 8
Beta Draft Confidential
Installing the Solaris 8 Patch Cluster
8. At the Reboot dialog box, choose Reboot Now.
The system displays the console login prompt after finishing the boot process.
9. At the console login prompt, log in as the root user and enter the root password.
The system returns a # prompt (the default shell prompt for the root user).
10. When the software prompts you for a windowing system, select either Common
Desktop Environment (CDE) or OpenWindows. Lucent recommends using CDE.
11. Proceed to “Installing the Solaris 8 Patch Cluster” on page 2-10.
Installing the Solaris 8 Patch Cluster
You must install the Solaris 8 patch cluster file 8_Recommended.zip on your
system.
Note – For additional Lucent-recommended Solaris patches, see the appropriate
NavisCore Software Release Notice (SRN).
To install the Solaris 8 patch cluster:
1. As root user, use a browser to download the patches from the Sun Microsystems
Web site. The URL is:
http://sunsolve.sun.com
2. Select Patches from the menu on the left side of the screen.
3. Select Recommended and Security Patches from the menu on the right side of the
screen. (This option is listed under the Downloads menu and the Recommended
and Security Patches heading.)
4. Choose Agree after reading the object code license.
A table titled “Recommended & Security Patch Clusters for Solaris” is displayed.
5. Select the protocol used for downloading - HTTP or FTP in the Clusters column
of the row that reads “Solaris 8” in the OS column.
6. In the Save As... window, choose OK to select the default directory and filename.
The download takes several minutes to complete.
7. Once the download has completed, enter the following in an Xterm window:
cp 8_Recommended.zip /tmp
cd /tmp
unzip 8_Recommended.zip
rm 8_Recommended.zip
8. When the # prompt appears, enter:
2-10 B-STDX, CBX, and GX Network Management Station Installation Guide
Page 41

Beta Draft Confidential
cd 8_Recommended
./install_cluster
After several lines of output which warns against having enough disk space, the
following message appears:
Are you ready to continue with install? [y/n]:
9. Enter y to continue.
The installation may take up to 1.5 hours to complete.
Installing Solaris 8
Installing the Solaris 8 Patch Cluster
10. When the
init 6
11. Proceed to Chapter 3, “Sybase Prerequisite Tasks.”
# prompt appears, enter:
B-STDX, CBX, and GX Network Management Station Installation Guide 7/12/042-11
Page 42

Installing Solaris 8
Installing the Solaris 8 Patch Cluster
Beta Draft Confidential
2-12 B-STDX, CBX, and GX Network Management Station Installation Guide
Page 43

Beta Draft Confidential
Sybase Prerequisite Tasks
In this guide, Sybase Adaptive Server Enterprise (ASE) 12.5.0.1 will be referred to as
Sybase 12.5.0.1.
The Sybase 12.5.0.1 relational database software program stores database information
and provides backup and recovery of database files.
3
This chapter describes Sybase prerequisite tasks, which include:
• Partitioning the second disk(s) using raw partitions
• Loading the Lucent-supplied Sybase 12.5.0.1 CD-ROM and extracting the scripts
• Setting up the system before installing Sybase 12.5.0.1
Note – With the introduction of Sybase 12.5.0.1, using default settings during the
Sybase installation is no longer an appropriate path and will result in degradation of
performance on the Sybase server. If you have not done so yet, contact the Technical
Support organization for specific tuning information that is needed based upon
network configuration and usage.See “Technical Support” on page xviii.
Before You Begin
Before you perform Sybase prerequisite tasks, verify that you:
• Are following the correct NMS installation sequence (See “Installation Sequence”
on page 1-10)
• Have installed Solaris 8
• Have installed Solaris 8 patch(es)
• Do not already have Sybase installed on your machine
You can verify if Sybase has been installed on your machine by checking to see if the
/opt/sybase directory exists and/or by trying to become the Sybase user by entering
the following command:
B-STDX, CBX, and GX Network Management Station Installation Guide 3-1
Page 44

Sybase Prerequisite Tasks
Before You Begin
su - sybase
Note – The procedures in Chapter 3, “Sybase Prerequisite Tasks” and Chapter 4,
“Installing Sybase 12.5.0.1” utilize the Lucent script to install Sybase. If you are not
using the Lucent script to install Sybase, contact Technical Assistance Center prior to
installing Sybase. See “Technical Support” on page xviii.
Note – Default Sybase parameters will not support the NavisCore database. Sybase
must be tuned on a per server, per configuration basis. Contact Technical Assistance
Center prior to installing Sybase. See “Technical Support” on page xviii.
The entire Sybase installation process (prerequisite tasks and the actual installation)
could take up to 1 and a half hours, depending on your configuration.
If you have a single-drive NMS that uses file-system files, proceed to “Loading the
Lucent-supplied Sybase 12.5.0.1 CD-ROM” on page 3-13. This is for lab
configurations only.
Beta Draft Confidential
If you have a two or more drive NMS that uses raw partitions for the disks to be used
for the Sybase installation, proceed to “Partitioning the Disk(s) to be Used for Sybase
Using Raw Partitions” on page 3-3.
3-2 B-STDX, CBX, and GX Network Management Station Installation Guide
Page 45

Beta Draft Confidential
Sybase Prerequisite Tasks
Partitioning the Disk(s) to be Used for Sybase Using Raw Partitions
Partitioning the Disk(s) to be Used for Sybase Using
Raw Partitions
Tabl e 3-1 lists the recommended partition settings for the disk(s) that Sybase will be
installed on.
Table 3-1. Partition Settings
Partition(s) Function
1 and 7 These partitions are not used
0 Master device for Sybase
3 Tempdb device for Sybase
4 System Procs device for Sybase
5 NavisCore device for Sybase
6 Log device for Sybase
Note – Sybase 12.5.0.1 allows a maximum 32-GB partition size.
Caution – Before you partition the disk(s), make sure the disk(s) you are about to
!
partition is not the same disk you partitioned during the Solaris install.
If you did not use the recommended partition settings (see Table 2-1 on page 2-5
through Table 2-3 on page 2-7), consult your System Administrator before completing
this section.
To partition the Sybase disk(s):
1. At the
Login prompt, enter root. When prompted for the root password, enter
<
root password
>.
B-STDX, CBX, and GX Network Management Station Installation Guide 7/12/043-3
Page 46

Sybase Prerequisite Tasks
Beta Draft Confidential
Partitioning the Disk(s) to be Used for Sybase Using Raw Partitions
2. In an Xterm window, enter format.
Output similar to the following is displayed:
3. At the
Note – If you choose the disk that was already partitioned, the system displays the
following:
Specify disk (enter its number) prompt, enter <
corresponding to a disk to be used for Sybase
Warning: Current Disk has mounted partitions.
a. At the format prompt, enter disk.
b. Go to step 4 and select the disk that you did not partition.
The Format Menu appears (Figure 3-1).
number
>.
Figure 3-1. Format Menu
3-4 B-STDX, CBX, and GX Network Management Station Installation Guide
Page 47

Beta Draft Confidential
Partitioning the Disk(s) to be Used for Sybase Using Raw Partitions
4. At the format prompt, enter partition.
The Partition Menu appears (Figure 3-2).
Sybase Prerequisite Tasks
Figure 3-2. Partition Menu
Defining Partitions 1 and 7
Perform the following steps to define the partition.
1. At the
2. At the
3. At the
4. At the
5. At the
Note – Repeat step 1 through step 5 for partition 7. (For step 1, enter 7 instead of 1.)
6. When you finish defining partitions 1 and 7, at the
partition prompt, enter 1.
Enter partition id tag prompt, enter unassigned.
Enter partition permission flags prompt, enter wm.
Enter new starting cyl prompt, enter 0.
Enter partition size prompt, enter 0mb.
print. The partition table appears. Do not make changes to partition 2 if it uses
the entire disk.
partition prompt, enter
B-STDX, CBX, and GX Network Management Station Installation Guide 7/12/043-5
Page 48

Sybase Prerequisite Tasks
Beta Draft Confidential
Partitioning the Disk(s) to be Used for Sybase Using Raw Partitions
Figure 3-3 on page 3-12 shows partition 2 defined as “backup” and uses the entire
disk because “Total Disk Cylinders Available” is 4924 and the Cylinders column
shows the value “0-4923,” which is 4924 cylinders. Proceed as follows:
• If partition 2 is defined similar to Figure 3-3 on page 3-12, and uses the entire
disk, proceed to “Creating a Master Device on Partition 0” on page 3-7.
• If partition 2 does not use the entire disk, proceed to “Defining Partition 2” on
page 3-6.
Note – You need to define partition 2 if it does not use the entire disk. Several cases
have been seen in the field where partition 2 did not use the entire disk.
Defining Partition 2
To define partition 2:
1. At the
2. Locate the “Total disk cylinders available” line in the partition table. Make a note
3. At the
4. At the
5. At the
6. At the
7. At the
8. Proceed to “Creating a Master Device on Partition 0.”
partition prompt, enter print.
of the number next to this line. Do not use the number next to reserved cylinders.
partition prompt, enter 2.
Enter partition id tag [unassigned] prompt, enter backup.
Enter partition permission flags [wm] prompt, enter wu.
Enter new starting cyl [0] prompt, enter 0.
Enter partition size prompt, enter $.
(Entering $ at the Enter partition size prompt will allocate the remaining
disk space to partition 2.)
3-6 B-STDX, CBX, and GX Network Management Station Installation Guide
Page 49

Beta Draft Confidential
Partitioning the Disk(s) to be Used for Sybase Using Raw Partitions
Creating a Master Device on Partition 0
To create a master device for Sybase on Partition 0:
Sybase Prerequisite Tasks
1. At the
2. At the
3. At the
Note – It is important that you enter 1 in step 4 for the starting cylinder for partition 0
and not 0.
4. At the
5. At the
6. At the
7. Proceed to “Creating a Tempdb Device on Partition 3.”
partition prompt, enter 0.
Enter partition id tag prompt, enter unassigned.
Enter partition permission flags prompt, enter wm.
Enter new starting cyl[1]: prompt, enter 1.
Enter partition size prompt, enter 200MB.
partition prompt, view the partition table by entering print.
Partition 0 is complete.
Figure 3-3 on page 3-12 is an example of a completed partition table after all 5
partitions have been defined.
B-STDX, CBX, and GX Network Management Station Installation Guide 7/12/043-7
Page 50

Sybase Prerequisite Tasks
Beta Draft Confidential
Partitioning the Disk(s) to be Used for Sybase Using Raw Partitions
Creating a Tempdb Device on Partition 3
To create a tempdb device for Sybase on Partition 3:
1. At the
2. At the
3. At the
4. At the
partition prompt, enter 3.
Enter partition id tag prompt, enter unassigned.
Enter partition permission flags prompt, enter wm.
Enter new starting cyl[xxxx]: prompt, enter:
<
a number equal to the value of the ending cylinder from
partition 0 plus 1
>
(Using Figure 3-3 on page 3-12 as an example, this value would be 116.)
Note – Although Lucent recommends that you allocate 1 GB to partition 3 (step 5),
this number depends on your disk space availability. A partition size of 200MB is the
minimum value for the Tempdb Device.
5. At the
6. At the
Enter partition size prompt, enter 1GB.
partition prompt, view the partition table by entering print.
Partition 3 is complete.
Figure 3-3 on page 3-12 is an example of a completed partition table after all 5
partitions have been defined.
7. Proceed to “Creating a Sysprocsdev device on Partition 4.”
Creating a Sysprocsdev device on Partition 4
Note – The default system name for this device is sysprocsdev. However, it is
frequently referred to as the sybsystemprocs device since it stores the sybsystemprocs
database.
To create a sysprocsdev device for Sybase on Partition 4:
1. At the
2. At the
3. At the
4. At the
5. At the
partition prompt, enter 4.
Enter partition id tag prompt, enter unassigned.
Enter partition permission flags prompt, enter wm.
Enter new starting cyl[xxxx]: prompt, enter:
<
a number equal to the value of the ending cylinder from
partition 3 plus 1
>
(Using Figure 3-3 on page 3-12 as an example, this value would be 701.)
Enter partition size prompt, enter 200MB.
3-8 B-STDX, CBX, and GX Network Management Station Installation Guide
Page 51

Beta Draft Confidential
Partitioning the Disk(s) to be Used for Sybase Using Raw Partitions
6. At the partition prompt, view the partition table by entering print.
Partition 4 is complete.
Figure 3-3 on page 3-12 is an example of a completed partition table after all 5
partitions have been defined.
7. Proceed to “Creating a NavisCore Data Device on Partition 5.”
Creating a NavisCore Data Device on Partition 5
To create a NavisCore data device for Sybase on Partition 5:
Sybase Prerequisite Tasks
1. At the
2. At the
3. At the
4. At the
partition prompt, enter 5.
Enter partition id tag prompt, enter unassigned.
Enter partition permission flags prompt, enter wm.
Enter new starting cyl[xxxx]: prompt, enter:
<
a number equal to the value of the ending cylinder from
partition 4 plus 1
>
Using Figure 3-3 on page 3-12 as an example, this value would be 816.
5. At the
Enter partition size prompt, do the following:
a. To allocate the remaining disk space for the NavisCore Data and Log devices,
use the following equation to calculate the partition size for each device:
(<
Total available cylinders on drive
used for partitions 0, 3 and 4
device size
>
>)/2 = <
> - <
Total cylinders
NavisCore Data/Log
For example, using the values shown in Figure 3-3 on page 3-12:
(4924 (available cylinders on drive) - 815 (total used
cylinders)) / 2 = 2054 (NavisCore data device size).
b. In this example, you would enter 2054c at the Enter partition size
prompt.
6. At the
partition prompt, view the partition table by entering print.
Partition 5 is complete.
Figure 3-3 on page 3-12 is an example of a completed partition table after all 5
partitions have been defined.
7. Proceed to “Creating a NavisCore Log Device on Partition 6.”
B-STDX, CBX, and GX Network Management Station Installation Guide 7/12/043-9
Page 52

Sybase Prerequisite Tasks
Beta Draft Confidential
Partitioning the Disk(s) to be Used for Sybase Using Raw Partitions
Creating a NavisCore Log Device on Partition 6
To create a NavisCore log device for Sybase on Partition 6:
1. At the
2. At the
3. At the
4. At the
partition prompt, enter 6.
Enter partition id tag prompt, enter unassigned.
Enter partition permission flags prompt, enter wm.
Enter new starting cyl[xxxx]: prompt, enter:
<
a number equal to the value of the ending cylinder from
partition 5 plus 1
>
Using Figure 3-3 on page 3-12 as an example, this value would be 2870.
5. At the
Enter partition size prompt, do the following:
a. To allocate the remaining disk space for the Log device, use the equation in
step 5 on page 3-9 to calculate the partition size:
(<
Total available cylinders on drive
used for partitions 0, 3, and 4
device size
>
>)/2 = <
> - <
Total cylinders
NavisCore Data/Log
For example, using the values shown in Figure 3-3 on page 3-12:
(4924 (available cylinders on drive) - 815 (total used
cylinders)) / 2 = 2054 (NavisCore data device size).
b. In this example, you would enter 2054c at the Enter partition size
prompt.
6. When you have finished defining the Log device, do one of the following:
• If you wish to define partition 7 using any unallocated disk space, proceed to
“Defining Partition 7 (Optional)” on page 3-11.
• If you have allocated the entire disk to Sybase databases, proceed to
“Verifying Partition Sizes” on page 3-11.
3-10 B-STDX, CBX, and GX Network Management Station Installation Guide
Page 53

Beta Draft Confidential
Partitioning the Disk(s) to be Used for Sybase Using Raw Partitions
Defining Partition 7 (Optional)
If you have not used the entire disk for Sybase devices, define Partition 7 using the
remaining unallocated space:
Sybase Prerequisite Tasks
1. At the
2. Locate the “Total disk cylinders available” line in the partition table. Make a note
3. Subtract the Partition 6 ending cylinder number from the “Total disk cylinders
4. At the
5. At the
6. At the
7. At the
8. At the Enter partition size prompt, enter <
9. Proceed to “Verifying Partition Sizes.”
partition prompt, enter print to view the partition table.
of the number next to this line. Do not use the number next to reserved cylinders.
Figure 3-3 on page 3-12 is an example of an 8.49-GB disk drive.
available” number, then subtract 1. Make a note of this number.
partition prompt, enter 7.
Enter partition id tag prompt, enter unassigned.
Enter partition permission flags prompt, enter wm.
Enter new starting cyl[xxxx]: prompt, enter:
<
a number equal to the value of the ending cylinder from
partition 6 plus 1
Verifying Partition Sizes
Follow the steps below to verify the partition sizes for the Sybase disk:
>
value from step 3
>c.
1. At the
2. At the
3. At the
4. At the
5. If you are using a two-disk configuration, at the
6. Proceed to “Loading the Lucent-supplied Sybase 12.5.0.1 CD-ROM” on
partition prompt, enter print to view the final partition table. Confirm
that the cylinders are contiguous for partition 0, 3, 4, 5, 6, and 7. (Partition 7 will
be contiguous only if it was defined.)
partition prompt, enter quit.
format prompt, label and save the partitions by entering label.
Ready to label disk prompt, enter y.
format prompt, enter quit.
If you are using more than two disks, at the
proceed to step 3 on page 3-4 to partition the next disk to be used for Sybase.
page 3-13.
format prompt, enter disk and
B-STDX, CBX, and GX Network Management Station Installation Guide 7/12/043-11
Page 54

Sybase Prerequisite Tasks
Beta Draft Confidential
Partitioning the Disk(s) to be Used for Sybase Using Raw Partitions
Partition Table Examples
Use either Figure 3-3 or Figure 3-4 when you define partitions 0, 1, 2, 3, 4, 5, 6, and 7.
Figure 3-3. Partition Table for 8.49-GB Drive
Figure 3-4. Partition Table for 4.01-GB Drive
3-12 B-STDX, CBX, and GX Network Management Station Installation Guide
Page 55

Beta Draft Confidential
Sybase Prerequisite Tasks
Loading the Lucent-supplied Sybase 12.5.0.1 CD-ROM
Loading the Lucent-supplied Sybase 12.5.0.1 CD-ROM
To load the Lucent-supplied Sybase CD-ROM:
1. Verify that you are logged in as root. You should see a
# prompt in the Xterm
window.
If you are not logged in as root, in the Xterm window enter
prompted, enter
<
root password
>.
su - root. When
2. Insert the Sybase 12.5.0.1 CD into the CD-ROM drive.
3. In an Xterm window, change to the
cd /opt
/opt directory by entering:
4. Unzip the Sybase tar file and remove the installation script from the tar file by
entering:
gunzip -c /cdrom/cdrom0/<
Sybase install file name
>|tar xvf - ./cv_scripts
For example,
gunzip -c /cdrom/cdrom0/syb_install.09.00.00.00.tgz | tar
xvf - ./cv_scripts
See the latest Software Release Notice (SRN) for Sybase 12.5.0.1 for the Sybase
tar file name.
Note – This command will take several minutes to complete.
5. Change to the
cd /opt/cv_scripts
cv_scripts directory by entering:
Note – In a new Xterm window on the local system, run “xhost +” as the user who
controls the system console. Executing this command enables you to display the
installation log on the local system.
6. Run the Sybase installation script by entering:
./install_sybase
The following message appears:
Verifying super user privileges...
Would you like to view (tail -f) the install log (default=y)?
The Tail window allows users to view the installation log.
7. Press Return to accept the default (yes).
The following message appears:
B-STDX, CBX, and GX Network Management Station Installation Guide 7/12/043-13
Page 56

Sybase Prerequisite Tasks
Beta Draft Confidential
Loading the Lucent-supplied Sybase 12.5.0.1 CD-ROM
What display should the install log xterm go to
(default:0.0)?
8. Press Return or enter <
local hostname
>:0.0.
The Tail window appears. The pathname in the Tail window indicates where the
installation log can be found.
The following message appears:
WARNING: You need a minimum of two 400 Mhz CPUs and 1 GB of
RAM in order to run this software properly. Would you like to
continue? (Y/N)
9. If you have the memory requirements, enter y.
If you do not have the memory requirements, enter
n and restart the install once
you have the requirements.
The Sybase Installation Menu window appears.
[Press ^ C to abort...]
Sybase Installation Menu...
1. Set up the system before SYBASE Installation
2. Install Sybase
3. Upgrade Sybase
4. Configure a Remote Sybase Backup Server
5. Configure an Additional Sybase Data Device
6. Exit
Please select one of the above options [1-6]?
Figure 3-5. Sybase Installation Menu
The Lucent-supplied Sybase installation scripts are loaded on your system. The
next section describes how to set up your system before installing the Sybase
12.5.0.1 software.
3-14 B-STDX, CBX, and GX Network Management Station Installation Guide
Page 57

Beta Draft Confidential
Setting Up the System
The Sybase installation script:
• Creates the Sybase and NMS user accounts
• Creates additional user accounts
• Assigns TCP socket numbers to the Sybase and backup servers
• Sets the NavisCore device names
• Sets the Master, Tempdb, Sysprocsdev, Data, and Log devices
Note – Refer to the Sybase Worksheet in Appendix F to record selected parameter
settings.
To set up your system:
Sybase Prerequisite Tasks
Setting Up the System
1. At the Sybase Installation Menu, set up the system by entering
1.
The following message appears:
Complete all prerequisite tasks before continuing. See
Lucent’s Installation Documentation for more information.
Do you wish to continue? <y|n> [default=y]:
2. Press Return to continue.
The following message appears:
Setting up your system for the Sybase Install
------------------------------------------------
Creating the dba group for database system administrator.
Successfully added group ‘dba’ with gid 300
Creating a user account for sybase
---------------------------------------
Enter the Sybase environment path [default : /opt/sybase] ?
3. Press Return to accept the default of /opt/sybase.
The following message appears:
Adding user sybase. Please wait...
Successfully added user sybase...
Configuring the user account with environment files.
--------------------------------------------------------
Enter the Database Server Name (default=<
Hostname in CAPITAL LETTERS
B-STDX, CBX, and GX Network Management Station Installation Guide 7/12/043-15
>) ?
Your system’s
Page 58

Sybase Prerequisite Tasks
Setting Up the System
Caution – In step 4, do not enter CASCADE for your database server name (it is a
!
reserved Sybase word); the installation fails if you use it. By default, the script uses
the system hostname. If the hostname contains a hyphen (-), you must not use the
hyphen because the installation fails.
4. At the Enter the Database Server Name prompt, do one of the following:
Beta Draft Confidential
• Press Return to accept the default of
<
•Enter
5. At the
the default (
database server name
Enter the name for the error log prompt, press Return to accept
<database server name>_err.log
<your system’s hostname>
>.
).
.
Note – In step 6, choose a secure password that you can remember (for example,
superbase). The password must be at least six characters in length. If you enter a
password with fewer characters, you will be unable to initiate an
isql session after
completing the installation. Do not enter CASCADE for the Database SA Password (it
is a reserved Sybase word).
6. At the
Enter the Database SA Password prompt, enter:
<
Your database SA password
>
When prompted, re-enter the password.
The following message appears:
Creating /etc/rc2.d/S97sybase..Done.
Creating /etc/rc0.d/K01sybase..Done.
Creating /etc/rc2.d/S98sybase..Done.
The script creates the three listed files that activate and deactivate the Sybase
12.5.0.1 Server and the backup server. The script uses these files later in the
installation to shut down and start up the Sybase Server. The following message
appears:
You must add at least one more user account.
Enter name of the user [default: nms] ?
7. Press Return to accept the default (nms).
3-16 B-STDX, CBX, and GX Network Management Station Installation Guide
Page 59

Beta Draft Confidential
8. At the Enter group to which the new user belongs prompt, press
Return to accept the default of staff.
The following messages appear:
Creating a user account for nms
---------------------------------------
Adding user nms. Please Wait...
Successfully added user nms...
Configuring the user account with environment files.
----------------------------------------------------
Setting Shared Memory Allocations
---------------------------------
The Lucent script increases Sybase’s shared memory. The script accomplishes this
by adding the line
/etc/system file.
The system displays the following:
set shmsys:shminfo_shmmax=131072000 to the
Sybase Prerequisite Tasks
Setting Up the System
Making a backup copy of '/etc/system' in '/etc/system.cv'
Setting TCP Socket device for Sybase
------------------------------------
The Socket Number for SYBASE is 1025
The Socket Number for SYBASE BACKUP is 1026
The Lucent script assigns TCP socket numbers to Sybase and the local backup
server. The socket number 1025 is assigned to Sybase and 1026 is assigned to the
local backup server. If these numbers are already in use, the script assigns the next
available numbers. The system displays the following:
Do you wish to continue? <y|n> [default=y]:
9. Press Return to continue.
The following message appears:
Creating Additional User Accounts
-----------------------------------
1. Create User Account.
2. Proceed to the Next Step.
Please select one of the above options [1-2]?
B-STDX, CBX, and GX Network Management Station Installation Guide 7/12/043-17
Page 60

Sybase Prerequisite Tasks
Setting Up the System
10. Select one of the following options:
Beta Draft Confidential
•Enter
1 to create additional user accounts.
The script prompts you for information similar to what you provided for the
nms user account. See step 7 on page 3-16. Once you create the additional
user, the Creating Additional User Accounts Menu reappears.
•Enter 2 to proceed to the next step.
The Device Installation Menu appears.
Device Installation Menu...
1. NavisCore Device Installation
2. CNM Device Installation
3. Fault Server Device Installation
4. Bulk Stats Device Installation
5. Other Device Installation
Please select one of the above options [1-5]?
Figure 3-6. Device Installation Menu
11. Enter
1 to install the NavisCore device.
The following message appears:
NavisCore Device Installation Selected...
Note – If you use Sybase in conjunction with other Lucent products (CNM Proxy
Agent, NavisXtend Statistics Server (Bulk Statistics), and NavisXtend Fault Server),
you must configure additional devices for these products. Call the Technical
Assistance Center for assistance. See “Technical Support” on page xviii.
3-18 B-STDX, CBX, and GX Network Management Station Installation Guide
Page 61

Beta Draft Confidential
The following menu appears:
Setting the master device used for Sybase
-----------------------------------------
You can create the Master Device on a RAW PARTITION or on a FILE
SYSTEM FILE.
Select the type of device for Master Device
1. Raw Partition.
2. File System File.
3. Proceed to the Next Step.
Enter Selection [1-3]?
Sybase Prerequisite Tasks
Setting Up the System
Figure 3-7. Sybase Master Device Menu
12. Specify your master device as follows:
• To select Raw Partitions, enter
1.
Proceed to “Using Raw Partitions for the Master Device” on page 3-20.
• To select File System Files (for lab configurations only), enter
Proceed to “Using File System Files for the Master Device (Lab
Configurations Only)” on page 3-22.
2.
B-STDX, CBX, and GX Network Management Station Installation Guide 7/12/043-19
Page 62

Sybase Prerequisite Tasks
Beta Draft Confidential
Setting Up the System
Using Raw Partitions for the Master Device
If you selected Raw Partitions in step 12 on page 3-19, the following message
appears:
WARNING: IF YOU INSTALL THE SQL SERVER ON A RAW PARTITION,
ANY EXISTING FILES ON THAT PARTITION WILL BE OVERWRITTEN.
Do you wish to continue? [default=y]:
1. Press Return to continue.
Note – The Lucent script does not provide defaults for the following prompts because
customer configurations vary.
The following message appears:
Setting up Raw Partition Devices
----------------------------------Enter the Master Device Path Name (e.g. /dev/rdsk/c0t1d0s0):
2. Enter <
For example,
master device pathname
/dev/rdsk/c0t1d0s0
>.
The following message appears:
Setting device permissions. Please Wait..
Device /dev/rdsk/c0t1d0s0 has been set.
Enter the tempdb Device Path Name (e.g. /dev/rdsk/c0t1d0s3):
3. Enter <
For example,
tempdb device pathname
/dev/rdsk/c0t1d0s3
>.
The following message appears:
Setting device permissions. Please wait..
Device /dev/rdsk/c0t1d0s3 has been set.
Enter the Procs Device Path Name (e.g. /dev/rdsk/c0t1d0s4):
4. Enter <
For example,
procs device pathname
/dev/rdsk/c0t1d0s4
>.
The following message appears:
Setting device permissions. Please Wait..
Device /dev/rdsk/c0t1d0s4 has been set
Enter the Cascade Device Path Name (e.g.
/dev/rdsk/c0t1d0s5):
3-20 B-STDX, CBX, and GX Network Management Station Installation Guide
Page 63

Beta Draft Confidential
Sybase Prerequisite Tasks
Setting Up the System
5. Enter <
Cascade device pathname
>.
For example, /dev/rdsk/c0t1d0s5
The following message appears:
Setting device permissions. Please Wait..
Device /dev/rdsk/c0t1d0s5 has been set.
Enter the Log Device Path Name (e.g. /dev/rdsk/c0t1d0s6):
6. Enter <
For example,
log device pathname
/dev/rdsk/c0t1d0s6
>.
The following message appears:
Setting device permissions. Please wait..
Device /dev/rdsk/c0t1d0s6 has been set.
The maximum value for your Master Device has been calculated
to maximize the size of your raw partition. By accepting the
default you will be utilizing the whole raw device. A minimum
value has been established at 200 Mbytes. You will not be
allowed to go below that threshold.
NOTE: It is recommended that you accept the maximum value.
Otherwise, the space left over will be wasted.
Enter size of your Master Device in Megabytes:
7. Press Return to accept the default of 201.
The following message appears:
Press Enter to return...
8. Press Return.
The following message appears:
******************************************************
If you have completed the initial SYBASE setup
successfully, please REBOOT the workstation now.
9. At the # prompt, reboot the system by entering:
init 6
The Sybase prerequisite tasks are complete.
10. Proceed to Chapter 4, “Installing Sybase 12.5.0.1.”
B-STDX, CBX, and GX Network Management Station Installation Guide 7/12/043-21
Page 64

Sybase Prerequisite Tasks
Beta Draft Confidential
Setting Up the System
Using File System Files for the Master Device (Lab Configurations Only)
If you selected File System Files (for lab configurations only) in step 12 on page 3-19,
the following message appears:
WARNING: Do not create Sybase master devices as regular UNIX files
on ‘Production’ SQL Servers. I/O to operating system files is
buffered I/O, so your data may not be recoverable in the case of a
system crash or other failure.
Avoid remote mounted file systems. Do not create or use devices on
remote NFS-mounted or RFS mounted directories.
You also need to determine if there is enough space in the file
system for master device.
NOTE: Consult your Lucent manual for recommended space
requirements.
Press Return to Continue....
Figure 3-8. Warning Window
3-22 B-STDX, CBX, and GX Network Management Station Installation Guide
Page 65

Beta Draft Confidential
1. Press Return to continue.
The following window appears:
Disk space report
--------------------------
Filesystem kbytes used avail capacity Mounted on
/dev/dsk/c0t0d0s0 96019 23866 62553 28% /
/dev/dsk/c0t0d0s4 288556 197752 61954 77% /usr
/dev/dsk/c1t0d0s4 3939604 501 3545143 1% /VIEWS_central
/dev/dsk/c0t0d0s5 3188923 1572215 1297818 55% /opt
Do you want to Continue with the configuration (y/n) ? y
Sybase Prerequisite Tasks
Setting Up the System
Figure 3-9. Disk Space Report Window
2. To continue, enter
3. At the
Enter name for database device directory prompt, press
Return to accept the default of
y.
/opt/databases.
4. The following message appears.
The minimum value for your Master Device has been
established at 200 MBytes. By accepting the default you will
be assigning the minimum space allowed for an initial
NavisCore Installation.
NOTE: Consult your Lucent manual for recommended sizes.
Enter the size of the Master Device in Megabytes
[default=200]:
Enter the size of your Master Device in Megabytes:
5. Press Return to accept the default of 200.
Note – Although Lucent recommends that you allocate 1 GB to Tempdb device
(step 6), this number depends on your disk space availability. A partition size of
200MB is the minimum value for the Tempdb Device.
6. At the
Enter the size of your Tempdb Device in Megabytes prompt,
enter 1000.
B-STDX, CBX, and GX Network Management Station Installation Guide 7/12/043-23
Page 66

Sybase Prerequisite Tasks
Setting Up the System
7. At the Enter the size of your System Procs Device in Megabytes
prompt, press Return to accept the default of 200.
Beta Draft Confidential
8. At the
Note – For file system file configurations, /opt requires at least 1.7-GB for the
database files.
9. At the
10. Press Return to continue.
11. At the # prompt, reboot the system by entering init 6.
Enter the size of your Data Device in Megabytes prompt,
press Return to accept the default of 300.
Enter the size of your Log Device in Megabytes prompt,
press Return to accept the default of 300.
The following message appears:
Creating Master Device file...
Making directory for the master device...
Press Enter to return...
The following message appears:
******************************************************
If you have completed the initial SYBASE setup
successfully, please REBOOT the workstation now.
The Sybase prerequisite tasks are complete.
12. Proceed to Chapter 4, “Installing Sybase 12.5.0.1.”
3-24 B-STDX, CBX, and GX Network Management Station Installation Guide
Page 67

Beta Draft Confidential
Installing Sybase 12.5.0.1
This chapter describes how to install Sybase 12.5.0.1.
Note – With the introduction of Sybase 12.5.0.1, using default settings during the
Sybase installation is no longer an appropriate path and will result in degradation of
performance on the Sybase server. If you have not done so yet, contact the Technical
Support organization for specific tuning information that is needed based upon
network configuration and usage.See “Technical Support” on page xviii.
4
Before You Begin
Before you begin, verify that you:
• Are following the correct NMS installation sequence (See “Installation Sequence”
on page 1-10)
• Have partitioned the disk(s) using raw partitions
• Have set up the system
B-STDX, CBX, and GX Network Management Station Installation Guide 4-1
Page 68

Installing Sybase 12.5.0.1
Installing Sybase 12.5.0.1
Installing Sybase 12.5.0.1
To run the Sybase 12.5.0.1 installation script:
Beta Draft Confidential
1. At the console login, enter
root. When prompted, enter <
root password
>.
2. Insert the Sybase 12.5.0.1 CD into the CD-ROM drive.
Note – In a new Xterm window on the local system, run “xhost +” as the user who
controls the system console. Executing this command enables you to display the
installation log on the local system.
3. Gunzip the Sybase install file by entering:
gunzip -c /cdrom/cdrom0/<
tar file name
>
Sybase install file name
> > /tmp/<
Sybase
For example,
gunzip -c /cdrom/cdrom0/syb_install.09.00.00.00.tgz >
/tmp/syb_install.09.00.00.00.tar
Note – This command will take several minutes to complete.
4. Change to the /opt/cv_scripts directory by entering:
cd /opt/cv_scripts
5. Run the Sybase installation script by entering:
./install_sybase
The following message appears:
Verifying super user privileges...
Would you like to view (tail -f) the install log (default=y)?
The Tail window allows users to view a log of the installation process.
6. Press Return to accept the default (yes).
The following message appears:
What display should the install log xterm go to
(default:0.0)?
7. Press Return or enter <
local hostname
>:0.0.
The tail window appears.
The following message appears:
WARNING: You need a minimum of two 400 Mhz CPUs and 1 GB of
RAM in order to run this software properly. Would you like to
continue? (Y/N)
4-2 B-STDX, CBX, and GX Network Management Station Installation Guide
Page 69

Beta Draft Confidential
8. If you have the memory requirements, enter y.
Installing Sybase 12.5.0.1
Installing Sybase 12.5.0.1
If you do not have the memory requirements, enter
you have the requirements.
The Sybase Installation Menu appears:
[Press ^ C to abort...]
Sybase Installation Menu...
1. Set Up the system before SYBASE Installation
2. Install Sybase
3. Upgrade Sybase
4. Configure a Remote Sybase Backup Server
5. Configure an Additional Sybase Data Device
6. Exit
Please select one of the above options [1-6]?
n and restart the install once
Figure 4-1. Sybase Installation Menu
9. At the Sybase Installation Menu, enter
2.
The following message appears:
The following items are required to be completed before
performing this step.
1. Space requirements must be clarified.
2. Step 1 from the Sybase menu must be completed.
Do you wish to continue? <y|n> [default=y]:
10. Press Return to continue.
The system displays the parameters you entered and prompts you to make any
necessary changes. Figure 4-2 shows an example of raw partition parameters.
B-STDX, CBX, and GX Network Management Station Installation Guide 7/12/044-3
Page 70

Installing Sybase 12.5.0.1
Installing Sybase 12.5.0.1
Sybase Installation Parameter
*******************************
Beta Draft Confidential
Parameter
*********
0. Done Editing
1. SYBASE /opt/sybase
2. DSQUERY CENTRAL
3. HOSTNAME central
4. BACKUP_HOSTNAME central
5. SYB_TCP_Sock 1025
6. SYB_BACKUP_TCP_Sock 1026
7. SA_USER sa
8. SYB_ERR_LOG /opt/sybase/ASE-12_5/install/CENTRAL_err.log
9. SYB_Master_Dev /dev/rdsk/c0t1d0s0
10. SYB_Master_Size (MB) 201
11. SYB_Procs_Dev /dev/rdsk/c0t1d0s4
Value
***********************
12. SYB_Procs_Size (MB) 201
13. SYB_Cascade_Dev /dev/rdsk/c0t1d0s5
14. SYB_Cascade_Size (MB) 3601
15. SYB_Log_Dev /dev/rdsk/c0t1d0s6
16. SYB_Log_Size (MB) 3601
17. SYB_tempdb_Dev /dev/rdsk/c0t2d0s3
18. SYB_tempdb_Size (MB) 1025
19. SYB_Dev_Type Raw
Enter the number of the parameter you wish to alter :
Figure 4-2. Raw Partition Parameters
4-4 B-STDX, CBX, and GX Network Management Station Installation Guide
Page 71

Beta Draft Confidential
11. If you need to make additional changes, keep the following in mind:
• If you change parameters 9 through 19, the Sybase Master Device Menu
reappears. See Figure 3-7 on page 3-19.
• If you change parameter 1, the script prompts you to change parameter 8
(SYB_ERR_LOG).
Tabl e 4-1 provides a description for each of the Sybase parameters.
Table 4-1. Sybase Configuration Parameters
Sybase Parameter Description
Installing Sybase 12.5.0.1
Installing Sybase 12.5.0.1
SYBASE
DSQUERY
HOSTNAME
BACKUP_HOSTNAME
SYB_TCP_Sock
SYB_BACKUP_TCP_Sock
SA_USER
SYB_ERR_LOG
SYB_Master_Dev
SYB_Master_Size (MB)
SYB_Procs_Dev
SYB_Procs_Size (MB)
SYB_Cascade_Dev
Target directory for Sybase installation.
Sybase Server name, which should be your system’s
HOSTNAME (capital letters, no hyphens).
Name of Sybase workstation.
Name of Sybase workstation (same as HOSTNAME).
TCP socket number for Sybase.
TCP socket number for backup Sybase.
Default Sybase system administrator user name.
Default pathname of log file that contains all SQL Sybase
errors.
Pathname of Sybase Master device.
Size (in megabytes) of Master device.
Pathname of Sysprocsdev device.
Size (in megabytes) of Sysprocsdev device.
Pathname of NavisCore data device.
SYB_Cascade_Size (MB)
SYB_Log_Dev
SYB_Log_Size (MB)
SYB_tempdb_Dev
SYB_tempdb_Size (MB)
SYB_Dev_Type
B-STDX, CBX, and GX Network Management Station Installation Guide 7/12/044-5
Size (in megabytes) of NavisCore data device.
Pathname of NavisCore log device.
Size (in megabytes) of NavisCore log device.
Pathname of tempdb device.
Size (in megabytes) of tempdb device.
Type of Sybase device installation (FileSystem or Raw). The
install program sets this value automatically.
Page 72

Installing Sybase 12.5.0.1
Installing Sybase 12.5.0.1
12. When you complete your changes, enter 0 to continue.
The following message appears:
Do you wish to extract Sybase Installation media ‘y|n’
(default = ‘y’)?
13. Press Return.
14. The following message appears:
Install the media in your local device now.
*******************************************
Enter the full path of the media device:
15. Enter:
Beta Draft Confidential
/tmp/<
(For example, /tmp/syb_install.09.00.00.00.tar)
See the latest Software Release Notice for Sybase 12.5.0.1 for the Sybase tar file
name.
The following message appears:
The device was found and is ready for extraction.
Press Return to Continue....
16. Press Return.
Sybase tar file name
>
4-6 B-STDX, CBX, and GX Network Management Station Installation Guide
Page 73

Beta Draft Confidential
The following messages appear:
Extracting Sybase Installation Media from the device ...Done.
Running ’srvbuildres’ and creating the sybase
server.../opt/sybase/ASE-12_5/bin/srvbuildres:
Port number ’1025’ is being reserved or currently
in use by a running server.
/opt/sybase/ASE-12_5/bin/srvbuildres: Building Adaptive Server ’CENTRAL’:
/opt/sybase/ASE-12_5/bin/srvbuildres: Writing entry into directory services...
/opt/sybase/ASE-12_5/bin/srvbuildres: Directory services entry complete.
/opt/sybase/ASE-12_5/bin/srvbuildres: Building master device...
/opt/sybase/ASE-12_5/bin/srvbuildres: Master device complete.
/opt/sybase/ASE-12_5/bin/srvbuildres: Writing RUN_SERVER file...
/opt/sybase/ASE-12_5/bin/srvbuildres: RUN_SERVER file complete.
/opt/sybase/ASE-12_5/bin/srvbuildres: Starting server...
/opt/sybase/ASE-12_5/bin/srvbuildres: Server started.
/opt/sybase/ASE-12_5/bin/srvbuildres: Building sysprocs device and sybsystemprocs
database...
/opt/sybase/ASE-12_5/bin/srvbuildres: sybprocs device and sybsystemprocs database
created.
/opt/sybase/ASE-12_5/bin/srvbuildres: Running installmaster script to install system
stored procedures...
/opt/sybase/ASE-12_5/bin/srvbuildres: /opt/sybase/ASE-12_5/scripts/installmaster: 10%
complete.
/opt/sybase/ASE-12_5/bin/srvbuildres: /opt/sybase/ASE-12_5/scripts/installmaster: 20%
complete.
/opt/sybase/ASE-12_5/bin/srvbuildres: /opt/sybase/ASE-12_5/scripts/installmaster: 30%
complete.
/opt/sybase/ASE-12_5/bin/srvbuildres: /opt/sybase/ASE-12_5/scripts/installmaster: 40%
complete.
/opt/sybase/ASE-12_5/bin/srvbuildres: /opt/sybase/ASE-12_5/scripts/installmaster: 50%
complete.
/opt/sybase/ASE-12_5/bin/srvbuildres: /opt/sybase/ASE-12_5/scripts/installmaster: 60%
complete.
/opt/sybase/ASE-12_5/bin/srvbuildres: /opt/sybase/ASE-12_5/scripts/installmaster: 70%
complete.
/opt/sybase/ASE-12_5/bin/srvbuildres: /opt/sybase/ASE-12_5/scripts/installmaster: 80%
complete.
/opt/sybase/ASE-12_5/bin/srvbuildres: /opt/sybase/ASE-12_5/scripts/installmaster: 90%
complete.
/opt/sybase/ASE-12_5/bin/srvbuildres: /opt/sybase/ASE-12_5/scripts/installmaster: 100%
complete.
/opt/sybase/ASE-12_5/bin/srvbuildres: installmaster script complete.
/opt/sybase/ASE-12_5/bin/srvbuildres: Installing common character sets (Code Page 437,
Code Page 850, ISO Latin-1, Macintosh and HP Roman-8)...
/opt/sybase/ASE-12_5/bin/srvbuildres: Character sets installed.
/opt/sybase/ASE-12_5/bin/srvbuildres: Setting server name in Adaptive Server...
/opt/sybase/ASE-12_5/bin/srvbuildres: Server name added.
/opt/sybase/ASE-12_5/bin/srvbuildres: Server ’CENTRAL’ was successfully created.
Done Successfully. Creating the Data and Log devices
Please wait...
Running ’alter’ commands to expand the master device and
the tempdb file. This may take a few moments.
Installing Sybase 12.5.0.1
Installing Sybase 12.5.0.1
B-STDX, CBX, and GX Network Management Station Installation Guide 7/12/044-7
Page 74

Installing Sybase 12.5.0.1
Installing Sybase 12.5.0.1
Please Wait ...Done Successfully.
Increasing the Memory allocations to 28672 for improved performance ...
Note – The Lucent script increases memory allocation to allow basic Sybase
commands to execute. The script increases the allocation because the system defaults
have insufficient byte memory for Sybase commands. For more information, see the
Installation Guide Sybase Adaptive Server Enterprise on Sun Solaris.
The screen displays the following:
Increasing total memory
-----------------------
Increasing the Number of Users Connections
------------------------------------------
Beta Draft Confidential
By default, the Sybase installation sets the number of user
connections to 25. Lucent sets it to 150. If you need a
different number of connections then enter the number of
connections (25 or higher).
Enter the number of user connections [default=150] ?
17. Do one of the following:
• Press Return to accept the default of 150.
•Enter
<
Number of remote users
>.
The following messages appear:
Done...
Now increasing number of open objects for NavisCore
---------------------------------------------------
Done...
Now increasing number of open databases for NavisCore
---------------------------------------------------
Done...
Now increasing stack guard size for NavisCore
---------------------------------------------------
Done...
Now increasing number of locks for NavisCore
---------------------------------------------------
4-8 B-STDX, CBX, and GX Network Management Station Installation Guide
Page 75

Beta Draft Confidential
Done...
Please wait...
Restarting Server with increased options
The script shuts down and restarts the Sybase Server, enabling the new
configuration parameters to take effect.
The following messages appear:
Configuring Local Backup Server
*******************************
Running ’srvbuildres’ and creating the sybase
server.../opt/sybase/ASE-12_5/bin/srvbuildres: Port number ’1026’ is being
reserved or currently in use by a running server.
/opt/sybase/ASE-12_5/bin/srvbuildres: Building Backup Server ’SYB_BACKUP’:
/opt/sybase/ASE-12_5/bin/srvbuildres: Writing entry into directory
services...
/opt/sybase/ASE-12_5/bin/srvbuildres: Directory services entry complete.
/opt/sybase/ASE-12_5/bin/srvbuildres: Writing RUN_SYB_BACKUP file...
/opt/sybase/ASE-12_5/bin/srvbuildres: RUN_SYB_BACKUP file complete.
/opt/sybase/ASE-12_5/bin/srvbuildres: Starting server...
/opt/sybase/ASE-12_5/bin/srvbuildres: Server started.
/opt/sybase/ASE-12_5/bin/srvbuildres: Server ’SYB_BACKUP’ was successfully
created.
Backup Server Install Successful...
Backup Server/12.5.0.1/SWR 9981 IR/P/Sun_svr4/OS 5.8/rel
125x/2208/32-bit/OPT/Tue Feb 26 03:03:59 2002
Confidential property of Sybase, Inc.
...
Information is displayed on confidentiality of Sybase, Inc.
Installing Sybase 12.5.0.1
Installing Sybase 12.5.0.1
...
Logging Backup Server messages in file
‘/opt/sybase/ASE-12_5/install/JOOP_bckup_err.log’
Modifying Interfaces File format..
The SYBASE Installation Process is Complete...
**********************************************
Press Return to Continue ...
18. Press Return to continue. The Sybase Installation Menu appears.
19. At the Sybase Installation Menu, enter
6 to exit.
The following message appears:
Cleaning up temporary files......Done.
Exiting Installation script.
20. Remove the CD-ROM from the CD-ROM device.
21. To close the Tail window, with the cursor in the window, hold down <Ctrl> and
press C.
B-STDX, CBX, and GX Network Management Station Installation Guide 7/12/044-9
Page 76

Installing Sybase 12.5.0.1
Installing Sybase 12.5.0.1
The Sybase installation is complete.
22. Become the Sybase user by entering:
su - sybase
23. Source file that sets the environment variables by entering one of the following
commands:
If you are using C shell, enter:
source /opt/sybase/SYBASE.csh
If you are using Bourne shell, enter:
. /opt/sybase/SYBASE.sh
24. Initiate an isql session by entering:
Beta Draft Confidential
isql -U sa -P <
SA password
> -S <
database server name
>
For example, isql -U sa -P superbase -S CENTRAL
25. Check the Sybase version that is currently running by entering:
1> select @@version
2> go
Output similar to the following should be displayed:
Adaptive Server Enterprise/12.5.0.1/SWR 9982
IR/P/Sun_svr4/OS 5.8/rel12501/1776/64-bit/FBO/Tue Feb 26
01:22:10 2002
1> quit
> exit
Note – For information on Lucent-recommended patches, see the Software Release
Notice for Sybase 12.5.0.1.
26. Proceed to Chapter 5, “Installing HP OpenView 6.2.”
4-10 B-STDX, CBX, and GX Network Management Station Installation Guide
Page 77

Beta Draft Confidential
Installing HP OpenView 6.2
The HP OpenView for Sun system Version 6.2 network management software
application runs in conjunction with NavisCore on the NMS. This chapter describes
how to:
• Set up the system
5
• Install HP OpenView 6.2 software on the system
• Disable IP Discovery
• Verify the installation
• Obtain information on installing HP OpenView patches
In this guide, HP OpenView Network Node Manager (NNM) will simply be referred
to as HP OpenView.
Before You Begin
Before you set up the system, verify that you:
• Are following the correct NMS installation sequence (See “Installation Sequence”
on page 1-10)
• Have installed Solaris 8
• Have installed Solaris 8 required patches
• Have installed Sybase 12.5.0.1
• Have installed a Sybase backup server (local, remote, or both)
Note – See the Software Release Notice for NavisCore Release 09.00.00.00 to ensure
that you have all the required Solaris 8 patches installed prior to beginning the
installation of HP OpenView 6.2. If you do not, you will be required to exit out of the
installation prior to completion to install the patches.
B-STDX, CBX, and GX Network Management Station Installation Guide 5-1
Page 78

Installing HP OpenView 6.2
Beta Draft Confidential
Script File Installation Method
Script File Installation Method
The following sections show you how to:
• Set up the system
• Install HP OpenView 6.2
• Disable IP discovery
• Verify the HP OpenView installation
Setting Up the System
The procedure in this section includes:
• Loading the Lucent-supplied HP OpenView media
• Extracting the installation script from the media
• Running the installation script
• Setting up the system
When you run the installation script the first time, the script sets up the system by
adding semaphores to the
communication signal that indicates the status of a shared system resource, such as
shared memory. The installation encounters problems if you do not add semaphores to
the
/etc/system file. After the script updates this file, reboot the workstation.
To set up the system:
1. Verify that you are logged in as root user. You should see a
window.
If you are not logged in as root, enter
prompted, enter
2. Insert the HP OpenView 6.2 CD into the CD-ROM drive.
3. Change to the scripts directory by entering:
cd /cdrom/cdrom0/cv_scripts
4. Run the HP OpenView installation script by entering:
./install_cvux
The following message appears:
/etc/system file. A semaphore is an interprocess
# prompt in the Xterm
su - root in the Xterm window. When
<
root password
>.
Verifying superuser privileges.....
5-2 B-STDX, CBX, and GX Network Management Station Installation Guide
Page 79

Beta Draft Confidential
The NavisCore/UX Installation Menu appears (Figure 5-1).
[Press ^ C to abort...]
NavisCore/UX Installation...
1. Install HPOV
2. Install NavisCore
3. Help...
4. Exit
Please select one of the above options [1-4]?
Installing HP OpenView 6.2
Script File Installation Method
Figure 5-1. NavisCore/UX Installation Menu
5. At the NavisCore/UX Installation Menu, view the HP OpenView Installation
Menu by entering
1.
The HP OpenView Installation Menu appears (Figure 5-2).
[Press ^ C to abort...]
HP OpenView Installation Menu...
1. Install/Upgrade HP OpenView (to version 6.2)
2. Install Latest HP OpenView Patches (as of this release)
3. Enable IP Discovery Mechanism (Unsupported)
4. Disable IP Discovery Mechanism
5. Return to Main Menu
NOTE: Please refrain from using the ‘kill -9 [pid]’ command since
this may leave your system in an undesired state.
Please select one of the above options [1-5]?
Figure 5-2. HP OpenView Installation Menu
B-STDX, CBX, and GX Network Management Station Installation Guide 7/12/045-3
Page 80

Installing HP OpenView 6.2
Script File Installation Method
6. At the HP OpenView Installation Menu, set up the system by entering 1.
Note – When you select option 1 the first time, the script modifies the /etc/system
file. These modifications take effect once you reboot the system. However, when you
select option
The following message appears:
Would you like to view (tail -f) the install log (default=y)?
The Tail window allows users to view a log of the installation process.
7. Press Return.
Note – In a new Xterm window on the local system, run “xhost +” as the user who
controls the system console. Executing this command enables you to display the
installation log on the local system.
Beta Draft Confidential
1 again, the script installs HP OpenView 6.2.
The following message appears:
What display should the install log xterm go to
(default:0.0)?
8. Press Return or enter <
local hostname
>:0.0.
The Tail Window appears and the following message appears in the Xterm
window:
Note: In order to restore back to the original state of your
HP OpenView installation, it is recommended that you back
your system up before continuing with this procedure.
Complete all prerequisites before continuing.
Do you wish to continue? <y|n> [default=y]:
9. Press Return to continue.
The following message appears:
Modifications have been made to ‘/etc/system’. For the
changes to take effect, you must REBOOT the workstation now.
Then re-run the scripts after the system resumes.
#
10. At the # prompt, enter init 6 to reboot the system.
When the system reboots, the Sybase Server automatically shuts down and
restarts. If you installed a two-system configuration, the Sybase Server does not
shut down because Sybase now resides on another system.
11. Proceed to “Installing HP OpenView 6.2”.
5-4 B-STDX, CBX, and GX Network Management Station Installation Guide
Page 81

Beta Draft Confidential
Installing HP OpenView 6.2
In this section, you will:
• Run the installation script
• Install HP OpenView 6.2 software on the system
• Disable IP map discovery
• Verify the installation
To install HP OpenView 6.2:
Installing HP OpenView 6.2
Script File Installation Method
1. Verify that you are logged in as root user. You should see a
window.
If you are not logged in as root, enter:
su - root
When prompted, enter:
<
root password
2. Change to the cv_scripts directory by entering:
cd /cdrom/cdrom0/cv_scripts
3. Run the HP OpenView installation script by entering:
./install_cvux
The following message appears:
Verifying superuser privileges.....
The NavisCore/UX Installation Menu appears (Figure 5-3).
>
# prompt in the Xterm
B-STDX, CBX, and GX Network Management Station Installation Guide 7/12/045-5
Page 82

Installing HP OpenView 6.2
Script File Installation Method
Beta Draft Confidential
[Press ^ C to abort...]
NavisCore/UX Installation...
1. Install HPOV
2. Install NavisCore
3. Help...
4. Exit
Please select one of the above options [1-4]?
Figure 5-3. NavisCore/UX Installation Menu
4. At the NavisCore/UX Installation Menu, view the HP OpenView Installation
Menu by entering
1.
The HP OpenView Installation Menu appears (Figure 5-4).
[Press ^ C to abort...]
HP OpenView Installation Menu...
1. Install/Upgrade HP OpenView (to version 6.20)
2. Install Latest HP OpenView Patches (as of this release)
3. Enable IP Discovery Mechanism (Unsupported)
4. Disable IP Discovery Mechanism
5. Return to Main Menu
NOTE: Please refrain from using the ‘kill -9 [pid]’ command since
this may leave your system in an undesired state.
Please select one of the above options [1-5]?
Figure 5-4. HP OpenView Installation Menu
5-6 B-STDX, CBX, and GX Network Management Station Installation Guide
Page 83

Beta Draft Confidential
5. At the HP OpenView Installation Menu, enter 1 to install HP OpenView 6.2.
The following message appears:
Would you like to view (tail -f) the install log (default=y)?
The Tail window allows users to view the installation log.
6. Press Return.
Note – In a new Xterm window on the local system, run “xhost +” as the user who
controls the system console. Executing this command enables you to display the
installation log on the local system.
The following message appears:
What display should the install log xterm go to
(default:0.0)?
Installing HP OpenView 6.2
Script File Installation Method
7. Press Return or enter <
local hostname
>:0.0.
The following message appears:
Note: In order to restore back to the original state of your
HP OpenView installation, it is recommended that you back
your system up before continuing with this procedure.
Complete all prerequisites before continuing.
Do you wish to continue? <y|n> [default=y]:
8. Press Return to continue.
The script creates the Sybase and NMS user accounts. The script does this to
provide user accounts on the HP Server if you install a two-system configuration
(Sybase on one system, HP OpenView and NavisCore on another). If you are
installing a single-system configuration, the user accounts have already been
created by the Sybase installation script.
The following messages assume a single-system configuration:
Creating Group Account for ‘dba’
---------------------------------
The group, ‘dba’, already exists.
Creating a user account for sybase
---------------------------------------
The user, sybase, already exists.
Enter the Sybase environment path [default : /opt/sybase] ?
B-STDX, CBX, and GX Network Management Station Installation Guide 7/12/045-7
Page 84

Installing HP OpenView 6.2
Script File Installation Method
9. Press Return to accept the default of /opt/sybase.
The following message appears:
You must add at least one more user account.
Enter the name of the user [default : nms]?
10. Press Return to accept the default.
The following message appears:
Enter group to which the new user belongs [default : staff]?
11. Press Return to accept the default of staff.
The following messages appear:
Creating a user account for nms
---------------------------------------
The user, nms, already exists.
Enter the Sybase Server name [default : <Your system’s
Hostname in CAPITAL LETTERS>]
Beta Draft Confidential
12. Press Return to accept the default.
The following message appears:
Do you wish to continue? <y|n> [default=y]:
13. Press Return to continue.
The following message appears:
Creating Additional User Accounts
-----------------------------------
1. Create User Account.
2. Proceed to the Next Step.
Please select one of the above options [1 or 2] ?
14. Do one of the following:
• To create additional user accounts, enter
1.
The script prompts you for information similar to that provided for the nms
user account (see step 13 on page 5-8). Once you create the additional user,
the Creating Additional User Accounts Menu reappears.
• To proceed to the next step, enter
The following message appears when you enter
2.
2:
The CD Installation media was found!
[Hit Return to continue with the installation.]
5-8 B-STDX, CBX, and GX Network Management Station Installation Guide
Page 85

Beta Draft Confidential
15. Press Return.
The following message appears:
===========================================================
Welcome to the HP OpenView Network Node Manager Installation
NNM Release B.06.20 for SunOS
Apr 23 2001
Copyright (c) 1990-2001 Hewlett-Packard Company, All Rights
Reserved.
===========================================================
Do you want to install the manpages? (y|n):
16. Enter y or n.
The following messages may appear, depending on your configuration:
We did not detect any discovery data on your system. We
recommend that you let Network Node Manager discover your
network automatically.
Installing HP OpenView 6.2
Script File Installation Method
NOTE: Advanced users may not want to autodiscover if you want
to configure how Network Node Manager performs discovery
(e.g. install discovery filters, use a seedfile, or
configure level 2 discovery).
To start Network Node Manager discovery manually, you can
select "Options -> Network Polling Configuration: IP" from
the Network Node Manager user interface (ovw).
Do you want Network Node Manager to discover your network
automatically after the installation? (y/n):
17. Enter n.
The following message appears:
Do you want the Network Node Manager user interface to be
displayed after the installation? (y|n):
18. Enter y.
If you have a web browser installed, the following message appears:
** NOTE ** This install program has chosen the following
browser for you:
/usr/dt/bin/netscape
to launch Network Node Manager web interface.
If this is not the browser you would like to use, please edit
the /etc/opt/OV/share/conf/ovweb.conf file after this
installation.
If you do not have a web browser installed, the following message appears:
* * * WARNING * * *
B-STDX, CBX, and GX Network Management Station Installation Guide 7/12/045-9
Page 86

Installing HP OpenView 6.2
Script File Installation Method
Install was not able to find a Web Browser in well known
locations on your system. Until you install a Web Browser,
you will not be able to request your license over the Web,
nor will you be able to access the Network Node Manager Web
interface.
Please enter your Web Browser with full directory path or
enter "s" to skip: /usr/dt/bin/netscape
The following messages appear if you entered “s” to skip when prompted for the
directory path of your Web Browser.
* * * WARNING * * *
If you plan to install a Web Browser at a later time, you
will need to create the /etc/opt/OV/share/conf/ovweb.conf
file after your browser installation. You need to add the
following two lines to the file:
Browser: <Your browser name with full path> %s
Port: 8880
Beta Draft Confidential
** NOTE ** This install program has chosen the following
browser for you: /opt/software/tools/bin/netscape
to launch Network Node Manager web interface.
If this is not the browser you would like to use, please edit
the /etc/opt/OV/share/conf/ovweb.conf file after this
installation.
Messages similar to the following appear:
This installation will put the following software on your
system:
HP OpenView Network Node Manager for Solaris 2.x
HP OpenView Network Node Manager Manpages
Do you want to continue with this installation? (y|n):
19. To continue, enter y.
The following messages appear:
No further interaction is needed for this installation.
A typical Network Node Manager installation takes about 25
to 35 minutes.
If you want to closely track the progress of the
installation, open a separate terminal window and give the
command:
tail -f /var/adm/sw/swagent.log
Notes and warnings will be written to this log as well as indications of the
installation’s progress.
5-10 B-STDX, CBX, and GX Network Management Station Installation Guide
Page 87

Beta Draft Confidential
Note – Do not use the kill command or Control-C to exit the install script once
the installation process has begun. Using these commands may leave files on your
system in a corrupt state.
The following messages appear:
Congratulations! Your installation was successful.
Starting Network Node Manager daemons:
Name PID State Last Message(s)
OVsPMD 5372 RUNNING -
pmd 5373 RUNNING Initialization complete.
Installing HP OpenView 6.2
Script File Installation Method
ovrequestd 5374 RUNNING Initialization complete.
ovtrapd 5455 RUNNING Initialization complete.
ovsessionmgr 5453 RUNNING Initialization complete.
ovactiond 5456 RUNNING Initialization complete.
ovwdb 5454 RUNNING Initialization complete.
ovalarmsrv 5457 RUNNING Loading alarms from database
ovtopmd 5461 RUNNING Connected to native database
“openview”.
ovuispmd 5468 RUNNING Initialized. 0 ovw clients
registered.
ovalarmsrv 5457 RUNNING Initialization complete.
snmpCollect 5470 RUNNING Initialization complete.
netmon 5469 RUNNING Loading databases...
httpd - unknown (Does not communicate with
ovspmd.)
ovdbcheck 5458 RUNNING Connected to embedded
database.
ovspmd: Attempt to start HP OpenView services is complete.
B-STDX, CBX, and GX Network Management Station Installation Guide 7/12/045-11
Page 88

Installing HP OpenView 6.2
Script File Installation Method
Would you like to view the Release Notes? (y|n):
20. Enter n.
The following messages appear:
You can view the Release Notes at URL:
file:/opt/OV/www/htdocs/C/ReleaseNotes/README_NNMGR.html
Network Node Manager Installation complete.
You may access the Network Node Manager interface by
running:
/opt/OV/bin/ovw &
You may access the HP OpenView Java-based Web Interface
using a Web Browswer pointed at the URL:
http://[system_name]:8880/OvCgi/ovlaunch.exe
See the Release Notes for supported Web Browsers and for more
details on using the HP OpenView Java-based Web Interface.
Beta Draft Confidential
Hit the Return key to Continue...
Note – For details on the installation, review the log file
/var/adm/sw/swagent.log).
(
21. Proceed to “Disabling IP Discovery”.
5-12 B-STDX, CBX, and GX Network Management Station Installation Guide
Page 89

Beta Draft Confidential
Disabling IP Discovery
IP Discovery finds all IP-addressable nodes on your network and creates an object for
each discovered node. Lucent switches do not respond to IP Discovery; therefore, the
script disables it. See Appendix C, “IP Discovery” to re-enable IP Discovery.
Caution – Lucent does not support IP Discovery. Enabling this feature severely
!
affects the performance of your NMS Server.
When IP Discovery is disabled, the following messages display:
HP OpenView Network Node Manager Configuration
**********************************************
Setting up Symbolic Links................Done.
Disabling HP OpenView IP Configuration
****************************************
Installing HP OpenView 6.2
Script File Installation Method
Stopping the OV Platform...Done.
Removing netmon...Done.
Removing ovrepld...Done.
Removing snmpcollect...Done.
Removing ipmap...Done.
Disabling XNmevents for netmon and snmpCollect...Done.
The disabling of IP Map discovery is complete.
Starting the HP OpenView object database...Done.
Processing field registration entries...Done.
Do you wish to continue? <y|n> [default=y]:
1. Press Return to continue.
The following message appears:
Verifying the HPOV installation
----------------------------------
The HP OpenView Window and the Events Category dialog box
will appear. Choose Map => Exit from HP OpenView to end the
verification.
An HP OpenView Windows QUESTION dialog box will be displayed with the
following message:
You are currently running Network Node Manager with a
temporary password. This password will expire on
<day/date/time/year>.
B-STDX, CBX, and GX Network Management Station Installation Guide 7/12/045-13
Page 90

Installing HP OpenView 6.2
Beta Draft Confidential
Script File Installation Method
If you have purchased Network Node Manager, you can now
register your product, which will give you a permanent
password to fully enable your product. You will need your HP
Order Number (which is found on your Entitlement
Certificate) when filling out your password request.
2. At the HP OpenView Windows QUESTION dialog box, choose Ok if you’d like
to register your product at this time. If you’d like to register it at a later time,
choose Cancel.
Note – See the Software Release Notice for HP OpenView 6.2 for more information
on obtaining a permanent password.
3. Proceed to “Verifying the HP OpenView Installation”.
Verifying the HP OpenView Installation
The HP OpenView 6.2 installation successfully completes when you see the HP
OpenView Window and Event Categories window (Figure 5-5).
Figure 5-5. HP OpenView 6.2 Window
To complete the installation:
1. Exit the HP OpenView window and Events Category window by selecting
⇒ Exit.
Map
5-14 B-STDX, CBX, and GX Network Management Station Installation Guide
Page 91

Beta Draft Confidential
2. At the OpenView Windows WARNING dialog box, choose OK.
The HP OpenView window and Events Category window disappears.
3. Proceed to “Applying HP OpenView 6.2 Patches”.
Applying HP OpenView 6.2 Patches
1. At the HP OpenView Installation Menu, enter 2 to install the HP OpenView
patches.
The following message appears:
Would you like to view (tail -f) the install log (default=y)?
2. Press Return.
Note – In a new Xterm window on the local system, run “xhost +” as the user who
controls the system console. Executing this command enables you to display the
installation log on the local system.
Installing HP OpenView 6.2
Script File Installation Method
The following message appears:
What display should the install log xterm go to
(default:0.0)?
3. Press Return.
The following message appears:
Enter a temporary working directory with at least 280 MBytes
for the patch installation [default=/tmp/HP_PATCH]?
4. Press Return.
The following message appears:
Enter a directory with at least 280 MBytes for the patch
uninstall save files [default=/system]?
5. Press Return.
Note – If you do not have enough space in /system, you will get a message to try
again when more space is available and you will be exited out of the install script.
6. After the patches are installed, at the HP OpenView Installation Menu, enter
return to the main menu.
5 to
7. At the NavisCore/UX Installation Menu, exit by entering
The following message appears:
Cleaning up temporary files......Done.
Exiting Installation script.
B-STDX, CBX, and GX Network Management Station Installation Guide 7/12/045-15
4.
Page 92

Installing HP OpenView 6.2
Script File Installation Method
8. To close the Tail window, with the cursor in the window, hold down <Ctrl> and
press C.
Note – See the Software Release Notice for HP OpenView 6.2 to verify that you have
the latest mandatory patches.
9. Proceed to Chapter 6, “Installing NavisCore.”
Beta Draft Confidential
5-16 B-STDX, CBX, and GX Network Management Station Installation Guide
Page 93

Beta Draft Confidential
Installing NavisCore
NavisCore is an integrated network-management software application that
incorporates HP OpenView to:
• Create and edit network maps
• Configure Lucent switches
6
• Create and edit both nodes and trunks
• Monitor network activity
This chapter describes how to install NavisCore and add a static route to the Network
Management Station.
Before You Begin
Before you install NavisCore, verify that you:
• Are following the correct NMS installation sequence (See “Installation Sequence”
on page 1-10)
• Have installed HP OpenView 6.2
• Have installed HP OpenView 6.2 patches
B-STDX, CBX, and GX Network Management Station Installation Guide 6-1
Page 94

Installing NavisCore
Beta Draft Confidential
Script File Installation Method
Script File Installation Method
The following sections show you how to:
• Set up the system
• Install NavisCore
Setting Up the System
To install NavisCore:
1. Verify that you are logged in as root. If you are not logged in as root, enter:
su - root
When prompted, enter:
<
root password
2. At the # prompt, verify Sybase is running by entering:
>
ps -aef | grep data
A message similar to the following appears:
Figure 6-1. Sybase Server Messages
The first line of output indicates Sybase is running.
3. If Sybase is not running, enter:
/etc/rc2.d/S97sybase
4. Verify that HP OpenView Services is running by entering:
/opt/OV/bin/ovstatus
6-2 B-STDX, CBX, and GX Network Management Station Installation Guide
Page 95

Beta Draft Confidential
A similar message to the following appears if HP OpenView Services are running.
Installing NavisCore
Script File Installation Method
Figure 6-2. HP OpenView Services window
5. If HP OpenView Services are not running, enter:
/opt/OV/bin/ovstart
6. Insert the NavisCore CD-ROM into the CD-ROM drive.
7. Change to the
cd /cdrom/cdrom0/cv_scripts
8. Run the installation script by entering:
./install_cvux
9. Proceed to “Installing NavisCore”.
cv_scripts directory by entering:
B-STDX, CBX, and GX Network Management Station Installation Guide 7/12/046-3
Page 96

Installing NavisCore
Script File Installation Method
Installing NavisCore
The NavisCore/UX Installation Menu appears:
[Press ^ C to abort...]
NavisCore/UX Installation...
1. Install HPOV
2. Install NavisCore
3. Help...
4. Exit
Please select one of the above options [1-4]?
Beta Draft Confidential
Figure 6-3. NavisCore/UX Installation Menu
1. At the NavisCore/UX Installation Menu, enter
2.
The following message appears:
Would you like to view (tail -f) the install log (default=y)?
The Tail window allows users to view the installation log.
2. Press Return.
Note – In a new Xterm window on the local system, run “xhost +” as the user who
controls the system console. Executing this command enables you to display the
installation log on the local system.
The following message appears:
What display should the install log xterm go to
(default:0.0)?
3. Press Return or enter <
local hostname
>:0.0.
6-4 B-STDX, CBX, and GX Network Management Station Installation Guide
Page 97

Beta Draft Confidential
The Tail Window and the NavisCore Installation Menu appear:
[Press ^ C to abort...]
NavisCore Installation Menu...
1. New NavisCore Installation (DB Creation)
2. Upgrade NavisCore Installation (DB Upgrade)
3. HP OpenView Integration only (NO DB Action)
4. Return to Main Menu
Please select one of the above options [1-4]?
Installing NavisCore
Script File Installation Method
Figure 6-4. NavisCore Installation Menu
4. Select a new NavisCore installation by entering
1.
The following messages appear:
**********************************************************
Detected a valid operating system (SunOS 5.8) for this
install.
**********************************************************
Complete all prerequisite tasks before continuing. See the
CV/UX Installation Documentation for more information.
Do you wish to continue? <y|n> [default=y]:
5. Press Return to continue.
Note – See the Sybase worksheet in Appendix F for step 6 through step 10.
The following message appears:
Sybase Information Request
*****************************
Enter the Sybase install path (default=/opt/sybase)?
6. Press Return to accept the default of /opt/sybase or enter
<
Sybase install path
B-STDX, CBX, and GX Network Management Station Installation Guide 7/12/046-5
>.
Page 98

Installing NavisCore
Script File Installation Method
7. At the Enter Database Server Name prompt, do either of the following:
Beta Draft Confidential
• Press Return to accept the default,
•Enter <
database server name>.
<your system’s hostname>.
8. At the Enter the Sybase system administrator user name prompt,
press Return to accept the default (sa).
9. At the
10. At the Enter Database SA Password prompt, enter <
Enter the NavisCore database name prompt, press Return to
<
accept the default (cascview) or enter
NavisCore database name>.
SA password>.
(For example, superbase)
When prompted, re-enter the SA password.
The following message appears:
*****************************************************
Modifying pmd.lrf file to generate trapd.log file...
DONE.
*****************************************************
Do you wish to preserve trapd.conf customizations ‘y/n’
(default = ‘y’)?
11. Press Return to accept the default.
The following message appears:
Do you wish to extract CV/UX Installation media ‘y|n’
(default = ‘y’) ?
12. Press Return.
The following message appears:
Install the media in your device now.
***********************************
13. If you are prompted to enter the path of the local host, enter:
/cdrom/cdrom0/
where
<NavisCore tar file name>
<NavisCore tar file name>
is the NavisCore tar file name. See the
latest Software Release Notice for NavisCore Release 09.00.00.00 for the
NavisCore tar file name.
The following message appears:
The CD Installation Media was found!
[Hit Return to continue with the installation.]
6-6 B-STDX, CBX, and GX Network Management Station Installation Guide
Page 99

Beta Draft Confidential
14. Press Return to continue.
The following message appears:
Extracting CV/UX Installation Media into /opt...Done.
Do you wish to continue? <y|n> [default=y]:
15. Press Return to continue.
The following message appears:
Checking for pre-existing NavisCore Installations
***************************************************
Creating a New NavisCore database
**************************************
Enter the NavisCore database data size (default: 100):
16. Press Return to accept the default of 100.
Installing NavisCore
Script File Installation Method
17. At the
Enter the NavisCore database Log size prompt, press Return to
accept the default, 100.
The following message appears:
Creating the NavisCore database...
Data Space = ‘100’ MB
Log Space = ‘100’ MB
Checking for pre-existing NavisCore Installations
*************************************************
Running database script DBUTL_CreateDB.scr...Done.
Running database script DBUTL_UpgradeDB.scr...Done
Configuring NavisCore Environment
***********************************
Setting $SYBASE in /opt/CascadeView/etc/cvdb.cfg to ‘/opt/sybase’.
Setting the database server name in /opt/CascadeView/etc/cvdb.cfg
database server name
to <
Installing Java 2 Runtime Environment
*************************************
>
Note – NavisCore releases prior to 05.xx.xx.xx do not install the Java 2 Runtime
Environment.
uncompressing package file.....
Extracting package file....
Processing package instance <SUNWj2rt> from </opt/CascadeView/jre>
JDK 1.2 run time environment
(sparc) 1.2.2,REV=2000.03.17.13.20
## Software contents file initialized
B-STDX, CBX, and GX Network Management Station Installation Guide 7/12/046-7
Page 100

Installing NavisCore
Script File Installation Method
The selected base directory </opt/CascadeView/jre/jre1.2/usr> must
exist before installation is attempted.
Do you want this directory created now [y,n,?,q]
18. Enter y and press Return.
Using </opt/CascadeView/jre/jre1.2/usr> as the package base
directory.
## Processing package information.
## Processing system information.
## Verifying package dependencies.
The following messages appear:
WARNING:
The <SUNWcar> package "Core Architecture, (Root)" is a
prerequisite package and should be installed.
WARNING:
The <SUNWkvm> package "Core Architecture, (Kvm)" is a
prerequisite package and should be installed.
WARNING:
The <SUNWcsr> package "Core Solaris, (Root)" is a
prerequisite package and should be installed.
WARNING:
The <SUNWcsu> package "Core Solaris, (Usr)" is a
prerequisite package and should be installed.
WARNING:
The <SUNWcsd> package "Core Solaris Devices" is a
prerequisite package and should be installed.
WARNING:
The <SUNWmfrun> package "Motif RunTime Kit" is a
prerequisite package and should be installed.
Do you want to continue with the installation of <SUNWj2rt> [y,n,?]
Beta Draft Confidential
19. Enter y and press Return.
The following messages appear:
## Verifying disk space requirements.
## Checking for conflicts with packages already installed.
## Checking for setuid/setgid programs.
This package contains scripts which will be executed with
super-user permission during the process of installing this
package.
Do you want to continue with the installation of <SUNWj2rt> [y,n,?]
6-8 B-STDX, CBX, and GX Network Management Station Installation Guide
 Loading...