

Lowrance TH-FLWBL User Manual
Pub. 988-0154-081
TH-FLWBL
Polyurethane Marine Adhesive Sealant
Rudders
Engine
intakes
1
Installation Instructions for
Through-Hull Transducer
The TH-FLWBL is an 11°, 200 kHz transducer designed for use with
Lowrance blue-connector sonar units. This instruction sheet will help you
install your TH-FLWBL through-hull transducer.
Read these instructions carefully before attempting the installation. De-
termine which mounting location is right for your transducer and boat.
Remember, the transducer installation is the most critical part of
a sonar installation.
Recommended Tools and supplies
Transducer
Recommended tools for this job include: drill, 1/8" (3.17 mm) drill bit for pilot
hole, hole saw with a blade appropriate to your hull type. Required supplies
for this job include: high quality, marine grade above- or below-waterline
5200 or equivalent). For saltwater use, you will also need a water-based anti-
fouling paint to prevent sea growth. (Supplies not included.)
Selecting a Transducer Location
The transducer's mounting location is an important factor in its performance.
Consider the following issues carefully before beginning installation.
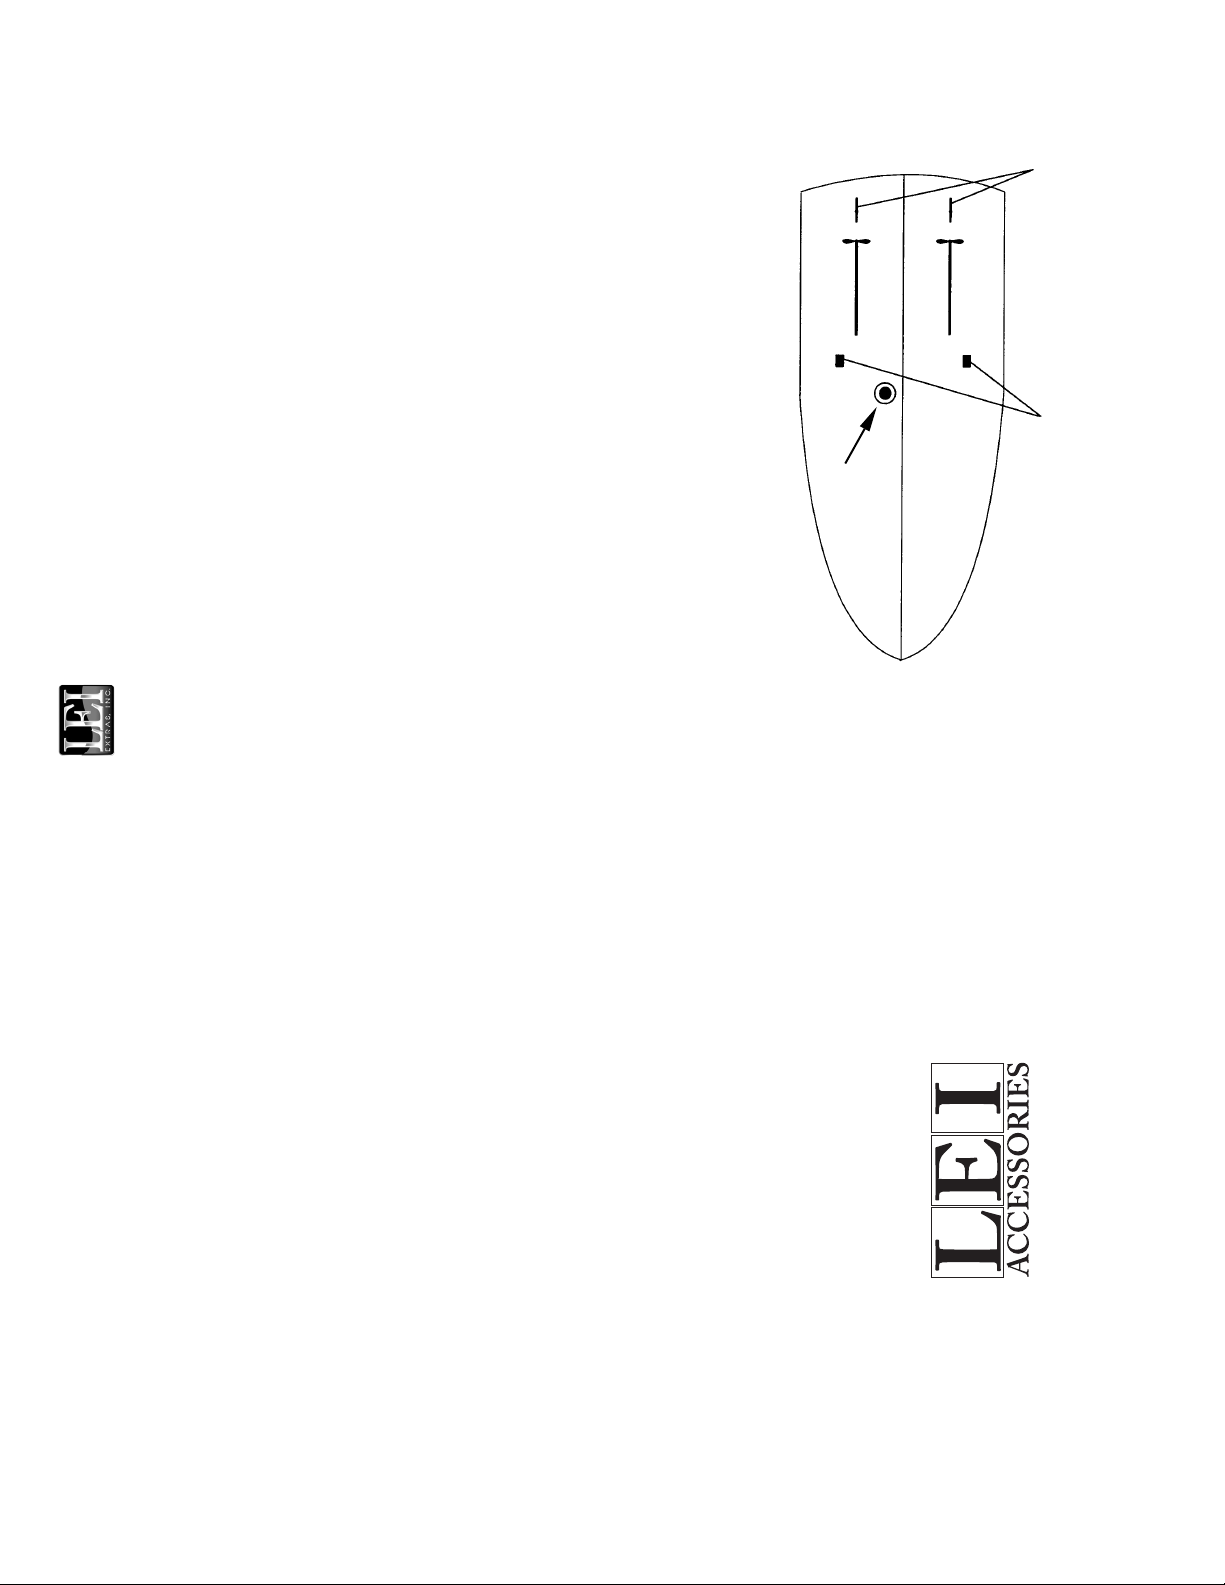
1. Water flow: The transducer should be located in an area that has a
smooth water flow. This is typically close to the centerline of the hull.
2. Inboard powered hulls: On inboard powered hull boats, you should
install the transducer ahead of the propeller shafts and rudders. This is
sealant/adhesive compound (3M
typically an amidships location ahead of the engine's water intakes.
Mount the transducer amidships, forward of any fittings on the hull that
Products
will cause excessive water noise.
All Rights Reserved
Never use ketone-based antifouling paint. Ketones can attack
many plastics, and could cause damage to the transducer.
6. Route the transducer cable to the sonar unit. If the cable is too long, do
not cut it! Coil and store the excess cable.
7. Check for leaks! After the boat is placed in the water, check for leaks
immediately. Check the boat for leaks again several times during the
next 24 hours. If you notice any leakage at all, the transducer should be
re-installed with a new coat of adhesive.
Maintenance
Sea growth can accumulate rapidly on the transducer's surface. This
growth will reduce the transducer's performance. To prevent this, any
portions of the transducer surface exposed to saltwater must be coated
with antifouling paint. Use only water-based paint.
Caution:
Apply paint every 8 months or at the beginning of each boating season.
Clean the transducer periodically with a soft cloth and mild household
detergent. If fouling does occur, use a stiff brush or putty knife to remove
the growth. Wet sanding of the fouled surface is permissible with #220 or
finer-grade sandpaper.
and Eagle
For Lowrance
Pub. 988-0154-081 © Copyright 2004
4
Printed in USA 051204 LEI Extras, Inc.
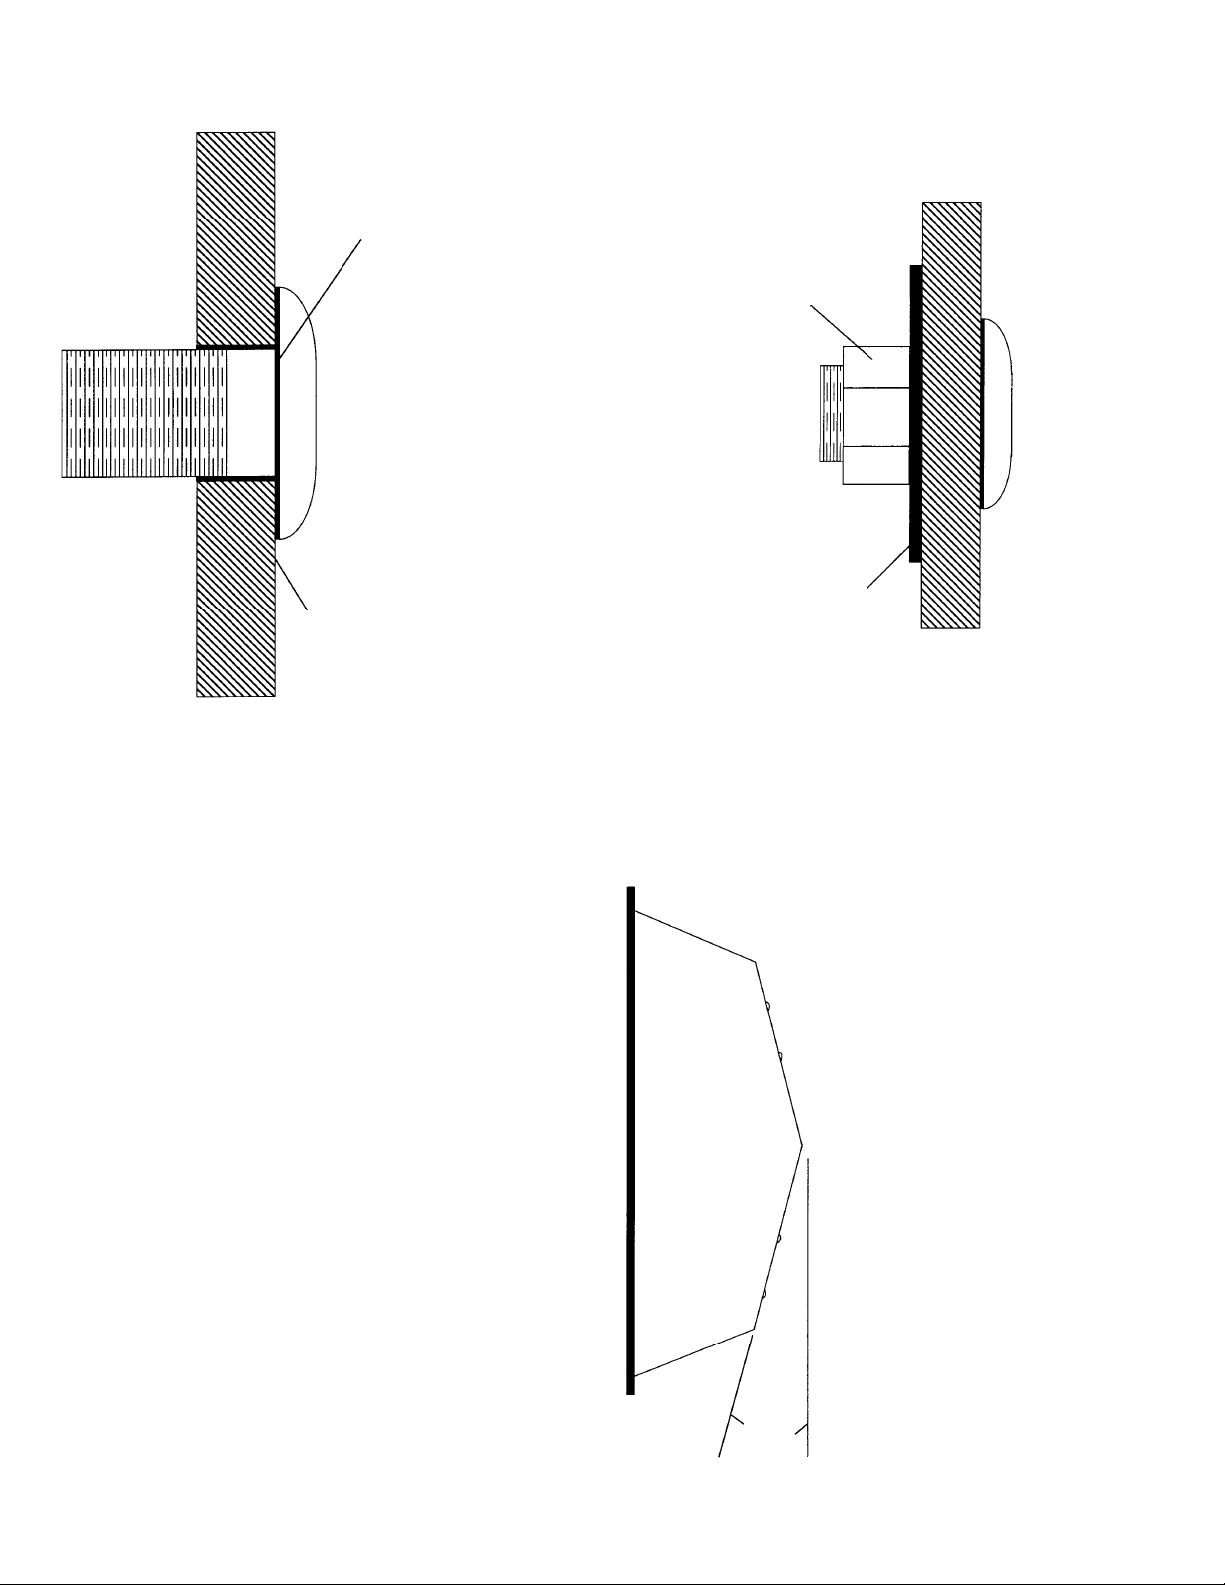
Apply adhesive
liberally
the lower part of the sensor as shown.
Nut
3
the transducer in place.
Hull
Washer
Spread adhesive around the lip of the transducer housing and up around
3. Using the marine-grade sealant/adhesive, apply a 1/8" (3.17 mm) bead
of sealant around the lip of the transducer housing. Also spread the seal-
ant up around the lower part of the sensor housing, spreading it higher
on the housing than the hull is thick.
4. From the outside of the hull, pass the transducer cable up through the
hole, then push the transducer with sealant into it. Use a twisting motion
to squeeze out excess sealant. Remove excess sealant from the outside of
the hull before it dries, to ensure a smooth flow of water around the
transducer.
5. On the inside of the hull, slide the provided rubber washer over the
housing and install the nut. Hand-tighten the nut, being careful not to
over-tighten. Do not use a wrench to tighten the nut!
After positioning the provided washer, use the provided nut to secure
2
This transducer is designed to perform best in boats with a hull deadrise
of 10° or less. The transducer will work at greater angles, but it will be
sending signals off at an angle instead of straight to the bottom, so it
won't return true depth readings. The higher angle will also prevent the
transducer from performing to its full depth potential.
3. Planing hulls: On planing hull boats with outboard motors or stern
drives, you should install the transducer close to the transom to ensure it
will be in the water at all times.
4. Noise: When choosing a transducer location, keep in mind that ambient
noise is always present, from the mechanical noise made by the engine(s),
the movement of the hull through the water, and other sources. These
sound waves can interfere with the operation of the transducer. While am-
bient noise can't be eliminated, careful selection of a mounting location can
minimize the effect of vessel-generated noise. The lower the noise level, the
greater the sonar's unit's usable sensitivity.
5. Surface obstructions: don't mount the transducer behind other
through-hull fittings. Such obstructions will interfere with the smooth
flow of water necessary for a clean sonar reading.
6. Clearance: Make sure there is enough room on the inside of the hull
to install the transducer and there is clearance to attach the nut.
NOTE:
Deadrise of
This transducer is designed for hulls with a deadrise of 10° or less.
10° or less
Installing the Transducer in Your Boat's Hull
1. After you've determined the proper location for the transducer, drill a
1/8" (3.17 mm) pilot hole from inside the hull. Check the outside of the hull
to make sure there is no obstruction in the way, such as a strake. If you
find a problem with the chosen location, fill the pilot hole with the sealant-
adhesive compound and choose another mounting location.
2. The TH-FLWBL transducer requires a 2" (50.8 mm) hole. Using a hole
saw, drill from the outside of the hull to prevent the gel coat from crack-
ing on fiberglass hulls. Use eye and face protection when drilling the hole.
Afterwards, clean the area around the hole with detergent or alcohol.
This will establish a good surface for the adhesive.
 Loading...