

Page 1
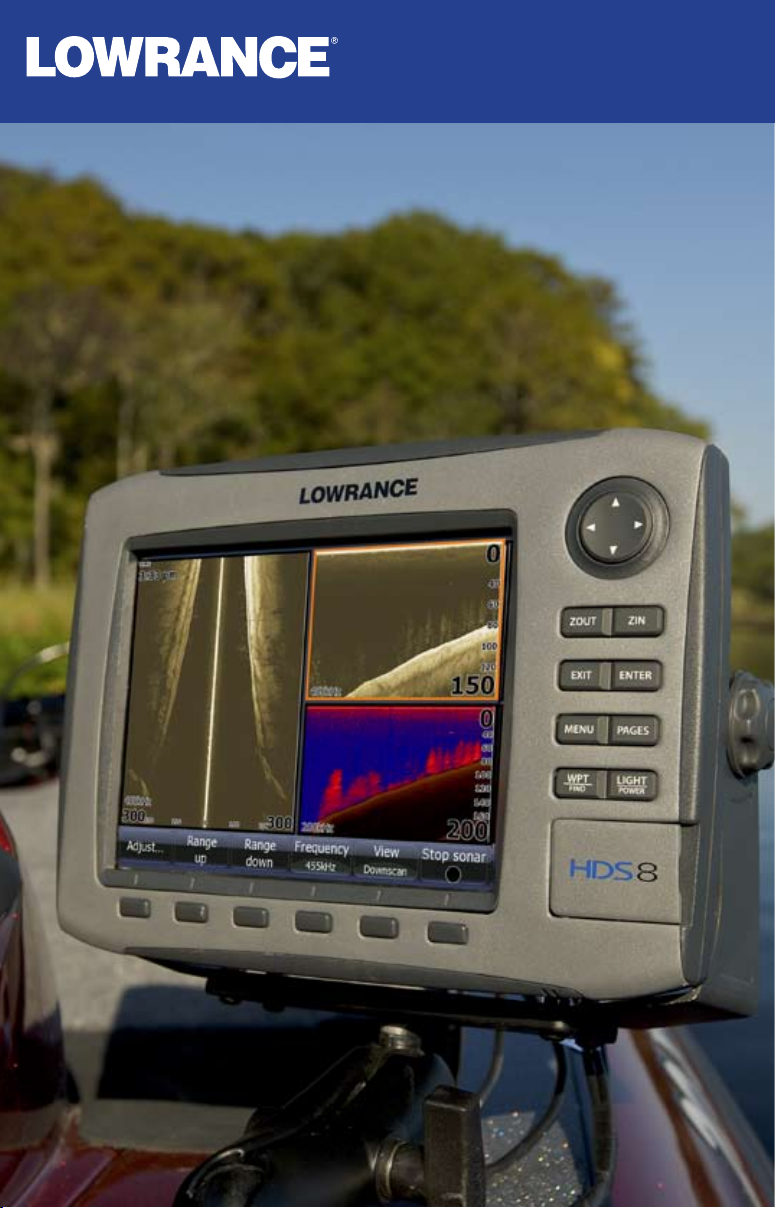
TM
StructureScan
Sonar Imaging
Operation Manual
Page 2

Copyright © 2009 Navico
All Right Reserved.
No part of this manual may be copied, reproduced, republished, transmitted or distributed
for any purpose, without prior written consent of Navico.
StructureScan™ is a trademark and Lowrance ® and Navico ® are registered trademarks of
Navico, Inc.
Navico may nd it necessary to change or end our policies, regulations and special
offers at any time. We reserve the right to do so without notice. All features and
specications subject to change without notice.
For user manuals and the most current information on this product, its operation and
accessories, visit our web site:
www.lowrance.com
Lowrance Electronics
12000 E Skelly Dr.
Tulsa, OK 74128-2486
Page 3

Table of Contents
Softkeys ...................................................................................................... 2
StructureScan ........................................................................2
Sidescan ..........................................................................................2
Downscan........................................................................................3
Displaying Sidescan and Downscan ............................................5
Screen Congurations ...................................................................5
Overlay Downscan ..................................................................................... 6
Overlay Transparency ................................................................................ 7
StructureScan Options Softkey ................................................................. 7
StructureScan Menu.......................................................................8
Contrast ...................................................................................................... 8
Range ......................................................................................................... 8
Frequency................................................................................................... 8
View ............................................................................................................ 9
Palette ........................................................................................................ 9
Structure Options .........................................................................10
Structure Surface Clarity .......................................................................... 10
Structure Noise Rejection ........................................................................ 10
Flip Left/Right ........................................................................................... 10
Range Lines ..............................................................................................11
Measure Distance......................................................................................11
Stop Sonar................................................................................................ 12
Log sonar.................................................................................................. 12
Log All Channels....................................................................................... 13
Source ...................................................................................................... 13
Settings..................................................................................................... 13
Viewing Structure History ............................................................13
Save Waypoints ............................................................................14
1
Page 4
Softkeys
Instructions in this manual are based on HDS unit menus, not softkeys. If you have
an HDS-8 or HDS-10, you can get the same results using the softkeys.
To use softkeys:
Touch the desired softkey to change settings, view a softkey menu 1.
or adjustment scrollbar.
Use the keypad to select menu items and make adjustments to 2.
scrollbars. Press EXIT to close softkey menus.
NOTE: After making adjustments to options or settings, use the EXIT
key to resume normal operation.
StructureScan
Consists of two powerful sonar views: Sidescan and Downscan. Used in conjunction
with the built-in broadband sounder, StructureScan gives you an underwater
panoramic view.
Sidescan
Sidescan
Broadcasts a sonar beam to each side of your boat allowing you to view structure,
and terrain without having to drive your boat over the top of it.
2
Page 5
You can use Sidescan to:
Save waypoints at objects/locations off to side of the boat •
Review history•
Measure the size of underwater objects and the distance from one •
object/location to another object/location using live Sidescan returns
or Sidescan history
Create sonar logs•
Use two frequencies: 455 kHz (more distance) and 800 kHz (better •
denition)
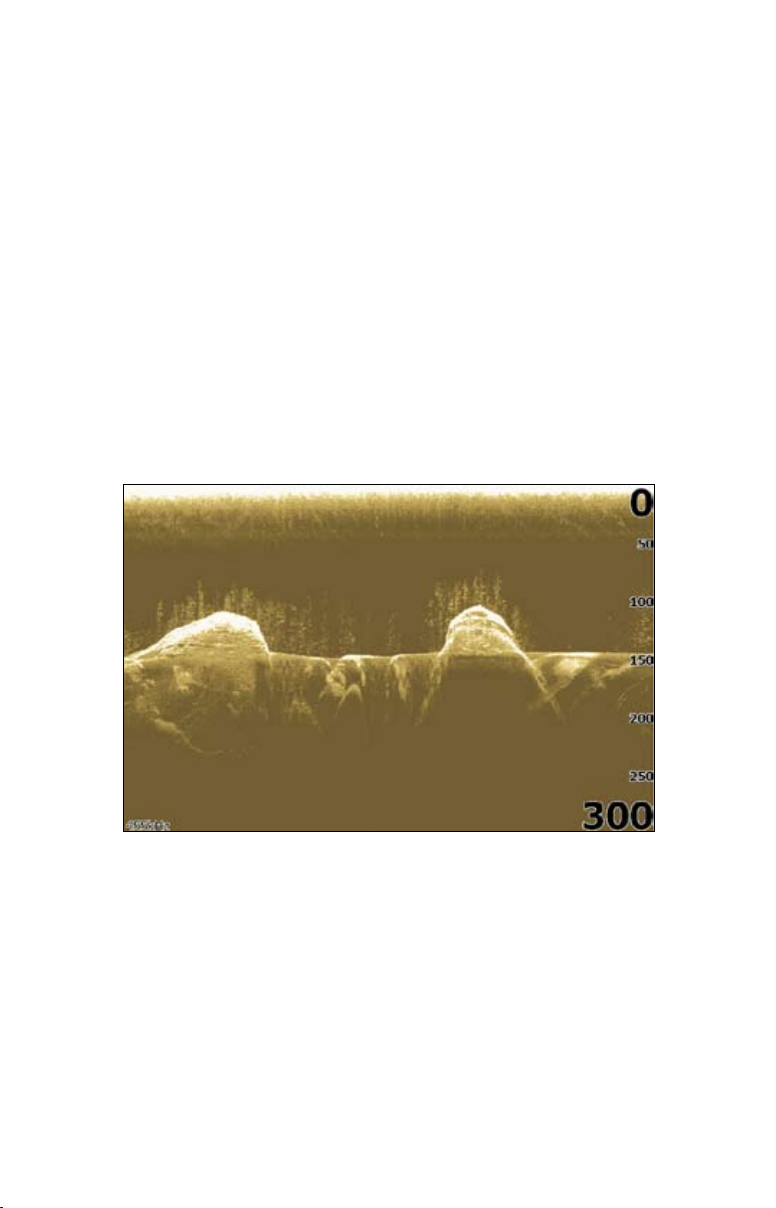
Downscan
Uses the same technology as sidescan, but broadcasts the beam downward, giving
you the same high resolution in a familiar right to left display.
You can use Downscan to:
See different view of objects/locations selected with cursor on •
Sidescan panel
Save waypoints •
Review history and create sonar logs•
Use two frequencies: 455 kHz (greater depth) and 800 kHz (better •
denition)
Overlay Downscan imaging on the sonar page •
Downscan
3
Page 6
Underwater
terrain
with the bottom
Transmit Burst
Transducer
sidescan signal
makes contact
Water column
between boat
and where
Trees
Sidescan
Trees
Built-in Broadband sounder
4
Downscan
Page 7
Displaying Sidescan and Downscan
Sidescan and Downscan can be shown on the display individually or together in
different split screen congurations.
To display Sidescan:
Press the 1. PAGES key.
Use the keypad to rotate the 2.
carousel menu until Structure is
selected.
Press 3. ENTER.
Pages screen for HDS-8 /10 units.
To display Downscan:
From the Sidescan onscreen display, press 1. MENU.
Select 2. Structure Options and press ENTER.
Highlight 3. View and press ENTER.
Select 4. Down and press ENTER.
NOTE: To access the StructureScan menu, press MENU from a
StructureScan page or from an active StructureScan panel.
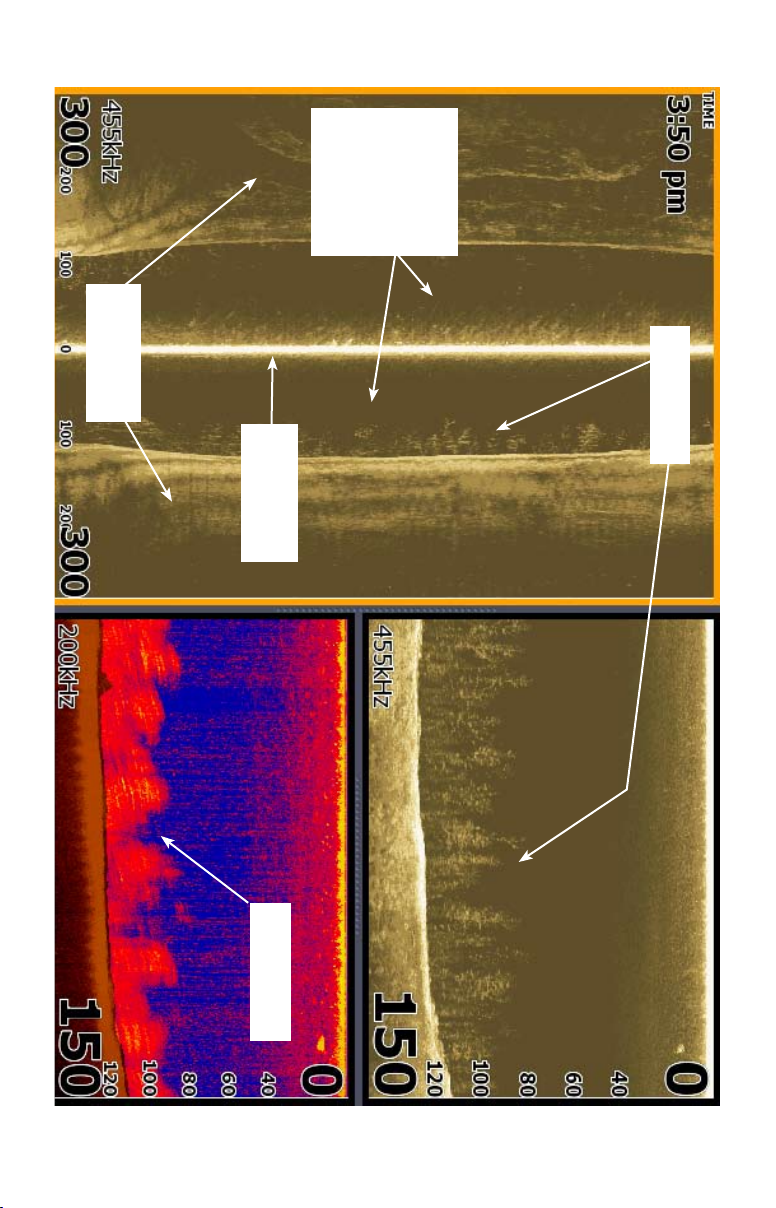
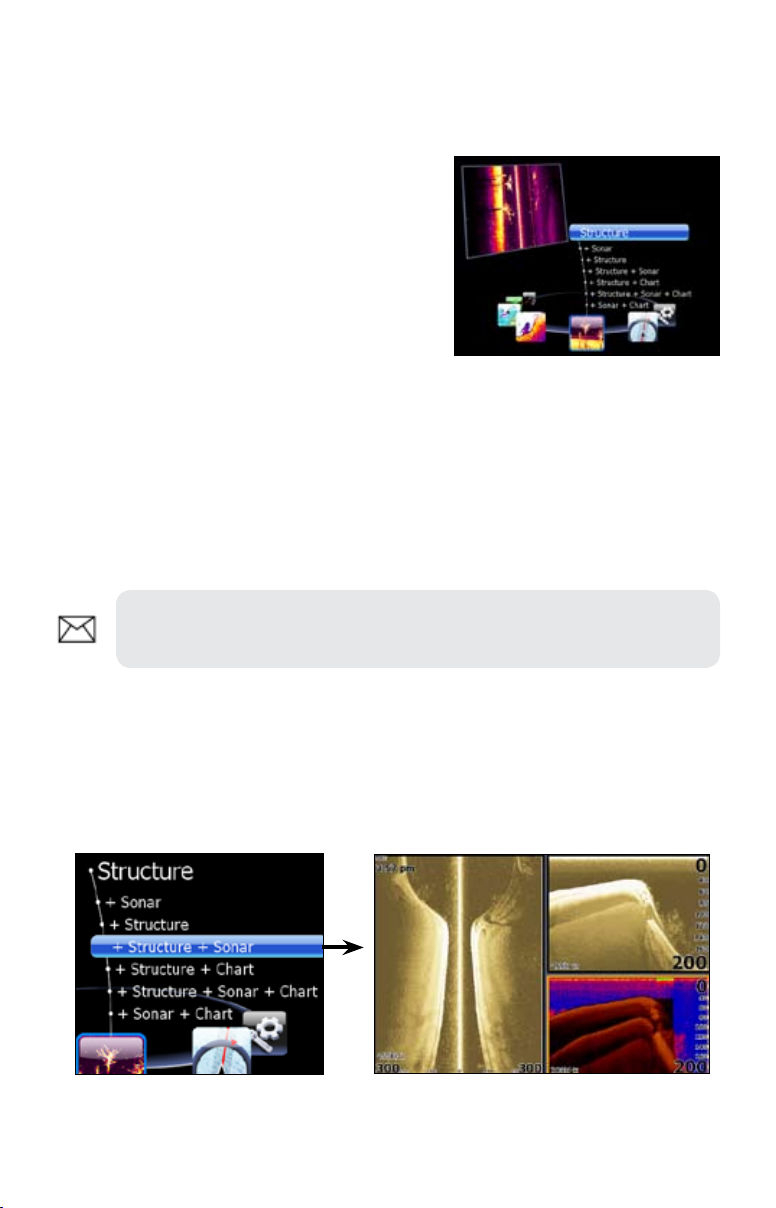
Screen Congurations
StructureScan can be shown with other pages in various screen congurations
including: splitscreen, tri-screen (HDS-8/10 only) and quad screen (HDS-8/10
only).
Selecting Structure + Sonar from the Structure menu displays a tri-screen
with two StructureScan panels and a sonar panel.
5
Page 8
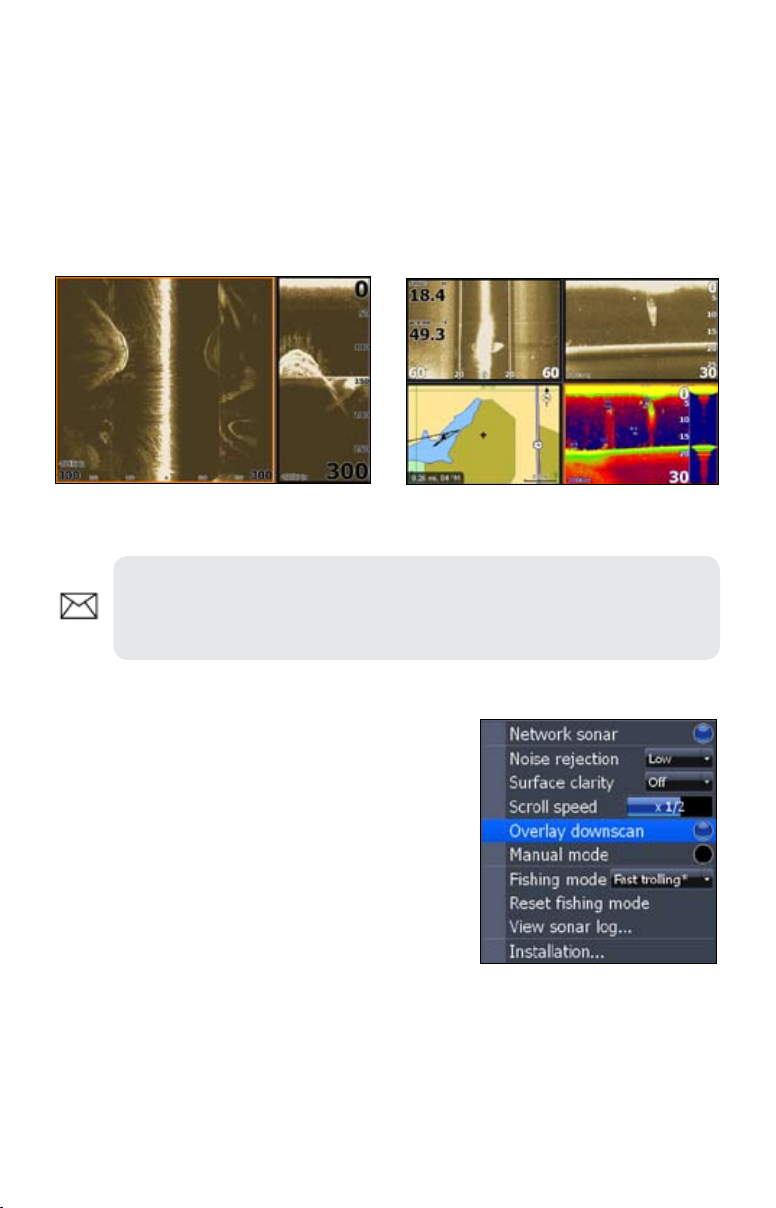
To display a split, tri or quad screen:
Press the 1. PAGES key.
Press the keypad left/right to rotate the carousel menu until 2. Structure
is selected.
Press the keypad up/down to select the desired combination of 3.
panels and press ENTER.
Structure + Structure Splitscreen
Structure + Structure + Sonar + Chart
Quadscreen (HDS -8/10 only).
NOTE: To switch the active panel on a multi-screen display, hold down
the Pages key until the orange border switches to the next panel. Repeat
this step to rotate active status to the next panel.
Overlay Downscan
Places downscan data on top of sonar data, making
it easier to separate sh from structure.
To turn on Downscan Overlay:
Press 1. MENU twice.
Select 2. Sonar and press ENTER.
Highlight3. Overlay Downscan and press
ENTER.
6
Page 9

Downscan overlay set to 0%.
Overlay Transparency
Controls the transparency of Downscan overlay on the sonar page, allowing you to
select an overlay level best suited for current water conditions.
To make adjustments to Overlay:
Make sure the sonar panel is the active panel. 1.
Press MENU.
Select 2. Adjust and press ENTER.
Use the keypad to highlight 3. Overlay.
Press the keypad left/right to decrease/increase 4.
overlay transparency.
StructureScan Options Softkey
If you have an HDS-8 or HDS-10, you will notice
the Stop Sonar softkey is replaced with the Structure
Options softkey when Overlay Downscan is turned
on.
That gives you one-touch access to StructureScan
display options and settings, including the Overlay
adjustment scrollbar.
Downscan overlay set to 85%
7
Page 10

StructureScan Menu
Provides access to StructureScan features, settings and the
Structure Options menu.
To access the StructureScan menu, press MENU from the
StructureScan page.
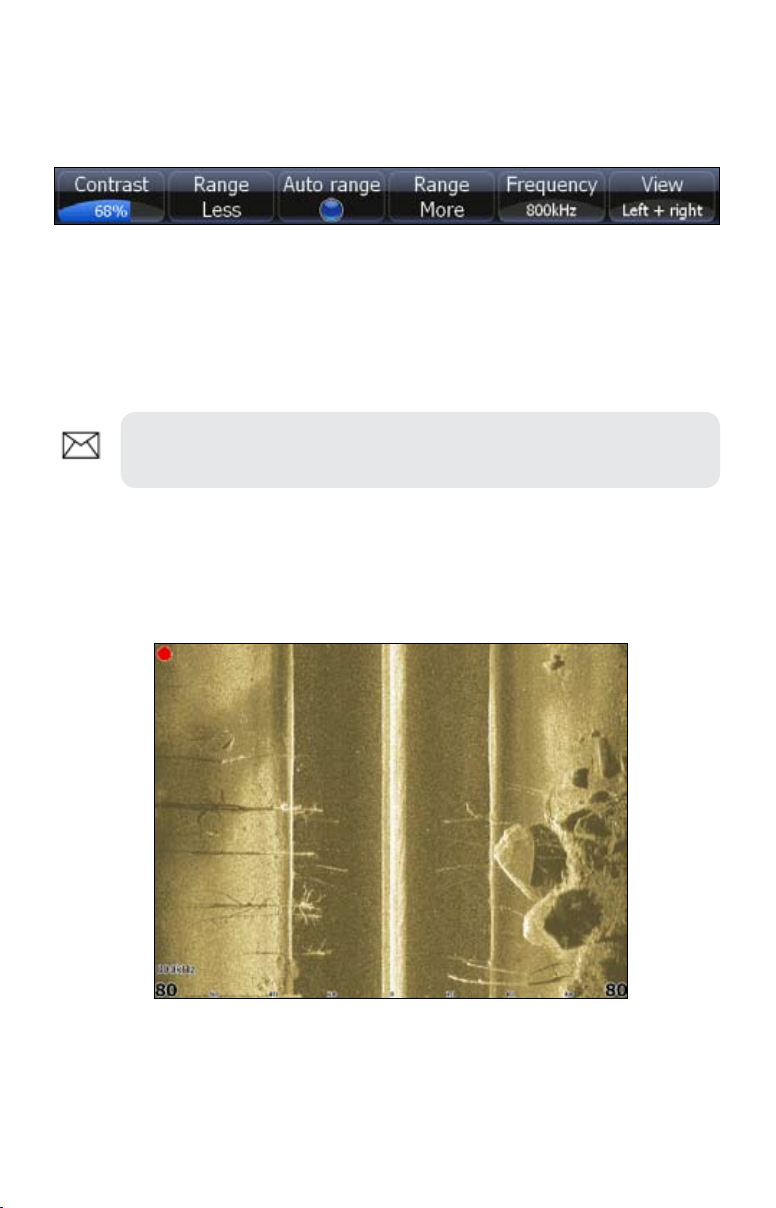
Contrast
Controls the level of contrast used on the display.
To make adjustments, highlight Contrast on the StructureScan menu and press the
keypad left/right to decrease/increase the contrast level.
Range
Used to adjust the width of a sidescan image and controls the
section of the water column shown when downscan is the
selected view.
To select Range:
Select 1. Range from the Structure menu and press
ENTER.
Use the keypad to select the desired range and 2.
press ENTER.
Frequency
StructureScan supports two frequencies: 455 kHz (greater depth/distance) and 800
kHz (better denition).
To select a Frequency:
Structure menu
Select 1. Frequency from the StructureScan
menu and press ENTER.
Highlight the desired frequency and press 2.
ENTER.
8
Page 11

View
Controls the view your unit will use when displaying
StructureScan data. In a multi-panel display, you can select
different views for each StructureScan panel.
To select a View:
View menu
Select 1. View from the StructureScan menu and press ENTER.
Highlight the desired option and press 2. ENTER.
Left Only
Left and Right selected on View menu.
Right Only
Palette
Gives you control of the overall look and feel of the display by allowing you to select
a palette with color and brightness levels geared toward your viewing preferences.
Palette No. 1 Palette No. 2
To select a Palette:
Select 1. Palette from the StructureScan menu and press ENTER.
Use the keypad to select the desired palette and press 2. ENTER.
9
Page 12

Structure Options
To make adjustments to StructureScan display
settings, highlight Structure Options on the
StructureScan menu and press ENTER.
Structure Options menu
Structure Surface Clarity
Adjusts sensitivity near the surface of the water to reduce or eliminate onscreen
clutter caused by wave action, boat wakes, temperature inversion, etc.
Structure Surface Clarity turned off.
To adjust Surface Clarity:
Select 1. Structure Surface Clarity from the Structure Options menu
and press ENTER.
Use the keypad to select the desired setting and press 2. ENTER.
Structure Noise Rejection
Reduces onscreen clutter caused by bilge pumps, engine vibration, air bubbles or
other transducers on your boat.
To turn Structure Noise Rejection On/Off,
highlight Structure Noise Rejection on the
Structure Options menu and press ENTER.
Flip Left/Right
Controls the orientation of the sidescan/downscan onscreen display.
If the transducer is installed with the cabled end pointing away from the back of
your boat (Direct Step Mount) or pointing away from the front of your trolling
motor, you must turn on Flip Left/Right.
Structure Surface Clarity on High.
10
Page 13

Cabled end of transducer
That will ensure that what is on the left or right side of
your boat underwater, will be shown on the corresponding
side of the screen on your display unit.
To turn on/off Flip Left/Right, highlight Flip Left/Right
on the Structure Options menu and press ENTER.
Back of the boat
Range Lines
Onscreen lines that make it easier to estimate
depth of sonar targets (Downscan) or distance
from sonar targets (Sidescan).
To turn on/off Range Lines, select Range
Lines on the Structure Options menu and press
ENTER.
Range Lines shown in Sidescan
view.
Measure Distance
Measures the size of underwater objects and the distance from one object/location
to another object/location.
To Measure Distance:
Press 1. MENU from a StructureScan page.
Highlight 2. Measure Distance and press ENTER.
Use the keypad to move the cursor into the desired position.3.
To measure the distance from the selected location to another object 4.
or location press ENTER and move the cursor.
Press 5. EXIT to return to normal operation.
The
selected
locations
are 40.5
feet apart.
11
Page 14

Stop Sonar
Stops Sidescan and Downscan sonar from the scrolling, allowing you to get a closer
look at onscreen objects or locations.
To pause/restart the chart, highlight Stop Sonar on the Structure menu and press
ENTER.
Log sonar
Records sonar logs, allowing you to review
StructureScan and broadband sonar data later
via an MMC or SD card.
To access the Log Sonar menu, select Log
Sonar Data from the Structure menu and press
ENTER.
Log Sonar Menu
Filename
Save to
Bytes
Input the desired name for the sonar log le
Selects location where sonar log will be saved/stored; to save
data to MMC/SD card, select Memory Card
Controls number of bytes per sounding. More bytes yields
better resolution/shorter logging time; conversely, fewer
bytes produces longer sonar logs/lower resolution
Log All Channels
Time Remaining
To input a lename:
Highlight the Filename text box and 1.
press ENTER. A keyboard will appear
on the screen.
Use the keypad to input the desired 2.
lename.
Select 3. OK and press ENTER.
Logs StructureScan data and conventional sonar data
simultaneously. When logging all channels, logs are saved
in.Sl2 format instead of .slg format. The .Sl2 le format is
not compatible with non-HDS units.
Recording time left until memory storage runs out
12
Page 15

To adjust Save to or Bytes per Sounding:
Highlight 1. Save to or Bytes per Sounding from the Sounder Logging
menu and press ENTER.
Use the keypad to select the desired option and press 2. ENTER.
To turn on/off Log All Channels:
Highlight 1. Log All Channels on the Log Sonar menu.
Press 2. ENTER.
Record
To record a sonar log, highlight the
Record button and press ENTER.
To stop logging:
Select 1. Stop from the Sounder
Logging menu and press
ENTER.
Highlight the 2. Stop Logging
button and press ENTER.
Source
Selects the transducer data that will be shown by a your display unit when there is
more than one StructureScan transducer connected to an ethernet network.
To select a source:
Select 1. Source from the Structure menu and press ENTER.
Highlight the desired option and press 2. ENTER.
Settings
Opens the Sonar Settings menu.
Red circle indicates sonar log is being
recorded; All Channels are being
logged in this example
Viewing Structure History
You can view Sidescan or Downscan history individually — by displaying them full
screen — or simultaneously by adding them to a multi-panel screen.
13
Page 16

To view history:
From a StructureScan page, press the keypad down (Sidescan) 1.
or to the left (Downscan). The blue history tracking bar will appear
helping you keep tabs on where you are in the history log.
To return to normal operation, press 2. EXIT.
Blue history tracking bars
Save Waypoints
You can save waypoints using both Sidescan and Downscan views, allowing you to
mark a desired object/location so you can revisit it later.
To save a waypoint:
Press the keypad to activate the 1.
cursor.
Move the cursor over the desired 2.
object/location and press MENU.
Select 3. New Waypoint at Cursor
and press ENTER.
NOTE: You can save a waypoint by moving the cursor into the desired
position and pressing Enter or the Wpt key from the StructureScan or
Sonar pages.
14
Page 17

StructureScan Specications
Power
Requirement
Voltage Input 10V - 17V
Transmit Power
Current Drain Max: .75A Typical: .60A Inrush: 4.7A pk
Fuse Type External: 3A Fast Acting Automotive Blade
Transducer Cable 20 feet (6m)
Target Separation
Transducer
Frequency
Communication Ethernet
Shared devices
supported
Weight
Max Range 455kHz (500ft — 250 per side) 800kHz (300ft —150 per side)
Max Speed 35 mph (56 kmh)
12 Volts
WRMS: 500W
WPK: 4000W
1.5” (38.1mm)
455kHz and 800kHz
3
LSS-1 (1.8lbs)
Transducer (1.9lbs)
Transducer with bracket (2.55lbs)
Sidescan Specications
Mark objects 15 mph (24 kmh)
Optimum speed 10 mph (16 kmh) or less
Downscan Specications
Max Depth 100 ft (800kHz); 300 ft (455kHz)
Max Speed 55 mph (88 kmh)
Mark objects 35 mph (56 kmh)
Optimum speed 10 mph (16 kmh) or less
15
Page 18

StructureScan LED Guide
Indicator LED Status Denition
Transducer LED Off
Transducer LED Green/ stays on
Transducer LED Green/ashing
Power LED Off No power or not switched on
Power LED Red/stays on Product in booting process
Power LED Green/stays on Product has power/operating
Power LED Red/Green/slowashing
Power LED Red/Greenfastashing
Ethernet LED Off
Ethernet LED Yellow/Flashing-solid
StructureScan Troubleshooting Tips
StructureScan not displayed
No Data Check range or turn on auto range
Data washed out/same color Turn down contrast; try different palettes
Signal fades at distances/depths
more than 100 feet
Left/right data swapped on screen Toggle the Flip Left/Right feature
No Source is displayed
Use 455 kHz frequency at deeper depths
Transducer not connected or cable/
transducer is broken
Transducer detected/locked on to
bottom
Transducer detected/not locked on
to bottom
Product in factory mode; ethernet
communication working
Product in factory mode; no ethernet
communication (cable unplugged or
bad cable)
No ethernet communication (cable
unplugged, bad cable or remote unit
not powered)
Ethernet communication is working
(link/active light)
Make sure LSS-1 is powered•
Check unit software; must have at •
least version 2.5
Make sure yellow wire is connected •
to switched power source
Check fuse•
Make sure HDS unit and LSS-1 are •
powered and connected to ethernet
network
Make sure all switches are •
powered
Check link/active light to see which •
units are not communicating
16
Page 19

Disclaimer
As Navico is continuously improving this product, we retain the
right to make changes to the product at any time which may
notbereectedinthisversionofthemanual.Pleasecontact
your nearest distributor if you require any further assistance.
It is the owner’s sole responsibility to install and use the
instrument and transducers in a manner that will not cause
accidents, personal injury or property damage. The user of this
product is solely responsible for observing safe boating
practices.
NAVICO HOLDING AS. AND ITS SUBSIDIARIES, BRANCHES
AND AFFILIATES DISCLAIM ALL LIABILITY FOR ANY USE OF
THIS PRODUCT IN A WAY THAT MAY CAUSE ACCIDENTS,
DAMAGE OR THAT MAY VIOLATE THE LAW.
Governing Language: This statement, any instruction manuals,
user guides and other information relating to the product
(Documentation) may be translated to, or has been translated
from, another language (Translation). In the event of any
conictbetweenanyTranslationoftheDocumentation,the
English language version of the Documentation will be the
ofcialversionoftheDocumentation.
This manual represents the product as at the time of printing.
NavicoHoldingAS.anditssubsidiaries,branchesandafliates
reservetherighttomakechangestospecicationswithout
notice.
Copyright © 2009 Navico Holding AS.
17
Page 20

18
Page 21

19
Page 22

20
Page 23

How to Obtain Service…
…in the USA:
Contact the Factory Customer Service Department. Call toll-free:
For Lowrance: 800-324-1356. For Eagle: 800-324-1354
8 a.m. to 5 p.m. Central Standard Time, M-F
Lowrance Electronics and Eagle Electronics may nd it necessary to change or end their
shipping policies, regulations and special offers at any time. They reserve the right to do
so without notice.
…in Canada:
Contact the Factory Customer Service Department. Call toll-free:
800-661-3983
905-629-1614 (not toll-free)
8 a.m. to 5 p.m. Eastern Standard Time, M-F
…outside Canada and the USA:
Contact the dealer in the country where you purchased your unit. To locate a
dealer near you, see the instructions in paragraph number 1 below.
Accessory Ordering Information
LEI Extras, Inc. is the accessory source for sonar and GPS products
manufactured by Lowrance Electronics and Eagle Electronics. To order Lowrance
or Eagle accessories, please contact:
1) Your local marine dealer or consumer electronics store. To locate a Lowrance
dealer, visit the web site, www.lowrance.com, and look for the Dealer Locator. To
locate an Eagle dealer, visit the web site, www.eaglesonar.com, and look for the
Dealer Locator. Or, consult your telephone directory for listings.
2) U.S. customers visit our web site www.lei-extras.com.
3) Canadian customers: Lowrance/Eagle Canada, 919 Matheson Blvd. E. Missis-
sauga, Ontario L4W2R7 or fax 905-629-3118.
Call toll free in Canada, 800-661-3983, or dial 905 629-1614 (not toll free), 8 a.m.
to 5 p.m. Eastern Standard Time, M-F.
Page 24

*988-0179-00A*
© Copyright 2009
All Rights Reserved
Navico Holding AS
 Loading...