

Page 1
Pub. 988-0154-671
www.lei-extras.com
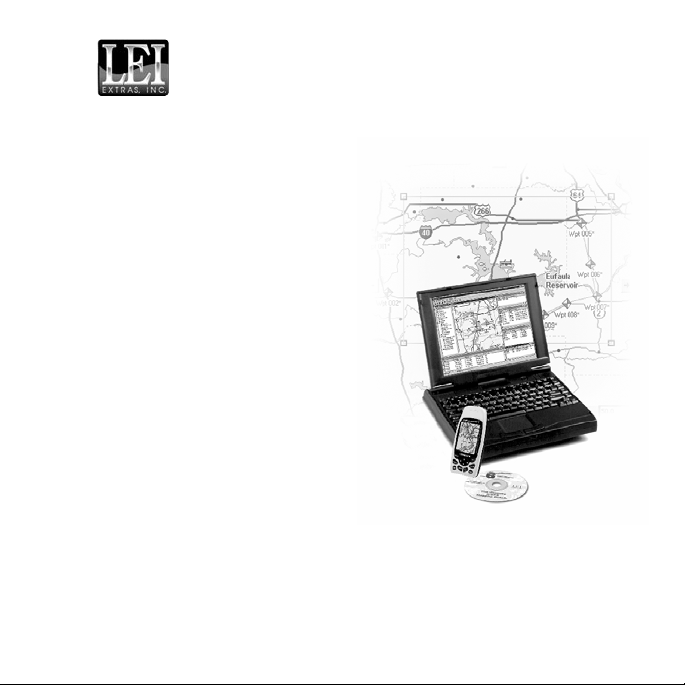
MapCreate™ 7
Custom Mapping Software for GPS
Page 2

Copyright © 2006 LEI. All rights reserved.
No part of this manual may be copied, reproduced, republished, transmitted, distributed,
downloaded or stored in any storage medium, for any purpose, without prior written consent of
LEI. Any unauthorized commercial distribution of this manual is strictly prohibited.
MapCreate™ is a trademark of LEI.
U.S. Points of Interest Data in this unit are by infoUSA, copyright © 2001-2006, All
Rights Reserved. infoUSA is a trademark of infoUSA, Inc.
U.S. eXitSource Database, copyright © 2001-2006 Zenrin Co. Ltd. Exit Authority™
and eXitSource™ are trademarks of Zenrin Co. Ltd.
Canadian mapping data © 2006 by DMTI Spatial Inc.
European mapping data © 2006 by Tele Atlas NV, the reference in digital mapping.
LEI Extras, Lowrance Electronics, or Eagle Electronics may find it necessary to change or end
their policies, regulations and special offers at any time. They reserve the right to do so without notice. All screens in this manual are simulated.
For free owner's manuals and the most current information on this product, it's operation and
accessories, visit the manufacturer's web sites:
www.lowrance.com www.eaglegps.com
To purchase Lowrance or Eagle accessories,
visit our web site:
www.lei-extras.com
LEI
PO BOX 129
Catoosa, OK USA 74015
Printed in USA.
Page 3

Installing MapCreate:
For best performance, we suggest you uninstall previous versions of MapCreate™ before installing this version. If you do not have a DVD drive, this version
of MapCreate will not install. To install MapCreate, follow these steps:
WARNING:
You must close all other open applications and temporarily
disable any virus scan software before you install MapCreate. Some virus scanning programs will cause undefined
error messages and prevent MapCreate from installing
correctly. If strange errors occur during install, make sure
virus scan software is off, then reinstall MapCreate. When
installation is finished, remember to turn your virus scan
software back on only after MapCreate and the card reader
are installed and your computer has rebooted.
1. Insert the MapCreate DVD (or disc 1) into the computer's drive.
2. The MapCreate setup program should start automatically. If it does,
you can skip to step 5. If it does not, click START|RUN.
3. Type D:\setup.exe (where D: is the drive letter for your CD/DVD drive).
4. Click OK to begin installation.
NOTE:
If you are using Windows 2000 or Windows XP Professional, you
may receive an error message if you are not logged on with administrator privileges. If this occurs, you can complete the MapCreate installation by first logging on as an administrator, then proceeding
with step 1.
1
Page 4

5. Follow the on-screen instructions:
®
• InstallShield
will load automatically. A message box will appear, re-
minding you to disable any antivirus software. Click OK to continue.
• Read the License Agreement. If you accept the agreement, click YES;
if you do not accept, click NO, and MapCreate will not be installed on
your computer.
• Choose a destination folder for the program. You can accept the default
(recommended) or you can choose another location. Click NEXT to continue
the installation.
• Select the type of setup, and click NEXT to continue the installation.
• If you choose Custom install, select the components to install. Then
click NEXT to continue. With all your preferences determined, InstallShield will begin copying files.
• The Setup Status window shows the progress of the installation. If
needed, the install will prompt you for additional discs. When asked, insert the appropriate DVD and click OK to continue the setup. When the
program files have all been copied, InstallShield Wizard will display a
message that setup is complete. Click FINISH to close the wizard program.
• After the MapCreate files have been installed on your computer, you
are prompted to install the MMC card reader drivers. Make sure the
card reader is not plugged in yet, then click OK to continue. (If you
stop the program, you can install the card reader later, but MapCreate
will not run until the card reader is installed. To install later refer to
the instruction sheet that came with the card reader.)
2
Page 5

• The setup program for the USB SD/MMC Reader will load first.
When the setup program has loaded, a welcome screen will display.
Click NEXT when you're ready to begin the card reader installation.
• Read the complete License Agreement. If you accept the agreement,
click YES. (If you do not accept, click NO, and the SD/MMC Reader
software will not be installed on your computer, and MapCreate will
not run.)
• Choose a destination folder for the SD-MMC Reader program. This is
where you want the files on your hard drive. You can accept the default (recommended) or choose another location. Click NEXT to continue.
• Select the folder where you want to place the shortcut for the
SD/MMC Reader program. You can accept the default or choose another location. Click NEXT to continue the installation.
• The setup program is ready to install the SD-MMC Reader program
on your computer. Click NEXT to continue. The setup program will
display the progress of the installation.
6. When the card reader install program has finished, the InstallShield
wizard completion window appears. We strongly recommend that you restart your computer now. MapCreate and the card reader will not run until
your computer restarts.
With the "restart my computer now" option selected, click FINISH. After
the computer restarts and Windows has finished loading, plug the card
reader into a USB port. After Windows finishes installing the card
3
Page 6

reader, it will appear as an additional drive letter in My Computer. The
card reader and MapCreate are ready to use.
If you are running an antivirus program on your computer, be sure to
turn it back on at this time.
Care of your MapCreate DVDs:
Protect the shiny recorded surface of the compact discs from scratches,
fingerprints and dirt. Hold a disc along the outer edge or by the center
hole. Clean a dirty disc with a soft, dry cloth. You can also use a commercial CD/DVD cleaner or ethyl alcohol to remove fingerprints and dirt. Do
not leave your discs in direct sunlight or in a hot, humid location.
Starting MapCreate:
To start MapCreate, make sure one of the MapCreate DVDs is in your
DVD/CD-ROM drive. Click the START on the Windows taskbar, then
click on the MapCreate shortcut in the program menu. (A disc must be in
the drive each time you start the program.)
If you prefer, you can start MapCreate using the alternate methods described below.
To start MapCreate from Windows Explorer:
Open Windows Explorer, if it is not already running. Navigate to the folder
where MapCreate is. By default the path is: C:\Program Files\LEI\MapCreate.
Next, double-click MapCreate.exe to launch the program.
For more details on the many other ways to create and manipulate shortcuts, open your Windows help file and search for the word "shortcut."
4
Page 7

Using the Help File
The Help File contains the Quick Reference tutorial material from the
instruction manual and the Command Reference, which documents every
command in MapCreate. To open the Help File, hit F1 on the keyboard or
with the mouse, click Help hen Help File
You navigate through the help information just as you would any other website,
using the clickable hyperlinks to move around. There are links at the top and
bottom of each Help document. The Table of Contents in the window frame at
left is organized like the table of contents in the manual and the topics are
linked. You can drag the Table of Contents window border to fit your screen.
If you would like to have a hard copy of the instruction manual, the latest manual for MapCreate is available for downloading in PDF format for
free on our website, www.lowrance.com. The PDF format is suitable
for printing on at home.
To view descriptions of the MapCreate interface, and tips on how
to maneuver through the program, click Working With MapCreate.
To view tutorial lessons on the 10 basic MapCreate functions, click
Basic Tutorials in the help file.
To view detailed instructions on all commands available in MapCreate,
click Command Reference.
Searching Help Documents
Once you have opened a help document, you can search it for the information you need. The Table of Contents has been organized for easy
reading, but it too is searchable, using the commands below. (The Command Reference is in alphabetical order.)
5
Page 8

Searching with Internet Explorer browser:
1. Click somewhere on the help page you intend to search. This makes
sure your browser will search the correct page.
2. Click Edit|Find (on This Page) or use the shortcut keys Ctrl+F to begin
your search.
Internet Explorer's Find command to search Help documents.
3. In the Find what: box, type the term, phrase or command you are looking for, adjust any options such as up or down, then click Find Next.
Searching a Help document for the term "map border."
6
Page 9

Searching with Netscape browser:
1. Click somewhere on the help page you intend to search. This makes
sure your browser will search the correct page.
2. Click Search|Find in This Page or use the shortcut keys Ctrl+F to begin your search.
Netscape's Find command to search Help documents.
3. In the Find text: box, type the term, phrase or command you are looking for, adjust any options such as search backwards, then click Find.
Searching a Help document for the term "map border."
7
Page 10

Quick Start Reference: How to make and save a map
1. Start MapCreate by clicking the Windows Start button and choosing
your version of MapCreate from the menu.
2. Maneuver the Master Map so you can see the area you want to include
in your map. Use the Pan Arrow buttons to move north, south, east or
west. Use the Zoom-In and Zoom-Out (Z-In or Z-Out) buttons as needed
to close in on or back away from the area you're viewing.
3. Click the Draw Map Borders button in the toolbar. Move the mouse
pointer above and to the left of the desired area. Click, hold down the
mouse button and drag diagonally down until the desired area is enclosed within the green border box. Then release the mouse button. You
have just drawn a Map Border.
4. With the Map Border displayed, click the Estimate Custom Map Size
button, on the Create Map toolbar. After a moment it will tell you your
map's file size. If it fits the card, click OK to clear the message and jump
to step 5. If the map file is too large for the card, click OK to clear the
message, then redraw your map border a little smaller. Click the Delete
Map Border button, click on any green border line, then re-draw a
smaller border box. Use the Estimate button to re-check the size until it
is correct.
Dialog box showing the amount of memory needed on MMC.
8
Page 11

5. When your file is the right size, click the Create Map button on the
Create Map toolbar. The program displays a message about copyright
and encryption.
6. If this is the first time you have tried to save a file to your memory
card, MapCreate will need to register the card. Make sure you have a
card in your card reader. Click OK to continue. (Clicking Cancel ends the
process.)
The next time you use this card, you will skip ahead to step 11.
Message appears explaining card registration.
7. Another message box asks whether you want to register your current
card or not. Click Yes to continue the card registration process.
Dialog box showing how many cards are left to register.
9
Page 12

8. You can change the label on your memory card if you prefer. Delete the
default name, "Card1," and enter the new name. Click Register to continue.
Card Registry dialog box.
9. Another message box tells you when your card has been registered.
Click OK to continue.
Status dialog box.
10
Page 13

10. The Card Registry window appears again. Click Done to save your map.
Card Registry dialog box.
NOTE:
If the Automatically Append Label To Saved Maps box is selected
(see figure above), MapCreate will automatically add your card's label to the end of whatever name you give the file you are saving.
Let's use the figure above as an example. If we name our map
"Phoenix.lcm," MapCreate will automatically name the file "Phoe-
nix_CARD1.lcm." To cancel this option, click the Automatically Append… box to remove the check mark.
11
Page 14

11. A window shows the progress of your map build. When the map is
built, MapCreate displays the Save As dialog box. Type a file name for
your Map File, and click Save. (MapCreate will save your new custom
map to your memory card.)
12. After the program has saved the map to your card, the Save Progress
box disappears. You can now close MapCreate and remove the card from
the reader.
13. Follow the instructions in your GPS manual for loading the MMC or
SD card into your unit. It will automatically read the map when the unit
is turned on.
12
Page 15

Accessory Ordering Information for all countries
LEI Extras™, Inc. is the accessory source for sonar and GPS products manufactured by
Lowrance Electronics and Eagle Electronics. To order MapCreate and GPS accessories
such as MMC cards or MMC card readers, please contact:
1) Your local marine dealer or consumer electronics store. Most quality dealers that
handle marine electronic equipment or other consumer electronics should be able to
assist you with these items.
To locate a Lowrance dealer, visit the web site, www.lowrance.com, and look for the Dealer
Locator. To locate an Eagle dealer, visit the web site, www.eaglegps.com, and look for the
Dealer Locator. Or, consult your telephone directory for listings.
2) U.S. customers: LEI Extras Inc., PO Box 129, Catoosa, OK 74015-0129
Call 1-800-324-0045 or visit our web site www.lei-extras.com.
3) Canadian customers can write:
Lowrance/Eagle Canada, 919 Matheson Blvd. E. Mississauga, Ontario L4W2R7 or fax
905-629-3118.
Shipping Information
If it becomes necessary to send a product for repair or replacement, you must first receive a return authorization number from Customer Service. Products shipped without
a return authorization will not be accepted. When shipping, we recommend you do the
following:
1. Pack the product in a suitable size box with packing material to prevent any damage
during shipping.
2. For proper testing, include a brief note with the product describing the problem. Be
sure to include your name, return shipping address and a daytime telephone number.
An e-mail address is optional but useful.
3. Write the Return Authorization (RA) number on the outside of the box underneath
your return address.
4. For your security, you may want to insure the package through your shipping courier. LEI does not assume responsibility for goods lost or damaged in transit.
Page 16

Visit our web site:
www.lei-extras.com
For Lowrance® and Eagle® Products
LEI Pub. 988-0154-671 © Copyright 2006
All Rights Reserved
Printed in USA 122206 LEI
 Loading...