

Page 1
HOME CABINET
Stacking Kit Installation
BEFORE YOU BEGIN
These units are extremely heavy. Ensure that you have
enough people on hand to help in the repositioning of the
units so that it can be done safely and without damage.
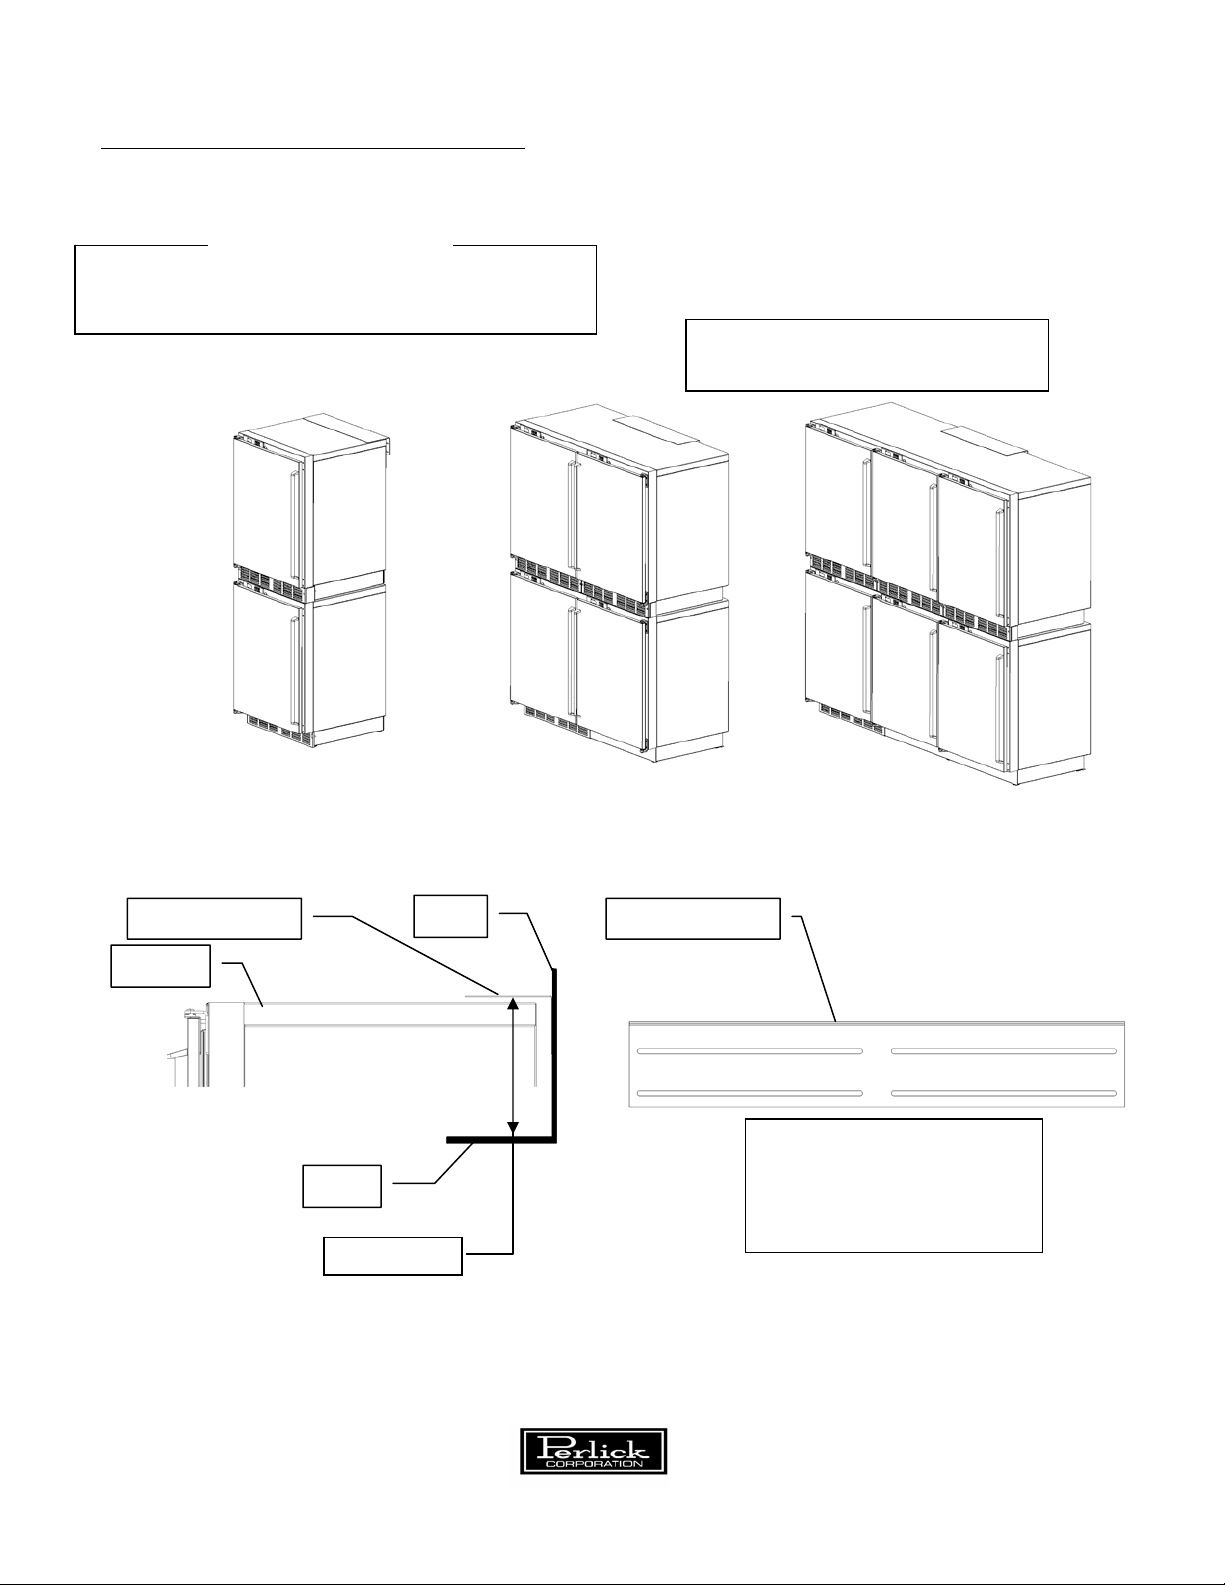
1) Mount the anti-tip bracket to the
wall as shown.
Anti-tip Bracket
Wall
Top unit
Floor
68.125inches
Each available size cabinet shown stacked and in
position with the anti-tip bracket installed. All
door and drawer configurations can also be stacked
Anti-tip Bracket
Slots elongated to allow as much
flexibility as possible in keeping
the bracket centered on the unit
while mounting into wall studs.
One screw per slot.
8300 W. Good Hope Rd. Milwaukee, WI 53223 Phone: (414) 353-7060 Fax: (414) 353-7069 bringperlickhome.com
Perlick is committed to continuous improvement. Therefor, we reserve the right to change specifications without war ning.
Page 2
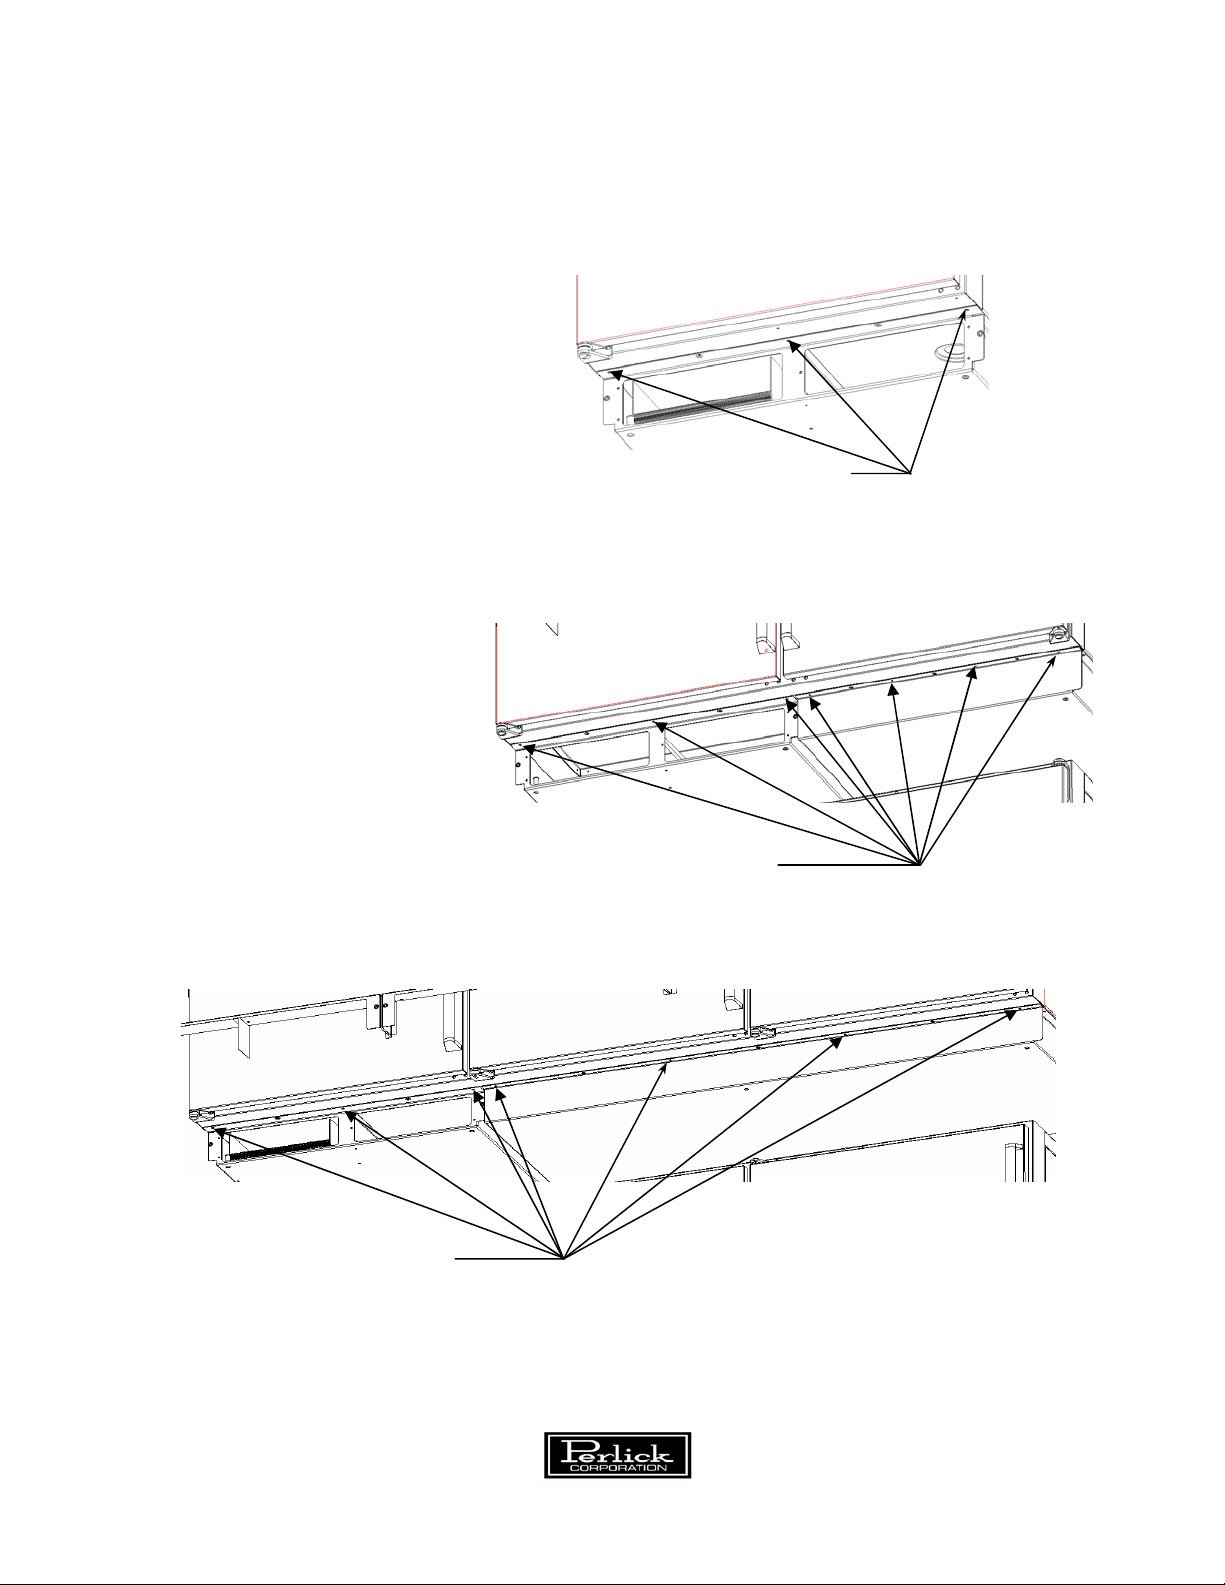
2) Decide which unit is desired to be
3) Remove the grill and leg levelers
4) Place the top unit carefully onto the
5) Remove screws from the unit as
the top unit of the stacked
configuration
from the top unit
bottom unit, use caution so as not to
damage either unit. The top unit
should be set slightly forward in
relation to the bottom unit to
provide easier access to mounting
holes.
shown
Remove these screws (per step 4)
Remove these screws (per step 4)
Remove these screws (per step 4)
8300 W. Good Hope Rd. Milwaukee, WI 53223 Phone: (414) 353-7060 Fax: (414) 353-7069 bringperlickhome.com
Perlick is committed to continuous improvement. Therefor, we reserve the right to change specifications without war ning.
Page 3

d
d
6) Using the same screws from step 5,
assemble the grill mounting brackets
to the unit. There is a separate grill
and grill mounting bracket for each
door opening of your unit
7) Assemble the louvered grill plates to
the unit. Each grill plate is identical
8) Slide the top unit into position so the
front surfaces on the top and bottom
units are flush with one another.
9) Push the entire stacked arrangement
into its final position under the antitip bracket.
n
r
2
& 3
compartment grill
mounting brackets are identical.
Only the grill mounting bracket for
st
the 1
(leftmost) compartment has
8300 W. Good Hope Rd. Milwaukee, WI 53223 Phone: (414) 353-7060 Fax: (414) 353-7069 bringperlickhome.com
Perlick is committed to continuous improvement. Therefor, we reserve the right to change specifications without war ning.
 Loading...