


®
THE SMOKELESS CHARCOAL GRILL
B E D I E N U N G S A N L E I T U N G
Holzkohlegartengrill Typ G600
INSTRUCTION MANUAL
Charcoal Garden Grill, Type G600
MODE D‘EMPLOI
Barbecue de jardin au charbon de bois, Type G600
ISTRUZIONI PER L’USO Barbecue da giardino, Tipo G600
MANUAL DE INSTRUCCIONES Barbacoa de jardín de carbón vegetal, Tipo G600
KÄYTTÖOHJE
Puutarhagrilli, Tyyppi G600
BRUKSANVISNING
Träkolsträdgårdsgrill, Typ G600
GEBRUIKSHANDLEIDING
Houtskooltuinbarbecue, Type G600
NÁVOD K OBSLUZE
Zahradní gril na dřevěné uhlí
Typ G600
NÁVOD K OBSLUHU
Záhradný gril na drevené uhlie, Typ G600
ИНСТРУКЦИЯ ПО ЭКСПЛУАТАЦИИ Садовый гриль на древесном угле Тип G600
UPUTE ZA UPORABU
Vrtni roštilj na ugljen, tip G600
CRO RUS SVK CZE SWE FIN NED SPA ITA FRA ENG DEU

2

®
THE SMOKELESS CHARCOAL GRILL
|
|
|
|
|
THE |
SMOKELESS |
|
|
|
|
|
® |
|||||
|
|
|
|
|
CHARCOAL |
|
|
|
|||||||||
|
|
|
|
|
BE |
|
GRILL |
||||||||||
|
|
|
|
|
DIENU |
|
|||||||||||
|
|
|
|
|
|
|
|
|
|
||||||||
|
|
|
|
|
|
|
|
|
NGSANLEITUN |
G |
|||||||
|
|
|
|
|
|
|
|
Holzkohlegartengrill |
Typ G600 |
||||||||
|
INSTRUCTION MANUAL |
|
|
|
|
|
|
|
|
|
|||||||
|
Charcoal |
Garden |
Grill, Type G600 GEBRUIKSHANDLEIDING |
|
|
|
|
||||||||||
|
MODE |
|
|
|
|
|
|
|
|
||||||||
|
|
D‘EMPLOI |
|
|
|
Houtskooltuinbarbecue, Type G600 |
|
|
|||||||||
|
Barbecue de jardin au |
charbon |
NÁVOD K |
OBSLUZE |
|
|
|
|
|||||||||
|
de bois, Type |
G600 |
|
|
|
|
|
|
|
||||||||
|
|
|
|
|
|
|
Zahradní gril na |
dřevěné uhlí |
|
|
|
|
|||||
|
ISTRUZIONI PER |
|
|
|
|
Typ G600 |
|
|
|
|
|
||||||
|
L’USO |
|
|
|
|
|
|
|
|
|
|
||||||
|
Barbecue da |
|
|
|
NÁVOD K OBSLUHU |
|
|
|
|
||||||||
|
|
|
giardino, Tipo G600 |
|
|
|
|
||||||||||
|
MANUAL DE |
INSTRUCCIONES |
Záhradný gril na |
drevené uhlie, |
Typ G600 |
|
|||||||||||
|
Barbacoa de jardín de |
carbón |
ИНСТРУКЦИЯ ПО |
|
|
|
|
|
|||||||||
vegetal, Tipo |
G600 |
|
|
|
|
|
|
||||||||||
|
|
|
|
|
|
|
|
|
Садовый гриль |
наЭКСПЛУАТАЦИИ |
|
|
|||||
KÄYTTÖOHJE |
|
|
|
|
|
|
Тип G600 |
|
|
древесном угле |
|
|
|||||
Puutarhagrilli, |
Tyyppi G600 |
|
|
UPUTE |
ZA UPORABU |
|
|
|
|
||||||||
BRUKSANVISNING |
|
|
|
|
Vrtni roštilj na |
ugljen, tip G600 |
|
|
|
|
|||||||
Träkolsträdgårdsgrill, Typ G600 |
|
|
|
|
|
|
|
|
|
||||||||
DEU ENG FRA ITA SPA NED FIN SWE CZE SVK RUS CRO
13
12 
11
10
9
1
2
3
4
5
6
7
8
3

DEU Komponentenliste |
|
ENG List of Components |
||
1 |
- 1 x Grillrost |
|
1 |
- 1 x Grill Grid |
2 |
- 2 x Deckel für den Holzkohlebehälter |
|
2 |
- 2 x Charcoal Container Cover |
3 |
- 2 x Holzkohlebehälter |
|
3 |
- 2 x Charcoal Container |
4 |
- 1 x Anzündschale |
|
4 |
- 1 x Ignition Plate |
5 |
- 1 x Innenschale |
|
5 |
- 1 x Inner Bowl |
6 |
- 1 x Außenschale mit eingebautem Batteriefach |
|
6 |
- 1 x Outer Bowl with integrated Battery Case |
7 |
- 2 x Verriegelungsschnallen |
|
7 |
- 2 x Latch |
8 |
- 2 x Kombinierte An-/Ausschalter-Lüftung und |
|
8 |
- 2 x On/Off Switch for Heat Regulation |
|
Wärmerregler mit Lichtanzeige |
|
|
with Light Indicator |
9 |
- 4 x Batterie AA 1,5V DC |
|
9 |
- 4 x Battery AA 1,5V DC |
10 |
- 1 x Batteriefachabdeckung |
|
10 |
- 1 x Battery Case Cover |
11 |
- 1 x Netzadapter |
|
11 |
- 1 x Power Adapter |
12 |
- 1 x Grillwagen |
|
12 |
- 1 x Grill Cart |
13 |
- 1 x Bedienungsanleitung |
|
13 |
- 1 x Instruction Manual |
|
|
|
|
|
FRA Liste des pièces |
|
ITA Distinta componenti |
||
1 |
- 1 x grille |
|
1 |
- 1 x griglia |
|
2 |
- 2 x coperchio per il contenitore della carbonella |
||
2 |
- 2 x couvercle pour le réservoir à charbon de bois |
|
||
3 |
- 2 x réservoir à charbon de bois |
|
3 |
- 2 x contenitore della carbonella |
4 |
- 1 x plaque d’allumage |
|
4 |
- 1 x piano di accensione |
5 |
- 1 x cuve intérieure |
|
5 |
- 1 x guscio interno |
6 |
- 1 x cuve extérieure avec compartiment à piles intégré |
|
6 |
- 1 x guscio esterno con vano batterie integrato |
7 |
- 2 x clips de fixation |
|
7 |
- 2 x fibbie di bloccaggio |
8 |
- 2 x boutons combinés de marche-arrêt servant à la |
|
8 |
- 2 x sistema di ventilazione combinato di |
|
régulation du ventilateur et de thermostat avec |
|
|
accensione/spegnimento e regolatore |
|
témoin lumineux |
|
|
di calore con spia luminosa |
9 |
- 4 x piles AA 1,5V DC |
|
9 |
- 4 x batterie AA 1,5V DC |
10 |
- 1 x couvercle pour le compartiment à piles |
|
10 |
- 1 x coperchio del vano batterie |
11 |
- 1 x adaptateur secteur |
|
11 |
- 1 x adattatore di rete |
12 |
- 1 x chariot |
|
12 |
- 1 x carrello per il barbecue |
13 |
- 1 x mode d’emploi |
|
13 |
- 1 x istruzioni per l’uso |
|
|
|
|
|
|
SPA Lista de componentes |
1 |
- 1 x Parrilla |
2 |
- 2 x Tapa para el recipiente de carbón vegetal |
3 |
- 2 x Recipiente de carbón vegetal |
4 |
- 1 x Bandeja de encendido |
5 |
- 1 x Bandeja interior |
6 |
- 1 x Bandeja exterior con compartimiento para |
|
pilas incorporado |
7 |
- 2 x Hebillas de aseguramiento |
8 |
- 2 x Interruptor de conexión/desconexión combinado |
|
del ventilador y regulador de calor con indicación |
|
luminosa |
9 |
- 4 x Pilas AA 1,5V CC |
10 |
- 1 x Cubierta de compartimiento de pilas |
11 |
- 1 x Adaptador de red |
12 |
- 1 x Carro para barbacoa |
13 |
- 1 x Instrucciones de manejo |
|
|
NED Component list
1 - 1 x grillrooster
2 - 2 x deksel voor houtskoolreservoir
3 - 2 x houtskoolreservoir
4 - 1 x ontstekingsplaat
5 - 1 x binnenste schaal
6 - 1 x buitenste schaal met geïntegreerd batterijcompartiment
7 - 2 x vergrendelsluitingen
8 - 2 x gecombineerde aan-/uitknop van ventilator en warmteregelaar met indicatielampje
9 - 4 x batterij AA 1,5V DC
10 - 1 x afdekplaatje batterijcompartiment
11 - 1 x netadapter
12 - 1 x barbecuewagen
13 - 1 x gebruikshandleiding
4

FIN Osaluettelo |
|
SWE Lista över grillens delar |
||
1 |
- 1 x Grilliritilä |
|
1 |
- 1 x Grillgaller |
2 |
- 2 x Hiiliastian kansi |
|
2 |
- 2 x Lock för träkolsbehållare |
3 |
- 2 x Hiiliastia |
|
3 |
- 2 x Träkolsbehållare |
4 |
- 1 x Sytytyslevy |
|
4 |
- 1 x Tändningsdel |
5 |
- 1 x Sisäkulho |
|
5 |
- 1 x Innerdel |
6 |
- 1 x Ulkokuori paristokoteloineen |
|
6 |
- 1 x Ytterdel med integrerat batterifack |
7 |
- 2 x Salpa |
|
7 |
- 2 x Låsklämmor |
8 |
- 2 x Katkaisinja säädinyhdistelmä merkkivalolla |
|
8 |
- 2 x Kombinerad fläktströmbrytare och |
9 |
- 4 x Patteri AA 1,5V DC |
|
|
värmereglage med lampindikering |
10 |
- 1 x Patterikotelon kansi |
|
9 |
- 4 x Batteri AA 1,5V DC |
11 |
- 1 x Verkkoliitin |
|
10 |
- 1 x Batterifackskåpa |
12 |
- 1 x Grillivaunu |
|
11 |
- 1 x Nätadapter |
13 |
- 1 x Käyttöohjeet |
|
12 |
- 1 x Grillvagn |
|
|
|
13 |
- 1 x Bruksanvisning |
|
|
|
|
|
CZE |
Seznam komponent |
|
SVK |
Zoznam komponentov |
||
1 |
- 1 x Grilovací rošt |
|
1 |
- 1 x Rošt na grilovanie |
||
2 |
- 2 x Víčko zásobníku dřevěného uhlí |
|
2 |
- 2 x Viečko zásobníka dreveného uhlia |
||
3 |
- 2 x Zásobník dřevěného uhlí |
|
3 |
- 2 x Zásobník dreveného uhlia |
||
4 |
- 1 x Podpalovací talířek |
|
4 |
- 1 x Zapaľovací tanierik |
||
5 |
- 1 x Vnitřní mísa |
|
5 |
- 1 x Vnútorná miska |
||
6 |
- 1 x Vnější plášť se zabudovanými bateriemi |
|
6 |
- 1 x Vonkajší plášť so zabudovanými batériami |
||
7 |
- 2 x Bezpečnostní přezky |
|
7 |
- 2 x Bezpečnostné pracky |
||
8 |
- 2 x Otočný ovladač intenzity přívodu vzduchu/ |
|
8 |
- 2 x Otočný ovládač intenzity prívodu vzduchu |
||
|
|
Regulátor teploty s osvětlením |
|
|
a regulátor teploty s osvetlením |
|
9 |
- 4 x Baterie AA 1,5V DC |
|
9 |
- 4 x Batérie AA 1,5V DC |
||
10 |
- 1 x Kryt baterií |
|
10 |
- 1 x Kryt batérií |
||
11 |
- 1 x síťový adaptér |
|
11 |
- 1 x Sieťový adaptér |
||
12 |
- 1 x vozík grilu |
|
12 |
- 1 x Grilovací vozík |
||
13 |
- 1 x Návod k obsluze |
|
13 |
- 1 x Návod k obsluhe |
||
|
|
|
|
|
||
|
|
|
|
|||
RUS |
Список запчастей |
|
CRO |
Popis dijelova |
||
1 |
- 1 x решётка для гриля |
|
1 |
- 1 x Rešetka roštilja |
||
2 |
- 2 x крышки емкости для древесного угля |
|
2 |
- 2 x Poklopac spremnika za drveni ugljen |
||
3 |
- 2 x емкости для древесного угля |
|
3 |
- 2 x Spremnik za drveni ugljen |
||
4 |
- 1 x поддон под горючее вещество |
|
4 |
- 1 x Ploča za paljenje |
||
5 |
- 1 x внутренняя чаша |
|
5 |
- 1 x Unutrašnja posuda |
||
6 |
- 1 x внешняя чаша с встроенным отсеком для |
|
6 |
- 1 x Vanjska posuda s integriranim |
||
|
|
батареек |
|
|
|
baterijskim pretincem |
7 |
- 2 x защелки |
|
7 |
- 2 x Držač |
||
8 |
- 2 x комбинированных переключателя венти |
|
8 |
- 2 x kombinirani prekidač za uključenje |
||
|
|
ляции и регулирования температуры со |
|
|
|
isključenje i regulaciju topline sa |
|
|
световой индикацией |
|
|
|
svjetlosnim indikatorom |
9 |
- 4 x батарейки AA 1,5 В постоянного тока (DC) |
|
9 |
- 4 x Baterija AA 1,5V DC |
||
10 |
- 1 x крышка отсека для батареек |
|
10 |
- 1 x Poklopac baterijskog pretinca |
||
11 |
- 1 x сетевой адаптер |
|
11 |
- 1 x Mrežni adapter |
||
12 |
- 1 x тележка для гриля |
|
12 |
- 1 x Kolica za roštilj |
||
13 |
- 1 x инструкция по эксплуатации |
|
13 |
- 1 x Upute za uporabu |
||
|
|
|
|
|
|
|
5

BEDIENUNGSANLEITUNG
Vorwort
Lesen Sie die Bedienungsanleitung des Holzkohlegartengrills vor Inbetriebnahme vollständig und sorgfältig durch. Bewahren Sie diese für Nachschlagezwecke auf und geben diese auch an jeden nachfolgenden Verwender weiter.
|
|
TECHNISCHE |
Gewicht |
Material |
|
|
DATEN |
ca. 21,8 kg |
Aussenschale: Pulverbeschichtetes Stahl |
DEU |
|
|||
|
|
Abmessungen Grill |
Boden: Schlagfester Kunststoff (ABS) |
|
|
|
|
||
|
|
|
Ø oben ca. 600 mm |
Griff, Grillrost, Innenschale, Holzkohlebehälter, |
|
|
|
||
|
|
|
Ø unten ca. 488 mm |
Anzündschale und Verriegelungsschnallen: Edelstahl |
|
|
|
Höhe ca. 284 mm |
Grillwagen: Pulverbeschichtetes Stahl |
|
|
|
Ø Grillrost ca. 576 mm |
Räder: Schlagfester Kunststoff |
|
|
|
|
Batteriebetrieben: 4 x 1.5V AA (6 Volt). |
|
|
|
|
|
Sicherheitsinformationen
Wichtige Symbole und Vorsichtsmaßnahmen
 WICHTIG Bleiben Sie Aufmerksam!
 ACHTUNG Gefahr von Sachschäden bzw. Schäden am Produkt.
VORSICHT |
Gefahren oder gefährliche Verhaltensweisen, die leichte Verletzungen |
||
oder Sachschäden zur Folge haben können. |
|||
|
|||
|
|
|
|
WARNUNG |
Gefahren oder gefährliche Verhaltensweisen, die zu schweren |
||
Verletzungen oder sogar zum Tod führen können. |
|||
|
|||
WARNUNG |
- Warnung vor Verbrennung! |
|
- Warnung vor Erstickung! |
|
- Nicht in geschlossenen Räumen benutzen! |
VORSICHT |
- Zum Anzünden oder Wiederanzünden keinen Spiritus, Benzin oder |
|
vergleichbare Flüssigkeit verwenden! |
|
- Halten Sie Kinder und Haustiere fern! |
|
- Verwenden Sie nur Sicherheitsbrennpaste als Anzündhilfe |
|
entsprechend der Europäischen Norm für Anzündhilfe (EN 1860-3) |
|
- Bei Berühren des heißen Grillrostes Handschuhe tragen |
ACHTUNG |
- Lassen Sie den Grill vor dem Reinigen völlig abkühlen. |
|
- Niemals den Holzkohlebehälter zum löschen der glühenden |
|
Holzkohle mit Wasser übergießen. |
WICHTIG |
- Vor dem Gebrauch muss der Grill auf eine stabilen Untergrund gestellt werden. |
|
- Benutzen Sie beim Grillen eine Grillzange. Wir empfehlen die |
|
Verwendung von LotusGrill Zubehör. |
|
- Lassen Sie den heißen Grill nie unbeaufsichtigt. |
|
- Bei sehr fetthaltigen Grillgut bitte beachten, dass die Innenschussel |
|
regelmäßig entleert wird. |
|
- Lassen Sie den Grill nicht unabgedeckt im Regen stehen. |
|
Wir empfehlen die Verwendung einer LotusGrill XXL-Abdeckung. |
6 Bedienungsanleitung
Sicherheitsinformationen
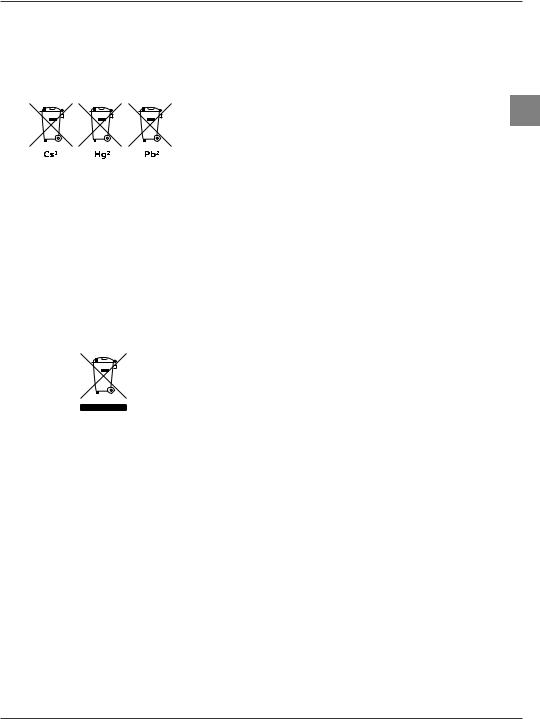
Batterien sicher handhaben und entsorgen
Die sichere Handhabung der Batterien ist zu beachten:
Es dürfen nur im Handel zugelassene AA-Batterien in einwandfreiem Zustand verwendet werden.
Die ordnungsgemäße Entsorgung der Batterien ist zu beachten: Die leeren Batterien sind nach den gesetzlichen Bestimmungen des Batteriegesetzes (BattG) zu entsorgen, d.h. bei den von den Händlern eingerichteten Sammelstellen abzugeben.
Die leeren Batterien dürfen nicht im Hausmüll entsorgt werden.
Holzkohle sicher entsorgen
Entsorgen Sie die verbrauchte Holzkohle nur in dafür vorgesehene Gefäße aus Metall oder anderen nicht brennbaren Materialien. Geben Sie diese nicht in Kunststoffoder andere Behälter aus brennbaren Materialien.
Altgerät umweltgerecht entsorgen
Entsorgen Sie Ihr Altgerät getrennt vom Hausmüll durch Abgabe an den hierfür vorgesehenen Sammelstellen. Diese teilt Ihnen der Hersteller auf Anfrage mit.
Bestimmungsgemäße Verwendung
Dieser Holzkohlegartengrill darf zum Grillen mit Holzkohle für die Zubereitung von grillbaren Speisen eingesetzt werden.
Dieser Holzkohlegartengrill darf nicht in geschlossenen Räumen verwendet werden.
Alle Vorgaben dieser Bedienungsanteilung sind unverändert einzuhalten.
Der Holzkohlegartengrill ist nur für den privaten Gebrauch bestimmt!
Allgemeine Hinweise zur Montage
Lesen Sie die Montageanleitung sorgfältig durch und befolgen Sie die Sicherheitshinweise. Nehmen Sie sich ausreichend Zeit für den Zusammenbau. Schaffen Sie zuvor eine ebene Arbeitsfläche mit ausreichend Platz. Entnehmen Sie das Gerät der Verpackung!
DEU
Deutsch 7

DEU
Montagevorbereitung
Überprüfen Sie bitte anhand der nachstehenden Einzelteilliste und der Zeichnung die Vollständigkeit des Lieferumfangs.
Entfernen Sie das Verpackungsmaterial.
Erste Benutzung
Auf dem Holzkohlebehälter können produktionsbedingt Ölreste sein, die nur bei der ersten Benutzung leichte Rauchentwicklung verusachen können.
HUN SLK NED CZE SWE FIN SPA ITA FRA ENG
Pflege und Aufbewahrung
 WICHTIG Sie müssen den Grill vor der Reinigung vollständig abkühlen lassen.
 VORSICHTBenutzen Sie kein Wasser, um den heißen Grill abzukühlen. Es kann sonst zu Verbrennungen und Verbrühungen kommen.
-Nach jeder Benutzung sind der Grillrost und die Innenschüssel sowie sonstige verschmutze Teile zu reinigen.
-Warten Sie mit der Reinigung unbedingt bis der Grill vollständig abgekühlt ist, da sonst die Gefahr von Verbrennungen besteht.
-Grillrost und Innenschüssel können entweder in der Spulmaschine oder per Hand mit allen handelsüblichen Geschirrspülmitteln gereinigt werden.
-Wir empfehlen zur Reinigung hartnäckiger Rückstände, handelsübliche Grillreiniger z. B. den LotusGrill Grillund Backofenreiniger. Verwenden Sie zur Reinigung niemals Säure, Lösungsbenzin oder andere brennbaren Stoffe.
-Die Außenschale mit der Elektroeinheit mit einem feuchten Lappen oder einer Bürste reinigen.
-Vor längerer Außerbetriebsetzung sollten die Batterien aus dem Gerät entfernt werden.
-Der Holzkohlebehälter darf nur trocken, z. B. mit einer Bürste, gereinigt werden.
 ACHTUNG Den Holzkohlebehälter nie mit Wasser reinigen!
Gewährleistung:
Für den Kauf eines LotusGrills stehen Ihnen die gesetzlichen Gewährleistungsrechte zu.
Die Rückseite dieser Bedienungsanleitung mit Händlerstempel bzw. Ihre Kaufquittung mit Angaben des Kaufdatums ist Ihr Gewährleistungsnachweis.
Eventueller Verschleiß, Rostbildung, Verformung und Verfärbung der Teile (insbesondere der Edelstahlteile), die direkt dem Feuer ausgesetzt sind, sind normal und funktionsbedingt und stellen keinen Gewährleistungsfall dar. Der Holzkohlebehälter ist ein Verschleißteil und sollte von Zeit zu Zeit gewechselt werden.
8 Bedienungsanleitung

Montageund Gebrauchsanweisung
1. |
Montieren Sie als erstes den Grillwagen (12) nach Montageanleitung. |
|
||
2. |
Nehmen Sie die Aussenschale (6) und setzen Sie sie mit den konischen Füßen an die dafür |
|
||
|
vorgesehene Gummilager auf dem Ring des Grillwagens. |
|
||
3. |
Schrauben Sie die Aussenschale (6) von unten durch de Ring des Grillwagens mit drei |
|
||
|
Schrauben fest. |
|
|
DEU |
4. |
Öffnen Sie das Batteriefach (10) im Boden der Außenschale (6). Setzen Sie die vier |
|||
|
AA -Batterien(9) ein. Achten Sie auf die Polarität. Verschließen Sie das Batteriefach (10). |
|
||
|
Wenn ein 220V Stromanschluss zur Verfügung steht, können Sie den mitgelieferten |
|
||
|
Netzadapter (11) verwenden. Die Anschlussbuchse befindet sich zwischen die zwei Regler (8). |
|
||
5. |
Legen Sie die Innenschale (5) in die Außenschale (6). |
|
||
6. |
Befullen Sie die Holzkohlebehälter (3) vollständig mit Holzkohle z. B. LotusGrill |
|
||
|
Buchen-Grillholzkohle*, und setzen Sie die Deckel(2) auf die Holzkohlebehälter. |
|
||
|
Der Lotusgrill XXL kann auch nur mit einem Holzkohlebehälter betrieben werden. |
|
||
7. |
Tragen Sie einen circa 10mm breiten Ring des Grillanzundgels mit ca. 2cm Abstand um |
|
||
|
die Einblasöffnungen der Anzundschale (4) auf und legen Sie die Anzundschale auf die |
|
||
|
Innenschale (5). Wir empfehlen die LotusGrill Sicherheitsbrennpaste. |
|
||
|
VORSICHT |
|
|
|
|
Kein Brennpaste in die Einblasöffnungen spritzen! Brandgefahr! |
|
|
|
|
|
|
|
|
8.Schalten Sie die Ein/Aus-Schalter (8) an der Außenschale(6) ein und drehen Sie die Regler (8) zunächst auf die höchste Stufe (nach rechts).
WICHTIG Damit die Flamme beim Anzünden nicht erstickt, müssen die Lüfter eingeschaltet sein.
9.Zunden Sie das Gel an, bis es brennt.
10.Stellen Sie die gefullten Holzkohlebehälter(3) mit Deckel(2) auf die Anzundschale(4). Innerhalb kurzester Zeit beginnt die Holzkohle zu gluhen.
VORSICHT Sie müssen die Holzkohlebehälter vorsichtig und gleichmässig aufsetzen.
11.Legen Sie den Grillrost(1) auf die Innenschale (5). Die zwei Bugel seitlich am Grillrost mussen auf die Verriegelungsschnallen (7) ausgerichtet sein.
12.Haken Sie die zwei Bugel mit den Verriegelungsschnallen (7) ein und drucken Sie die Schnallen nach unten. Der gesamte Gartengrill ist jetzt eine verbundene Einheit.
13.Nach circa 5 Minuten ist der LotusGrill® XXL einsatzbereit. Um die Hitze zu regulieren, benutzen Sie die beide Wärmeregler (8). Sie können die Temperatur getrennt regeln. (Rechte Regler für die rechte Behälter bzw. linke Regler für die linke Behälter) Die Lufter bleiben während dem gesamten Grillvorgang angeschaltet.
* Jede normale Holzkohle ist verwendbar. Briketts bringen keine optimale Ergebnisse. |
Deutsch 9 |
INSTRUCTION MANUAL
Introduction
Before using the Charcoal Garden Grill for the first time, read the manual thoroughly. Keep the manual for your reference during the complete product life and pass it on to any other grill users.
|
|
TECHNICAL |
Weight |
Material |
|
|
DATA |
21,8 kg |
Outer bowl: Powder-coated steel |
|
|
|
Measurements |
Base: Impact-resistant plastic (ABS) |
|
|
|
top diameter 600 mm |
Handle, grill grid, inner bowl, charcoal |
|
|
|
bottom diameter 488 mm |
container, ignition plate and latches: Stainless steel |
|
|
|
height 284 mm |
Grill cart: Powder-coated steel |
ENG |
|
|
||
|
|
grid diameter 576 mm |
Wheels: Impact-resistant plastic |
|
|
|
|
Operated with 4 x 1.5 VV batteries (6 Volt). |
|
|
|
|
|
|
Safety information
Important symbols and precautionary measures
IMPORTANT |
Be attentive! |
|
|
ATTENTION |
Inaccurate use could cause damage to material. |
|
|
CAUTION |
Inaccurate use could cause small injuries or damage to material. |
|
|
WARNING |
Inaccurate use could cause heavy injuries or even lethal outcome. |
|
|
WARNING |
- Risk of burns! |
|
- Risk of suffocation! (in case of grilling in a closed space) |
|
- Do not use this grill in unventilated spaces. |
CAUTION |
- Do not use spiritus, petrol or other equivalent liquid to ignite or |
|
reactivate the fire! |
-Keep the grill away from children and animals!
-Use only osafety fuel gel lighters according to European Standard (EN 1860-3)
-Wear gloves when touching the hot grill grid.
ATTENTION |
- Let the grill cool off entirely before cleaning. |
|
- Never pour water into the charcoal container in order to |
|
extinguish the charcoal. |
IMPORTANT |
- The bbq must be placed on a stable support before use |
|
- Use barbecue tongs. We recommend LotusGrill Accessories. |
|
- Never leave the hot grill unattended. |
|
- When grilling very fatty foods, ensure that the inner bowl is |
|
emptied on a regular basis. |
|
- Do not leave the BBQ uncovered in the rain. We recommend using |
|
a LotusGrill XXL cover. |
10 Instruction Manual
Safety information
Secure handling and disposal of used batteries
Please note: Only use commercially approved AA-batteries.
Remember to dispose batteries properly according to local regulation, i.e. at a battery collection point.
Batteries may not be disposed with domestic waste.
Proper disposal of charcoal
Dispose charcoal in proper non-combustible or metal containers only. Do not dispose in plastic or inflammable containers.
Environmentally friendly disposal of electrical equipment
Please dispose your old grill at proper collection points, which the manufacturer can point out to you at request. Do not dispose your old device with domestic waste.
Intended Use
The LotusGrill may be used to grill meals using charcoal. Do not use this grill in unventilated spaces.
All guidelines provided in this manual must be observed.
The LotusGrill grill is intended for private use only!
Assembly: General Information
Read the assembly instructions carefully and follow the safety information. Be sure to have enough time at your disposal. Create ample space. Remove grill from packaging!
ENG
English 11

ENGDEU
Assembly: Preparation
Check list of components and chart to make sure all items are included in delivery. Take off packaging.
First Use
The Charcoal Container may contain a thin oil film on the metal, due to its production process. This oil can cause smoke only in the first use.
Maintenance and Storage
 IMPORTANT The grill must cool off completely before cleaning.
 CAUTION Do not use water to cool off the hot grill. Burns and scalding might occur.
Clean grill grid, inner bowl and other dirty parts after each use. The grill must cool off entirely before cleaning, otherwise burning injuries might occur.
Grill grid and inner bowl are dishwasher safe or can be cleaned with standard washing-up liquid.
We recommend for cleaning of tenacious residues commercially available barbecue cleaners e.g. the LotusGrill Cleaner for BBQand Oven.
Clean outer bowl (containing electronic unit) only with wet cloth or brush.
Do not use acidic, solvent or other flammable liquids.
Remove batteries during a longer period of storage.
The charcoal container may be cleaned only dry, e. g. with a brush.
 ATTENTION Never use water to clean the charcoal container!
Warranty
The LotusGrill has a 2-years-warranty from date of purchase against manufacturing defects, given that it was used according to instructions of use. For proof of warranty, please retain your sales receipt with indicated date of purchase.
Abrasion, rust, deformation or staining of parts exposed directly to flame (especially stainless steel parts) are normal wear after use and are under no circumstance considered to be manufacturing defects.
12 Instruction Manual

Assembly and Operation Instructions
1.First assemble the grill cart (12) following the Assembly Instructions.
2.Take the outer bowl (6) and, using the tapered feet, place it on the rubber supports provided on the grill cart ring.
3.Use the three screws to screw the outer bowl (6) on tightly from below through the grill cart
ring.
4Open the battery case (10) at the bottom of the outer bowl (6). Insert four AA batteries (9). Mind polarity. Close the battery case (10). If a 220V electrical connection is available, you
can use the power adapter (11) provided. The connection socket is located between the two regulators (8).
5.Place the inner bowl (5) into the outer bowl (6).
6.Fill the charcoal containers (3) completely with charcoal e.g. LotusGrill Beech Charcoal*. Put the covers(2) on the charcoal containers.
The LotusGrill XXL can also be operated with just one charcoal container.
7.Apply a circular layer of lighter gel, approx 10 mm (0.4 inches) wide, at a distance of approx. 2 cm around the ignition plate(4) air openings. Place ignition plate into inner bowl(5). We recommend the LotusGrill Safety Fuel Gel.
 CAUTION Do not squirt any fuel gel into the air openings! Risk of fire!
8.Turn on the On/Off switches (8)on the outer bowl(x) and first turn the regulators (8) to the highest level (clockwise).
 IMPORTANT In order not to quench the flame, the ventilation needs to be turned on.
9.Light gel until it burns.
10.Put the covers(2) on the filled charcoal containers(3) and place the containers on the ignition plate(4). Within a short period of time, the charcoal will be glowing.
 CAUTION Place the charcoal containers carefully and evenly on the ignition plate!
11.Put the grill grid(1) on top of the inner bowl (5). Both metal loops at the side of the grill grid have to be aligned with the latches.
12.Hook the latches (7) into the metal loops, and pull down to lock the device. The entire garden grill is now a connected and compact unit.
13.After approx. 5 minutes, the LotusGrill® XXL is ready for use. Use the two On/Off switches for heat regulation(8) to regulate heat. You can regulate the temperatures separately (right switch for the right container and left switch for the left container). The fans stay on during the entire barbecue session.
ENG
* Every common type of charcoal can be used. Briquettes do not deliver optimal results. |
English 13 |

MODE D´EMPLOI
FRA
HUN SLK NED
Avant-propos
Lisez le mode d’emploi du barbecue à charbon de bois entièrement et attentivement avant sa première mise en service. Conservez-le dans le cas où vous auriez besoin de le consulter à nouveau et remettez-le à toutes les personnes qui utiliseront le barbecue après vous.
DONNÉES |
Poids |
Material |
TECHNIQUES |
21,8 kg |
Cuve extérieure: acier revêtu de poudre |
|
Measurements |
Fond: matière plastique résistante aux chocs (ABS) |
|
en haut 600 mm |
Poignée, grille, cuve intérieure, réservoirs à charbon de bois, |
|
du bas 488 mm |
coupelle d‘allumage et fermoirs de verrouillage : acier inoxydable |
|
hauteur 284 mm |
Chariot pour barbecue: acier revêtu de poudre |
|
grille 576 mm |
Roues : matière plastique résistante aux chocs |
|
|
Foctionne à piles 4 x 1.5 V AA (6 Volt). |
Consignes de sécurité
Symboles et mesures de précaution à connaître et à respecter
|
- Attention au risque d’asphixie ! |
|
|
- N’utilisez pas le barbecue dans des pièces fermées. |
|
PRÉCAUTION |
- Ne pas utiliser d’alcool, d’essence ou autre liquide analogue pour |
|
|
allumer ou réactiver le feu! |
|
IMPORTANT |
|
Soyez toujours vigilant. |
ATTENTION |
|
Risque de dégâts matériels ou d’endommager le produit. |
PRÉCAUTION |
|
Dangers ou conduite dangereuse susceptibles de provoquer des |
|
|
blessures légères ou des dégâts matériels. |
AVERTISSEMENT |
|
Dangers ou conduite dangereuse susceptibles d’entraîner des |
|
blessures graves voire la mort. |
|
AVERTISSEMENT - Attention au risque de brûlure ! |
||
|
- Tenez les enfants et les animaux domestiques éloignés du barbecue. |
|
|
- Utilisez exclusivement un gel d‘allumage de sécurité, |
|
|
|
conformément à la norme européenne relative à l’usage des |
|
|
produits allume-feu (EN 1860-3). |
|
- |
Mettre des gants avant de toucher la grille brûlante. |
ATTENTION |
- Attendez que le barbecue ait complètement refroidi avant de le netoyer. |
|
|
- Ne jamais utiliser d’eau pour éteindre le charbon de bois dans la cage |
|
|
à charbon. |
|
IMPORTANT |
- Le barbecue doit être installé sur un support horizontal stable avant |
|
utilisation. |
||
|
-Pendant l’utilisation du barbecue, utilisez toujours une pince à barbecue. Nous vous recommandons d’utiliser les accessoires LotusGrill.
-Ne laissez jamais le barbecue encore chaud/brûlant sans surveillance.
-Lorsque vous faites cuire des aliments, assurez-vous que le saladier interne est vidé régulièrement.
-Ne pas laisser le barbecue sous la pluie sans protection. Nous recommandons d’utiliser la housse de protection LotusGrill XXL.
14 Mode D´Emploi

Consignes de sécurité
Manipuler et éliminer les piles en toute sécurité
Veuillez respecter les règles de manipulation des piles: Utilisez uniquement des piles AA autorisées sur le marché et en parfait état, c’est-à-dire sans défauts visibles.
Veuillez respecter les règles d’élimination des piles:
Les piles usagées doivent être éliminées conformément aux dispositions de la loi sur l’élimination des piles, c’est-à-dire qu’elles seront déposées dans les points de collecte installés chez les commerçants.
Les piles usagées ne doivent pas être jetées avec les ordures ménagères.
Éliminer le charbon de bois en toute sécurité
Pour vous débarrasser de votre charbon de bois usagé, utilisez exclusivement des conteneurs spécialement conçus à cet effet, en métal ou à base de matériaux non inflammables. Ne placez pas le charbon de bois usagé dans des conteneurs en plastique ou à base de matériaux inflammables.
Éliminer un appareil usagé sans nuire à l’environnement
Ne jetez pas votre appareil usagé avec les ordures ménagères, mais déposez-le dans un des points de collecte prévus à cet effet. Pour en connaître les coordonnées, adressez-vous au fabricant.
Utilisation conforme à la règlementation
Ce barbecue à poser est conçu pour préparer des grillades au charbon de bois.
Cet appareil ne doit pas être utilisé dans des espaces fermés.
Les instructions contenues dans la présente notice doivent être suivies de manière stricte.
Le barbecue à poser à charbon de bois est réservé à un usage exclusivement privé.
Consignes générales de montage
Lisez attentivement la notice de montage et respectez les consignes de sécurité. Prenez le temps nécessaire pour effectuer le montage dans de bonnes conditions. Prévoyez une surface de travail plane et dégagée. Sortez l’appareil de son carton d’emballage.
FRA
Français 15

Avant le montage
Assurez-vous que tous les articles vous ont bien été livrés avec le barbecue en vous référant à la liste des pièces et aux illustrations fournies.
Éloignez le carton d’emballage.
FRA DEU
Première utilisation
Des résidus graisseux résultant de la fabrication du barbecue ont pu s’accumuler sur le support métallique du réservoir à charbon de bois et peuvent dégager une légère fumée.
Ce phénomène disparaîtra après la première utilisation.
Entretien et stockage
IMPORTANT |
|
Avant de nettoyer le barbecue, attendez qu’il ait complètement refroidi. |
|
|
|
|
|
|
|
|
|
PRÉCAUTION |
|
N’utilisez jamais d’eau pour refroidir le barbecue encore chaud/brûlant. |
|
|
|
|
Vous risquez en effet de vous brûler ou de vous ébouillanter. |
|
|
|
|
-Après chaque utilisation, veillez à nettoyer la grille, la cuve intérieure ainsi que toutes les pièces tachées.
-Pour cela, vous devez impérativement attendre que le barbecue ait complètement refroidi afin d’éviter tout risque de brûlure.
-La grille et la cuve intérieure peuvent passer au lave-vaisselle ou être nettoyées à la main avec du liquide vaisselle classique.
-Nous recommandons pour le nettoyage des résidus tenaces sur la grille, l’utilisation d’un nettoyant spécial barbecue (ex : Le nettoyant LotusGrill pour barbecue et four). N’utilisez jamais d’acide, d’essence minérale ou autres solvants.
-Pour le nettoyage de la cuve extérieure, qui contient l’unité électrique, utilisez un chiffon humide ou une brosse.
-Nous vous recommandons de retirer les piles de leur compartiment avant une période d’inutilisation prolongée du barbecue.
-La cage à charbon doit être nettoyer à sec, par exemple avec une brosse.
 ATTENTION Ne jamais utiliser d’eau ou d’autres liquides pour nettoyer le réservoir à charbon.
Garantie
Votre barbecue LotusGrill est couvert par une garantie de deux ans pour tout défaut de construction à compter de la date d’achat et sous réserve que l’appareil ait été utilisé conformément aux instructions de la présente notice d’utilisation. Votre ticket de caisse mentionnant la date d’achat fait office de certificat de garantie.
Il se peut que vous constatiez l’apparition de traces d’usure, de rouille, une déformation ou une décoloration des pièces (en particulier des pièces en acier inoxydable) qui sont directement exposées aux flammes. Ces phénomènes sont tout à fait normaux et résultent de l’utilisation normale de l’appareil. Ils ne peuvent en aucun cas être assimilés à des défauts de fabrication. Le réservoir à charbon de bois est une pièce d’usure qu’il conviendra de remplacer de temps en temps.
16 Mode D´Emploi

Montage et mode d’emploi
1. |
Commencez par assembler le chariot (12) en suivant les instructions du manuel. |
|
|||
2. |
Prenez la cuve extérieure (6) et placez-en les pieds coniques sur les supports en caoutchouc |
|
|||
|
prévus à cet effet sur la plaque circulaire du chariot du barbecue. |
|
|||
3. |
Fixez la cuve extérieure (6) à la plaque circulaire par en-dessous avec trois vis. |
|
|||
4. |
Ouvrez le compartiment à piles (10) situé au fond de la cuve extérieure (6). Introduisez |
|
|||
|
les quatre piles AA (9). Faites attention à respecter la polarité. Refermez le |
|
|||
|
compartiment à piles (10). Si une prise de courant en 220 V est disponible, branchez |
|
|||
|
l’adaptateur (11) secteur joint à la livraison. La prise se trouve entre les deux boutons de |
|
|||
|
réglage (8) sur l’appareil. |
|
|
|
|
5. |
Placez la cuve intérieure (5) dans la cuve extérieure (6). |
|
|||
6. |
Remplissez complètement les réservoirs de charbon (3), par exemple avec du charbon de |
FRA |
|||
|
hêtre Lotus Grill*, puis placez les couvercles (2) sur les réservoirs à charbon de bois. |
||||
|
|
||||
|
Le LotusGrill XXL peut également fonctionner avec un seul réservoir à charbon de bois. |
|
|||
7. |
Formez un cercle large d’environ 10 mm avec du gel allume-feu à une distance de 2 cm |
|
|||
|
par rapport aux orifices d’insufflation de la coupelle d’allumage (4) puis déposez la |
|
|||
|
coupelle d’allumage au fond de la cuve intérieure (5). Nous recommandons |
|
|||
|
l’utilisation du gel allume-feu LotusGrill. |
|
|||
|
|
|
|
||
|
PRÉCAUTION |
|
Ne pas faire gicler du gel allume-feu dans les orifices |
|
|
|
|
|
d’insufflation! Risque d‘incendie! |
|
|
|
|
|
|
|
|
8. Mettez en marche les boutons de marche-arrêt (8) sur la cuve extérieure et réglez d’abord les thermostats (8) sur la position maximale (vers la droite).
IMPORTANT |
Le ventilateur doit être en marche pour que la flamme ne |
|
s’éteigne pas. |
|
|
9.Tenez l’allumette allumée en contact avec le gel jusqu’à ce que le gel s’enflamme.
10.Placez les réservoirs pleins de charbon de bois (3) avec leur couvercle(2) sur la coupelle d’allumage (4). Le charbon de bois devient incandescent en quelques instants.
PRÉCAUTION |
Installez les réservoirs à charbon de bois symétriquement avec |
|
précaution. |
|
|
11.Posez la grille(1) sur la cuve intérieure (5). Les deux étriers de part et d’autre de la grille doivent être en face des clips de verrouillage.
12.Accrochez les deux clips (7) sur les étriers de la grille puis appuyez vers le bas sur les clips pour verrouiller l’ensemble. Tous les éléments du barbecue de jardin sont maintenant solidaires les uns des autres.
13.Le LotusGrill® XXL est opérationnel au bout de 5 minutes environ. Utilisez les deux thermostats (8) pour réguler la chaleur. Vous pouvez régler la température séparément (sur le bouton droit pour le foyer droit et sur le bouton gauche pour le foyer gauche). Les ventilateurs restent en marche durant toute la durée des grillades.
* Tous les types de charbon de bois peuvent être utilisés. Les briquettes ne donnent pas un résultat optimal. |
Français 17 |
 Loading...