

LORTONE
INSTRUCTIONS AND PARTS LIST
LS12C Item # 053-093
LS12 Item # 053-090
LS12/LS12C
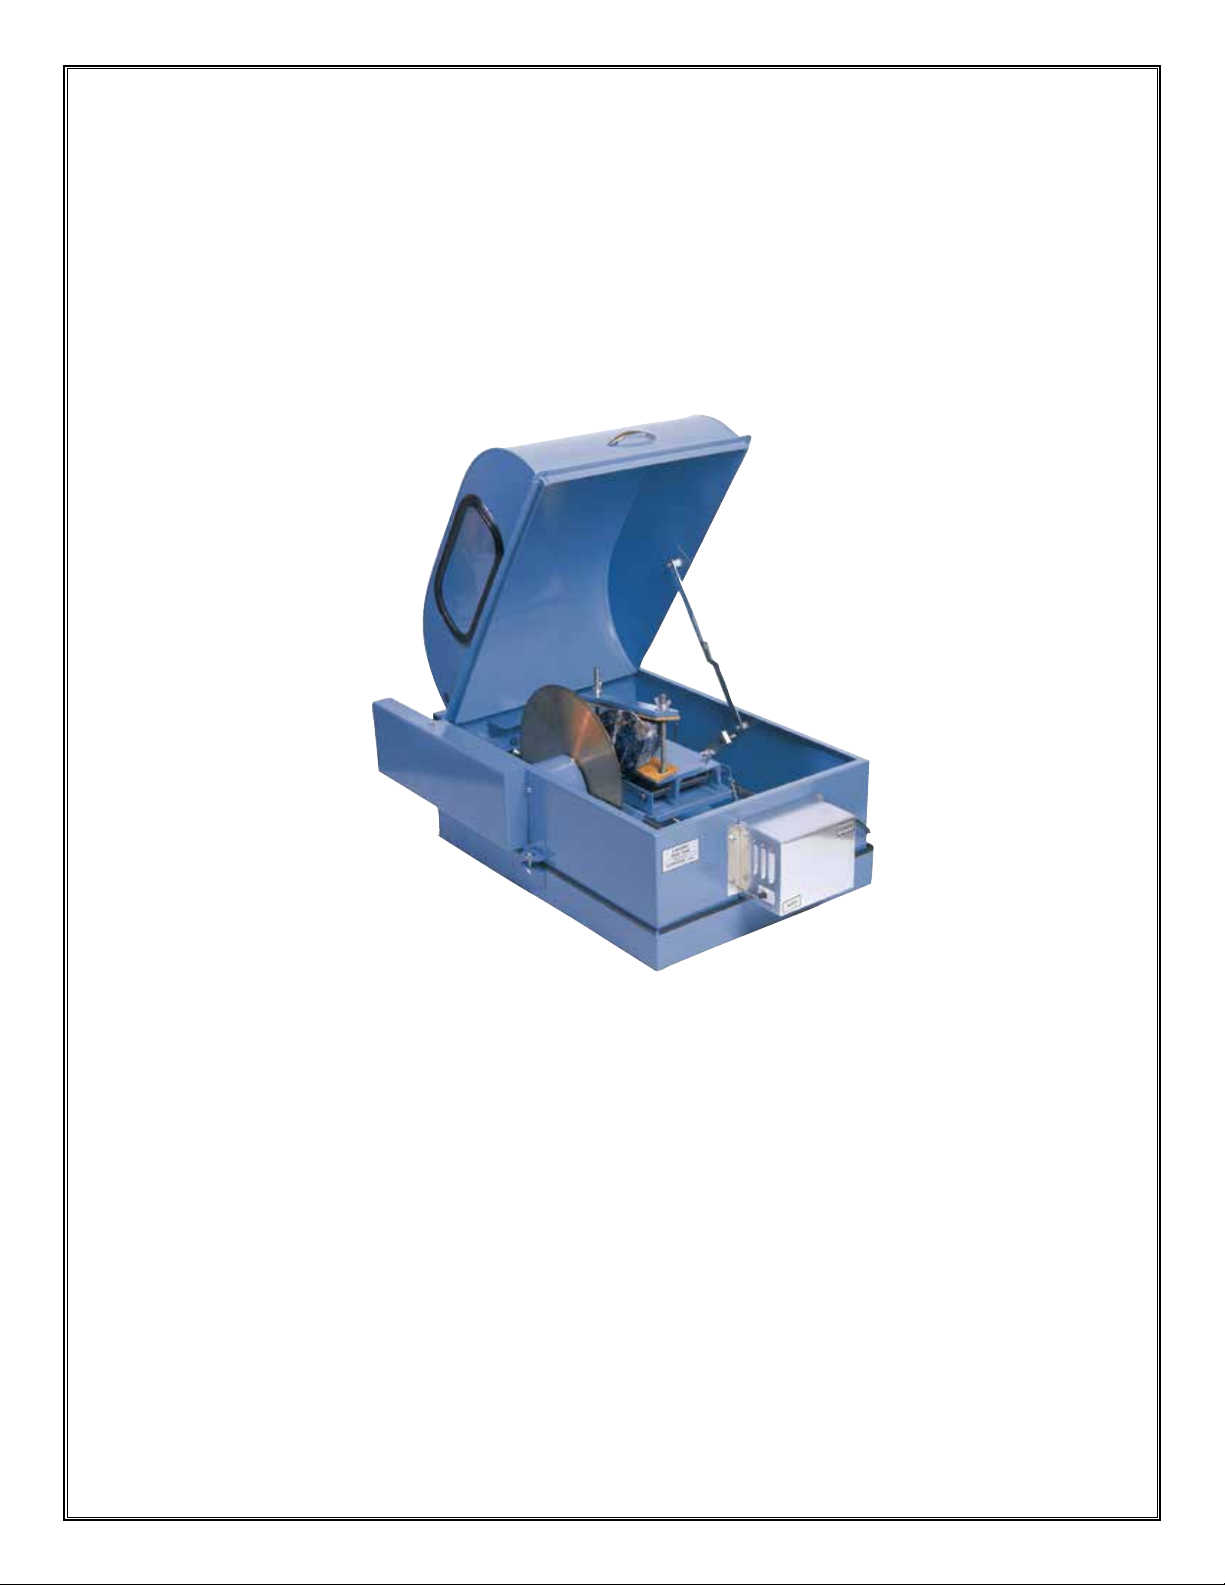
The LS12 is a quiet, fully enclosed, professional quality 12” slab saw. It comes
equipped with a powerful screw-feed and a 4 1/2” capacity vise. Properly set-up,
operated and maintained, the LS12 will easily cut most rock and non-metallic
materials. Oil coolant required.
• Bench-Top Design
• Power Screw-Feed
• Sturdy Welded Steel Frame
• Hinged Hood with Tempered Glass Window
• 12” Blade (LS12C only)
• Overload Protected 1/3 HP Motor (LS12C only)
12/12
LORTONE, inc • 12130 Cyrus Way, Mukilteo, WA 98275 U.S.A
Phone: 425-493-1600 • www.lortone.com
Copyright © 2014 Lortone, Inc
Page 1
SETUP
Check to make sure you have received the following parts:
•
(1) LS12 Saw
(1) Belt Guard with mounting screws
(1) Drive Belt
(1) Accessory Package Containing:
(4) Motor Mounting Bolts with Nuts and Washers
(2) Motor Mount Attachment Screws
(2) Adjusting Bolts with Nuts and Caps
(1) 2 1/4 x 1/2” Motor Pulley
(1) Blade Dressing Stick
Remove the saw from its packing and place on a sturdy, at, level surface.
•
(1) Operators Manual and Warranty Card
(1) 12” Diamond Blade (LS12C only)
(1) 1/3 HP Drive Motor (LS12C only)
Note: Motor for this unit is shipped separately.
Read the following instructions before
assembly or use. Failure to follow
instructions can result in damage to
the machine or injury to the operator.
IMPORTANT
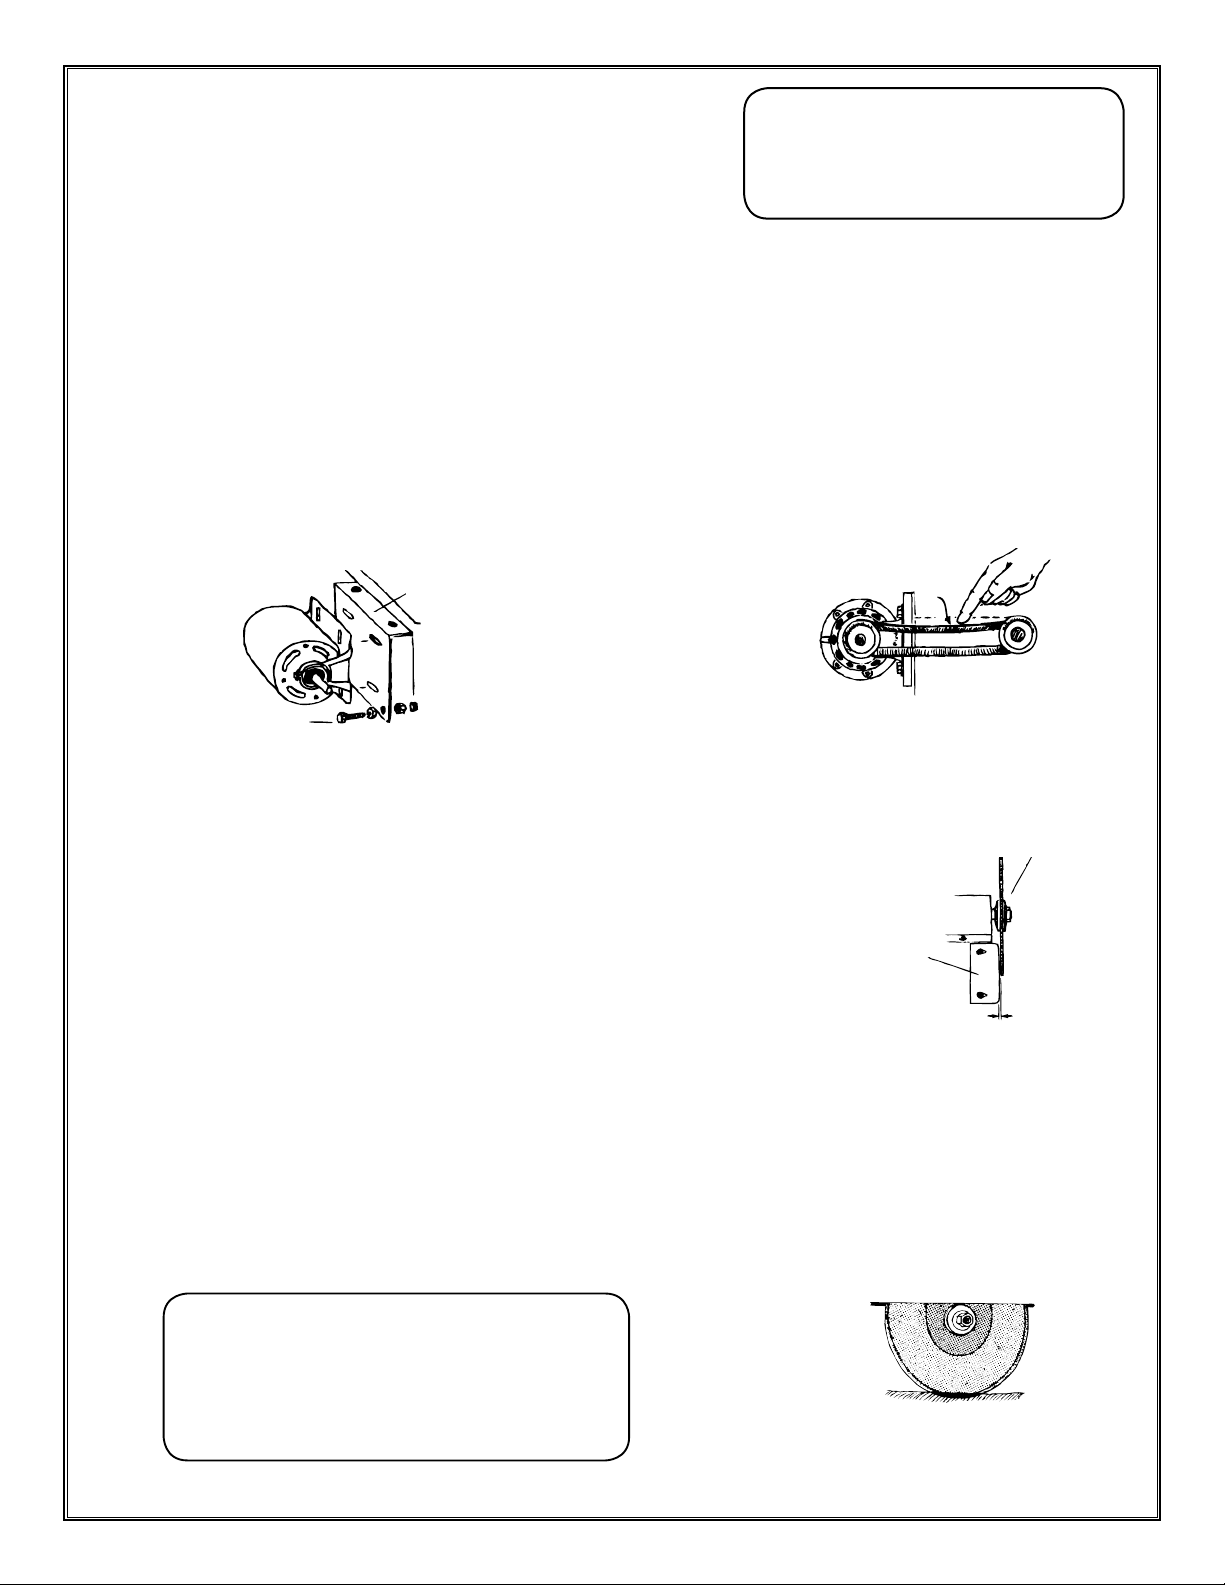
MOTOR INSTALLATION
Secure motor to motor mount with bolts provided.
•
Install adjustment bolts in motor mount as shown and attach motor to saw frame.
•
Place motor pulley on the motor shaft. Tighten set screw securely.
•
Install belt and adjust motor to obtain correct belt alignment and tension.
•
Do not over tighten the belt as this can lead to excessive noise and premature bearing wear.
Motor Mount
Adjust belt tension
for 1/2” -1” slack
Adjustment
Bolts
BELT GUARD INSTALLATION
Place belt guard over the belt, motor pulley, and frame.
•
Install the two mounting screws, tighten securely.
•
SLAB CATCHER
Loosen hold-down screws and adjust slab catcher to clear blade by 1/8”.
•
Slab
Catcher
ELECTRICAL CONNECTION
Make sure all Switches on the Motor and Control Box are in the OFF position
•
Make sure the hood is closed.
•
Plug the Motor Cord into the outlet on the Control Box.
•
Plug the Saw Power Cord into a grounded outlet
•
COOLANT
We recommend LORTONE Cutting Oil #086-010 for optimal results.
Use a neutral petroleum base oil with a high ash point and no additives.
•
Add approximately 2 gallons of coolant until the bottom 1/4”-1/2” of the blade is covered.
•
Install Blade &
Outer Flange,
Tighten Arbor Nut
securely.
1/8”
12/12
CAUTION
DO NOT run saw without proper coolant.
DO NOT use Kerosene or other ammable solvents.
DO Not use water or water soluble oils.
Failure to follow these instructions can result in
damage to machine or serious injury to operator.
Use of these coolants will void the warranty.
LORTONE, inc • 12130 Cyrus Way, Mukilteo, WA 98275 U.S.A
Phone: 425-493-1600 • www.lortone.com
Copyright © 2014 Lortone, Inc
Coolant 1/4”-1/2” on Blade
Page 2
BLADE CARE & DRESSING
Clamp a Blade Dressing Stick in the vise. With the hood closed and the saw running, make several cuts
•
through the stick. Repeat as needed.
Dress the blade frequently. Dull or glazed blades will quickly dish or warp.
•
Note: Dished or warped blades are not covered under warranty.
YOU MUST DRESS THE BLADE PRIOR TO INITIAL USE.
•
This removes the protective paint from the cutting edge of the blade.
OPERATION
Make sure all Switches on Control Box are in the “OFF” position (toward saw) before opening the hood.
•
Clamp material securely in vise. Check for looseness of material and re-tighten if necessary.
•
Adjust cross feed and hand tighten the carriage lock screw #488-056. See Fig A.
•
Check to be sure that material will clear the arbor shaft cover and the blade anges.
To release carriage, pull half nut lever toward control box. Slide the carriage to desired position and release
•
the half nut lever. Make sure the lever is fully engaged.
Adjust shutoff chain #447-001 for desired length of cut.
•
To Start Saw:
Note: The “Power” switch operates the motor and supplies power
to the “Feed” switch. The “Feed” switch operates the feed motor only
and will not work with the “Power” switch in the off position.
Close hood and make sure both switches are in the “OFF” position.
•
Turn the “Power” switch to “ON” position to start blade rotation.
•
To start power feed, turn “Feed” switch to “ON” position.
•
Do not operate saw with Hood open.
Turn off both switches and unplug
Failure to follow these instructions
CAUTION
saw prior to opening hood.
can result in serious injury.
While Cutting: IMPORTANT- DO NOT LEAVE SAW UNATTENDED
Listen for changes in operating noise. Sudden changes can indicate damaged material or blade.
•
Over-heating of the main motor can result in tripping of the safety overload protector.
•
Note: Tripping the safety overload protector does not shut off the power feed. To prevent blade & saw
damage, IMMEDIATELY turn off both the “Power” & “Feed” switches. Inspect the machine and blade for
damage and correct any problems before continuing. When cool, press the red reset button on the drive
motor to reset the protector.
At End of Cut:
Push both switches toward saw to “OFF” position before opening the hood.
•
•
Remove the cut slab. Inspect the remaining material to make sure it is secure in the vise.
Loosen carriage lock screw and advance the carriage by turning the cross-feed wheel.
•
Each turn advances the cross-feed carriage approximately 1/16 inch (.062).
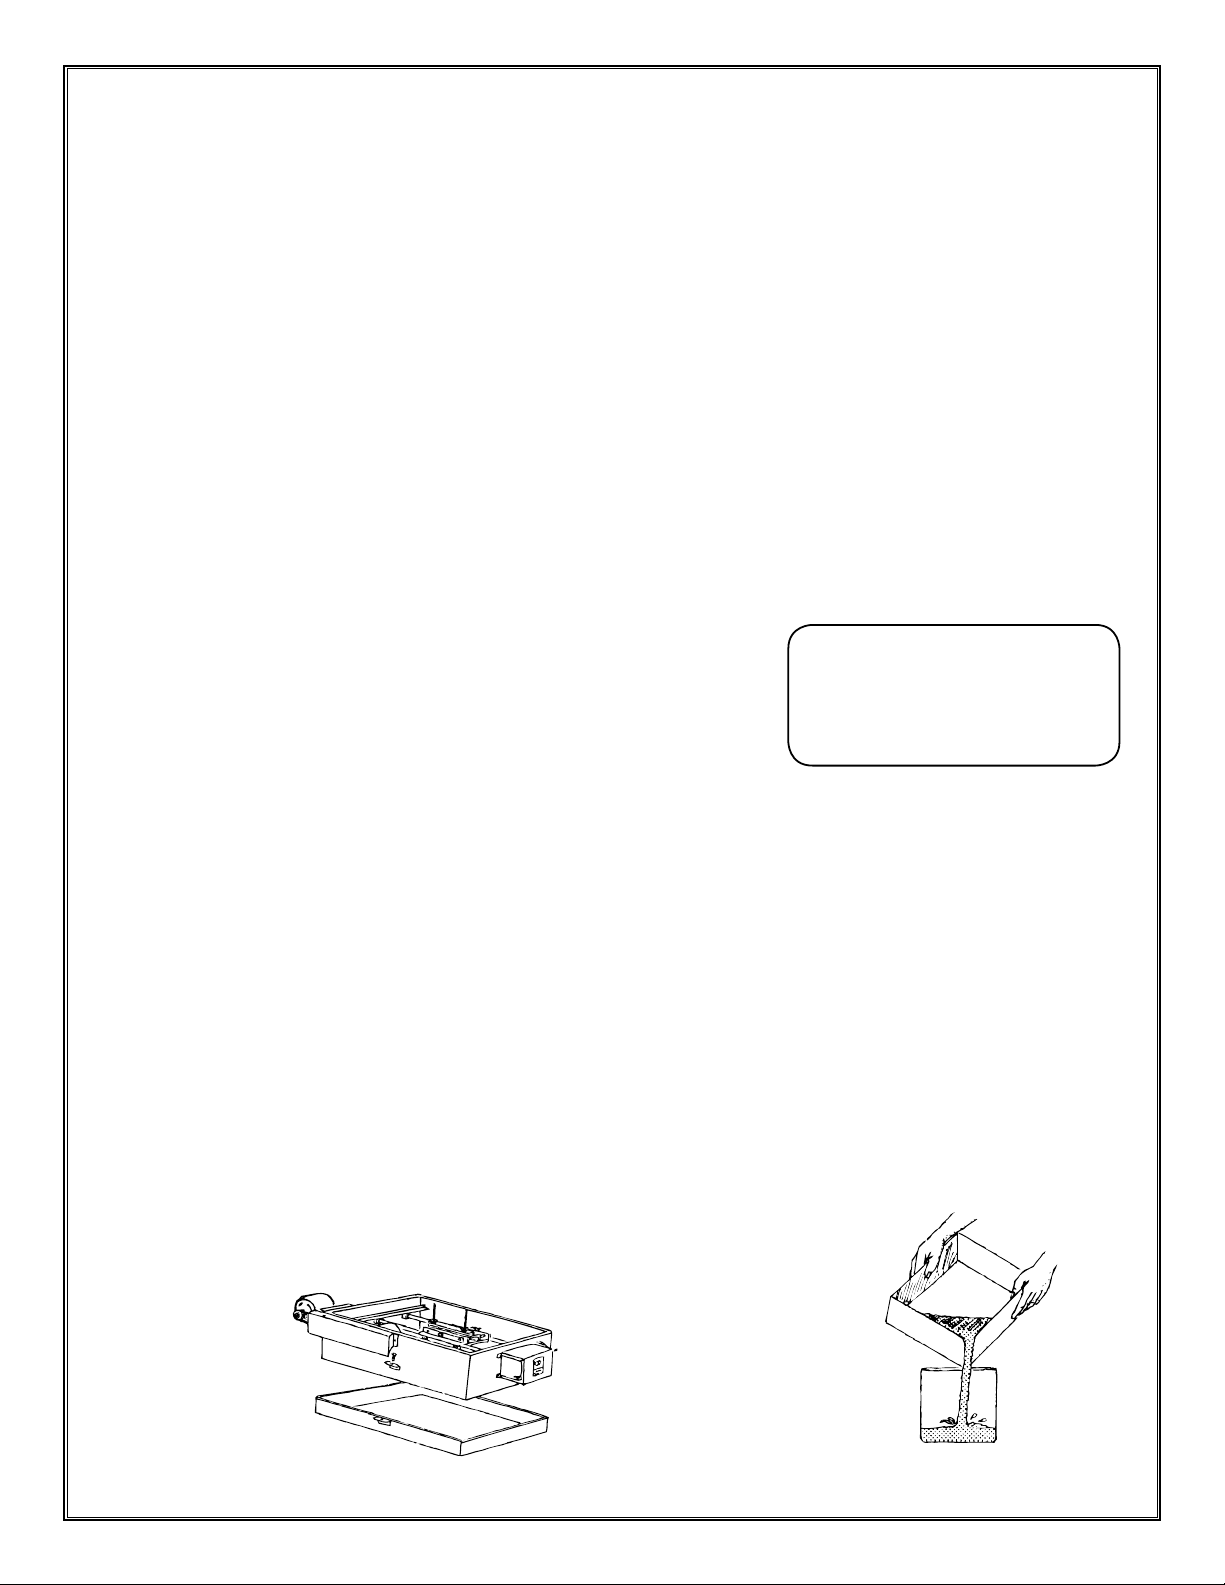
The saw should be cleaned periodically when sediment builds up to a depth of 1/4”.
•
Unbolt the saw case from the coolant pan and lift out the case.
•
Empty the coolant pan and wipe sludge from the case and power feed screw.
•
Re-install case in coolant pan, attach bolts, and add clean and/or ltered oil.
•
Unbolt Pan to Clean
CLEANING MAINTENANCE
Pour Out Used Oil &
Dispose of Properly.
12/12
LORTONE, inc • 12130 Cyrus Way, Mukilteo, WA 98275 U.S.A
Phone: 425-493-1600 • www.lortone.com
Copyright © 2014 Lortone, Inc
Page 3

053-010
053-011
053-005
215-002
Item Description
052-051 Arbor Shaft
053-028 Flange (2 required)
052-020 Feed Rod Coupling
052-022 Power Feed Support
053-001 Feed Rod
053-003 Cross Feed Bolt
053-004 Bracket, Bearing
053-005 Channel, Carriage
053-006 Shaft, Cross Feed
053-008 Threaded Vise Bolt, Cross Feed
053-009 Vise Bottom Plate
053-010 Vise Top Plate
053-011 Vise Pad, Top
481-081 Wing Nut
053-012 Slab Catcher
053-013 Arbor Cover
053-014 Motor Mount
053-016 Carriage Way
058-017 Vise Pad, Bottom
053-047 Window Key Rubber
053-048 Window Rubber Seal
053-109 Control Box (Box Only)
053-106 Belt Guard
053-100 Hood
053-101 Case
053-102 Vise Carriage
053-104 Coolant Pan
053-107 Half Nut
Vise Carriage
Fig. A
481-081
058-017
053-009
488-056
206-031
053-102
053-008
119-001
053-006
Model LS12
Item Description
119-001 Cross Feed Crank Handle Assy
200-005 Carriage Bearing
200-006 Arbor Bearing
201-012 Feed Rod Bearing
204-001 Bearing Strap
205-010 Felt Washer
206-031 Retaining Ring
210-038 Belt (4L360)
211-009 Motor Pulley (2-1/4” x 1/2”)
211-031 Arbor Pulley (4” x 3/4”)
213-002 Spring
215-002 Carriage Collar (5/16”)
215-003 Set Collar (1/2”) (2 places)
215-009 Set Collar (3/4”)
260-001 Window
290-001 Hood Handle
290-012 Hood Brace
301-051 Power Feed Motor
304-012 Switch
304-013 Switch Hex Nut
304-014 Switch Lock-Washer (not shown)
305-002 Receptacle
320-004 Strain Relief
350-002 Cord
447-002 Shutoff Chain (21” long)
481-057 Arbor Nut
488-056 Carriage Lock Screw
566-012 Replacement Blade Dressing Stick
205-010
Arbor Shaft
Fig. B
**Parts sold individually**
320-004
350-002
053-013
204-001
See Fig. C2**
052-051
053-109
200-006
053-028
304-012
481-057
304-013
200-005
12/12
053-004
(3)
200-005
213-002
053-107
LORTONE, inc • 12130 Cyrus Way, Mukilteo, WA 98275 U.S.A
Phone: 425-493-1600 • www.lortone.com
Gear Box
Fig. C
Copyright © 2014 Lortone, Inc
305-002
See Fig. C2**
052-022
301-051
052-020
Fig. C2
**Switch
Page 4

Model LS12
290-001
053-106
053-047
053-048
211-009
210-038
260-001
053-014
Arbor
See
Fig. B
053-100
290-012
Vise Carriage
See Fig. A
215-009
053-101
201-012
215-003
053-016
(2 places)
053-001
12/12
211-031
053-012
LORTONE, inc • 12130 Cyrus Way, Mukilteo, WA 98275 U.S.A
Phone: 425-493-1600 • www.lortone.com
Copyright © 2014 Lortone, Inc
447-002
Control Box
See Fig. C
053-104
Page 5

CAUTION !!
Failure to follow these instructions
may result in injury to the operator
and damage to the machine.
FOR PROPER OPERATION USE ONLY
5-10 wt. PETROLEUM OIL,
NON-DETERGENT TYPE,
WITH A HIGH FLASH POINT
DO NOT USE water, water-soluble oil,
solvents, fuels, anti-freeze or vegetable oil.
Use of these or other materials will result in
substandard performance and damage to
the machine is not covered under warranty.
We suggest LORTONE Cutting Oil
#086-010
CAUTION !!
12/12
LORTONE, inc • 12130 Cyrus Way, Mukilteo, WA 98275 U.S.A
Phone: 425-493-1600 • www.lortone.com
Copyright © 2014 Lortone, Inc
Page 6
 Loading...