

Page 1
Page 1
DMC2161
(R2)
WWW.LOREXCCTV.COM
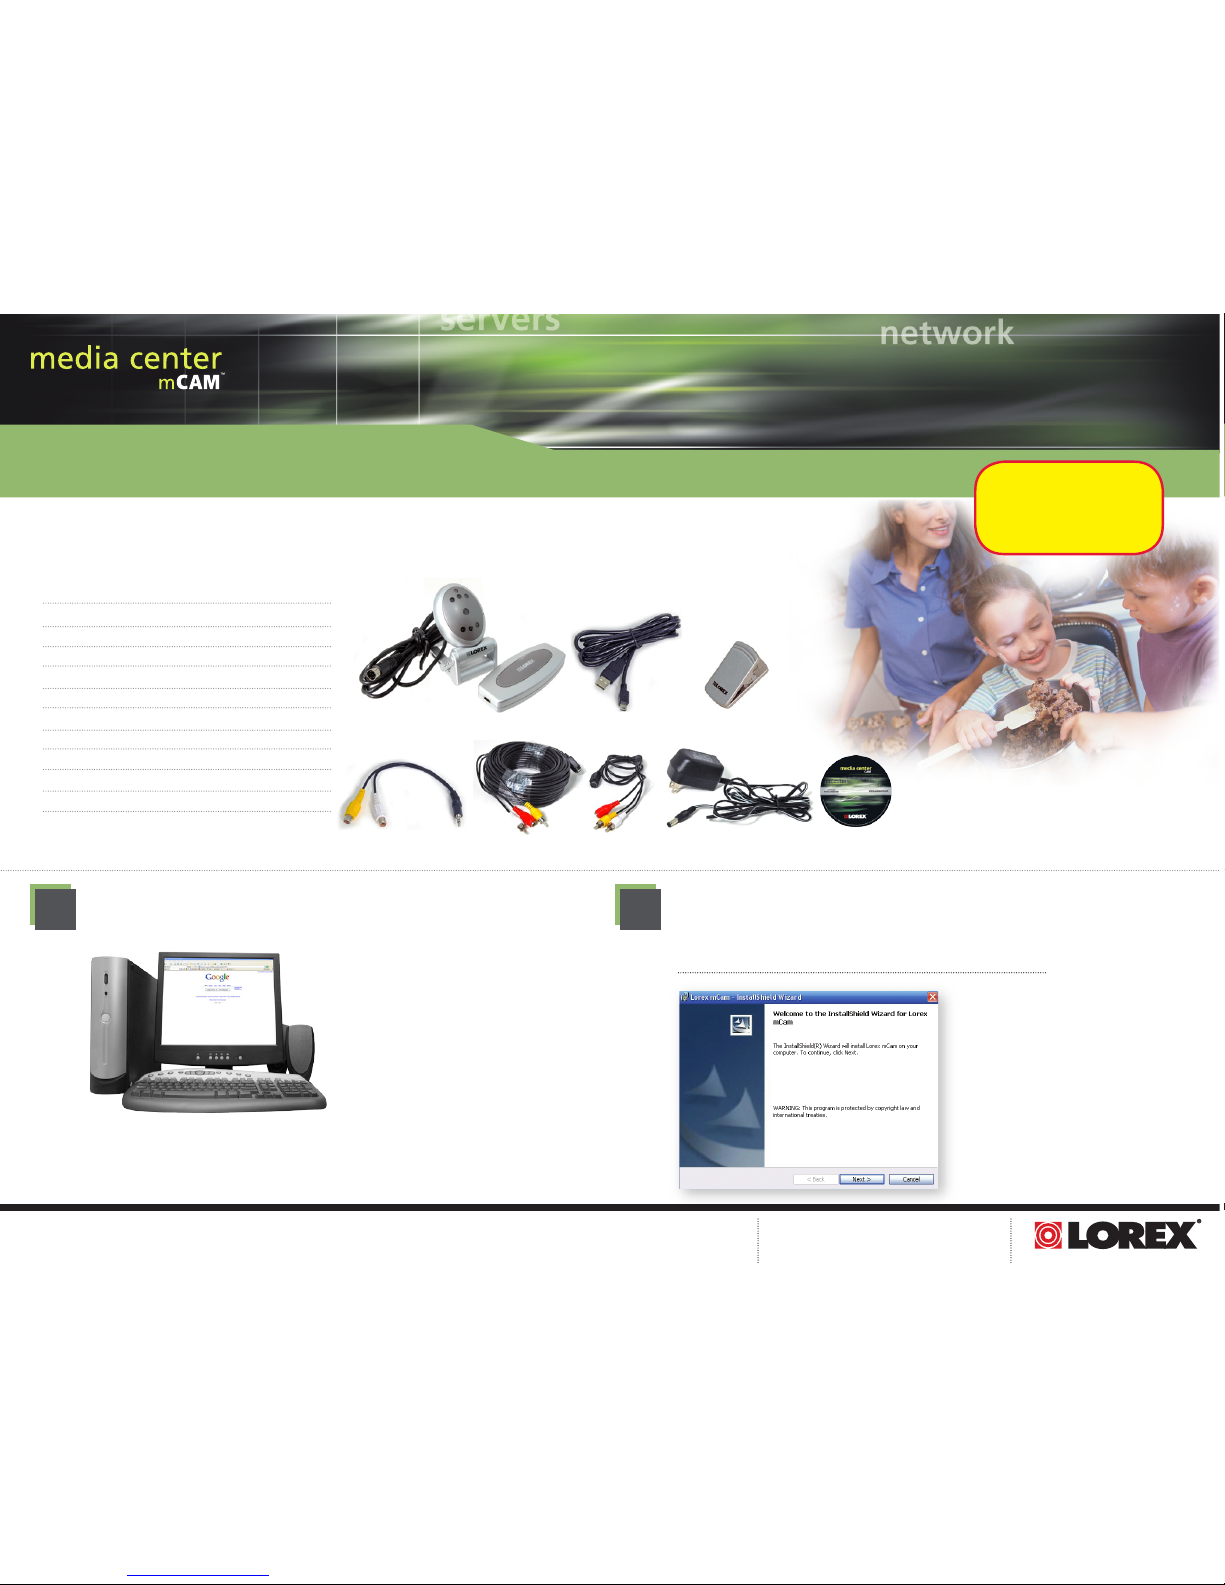
System Contents
Ensure your computer is connected to the Internet
in order for you to obtain any program updates.
Insert the mCAM Application Software CD into your computer’s
CD-ROM drive. Follow the instruction dialog boxes to guide you
through the installation process.
Note: You will need to accept the License Agreement
2
* This set-up guide is intented for users using Internet Explorer as their Internet browser
SETTING UP YOUR mCAM
installation should take approximately 20 minutes
20:00
1 - Color Camera with 6 ft Cable
1 - 9V Power Adapter
1 - Camera Mounting Stand (desk mount)
1 - USB Video Grabber
1 - 55 ft (17 meter) Audio/Video/Power Cable
1 - 3 (0.9 meter) ft Audio/Video/Power Cable
1 - USB Cable (6ft)
1 - Clip-on stand
1 - AV Cable (7”)
1 - User Manual
1 - Quick Setup Guide
1 - mCAM Application Software CD
USB Video Grabber
55 ft Audio/Video
Power Cable
3 ft Audio/Video
Power Cable
9V Power Adapter
Color Camera with
6ft Cable
USB Cable (6ft) Clip-on Stand
AV Cable (7”)
1
mCAM Application
Software CD
Compatible with:
Windows Vista™
Windows Media Center™
Windows XP™
Computer
Page 2
Page 2
DMC2161
(R2)
WWW.LOREXCCTV.COM
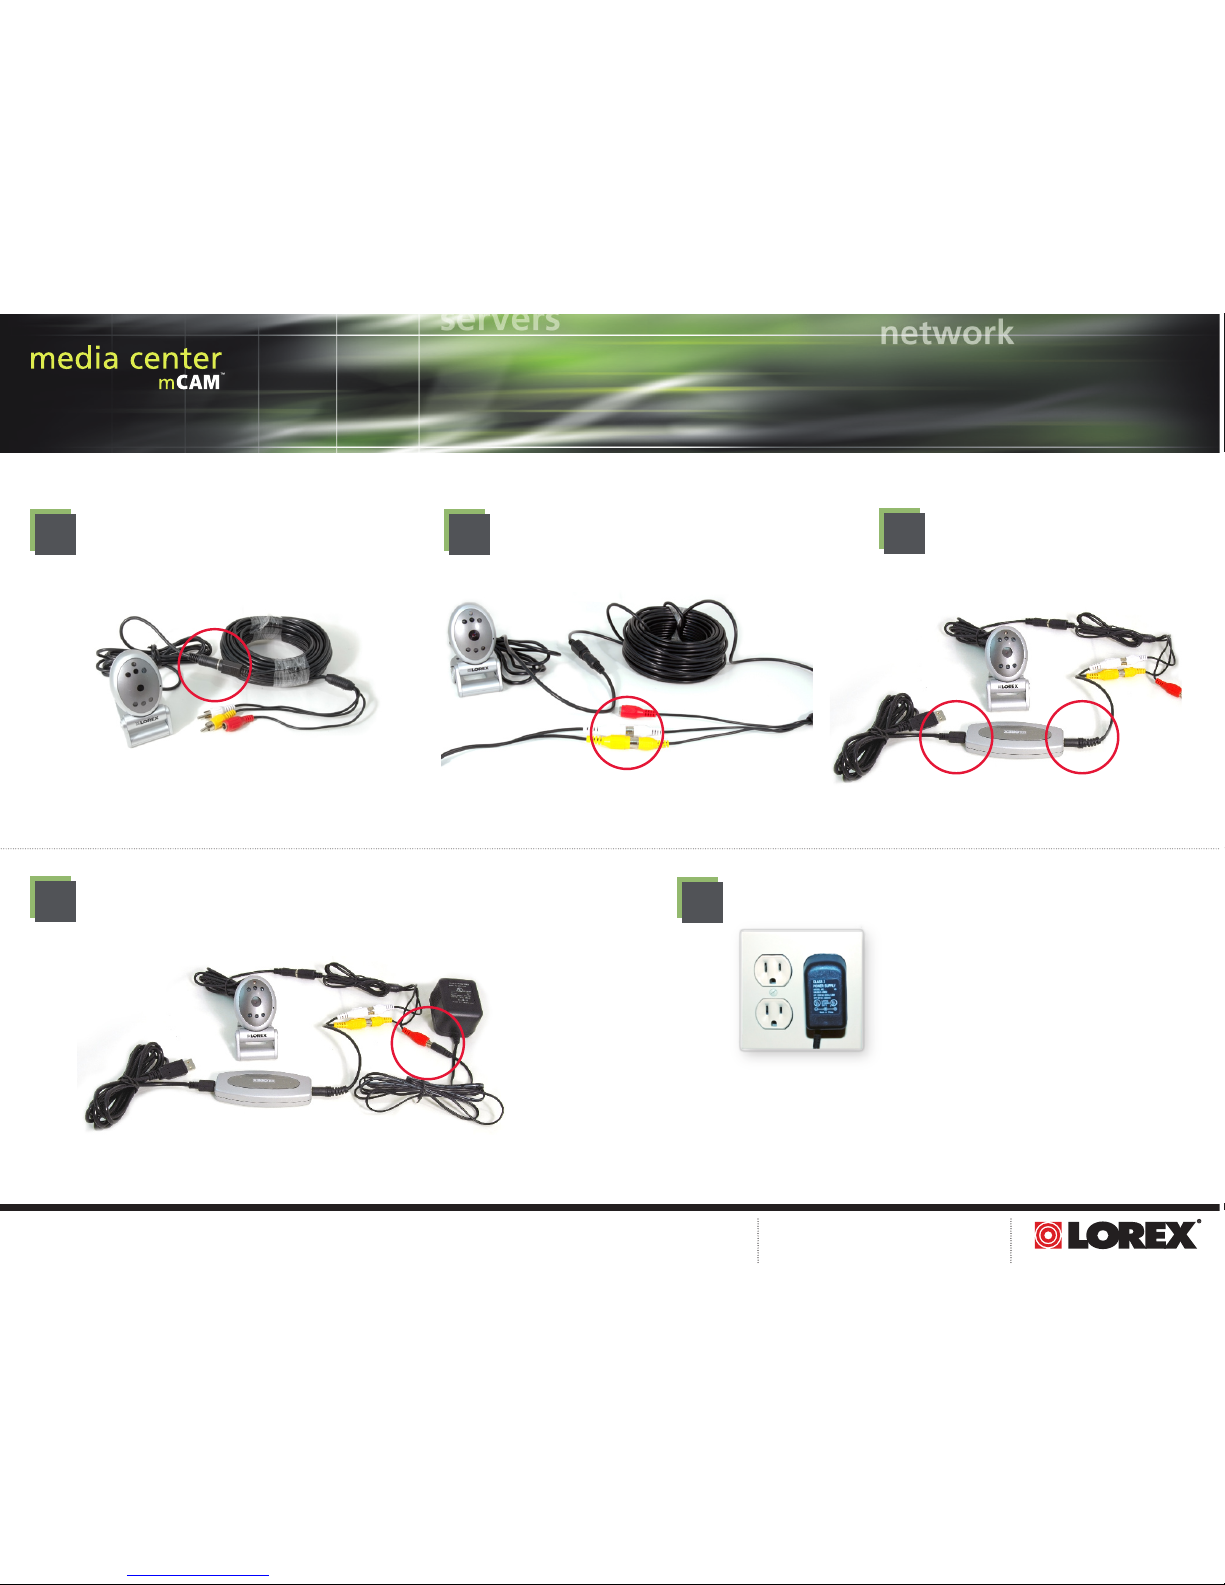
3 ft Audio/Video
Power Cable
Color Camera with
6ft Cable
AV Cable (7”)
USB Cable (6ft)
Color Camera with
6ft Cable
SETTING UP YOUR mCAM
Determine the camera distance to your
computer. Connect the camera either
to the 3ft Audio/Video/Power cable or
the 55ft Audio/Video/Power cable
3
Connect the 7” AV cable (in step 4)
to the video grabber. Connect the
USB cable to the video grabber
5
3 ft Audio/Video
Power Cable
Color Camera with
6ft Cable
AV Cable (7”)
USB Cable (6ft)
USB Video Grabber
9V Power Adapter
Connect the Power cable to
the 9V Power Adapter
6
Plug the 9V Power Adapter
into an electrical outlet
7
Connect the Audio/Video/Power
cable (in step 3) to the 7” AV cable
4
USB Video Grabber
Color Camera with
6ft Cable
55 ft Audio/Video
Power Cable
3 ft Audio/Video
Power Cable
AV Cable (7”)
55 ft Audio/Video
Power Cable
Page 3

Page 3
DMC2161
(R2)
WWW.LOREXCCTV.COM
SETTING UP YOUR mCAM
Follow the New Hardware Wizard dialog boxes to install the new hardware.
Select NO, not this time in the Hardware Wizard screen followed by pressing the
Next button. Select the Install the Software automatically (recommended)
button, and when prompted click the Finish button
9
Restart your Computer
10
Note: Restart your computer before opening
the mCAM application
Connect the USB Video Grabber into your computer’s USB Port
8
Back of a Computer
USB Video Grabber
11A
Open the Media Center Application Software
For systems with Windows Media Center™
Select More Programs and Select Lorex mCAM
11B
Computer
Page 4

Page 4
DMC2161
(R2)
WWW.LOREXCCTV.COM
SETTING UP YOUR mCAM
12
14
It’s all on the web
Product Information
User Manuals
Quick Start Guides
Specification Sheets
Software Updates
Firmware Upgrades
For additional information or troubleshooting help, refer to your owners
manual for assistance. you can also call or email for further support.
Toll Free Technical Support: 1-888-42 LOREX (1-888-425-6739)
Email Support: support@lorextechnology.com
Website: www.lorexcctv.com
To learn more about this
system, please print
or refer to the Owners
manual on the CD.
Information in this document is subj ect to change without n otice. As our products are subject to contin uous improvement, Lore x Technology and our s ubsidiaries reserve the right to
modify product design, specifications and prices, without no tice and without incur ring any obligation. E &OE © 2007 LOREX. All rights reserved.
For systems using other Windows operating
system*
Select Start--->All programs--->Lorex mCAM--->
mCAM to access the Main Menu using your web
browser.
* See user manual for minimum system requirements
Select the Local Surveillance Icon
13
 Loading...