

Page 1

Instruction Manual
LZV1722 HD PTZ Camera
On-Screen Display (OSD) Menu
Page 2

Page 3

Instruction Manual
LZV1722 HD PTZ
Camera
#LX400027; r. 1.0/16996/16996; en-US
iii
Page 4
Thank you for purchasing this product. Lorex is committed to providing our customers with a high quality,
reliable security solution.
This manual refers to the following models:
LVZ1722
For the latest online manual, downloads and product updates, and to learn about our complete line of
accessory products, please visit our website at:
www.lorextechnology.com
WARNING
RISK OF ELECTRIC SHOCK
DO NOT OPEN
WARNING: TO REDUCE THE RICK OF ELECTRIC SHOCK DO NOT REMOVE
COVER. NO USER SERVICABLE PARTS INSIDE.
REFER SERVICING TO QUALIFIED SERVICE PERSONNEL.
The lightning flash with arrowhead symbol, within an equilateral
triangle, is intended to alert the user to the presence of uninsulated
"dangerous voltage" within the product’s enclosure that may be of
sufficient magnitude to constitute a risk of electric shock.
The exclamation point within an equilateral triangle is intended to
alert the user to the presence of important operating and
maintenance (servicing) instructions in the literature accompanying
the appliance.
WARNING: TO PREVENT FIRE OR SHOCK HAZARD, DO NOT EXPOSE THIS UNIT
TO RAIN OR MOISTURE.
CAUTION: TO PREVENT ELECTRIC SHOCK, MATCH WIDE BLADE OF THE PLUG
TO THE WIDE SLOT AND FULLY INSERT.
#LX400027; r. 1.0/16996/16996; en-US
iv
Page 5

Table of contents
1 Using the On-Screen Display (OSD) Menu . ................. ................. ...........1
1.1 System Settings ......... ................. ............ ..... ............ ..... ............ .1
1.1.1 System Information................ ............ ..... ............ ..... ......... 2
1.1.2 Address (ADDR) Information ......... ................. ................. ...2
1.1.3 Restore Factory Defaults ................ ................. ............ ..... .2
1.1.4 Camera System Restart......... ................. ................. ..........3
1.2 Display Settings................. ................. ............ ................. ...........3
1.3 Camera Settings...... ................. ................. ............ ................. .... 4
1.3.1 White Balance Settings ...... ................. ................. .............6
1.3.2 Exposure Mode ....... ................. ................. ............ ..........7
1.3.3 Exposure Compensation.. ................. ............ ..... ............ .... 8
1.3.4 Bright Light Compensation (BLC)............ ............ ..... ............ 9
1.3.5 Slow Shutter ........... ..... ............ ................. ................. ... 10
1.3.6 AGC Gain Limit........... ................. ............ ..... ............ ..... 10
1.3.7 2D & 3D Digital Noise Reduction .... ............ ................. ...... 11
1.3.8 High Light Reduction (HLR)... ............ ..... ................. ......... 12
1.3.9 Auto Exposure Recovery ......... ..... ............ ................. ...... 13
1.3.10 Wide Dynamic Range (WDR) .. ................. ................. ....... 13
1.3.11 Day / Night Setting.... ................. ................. ............ ........ 14
1.3.12 Focus Settings.... ................. ................. ................. ........ 15
1.3.13 Image Adjust ......... ................. ................. ................. ..... 16
1.3.14 Zoom Speed ... ............ ..... ............ ................. ............ .... 16
1.3.15 Aperture Settings ......... ................. ................. ............ .... 17
1.3.16 Digital Zoom ............ ................. ................. ................. .. 17
1.3.17 Picture Flip ..... ................. ................. ................. ........... 18
1.3.18 Lens Initialization.... ................. ................. ................. ..... 18
1.3.19 Picture Mode............. ............ ..... ............ ................. ...... 19
1.3.20 Camera Factory Defaults .... ............ ................. ................ 20
1.3.21 Camera Restart ........... ................. ................. ............ .... 20
1.4 Function Settings..... ..... ............ ..... ............ ..... ............ ..... ......... 20
1.4.1 Preset................ ................. ............ ..... ............ ............ 22
1.4.2 Auto Pan ........... ............ ..... ............ ................. ............. 23
1.4.3 Auto Scan ............... ................. ................. ................. .. 23
1.4.4 Tour ........... ................. ................. ............ ................. .. 24
1.4.5 Pattern........... ................. ............ ................. ................ 25
1.4.6 Idle Motion.... ................. ................. ................. ............ . 26
1.4.7 Privacy Mask.. ................. ................. ..... ............ ............ 26
1.4.8 PTZ Speed ............... ................. ................. ................. . 27
1.4.9 Power Up ..... ................. ................. ................. ............ . 28
1.4.10 Menu Password .. ............ ..... ............ ................. ............. 29
1.4.11 Menu Idle ....... ................. ............ ................. ................ 29
1.4.12 PTZ Auto Stop ............ ................. ................. ..... ............ 30
2 OSD Menu Default Values............... ................. ................. ................. . 31
#LX400027; r. 1.0/16996/16996; en-US
v
Page 6

Page 7

1
Using the On-Screen Display
(OSD) Menu
You can configure the camera’s advanced settings on a Lorex LHV1000 Series DVR using
the OSD menu. Use the OSD menu to correct imperfections in the camera image as well
as configure automated PTZ functions, such as preset locations, patterns, and tours.
Note
It is recommended to change only one setting at a time. If you have made changes and are not happy
with the outcome, see 1.3.20 Camera Factory Defaults, page 20 to reset all items in the Camera Setting
menu to their default values. See 1.1.3 Restore Factory Defaults, page 2 to reset all other items in the
OSD menu.
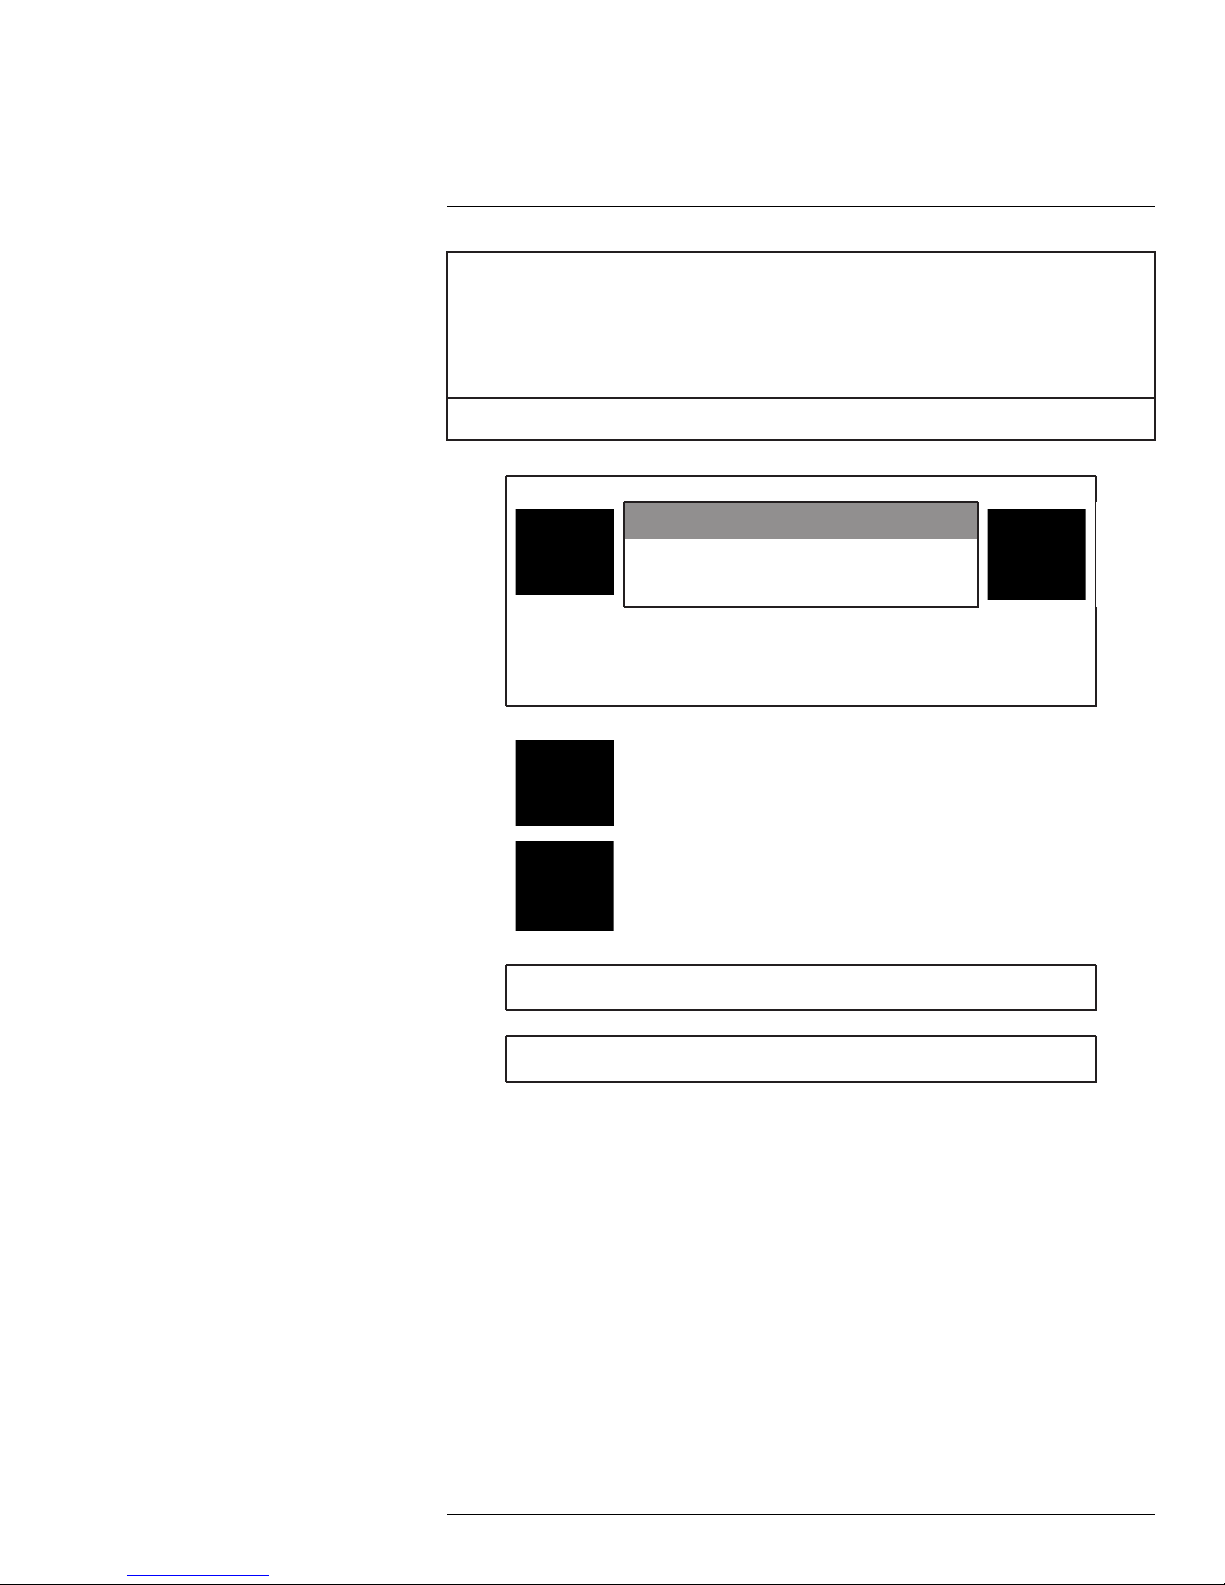
To access the OSD menu:
1. In Live View, double-click the channel that has the PTZ camera connected to open in
full-screen.
2. Right-click and click Pan/Tilt/Zoom. Enter the system user name and password if
prompted. The PTZ menu opens.
3. Click the arrow in the PTZ control window to show advanced controls.
4. Click
5. Use the on-screen controls to configure menu items:
• Up / down arrows: Select menu items.
• Left / right arrows: Change values for menu items.
• Esc: Exit the OSD menu.
• Enter: Confirm selection.
1.1 System Settings
Use the system settings menu to configure basic system information.
System Settings — Menu Structure:
SYSTEM INFORMATION ADDR Displays the camera address.
ADDR INFORMATION
. The OSD menu appears over the camera image.
BR Displays the camera baud rate.
PARITY Displays the communication parity.
PTZ VER Displays the PTZ firmware version.
CAM VER Displays the camera firmware version.
ADDR TYPE
ADDR-HARD 1–255
ADDR-SOFT
• HARD
• SOFT
0–255
#LX400027; r. 1.0/16996/16996; en-US
1
Page 8

1
Using the On-Screen Display (OSD) Menu
SET NORTH Set the current viewing angle as the benchmark angle for the camera.
LANGUAGE Set the language for the OSD menu.
FACTORY DEFAULT Restore the camera system settings to their original, out-of-the-box state.
Exposure settings are not affected when you restore the camera system
settings.
RESTART Reboot the PTZ camera. OSD settings are not affected when you reboot
the camera.
1.1.1 System Information
Note
The information in this section is for service purposes only.
The system information menu displays the PTZ protocol information, including the camera
address, baud rate, parity, and firmware version numbers. The information in this section
is for reference and cannot be configured through the OSD menu.
1.1.2 Address (ADDR) Information
Note
The information in this section is for service purposes only.
The address information menu lets you choose how the camera address is determined.
The camera address is how standard definition DVRs identify PTZ cameras. Under ADDR
TYPE, select HARD to have the address determined by the DIP switches inside the camera housing, or SOFT to select the address using the software (select the address value
under ADDR-SOFT).
1.1.3 Restore Factory Defaults
Restore the camera module to its out-of-the-box state. This will reset all menu items except those in the CAMERA SETTING menu back to their default values.
#LX400027; r. 1.0/16996/16996; en-US
2
Page 9

1
Using the On-Screen Display (OSD) Menu
CAUTION
This step cannot be undone.
To restore camera factory defaults:
1. Use the on-screen arrow keys to navigate to SYSTEM SETTING and click Enter.
2. Select FACTORY DEFAULT and click Enter.
1.1.4 Camera System Restart
Restarts the camera system. The camera powers off and then resumes normal function.
Note
Restarting the camera system does not affect OSD menu settings.
To restart the camera module:
1. Use the on-screen arrow keys to navigate to SYSTEM SETTING and click Enter.
2. Select RESTARTand click Enter.
1.2 Display Settings
Use the display settings menu to choose what information appears over the camera image.
Display Settings — Menu Structure:
PRESET ON / OFF
AZIMUTH DISP ON / OFF
#LX400027; r. 1.0/16996/16996; en-US
3
Page 10

1
Using the On-Screen Display (OSD) Menu
POSITION ON / OFF
INSIDE TEMP
• °C
• °F
• OFF
To configure the display settings:
1. Use the on-screen arrow keys to navigate to DISPLAY SETTING and click Enter.
2. Under PRESET, select ON to show the preset title on the video display, or select OFF
to hide.
3. Under AZIMUTH DISP, select ON to show the camera’s coordinates on the video dis-
play, or select OFF to hide.
4. Under POSITION, select ON to show the angle between the camera’s current position
and the benchmark position on the video display (for details on setting benchmark position, see 1.1 System Settings, page 1), or select OFF to hide.
5. Under INSIDE TEMP, select °F or °C to show the camera’s internal temperature on the
video display, or select OFF to hide.
1.3 Camera Settings
Use the camera settings menu to adjust the camera image.
Camera Settings — Menu Structure:
#LX400027; r. 1.0/16996/16996; en-US
4
Page 11

1
Using the On-Screen Display (OSD) Menu
WB SETTING WB MODE
R GAIN
B GAIN
EXPOSURE
SETTING
DAY/NIGHT
SETTING
AE MODE
GAIN SETTING
SHUTTER 1/4 – 1/30,000
IRIS SETTING
EXPOSURE
COMP
BLC ON / OFF
NEXT PAGE SLOW
DAY/NIGHT
TYPE
THRESHOLD
• AUTO
• ATW
• INDOOR
• OUTDOOR
• OUTDOOR AUTO
• NA LAMP
• NA LAMP AUTO
• MANUAL
0–100
0–100
• AUTO
• MANUAL
• IRIS PRIO
• SHUTTER PRIO
1–16
1–18
1–15
SHUTTER
SLOW
SHUTTER
LIMIT
AGC GAIN
LIMIT
NR 1–16 or OFF
CAMERA
3D NR
HIGH
LIGHT
REDUCE
NEXT
PAGE
• DAY
• NIGHT
• AUTO
• ELECTRON
• MECHANISM
1–8
ON / OFF
1/1 – 1/30
1–3
1–16 or OFF
• HIGH
• LOW
• OFF
AE RECOVERY
WDR SETTING WDR MODE >
• 5M
• 15M
• 30M
• 1H
• 2H
• OFF
ON / OFF
#LX400027; r. 1.0/16996/16996; en-US
5
Page 12

1
Using the On-Screen Display (OSD) Menu
FOCUS
SETTING
IMAGE
ADJUST
ZOOM SPEED
NEXT PAGE
FOCUS MODE
FOCUS LIMIT
AF
SENSITIVITY
IR
CORRECTION
HUE 1–100
BRIGHTNESS
SATURATION
CHROMA
SUPPRESS
GAMMA
CONTRAST
STYLE
1–8
APERTURE 1–16
APERTURE
RESTRAIN
DIGITAL ZOOM ON / OFF
PICTURE FLIP ON / OFF
LENS INIT Performs a lens initialization.
PICTURE
MODE
NEXT PAGE CAMERA
• AUTO
• MANUAL
• SEMIAUTO
• 10CM
• 1M
• 2M
• 3M
• 5M
• AUTO
• LOW
• MID
• HIGH
• ON
• OFF
• AUTO
1–100
1–100
1–4
1–16
1–100
• STANDARD
• SOFT
• NATURAL
1–16
• 720P / 25
• 720P / 30
• 720P / 50
• 720P / 60
FACTORY
DEFAULT
CAMERA
RESTART
Restores the camera to its original, out-of-the-box
settings.
Restarts the camera.
1.3.1 White Balance Settings
The white balance setting menu is used to correct color appearance in the camera image.
#LX400027; r. 1.0/16996/16996; en-US
6
Page 13

1
Using the On-Screen Display (OSD) Menu
To configure white balance settings:
1. Use the on-screen arrow keys to navigate to CAMERA SETTING and click Enter.
2. Select WB SETTING and click Enter.
3. Under WB MODE, click the left / right arrow keys to select one of the following options
based on the camera’s environment:
• AUTO: The camera adjusts white balance automatically.
• ATW: The camera adjusts white balance automatically for various color
temperatures.
• INDOOR: Recommended for most indoor installations.
• OUTDOOR: Recommended for outdoor installations.
• OUTDOOR AUTO: Recommended for outdoor installations — white balance is ad-
justed automatically for outdoor lighting conditions.
• NA LAMP: Recommended for environments with natural lighting.
• NA LAMP AUTO: Recommended for environments with natural lighting — white
balance is adjusted automatically for natural lighting conditions.
• MANUAL: This mode allows you to configure the R GAIN (red) and B GAIN (blue)
values to achieve proper white balance.
1.3.2 Exposure Mode
The exposure mode settings allow you to configure the concentration of light used to produce an image. You can configure a custom exposure or let the camera determine the exposure automatically.
#LX400027; r. 1.0/16996/16996; en-US
7
Page 14

1
Using the On-Screen Display (OSD) Menu
To configure the camera’s exposure mode:
1. Use the on-screen arrow keys to navigate to CAMERA SETTING and click Enter.
2. Select EXPOSURE SETTING and click Enter.
3. Under AE MODE, click the left / right arrow keys to select one of the following exposure
modes:
• AUTO: The settings for gain, iris, and shutter are determined automatically by the
software.
• IRIS PRIORITY: Configure iris settings only. Gain and shutter settings are deter-
mined automatically by the software.
• SHUTTER PRIORITY: Configure shutter settings only. Gain and iris settings are de-
termined automatically by the software.
• MANUAL: Advanced users only — this mode requires you to configure the settings
for gain, iris, and shutter to achieve proper exposure.
4. Under GAIN SETTING, click the left / right arrow keys to set the gain value (1–16). Setting the gain manually allows you to artificially create a brighter (high gain) or darker
(low gain) image. The AE MODE must be set to MANUAL to configure the gain value.
5. Under SHUTTER, click the left / right arrow keys to set the shutter speed (1/4 – 1/
30,000). Setting the shutter speed manually determines how long the camera shutter
remains open when capturing an image. It is recommended to keep shutter speed set
to 1/60 to ensure smooth video. The AE MODE must be set to MANUAL or SHUTTER
PRIO to configure the shutter speed.
6. Under IRIS, click the left / right arrow keys to adjust the iris (1–18). Setting the iris manually determines how much light comes through the lens. The AE MODE must be set
to MANUAL or IRIS PRIO to configure the iris setting.
1.3.3 Exposure Compensation
Use exposure compensation to fine-tune the camera’s exposure. You can use exposure
compensation with automatic exposure to brighten or darken an image to your preference.
#LX400027; r. 1.0/16996/16996; en-US
8
Page 15

1
Using the On-Screen Display (OSD) Menu
To set exposure compensation:
1. Use the on-screen arrow keys to navigate to CAMERA SETTING and click Enter.
2. Select EXPOSURE SETTING and click Enter.
3. Under EXPOSURE COMP, click the left / right arrow keys to set the exposure compen-
sation value from 1 (darkest) to 15 (brightest).
Note
Exposure compensation does not affect the camera image if AE MODE is set to MANUAL.
1.3.4 Bright Light Compensation (BLC)
Turning on Bright Light Compensation (BLC) tones down highlighted areas of the image to
create clearer, more detailed renderings of darker objects in the foreground.
To enable BLC:
1. Use the on-screen arrow keys to navigate to CAMERA SETTING and click Enter.
2. Select EXPOSURE SETTING and click Enter.
#LX400027; r. 1.0/16996/16996; en-US
9
Page 16

1
Using the On-Screen Display (OSD) Menu
3. Under BLC, click the left / right arrow keys to select ON.
1.3.5 Slow Shutter
Slow shutter is used to allow extra light into the camera thereby providing brighter images
in low light conditions.
To enable slow shutter:
1. Use the on-screen arrow keys to navigate to CAMERA SETTING and click Enter.
2. Select EXPOSURE SETTING and click Enter.
3. Select NEXT PAGE and click Enter.
4. Under SLOW SHUTTER, click the left / right arrow keys to turn slow shutter on.
5. Under SLOW SHUTTER LIMIT, click the left / right arrow keys to set the shutter speed
low limit (1/1 – 1/30). It is recommended to keep the slow shutter limit at the default value of 1/30.
1.3.6 AGC Gain Limit
The camera uses automatic gain control (AGC) to refine the video output signal.
#LX400027; r. 1.0/16996/16996; en-US
10
Page 17

1
Using the On-Screen Display (OSD) Menu
To configure AGC:
1. Use the on-screen arrow keys to navigate to CAMERA SETTING and click Enter.
2. Select EXPOSURE SETTING and click Enter.
3. Select NEXT PAGE and click Enter.
4. Under AGC GAIN LIMIT, click the left / right arrow keys to set the high limit for the camera’s automatic gain control (1–3). It is recommended to set the gain limit at 3. Use a
lower setting to reduce noise in the camera image.
1.3.7 2D & 3D Digital Noise Reduction
The camera features 2 types of noise reduction: 2D temporal noise reduction (NR in the
OSD menu) and 3D spatial noise reduction (CAMERA 3D NR). 2D noise reduction helps
to limit the appearance of noise (graininess in the camera image) around stationary objects. 3D noise reduction accomplishes the same process for moving objects as well, providing clearer images in low light conditions. Removing noise from the camera image
reduces your recording file size and makes videos clearer and more detailed.
To configure noise reduction:
1. Use the on-screen arrow keys to navigate to CAMERA SETTING and click Enter.
2. Select EXPOSURE SETTING and click Enter.
3. Select NEXT PAGE and click Enter.
#LX400027; r. 1.0/16996/16996; en-US
11
Page 18

1
Using the On-Screen Display (OSD) Menu
4. Under NR, click the left / right arrow keys to set the 2D noise reduction level (1–16). It
is recommended to keep the 2D noise reduction at the default level of 8 unless the
camera image is noisey in low-light conditions.
5. Under CAMERA 3D NR, click the left / right arrow keys to set the 3D noise reduction
level (1–16). It is recommended to keep the 3D noise reduction at the default level of 8
unless the camera image is noisey in low-light conditions.
1.3.8 High Light Reduction (HLR)
Turn High Light Reduction (HLR) on or off. Turning HLR on darkens extremely bright camera images to ensure a clear camera image.
To enable HLR:
1. Use the on-screen arrow keys to navigate to CAMERA SETTING and click Enter.
2. Select EXPOSURE SETTING and click Enter.
3. Select NEXT PAGE and click Enter.
#LX400027; r. 1.0/16996/16996; en-US
12
Page 19

1
Using the On-Screen Display (OSD) Menu
4. Under HIGH LIGHT REDUCE, click the left / right arrow keys to select a sensitivity
level:
• HIGH: The brightness of highlighted areas is greatly reduced.
• LOW: The brightness of highlighted areas is slightly reduced.
• OFF: HLR is turned off.
1.3.9 Auto Exposure Recovery
Changing the camera’s iris setting through the DVR menu takes priority over the exposure
settings in the OSD menu. Turning on Auto Exposure Recovery (AER) will reset the camera’s iris to the setting specified in the OSD menu after a period of time.
To enable AER:
1. Use the on-screen arrow keys to navigate to CAMERA SETTING and click Enter.
2. Select EXPOSURE SETTING and click Enter.
3. Select NEXT PAGE and click Enter. Repeat on the next page to reach the last page of
the EXPOSURE SETTING menu.
4. Under AE RECOVERY, click the left / right arrow keys to select a period of time after
which the camera’s exposure will reset. Choose a time between 5M and 2H, or select
OFF to turn off auto exposure recovery.
1.3.10 Wide Dynamic Range (WDR)
Turn Wide Dynamic Range (WDR) on or off. Turning WDR on fixes harsh contrast between
bright and dark sections of the camera image.
#LX400027; r. 1.0/16996/16996; en-US
13
Page 20

1
Using the On-Screen Display (OSD) Menu
To enable digital WDR:
1. Use the on-screen arrow keys to navigate to CAMERA SETTING and click Enter.
2. Select EXPOSURE SETTING and click Enter.
3. Select NEXT PAGE and click Enter. Repeat on the next page to reach the last page of
the EXPOSURE SETTING menu.
4. Select WDR SETTING and click Enter.
5. Under WDR MODE, click the left / right arrow keys to select ON.
1.3.11 Day / Night Setting
Choose how the camera switches over from day mode (color) to night mode (black &
white).
To configure day / night settings:
1. Use the on-screen arrow keys to navigate to CAMERA SETTING and click Enter.
2. Select DAY / NIGHTand click Enter.
#LX400027; r. 1.0/16996/16996; en-US
14
Page 21

1
Using the On-Screen Display (OSD) Menu
3. Under DAY / NIGHT, click the left / right arrow keys to select one of the following
options:
• AUTO: The camera switches between day and night mode automatically with
changing light conditions (recommended).
• DAY: The camera remains in full color. This setting is not recommended unless the
camera is in an area with constant lighting.
• NIGHT: The camera remains in black & white. This setting is not recommended un-
less the camera is in a constantly dark environment.
4. Under TYPE, click the left / right arrow keys to select one of the following options:
• ELECTRON: Day / night switch-over is determined by camera software. This is rec-
ommended if the camera switches its viewing mode at around the same time every
day (for example, sunset or sunrise in an outdoor location).
• MECHANISM: Day / night switch-over is determined by a light filter. This is recom-
mended if the camera is in a location with fluctuating light conditions (for example,
indoors with lights turning on and off throughout the day).
5. Under THRESHOLD, click the left / right arrow keys to set the conditions for day / night
switch-over. Select a number between 1 (switch-over in brighter conditions) and 8
(switch-over in darker conditions).
Note
DAY / NIGHT must be set to AUTO to configure this menu item.
1.3.12 Focus Settings
Choose how the camera focuses on objects in the image.
To configure focus settings:
1. Use the on-screen arrow keys to navigate to CAMERA SETTING and click Enter.
2. Select FOCUS SETTING and click Enter.
3. Under FOCUS MODE, click the left / right arrow keys to select one of the following
options:
• AUTO: The camera automatically adjusts the focus after it performs a Pan-Tilt-
Zoom function (recommended).
• MANUAL: The camera must be manually put into focus using the DVR menu.
• SEMIAUTO: The camera automatically adjusts the focus after Zoom functions only.
4. Under FOCUS LIMIT, click the left / right arrow keys to set the focus limit. Set the focus
limit between 10CM and 5M to only perform auto-focus on objects further out than the
focus limit (for example, a focus limit of 1M means that the camera will focus on objects
further than a metre away), or select AUTO to auto-focus on all objects regardless of
their distance from the camera.
#LX400027; r. 1.0/16996/16996; en-US
15
Page 22

1
Using the On-Screen Display (OSD) Menu
5. Under AF SENSITIVITY, click the left / right arrow keys to select LOW (least amount of
automatic focusing), NORMAL, or HIGH (greatest amount of automatic focusing).
6. Under IR CORRECTION, click the left / right arrow keys to select ON or AUTO to enable IR correction, or OFF to disable. IR correction is especially effective in night-time
conditions.
1.3.13 Image Adjust
Perform fine-tuning on the camera image. This menu item allows you to configure the hue,
brightness, saturation, chroma suppression, gamma level, contrast, and image style.
To adjust the camera image:
1. Use the on-screen arrow keys to navigate to CAMERA SETTING and click Enter.
2. Select IMAGE ADJUSTand click Enter.
3. Under HUE, click the left / right arrow keys to select a hue value for the camera image
(1–100).
4. Under BRIGHTNESS, click the left / right arrow keys to select a brightness value for
the camera image (1–100).
5. Under SATURATION, click the left / right arrow keys to select a saturation value for the
camera image (1–100).
6. Under CHROMA SUPPRESS, click the left / right arrow keys to select a chroma suppression value for the camera image (1–4).
7. Under GAMMA, click the left / right arrow keys to select a gamma value for the camera
image (1–16).
8. Under CONTRAST, click the left / right arrow keys to select a contrast value for the
camera image (1–100).
9. Under STYLE, click the left / right arrow keys to select one of the following options:
• STANDARD: Default image style. Sharp, saturated image with vivid colors.
• SOFT: Lowers image detail to create a softer image.
• NATURAL: High saturation with lower sharpness. Designed to reduce eye strain.
1.3.14 Zoom Speed
Set the speed for the camera’s zoom function.
#LX400027; r. 1.0/16996/16996; en-US
16
Page 23

1
Using the On-Screen Display (OSD) Menu
To set zoom speed:
1. Use the on-screen arrow keys to navigate to CAMERA SETTING and click Enter.
2. Under ZOOM SPEED, click the left / right arrow keys to select a zoom speed value
from 1 (slowest) to 8 (fastest).
1.3.15 Aperture Settings
Set the aperture and aperture restrain values for the camera to configure the sharpness of
the camera image. The APERTURE menu item determines the sharpness of the camera
image, while APERTURE RESTRAIN is used to fine-tune the sharpness to eliminate noise
in the image.
To configure image sharpness:
1. Use the on-screen arrow keys to navigate to CAMERA SETTING and click Enter.
2. Select NEXT PAGE and click Enter.
3. Under APERTURE, click the left / right arrow keys to set an image sharpness value
from 1 (least sharp) to 16 (sharpest).
4. Under APERTURE RESTRAIN, click the left / right arrow keys to fine-tune the image
sharpness. Select a value from 1 (least sharp) to 16 (sharpest).
1.3.16 Digital Zoom
The camera uses 12X optical zoom to capture a subsection of the camera image in great
detail. If you want to zoom in even closer, the camera also features 16X digital zoom. By
default, digital zoom is turned off.
#LX400027; r. 1.0/16996/16996; en-US
17
Page 24

1
Using the On-Screen Display (OSD) Menu
To enable digital zoom:
1. Use the on-screen arrow keys to navigate to CAMERA SETTING and click Enter.
2. Select NEXT PAGE and click Enter.
3. Under DIGITAL ZOOM, click the left / right arrow keys to turn on digital zoom.
1.3.17 Picture Flip
You can manually rotate the camera image 180° using the PICTURE FLIP feature.
To enable picture flip:
1. Use the on-screen arrow keys to navigate to CAMERA SETTING and click Enter.
2. Select NEXT PAGE and click Enter.
3. Under PICTURE FLIP, click the left / right arrow keys to turn on picture flip (rotate the
image 180°).
1.3.18 Lens Initialization
Performing a lens initialization resets the camera lens.
#LX400027; r. 1.0/16996/16996; en-US
18
Page 25

1
Using the On-Screen Display (OSD) Menu
To initialize the lens:
1. Use the on-screen arrow keys to navigate to CAMERA SETTING and click Enter.
2. Select NEXT PAGE and click Enter.
3. Select LENS INIT and click Enter. The camera image disappears momentarily while
the lens initializes.
1.3.19 Picture Mode
Choose the resolution and frame rate of the camera’s live view.
To set picture mode:
1. Use the on-screen arrow keys to navigate to CAMERA SETTING and click Enter.
2. Select NEXT PAGE and click Enter.
3. Under PICTURE MODE, click the left / right arrow keys to select the resolution and
frame rate for the live video stream. North American users should select one of the picture modes listed under NTSC, while European users should use one of the PAL pic-
ture modes.
NTSC:
• 720P / 30: 720p resolution @ 30 frames per second (recommended).
• 720P / 60: 720p resolution @ 60 frames per second.
PAL:
• 720P / 25: 720p resolution @ 25 frames per second.
• 720P / 50: 720p resolution @ 50 frames per second.
#LX400027; r. 1.0/16996/16996; en-US
19
Page 26

1
Using the On-Screen Display (OSD) Menu
1.3.20 Camera Factory Defaults
Restore the camera module to its out-of-the-box state. This will reset all menu items in the
CAMERA SETTING menu back to their default values.
CAUTION
This step cannot be undone.
To restore camera factory defaults:
1. Use the on-screen arrow keys to navigate to CAMERA SETTING and click Enter.
2. Select NEXT PAGE and click Enter. Repeat on the next page to reach the last page of
the CAMERA SETTING menu.
3. Select CAMERA FACTORY DEFAULT and click Enter.
1.3.21 Camera Restart
Restarts the camera module. This means that the camera’s PTZ module will restart without the whole camera powering off.
Note
Restarting the camera module does not affect OSD menu settings.
To restart the camera module:
1. Use the on-screen arrow keys to navigate to CAMERA SETTING and click Enter.
2. Select NEXT PAGE and click Enter. Repeat on the next page to reach the last page of
the CAMERA SETTING menu.
3. Select CAMERA RESTARTand click Enter.
1.4 Function Settings
Use the function settings menu to configure preset locations, patterns and tours for the
camera, as well as set menu options such as idle time and password.
Function Settings — Menu Structure:
#LX400027; r. 1.0/16996/16996; en-US
20
Page 27

1
Using the On-Screen Display (OSD) Menu
PRESET PRESET
AUTO
PAN
AUTO
SCAN
TOUR TOUR NO
PATTERN PATTERN
IDLE
MOTION
NO
TITLE
SETTING Set the camera’s current position for the selected preset.
CALL The camera automatically moves to the position of the currently selected
PAN
SPEED
RUN
STOP Camera stops panning.
AUTO
SCAN NO
SET LEFT
LIMIT
SET
RIGHT
LIMIT
SCAN
SPEED
CALL
STOP Stops auto-scanning
SETTING Configure a custom tour using 2 or more of your preset locations.
DELETE Deletes currently selected tour.
CALL
STOP Stops the tour.
NO
PROGRAM
START
PROGRAM
STOP
CALL
STOP Stops the pattern.
IDLE
FUNCTION
IDLE TIME 1MIN–720MIN
IDLE
ACTION
PARAMETER
1–300
PRESET1–PRESET300
preset.
1–8
Camera starts panning.
1–5
Sets the current viewing angle as the left limit for the current auto-scan.
Sets the current viewing angle as the right limit for the current auto-scan.
1–8
Begins the selected auto-scan pattern.
1–8
Begins the selected tour.
1–5
Begins tracking the camera’s movement for the creation of a pattern.
Stops tracking camera movement and ends the current pattern.
Begins the selected pattern.
ON / OFF
• PRESET
• SCAN
• TOUR
• PATTERN
• NONE
Values change depending on IDLE ACTION setting:
• PRESET: 1–300
• SCAN: 1–5
• TOUR: 1–8
• PATTERN: 1–5
• NONE: N/A
#LX400027; r. 1.0/16996/16996; en-US
21
Page 28

1
Using the On-Screen Display (OSD) Menu
NEXT
PAGE
PRIVACY
MASKING
PTZ
SPEED
SET ZERO Sets the camera’s current position as the horizontal benchmark position.
POWER
UP
MENU
PASSWORD
MENU
IDLE
PTZ AUTO
STOP
PRIVACY
NO
ACTIVATE ON / OFF
SETTING RESIZE
1–3
POWER
UP
PARAMETER
PASSWORD
SETTING Set a numerical password.
• OFF
• 1MIN
• 2MIN
• 3MIN
• 4MIN
• 5MIN
• OFF
• 5S
• 10S
• 15S
• 20S
• 25S
• 30S
1–24
Use on-screen arrows to resize privacy mask.
SAVE Save privacy mask.
• AUTO
• PRESET
• SCAN
• TOUR
• PATTERN
• NONE
Values change depending on POWER UP setting:
• AUTO: N/A
• PRESET: 1–300
• SCAN: 1–5
• TOUR: 1–8
• PATTERN: 1–5
• NONE: N/A
ON / OFF
1.4.1 Preset
Presets will save a camera position for quick retrieval. You can set up to 300 preset locations through the OSD menu.
#LX400027; r. 1.0/16996/16996; en-US
22
Page 29

1
Using the On-Screen Display (OSD) Menu
To add presets:
1. Before entering the OSD menu, move the PTZ camera to the location where you would
like to add a preset location, then launch the OSD menu.
2. Use the on-screen arrow keys to navigate to FUNCTION SETTING and click Enter.
3. Select PRESET and click Enter.
4. Under PRESET NO, click the left / right arrow keys to select a number for your preset
location.
Note
The DVR can only call presets 1–80 while the OSD menu can call presets 1–300.
5. Select SETTING and click Enter. The camera’s current position has now been set as
a preset.
Note
If you wish to test your preset, select the present number under PRESET NO. Select CALL then click En-
ter. The camera will move to the preset location automatically.
1.4.2 Auto Pan
Set the camera to pan continuously at a set speed.
To setup auto-pan:
1. Use the on-screen arrow keys to navigate to FUNCTION SETTING and click Enter.
2. Select AUTO PAN and click Enter.
3. Set PAN SPEED between 1 (slowest) and 8 (fastest).
Note
If you wish to test auto-pan speed, select RUN and click Enter. The camera will start continuously panning at the chosen speed. To stop the test, select STOP and click Enter.
1.4.3 Auto Scan
An auto scan automatically cycles between a left and right point. You can set up to 5 autoscan cycles.
#LX400027; r. 1.0/16996/16996; en-US
23
Page 30

1
Using the On-Screen Display (OSD) Menu
To add auto-scan cycles:
1. Before entering the OSD menu, move the PTZ camera to the starting position for the
auto-scan cycle you want to setup, then launch the OSD menu.
2. Use the on-screen arrow keys to navigate to FUNCTION SETTING and click Enter.
3. Select AUTO SCAN and click Enter.
4. Under AUTO SCAN NO, click the left / right arrow keys to select a number for your auto-scan cycle.
5. Select SET LEFT LIMIT and click Enter. The camera’s current position has now been
set as the start point for the auto-scan cycle.
6. Exit the OSD menu and move the camera to the end position for the auto-scan cycle
you want to setup, then launch the OSD menu again.
7. Select SET RIGHT LIMITand click Enter. The camera’s current position has now been
set as the end point, and the auto-scan cycle has been setup.
Note
If you wish to test the auto-scan cycle, select CALL and click Enter. The camera will cycle between the
left and right limits. To stop the test, select STOP and click Enter.
1.4.4 Tour
Tours will cycle through a set of presets. You can set up to 8 tours.
To add a tour:
1. Launch the OSD menu. Use the on-screen arrow keys to navigate to FUNCTION SETTING and click Enter.
2. Select TOUR and click Enter.
3. Under TOUR NO, click the left / right arrow keys to select a number for the tour.
4. Select SETTING and click Enter.
#LX400027; r. 1.0/16996/16996; en-US
24
Page 31

1
Using the On-Screen Display (OSD) Menu
5. Configure the following:
• Select 01 under the NO column and click Enter to configure the first preset location
in the tour.
• Use the left / right arrows to select PRESET. Use the up / down arrows to choose
the number of the first preset location in the tour.
• Use the left / right arrows to select DWELL. Use the up / down arrows to set the
length of time the camera will spend at the first preset location.
• Use the left / right arrows to select SPEED. Use the up / down arrows to set how fast
the camera moves into the first preset location (001=slowest; 016=fastest).
6. When you are finished configuring the first point in the tour, click Enter. Repeat step 5
for as many points as you want to set in the tour. A single tour can use up to 32 preset
locations.
Note
If you wish to test the tour, select CALL and click Enter. The camera will begin touring. To stop the test,
select STOP and click Enter.
To delete a tour:
1. Select the number of the tour you want to delete under TOUR NO.
2. Select DELETE and click Enter.
1.4.5 Pattern
Patterns automatically cycle the camera between two positions. You can set up to 5
patterns.
#LX400027; r. 1.0/16996/16996; en-US
25
Page 32

1
Using the On-Screen Display (OSD) Menu
To add a pattern:
1. Launch the OSD menu. Use the on-screen arrow keys to navigate to FUNCTION SETTING and click Enter.
2. Select PATTERN and click Enter.
3. Under PATTERN NO, click the left / right arrow keys to select a number for the pattern.
4. Select PROGRAM STARTand click Enter.
5. Exit the OSD menu and use the DVR controls to move the camera in the pattern you
want to save. Once you have completed the pattern, launch the OSD menu again. Repeat steps 1 & 2 to access the PATTERN menu again.
6. Select PROGRAM STOP and click Enter. The pattern has now been saved.
Note
If you wish to test the pattern, select CALL and click Enter. The camera will begin the pattern. To stop
the test, select STOP and click Enter.
1.4.6 Idle Motion
Choose an action for the camera to perform when left idle for a period of time.
To setup idle motion:
1. Launch the OSD menu. Use the on-screen arrow keys to navigate to FUNCTION SETTING and click Enter.
2. Select IDLE MOTION and click Enter.
3. Under IDLE FUNCTION, select ON to use idle motion, or OFF to perform no action
during idle periods.
4. Under IDLE TIME, use the left / right arrows to set how long before the camera begins
performing the idle motion.
5. Under IDLE ACTION, select the type of idle action for the camera to perform. Choose
from PRESET, SCAN, TOUR, PATTERN, or NONE.
6. Under PARAMETER, select the number for the chosen idle action. For example, set-
ting an IDLE TIME of 5MIN, an IDLE ACTION of TOUR, and a PARAMETER of 1 will
make the camera perform TOUR 1 after the camera is left idle for 5 minutes.
1.4.7 Privacy Mask
Applying a privacy mask places a black box over a specific area of the camera. You can
configure up to 24 privacy masks.
CAUTION
Privacy mask areas are blocked in recordings.
#LX400027; r. 1.0/16996/16996; en-US
26
Page 33

1
Using the On-Screen Display (OSD) Menu
To create a privacy mask:
1. Launch the OSD menu. Use the on-screen arrow keys to navigate to FUNCTION SETTING and click Enter.
2. Select NEXT PAGE and click Enter.
3. Select PRIVACY MASKING and click Enter.
4. Under PRIVACY NO, use the left / right arrows to set a number for the privacy mask.
5. Select SETTING and click Enter.
6. Under RESIZE, use the left / right arrows to select one of the four arrow symbols:
• Right arrow: Click Enter to increase the width of the privacy mask.
• Left arrow: Click Enter to decrease the width of the privacy mask.
• Upward arrow: Click Enter to increase the height of the privacy mask.
• Downward arrow: Click Enter to decrease the height of the privacy mask.
7. Select SAVE and click Enter to save the privacy mask.
8. Select BACK and click Enter.
9. Under ACTIVATE, use the left / right arrows to select ON to enable the privacy mask.
Note
You can only apply one privacy mask to the camera’s display at a time.
1.4.8 PTZ Speed
Set the speed for the camera’s Pan-Tilt-Zoom functions.
#LX400027; r. 1.0/16996/16996; en-US
27
Page 34

1
Using the On-Screen Display (OSD) Menu
To set PTZ speed:
1. Launch the OSD menu. Use the on-screen arrow keys to navigate to FUNCTION SETTING and click Enter.
2. Select NEXT PAGE and click Enter.
3. Under PTZ SPEED, use the left / right arrows to set the PTZ speed between 1 (slowest) and 5 (fastest).
1.4.9 Power Up
Choose an action for the PTZ camera to perform when it first powers up.
To configure power up settings:
1. Launch the OSD menu. Use the on-screen arrow keys to navigate to FUNCTION SETTING and click Enter.
2. Select NEXT PAGE and click Enter.
3. Under POWER UP, use the left / right arrows to set the camera’s function upon startup:
• AUTO: Camera performs default diagnostics check on startup.
• PRESET: Camera moves to a preset location on startup. Under PARAMETER, use
the left / right arrows to set the preset number (1–300).
• SCAN: Camera performs a scan cycle on startup. Under PARAMETER, use the left
/ right arrows to set the scan number (1–5).
• TOUR: Camera performs a tour on startup. Under PARAMETER, use the left / right
arrows to set the tour number (1–8).
• PATTERN: Camera performs a pattern on startup. Under PARAMETER, use the left
/ right arrows to set the pattern number (1–5).
• NONE: Camera performs no action on startup
#LX400027; r. 1.0/16996/16996; en-US
28
Page 35

1
Using the On-Screen Display (OSD) Menu
1.4.10 Menu Password
You can set a password that will be required to configure the OSD menu.
To set a menu password:
1. Launch the OSD menu. Use the on-screen arrow keys to navigate to FUNCTION SETTING and click Enter.
2. Select NEXT PAGE and click Enter.
3. Select MENU PASSWORD and click Enter.
4. Select SETTING and click Enter.
5. Use the on-screen arrow keys to set a password for the OSD menu. The password can
be up to 8 characters long. When you are finished, select ENTER and click Enter.
6. Under PASSWORD, use the left / right arrows to select ON to enable the password.
You will now be prompted for the password whenever you configure the OSD menu.
1.4.11 Menu Idle
Choose what happens to the OSD menu when left idle.
#LX400027; r. 1.0/16996/16996; en-US
29
Page 36

1
Using the On-Screen Display (OSD) Menu
To set menu idle:
1. Launch the OSD menu. Use the on-screen arrow keys to navigate to FUNCTION SETTING and click Enter.
2. Select NEXT PAGE and click Enter.
3. Under MENU IDLE, use the left / right arrows to set the length of time before the OSD
menu closes automatically (1MIN - 5MIN) or select OFF to prevent the menu from
closing automatically.
1.4.12 PTZ Auto Stop
Enable PTZ auto stop to prevent the camera from continually spinning.
To set PTZ auto stop:
1. Launch the OSD menu. Use the on-screen arrow keys to navigate to FUNCTION SETTING and click Enter.
2. Select NEXT PAGE and click Enter.
3. Under PTZ AUTO STOP, use the left / right arrows to set a time limit for continuous
PTZ functions(5S - 30S) or select OFF to impose no limit.
#LX400027; r. 1.0/16996/16996; en-US
30
Page 37

2
OSD Menu Default Values
The following table shows the default values for the camera’s OSD menu.
SETTING DEFAULT VALUE
SYSTEM SETTING → ADDR INFORMATION → ADDR TYPE HARD
SYSTEM SETTING → LANGUAGE ENGLISH
DISPLAY SETTING → PRESET OFF
DISPLAY SETTING → AZIMUTH DISPLAY ON
DISPLAY SETTING → POSITION OFF
DISPLAY SETTING → INSIDE TEMP OFF
CAMERA SETTING → WB SETTING → WB MODE AUTO
CAMERA SETTING → WB SETTING → R GAIN
CAMERA SETTING → WB SETTING → B GAIN
CAMERA SETTING → EXPOSURE SETTING → AE MODE AUTO
CAMERA SETTING → EXPOSURE SETTING → GAIN SETTING
CAMERA SETTING → EXPOSURE SETTING → SHUTTER 1/60
CAMERA SETTING → EXPOSURE SETTING → IRIS SETTING
CAMERA SETTING → EXPOSURE SETTING → EXPOSURE COMP
CAMERA SETTING → EXPOSURE SETTING → SLOW SHUTTER ON
CAMERA SETTING → EXPOSURE SETTING → NEXT PAGE → SLOW
SHUTTER LIMIT
CAMERA SETTING → EXPOSURE SETTING → NEXT PAGE → AGC
GAIN CONTROL
CAMERA SETTING → EXPOSURE SETTING → NEXT PAGE → NOISE
REDUCTION
CAMERA SETTING → EXPOSURE SETTING → NEXT PAGE → 3D
NOISE REDUCTION
CAMERA SETTING → EXPOSURE SETTING → NEXT PAGE → BLC OFF
CAMERA SETTING → EXPOSURE SETTING → NEXT PAGE → WDR
SETTING → WDR MODE
CAMERA SETTING → EXPOSURE SETTING → NEXT PAGE → NEXT
PAGE → HIGH LIGHT REDUCE
CAMERA SETTING → EXPOSURE SETTING → NEXT PAGE → NEXT
PAGE → AE RECOVERY
CAMERA SETTING → DAY/NIGHT SETTING → DAY/NIGHT AUTO
CAMERA SETTING → DAY/NIGHT SETTING → THRESHOLD
CAMERA SETTING → DAY/NIGHT SETTING → TYPE MECHANISM
CAMERA SETTING → FOCUS SETTING → FOCUS MODE SEMIAUTO
CAMERA SETTING → FOCUS SETTING → FOCUS LIMIT AUTO
CAMERA SETTING → FOCUS SETTING → AF SENSITIVITY NORMAL
CAMERA SETTING → FOCUS SETTING → IR CORRECTION OFF
CAMERA SETTING → IMAGE ADJUST → HUE
CAMERA SETTING → IMAGE ADJUST → BRIGHTNESS
CAMERA SETTING → IMAGE ADJUST → SATURATION
CAMERA SETTING → IMAGE ADJUST → CHROMA SUPPRESS
CAMERA SETTING → IMAGE ADJUST → GAMMA
CAMERA SETTING → IMAGE ADJUST → CONTRAST
50
50
2
11
8
1/30
3
8
8
OFF
OFF
15M
5
50
50
50
2
1
50
#LX400027; r. 1.0/16996/16996; en-US
31
Page 38

2
OSD Menu Default Values
SETTING DEFAULT VALUE
CAMERA SETTING → IMAGE ADJUST → STYLE STANDARD
CAMERA SETTING → ZOOM SPEED
CAMERA SETTING → NEXT PAGE → APERTURE
CAMERA SETTING → NEXT PAGE → APERTURE RESTRAIN
CAMERA SETTING → NEXT PAGE → DIGITAL ZOOM OFF
CAMERA SETTING → NEXT PAGE → PICTURE FLIP OFF
CAMERA SETTING → NEXT PAGE → PICTURE MODE 720P / 30
FUNCTION SETTING → AUTO PAN → PAN SPEED
FUNCTION SETTING → AUTO SCAN → SCAN SPEED
FUNCTION SETTING → IDLE MOTION → IDLE FUNCTION OFF
FUNCTION SETTING → IDLE MOTION → IDLE TIME 10MIN
FUNCTION SETTING → IDLE MOTION → IDLE ACTION NONE
FUNCTION SETTING → IDLE MOTION → PARAMETER NONE
FUNCTION SETTING → NEXT PAGE → PTZ SPEED
FUNCTION SETTING → NEXT PAGE → POWER UP → POWER UP AUTO
FUNCTION SETTING → NEXT PAGE → POWER UP → PARAMETER NONE
FUNCTION SETTING → NEXT PAGE → MENU IDLE 1MIN
FUNCTION SETTING → NEXT PAGE → PTZ AUTO STOP 15S
8
9
5
5
5
2
#LX400027; r. 1.0/16996/16996; en-US
32
Page 39

Page 40

Website
last page
www.lorextechnology.com
Copyright
© 2014, Lorex Corporation
All rights reserved worldwide. Names and marks appearing herein are either registered trademarks or trademarks of Lorex Corporation and/or its subsidiaries. All
other trademarks, trade names or company names referenced herein are used for identification only and are the property of their respective owners.
Legal disclaimer
As our product is subject to continuous improvement, Lorex Corporation & subsidiaries reserve the right to modify product design, specifications & prices without
notice and without incurring any obligation.E&OE.
Publ. No.: LX400027
Release: 1.0
Commit:
Head: 16996
Language: en-US
Modified: 2014-09-05
Formatted: 2014-09-05
16996
 Loading...