

Page 1
A
B
C
720P WIRELESS DIGITAL SECURITY CAMERA SYSTEM
LWU3624 / LWU3622
Quick Start Guide
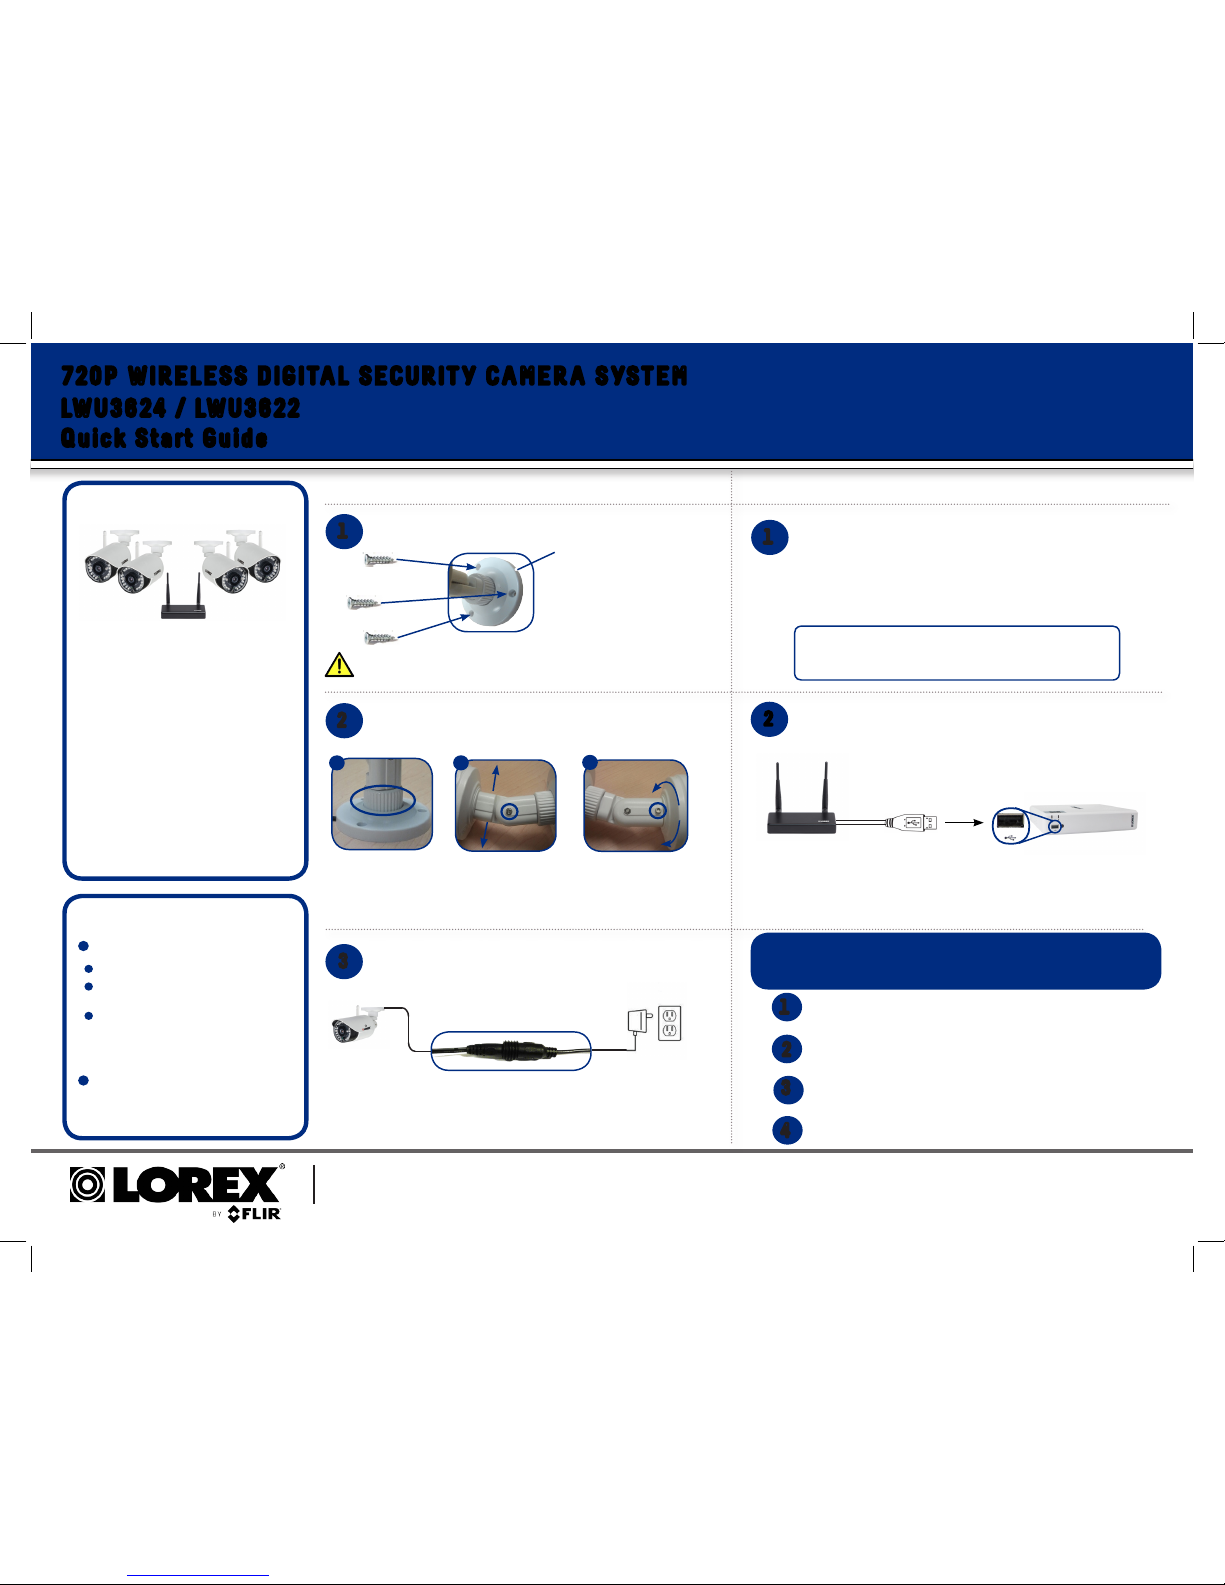
A. Installing the Cameras
Mount the camera to the wall or ceiling using the included screws.
1
2
Connect the camera power adapter to the camera. Connect
power adapter to a power outlet.
Before you permanently install your cameras:
www.lorextechnology.com
LWU3624_LWU3622_QSG_EN_R2
Getting Started
3
Adjust the angle of the camera until the desired view is set. Tighten the thumbscrew and the adjustment rings to secure the camera
position.
This system comes with the following components:
4x wireless 720p indoor/outdoor cameras*
4x antennas for cameras (pre-attached)*
4x power adapters for cameras*
4x mounting kits for cameras*
1x wireless indoor/outdoor receiver
2x antennas for receiver (pre-attached)
1x mounting kit for receiver
1x double-sided tape for receiver
*Quantity only applies to the LWU3624.
The LWU3622 contains 2 units of each.
Installation Tips
Plan where and how they will be positioned.
Determine where you will route the cable that
connects the camera to the power adapter.
Verify the camera’s performance by observing
the image on a monitor when the camera
is positioned where it will be permanently
installed.
Avoid installing cameras in locations that
require the wireless signal to pass through
cement, concrete and metal structures. This
will reduce the transmission range.
For outdoor use, installation in a
sheltered location is recommended.
NOTE:
If you run the cables along the
wall / ceiling, you must run the cable through the cable notch on the
base. This will keep the camera
base flush to the wall /
ceiling when mounted.
Cable Notch
B) Loosen lower screw
with the Allen key to adjust the camera’s vertical
position.
C) Loosen upper screw
with the Allen key
to rotate the camera
housing.
A) Turn the adjustment
ring to tighten / loosen
the stand connection.
Adjust the camera’s
horizontal position.
B. Installing the Receiver
Plug the USB cable from the wireless receiver into your DVR.
1
Use the included double-sided tape to securely attach the receiver to
a flat surface.
Use the included screws to mount the receiver to a wall.
OPTIONAL
OR
2
NOTE: It is not recommended to install more than 4 digital wireless
security cameras in the same environment to maintain optimal video
frame rate performance.
NOTE: The LWU3624/LWU3622 is compatible with
Lorex LH050/LH041 series DVRs only.
Visit www.lorextechnology.com for the most up-to-
date list of compatible recorders.
ATTENTION: Make sure to first connect and power on the
cameras before powering on the receiver. This will ensure a
proper connection.
Need Help?
Visit us online for up-to-date software and
complete instruction manuals
1
3
Go to www.lorextechnology.com
Search the model number of your product
Click on your product in the search results
Click the Downloads tab
2
4
 Loading...