

Page 1
Bioscience Solutions
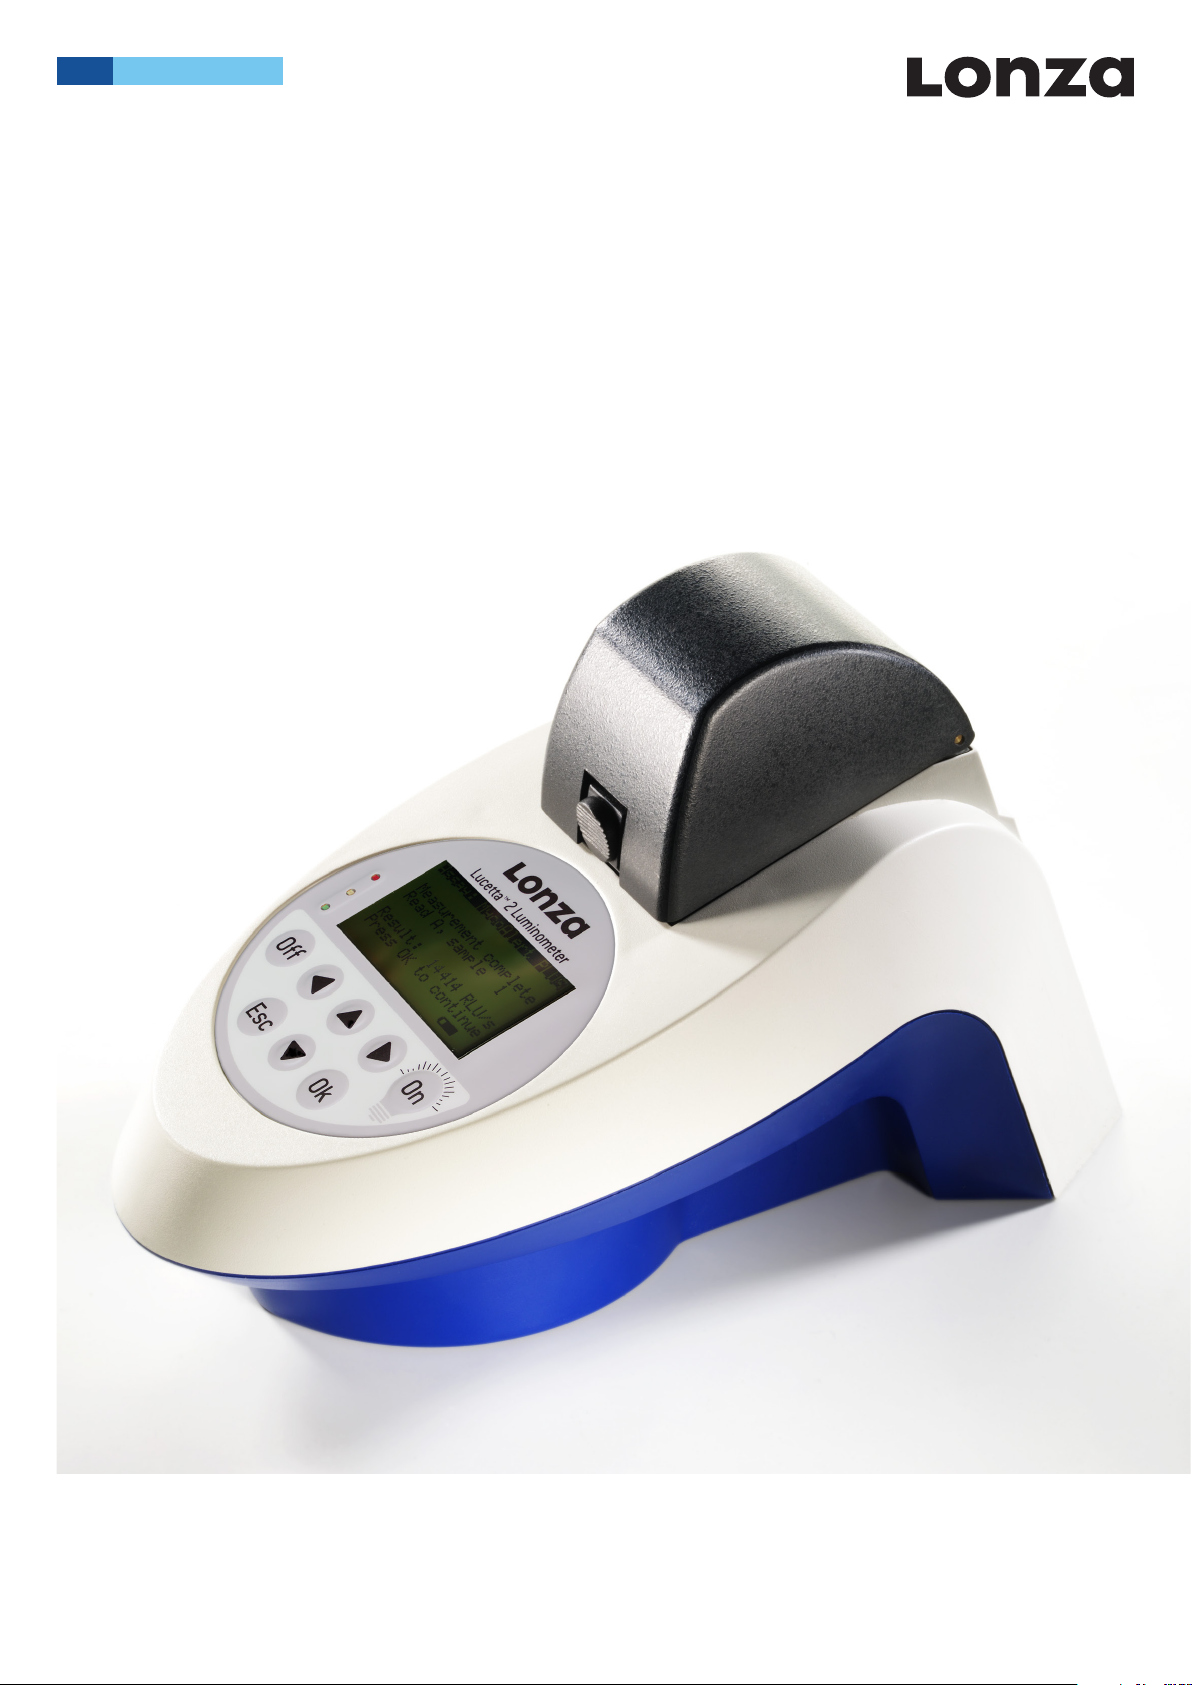
Lucetta™ 2 Luminometer Manual
Page 2

Page 3

Contents
1.0 Introduction 5
1.1 Lucetta™ 2 Luminometer Overview 5
1.2 Light Detection 5
2.0 General Use Instructions 5
2.1 Use Restrictions 5
2.2 Maintenance 5
2.3 Safety Instructions and Use Precautions 6
2.4 Storage Conditions 6
2.5 Batteries 6
2.6 Return Shipment 7
2.7 Instrument Disposal 7
3.0 Setup Instructions 7
3.1 Lucetta™ 2 Luminometer Components 7
3.2 Setup Instructions 8
3.3 Optimal Operation Temperature 8
3.4 Battery Operation 8
3.5 Electrical Outlet Operation 8
3.6 Consumables 8
3.7 Quality Control 8
Lucetta™ 2 Luminometer Manual – Bioscience Solutions 3
Page 4

4.0 Lucetta™ 2 Luminometer Operation 9
4.1 Menu 9
4.2 MycoAlert™ PLUS/ MycoAlert™ Run 9
4.3 Single Read Run 10
5.0 Data Storage and PC Upload 11
5.1 Maximum Storage Capacity 11
5.2 Viewing Logged Measurements 11
5.3 Upload to a PC 11
6.0 Setting Instrument Parameters 12
6.1 Password 12
6.2 Customer Settings 12
6.3 Date & Time 13
6.4 System 13
6.5 Information 13
7.0 Troubleshooting 14
8.0 Error Codes 14
9.0 Appendix 14
9.1 Factory Settings for Single Read 14
9.2 Technical Data 15
4 Bioscience Solutions – Lucetta™ 2 Luminometer Manual
Page 5

1.0 Introduction
1.2 Light Detection
1.1 Lucetta™ 2 Luminometer Overview
The Lucetta™ 2 Luminometer is a single tube luminometer developed
for the detection of bioluminescence and chemiluminescence. It can
be used as a portable battery-operated instrument as well as with an
external power supply and is suitable for detecting all luminescence.
Highly sensitive luminescence detection
The Lucetta™ 2 Luminometer is able to detect less than 3 fmols
ATP. The sample container is positioned beside the photon counting
photomultiplier and the read chamber is sealed to avoid light leakage.
Close proximity of the sample container to the highly sensitive photoncounting photomultiplier maximizes light collection efficiency and
allows the detection of minimal light intensities.
Robust and reliable construction
The Lucetta™ 2 Luminometer is a lightweight and compact instrument
with a measuring chamber for sample intake. After loading a sample, the
measuring chamber lid is closed and the measurement automatically
begins.
Stand-alone instrumentation
The Lucetta™ 2 Luminometer can be utilized as a stand-alone
instrument without a PC. It features on-board software with menu
options to optimize sample measurements (MycoAlert™ PLUS and
MycoAlert™ Mode or Single Read mode), upload data to a PC and
configure system parameters.
Two basic measurement modes
The easy to operate instrument-embedded software is tailored around
two basic measurement modes:
– MycoAlert™ PLUS and MycoAlert™ Mode: straight-forward
implementation of the procedure for running Lonza’s MycoAlert™
PLUS and MycoAlert™ Mycoplasma Detection Assays.
– Single Read mode: allows the user to obtain unprocessed
luminescence readings. This mode can be used for Lonza’s
ViaLight™ or ToxiLight™ Assay or other luminescent assays.
Data storage capacity and transfer
– Each completed measurement is stored in the instrument’s
internal circular memory with a storage capacity of up to 2,000
single sample readings.
– Furthermore, sample results may be uploaded to a PC to view and
analyze results with Microsoft® Excel®. The data transfer to PC is
enabled by the Lucetta™ Connect software.
Broad range of applications
Lucetta™ 2 Luminometer applications include:
– MycoAlert™ PLUS and MycoAlert™ Mycoplasma Detection Assays
– ATP assays, e.g. ViaLight™ Cell Proliferation and Cytotoxicity Assay
– Adenylate Kinase assays, e.g. ToxiLight™ Non-destructive
Cytotoxicity Assay
– Luciferase reporter gene analysis
The photomultiplier (detector) is a single photon counter, which
measures light ranging from 380 to 630 nm. The photons emitted
by the sample are converted into electrons and amplified by the
photomultiplier. The individual impulses are counted digitally and are
directly proportional in their linear range to the emitted amount of
light.
Luminescence is noted in Relative Light Units (RLU). For MycoAlert™
and MycoAlert™ PLUS measurements, the Lucetta™ 2 Luminometer
reports RLU/s values. For Single Read measurements, the Lucetta™ 2
Luminometer reports in RLU values. The readout is integrated over the
measurement period where RLU values in time intervals of 5 ms are
gathered.
2.0 General Use Instructions
2.1 Use Restrictions
The Lucetta™ 2 Luminometer is intended for research and
investigational use by professionals only. Please note that it is not
intended to be used for diagnostic purposes or for testing or treatment
of humans.
The Lucetta™ 2 Luminometer may only be used for measurement of
glow type bio- and chemiluminescence of samples in tubes.
The instrument may not be used for purposes other than those
described above.
2.2 Maintenance
The Lucetta™ 2 Luminometer is low maintenance. It should be protected
from dust and debris.
The surface of the instrument is protected by a robust and washable
finish. Should it become dirty or dusty, we recommend wiping it with a
damp cloth or optical grade tissue. If necessary, a mild, non-abrasive
detergent can be used. The instrument can be cleaned by wiping
with 70% (v/v) ethanol if required. Acetone damages the instrument
coating and should NOT be used for cleaning!
The sample holder must be kept clean and wiped with a damp cloth if
dirty.
No free fluid should ever enter the instrument! If this occurrs,
disconnect the instrument immediately, remove the test tube and
turn the instrument upside down to remove the fluid before it enters
the measuring chamber. Contact the Lonza Scientific Support Team
immediately!
Lucetta™ 2 Luminometer Manual – Bioscience Solutions 5
Page 6

Rechargeable batteries
Nickel metal hydride (NiMH) batteries are used to wirelessly operate
the Lucetta™ 2 Luminometer.
Batteries should be allowed to fully deplete, then fully recharged every
couple of months.
Discharging duration: approx. 6 h
Recharging duration: approx. 4–5 h
2.3 Safety Instructions and Use Precautions
Lucetta™ 2 Luminometer instruments have been tested by the
manufacturer, certified by international safety standards and are safe
to use when operated in accordance with this manual.
– Assays must be validated with the instrument prior to routine use.
– Certain biological and chemical components and samples may
pose a hazard or infection risk. Always refer to the description of
the sample to ensure adequate safety precautions are in place.
Utilize appropriate protective equipment to avoid exposure.
– Servicing and repair may only be performed by Lonza authorized
personnel.
– The user may perform only those maintenance steps specifically
described in this manual (section 2.2).
– The instrument must be decontaminated before repair work or
service.
– Do not enter or place foreign objects in the sample area.
– Avoid liquid spills on the instrument housing and in the sample
area. Wipe up all spills immediately and decontaminate the
instrument surfaces appropriately.
Please adhere to the following safety instructions and use precautions
before and during operation of the system or taking the instrument
into service:
– Read and understand the the Lucetta™ 2 Luminometer Manual
prior to using the instrument. All potential users should have
access to the manual and should read and understand it prior to
using the instrument.
– The Lucetta™ 2 Luminometer can be operated using an electrical
outlet or as a portable, battery-operated instrument. Ideally,
battery charging occurs while the instrument is not in use,
e.g overnight. To charge the battery, the instrument should be
attached to the provided AC power supply/charger and turned on.
– The power supply must be connected to a wall outlet complying
with local regulations of the country of its installation and
providing voltage and current according to the specification of the
power supply.
– Do not connect the power cord near fluids to avoid electric shock
and burning. The power cord must never become wet!
– When charging the instrument or operating with an external
power supply, make sure to use ONLY the originally provided
power supply. Substitution may create a hazard and harm the
instrument.
– Unauthorized opening, modification, repair, or improper usage of
the instrument may result in damage and will void all warranties.
– The instrument may only be used for its intended purpose (see
section 2.1).
It is the operator’s responsibility to adhere to local regulations when
installing and operating the system.
– The user must ensure the instrument is configured and installed
such that functionality is not impaired. Please refer to the setup
instructions (section 3.2).
– The instrument should be ultilized only when located on a stable
table or bench.
– Do not expose the instrument to a humid environment (>70%).
– The instrument should not be exposed to direct sunlight nor be
located in a hot environment (above 30°C).
– The instrument is not approved for use in fire or explosion
potential areas, nor for use with flammable or explosive media.
– The sample holder must remain free of dust and contamination.
The holder should only be open during sample loading/unloading
and cleaning.
– Use only specified sample tubes.
Note
If liquid gets inside the instrument, switch off the instrument
immediately. Do not operate the instrument if internal components
have been exposed to fluids. The instrument must be cleaned by Lonza
authorized personnel.
– Handling of instrument components with potential sample
contamination shall always be performed with protective gloves.
Disposal of parts must be according to federal, state or local
procedures for biohazardous waste handling and disposal. Use
secure leak proof containers and avoid unprotected handling of
par ts.
Lonza Cologne GmbH and its distributors disclaim all warranties, either
expressed or implied, and shall in no event be liable for damages,
including those to third parties, caused by or arising from improper
installation or any operation or use in violation of the above safety and
handling instructions.
2.4 Storage Conditions
For shipping and long-term storage, the instrument should remain in
the original cardboard box in a dry, dust-free environment and protected
from direct sunlight and significant temperature fluctuations. Storage
conditions should remain at 5–40°C and up to 80% humidity at 30°C,
non-condensing.
2.5 Batteries
To charge the battery, the instrument is attached to the provided AC
power supply/charger and switched on. Battery charging should be
done when instrument is not in use, e.g overnight. The instrument
holds three NiMH batteries each 1.2V/4000 mAh.
In case of battery defect, please contact Lonza Scientific Suppor t Team.
Lonza Cologne GmbH accepts no liability for damage caused by use of
other batteries than recommended by Lonza Scientific Support Team.
6 Bioscience Solutions – Lucetta™ 2 Luminometer Manual
Page 7
2.6 Return Shipment
If the instrument has to be returned to Lonza for servicing or inspection,
please follow the instructions below:
– Contact the Lonza Scientific Support team to obtain the required
decontamination and repair form. Complete both forms before
return shipment.
Note
Lonza Cologne GmbH will not accept instruments without completed
decontamination and repair order forms.
– Turn luminometer off and disconnect power supply.
– Clean the instrument according to the instructions for cleaning
and decontamination listed in the decontamination form.
– Remove any foreign objects that have entered the instrument.
– Contact your local distributor or Lonza representative for specific
shipping instructions.
– Contact Lonza Scientific Support for assistance if required.
A
2
1
2.7 Instrument Disposal
Decontaminate the instrument before disposal. This luminometer
contains electronic parts. To prevent environmental pollution please
dispose of the instrument and the corresponding accessories
according to local legislation. Within the European Union dispose the
instrument and accessories according to the directive 2012/19/EU
(Waste of Electrical and Electronic Equipment) or contact your local
Lonza representative.
3.0 Setup Instructions
3.1 Lucetta™ 2 Luminometer Components
The Lucetta™ 2 Luminometer is delivered with the following
components:
– 1 Lucetta™ 2 Luminometer Instrument
– 1 Power supply and country specific mains adaptor to load
internal rechargeable battery
– User Manual
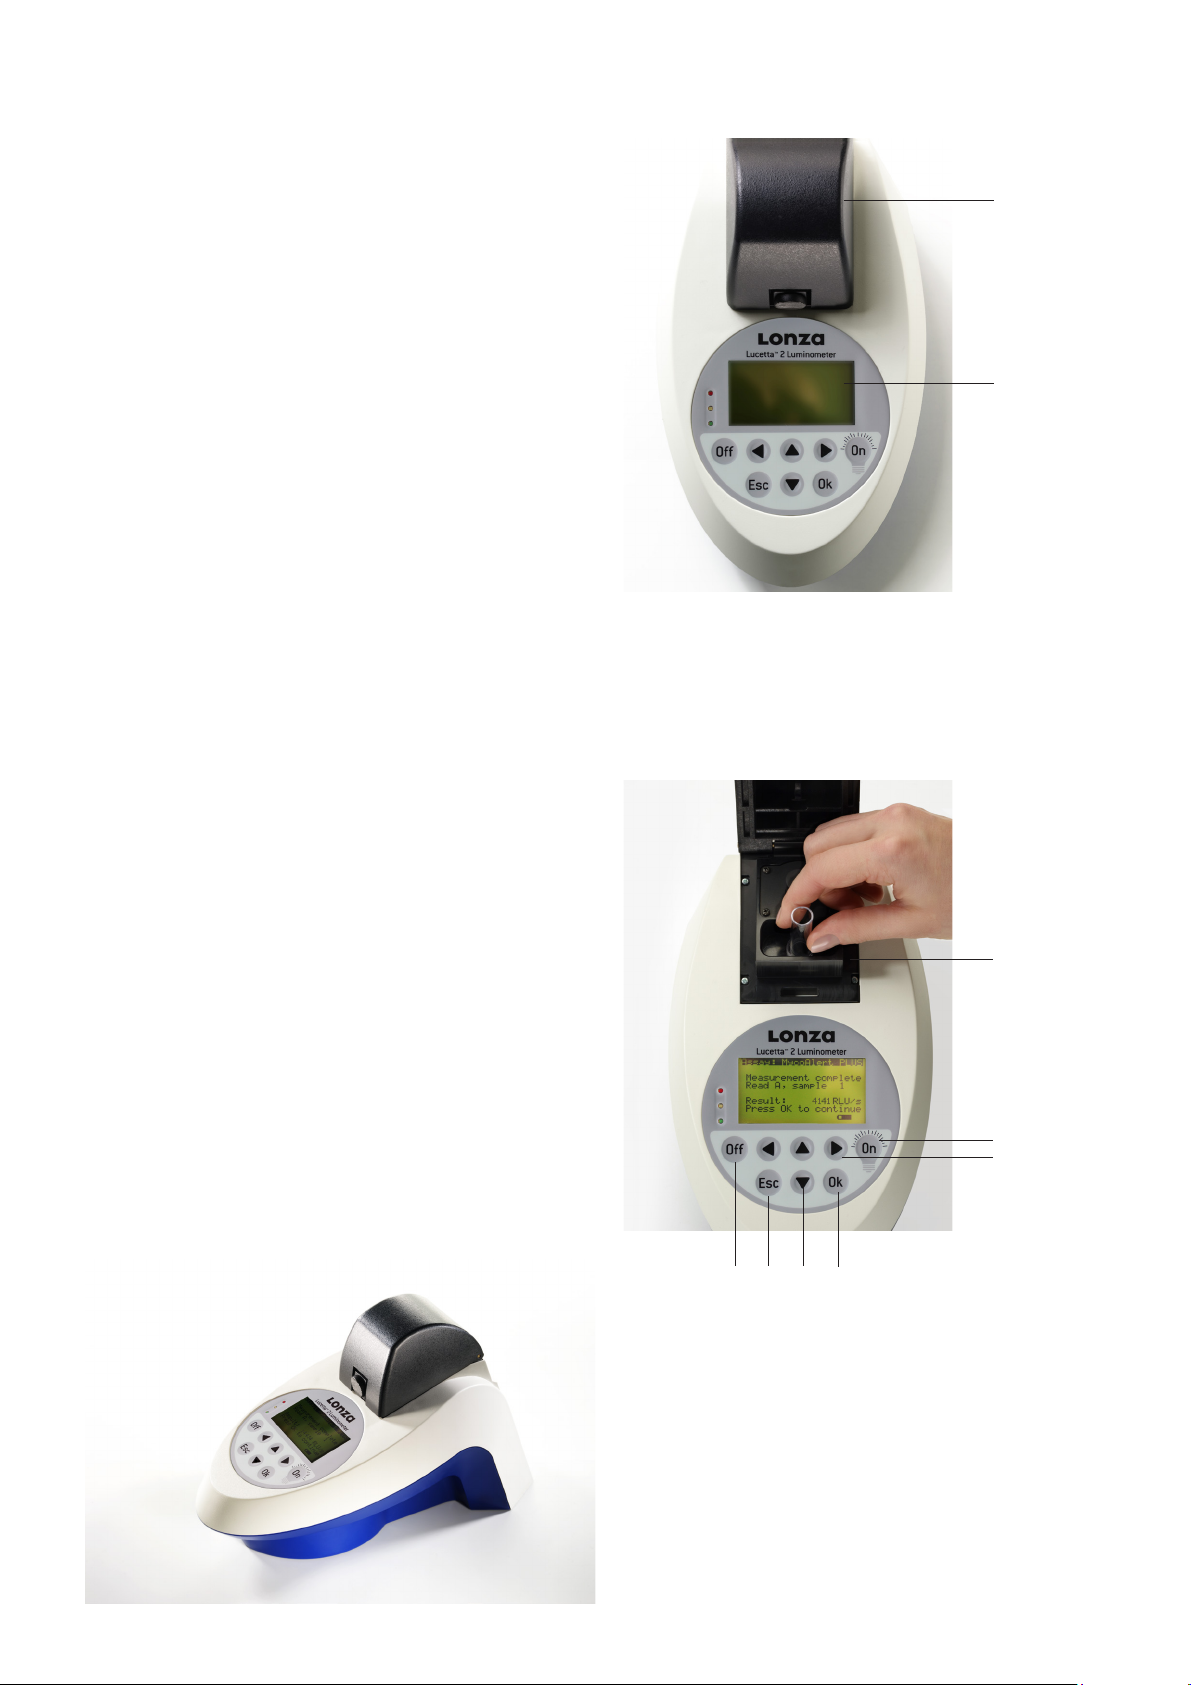
1 Graphic display
2 Lid
B
3
4
10/11
5 6
8/9
7
3 Measuring chamber with tube receptacle
4 ON button/ display light
5 OFF button
6 OK button
7 ESC button
8/9 Arrow button
10/11 Arrow button
Figure 1. Front view of the Lucetta™ 2 Luminometer (A) and display view (B)
Lucetta™ 2 Luminometer Manual – Bioscience Solutions 7
Page 8
1
2
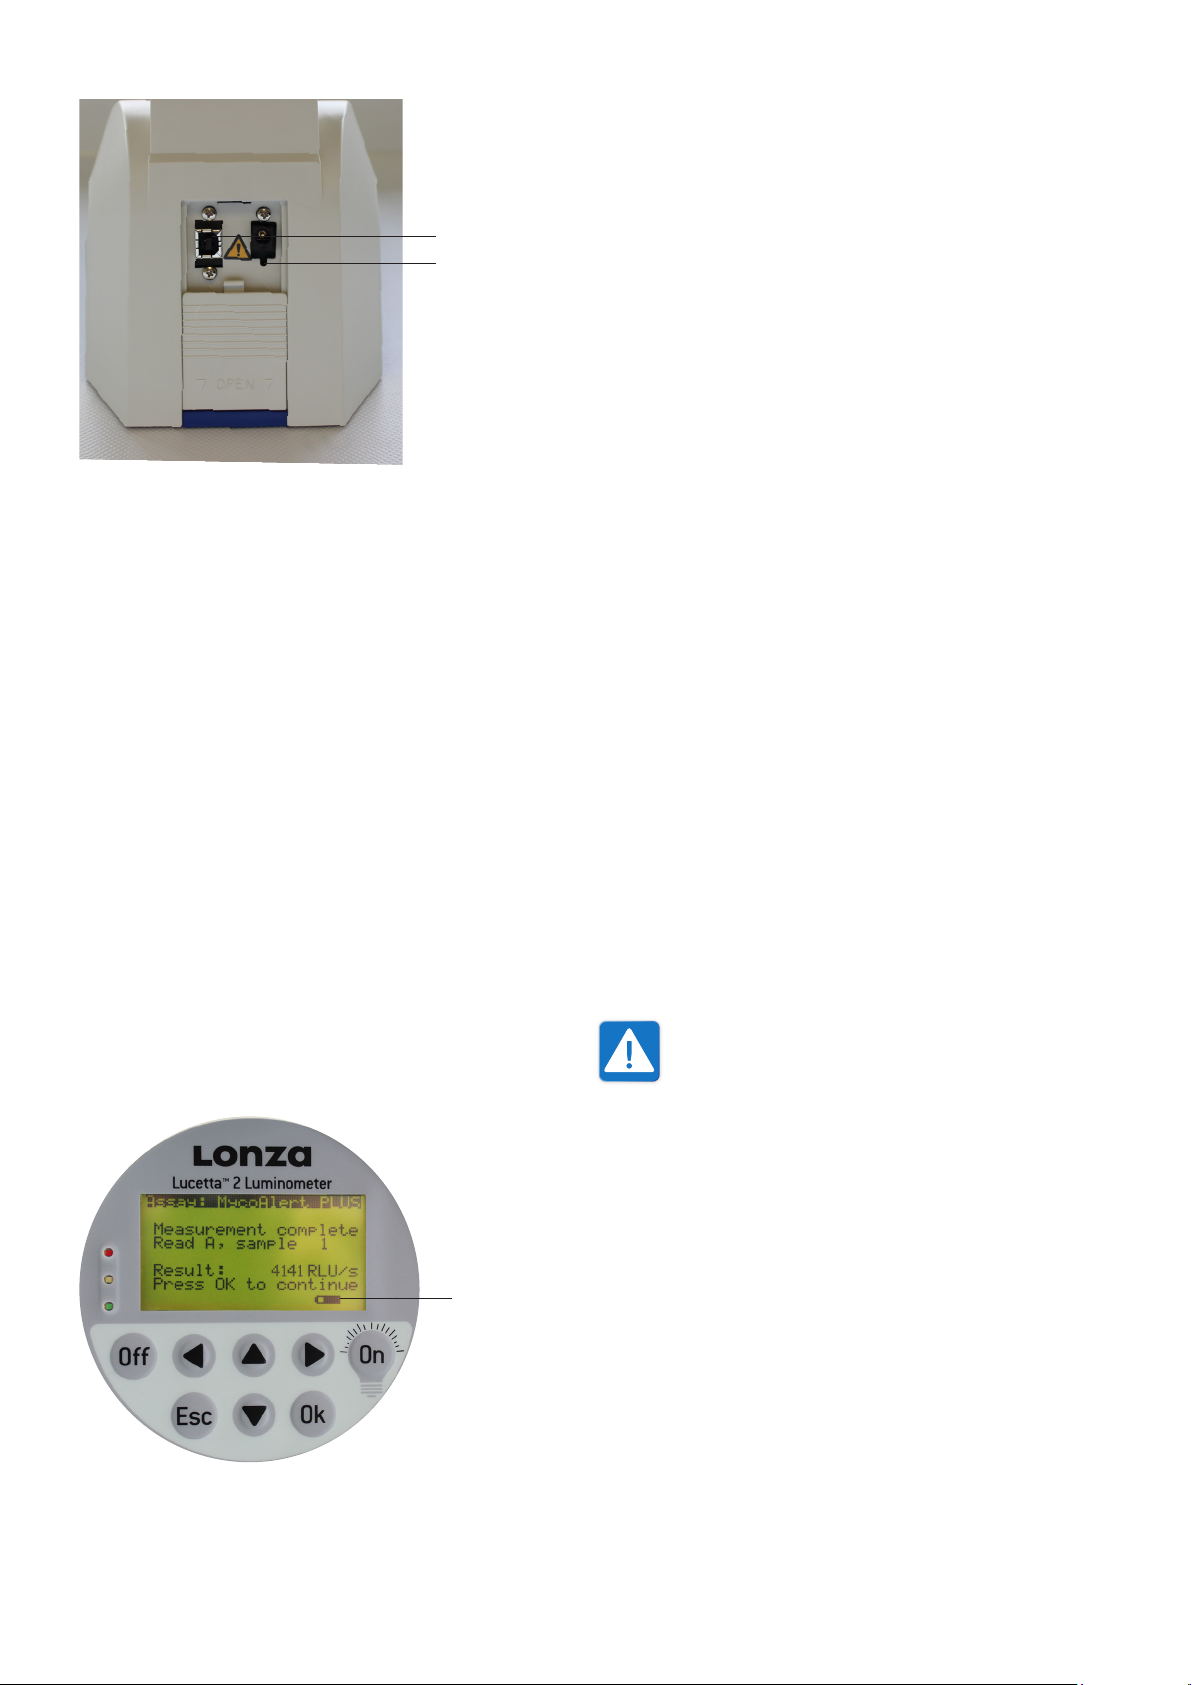
1 Power cord receptacle
2 USB port Type B
Figure 2. Back view of the Lucetta™ 2 Luminometer
3.2 Setup Instructions
– Carefully unpack the instrument and place it on the bench in a
dry, dust-free environment, protected from direct sunlight and
significant temperature fluctuations.
– To connect the instrument to an electrical outlet, slide the
protective panel on the rear of the instrument to the open position
to access the power socket. Plug in the power supply delivered
with the instrument and connect to a suitable outlet. Refer to the
power and safety information in sections 9.2 (Technical Data)
and 2.3 (Safety Instructions and Use Precautions).
– Turn the instrument on by pressing the ON button. The display will
illuminate when ON button is pressed a second time.
– Check the status of the rechargeable battery via the charging
indicator on the lower right corner of the display (Figure 3). If the
battery is low, please fully recharge it before using the instrument
or attach the instrument to an electrical outlet.
3.3 Optimal Operation Temperature
It is strongly recommended to operate luminescence measurements at
room temperature (20°C) to achieve the performance characteristics
listed in the technical data. The general operating range is 15–30°C
and below 70% humidity.
3.4 Battery Operation
The Lucetta™ 2 Luminometer is equipped with a rechargeable battery.
– The battery status can be checked via the charging indicator on
the lower right corner of the display.
– A full battery charge requires 4 to 5 hours. Prior to the first use, or
after a long period of unuse charge the battery for at least 5 hours.
– Ensure the instrument is switched on during the charge time.
– The battery lifespan depends on the power-on time of the
instrument, the use of display light and the age of the battery. The
battery may auto-discharge when the instrument is not used for
an extended period.
– To optimize the battery lifespan, the display light switches off
after 15 sec if the instrument is not in use.
– A warning message is displayed 10 minutes before the battery
becomes fully discharged. This is indicated by the message
“Battery low”. Connect the instrument to the charger and charge
the battery for at least 5 hours. If the battery is not charged,
a second warning message “Battery empty” is displayed. The
instrument shuts down automatically after another 10 minutes to
avoid deep discharge and needs to be connected to the charger if
switched on again.
3.5 Electrical Outlet Operation
When performing measurements while connected to an
outlet, the battery should be fully charged. If possible, avoid
charging of the battery during measurement, as charging
elevates the instrument internal temperature . During very
sensitive measurements or weak luminescence signals,
this slight temperature increase may lead to a high dark
count signal and influence measurement results.
1 Charging indicator
Figure 3. Display view with charging indicator
8 Bioscience Solutions – Lucetta™ 2 Luminometer Manual
3.6 Consumables
75 mm length and up to 12 mm diameter, 5 ml polystyrene tubes
1
are recommended (e.g. Sarstedt (Cat. No. 55.476) or BD Falcon
Round-Bottom Tubes (Cat. No. 352054)). Alternatively, 1.5 or 2 ml
microcentrifuge tubes may be used.
3.7 Quality Control
It is considered good laboratory practice to evaluate samples
according to instructions and specific recommendations included
in the package insert of the reagent kit or the standard laboratory
protocol. Performance failures of Quality Control checks could result in
erroneous test data. Samples should be obtained, treated and stored
following the instructions and recommendations of the kit insert.
Known internal quality standards or samples should be run.
Page 9
4.0 Lucetta™ 2 Luminometer
Operation
Note
Pressing ESC in any of the process related screens will exit the
measurement process and bring you back to the start screen. Do not
press ESC unless you really want to exit the measurement cycle.
4.1 Menu
On the front face of the Lucetta™ 2 Luminometer is an LCD display
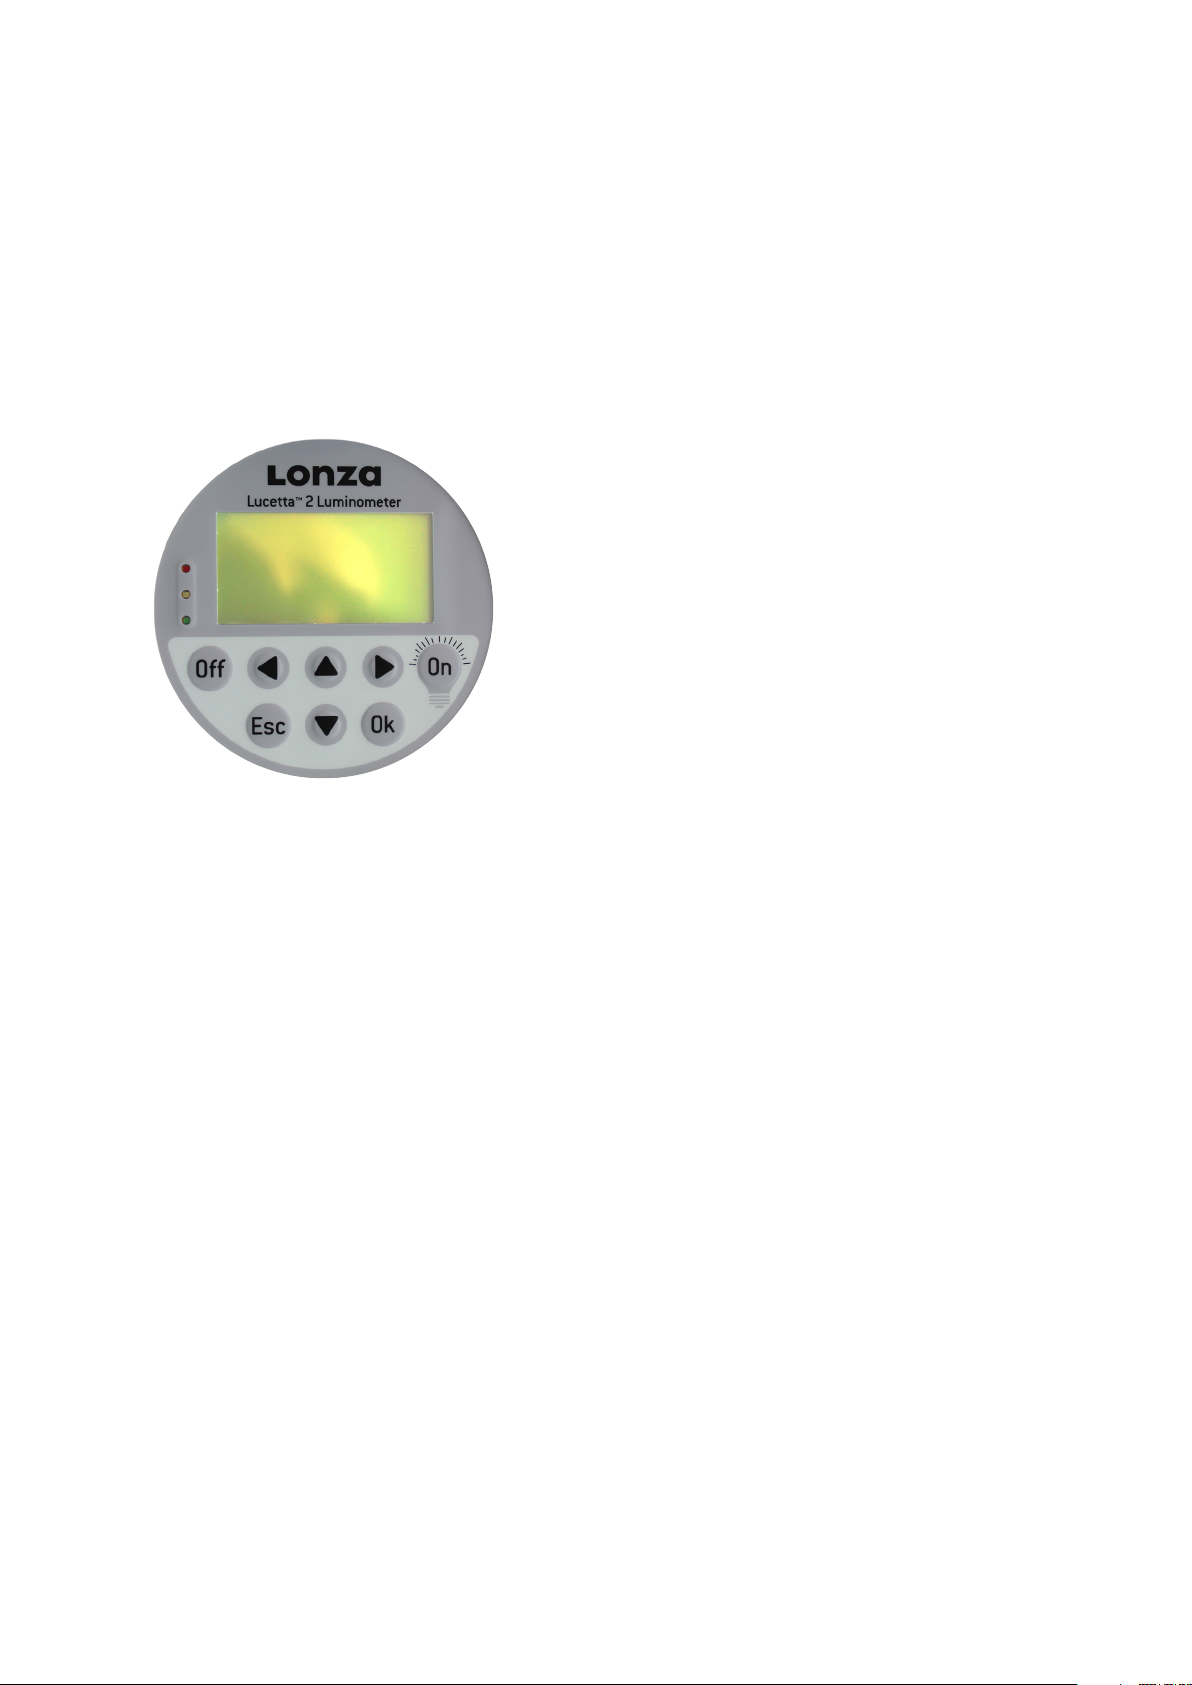
showing the menus, the measurement parameters, and the
measurement results. To open a submenu from the main menu (Figure
4) move the gray select bar up and down by using the two arrow
buttons . Once at the desired position, press OK to activate that
choice.
MAIN MENU
Run MycoAlert PLUS
Run MycoAlert
Run Single Read
Results
Settings
Figure 4. Main menu of the Lucetta™ 2 Luminometer.
“Run MycoAlert PLUS” or “Run MycoAlert” will take you to the programs
for the MycoAlert™ PLUS or MycoAlert™ Mycoplasma Detection Assay,
respectively. From here, the MycoAlert™ PLUS/ MycoAlert™ Assay can
be performed and the contamination status of cells be determined.
“Run Single Read” will take you to the single read programs. These
6 customizable programs can be used to perform the ViaLight™ Cell
Proliferation and Cytotoxicity Assay or the ToxiLight™ Cytotoxicity
Assay.
“Results” will allow you to view stored data and upload the data from
selected runs to your PC via the integral USB port on the rear side.
“Settings” opens a submenu that allows you to change date/time,
review the instrument information and adapt Single Read parameters.
End user settings can be protected with a password here. The submenu
“MycoAlert Settings” is only accessible by Lonza personnel.
4.2 MycoAlert™ PLUS/ MycoAlert™ Run
Select the correct program for the assay you want to run as
interpretation of the results is slightly different. For a detailed
description of the assay steps, please refer to the MycoAlert™ PLUS/
MycoAlert™ Assay Instructions.
1. Turn on the instrument by pressing the ON button.
2. Use arrow buttons to select RUN MYCOALERT PLUS when
running a MycoAlert™ PLUS Mycoplasma Detection Assay or
RUN MYCOALERT when running a MycoAlert™ PLUS Mycoplasma
Detection Assay, respectively. Press OK.
3. Enter the number of samples (1–99) by using arrow buttons
to select the digit you want to change. Use arrow buttons
to select a number from 0 to 9. Press OK. The instrument
will first perform reading A for all samples and then continue with
reading B for all samples. For convenient handling of incubation
times we recommend a maximum number of five samples in one
run.
4. Follow instructions to add MycoAlert™ PLUS or MycoAlert™
Reagent to the samples. Press OK when completed. This will start
the automatic countdown for the required incubation time of
5 minutes.
5. Wait for the instrument to beep and then press OK to continue.
Note
You can abort the automatic countdown by pressing arrow button
. You are prompted to confirm your decision by pressing the arrow
button and OK. This will access the next screen and allow you to
time the incubation manually.
6. Open the black lid of the Lucetta™ 2 Luminometer and insert
the first sample vial. Upon closing the lid the measurement
automatically starts with reading A. The measured value in RLU
will appear on the display.
7. Press OK to continue with the next sample.
8. After reading A is finished for all samples press OK to continue.
Add the MycoAlert™ Substrate to all samples and press OK when
completed. Again, this will start the automatic countdown for the
required incubation time of 10 minutes.
9. Wait for the instrument to beep and then press OK to continue.
Note
You can abort the automatic countdown by pressing arrow button
. You are prompted to confirm your decision by pressing the arrow
button and OK. This will access the next screen and allow you to
time the incubation manually.
10. Open the lid of the Lucetta™ 2 Luminometer and insert the first
sample vial. Upon closing the lid, the measurement automatically
begins with reading B. The measured value in RLU will appear on
the display.
11. Press OK to continue with the next sample.
12. After reading B is finished for all samples, press OK. The
complete results for all samples will be displayed (starting with
sample no.1) including the individual RLU readings A and B, the
calculated B/A ratio and the contamination status (Figure 5).
13. Pressing the arrow buttons allows you to switch back and
forth between the sample results.
14. Results are classified as CLEAN, BORDERLINE or CONTAMINATED
according to the values shown below. Classification is
indicated by 3 LEDs: green = clean, yellow = borderline, red =
contaminated.
Lucetta™ 2 Luminometer Manual – Bioscience Solutions 9
Page 10
Interpretation of Results
1. MycoAlert™ PLUS Assay
Ratio B/A Indicated as
> 1.2 CONTAMINATED
1.0–1.2 BORDERLINE
< 1.0 CLEAN
2. MycoAlert™ Assay
Ratio B/A Indicated as
> 1.2 CONTAMINATED
0.9–1.2 BORDERLINE
< 0.9 CLEAN
Please note that borderline ratios are different between the MycoAlert™
PLUS Assay and MycoAlert™ Assays.
15. Press ESC to go back to the main screen. The Lucetta™ 2
Luminometer has now stored a MycoAlert™ Data Record with
measurement results of all samples in its memory (see section
5).
MycoAlert PLUS
Result sample: 1/3
Read A: 204 RLU/s
Read B: 735 RLU/s
Ratio B/A = 3.6
CONTAMINATED
1. Turn on the instrument by pressing the ON button.
2. Use the arrow button to select RUN SINGLE READ and press
OK. Navigate up to ASSAY PROTOCOL NAME and press OK. Use
arrow buttons to select a protocol from the protocol list and
confirm with OK.
3. If a protocol with a new measurement time or threshold values is
needed, refer to chapter 6.0 (paragraph: Customer Settings) to
define a new protocol.
4. Each measurement is given an identifier number displayed under
TEST. By default the number begins with 1 counting upwards. The
number can be customized by using the arrow buttons to
select the TEST parameter and press OK. With arrow buttons
select the digit you want to change. Use arrow buttons
to select a number from 0 to 9. When numbers are selected,
confirm with OK.
5. Follow your assay protocol (add reagents, vortex, etc.).
Note
Pressing ESC in any of the process related screens will exit the
measurement process and bring you back to the start screen. Do NOT
press ESC unless you really want to exit the measurement cycle.
6. To start measurement, select START MEASUREMENT with the
arrow buttons .
7. Open the black lid of the Lucetta™ 2 Luminometer and insert the
sample vial.
8. Upon closing the lid, the measurement automatically begins. The
measured value in RLU will appear on the display (Figure 6).
Figure 5. Example of a MycoAlert™ PLUS Measurement screen. In this case,
CONTAMINATED is displayed as the B/A ratio is 3.6.
4.3 Single Read Run
The Single Read Run feature can be used with the ViaLight™ or ToxiLight™
Assays. For a more detailed description of the assay steps please refer
to the Instructions for ViaLight™ or ToxiLight™ Assay.
Single Read
Assay: Protocol 1
Test: 1
RLU: 1250
Result: pass
Figure 6. Example of a Single Read measurement screen. The result of the
measurement is 1250 RLU.
9. Press OK to continue with the next sample.
Repeat Steps #7 through #8 for multiple samples.
10. Press ESC to go back to the main screen. The Lucetta™ 2
Luminometer has now stored a Single Read data record with
measurement results of all samples in its memory (section 5).
10 Bioscience Solutions – Lucetta™ 2 Luminometer Manual
Page 11
5.0 Data Storage and PC Upload
The Lucetta™ 2 Luminometer has excellent data storage and
transfer capabilities. Each completed measurement is logged in the
instrument’s internal memory. When the maximum storage capacity is
reached, the oldest data are automatically overwritten. For long-term
data storage or data analysis, measurements can be uploaded to a PC
via USB connection. Data upload to a PC requires the Lucetta™ Connect
software.
5.1 Maximum Storage Capacity
Readings with 1 sample: The memory holds up to 2000 single sample
readings, i.e. 2000 reading of a Single Run or 2000 readings of a
MycoAlert Run (including both readings A and B, as well as the B/A
ratio and the contamination status message) or any combination of
both run modes.
5.2 Viewing Logged Measurements
The user can either select a date range for displaying logged
measurements or view all measurements stored in the instrument.
Select RESULTS in the main menu followed by DISPLAY RESULTS.
Display data
starting at:
Date: 10/18/2018
Time: 09:40
Start search
Figure 7: Example of time and date selection to view measurements
Select START SEARCH with arrow buttons and press OK to get to
the measurements (Figure 8).
Use arrow button down to view all measurements.
Assay: MycoAlert
10/12/2018 11:58:00
Sample: 1/ 9
Read A: 157 RLU/s
Read B: 493 RLU/s
Ratio B/A=3.1
CONTAMINATED
Viewing all results
The instrument shows the current date and time by default. If no
changes are made to the date or time, the instrument will display all
logged measurements.
Selecting a date range
Select a date and time in the past to display all logged measurements
from that date until the present.
Note
If no measurements were taken in the date range selected, the
instrument will display all logged measurements stored in the
instrument.
To change the date displayed, use arrow button to select DATE
and press OK. Use arrow buttons to select day, month or year.
Depending on the selected country for the date format (for more
details see section 6.0), the format is MM/DD/YYYY (USA) or DD.MM.
YYYY (Europe). The flashing cursor indicates the number to be adjusted
(Figure 7). To change the time displayed, select TIME to change hours
and minutes as described for changing the date.
Figure 8: Example of a logged measurement
5.3 Upload to a PC
For long-term storage measurement results may be uploaded to
a Windows Operating System and both viewed and analyzed with
Microsoft® Excel®. Data upload to a PC requires installation of the
Lucetta™ Connect software on the PC. This software is a separate
product and is not included in the Lucetta™ 2 Luminometer shipment.
It needs to be ordered individually (Catalog number SAAF-1003).
Before you begin, please install the Lucetta™ Connect software on your
PC. For a detailed description of the data upload to PC process, see the
instructions included with the Lucetta™ Connect software.
Note
The Lucetta™ Connect software is only compatible with a Windows
Operating System and cannot be used on a MacOS or Linux based
compu ter.
1. Close all other measurement programs running on your PC
before starting data transfer from the Lucetta™ 2 Luminometer.
2. Connect the Lucetta™ 2 Luminometer to the PC via the USB port of
your PC using the provided USB cable. Switch on your Lucetta™ 2
Luminometer and PC.
Lucetta™ 2 Luminometer Manual – Bioscience Solutions 11
Page 12
3. Open the Lucetta™ Connect software on your PC.
4. From the main menu of the Lucetta™ 2 Luminometer select
RESULTS and press OK.
5. Navigate to PC UPLOAD and press OK.
6. Choose the time frame for which you want to transfer data to
the PC (Figure 9; for details see section 5.2). If no time frame is
selected, all data are transferred. Select START TRANSFER with
arrow buttons and press OK to start data transfer.
7. In the Lucetta™ Connect software, select the results to be
saved in result files from the choices: last experiment, selected
experiments filtered by date, start time of experiment, protocol
and number of samples, or raw data. For more details please refer
to the information included with the Lucetta™ Connect software.
8. Press CREATE FILE to obtain result files.
9. Select the location on your PC where the Excel® result file(s)
should be saved. Excel® files are generated for each individual
experiment.
Transfer data
starting at:
Date: 10/18/2018
Time: T09:40
Start transfer
6.1 Password
If you want only authorized persons to change parameter settings
and/or delete results, it is possible to define a password. The default
password for a new instrument is 0000. Maximum number of digits for
a password is four.
1. Navigate down to SETTINGS and press OK.
2. Select PASSWORD and press OK
3. Enter OLD PASSWORD: To change the given number, use arrow
buttons to select the digit you want to change. Use arrow
buttons to select a number from 0 to 9. When numbers are
selected, confirm with OK.
4. Enter NEW PASSWORD: Change the 4 digits as described for OLD
PASSWORD and confirm with OK.
Password
Old Password: 0000
New Password: 0
Figure 9: Example of transfer result screen
6.0 Setting Instrument Parameters
Via the submenu SETTINGS (Figure 10) the Lucetta™ 2 Luminometer
allows the setting of a user password, creation of customized protocols
in Single Read mode and date and time setting options. Display
settings such as brightness and contrast can also be optimized here.
Instrument settings for MycoAlert measurements are passwordprotected and can only be accessed by Lonza service personnel.
Software version and serial number of the luminometer can also be
reviewed in the submenu.
SETTINGS
Password
Customer Settings
MycoAlert Settings
Date/Time
System
Information
Figure 11: Display for setting a password
6.2 Customer Settings
Six unique Single Read protocols can be configured. Definable protocol
parameters include LIMIT FAIL, LIMIT PASS and MEASUREMENT TIME.
Customer settings are password protected.
1. Navigate down to SETTINGS and press OK.
2. Select CUSTOMER SETTINGS and press OK.
3. Enter PASSWORD and press OK
4. Select protocol to be defined and press enter.
5. Create Protocol name. Name is limited to 10 characters.
6. Use arrow button and select LIMIT FAIL number.
7. Press OK and enter the RLU value for the limit fail which will serve
as the upper/lower threshold value to classify results as fail.
8. Select LIMIT PASS parameter with arrow button and select
limit pass number.
9. Press OK and enter the RLU value for the LIMIT PASS which will
serve as the lower/upper threshold of the range that will be used
to classify results as pass (Acceptance range). See Figure 11
Note
Results falling between the two thresholds will be classified as warn
(= Warning range).
Figure 10: Submenu SETTINGS
12 Bioscience Solutions – Lucetta™ 2 Luminometer Manual
10. Use arrow button and select MEASURING TIME parameter and
press OK.
11. Enter the desired measuring time in seconds and confirm with
OK. When all individual parameters have been defined exit by
pressing ESC and return to the SETTINGS submenu.
Page 13
Assay: Protocol 1
Limit Fail: 10000
Limit Pass: 5000
Meas. Time: 5
Figure 12: Display for setting Single Read parameters
6.4 System
Display brightness and contrast are adaptable to the lighting
conditions.
1. Navigate down to SETTINGS and press OK.
2. Select SYSTEM and press OK.
3. To adjust brightness, press OK. Use arrow buttons to
set levels between 1–4. The display illumination is changed
simultaneously to this entry. Confirm with OK.
4. To modify contrast, navigate down and select the CONTRAST
parameter and press OK. Using the arrow buttons, the
contrast level can be adjusted between levels 1–10. Press OK to
confirm and return to the SETTINGS sub-menu by pressing ESC.
6.3 Date & Time
Upon receipt of the instrument, date and time are set in European
format (dd-mm-yy and hh-mm with hours ranging from 0–24). Date
format can be changed to US (mm/dd/yyyy). See Figure 12.
1. Navigate down to SETTINGS and press OK
2. Select DATE/TIME and press OK.
3. Change date: To change the given date, press OK and use arrow
buttons to move to the year, month or day you want to
change. Use arrow buttons to select a number from 0 to 9.
When numbers are selected, confirm with OK.
4. Change date format: Use arrow button to select FORMAT and
press OK. Use arrow buttons to switch from Europe to USA.
5. Change time: Use arrow button to move to TIME and press OK.
With arrow buttons , select the hour and minute position
to change. Use arrow buttons until the correct value is
reached. Confirm with OK.
6. Press ESC to return to the SETTINGS sub-menu.
Date/Time
Date: 11/22/2018
Format: USA
Time: 09:34
System
Brightness : 4
Contrast : 4
Figure 14: Display for adjusting display brightness and contrast
6.5 Information
Software version and serial number of the luminometer can be
reviewed in the submenu.
1. Navigate down to SETTINGS and press OK.
2. Select INFORMATION and press OK
3. Software version and serial number are displayed.
Information
SW Version:
V 1.00
Serial No.:
718L2015
Figure 13: Display for setting date and time
Figure 15: Display for software version and serial number information
Lucetta™ 2 Luminometer Manual – Bioscience Solutions 13
Page 14

7.0 Troubleshooting
If unexpected results or instrument malfunction occur refer to the troubleshooting list below and/or contact Lonza’s Scientific Support Team.
Europe
Scientific Support: +32 87 321 611
[email protected]
USA
Scientific Support: +1 800 521 0390 (toll free)
[email protected]
Detected Failure Potential Error Action
Background value without sample tube
>20 RLU/s
Background or measurement value too
low (0 RLU/s)
Unexpected or wrong measurement
value
Measurement value too high Contamination of sample holder and/or measurement chamber
Contamination of sample holder and/or measurement chamber
with luminescent material
Luminescent material contamination inside instrument Service required; please contact Lonza.
Instrument environment suboptimal, e.g. temperature/humidity
excursions
Detector or electronics damaged, or incorrect instrument settings. Service required; please contact Lonza.
Sample position suboptimal Check the t of the sample in the sample holder
with luminescent material
Luminescent material contamination inside instrument Service required; please contact Lonza.
Clean sample holder and measurement chamber (refer to section
2.2. “Maintenance”)
Check installation procedure for compliance with operating
conditions
Clean sample holder and measurement chamber (refer to section
2.2 “Maintenance”)
8.0 Error Codes
Error Message Action
Display - 10 Turn o instrument and allow it to dry fully. Switch instrument on. If error message appears again, contact Lonza Scientic Support.
Other error messages Contact Lonza Scientic Support
9.0 Appendix
9.1 Factory Settings for Single Read
Protocol Limit Pass Limit Fail Measuring Time
1 5000 10000 5
2 7000 20000 5
3 20000 50000 10
4 50000 100000 10
5 100000 500000 10
6 10000 5000 10
14 Bioscience Solutions – Lucetta™ 2 Luminometer Manual
Page 15

9.2 Technical Data
Sample and Data Handling
Sample Tube Format Transparent polystyrol tubes and microcentrifuge tubes
Detector Ultra fast single photon counter with spectral sensitivity range of 380-630 nm
Sensitivity 1 fmol ATP using the ATP Bioluminescence Assay Kit CLSII (Boehringer Mannheim, FRG)
Background Value Background average <20 RLU/s
Dynamic Range 6 orders of magnitude
Measurement Time 1–999 sec, in increments of 1 sec
Data Format Data output in RLU
Hardware Microcontroller to control all instr ument functions
Microprocessor Software
Display Graphic display with backlit LED, 128 x 64 dots
Inte rfaces USB 2.0 Type B USB interface for PC connection (data transfer)
Software Built-in microprocessor, storage of 6 dierent customized measuring protocols
Data storage Storage of the last 2000 results
Hardware and Software Requirements
for Data Upload (Optional)
PC-software Data capture software program Lucetta™ Connect for data transfer to Excel®
Diameter: maximum up to 15 mm; minimum approximately 12 mm Length: 47-75 mm
8 buttons: 1 <ON/LIGHT> button, 1 <OFF> button, 1 <OK> button, 1 <ESC> button, 4 navigation buttons ,,, and .
Measurement of glow luminescence
2 operating modes (one pre-tailored for MycoAlert™ / MycoAlert™ PLUS Mycoplasma Detection Assay, one for single read measurement)
PC with industrial standard, Microsoft® Windows® 7 (32/64 bit) or higher Microsoft® EXCEL®
Instrument Specifications
Dimensions (w x d x h) 150 mm x 280 mm x 170 mm (5.90 in x 11.02 in x 6.69 in)
Weight Approx. 2 kg (4.4 lbs), incl. batteries
Power supply Universal input: 100–240 V AC, 50–60 Hz
Output: 5.9–6 V DC, 2.1 A (Negative pole is on the inside of the plug!)
Protection class II
Power consumption (instrument) Max. 15 W
Batteries 3 rechargeable Ni/MH Akku Baby, 1.2 V / 4000 mAh
Temperature range and humidity Storage: 5°–40° C, Operation: 15°–30°C 80% humidity at 31°C degreasing linearly to 50% at 40°C, no condensation
Electrical safety IEC 61010-1:2010 (Third Edition) UL 61010-1 (Third Edition) (USA) CAN/CSA-C22.2 No. 61010-1-12 (Third Edition) (Canada)
Certication This instrument bears the CE mark, based on conformity to EU legislation: Electromagnetic compatibility (EMC) 2014/35/EU, Low
Manufacturing date The manufacturing year is encoded by the second and third digit of the serial number, e.g. an instrument with a serial number
voltage (LVD) 2014/35/EU, Restriction of Hazardous Substances (RoHS) 2011/65/EG
719L2xxx was manufactured in 2019.
Lucetta™ 2 Luminometer Manual – Bioscience Solutions 15
Page 16

Contact Information
North America
Customer Service: +1 800 638 8174 (toll free)
Fax: +1 301 845 8338
[email protected]
Scientic Support: +1 800 521 0390 (toll free)
scienti[email protected]
Europe
Customer Service: +32 87 321 611
[email protected]
Scientic Support: +32 87 321 611
scienti[email protected]
International
Contact your local Lonza distributor
Customer Service: +1 301 898 7025
scienti[email protected]
International Oces
Australia +61 3 9550 0883
Belgium +32 87 321 611
Brazil +55 11 2069 8800
China +86 6430 3488
France 0800 91 19 81 (toll free)
Germany 0800 182 52 87 (toll free)
India +91 22 4342 4000
Japan +81 3 6264 0660
Luxemburg +32 87 321 611
Singapore +65 6521 4379
The Netherlands 0800 022 4525 (toll free)
United Kingdom 0808 234 97 88 (toll free)
Lonza Cologne GmbH–50829 Cologne Germany
For research use only. Not for use in diagnostic procedures.
Manufacturer and distributor information: The Lucetta™ 2 Luminometer is manufactured by Berthold
Technologies GmbH & Co. KG (Calmbacher Str. 22, 75323 Bad Wildbach, Germany) and distributed
by Lonza Cologne GmbH (Nattermannallee 1, 50829 Cologne, Germany) and Lonza Walkersville, Inc.
(8830 Biggs Ford Road, Walkersville, MD 21793).
Microsoft Windows and Excel are registered trademarks of Microsoft Corporation in the United States
and/or other countries.
Unless otherwise noted, all trademarks herein are marks of the Lonza Group or its affiliates.
The use of this product, alone or in combination with materials and/or methods of others, may require
a license from a third party. User shall be fully responsible for determining whether and from whom
it requires such license and for obtaining such license.
The information contained herein is believed to be correct and corresponds to the latest state of
scientific and technical knowledge. However, no warranty is made, either expressed or implied,
regarding its accuracy or the results to be obtained from the use of such information and no warranty
is expressed or implied concerning the use of these products. The buyer assumes all risks of use
and/or handling. No statement is intended or should be construed as a recommendation to infringe
any existing patent.
©2018 Lonza. All rights reserved.
CD-MN009 12/18
© Copyright 2018, Berthold Technologies
 Loading...