

Page 1

233–33156.024
Operating instructions
TV
– Xelos A 42 HD+ 100
– Xelos A 37 Full-HD+ 100
– Xelos A 37 HD+ 100
– Xelos A 32 HD+ 100
33156_024_Xelos_A32_42_GB_9_00_B1 133156_024_Xelos_A32_42_GB_9_00_B1 1 03.07.2008 15:34:2703.07.2008 15:34:27
Page 2

Contents
Remote control – TV functions ................................................................3
Control unit front side of the device .......................................................4
Connections rear side of the device – Xelos A 32/37 .............................. 5
Connections rear side of the device – Xelos A 42 ................................... 6
Welcome ................................................................................................... 7
Scope of delivery ............................................................................................7
About this operating manual ..........................................................................7
TV set equipment ............................................................................................7
Trademarks .....................................................................................................7
Operating convenience with wizards ...............................................................8
The wizards in overview .................................................................................. 8
Info display and TV index ...............................................................................8
For your safety ......................................................................................... 9
Environmental protection ...................................................................... 10
Initial installation ................................................................................... 11
Installing the TV set ......................................................................................11
Preparing the remote control unit .................................................................11
Connecting the TV set ...................................................................................11
Turning the set on/off ...................................................................................12
First installation wizard .................................................................................12
Positioning/aligning the DVB-T antenna ........................................................14
Operating convenience .......................................................................... 15
General information on menu operation ........................................................15
The info display ............................................................................................15
The index in the TV set ..................................................................................16
The Assist+ menu .........................................................................................16
TV menu – Overview diagram .......................................................................17
Radio menu – Overview diagram ..................................................................17
Daily operation ...................................................................................... 18
Select station ................................................................................................18
Select video source .......................................................................................19
Adjusting the sound .....................................................................................20
Adjusting the picture ....................................................................................21
Operation without remote control .................................................................21
Button functions ...........................................................................................22
Managing stations ................................................................................. 24
TV stations ...................................................................................................24
Put together / change favourites list .............................................................. 27
Picture in Picture .................................................................................... 28
Picture in Picture (PIP) ..................................................................................28
Configure Picture in Picture (PIP) mode .........................................................29
Electronic Programme Guide ................................................................. 30
Electronic Programme Guide – EPG ...............................................................30
Configuring EPG ...........................................................................................31
Teletext ................................................................................................... 32
Teletext ........................................................................................................32
Teletext menu ...............................................................................................33
Digital teletext (MHEG-5) ..............................................................................33
Radio ...................................................................................................... 34
Radio mode .................................................................................................34
EPG – Electronic Programme Guide (radio) ....................................................34
DVB ......................................................................................................... 35
Conditional Access module (CA module) .......................................................35
Software update ........................................................................................... 36
Other settings ........................................................................................38
Parental lock ................................................................................................38
Timer functions .............................................................................................38
On-screen displays ........................................................................................39
Time and date ..............................................................................................39
Operating additional equipment ........................................................... 40
Connection wizard ........................................................................................40
Devices to the connections AV1/AV2/AVS ......................................................42
Devices to the HDMI (DVI) connections .........................................................44
Devices to the PC IN connection ...................................................................45
Devices to the Component IN connection ......................................................46
Sound components wizard ............................................................................47
Play sound via active speakers ......................................................................47
Play sound via TV speakers and active subwoofer .......................................... 47
Connecting audio amplifiers .........................................................................48
Assignment of the digital audio input ...........................................................49
Audio connection in HDMI (DVI) devices .......................................................49
RS-232C interface (upgradable interface) ......................................................49
The direct way to record ...............................................................................50
Timer recording with external devices ............................................................51
PhotoViewer .................................................................................................52
Operating Loewe equipment .........................................................................54
Rotating the TV set (upgradable interface).....................................................56
Troubleshooting ..................................................................................... 57
Technical data ........................................................................................ 59
General data ................................................................................................59
Electrical data ..............................................................................................59
Connections (max. equipment) ......................................................................59
Accessories ............................................................................................. 60
Accessories ...................................................................................................60
Setup possibilities ......................................................................................... 60
Equipment variants and upgrade kits ............................................................61
Glossary .................................................................................................. 62
Index ...................................................................................................... 65
- 2
33156_024_Xelos_A32_42_GB_9_00_B2 233156_024_Xelos_A32_42_GB_9_00_B2 2 03.07.2008 15:36:2903.07.2008 15:36:29
Please fold out this page.
Page 3

Remote control – TV functions
(page 20) ............................................................. Sound off/on
(page 54) .................... LED display for current operating mode
(page 11, 54) ...................................... Switch over to TV mode
(page 54) ................................Switch over to operate recorder
(page 51) ................................................Timer overview on/off
(page 22) ......................................................Set picture format
(page 16) ...................................................Assist+ menu on/off
(page 30) .......................... Electronic Programme Guide on/off
(page 32) .........................................................Teletext on/off
(3
(page 15) .............................................................. Menu on/off
(page 20) .................................... V+/V– Volume louder/quieter
(page 29) .................................. PIP: Position of the PIP picture;
(page 15) .......................................................MENU: Select/set
Switch on /
switch off to standby mode .....................................(page 12)
Switch over to radio mode
(1
..............................(page 12, 34)
Switch over to operate DVD player ..........................(page 54)
Audio adjustment
/with logged in amplifier: Sound via... ....................(page 20)
Select station directly;
MENU: Enter numbers of letters ..............................(page 18)
AV selection .............................................................(page 19)
PIP on/off (picture in picture)....................................(page 28)
(3
Index on/off
........ ...................................................(page 16)
MENU: Info texts on/off ...........................................(page 15)
(3
Status display on/off
..............................................(page 23)
MENU: Hide menu...................................................(page 15)
P+/P– Select station up/down ..................................(page 18)
Station list on............. ..............................................(page 18)
MENU: Confirm/call .................................................(page 15)
(2 (3
(3
Yellow button:
Blue button:
(3
Select station up
Still frame off
Still frame on
Still frame on/off
3
If MHEG-5 is selected for the location of TV set UK or IRL during the
first installation, the button has a different function.
(3
Last station....................................(page 22)
(3
Programme info on/off .....................(page 22)
(2
(2
(2
(2
3 -
(page 22) .......................................................Teletext functions
Green button:
Red button:
(page 22) ..............................................................Freeze on/off
Select station from (2
(page 12) ................................................... /in the wizard: Back
Direct recording
(1
Radio only for DVB reception, provided the station broadcasts
this. Otherwise switch-over to an audio input.
(2
When equipped with Digital Recorder, these buttons have
different functions, see Digital Recorder user guide.
33156_024_Xelos_A32_42_GB_9_03_M3 333156_024_Xelos_A32_42_GB_9_03_M3 3 03.07.2008 15:35:2903.07.2008 15:35:29
Page 4

Control unit front side of the device
Button M:
Call the menu
in the menu: up/down
Switch on from the standby mode
Switch off from the standby mode
in the menu: to the left
Switch on the radio from the standby mode
(1
Radio only for DVB reception, provided the station broadcasts this.
Otherwise switch over to an audio input.
(2
Only with integrated Digital Recorder.
- 4
33156_024_Xelos_A32_42_GB_9_03_M4 433156_024_Xelos_A32_42_GB_9_03_M4 4 03.07.2008 15:35:3603.07.2008 15:35:36
Radio on/off
On/Off button:
Button – :
Station down
Button R:
(1
(back to TV mode)
in the menu: down
DR
+
Display:
= Standby
= Operation
= Operation without on-screen display
(Radio, EPG data capture or timer recording)
Button +:
Station up
in the menu: to the right
Display DR+:
+
DR
(no recording, no playback)
+
DR
or archive playback)
+
DR
(archive recording)
(2
= Digital Recorder integrated, but inactive
= Digital Recorder active (offset TV viewing
= Digital Recorder active
Page 5

Connections rear side of the device – Xelos A 32/37
Common Interface
S-VHS connection (AVS)
(e.g. for camcorder)
Audio in right (AVS)
Audio in left (AVS)
USB connection 1
(USB stick/card reader)
(CI-Slot)
Headphones
connection
Video in (AVS)
mains switch
(1
ANT2
Antenna/cable
analogue/digital
(Tuner 2)
(1
ANT SAT
Satellite antenna
(Sat tuner 1)
AUDIO OUT L/R - audio output left/right (analogue)
AUDIO IN1 L/R - audio input left/right (analogue)
AUDIO IN1 C - centre audio input (analogue)
SD/HD-COMPONENT IN Cb/Pb–Cr/Pr–Y - component video inputs
AUDIO DIGITAL IN - digital audio input
AUDIO LINK
(1
CONTROL
Factory settings:
AV1: DVD player
AV2: DVD recorder
You can change this during the ini-
tial installation (page 12) or in the
connection wizard (page 40).
Before you connect other devices
or make any changes, please start
the connection wizard (page 40)
and the sound components wizard
(page 47), and then follow the
instructions that are displayed on
the TV set.
- surround audio outputs (analogue)
(1
- rotating stand control
(1
RS-232C
- serial interface
220-240V~ 50/60Hz
mains connection
(tuner 1)
(1
ANT SAT2
(1
Satellite antenna
(Sat tuner 2)
AV1
Euro-AV
socket 1
ANT-TV
Antenna/cable
analogue/digital
(Tuner 1)
AV2 (RGB)
Euro-AV
socket 2
HDMI2 - HDMI (DVI) input 2
HDMI1 - HDMI (DVI) input 1
PC IN - VGA/XGA input
(1
USB
- USB connection 2 (USB stick/card reader)
AUDIO DIGITAL OUT - digital audio output
ANT OUT
Connect antenna
output with ANT-TV
(1
See page 61 for equipment and upgrade possibilities.
33156_024_Xelos_A32_42_GB_9_00_B5 533156_024_Xelos_A32_42_GB_9_00_B5 5 03.07.2008 15:36:3203.07.2008 15:36:32
SERVICE - service socket
AUDIO IN2 - audio input (analogue)
5 -
Page 6

Connections rear side of the device – Xelos A 42
Audio in left (AVS)
Audio in right (AVS)
Video in (AVS)
S-VHS connection (AVS)
(e.g. for camcorder)
Headphones
connection
USB connection 1
(USB stick/card reader)
Common Interface
(CI-Slot)
220-240V~ 50/60Hz
mains connection
ANT2
Antenna/cable
analogue/digital
(Tuner 2)
(1
(1
ANT SAT
Satellite antenna
(Sat tuner 1)
mains switch
AUDIO OUT L/R - audio output left/right (analogue)
AUDIO IN1 L/R - audio input left/right (analogue)
AUDIO IN1 C - centre audio input (analogue)
SD/HD-COMPONENT IN Cb/Pb–Cr/Pr–Y - component video inputs
AUDIO DIGITAL IN - digital audio input
AUDIO LINK
Factory settings:
AV1: DVD player
AV2: DVD recorder
You can change this during the ini-
tial installation (page 12) or in the
connection wizard (page 40).
Before you connect other devices
or make any changes, please start
the connection wizard (page 40)
and the sound components wizard
(page 47), and then follow the
instructions that are displayed on
the TV set.
(1
- surround audio outputs (analogue)
(1
CONTROL
- rotating stand control
(1
RS-232C
- serial interface
(1
ANT OUT
Connect antenna
output with ANT-TV
(tuner 1)
ANT SAT2
(1
Satellite antenna
(Sat tuner 2)
(1
See page 61 for equipment and upgrade possibilities.
- 6
33156_024_Xelos_A32_42_GB_9_00_B6 633156_024_Xelos_A32_42_GB_9_00_B6 6 03.07.2008 15:36:3303.07.2008 15:36:33
AV1
Euro-AV
socket 1
AN T-TV
Antenna/cable
analogue/digital
(Tuner 1)
AV2 (RGB)
Euro-AV
socket 2
HDMI2 - HDMI (DVI) input 2
HDMI1 - HDMI (DVI) input 1
PC IN - VGA/XGA input
(1
USB
- USB connection 2 (USB stick/card reader)
AUDIO DIGITAL OUT - digital audio output
SERVICE - service socket
AUDIO IN2 - audio input (analogue)
Page 7

Welcome
Thank you!
Loewe sets high standards in technology, design and user friendliness. This
applies equally for TV, video and accessories.
Your new TV set is equipped for the TV standard "HDTV"
(High Definition Television). With its high definition
screen, the 100 Hz image refresh frequency and the
future-oriented digital interfaces HDMI (High Definition
®
Multimedia Interface) it offers possibilities for watching
T
HDTV broadcasts in an excellent picture quality.
®
HDTV is a worldwide, digital standard in the 16:9 format
C
which revolutionises normal TV viewing. It is broadcast
®
with an up to five times greater resolution than conven-
S
tional signals and therefore creates an unexpectedly 3D
image.
The TV set is equipped for digital reception. You can use the everywhere
TV (DVB-T) already broadcast many times as well as digital cable (DVB-C)
and also digital satellite reception (DVB-S) with a upgrade.
The Loewe Digital
enables dual reception of uncoded stations of DVB-T, DVB-C and DVB-S.
If MHEG-5 is selected for location of TV set UK or IRL, DVB-C and DVB-S
reception is not possilbe, see also on page 13.
The TV set can be upgraded with an AC3 module. You can then connect
a speaker system (e.g. Loewe Individual Sound) and enjoy the movie
sound. Dolby Digital, dts and MPEG are decoded.
You can connect a card reader or a USB stick with digital photos to the
USB port of your TV set and look at your photos using the integrated
PhotoViewer software.
All functions can be controlled with the Loewe remote control.
We have designed the TV set in such a manner that you can easily
operate it with the help of wizards and menus. In for ma tio n about the
menu settings is displayed automatically. You will quickly comprehend
the context .
+
HD 100 platform in sets with Digital Recorder even
Scope of delivery
•
LCD TV set
•
Power cable
•
Antenna cable
•
Table mount (assembled)
•
Remote control Assist with two batteries
•
Marketing and service card
•
Operating instructions of Digital Recorder if there is one integrated
in the TV set
•
These operating instructions
About this operating manual
For many questions concerning the technology you will find an answer
in the index of your TV set. If your question concerns TV set operation,
you can access a function directly from the index of the Tv set. Owing to
this possibility, this operating manual only explains the most important
operating steps.
The index/glossary from page 62 onwards gives explanations of certain
terms used in the TV set and the operating manual.
Sections beginning with the symbol ➠ indicate important instructions,
hints or conditions for the following settings.
Terms which you will find in the menu or printed on the remote control
or the TV set are printed in bold letters.
In the description, the necessary operating elements are located to the left
of the text with the handling instructions.
Depending on the connected accessory equipment the menus in the TV
set can differ from those described here.
All the station names, programme contents and the illustrated photos in
this operating manual are examples.
TV set equipment
See the rating plate on the rear of the set for the precise product designation. The precise features are listed in the Integrated features item in
the index of the TV set (see page 16).
Trademarks
Made under licence by Dolby Laboratories. "Dolby“ and the double-D
symbol are trademarks of Dolby Laboratories.
The screen font "LoeweL2700“ is based on the "Tavmjong Bah Arev
(tavmjong.free.fr)“ font, which in turn is based on "Bitstream Vera“.
Bitstream Vera is a trademark of Bitstream Inc.
This set contains software based partly on the work of the Independent
JPEG Group.
Masthead
Loewe Opta GmbH
Industriestraße 11
D-96317 Kronach
www.loewe.de
All rights including translation, technical modifications and errors reserved.
Printed in Germany
Date of issue 07/08-9.0 TB/FP
ID: 6.8.0 / 5.19.0
© Loewe Opta GmbH, Kronach
7 -
33156_024_Xelos_A32_42_GB_9_00_B7 733156_024_Xelos_A32_42_GB_9_00_B7 7 03.07.2008 15:36:3403.07.2008 15:36:34
Page 8

Welcome
Operating convenience with wizards
This TV set offers user prompting with wizards that take you through the
settings step-by-step.
You can return to the previous step or exit the wizard at any time.
+
Assist
You can select the most important operating modes directly with the
Assist+ menu (ASSIST button). Selectable modes are: TV, Radio digital,
Teletext, PhotoViewer, CA module, Index and Digital Recorder archive
when Digital Recorder is integrated (see page 16).
The wizards in overview
Initial installation
The initial installation wizard helps you with the initial installation and
connection of any existing equipment (see page 12).
Setting up the antenna
You enter in the antenna wizard which antenna signals are available to
you. The antenna wizard is called in initial installation (see page 12). You
can also open the antenna wizard in the TV menu under Connections →
Antenna DVB → Antenna DVB-S
Search wizard
If, after the initial installation, you want to search for new stations, or if
you have set up your antenna for the first time, then you can handle
this task with the help of the search wizard (see page 24). You will find
the search wizard in the TV menu under Settings
wizard.
Connecting external devices
The connection wizard ensures that all devices are correctly registered
and connected. It is started automatically at the end of the initial installation wizard but can also be called separately (see page 40).
find the connection wizard in the TV menu under Connections
devices/modifications.
Connecting sound components
The sound component wizard ensures that the components which reproduce the TV sound are correctly registered, connected and set. It is started
automatically at the end of the initial installation wizard but can also be
called separately (see page 47). You will find the sound components wizard
in the TV menu under Connections → Sound components.
(1
or Antenna DVB-T.
→ Stations → Search
You will
→ New
Programming and managing recordings
The recording wizard helps you to programme a video recording with a
VCR, DVD recorder or, if installed, Digital Recorder (see page 50).
Station list
The station list is a list of all the stored stations. You can also use the
station list for switching stations conveniently (see page 18).
Software update wizard
You can load the latest software for your TV set via DVB stations or with
the aid of a USB stick (see page 36).
Info display and TV index
An information display for each menu item
The info display automatically shows content-based info texts in the upper
part of the screen for each menu item. It forms a convenient operating
system with the index (see page 15).
An index in the TV set
The index gives you an overview of the functional scope of your TV set. You
can also start wizards and menu settings directly from here (see page 16).
You can select your language for operating the TV set.
Index
Language
Integrated features
Repeat initial installation
*
Access code
ASSIST+
Automatic dimmer
Automatic station programming
OK
Activate Previous/next letter
a
-
z
Select letter Page ↓↑
P+
P–
OK
END
(1
if upgraded
- 8
33156_024_Xelos_A32_42_GB_9_00_B8 833156_024_Xelos_A32_42_GB_9_00_B8 8 03.07.2008 15:36:3403.07.2008 15:36:34
Page 9

For your safety
For your own safety and to prevent unnecessary damage to your device,
read and comply with the following safety instructions:
Proper use and environmental conditions
This TV set is intended exclusively for the reception and reproduction of
video and audio signals and designed for the home and office . It may
not be used in rooms with high humidity (e.g. bathrooms, saunas) or
high dust concentration (e.g. workshops ). The manufacturer‘s warranty is
only valid for use in the specified permissible environment.
If the set is used outdoors then ensure that it is protected against mois-
ture (rain, splashing water, or dew). High humidity and dust concentration
cause creep currents in the set . This can cause electric shocks or fires .
If you have brought the set into a
warm environment from the cold, then
wait for about 1 hour before switching
it on to avoid formation of condensa-
tion.
Do not place any objects filled with
liquid or burning candles on the device. Protect the set against dripping
and splashing water.
Never place the TV set in a position
where it is exposed to vibrations. This
can lead to material overload.
Transporting
Only transport the device in vertical position. Grasp the device on the
upper and lower edges of the housing.
The LCD screen is made of glass or plastic and can break if not handled
properly.
If the LCD screen is damaged and liquid crystal is leaking, wear rubber
gloves for handling the TV set. If there is skin contact immediately wash
thoroughly with water.
Power supply
The wrong voltage can damage the set. This equipment must only be
connected to a mains power supply which has the same voltage and
frequency as that specified on the rating plate; use the power cable
provided. The mains plug of the TV set must be easily accessible so that
the device can be disconnected from the mains at any time. When you
unplug the mains plug, do not pull on the cable rather pull on the plug
housing. The cable in the mains plug could be damaged and cause a
short circuit the next time it is plugged in.
Lay out the power cable in such a manner that it cannot be damaged.
The power cable may not be kinked or laid over sharp edges, stepped
on or exposed to che mi cals ; The latter also applies for the entire equipment. A power cable with damaged insulation can cause electrical shock
and is a fire hazard.
Air circulation and high temperatures
The vent slots on the rear panel of the set must always be kept free.
Please do not place newspapers or cloths on/over the TV.
At least 10 cm clearance must be
left at the sides and top for air
circulation if the TV set is placed or
10 cm
hung in a cabinet or a shelf.
Like any electronic device, your TV
10 cm 10 cm
set requires air for cooling. Obstruction of the air circulation can
cause fires.
The set is suitable for different installation solutions. See the instructions
for assembly for the different installation solutions.
Stand the TV set with the table or floor stand only on a level, sturdy,
horizontal base. Particularly ensure that the set does not protrude to the
front when placed in or on pieces of furniture.
Set up the device where it is not exposed to direct sunlight and where it
is not exposed to additional warming through heating elements.
Prevent metal items, needles, paper clips, liquids, wax, or similar items,
from getting into the interior of the device through the vent slots in the
rear panel. Such objects can cause short circuits in the set, which could
possibly cause a fire.
If something should get into the interior of the set then immediately
unplug the mains plug of the device and contact customer service for
more information.
9 -
33156_024_Xelos_A32_42_GB_9_00_B9 933156_024_Xelos_A32_42_GB_9_00_B9 9 03.07.2008 15:36:3603.07.2008 15:36:36
Page 10

For your safety
Environmental protection
Repairs and accessories
Never remove the back of the TV set yourself. Only have your TV device
repaired or serviced by authorized television technicians.
Only use ori gi nal accessories such as Loewe stands if possible (see Accessories on page 60).
Supervision
Do not allow children to use the TV set without supervision or to play in
the immediate vicinity of the TV set . The set could tip over, be pushed
off or pulled down from the stand surface and injure someone.
Do not allow the switched-on TV set to run unattended.
Volume
Loud music can lead to ear damage. Avoid extreme volume especially
over long periods and when using headphones.
Cleaning
Clean the TV set, the screen, and the remote control unit with a soft,
moist, and clean cloth,only, without any aggressive or scouring cleaning
agents .
Thunder storms
Pull out the mains plug and all connected antenna cables from the TV
set in a thunderstorm. Overvoltage caused by lightning can damage the
set via the antenna system, as well as via the mains power. The mains
plug and all connected antenna cables should also be pulled out during
long periods of absence.
Energy consumption
Your TV set is equipped with an eco-standby power supply. In the standby
mode, the power consumption drops to low power (see Technical data on
page 59). If you want to save even more energy then switch the device
off with the mains switch. However note that in this case, EPG (Electronic
Programme Guide) data will be lost, and it may be that programmed
timer recordings cannot be executed via the TV device.
If you activate the automatic dimming (see page 21), your TV picture will
adapt to the ambient brightness. This reduces the power consumption
of the TV set.
Packaging and box
You have made a decision to purchase a high-quality technical product
with a long service life. For disposal of the packaging, in accordance with
national legislation we have paid a fee to a commissioned recycler to pick
up the packaging from the dealer. Nevertheless we recommend keeping
the original box and packaging material on hand so that the device can
be transported with optimal protection if necessary.
The set
The EU directive 2002/96/EC regulates the proper way
to recycle, handle and utilise used electronic devices.
Old electronic devices consequently must be disposed of
separately. Please do not dispose of this device in normal
household trash!
You may return your used set free of charge at designated
recycling centres or at your specialist dealer whenever you purchase a
new, comparable set. Further details about returning (also for non-EU
countries) are available from your local authorities.
Note on the LCD screen
The TV set you have purchased with LCD screen satisfies the most rigorous quality requirements and has been inspected relative to pixel errors.
In spite of the utmost care in manufacturing the display, for technical
reasons the possibility that some pixels will have defects cannot be 100%
excluded. Please understand that these types of effects, as long as they
are within the standard of specified limits, cannot be considered as a
device defect in terms of the guarantee.
- 10
33156_024_Xelos_A32_42_GB_9_00_B10 1033156_024_Xelos_A32_42_GB_9_00_B10 10 03.07.2008 15:36:4203.07.2008 15:36:42
Batteries
The batteries supplied as initial equipment do not contain
any pollutants such as cadmium, lead, or mercury.
Used batteries should no longer be disposed of in the do-
mestic waste according to the Battery Ordinance. Dispose
of your batteries at no charge in the collection containers
that are set up for this purpose in retail stores.
Page 11

Initial installation
Installing the TV set
First plan the installation solution for your TV set. See the installation
instructions of the enclosed table mount for this.
See accessories (page 60) for other installation options.
Preparing the remote control unit
Inserting or replacing batteries
Press the embossed arrow and push down the
battery compartment cover .
Insert two alkaline manganese LR 03 (AAA) batteries;
ensure that the + and – poles are correctly positioned!
Slide the cover up from below.
AAA LR0
AAA LR03
3
Adjusting the remote control for operating the TV set
Press the TV button.
See page 54 to find out how to operate other Loewe
equipment.
Satellite antenna, if upgraded:
Connect one antenna plug each, for example, from the
antenna switch or the Twin-LNC of the satellite system
to the ANT-SAT and ANT-SAT2 sockets (only for sets with
DR+).
If you only connect one SAT antenna cable, connect it
to ANT-SAT.
Xelos A32
Xelos A37
ANT2
ANT
SAT2
Xelos A42
ANT2
ANT
SAT
TV
R
220-240V~
50/60Hz
Connecting the TV set
Connecting to the mains
Remove the cover for the connections.
Connect the TV set to a 220-240V power outlet:
First plug the small plug of the power cable into the
power connection on the rear of the TV, then plug the
large power plug into a mains power outlet.
Connecting the antenna
Analogue / DVB-C- / DVB-T antenna:
In sets with DR+: Plug the antenna plug of the antenna
or cable system or the room antenna into the ANT2
socket. The connecting cable between ANT-TV and ANT
Receiving coded stations
OUT has already been plugged in at the factory.
In sets without DR+: Plug the antenna plug of the
antenna or cable system or the room antenna into the
AN T-TV socket.
33156_024_Xelos_A32_42_GB_9_00_B11 1133156_024_Xelos_A32_42_GB_9_00_B11 11 03.07.2008 15:36:4203.07.2008 15:36:42
ANT
SAT2
Connections on the back of the set (see also pages 5 and 6).
TV
R
ANT
SAT
220-240V~
50/60Hz
Replace the cover over the connections.
When using a CA module and a Smart-Card to receive
coded stations, please observe the handling of the CA
module (see page 35).
11 -
Page 12

Initial installation
Turning the set on/off
Switching the TV set to standby mode
Activate the mains switch on the back/bottom of the set.
The display in the control panel on the front of the set
will be illuminated red, the set is now in standby mode.
Switching the TV on/off on the control unit
Press the on/off button in the middle for about 2 seconds
to switch the TV set on/off.
Display
Switching the set on with the remote control
Switching the set off with the remote control
Switch on in Radio mode
- 12
Meaning of the display colour:
Red: Standby mode
Green: TV set is switched on
Orange: Radio mode, TV set receives EPG data or timer
recording active
Press the on/off button
or
numeric buttons (0–99)
or
TV button
or
OK button – station list is called
or
ASSIST button – Assist+ menu is called.
Press the on/off button.
➠ Before switching off the set with the mains switch, we
recommend you to switch it to standby mode.
Press R on the TV control unit.
or:
Press the RADIO button on the remote control
(radio mode, see page 34).
First installation wizard
Initial installation after switching on for the first time
This wizard starts automatically after the set is switched on for the first
time, however it can also be called later manually in the TV index, see
Repeat initial installation on page 16.
First installation wizard
Which language do you want to use for operation?
Initial installation
Language
Sprache D Kieli FIN
Language GB Jezik SLO
Langue F Jazyk SK
Lingua I Lisan TR
Idioma E Språk S
Taal NL Sprog DK
Jazyk CZ Idioma P
Γλώσσα
GR Язык RUS
Język PL Språk N
Nyelv H
OK
Proceed
The first step with the wizard starts when selecting the
language for the user prompts. From this point on
follow the instructions on your TV set.
Brief explanation of button functions:
Press the ring (up, down, left, right) to move the cursor
and to select settings.
By pressing the OK button a setting is confirmed and you
will go to the next step.
With the yellow button you can select or remove the individual items (see the example below).
When an element is selected, it is marked by a checkmark
.
Use this button to go back one step.
Exit the wizard with the END button (if available).
Initial installation
Connect antenna cable(s)
Antenna cable(s) for: to antenna socket(s):
Antenna/cable (analogue) ANT TV
DVB-T ANT TV
DVB-C ANT TV
DVB-S (cable 1) ANT SAT
DVB-S (cable 2) ANT SAT2
OK
Proceed Connect/disconnect
Back
An example of multiple selection using the yellow button.
OK
continued on next page
p
33156_024_Xelos_A32_42_GB_9_00_B12 1233156_024_Xelos_A32_42_GB_9_00_B12 12 03.07.2008 15:36:4603.07.2008 15:36:46
Page 13

Initial installation
Explanations of the setting possibilities, including the upgradeable
satellite reception:
Location of
TV set
Antenna
selection
Encrypted
stations
DVB-T:
Antenna
DVB-C:
Settings
DVB-S:
Satellite
system
High band
Select the country for country-specific pre-settings.
If UK or IRL is selected for the location of TV set, it is pos-
sible to activate MHEG-5 (UK Freeview) for the TV set.
A dialogue appears, where you can confirm to set the
operating software to the selected location.
If Yes is selected and confirmed with OK, the TV set turns
off and on again automatically. First installation starts
again after activating the operation software.
If MHEG-5 was activated, DVB-C and DVB-S can not be
used anymore. Only terrestrial/cable and DVB-T stations
are available.
Antenna/cable (analogue):
cable/antenna
DVB-T: digital terrestrial stations
DVB-C: digital stations via cable
DVB-S (line 1): digital stations via satellite
DVB-S (line 2): digital stations via satellite
You can state whether coded stations are to be searched
for in the search/update.
are also searched for. However, these stations can only
be received in connection with a CA module and the
appropriate Smart Card.
described on page 35.
If you are using an active antenna, then select yes (5V)
for the antenna power supply.
The conventional settings will be derived from the selection of set location. Only change this if you know other
symbol rates and modulation types or if you have to specify the network ID for your cable network (information
available from your cable network provider). If you want
to run the station search independently of the channel
grid, select frequency search for the search method.
Select which satellite(s) you receive from a list. For more
than one satellite, select the type of your changeover
switch or communal satellite system additionally. Ask
your dealer in this regard.
Specify here whether the high band of the selected satellite is to be searched in addition to the low band.
analogue stations via
Select yes then coded stations
Handling of the CA module is
LNC
frequencies
Low Band /
High Band
Search
method
Symbol rates
Favoured
signal source
Start search
Connecting
additional
devices
Normally, you do not need to change the values for high
and low band, unless the LNC (LNB) of your satellite
system uses a different oscillator frequency (important
for the frequency display).
After you have made these settings, you should receive
the picture and sound of the selected satellites (only with
Astra1 and HOTBIRD).
If you want to run the station search independently of
the channel grid, select frequency search for the search
method.
The symbol rates are specified by the satellite provider
and do not normally need to be changed.
Select the signal source from a list, the station of which is
to be at the top of your station list (starting with station
slot 1).
Start the automatic station search with OK.
First TV stations, then radio stations are searched for.
The stations found in the automatic search are divided into
the appropriate station blocks depending on the previously
selected antenna cables (signal sources). Subsequently the
stations can only be re-sorted within these blocks. At the
beginning of the station list you will find the block with
the stations of the preferred signal source.
Any mixed sorting of stations from different signal sources
is only possible with the favourites list.
➠ For TV sets with MHEG-5 software the stations are
tied to “Logical Channel Numbers” – “LCN” and
sorted from 1-799. Digital stations without “LCN” are
stored from 800 onwards. Analogue stations are stored
from 1001.
Then the connection and sound component wizard
starts which helps you to log in, set and connect video
recorders, decoders, a loudspeaker system or a HiFi/AV
amplifier to your TV set. DVD players and DVD recorders
are already registered at the factory.
You can start the connection wizard and the sound
components wizard manually later and add new devices.
Further information is available from page
wizard) and page
47
(Sound components wizard).
40
(Connection
continued on next page
33156_024_Xelos_A32_42_GB_9_00_B13 1333156_024_Xelos_A32_42_GB_9_00_B13 13 03.07.2008 15:36:5003.07.2008 15:36:50
p
13 -
Page 14

Initial installation
Digital Link
If you have logged in and connected a recorder in the
connection wizard, the Digital Link Plus transmission
Plus
starts when the sound component wizard closes. If a
Digital Link Plus compatible recorder is connected, the
station list of the analogue stations is transmitted to the
external recorder.
You can also call Digital Link Plus manually under TV menu
→ Connections → Digital Link Plus.
Explanations of the DVB-T antenna:
Room
antenna
antenna
With good reception conditions a room antenna can be
used for DVB-T (socket ANT2).
Active
Under less favourable reception conditions, an active
antenna is recommended which must be set accordingly
in the first time commissioning or in the TV menu → Connections → Antenna DVB → Antenna DVB-T (see DVB-T
antenna on page 13).
Unidirectional
antenna
If the location is outside of the normal transmission range
then a directional antenna can be used to improve reception quality.
Positioning/aligning the DVB-T antenna
If you receive one or more DVB-T stations with picture or sound interference, you should change the position and alignment of the antenna. Ask
your dealer to tell you which channels are used to broadcast the DVB-T
stations in your region.
➠ In normal TV mode, without other displays.
A DVB-T station is received and selected.
Call TV menu.
Select Settings,
go to the menu line below.
Select Stations,
go to the menu line below.
Select Manual adjustment,
OK call manual adjustment.
Signal source
Select the area in which you want the broadcaster to search here. You can
use the button to automatically select station by station.
Manual adjustment
SIgnal source DVB-T DVB-C DVB-S A
Channel E05
Frequency 177.50 MHz
Bandwidth 7 MHz
Name 12 Test
C/N 81
Level 80
BER 0 E-7
Overwrite station
Search
END
INFO
The signal source is already on DVB-T due to the station
preselection.
Position and align the antenna in such a manner that
maximum values for C/N and Level are obtained.
Blue button: Start search.
Search for DVB-T stations one after another and compare
values for C/N and Level.
Then position/align the antenna to the weakest station
so that maximum values for C/N and Level are obtained.
Thereafter perform an automatic search for all DVB-T
stations, see page 24.
Explanation of the setting possibilities:
Bandwidth
Depending on the selected channel and country the
associated bandwidth of 7 or 8 MHz will be set automatically.
- 14
33156_024_Xelos_A32_42_GB_9_00_B14 1433156_024_Xelos_A32_42_GB_9_00_B14 14 03.07.2008 15:36:5003.07.2008 15:36:50
Page 15

Operating convenience
e
e
General information on menu operation
Menus for the individual operating modes (TV, Radio, PIP, EPG, Teletext,
PhotoViewer and DR archive, if equipped with Digital Recorder) are called
with the MENU button. Other menus can be opened with other buttons
on the remote control.
The menus are displayed at the bottom of the screen. At the top you get
additional information about the selected menu item (see info display on
the right).
➠ In normal TV mode, without other displays.
Call TV menu.
Picture
Here you can adjust among other things: Contrast, colour, brightness, picture
adjustment, sharpness, picture format.
TV menu
Picture adjustment ...
Example: Selecting and executing functions
Select Picture,
go to the menu line below.
Select Brightness,
go to the menu line below.
Set Brightness.
Return to the Brightness menu line
to make other picture settings.
Select more ... ,
OK call more ... functions.
Select Auto format,
go to the menu line below.
Select on / off.
Conclude the settings.
Inputs with the numeric buttons
Letters have to be entered for specific functions. Like using
a mobile phone keypad (1 to 9), press a numeric button
until the desired character appears.
The available letters are printed on the individual numeric
buttons.
Sound
Recording SettingsPicture
Connections
ENDINFO
The info display
The info display shows a content-based info text for each menu item at
the top edge of the screen to aid you in making the settings . In conjunction with the index it makes a convenient control system.
➠ A menu is displayed.
The factory setting is that the info display is shown automatically for each menu item. In this case you can temporarily hide the info texts with the INFO button.
The automatic info display can be hidden via a menu
setting. Then it can be displayed temporarily by pressing
the INFO button.
Settings
Here, you can search for stations automatically or manually as well as set the
menu language, timer functions, parental lock, on-screen displays, etc.
TV menu
Settings
ctions
Stations ...
SoundPicture
An INFO icon at the bottom right above the menu bar
also tells you that an info text is available.
If a several page info text is available, Page
↓↑
ed in the info window and you can scroll through the
individual info pages with P+ and P–.
Permanently display or hide the automatic info display
Once you have become familiar with how to operate the TV set, you can
switch off the automatic info display.
➠ In normal TV mode, without other displays.
Call TV menu.
Select Settings,
go to the menu line below.
Select Miscellaneous,
go to the menu line below.
Select On-screen displays,
go to the menu line below.
Select Automatic info,
go to the menu line below: yes / no.
Recording
is display-
ENDINFO
Conn
15 -
33156_024_Xelos_A32_42_GB_9_00_B15 1533156_024_Xelos_A32_42_GB_9_00_B15 15 03.07.2008 15:36:5403.07.2008 15:36:54
Page 16

Operating convenience
The index in the TV set
You can start all wizards and many operating functions directly from
this point. The complete function scope of the TV set can thus be easily
understood.
Alphabetic sorting is preceded by the items Language, Integrated features
and Repeat initial installation.
Call index
➠ In normal TV mode, without other displays.
Call Index.
You will see an info text for the highlighted keyword in
the info display. If MHEG-5 is active, call the status display
with INFO and press INFO again for index.
You can select your language for operating the TV set.
If an OK symbol appears in the marked line, this function
can be called directly with OK.
Selecting a keyword
Enter initial letters with the numeric buttons like with a
mobile phone keypad (see page 15).
or go with:
to the preceding / next letters,
from line to line,
Index
Language
Integrated features
Repeat initial installation
*
Access code
ASSIST+
Automatic dimmer
Automatic station programming
OK
Activate Previous/next letter
a
-
z
Select letter Page ↓↑
P+
P–
OK
END
The Assist+ menu
The most important additional functions of the TV set can be called
directly by the Assist+ menu.
Call Assist
Description of the individual functions:
+
Call Assist+ menu.
Select additional functions.
OK calls the function.
+
Assist
TV
Radio digital
Teletext
DR archive
PhotoViewer
CA module
Index
END
OK
Your personal photo selection
TV: See page 18 onwards.
Radio digital: See page 34.
Teletext: See page 32 onwards.
DR archive: Menu item only appears if the TV set is
equipped with Digital Recorder; see Digital
Recorder operating instructions.
PhotoViewer: See from page 52.
CA module: Menu item only appears if a CA module is
plugged (see page 35) and a digital station
is selected.
Index: See left column.
P+/P– scroll backwards or forwards in whole pages.
Example: You want to have the TV set switch off automatically at
a specific time:
Select the item Switch off → Automatic, you go to the
setting with OK.
- 16
33156_024_Xelos_A32_42_GB_9_00_B16 1633156_024_Xelos_A32_42_GB_9_00_B16 16 03.07.2008 15:36:5903.07.2008 15:36:59
Page 17

Operating convenience
TV menu – Overview diagram
TV menu
Picture Sound
Picture adjustment
Contrast
Colour intensity
Colour temperature
Brightness
Sharpness
Digital Noise Control (DNC)
more...
+
Image
Picture format
Move picture up/down
Auto format
Film quality improvement (DMM)
Automatic dimmer
(3
Sound via
Sound effects
Sound adjustment
Headphone volume
Loudness
more...
(9
Loudspeaker sound
Headphone sound
Auto volume
AV output signal
Maximum volume
Switch on volume
Volume adjustment for
current station
Balance
Radio menu – Overview diagram
Radio menu
Sound
Sound effects
Sound adjustment
Headphone volume
Loudness
more...
Auto volume
Maximum volume
Switch on volume
Volume adjustment for
current station
Balance
Search wizard
Manual adjustment
Change stations
Select/change favourites
(1
A wizard is started here.
(2
Menu items only appear for analogue stations.
(3
Menu item only appears for certain picture formats (see page 22).
(4
List of individual menu items.
(5
Menu item only appears when a CA module is plugged in (see page 35).
(6
Menu item only appears with motor control/RS 232 is upgraded and a stand with motor drive is used (see page 60).
(7
Menu item only appears in sets with DR+ or with logged in external recorder.
(8
Menu item does not appear for analogue stations.
(9
Menu item only appears with certain settings in the audio component wizard (see page 20).
(2
(2
Stations
(1
Recording
Recording wizard
Timer list
Pre-record time
Post record time
Switch off times
Alarm times
Wake up with
Wake up signal volume
(7
(1
Timer functions
(4
(4
Connections
New devices/modifications
Sound components
Antenna DVB
Digital Link Plus
Miscellaneous
Manual adjustment of
AV standard
Assign digital audio input
Allow switching voltage
RGB insertion at AV2
Remote TV switch on via Digital
Link HD
(1
(1
(1
Settings
Stations
Search wizard
Manual adjustment
Change stations
Select/change favourites
Parental lock
Timer functions
Switch off times
Alarm times
Wake up with
Wake up signal volume
Language
Menu
Subtitles (DVB)
Audio (DVB)
Miscellaneous
On-screen displays
Time and date
Software update
CA module: xxx
DVB settings
Rotate TV
(1
(4
(4
(1
(5 (8
(6
17 -
33156_024_Xelos_A32_42_GB_9_00_B17 1733156_024_Xelos_A32_42_GB_9_00_B17 17 03.07.2008 15:37:0303.07.2008 15:37:03
Page 18

Daily operation
Select station
With the keys P+ and P - on the remote control
P+/P– Station up/down.
The station display with sound identification is displayed
briefly.
➠ If favourites are selected, the station in the favourites list
is switched over with P+/P– (see page 19).
➠ If other languages or DVB subtitles are available on DVB
stations, the language and subtitle selection is displayed
under the station display.
See also 23: Additional selection possibilities for DVB
stations.
With the numeric keys of the remote control
1-digit stations
Keep the numeric button pressed for one second, the
long
short short long
all short
Call last viewed station (for TV sets with MHEG-5 software)
station changes immediately.
or:
Press numeric button briefly, the station changes after 2
seconds (immediate change for up to 9 stored stations).
2-digit and 3-digit stations
Press first (and second) numeric button briefly.
Keep the last numeric button pressed for one second, the
station changes immediately.
or:
Press all the numeric buttons briefly, the station changes
after 2 seconds (changes immediately in case of up to 99
or 999 stored stations).
4-digit stations
Press all four numeric buttons, the station changes immediately.
➠ If favourites are selected, you can switch to the station
in the favourites list with the numeric buttons (see page
19). Maximum two-digit station numbers are possible.
➠
When you select an empty memory location, the TV
switches to the next available station.
You can switch back and forth quickly between
two stations using these buttons.
With the station list
➠ In normal TV mode, without other displays, no favour-
OK Call Station list.
Sorting
numerically
P+
P–
P+/P– Scroll in the pages of the station list.
Jump to the next station block.
Mark stations.
or:
Enter the number of the station with the numeric buttons.
The marked station is shown as a small picture .
OK The marked station is called.
Blue button: Changes the sorting between numerically
Sorting
alphabetically
P+
P–
Enter initial letters with the numeric buttons like with a
mobile phone keypad (see page 15).
The first station for the specified letters is marked.
Mark stations.
OK The marked station is called.
ites selected:
Station list
Page ↑↓
Station list
Page ↑↓
COMP. IN
HDMI1/DVI
HDMI2/DVI
VGA
AVS
DVD
VCR
0 VIDEO
1 Das Erste
2 ZDF
3 WDR Köln
21:00 - 21:45 Urlaubsparadies - Toskana
OK
Switch to ...
09
-
Select station
Favourites
4 Bayerisches FS
5 hr-fernsehen
6 Phoenix
7 BR-alpha
8 3sat
9 EinsExtra
10 EinsFestival
11 EinsPlus
12 ZDFinfokanal
OK
13 ZDFdokukanal
14 ZDFtheaterkan
15 arte
and alphabetically.
3sat
9Live
arte
ARD
AVS
Bayrisches FS
BR-alpha
BR
CNN INT
21:00 - 21:45 Urlaubsparadies - Toskana
OK
Switch to ...
a
-
z
Select letter
Favourites
COMP IN
Das Erste
DSF
DVD
DVD-REC
EinsExtra
EinsFestival
EinsPlus
Eurosport
Scan stations
Change stations
Sort alphabetically
Scan stations
Change stations
Sort numerically
END
INFO
OK
END
INFO
- 18
33156_024_Xelos_A32_42_GB_9_00_B18 1833156_024_Xelos_A32_42_GB_9_00_B18 18 03.07.2008 15:37:0303.07.2008 15:37:03
Page 19

Daily operation
With the favourites lists
You can save and call your favourite stations in 6 favourites lists (e.g. for
multiple users). Each favourites list can contain up to 99 stations. After
initial installation, 10 stations from the station list are already stored in
the first list. Change the favourites list to suit your requirements (see Put
together / change favourites lists on page 27).
➠ In normal TV mode, without other displays:
OK calls the station list.
Red button: Calls the favourites list.
Favourites
Favourite list1
1 Das Erste
2 ZDF
3 WDR Köln
4 Bayrisches FS
5 hr-fernsehen
6 Phoenix
7 BR-alpha
8 3sat
9 EinsPlus
10 EinsExtra
11 MTV
12 VIVA
09
-
Select station
P+
Page ↑↓
P–
OK
Switch to ...
Station list
OK
Scan stations
Change favourites
END
INFO
Select station directly with numeric buttons. Or:
Mark stations.
P+/P– Scroll in the pages of the favourites list.
Select other favourites list.
➠ Other favourites lists can only be selected if these
contain stations.
OK The marked station is called.
Red button: Back to the station list.
Green button: Scan all stations of the currently selected
favourites list.
Yellow button: Change the Favourites lists, see page 27.
Explanation of the favourites lists:
The selection made with the red button (favourites list) is retained until
you switch back to the station list with the red button.
If favourites are selected, the name of the favourites list appears in the
status display after the station name after changing stations.
Explanation of the icons following station names:
Digital DVB-T station (terrestrial via antenna)
Digital DVB-C station (via cable)
Digital DVB-S station (via satellite)
Coded station
Select video source
➠ Please ensure that the appropriate devices have also been registered
with the connection wizard (see page 40).
With the AV selection
Call AV selection.
AV selection
COMP. IN
HDMI2/DVI
HDMI1/DVI
PC IN
AVS
Select desired device or connection,
OK switch over.
A signal from the selected video source should now be
visible.
With the station list
➠ In normal TV mode, without other displays:
OK Call the station list.
If the favourites list is displayed, switch to the
In numerical sorting the connections or devices are always
at the beginning of the list.
In alphabetic sorting, the connections or devices are
sorted in alphabetically.
P+
P–
Select connection/device.
OK Switch over.
DVD-REC
DVD
VIDEO
OK
Switch to ...
station list first.
Page ↑↓
Station list
COMP. IN
HDMI1/DVI
HDMI2/DVI
VGA
AVS
DVD
VCR
0 VIDEO
1 Das Erste
2 ZDF
3 WDR Köln
09
OK
Switch to ...
-
Select station
Favourites
OK
4 Bayerisches FS
5 hr-fernsehen
6 Phoenix
7 BR-alpha
8 3sat
9 EinsExtra
10 EinsFestival
OK
11 EinsPlus
12 ZDFinfokanal
13 ZDFdokukanal
14 ZDFtheaterkan
15 arte
Scan stations
Change stations
Sort alphabetically
END
END
INFO
19 -
33156_024_Xelos_A32_42_GB_9_00_B19 1933156_024_Xelos_A32_42_GB_9_00_B19 19 03.07.2008 15:37:0903.07.2008 15:37:09
Page 20

Daily operation
Sound adjustmentSound effectsVolume
24
Headphone vo
Adjusting the sound
Switching sound on/off
Sound off;
Sound on: Press button again or set volume V+.
Setting the volume
V+/V– Volume louder / quieter.
The volume bar will be shown briefly if no other menu is
displayed.
Call sound adjustment
Call Sound adjustment.
Sound adjustment ...
off
Select sound adjustment by pressing several times.
or:
Select sound adjustment.
Other sound settings in volume setting and sound adjustment
➠ As long as the volume bar or the selection of the sound
adjustment is still visible:
Call additional sound settings.
Select sound setting,
go to the menu line below.
Make changes.
Sound settings via the TV menu
➠ In normal TV mode, without other displays.
Call TV menu.
Select Sound,
go to the menu line below.
Select desired sound setting,
go to the menu line below.
Make changes.
Speech
Classical
Pop Custom music sound
END
Explanations of the sound settings:
Sound via
Playback over the TV speakers, active speakers, Loewe Auro,
Loewe Sound Projector or an external hi-fi amplifier.
The selection active speakers, hi-fi/AV amplifier or Sound
Projector is only possible if these have been logged in in
the audio component wizard. The Auro selection is only
possible if a Loewe DVD Preceiver Auro is connected.
The menu item Sound via does not appear if TV speak-
ers or TV speakers + active subwoofer is set in the audio
components wizard.
Sound effects
Set sound effects Stereo, Panorama, 3D Surround. Pano-
rama gives the stereo sound a virtual base widening. 3D
Surround converts a stereo signal into a virtual surround
signal.
Sound
adjustment
Headphones vol.
Loudness
more ...
Loudspeaker/
Headphone
Auto Volume
Speech, Classical, Pop, Custom music and film sound. You
can set the treble and bass for music and movie sound.
Adjust the headphones volume.
Proper boost of bass and treble tones at low volume.
Call with OK.
Selection possibility Mono/Stereo or Sound 1 or Sound
2 for two-sound broadcasts separately for speakers and
sound
headphones. Only available with analogue stations.
Reduces volume differences, e.g. for advertisements that
are too loud.
AV output
Sound selection for two sound broadcasts.
signal
Maximum
Determining the maximum volume that can be set.
volume
Switch on
volume
Specify the volume that is set when switching on the TV
set with the power switch.
If the volume when switching off the TV set into standby
mode is higher than specified here, it is automatically
reduced to the fixed switch-on volume when switching
back on.
Volume
adjustment for
current station
The volume can differ according to the individual stations.
If the sound is too loud or too quiet in relation to other
stations, adapt the volume. When the menu is open, you
can select the stations one after another with P+/P– and
adjust every single station conveniently.
Balance
Set stereo balance so that the volume impression is identical on the left and right.
- 20
33156_024_Xelos_A32_42_GB_9_00_B20 2033156_024_Xelos_A32_42_GB_9_00_B20 20 03.07.2008 15:37:1703.07.2008 15:37:17
Page 21
Daily operation
te
Adjusting the picture
Call TV menu.
TV menu
Picture adjustment ...
Select Picture,
go to the menu line below.
TV menu
Picture (standard values, TV digital)
Picture adjustment
Standard values (TV digital) ...
Select the desired picture function,
go to the menu line below.
Make changes.
Explanations of the picture settings:
Picture
adjustment
Contrast
Colour intensity
Switches the picture parameters between standard and
personal values.
Adjust contrast.
Adjust the colour.
Colour
Set warmer or colder tone for picture.
temperature
Brightness
Sharpness
more ...
Image
Picture format
Move picture
Adjust the brightness of the picture.
Adjust the contour sharpness of the picture.
DNC
Removes or reduces the signal noise in the picture.
Call with OK.
+
Picture improvement on/off and demo mode for Image+.
Set picture format (see page 22).
Move picture vertically (see page 22).
up/down
Auto format
Automatic detection and setting of the picture format for
Cinemascope or widescreen movies.
DMM
Reduce jolting.
Automatic
dimmer
The TV picture adapts to the ambient brightness. The
power consumption of the TV set is also reduced.
Standard values / personal values for picture adjustment
Call TV menu.
Select Picture,
go to the menu line below.
Select Picture adjustment,
go to the menu line below.
Sound
Recording SettingsPicture
ContrastCColour intensity
Connections
TV menu
Picture (personal values, TV digital)
Picture adjustment
Standard values (TV digital)
ENDINFO
Select desired values for picture,
OK
Personal values (TV digital)
ENDINFO
OK call selected values for picture.
Explanations for Picture adjustment:
Custom adjustments of contrast, colour intensity, colour temperature,
ENDINFO
brightness, sharpness and digital noise supression are saved in the custom
values. Every signal source (TV analogue, TV digital, HD analogue, HD
digital, PC, PhotoViewer) has its own personal values.
By selecting Standard values the picture parameters are reset to factory
values for the respective currently active signal source.
See the glossary for an explanation of the signal sources: Signal input
groups.
In the index of the TV set, all the picture and sound adjustments can be
reset to the factory values for all signal sources in one step under Reset
picture/sound
or Factory settings picture/sound.
Operation without remote control
Changing the station on the TV set
+ / – Station up/down.
Switching radio on or off or switching to radio
R Radio on or switch between TV and Radio.
Calling the TV menu on the set
M call Direct control on TV set menu,
Direct control on TV set
lection
19
– / + Select function.
➠ Service is intended for the customer service.
M or R Go to the menu line below,
– / + make changes.
M Move up one menu line,
– / + select other function.
BrightnessVolume
Contrast Picture format Sta
21 -
33156_024_Xelos_A32_42_GB_9_00_B21 2133156_024_Xelos_A32_42_GB_9_00_B21 21 03.07.2008 15:37:1903.07.2008 15:37:19
Page 22

Daily operation
on, with normal size ...
Teletext subtitles Personal text pages
Teletext functions
Button functions
Every operating mode of the TV set (TV, Radio, Teletext, EPG, PIP, PhotoViewer
and DR archive, if equipped with Digital Recorder) has its own menu and own
functions for the coloured buttons. The function of the coloured buttons is
shown at the bottom of the menus and wizards. Below, some of the function
are listed which you need in TV mode for the daily handling of your TV set.
Functions of the coloured buttons in TV mode
➠ The coloured buttons do not work as described below
for TV sets with MHEG-5 software, but they operate as
described on page 33 (Digital Teletext).
Red button: Freeze on/off.
In sets with Digital Recorder: DR archive on/off.
For TV sets with MHEG-5 software you can open the DR
archive via the menu Assist+ (see page 16).
Green button: Open the Teletext functions menu.
Select Teletext subtitles or Personal text pages.
Go to the menu line below in Teletext subtitles.
Select the size of the Teletext subtitles,
OK show Teletext subtitles.
(display only if subtitles are available).
END: Teletext subtitles off or select off in menu.
OK in Personal text pages calls the teletext pages or
the teletext page directly if only one page is noted
(for defining pages, see page 33).
Yellow button: Go to the last viewed station.
Use this button to quickly switch back and forth between
two stations. For MHEG-5 see page 18 or on this page at
the right lower column.
Blue button: Show programme info.
For MHEG-5, no programme info is available.
1 ARD
14:30 - 15.15 Urlaubsparadies Toskana
ENDINFO
Selecting the picture format
Press the Picture format button until the desired picture
format is set or press
to select the desired picture format.
The Panorama picture format can be set between
proportionally correct and format filling display. Black
bars are visible on the left and right of the picture in
the prportionally correct display.
Switch: Keep the M button on the TV pressed, at the
same time, press the Picture format button on the remote
control briefly.
Reset: Press the same button combination again.
Explanations of the picture formats:
➠ The setting options depend on the transmitted picture
content.
16:9 Proportionally correct display of 16:9 broadcasts.
4:3 Proportionally correct display of 4:3 broadcasts.
Panorama Proportionally correct or format filling display (as-delivered
state) of 4:3 broadcasts on the 16:9 screen. Station logo
and subtitles remain visible.
See above for switching the Panorama mode.
Cinema Proportionally correct, format filling display of 4:3 broad-
casts on 16:9 screens. Station logo and subtitles usually
not visible.
Zoom Proportionally correct display. Maximum picture magni-
fication.
PALplus Is a 4:3-compatible 16:9 picture broadcast supplied by
the station which is detected automatically.
If a high resolution video signal is displayed on the TV set
or fed in via the interfaces PC IN, HDMI1/DVI, HDMI2/DVI
oder COMP. IN, the picture formats 16:9 TV, 4:3 TV, 16:9
PC and 4:3 PC can be set.
Move picture vertically
➠ In normal TV mode without other displays.
Move picture up/down.
Programme info 14:43
OK
Detailed info (teletext) Programme previewDetailed info
END
Permanent display of time
Press twice in rapid succession: Time is displayed permanently.
14:42
K or END: Hide time.
- 22
33156_024_Xelos_A32_42_GB_9_00_B22 2233156_024_Xelos_A32_42_GB_9_00_B22 22 03.07.2008 15:37:2303.07.2008 15:37:23
To show subtitles or news tickers which have been cut
off, the picture can be moved up or down in the picture
formats Panorama, Cinema and Zoom (not with high
resolution signal) with the arrow buttons .
➠ For TV sets with MHEG-5 software you can switch
back and forth quickly between two stations using
these buttons (see also on page 18).
Page 23

Daily operation
Status display
➠ In normal TV mode, without other displays.
END: Show/hide status display.
For MHEG-5, INFO button.
1 Das Erste Stereo
14:30 - 15:15 Toskana
Language-/sound selection
14:42 Alarm time 20:00 Sleep timer 23:00
You will see the number and name of the station and the
title of the current broadcast (if available) and the sound
identification in the top two lines.
The bar (if available) indicates the progress of the current
programme.
A selection (see right hand column), the time and, if activated, the alarm time and switch-off time appear at the
bottom depending on the DVB station.
Explanations of the sound identification:
Transmitted audio signal:
Mono Mono audio transmission analogue
2-sound Two sound broadcast (Sound1/Sound2) analogue
Stereo Stereo sound transmission analogue or digital (PCM)
Dolby Digital Dolby Digital sound transmission (DD)
dts dts sound transmission
MPEG MPEG sound transmission
ProLogicII Dolby Pro Logic II
Used loudspeakers:
2 Playback via TV loudspeakers (L/R Stereo).
Additional selection possibilities for DVB stations
In the status display additional selection possibilities can be offered for
specific programmes depending on the DVB programme provider.
➠ The coloured buttons do not work as described below
for TV sets with MHEG-5 software, but they operate
as described on page 33 (Digital teletext).
➠ If you press one of the coloured buttons or the TEXT
button while the status display is on, the appropriate
selection menu is displayed.
➠ The selection line is also displayed automatically when
a new broadcast with different options to the previous
broadcast begins or when you switch stations.
The following options are possible:
Red button:
Channel selection for multi-channel providers
Green button: Language/audio selection
Yellow button: Time selection
Blue button: Protection of minors
TEXT: DVB subtitles
The selection menus are only available as long as the status display is shown. However, you can call them again
by pressing the END button.
Other setting options for DVB stations
You can make general presettings for DVB stations under TV menu →
Settings → Miscellaneous → DVB settings.
Subtitle
Here you can preset whether a subtitle is always to be
mode
displayed as soon as it is offered by the station. A special
subtitle for impaired hearing can also be selected.
Subtitles are not offered by all stations. Many stations only
broadcast subtitles by teletext.
Audio
Here you can preset whether you always want to hear a
mode
special sound for impaired sight as soon as it is offered
by the station.
DVB character
Select the DVB character set so that the title of the broad-
set
cast of your favourite received station or the texts of your
CA module are displayed correctly.
23 -
33156_024_Xelos_A32_42_GB_9_00_B23 2333156_024_Xelos_A32_42_GB_9_00_B23 23 03.07.2008 15:37:3003.07.2008 15:37:30
Page 24

Managing stations
TV stations
Various options for managing stations are available via the TV menu. For
example the description for TV stations. For radio stations the same applies,
except that the Radio menu is called in Radio mode (see also page 34).
➠
Station management is not possible if a programmed timer recording
is still pending.
Search/update stations – Search wizard
In the search/update with the search wizard, new stations are searched
for which have not yet been stored.
➠ You have to repeat the initial installation (see page 12)
and automatically search for new ones if you want to
delete all the existing stations and automatically search
for new ones. Do also use the first installation if you
want to change to receiving MHEG-5 stations (attend
restrictions for DVB software update, see page 36).
Call TV menu.
Select Settings,
go to the menu line below.
Select Stations,
go to the menu line below.
Select Search wizard,
go to the menu line below.
In the upper info text the current search settings will now
be displayed:
Search wizard
Your TV carries out the update of the station range (search for new stations;
delete stations no longer broadcast) with the following settings:
Location of TV set United Kingdom
Signal source DVB-T
TV menu
Settings
Stations
Search wizard
OK
Start search/updateChange search settings
If you want to change these search settings:
Select Change search settings,
OK wizard prompts search settings.
If you agree with these settings:
Select Start search/update,
OK start search.
END
Explanations of some search settings, including the upgradeable
satellite reception:
Set location
Select the country for country-specific defaults and station sorting.
Signal source
Here select antenna, cable, or satellite, depending on
where you want to search for new stations.
Here you can also call a configuration of the DVB-T and
DVB-S antennae with the green button (see page 13).
Antenna/cable:
TV/colour
standard
With selection of set location the conventional TV
standard/colour standard is the default. This should only
be changed if stations with other standards are to be
searched.
Encrypted
stations
You can state whether coded stations are to be searched
for in the search/update.
Select yes then coded stations
are also searched for. However, these stations can only
be received in connection with a CA module and the appropriate Smart Card.
Ask your dealer which Smart Card
you need to receive certain stations. Handling of the CA
module is described on page 35.
DVB-T
Search method
If you want to run the station search independently of
the channel grid, select frequency search for the search
method.
DVB-C
Settings
With the selection of set location the conventional settings will be preset. Only change this if you know other
symbol rates and modulation types or if you have to
specify the network ID for your cable network (information available from your cable network provider).
If you want to run the station search independently of
the channel grid, select frequency search for the search
method.
DVB-S
Settings
If you want to run the station search independently of
the channel grid, select frequency search for the search
method.
The symbol rate is specified by the satellite provider and
normally does not need to be adjusted.
Red button: Abort current search/update.
- 24
33156_024_Xelos_A32_42_GB_9_00_B24 2433156_024_Xelos_A32_42_GB_9_00_B24 24 03.07.2008 15:37:3103.07.2008 15:37:31
Page 25

Managing stations
Search for/update stations – handling of new and no longer found stations
After the automatic search/update has been completed, the number of
new found stations is displayed.
OK List of newly found stations.
Search wizard
All stations marked with a are saved.
Note: The newly found stations which you have already deleted
are not marked.
Search for/update station
Newly found stations
WDR-Köln
EinsFestival
MDR S-ANHALT
Test-R
ARD-Online-Kanal
ARD-TEST-2
ARD-TEST-1
MDR THÜRINGEN
OK
Proceed
P+
Page ↑↓
P–
OK
Mark/unmark station
Mark/unmark all
Select station,
Yellow button: Mark / unmark station
Blue button: Mark / unmark all
OK saves the marked station.
Afterwards, if available, a list of the stations which are
stored but temporarily not broadcasting or which no
longer exist is displayed.
The number of the used memory location is in front of
the station. Please select the stations you want to delete
permanently.
Search wizard
The following stored stations were no longer found because they are not
currently broadcasting a programme or no longer exist. Please mark those
you want to delete completely. Those not marked are retained.
Search for/update station
Stations no longer found
112 S36
127 Test-R
134 TVOTEXT
142 ARD-Online...
OK
Proceed
P+
Page ↑↓
P–
OK
Mark/unmark station
Mark/unmark all
Select station,
Yellow button: Mark / unmark station
Blue button: Mark / unmark all
OK deletes the selected stations.
END: Exit search wizard.
Search/update station – manual search
Call TV menu.
Select Settings,
go to the menu line below.
Select Stations,
go to the menu line below.
Select Manual adjustment,
OK call input box.
You can enter or edit the station data in the following
lines:
Manual adjustment
Signal source Antenna/cable (analogue) DVB-T DVB-C D
Channel S21
Frequency 303.25 MHz
Name KIKA
TV stand. B/G
Col. standard Autom.
Store
Search
END
INFO
Or:
Blue button: Starts Search and searches for next station.
Red button: Stores station.
➠ Only the stations for the selected signal source are
stored which are not available in the station list.
➠ Stations which are already available for the selected
signal source in the station list are displayed with grey
shaded station number and name. These stations can
only be overwritten with the red button.
Explanations of some search settings:
Various settings are possible depending on the selected signal source.
Some settings have already been explained in the initial installation (see
page 12 onwards).
Signal source
Selection of the range in which you want to search for
the station.
Channel
Frequency
TV stand.
Direct input of the channel.
Direct input of the station frequency.
Input of the TV standard of the station,
(B/G, I, L, D/K, M, N).
Ask your dealer in this regard.
Col. standard
Input of the colour standard of the station,
(PAL, SECAM, NTSC-V, PAL60, Autom.).
Ask your dealer in this regard.
25 -
33156_024_Xelos_A32_42_GB_9_00_B25 2533156_024_Xelos_A32_42_GB_9_00_B25 25 03.07.2008 15:37:3403.07.2008 15:37:34
Page 26
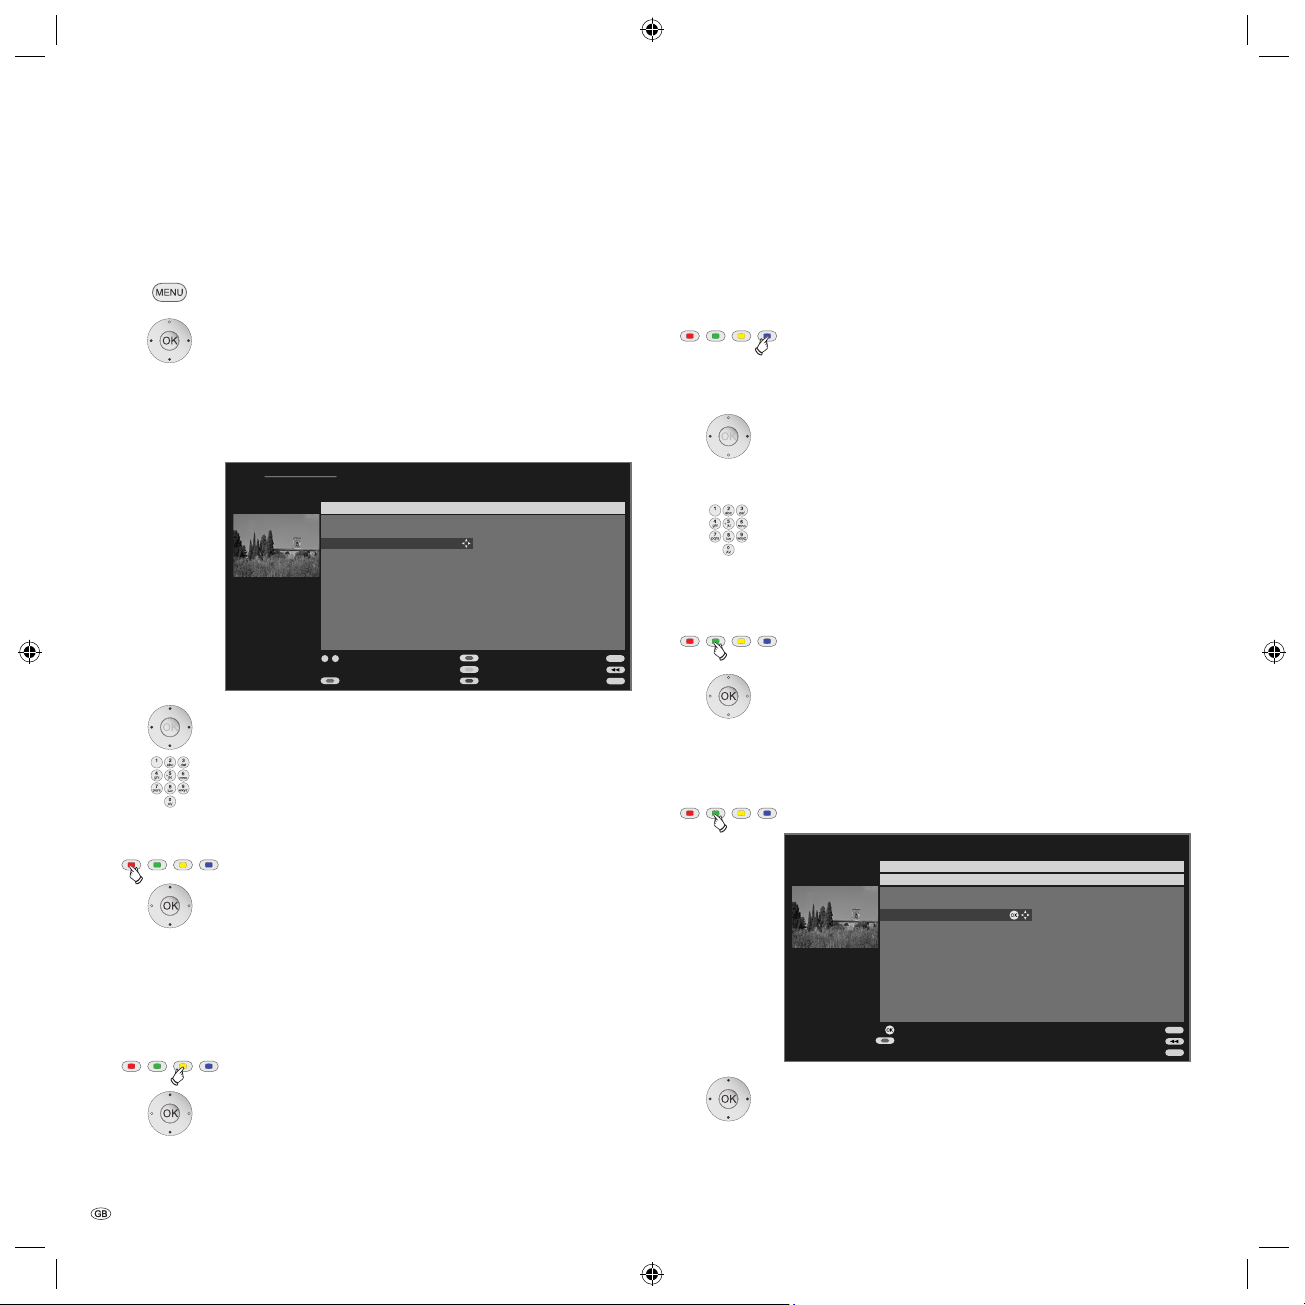
Managing stations
Change, delete, move, rename, restore station
➠ Change station can also be called via the station list
(page 18).
Call TV menu.
Select Settings,
go to the menu line below.
Select Stations,
go to the menu line below.
Select Change stations,
OK call list of stations.
Change stations
Here you can move station, delete stations, restore stations you have
deleted and enter and change station names of analogue stations.
P+
Page ↑↓
P–
Change stations
1 ARD
2 ZDF
3 SAT.1
4 D Vierte
5 RTL
6 VOX
7 S-RTL
8 N-TV
9 DSF
10 EinsPlus
11 9Live
12 RTL2
09
-
Select station
Delete
In this menu you can delete, move, rename or restore
stations.
or numeric buttons:
Select the appropriate station.
Scroll with P+/P– if necessary.
Delete station
Red button: Starts Delete station.
Select several stations to be deleted if necessary,
OK to execute the delete.
Move station / Change order
➠ Not possible for MHEG-5 stations.
➠ Stations can only be resorted within the signal
source block.
Yellow button: Starts Move station.
mark several stations if needed,
OK selection ended,
Select insertion position from which the selected
stations are to be inserted,
OK to execute the move.
- 26
13 WDR 3
14 BR
15 HR
16 MDR 3
17 KIKA
18 PHOENIX
19 BR-ALPHA
20 3SAT
21 KABEL 1
100 Das Erste
101 ZDF
102 WDR Köln
Restore stations
Move
Rename
Rename station
➠ Not possible for MHEG-5 stations.
➠ DVB stations which also transmit the station name
cannot be renamed. In this case, the Rename function
is hidden.
Blue button: Starts Rename
station.
Under the 1st letter of the name you will see a line
indicating the current input position.
Input position one character to the right (also for
blanks).
Input position one character to the left (deletes the
character).
Enter the letters one after another with the numeric
buttons on the remote control. Like using a mobile phone
keypad, press a numeric button until the desired character appears. The available letters are printed respectively
on the buttons. Different special characters can be
selected with button 1.
END
INFO
Green button: Switch upper/lower case letters.
OK to save new name.
Restore stations
Stations which have been deleted from the station list can be restored.
Green button: Starts Restore stations.
Change stations
P+
P–
Page ↑↓
Restore stations
3sat
KIKA
ZDF
ZDFinfokanal
ZDFdokukanal
ZDFinfokanal
Eurosport
NONAME
RTL
Phoenix
BRalpha
NDR FS HH
OK
Restore
Cancel restore
OK
Das Erste
Das Vierte
RTL Television
9Live
WDR Köln
VOX
ProSieben
Super RTL
n-tv
DSF
RTL2
KABEL1
END
INFO
Select station,
OK
station is restored.
The restored station is sorted in according to its signal
source at the end of the respective signal block
.
33156_024_Xelos_A32_42_GB_9_00_B26 2633156_024_Xelos_A32_42_GB_9_00_B26 26 03.07.2008 15:37:4003.07.2008 15:37:40
Page 27

Managing stations
Put together / change favourites list
Each favourites list can contain up to 99 stations. You can put together
the favourites lists to suit your requirements (e.g. topic lists). Other persons
using this TV set can create their own favourites lists.
The favourites lists also have the advantage that the stations of different
signal sources can be stored in the order you wish.
➠ Change favourites can also be called via the favourites
list (page 19).
Call TV menu.
Select Settings,
go to the menu line below.
Select Stations,
go to the menu line below.
Select Select/change favourites,
OK calls list of all stations and last active favourites list.
P+
Page ↑↓
P–
Green button: Select the next favourites list.
Rename favourites list
➠ Favourites list (right column) must be selected.
If not, change the list with .
Blue button: Starts Rename favourites list.
Numeric buttons: Enter new name (same procedure as
under Rename station, see page 26).
OK to save new name.
Select/change favourites
All stations
1 Das Erste
2 ZDF
3 WDR Köln
4 Bayrisches FS
5 hr-fernsehen
6 Phoenix
7 BR-alpha
8 3sat
9 EinsExtra
10 EinsFestival
11 SAT.1
12 RTL
09
-
Select station Next favourite list
Clear favourite list Change sorting
Stations of Favourite list1
OK
1 Das Erste
2 ZDF
3 WDR Köln
4 Bayrisches FS
5 hr-fernsehen
6 Phoenix
7 BR-alpha
8 3sat
9 EinsExtra
10 EinsFestival
11 SAT.1
12 RTL
END
INFO
Add station to favourites list
➠ All stations (left column) must be selected.
If not, change the list with .
P+/P– Scroll in the pages of the station list if necessary.
Mark station or select the station with the numeric
buttons (
betical station order
enter the initial letters in case of alpha-
) which you want to enter in
the favourites list.
OK transfers the station to the favourites list.
The new station is inserted at the end of the favour-
ites list. Proceed in the same manner with additional stations.
Delete station from favourites list
➠ Favourites list (right column) must be selected.
If not, change the list with .
mark station to be deleted.
OK removes the marked station from the favourites list.
or:
Red button: Starts Clear favourites list.
OK confirms clear favourites list.
Move / change order of stations in the favourites list
➠ Favourites list (right column) must be selected.
If not, change the list with .
Mark station to be moved.
Yellow button: Starts Move station.
Select insertion position at which the selected
station is to be inserted.
The insertion position can also be selected with
the numeric buttons.
OK to execute the move.
27 -
33156_024_Xelos_A32_42_GB_9_00_B27 2733156_024_Xelos_A32_42_GB_9_00_B27 27 03.07.2008 15:37:4903.07.2008 15:37:49
Page 28

Picture in Picture
Picture in Picture ( PIP)
The concurrent display of two different images is referred to as Picture
in Picture.
➠ The coloured buttons do not work as described below for TV sets
with MHEG-5 software, but they operate as described on page 33
(Digital Teletext).
A concurrent display of two HDTV signals is not possible.
➠
➠
A concurrent display of two coded stations is not possible.
➠
Picture change and station selection is restricted during recording.
➠
In sets without Digital Recorder, the PIP mode is restricted to AV-PIP
(one TV station and one AV source). If a satellite tuner is upgraded in
these sets, PIP mode from digital satellite picture and analogue picture
via cable TV or house antenna is possible additionally.
Your TV set distinguishes between two PIP displays:
Split Screen In this case screen is divided in the middle and the addi-
Small PIP In this case a small PIP image is inserted in the TV picture.
The PIP operation distinguishes between two functionalities:
Standard PIP Stations freely selectable and changeable for PIP and TV
Start and end picture in picture mode
Standard PIP operation:
PIP as freeze picture
- 28
tonal PIP image is shown on the right side of the screen.
Both images are compressed horizontally and each gets
half of the screen.
picture (coloured buttons have PIP-specific meaning, see
below).
iPIP Only in sets with Digital Recorder: The TV picture is moved
to the PIP picture when you press the PIP button. The
station of the TV picture is now freely selectable. When
you press the PIP button again, the PIP picture returns to
the TV picture and the PIP window closes.
Show/hide PIP.
In the Standard PIP function a green frame indicates that
the station selection acts on the PIP picture. A white frame
means that the operation refers to the main picture. If
the frame is blue, the station play is active in the PIP
picture. If the iPIP function is activated, this is indicated
by an orange frame.
➠ For TV sets with MHEG-5 Software, you switch from
the green bar/frame to the white by using the PIP
key. The next time you press the PIP key, PIP is
switched off.
➠ The frame is green,
if not, press the green button.
Red button: Freeze picture in PIP on / off.
Swap contents of PIP and main picture
➠ The frame is green,
if not, press the green button.
Yellow button: Swaps contents of TV picture and PIP picture.
Select the PIP picture
➠ The frame is green,
if not, press the green button.
Select the station as usual.
2 ZDF
17.00 - 18.30 Flora & Fauna
Select the station for the main picture
➠ The frame is white,
if not, press the green button.
Select the station as usual.
1 ARD
17.30 - 20.00 Toskana
Scan station in the PIP
➠ The frame is green,
if not, press the green button.
Blue button: Start Scan stations.
The frame turns blue,
the stations now change automatically.
Blue button: Stop Scan stations.
The frame is green again.
33156_024_Xelos_A32_42_GB_9_00_B28 2833156_024_Xelos_A32_42_GB_9_00_B28 28 03.07.2008 15:37:5703.07.2008 15:37:57
Page 29

Picture in Picture
Configure Picture in Picture (PIP) mode
In the PIP menu you can set the PIP type (Split Screen or Small Picture), the
PIP function (Standard PIP or iPIP) and the position of the small picture.
Start PIP menu
➠ PIP mode started,
if not, press PIP button.
➠ The frame is green,
if not, press the green button.
Call the PIP menu.
TV menu
Settings
PIP
Type
Split screen ...
Switch to Small PIP / Split screen
➠ PIP menu open.
Functions
ENDINFO
Change position of the PIP small picture
➠ Other than the status line, which may possibly be
displayed, no other display is shown on the screen:
Move the PIP into a corner of the screen.
The position of the small picture can also be selected
under Position in the PIP menu.
Switch to iPIP / Standard PIP function
➠ PIP menu open.
TV menu
Settings
PIP
Functions
iPIP
Standard PIP
ENDINFO
Select Functions,
go to the menu line below.
TV menu
Settings
PIP
Type
Small PIP
ENDINFO
Split screen
Select iPIP or Standard PIP.
In iPIP the frame around the PIP picture is orange.
iPIP operation:
Select Type,
go to the menu line below.
Select Small PIP or Split screen.
When the iPIP function is set, the currently displayed
picture becomes the PIP picture on pressing the PIP
button. You can select other stations for the TV picture
and still keep an eye on the PIP picture. You can
temporarily “ban” commercials or programme sections
to the PIP picture in this way.
The PIP picture becomes the TV picture again (PIP off).
29 -
33156_024_Xelos_A32_42_GB_9_00_B29 2933156_024_Xelos_A32_42_GB_9_00_B29 29 03.07.2008 15:38:0503.07.2008 15:38:05
Page 30

Electronic Programme Guide
F
Electronic Programme Guide – EPG
EPG stands for Electronic Programme Guide and provides you with
on-screen programme details. With the system, as with a printed programme guide, you can learn about the current programme. In addition
programmes can be sorted according to certain topics, memorised, and
also recordings can be programmed.
Starting and ending EPG
Switch EPG on / off.
➠ A wizard will guide you through the necessary presettings
the first time you start the EPG. If you have analogue
reception, you enter the data capture for analogue
stations after that (see page 31).
➠ For TV sets with MHEG-5 software, EPG is only possi-
ble for DVB-T stations.
EPG (Electronic Programme Guide) Mon 31.07./16:05
Date
Mon 31.07.
Time
now
Stations
all
Topics
all
arte 15:57-16:59 Charmed - Zauberhafte Hexen
Das Erste 16:00-16:10 Tagesschau
ZDF 16:00-16:10 heute - in Europa
WDR Köln 16:00-16:15 WDR aktuell
Bayerisches... 16:00-16:05 Rundschau
2 ZDF
TEXT
Detail View Record
P+
Page ↑↓ Select time Select date, ... , topics
P–
hr-fernsehen 16:00-16:30 Schlemmerreise Spanien
MDR FERNS... 16:00-16:15 Hier ab vier
NDR FS HH 16:00-16:30 Tipps und Trends - Der Verbraucher...
SWR Fernse... 16:00-16:05 Baden-Württemberg aktuell
Charmed - Zauberhafte Hexen
OK
09
-
The display of the programme guide is divided into two
branches. The programme list (bottom) is influenced by
certain specifications (top).
Blue button: Switches between the upper default lines
Date, ..., Topics and the lower programme list.
Switching and memorizing with the programme list
➠ In the programme list first all currently running
programmes are listed.
➠ You are in the lower programme list,
if not, press the blue button.
Select station.
OK View / Memorise.
View The programme is in progress. The TV set switches to the
marked programme.
Memorise The programme has not started yet and is memorised. A
appears in front of the programme. The TV set switches over
automatically to the beginning of the programme or, if set
in the EPG menu (page 31) on from standby mode.
- 30
until 17:00 17:00 18:00 19:00
OK
END
MENU
Adjusting the programme list
➠ The selection is at the top of the specifications,
if not, press the blue button.
Select Date, Time, Stations or Topics.
Select defaults within the respective line.
EPG (Electronic Programme Guide) Mon 31.07./16.05
Date
2 ZDF
Mon 31.07.
Time
now
Stations
all
Topics
all
arte 15:57-16:59 Charmed - Zauberhafte Hexen
Das Erste 16:00-16:10 Tagesschau
ZDF 16:00-16:10 heute - in Europa
WDR Köln 16:00-16:15 WDR aktuell
Bayerisches... 16:00-16:05 Rundschau
hr-fernsehen 16:00-16:30 Schlemmerreise Spanien
MDR FERNS... 16:00-16:15 Hier ab vier
NDR FS HH 16:00-16:30 Tipps und Trends - Der Verbraucher...
SWR Fernse... 16:00-16:05 Baden-Württemberg aktuell
Charmed - Zauberhafte Hexen
Tue 01.08. Wed 02.08. Thu 03.08.
Change to programme list
Example If you are searching for the next news, select today’s date,
17:00 for example for the time, all for station and News
for topics. Then you get a list of all news programmes
from 17.00 h onwards in the programme list below it.
The type of list of programmes in the programme list
depends on the setting of the sorting in the EPG menu
31
(page
).
Time entry If the line Time is selected, then you can enter the time
after which the programmes will be displayed, via the
numeric buttons of the remote control. The broadcasts
are sorted according to the order of the station list within
the selected time window.
Stations If a favourites list has been selected, only the programmes
of stations from the favourites list are displayed in the
programme list. A single station can be selected with
“...”. The Select single station window is opened. After
selection, only programmes of the selected single station
are displayed.
Hint Before pressing the blue button to leave the upper selec-
tion lines, select one of the preceding lines. If you then
switch back to the programme list, you can change this
menu line with , without having to leave the programme list. If you have marked Time, then you can enter
the time, after which the programmes will be displayed,
with the numeric buttons of the remote control.
Paging through the programme list
P+/P– Page backwards / forwards.
In the entries for Date and Time, you will see changes in
time as well as in date when paging. Scrolling in the
programme list is also possible when the selection is at
the top of the specifications.
MENU
END
33156_024_Xelos_A32_42_GB_9_00_B30 3033156_024_Xelos_A32_42_GB_9_00_B30 30 03.07.2008 15:38:1703.07.2008 15:38:17
Page 31
Electronic Programme Guide
Calling additional information about the programmes
➠ Brief information about many programmes is displayed
below the programme list of the broadcasts.
You can call detailed information with the TEXT button if
this function is offered by the TEXT icon in the lower left.
Programming a recording for a recorder
➠ The selection is in the lower programme list,
if not, press the blue button.
Mark the desired programme.
Red button: Starts recording wizard.
Change or confirm timer data if necessary (see page 50,
"The direct way to record").
Then a red dot will be displayed in front of this programme
as an identification.
Red button: Deletes the already programmed recording
of the red marked programme from the timer.
If the timer data have been transferred to an external
recorder, then the timer must also be deleted there.
Configuring EPG
Start the EPG menu
➠ EPG mode is started,
if not, press the EPG button.
Call the EPG menu.
EPG menu
rovider SortinStation selection
Settings in the EPG menu:
Select provider (only for analogue stations), Station selection, Data capture, Switch on TV when marked, Sorting.
Explanations of setting possibilities in the EPG menu:
Select provider
In analogue TV reception there may be different providers who transmit the EPG data for certain station packages.
You can have the list of providers created automatically
with the yellow button in the provider selection. You can
select the desired provider at the end of the provider
search. You can create the list of providers manually with
the blue button.
OK
Data capture
Switch on TV when marked
Station
selection
In the station selection you can determine for which
station in the programme guide information is to be displayed. Only stations with are shown in the EPG.
With the coloured buttons you can select or remove
stations or only select the stations from the favourites
lists.
Because of the large number of receivable DVB-S stations
you should restrict the station selection. This reduces the
data entry time and increases the clarity in the EPG.
Marking the stations according to reception ranges:
Analogue stations via antenna/cable, for which the
current provider supplies data.
Digital terrestrial stations DVB-T.
Digital cable stations DVB-C.
(1
.
Data capture
Digital satellite stations DVB-S
on (for DVB + analogue): Data capture for DVB and ana-
logue stations
on (only for DVB): Data capture only for DVB stations.
off: No data capture.
After changes in the EPG menu or after switching off at
the mains switch the EPG data must be collected first.
To do this, switch on the set and select the station from
the analogue stations which you want defined as a provider and let the TV set run for about 1 hour with the
selected station. Or:
Switch the TV set into standby mode. The display on the
TV set glows orange after 2 minutes and the EPG data
entry begins.
The data capture normally takes place at night between
END
INFO
Switch on TV
when marked
2 and 5 o’clock if the TV set is in the standby mode.
When yes is set, the switched off TV switches on automatically from the standby mode at the beginning of a
set program. A screen message appears when switching
on. If this is not confirmed within 5 minutes with the
OK button, the TV switches back off automatically for
safety reasons.
Sorting
The programmes can be sorted either according to their
start times (chronologically) or according to stations (cor-
responding to station list).
(1
if upgraded
31 -
33156_024_Xelos_A32_42_GB_9_00_B31 3133156_024_Xelos_A32_42_GB_9_00_B31 31 03.07.2008 15:38:2303.07.2008 15:38:23
Page 32

Teletext
p
Teletext
Your TV set supports the two operating systems TOP Text and FLOF.
Up to 2,000 pages are stored so that you have quick access .
Starting and ending Teletext
Switch Teletext on / off.
100 100 ARDtext Do 07. 09. 06 14 : 14 : 42
ARD
Politik: Die neuen Gesetzesentwürfe . . . . . . . . . . . . 120
Wird auch der Nahverkehr teurer? . . . . . . . . . . . . . . 121
Australien: Keine Zugeständnisse . . . . . . . . . . . . . . 122
Tote bei Zugunglück in Schweden . . . . . . . . . . . . . 532
Tennis: Auftaktmatch wurde abgebrochen . . . . . . . 204
Formel 1: Neues Reglement für Motoren. . . . . . . . . 213
Fussball: Heimsieg für den Meister . . . . . . . . . . . . 204
13:00 ARD-Mittagsmagazin . . . . . . . . . . . . . . . . . 312
14:00 Tagesschau
Tagesschau . . . . 110/112 Kultur. . . . . . . . . . 500
Wetter. . . . . . . . . . 170 Gesellschaft . . . . . 530
Sport. . . . . . . . . . . 200/600 Lotto/Toto. . . . . . . 666
TV Guide . . . . . . . 300/400 Wirtschaft. . . . . . . 700
– +
Page selection
Page selection with the coloured buttons
Red button: Back to the previously viewed page.
Green button: On to next page.
Yellow button: To next topic.
Blue button: To next range of topics.
The coloured bars (for TOP) or the coloured text (for FLOF)
in the second to last line indicate which coloured buttons
you can use to page through topic areas and topics .
Teletext page displays
0 AV: Stop self changing pages.
9: Enlarge page (press several times).
PIP button: Show / hide TV picture.
Text
Inhalt tagesschau
100 100 ARDtext Do 07.09.06 14:14:42
ARD
Text
Politik: Die neuen Gesetzesentwürfe. . . . . . . . . . 120
Wird auch der Nahverkehr teurer?. . . . . . . . . . . . 121
Australien: Keine Zugeständnisse . . . . . . . . . . . 122
Tote bei Zugunglück in Schweden . . . . . . . . . . . 532
Tennis: Auftaktmatch wurde abgebrochen . . . 204
Formel 1: Neues Reglement für Motoren. . . . . . . 213
Fussball: Heimsieg für den Meister . . . . . . . . . . . 204
13:00 ARD-Mittagsmagazin . . . . . . . . . . . . . . . . 312
14:00 Tagesschau
Tagesschau . . . 110/112 Kultur . . . . . . . . . . 500
Wetter. . . . . . . . . . . 170 Gesellschaft . . . . . 530
Sport. . . . . . . . . 200/600 Lotto/Toto. . . . . . . 666
TV Guide. . . . . . 300/400 Wirtschaft. . . . . . . 700
– +
Page selection
Inhalt tagesschau
Additional page selection possibilities
1st possibility:
Call overview page 100.
2nd possibility:
Directly enter the page number.
3rd possibility:
➠ The page includes 3-digit page numbers.
Mark desired page number.
Tennis: Auftaktmatch wurde abgebrochen . . . . . . . 204
Formel 1: Neues Reglement für Motoren. . . . . . . . . 213
Fussball: Heimsieg für den Meister . . . . . . . . . . . . 204
13:00 ARD-Mittagsmagazin . . . . . . . . . . . . . . . . . 312
14:00 Tagesschau
Tagesschau . . . . 110/112 Kultur. . . . . . . . . . 500
Wetter. . . . . . . . . . 170 Gesellschaft . . . . . 530
Sport. . . . . . . . . . . 200/600 Lotto/Toto. . . . . . . 666
TV Guide . . . . . . . 300/400 Wirtschaft. . . . . . . 700
– +
Page selection View
OK Call the page.
4th possibility:
➠ The page consists of several sub-pages indicated by the
selection option on the last line.
TV Guide . . . . . . . 300/400 Wirtschaft. . . . . . . 700
– +
Page through sub-pages.
Call TOP table
➠ The table can only be called for stations with the TOP
operating system.
OK Call TOP table.
Wird auch der Nahverkehr teurer? . . . . . . . . . . . . . . 121
Australien: Keine Zugeständnisse . . . . . . . . . . . . . . 122
Tote bei Zugunglück in Schweden . . . . . . . . . . . . . 532
TOP table
ARD Text
Tennis: Auftaktmatch wurde abgebrochen . . . . . . . 204
tagesschau
Formel 1: Neues Reglement für Motoren. . . . . . . . . 213
Fussball: Heimsieg für den Meister . . . . . . . . . . . . 204
Wetter
Sport 1
13:00 ARD-Mittagsmagazin . . . . . . . . . . . . . . . . . 312
Fußball
14:00 Tagesschau
TV Guide
Tagesschau . . . . 110/112 Kultur. . . . . . . . . . 500
ARD heute
Wetter. . . . . . . . . . 170 Gesellschaft . . . . . 530
ARD morgen
Sport. . . . . . . . . . . 200/600 Lotto/Toto. . . . . . . 666
Kultur
TV Guide . . . . . . . 300/400 Wirtschaft. . . . . . . 700
weitere ...
– +
OK
View
Seitenauswahl
Mark topic area,
select topic column,
select topic,
OK call the page.
Inhalt tagesschau
Inhalt tagesschau
1 2 3 4 5
OK
Inhalt tagesschau
Wetter
Vorhersage
Staedte
Ballungsr.
Reise
OK
- 32
33156_024_Xelos_A32_42_GB_9_00_B32 3233156_024_Xelos_A32_42_GB_9_00_B32 32 03.07.2008 15:38:2603.07.2008 15:38:26
Page 33

Teletext
Programming timer recordings via Teletext
➠ Teletext is started,
if not, press the TEXT button.
Call the programme pages of the current station.
Green button: Go to the appropriate page.
Select the desired programme,
OK to programme the recording.
Change the appropriate recording data in the following
menu Timer data (see also page 50, "The direct way to
record").
OK Confirm.
Teletext menu
In the Teletext menu you can activate messages, reveal pages and configure
the teletext with the Settings menu function.
Starting the Teletext menu
➠ Teletext is started, if not, press the TEXT button.
Call the Teletext menu.
100 100 ARDtext Do 07. 09. 06 14 : 14 : 42
ARD
Politik: Die neuen Gesetzesentwürfe . . . . . . . . . . . . 120
Wird auch der Nahverkehr teurer? . . . . . . . . . . . . . . 121
Australien: Keine Zugeständnisse . . . . . . . . . . . . . . 122
Tote bei Zugunglück in Schweden . . . . . . . . . . . . . 532
Tennis: Auftaktmatch wurde abgebrochen . . . . . . . 204
Formel 1: Neues Reglement für Motoren. . . . . . . . . 213
Fussball: Heimsieg für den Meister . . . . . . . . . . . . 204
13:00 ARD-Mittagsmagazin . . . . . . . . . . . . . . . . . 312
14:00 Tagesschau
Tagesschau . . . . 110/112 Kultur. . . . . . . . . . 500
Wetter. . . . . . . . . . 170 Gesellschaft . . . . . 530
Sport. . . . . . . . . . . 200/600 Lotto/Toto. . . . . . . 666
Teletext menu
TV Guide . . . . . . . 300/400 Wirtschaft. . . . . . . 700
– +
Explanations of the Teletext menu functions:
Newsflash
Reveal
The current page is hidden when you activate Newsflash.
A symbol at the top left indicates that the function is active. If the contents of the message are updated and it is
a small newsflash, this is displayed in the TV picture. If it
is a full screen page, the symbol is displayed in blue and
the page can be called with the OK button.
Shows concealed information, e.g. for quiz questions or
VPS pages in the programme preview pages.
Text
OK
RevealNewsflash
Recording wizard Settings
Inhalt tagesschau
INFO
END
Explanations of the Teletext menu functions:
Recording
wizard
A wizard for recording via teletext helps to programme
an external recorder or the integrated Digital Recorder,
see also left column.
Settings
Preview
Sub-title
Personal
text pages
Other Teletext menu functions:
Input of the first teletext programme preview page if this
deviates from the factory setting (page 301).
pages
Input of the teletext subtitle pages for every station if this
deviates from the factory setting (page 150).
pages
Define up to six teletext pages which can be opened later
from a list in the menu Teletext functions → Personal text
pages (in TV mode press green button, see page 22).
Character set
Teletext character set can be switched to other languages
(Russian, Greek, Polish and Turkish).
Improved graphic representation of the Teletext.
HiText
(Not offered by all stations.)
Digital teletext (MHEG-5)
In the UK or Ireland, the teletext for DVB-T stations is transmitted as per
the MHEG-5 standard. It contains text, graphics, functions and links.
➠ Only for TV sets with MHEG-5 software.
➠ At the moment only available in United Kingdom and Ireland.
➠
Digital teletext is not available when DVB subtitles are being displayed.
The operation of these menus depends on the particular
provider. Normally after a station is changed, the provider
broadcasting the digital teletext makes an introductory
offer for this service on the screen via menu selection.
Follow these notes.
If no message appears telling you how to switch to digital
teletext after switching to another station, press the TEXT
key. If a selection for DVB subtitles is available, this item
must be hidden before.
Depending on the provider’s respective offer, you can use
the buttons and the OK button, the coloured
buttons, the END/TEXT button and sometimes even the
numeric buttons.
If you want to close the digital teletext, just select a different station using the P+/P– buttons or follow the menu
prompts on the screen.
33 -
33156_024_Xelos_A32_42_GB_9_03_M33 3333156_024_Xelos_A32_42_GB_9_03_M33 33 08.07.2008 16:11:5508.07.2008 16:11:55
Page 34

Radio
Radio mode
You can only receive radio stations via DVB.
If you do not have DVB radio reception then you can play audio from an
external device via the TV set using the audio/AV inputs.
➠ For TV sets with MHEG-5 software, the buttons may be configured
differently by the provider.
Radio mode on
RADIO button on the remote control.
Or:
R on the operating ring on the TV set.
digital
You see and information window about the currently set
station.
Minimise Radio dialogue to an info line / maximise.
Station switching
P+/P– or the numeric buttons of the remote control.
Or:
+ / – on the TV set operating ring.
Or:
OK Call station list / favourites.
➠ The selection of the stations / favourites is the same
Setting the volume
V+/V– Volume louder / quieter.
Other sound settings are the same as for the volume setting
in TV mode (see page 20).
Audio adjustment
Call Sound adjustment.
Other settings as for TV mode (see page 20).
- 34
Radio
1 DLF Stereo 2
15:05 - 16:00 Corso
Informationen und Musik
Volume 30
OK
Station list
INFO
Detail off
digital
Radio
1 DLF Stereo 2
Screen off/on
Previous station
as the procedure in TV mode (see pages 18 and 19).
15:07
15:07
MENU
TV
INFO
Switching the screen on/off
Red button: Switch off the screen.
The LED display on the set changes from green to orange.
Switch on the screen with the remote control:
Red button, OK button or RADIO button.
Switch on the screen on the TV set:
Press R on the TV set operating ring.
Radio menu
In the Radio menu, you can set the sound, search for and store radio
stations (automatically or manually), change stations and set switch
off/alarm functions.
The settings are made as described in TV mode.
Call radio menu
➠ Radio mode switched on,
if not, press the RADIO button.
Call the Radio menu.
END
Radio menu
Sound effects ...
StationsSound
Timer functions
INFO
Switch off radio mode
TV button on the remote control.
or:
R on the operating ring on the TV set.
EPG – Electronic Programme Guide (radio)
For the DVB radio stations you can also use an electronic programme
guide, if the station that is currently active supplies data.
Starting and ending EPG
➠ Radio mode switched on,
if not, press the RADIO button.
Switch EPG on / off.
➠ The EPG functions in radio mode are the same as in
TV mode. Read from page 30 onwards for further
information.
33156_024_Xelos_A32_42_GB_9_00_B34 3433156_024_Xelos_A32_42_GB_9_00_B34 34 03.07.2008 15:38:3703.07.2008 15:38:37
Page 35
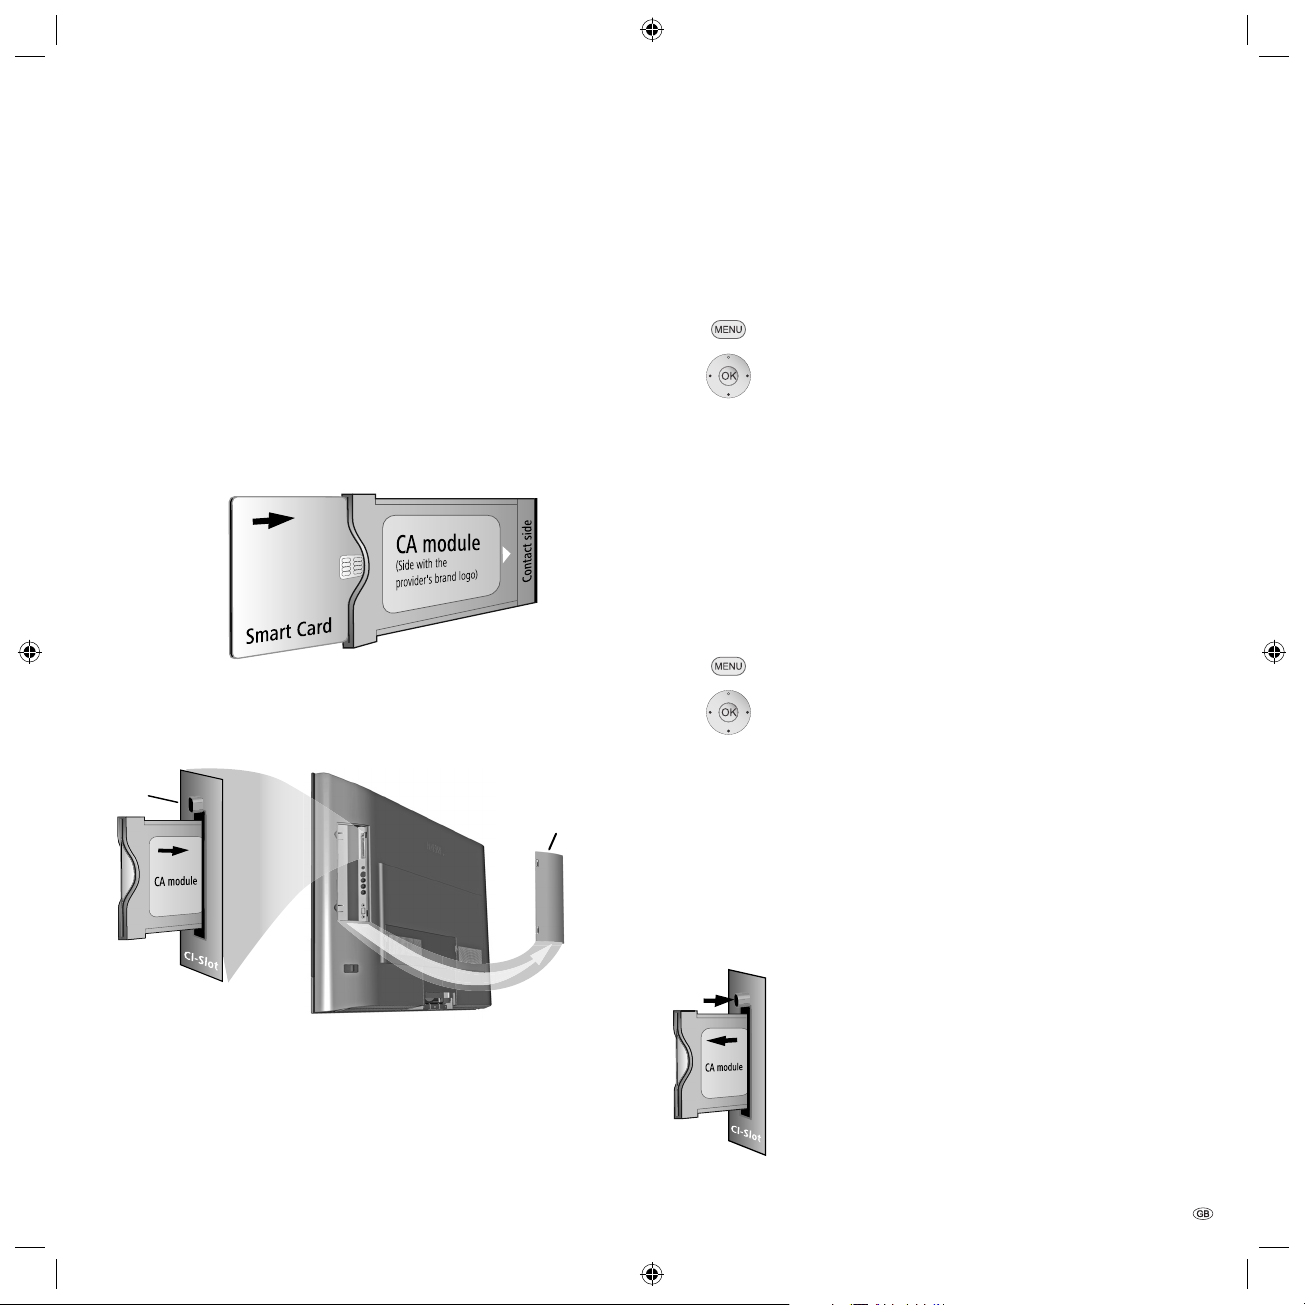
DVB
Conditional Access module (CA module)
In order to be able to receive digital stations, a Conditional Access module
( CA module) and a Smart Card must be inserted in the CI slot of your TV
set (see pages 5 and 6).
The CA module and the Smart Card are not part of the TV set's scope of
delivery. They are usually available from your dealer. Loewe provides no
guarantee for the functioning of the CA module.
Inserting the smart card into the CA module
Push the Smart Card into the CA module as far as it goes so that the side
with the gold coloured contact chip is facing the side of the CA module
marked with the provider's logo. Note the direction of the arrow printed
on the Smart Card.
Inserting the CA module in the CI slot
➠ Switch off the TV set's power switch.
Remove the cover from the rear of the set.
Ejector
button
Cover
Searching for encrypted stations
➠ The search wizard must only be started when the
setting possibility no has been selected for the search
for coded stations in first-time start-up or no CA
module has been inserted.
Call TV menu.
Select Settings,
go to the menu line below.
Select Stations,
go to the menu line below.
Select Search wizard,
go to the menu line below.
Select Change search settings,
OK wizard guides you through the search settings.
Description of the search settings, see page 24.
Calling CA module information
➠ This menu is only available with digital stations.
Call TV menu.
Select Settings,
go to the menu line below.
Select Miscellaneous,
go to the menu line below.
Select CA module: xxx
(xxx corresponds to the CA module provider),
OK call information.
The content of this menu depends on the provider of the
CA module.
Removing the CA module
➠ Switch off the TV set's power switch.
Remove the cover from the rear of the set.
Insert the CA module carefully into the CI slot with the
contact side first.
If you are standing in front of the TV set (display) then
the logo on the CA module must be pointing to the rear.
Do not use force. Make sure the module is not twisted
in the process.
The eject button protrudes slightly when the CA module
is inserted correctly.
33156_024_Xelos_A32_42_GB_9_00_B35 3533156_024_Xelos_A32_42_GB_9_00_B35 35 03.07.2008 15:38:4103.07.2008 15:38:41
Press in the ejection button on the appropriate
module drawer, the module is released.
Remove the module from the set.
Replace the cover.
35 -
Page 36

DVB
Software update
TV base software and DVB software
Your TV set provides the option to update the TV basic and DVB software. The current software versions can be installed on your set with a
USB stick.
Contact your dealer for a software update by USB stick.
The software can also be updated by different DVB reception paths (DVBT, DVB-C, DVB-S
However, the prerequisite for this is that the software is provided by the
appropriate DVB reception path.
This may differ depending on the TV set and the DVB program provided.
Ask your local dealer for information whether a software update via DVB
reception path is possible.
Automatic information by new software version
In the Change update settings menu (see right column) you can determine
via which DVB reception path (if possible) you want to receive updates.
Your TV set determines automatically overnight whether a new software
version is available via the selected DVB reception path. The TV set must
be left in the standby mode for this (do not switch off with the mains
switch).
If a new software version is available, the TV set informs you of this in an
on-screen message the next time it is switched on (see page 37 – Loading
new software).
Manual search for new software
If it is not displayed automatically that a new software is available when
you switch on the set, you can also search for one manually. The search
depends on the selected update source(s).
(1
if upgraded
- 36
(1
).
Call TV menu.
Select Settings,
go to the menu line below.
Select Miscellaneous,
go to the menu line below.
Select Software update.
OK Open the software update wizard.
The current update settings are displayed in the info
text.
Software update wizard
The software update can be made via a USB stick or DVB antenna. If you do
not make any changes, your TV makes it with the following settings:
Update source USB and satellite: ASTRA1 19,2°E (DVB-S)
(ASTRA1 19,2°E)
Frequency 12603 MHz
Symbol rate 22000
Band horiz/high
TV menu
Settings
Miscellaneous
Software update
OK
Change update settingsStart update
If you want to change the update settings:
Select Change update settings,
OK the wizard polls the update settings.
➠ The selection options depend on the antenna cables
connected at the initial installation (see page 12).
USB only
New software is searched for via USB.
USB and DVB-T
New software is searched for first via USB then via DVB-T
(digital terrestrial transmission).
USB and DVB-C
New software is searched for first via USB then via DVB-C
(digital cable transmission).
USB and satellite
New software is searched for first via USB then via DVB-S
(digital satellite transmission). The name of the currently
selected satellite is displayed.
Setting parameters of the different DVB update sources:
Channel
Select the channel on which the new software is provided.
Frequency
Enter the frequency of the station to be transmitted
directly.
Bandwidth
Is preset automatically depending on the selected channel.
Symbol rate
Enter the symbol rate of the station to be transmitted
directly.
Set the suitable type of modulation.
QAM
modulation
Set the transmission range for satellite reception.
Band
continued on the next page
END
p
33156_024_Xelos_A32_42_GB_9_00_B36 3633156_024_Xelos_A32_42_GB_9_00_B36 36 03.07.2008 15:38:4303.07.2008 15:38:43
Page 37

DVB
If you have adapted the update settings:
OK proceed.
Select Start update,
OK start update procedure.
Select software type:
TV base software or
DVB software,
OK start search.
If a new software version is available after the search, the
following screen message appears.
Loading new software
Software update wizard
Current TV base software: V4.3.0
Current DVB software: V4.3.0
You can now search for new software. Please select the software type and
start the search with the button.
Software update
Software type
TV base software
DVB software
OK
Proceed
Software update wizard
A new software is available.
TV base software: current V4.3.0 new V4.4.0
Please specify whether and, if so, when you want to load the new software.
OK
OK
A bar informs you about the progress of the charging
process. Do not switch your set off during this time!
This process can take up to 20 minutes depending on the
selected update source. You will be informed at the end.
At the end of charging:
Switch the TV set off and back on with the mains switch.
This is unnecessary when loading the software with the
Load new software after switch´off to standby update
option.
If a new software has not been updated by a DVB station, you will be reminded of this several times when
switching on the set.
END
➠ If a new TV software and a new DVB software are
available in the automatic search for new software via
DVB stations (see page 36), you can choose which
software is to be updated.
Software update
Update options
Load new software now
Load new software after switch off to standby
Keep current software
OK
Proceed
OK
END
Select update option:
Load new software now
Load new software after switch off to standby
(update after switching off)
Keep current software (no update desired).
OK Proceed or exit wizard.
OK Start Software update.
37 -
33156_024_Xelos_A32_42_GB_9_03_M37 3733156_024_Xelos_A32_42_GB_9_03_M37 37 04.07.2008 08:46:5404.07.2008 08:46:54
Page 38

Other settings
Parental lock
You can select and set various security options to prevent unauthorised
use of the TV set and to protect your children from unsuitable programmes.
Defining the access code ( PIN)
Call TV menu.
Select Settings,
go to the menu line below.
Select Parental lock,
go to the menu line below.
Define a four digit access code (PIN) the first time
you open it. The numbers appear in plain text. Note
the access code (PIN) well.
OK Confirm the access code (PIN).
The Parental lock menu is opened.
The four-digit access code (PIN) must be entered when
the parental lock is opened in future. It appears encrypted
(****) when entering for security reasons.
Code number
The code number cancels all entered PINs. It can be used for example if
you have forgotten your PIN. You will find a note about the code number
on page 64. Remove this from the manual and keep it in a safe place.
Explanations of setting possibilities in the Parental lock menu:
Lock
immediately
Lock daily
Age-related
Change
access code
Delete
access code
The TV set is locked immediately on exiting the menu.
Programmes of any kind can then only be watched after
entering the PIN.
The lock remains active until switching off in the menu.
The TV set is locked daily at the fixed time. Programmes
of any kind can then only be watched after entering
the PIN.
Some DVB stations also broadcast an age classification. If
lock
the age set here is below the broadcast age limit, the programme can only be watched after entering the PIN.
You can change your PIN at any time. Enter the new PIN
in place of the old one.
You can delete your entered PIN at any time.
Timer functions
This menu offers you convenient alarm services. Programmed alarms are
also active when the TV set has been switched off to standby.
If the TV set switches on from the standby mode by alarm, a screen
message appears. If this is not confirmed within 5 minutes with the OK
button, the TV switches back off automatically for safety reasons.
The TV set can also be switched off automatically at certain times. A screen
warning appears one minute before automatic switch off. The automatic
switch off can be interrupted by pressing any button.
Call Timer functions
Call TV menu.
Select Settings,
go to the menu line below.
Select Timer functions,
go to the menu line below.
Select the desired setting.
Explanations of setting possibilities in the Timer functions menu:
Switch off
today only
Switch off
One-time
reminder
Wake up
Mon-Fri
Wake up Sat
Wake up
Wake up
Wake up
signal
volume
The set switches to the standby mode automatically at
the specified time.
If a time is specified which has already passed on the same
day, the set switches off at this time the next day.
The set regularly switches to the standby mode automatically every day at the specified time.
daily
The set alerts you once today at the specified time.
If a time was specified which has already passed on the
same day, the alarm is saved for the next day.
The set regularly alerts you from Monday to Friday at
the set time.
The set alerts you regularly every Saturday at the specified time.
The set alerts you regularly every Sunday at the specified
time.
Sun
Specify whether the TV set switches on in the event of an
alarm from the standby mode in TV or radio mode with
with
the respectively last active station.
Set the desired volume of the alarm tone. The alarm
tone is emitted as a continuous tone as a guide during
the setting.
- 38
33156_024_Xelos_A32_42_GB_9_00_B38 3833156_024_Xelos_A32_42_GB_9_00_B38 38 03.07.2008 15:38:4503.07.2008 15:38:45
Page 39

Other settings
On-screen displays
You can select different settings in this menu which affect the on-screen
displays.
Call On-screen displays
Call TV menu.
Select Settings,
go to the menu line below.
Select Miscellaneous,
go to the menu line below.
Select On-screen displays,
go to the menu line below.
Select the desired setting.
Explanations of setting possibilities in the On-screen displays menu:
On-screen
display time
On-screen
display position
Volume
Automatic
Here you set the duration of the display, e.g. for the volume or the station display when changing stations.
The duration can be set between 2 and 9 seconds.
You can select between an upper and a lower display position so that other displays (subtitles) are not concealed.
Here you set whether or not the change in the volume
should also be displayed visually on the screen.
Select “yes” here if you want to be able to see the additional help permanently in the upper part of the screen
Info
while navigating the menu. Also see page 15 for further
information.
Time and date
If you receive a station with teletext after switching on the TV, the time
and date are recorded automatically. The date may have to be entered
manually for some stations.
Enter the time and date manually if you receive station without teletext.
Call time and date
Call TV menu.
Select Settings,
go to the menu line below.
Select Miscellaneous,
go to the menu line below.
Select Time and date,
go to the menu line below.
Select the desired setting.
Explanations of setting possibilities in the Time and date menu:
Time
Enter the time (00:00 to 23:59) with the numeric buttons
of the remote control.
Deviation from
Universal Time
The current time at the Greenwich Meridian 0 is to be
understood as world time. The time shift in relation to
this time must be given in hours (–11 to +13) (with the
buttonsor the numeric buttons on the remote control). Summer time is ignored.
Date
Enter the date (day.month.year) with the numeric buttons
on the remote control.
Beginning of
daylight-saving
daylight-saving
33156_024_Xelos_A32_42_GB_9_00_B39 3933156_024_Xelos_A32_42_GB_9_00_B39 39 03.07.2008 15:38:4703.07.2008 15:38:47
Enter the date on which the time is switched over to
summer time if it deviates from the automatically cal-
time
culated date.
End of
Enter the date on which the summer time ends if it deviates from the automatically calculated date.
time
39 -
Page 40
Operating additional equipment
Connection wizard
The connection wizard serves to connect accessory equipment optimally
to the TV set, make changes to the wiring of the devices or remove momentarily logged in equipment. The exact process of the wizard depends
on the choice of equipment.
➠ New equipment should not be connected until it has been logged in
in the Connection wizard first.
➠ DVD player on AV1 and DVD recorder on AV2 are preset at the
factory.
Call TV menu.
Select Connections,
go to the menu line below.
Select New devices/modifications.
OK calls the wizard.
Connection wizard
Connect the satellite dishes or cable/terrestrial antennas of your AV
equipment (recorder, decoder, ...) to the TV set according to the enclosed
operating manual. The connection wizard assists you when you connect your
equipment to the TV set via the AV sockets AV1, AV2 and AVS or via the
SD/HD-COMPONENT IN or HDMI1/2(DVI)* socket.
END
Connection
diagram
OK
Proceed
➠ The connection wizard can be exited at any time with
the END button.
OK Proceed.
The connection diagram shows the currently logged in
equipment.
Connection wizard
Now the TV set assumes that you have connected the following equipment:
DVD DVD
AVS AV1 AV2 COMP. IN HDMI1 HDMI2
AV equipment
selection
Select the equipment you want to connect or remove
equipment you no longer use in the AV equipment
selection.
Select equipment/connection.
Yellow button: Connect/disconnect equipment.
A Camcorder / camera is connected to the TV set additionally in the following example.
Connection wizard
Specify all new AV devices to be connected and all connection changes to the
existing devices here.
New devices/modifications
AV equipment selection
DVD
DVD player
DVD •
DVD recorder
VCR
Video recorder
SAT
Satellite receiver
STB
SetTopBox/dBox
Decoder
Decoder
Camera
Camcorder/camera
AV
Other device(s) to AV1/2/S
COMP.IN
Device to COMP.IN
HDMI/DVI
Device to HDMI1/DVI
HDMI/DVI
Device to HDMI2/DVI
OK
Proceed Connect/disconnect
END
OK Proceed.
The connection diagram is displayed again. Connect the
equipment to the corresponding connections of the TV
set as shown in the connection diagram.
➠ The accessory equipment should be connected to the
TV set with the power off (disconnected from the
mains). See also the instructions in the operating
manual of the equipment to be connected.
Connection wizard
Please connect your equipment as shown in the diagram.
DVD DVDCamera
AVS AV1 AV2 COMP. IN HDMI1 HDMI2
OK
Proceed
END
OK Proceed.
OK
Proceed
OK Proceed.
- 40
33156_024_Xelos_A32_42_GB_9_00_B40 4033156_024_Xelos_A32_42_GB_9_00_B40 40 03.07.2008 15:38:4803.07.2008 15:38:48
END
continued on next page
p
Page 41

Operating additional equipment
Signal type
Immediate
playback
Assign digital
audio input
New devices/modifications
Signal type at socket AV1 (DVD)
Automatic CVBS/YC
CVBS
YC
OK
Proceed
OK
END
Select the signal types of the individual devices one
after another where necessary.
Normally you should leave the setting on Automatic
CVBS/YC (e.g. for DVD player/recorder) or Autom.-
VHS/SVHS (e.g. VCR), otherwise select the suitable
signal type.
OK Proceed.
New devices/modifications
Immediate playback
no
OK
Proceed
OK
yes
END
Select yes or no.
If playback is started on a device connected to AV1
or AV2, the TV switches immediately to the approp-
riate AV input when yes is set.
When playing devices with Digital Link Plus, the
appropriate AV input is always switched to regardless
of the setting.
OK Proceed.
New devices/modifications
Assign digital audio input
no
to AV1 (DVD)
to AV2 (DVD-REC)
to AVS (CAM)
to HDMI1/DVI
to HDMI2/DVI
to COMP. IN
to PC IN
OK
Proceed
OK
END
Digital Link
Plus
Connection wizard
Transfer of the station list to the Digital Link Plus recorder(s).
Transfer (per recorder): 100%
OK
Proceed
END
If you have registered a recorder into the connection
wizard, the Digital Link Plus transmission starts.
If a Digital Link Plus capable recorder is connected, the
station list of the analogue stations is transmitted to the
external recorder.
You can also call Digital Link Plus under TV menu → Con-
nections → Digital Link Plus.
END: Exit connection wizard.
➠ The menu item only appears for certain presettings in
the Sound components wizard or with retrofitted
AC3/dts module (accessories see pages 60 und 61).
You have to feed the digital audio signal to the TV
set for the digital audio reproduction from an exter-
nal device.
The digital audio input (AUDIO DIGITAL IN) of the TV
set must be assigned to the appropriate connection
of the external device.
If no is selected, the analogue sound is used.
OK Proceed.
41 -
33156_024_Xelos_A32_42_GB_9_00_B41 4133156_024_Xelos_A32_42_GB_9_00_B41 41 03.07.2008 15:38:5103.07.2008 15:38:51
Page 42

Operating additional equipment
Devices to the connections AV1/AV2/AVS
Accessory equipment such as DVD players, video and DVD recorders
etc. can be connected to the TV set at the Euro-AV sockets AV1 and AV2
(see pages 5 and 6).
The AV input AVS (see pages 5 and 6) offers the possibility of connecting
a digital camera or a camcorder for example.
➠ All devices at the AV inputs must be registered in in the connection
wizard (see page 40 onwards).
The connection designations vary according to the logged in device. The
AV selection then contains, for example, DVD in place of AV1 or CAM
in place of AVS.
The Euro-AV sockets can process different signal types. Which signal type
your accessory device provides can be found in the operating manual of
the appropriate device.
Owing to the large number of AV devices available on the market, we can
only mention a few examples for the connection of accessory equipment
to the AV sockets here.
The following description of the connected equipment to the connections
AV1/2/S refers to the device types logged into the connection wizard
from page 40 onwards.
If the sound of a device connected to an AV socket is to be transmitted
digitally, a cinch cable must be plugged between the coaxial digital
output of the accessory equipment and the AUDIO DIGITAL IN socket of
the TV set. In addition the digital audio input must be assigned to the
corresponding AV socket in the connection wizard (see page 41).
The assignment of the digital audio input may also take place outside
the connection wizard. With TV menu → Connections → Miscellaneous
→ Assign digital audio input, the digital audio input can be assigned to
the appropriate AV socket, see page 49.
Connecting a DVD player to the TV set
➠ DVD player is registered with the connection wizard.
Switch off all equipment before connecting.
Connect the Euro-AV output of the DVD player to the
AV1 socket of the TV set.
Use a fully equipped Euro-AV cable (available from your
dealer) for this.
TV set
Connection
example of a
DVD player
AV1
DVD player
Playback from AV device
If the device supports Digital Link Plus on AV1/2 or if Immediate playback →
yes was selected in the connection wizard, the TV set switches automati-
cally to the appropriate AV input after switching on the AV device
The AV input can also be called manually, however.
Call AV selection.
AV selection
COMP. IN
HDMI2/DVI
HDMI1/DVI
PC IN
AVS
DVD-REC
DVD
VIDEO
OK
Switch to ...
OK
END
Select DVD,
OK switch over.
Start playback on the connected device.
- 42
33156_024_Xelos_A32_42_GB_9_00_B42 4233156_024_Xelos_A32_42_GB_9_00_B42 42 03.07.2008 15:38:5403.07.2008 15:38:54
Page 43

Operating additional equipment
Connecting a DVD recorder to the TV set
➠ DVD recorder is registered with the connection wizard.
Switch off all equipment before connecting.
Connect the Euro-AV output of the DVD recorder to the
AV2 socket of the TV set.
Use a fully equipped Euro-AV cable (available from your
dealer) for this.
If you want to receive and record analogue stations with
the receiver (tuner) built into the recorder, the recorder
must be looped into the aerial cable. Connect the DVD
recorder as shown in the connection example below.
Connection
example of a
DVD recorder
ANT2
S-VIDEO OUT
➠ If you want to record DVB stations with an external
recorder, the internal receiver of the TV set must be
used (see “Timer recording with external devices” on
page 51).
Playback from AV device
Call AV selection.
AV selection
COMP. IN
HDMI2/DVI
HDMI1/DVI
PC IN
AVS
DVD-REC
DVD
VIDEO
OK
Switch to ...
Connecting Camcorder/camera
➠ Camcorder/camera is registered with the connection
wizard.
Switch off all equipment before connecting.
Connect the AV output of the camcorder to the audio
input sockets L/R (white/red) and the S-VHS connection
of the AVS sockets of the TV set.
Use the AV cable enclosed with the camcorder for this.
Some camcorders only supply an FBAS signal instead of
an S-VHS signal at the AV output. In this case use the AVS
video input (yellow).
TV set
Connection
example of a
Audio in
L/R (AVS)
camcorder
AV2
Camcorder
S-VHS connection
(AVS)
TV set
Playback from AV device
DVD recorder
TV
R
Call AV selection.
AV selection
COMP. IN
HDMI2/DVI
HDMI1/DVI
PC IN
CAM
DVD-REC
DVD
VIDEO
OK
Switch to ...
OK
END
Select CAM,
OK switch over.
Start playback on the connected device.
OK
END
Select DVD-REC,
OK switch over.
Start playback on the connected device.
43 -
33156_024_Xelos_A32_42_GB_9_00_B43 4333156_024_Xelos_A32_42_GB_9_00_B43 43 03.07.2008 15:38:5603.07.2008 15:38:56
Page 44

Operating additional equipment
Devices to the HDMI ( DVI) connections
The HDMI connections (High Definition Multimedia
Interface) allow the transmission of digital video and
audio signals from a player, e.g. DVD player, DVD recorder, Blu-ray player, game console or Set-Top-Box via
a single cable.
The digital video and audio data are transmitted without data compression
digitally and therefore lose none of their quality.
Your TV set shows 24p films (see glossary on page 62) which are output
by a player connected via HDMI, e.g. Loewe BluTech Vision, automatically
in the original 24p format.
Film quality improvement (DMM) must be set to on (see page 21).
Digital video signals from a DVI player can be also be reproduced by the
HDMI connection using a DVI/HDMI adapter cable. The sound must be
piped in additionally.
HDMI and DVI both use the same copy protection method HDCP.
Connecting the device
➠ It is not necessary to register HDMI devices with the
connection wizard.
Switch off all equipment before connecting.
Connect the device with an HDMI cable (type A, 19-wire)
to the HDMI1/DVI or HDMI2/DVI socket of the TV set.
TV set
Connection
example of a
Blu-ray player
HDMI2
Blu-ray player
If a DVI/HDMI adapter cable is used, the corresponding
sound can be piped through the AUDIO IN1 (analogue)
or AUDIO DIGITAL IN (digital) socket on the TV set (see
also page 49).
Playback from the device
Call AV selection.
AV selection
COMP. IN
HDMI2/DVI
HDMI1/DVI
PC IN
AVS
DVD-REC
DVD
VIDEO
OK
Switch to ...
OK
END
Select HDMI1/DVI or HDMI2/DVI socket,
OK switch over.
Start playback on the connected HDMI device. The best
possible format for the picture is detected and set automatically.
Digital Link HD in CEC-capable devices
With Digital Link HD accessory equipment with CEC support (e.g. Loewe
BluTech Vision) is controlled by the TV set. A concealed installation of the
accessory equipment is also possible.
Operation of equipment with Digital Link HD
As long as a HDMI programme slot is selected, all remote control commands which can be processed by the device connected to the respective
socket are passed on to it. The device can therefore be installed concealed
and still be controlled.
➠ Volume setting, sound off/on, listen mode and selection of picture
format always act on the operation of the TV set.
On/off button:
short: Switch off TV set to the standby mode.
long: Switch off TV set and connected Digital Link HD-
capable equipment to the standby mode (system
standby).
TV button:
short: Switch back to the last viewed TV station.
long: Switch Digital Link HD on/off temporarily.
Remote TV switch on via Digital Link HD
In the TV menu under Connections → Miscellaneous → Remote TV switch
on via Digital Link HD, you can select whether the TV set is to switch on
automatically from standby mode when a disc is played or a screen menu
displayed on connected Digital Link HD-capable HDMI equipment.
- 44
33156_024_Xelos_A32_42_GB_9_00_B44 4433156_024_Xelos_A32_42_GB_9_00_B44 44 03.07.2008 15:39:0203.07.2008 15:39:02
Page 45

Operating additional equipment
Devices to the PC IN connection
You can connect a PC to the PC IN socket for example
and thus use the TV screen as a monitor.
➠ When connecting a PC or accessory equipment to the PC IN socket
of the TV set, set one of the following screen resolutions on the PC /
accessory equipment first.
800 x 600 60 Hz (SVGA) 1024 x 768 60 Hz (XGA)
1280 x 1024 60 Hz (SXGA) 1360 x 768 60 Hz (WXGA)
720 x 576i (SDTV) 720 x 480i (SDTV)
720 x 576p (SDTV) 720 x 480p (SDTV)
1280 x 720p (HDTV) 1920 x 1080i (HDTV)
Connecting the device
Connection
example of a
computer
There is no need to
➠
tion wizard.
Switch off all equipment before connecting.
Connect the device to the TV set’s PC IN socket with a VGA
cable.
Connect the analogue audio signal of the PC to the AUDIO
IN2 jack on the TV set with a stereo cable.
PC
MIC
DIG-OUT
register
the device with the connec-
TV set
PC IN
IN
OUT
AUDIO IN2
Playback from the device
Call AV selection.
AV selection
COMP. IN
HDMI2/DVI
HDMI1/DVI
PC IN
AVS
DVD-REC
DVD
VIDEO
OK
Switch to ...
OK
END
Select PC IN socket,
OK switch over.
Adapt geometry (only possible with certain signals)
This can be used to position the picture correctly and move the position
of the picture (horizontally and vertically) so that it fills out the whole
screen.
Call TV menu.
Select Geometry,
go to the menu line below.
Select the desired setting,
go to the menu line below.
Make settings.
Set colour standard (only possible with certain signals)
Call TV menu.
Select Picture,
go to the menu line below.
Select and set Colour standard:
RGB or
Ycc / Ypp
The colours will not be shown correctly if the wrong
standard is set.
Alternatively, connect the digital audio output of the PC or
accessory equipment to the AUDIO DIGITAL IN socket of
the TV set with a cinch cable.
The digital audio input can be assigned to the PC IN socket
by TV menu
tal audio input, see page
33156_024_Xelos_A32_42_GB_9_00_B45 4533156_024_Xelos_A32_42_GB_9_00_B45 45 03.07.2008 15:39:0503.07.2008 15:39:05
→
Connections → Miscellaneous → Assign digi-
49.
45 -
Page 46

Operating additional equipment
Devices to the Component IN connection
DVD players/recorders or a Set-Top-Box with Component
Video connections can also be connected to the Cb/Pb
Cr/Pr Y sockets (SD/HD-COMPONENT) of the TV set instead
of to the EURO-AV sockets.
The connecting cable with three cinch plugs each transfers the picture
information with a better quality than a EURO-AV cable. You need another
cable for the sound transmission.
Connecting the device
➠ Device to COMP. IN is registered with the connection
wizard.
Switch off all equipment before connecting.
Connect the Component Video outputs of the external
device by a triple cinch cable to the Cb/Pb Cr/Pr Y sockets
of the TV set.
Connect the analogue audio outputs of the external
device to the AUDIO IN1 L/R sockets of the TV set by a
dual cinch cable.
Connection
example of a
Set-Top-Box
AUDIO IN1 L/R
Cb/Pb Cr/Pr Y
TV set
Playback from the device
Call AV selection.
AV selection
COMP. IN
HDMI2/DVI
HDMI1/DVI
PC IN
AVS
DVD-REC
DVD
VIDEO
OK
Switch to ...
OK
END
Select COMP. IN socket,
OK switch over.
Adapt geometry (only possible with certain signals)
This can be used to position the picture correctly and move the position
of the picture (horizontally and vertically) so that it fills out the whole
screen.
Call TV menu.
Select Geometry,
go to the menu line below.
Select the desired setting,
go to the menu line below.
Make settings.
Set-Top-Box with
COMPONENT OUT
Alternatively, connect the digital audio output of the external device to the AUDIO DIGITAL IN socket of the TV set
with a cinch cable.
The digital audio input can be assigned to the COMP. IN
socket by TV menu
digital audio input, see page
- 46
33156_024_Xelos_A32_42_GB_9_00_B46 4633156_024_Xelos_A32_42_GB_9_00_B46 46 03.07.2008 15:39:0703.07.2008 15:39:07
→
Connections → Miscellaneous → Assign
49.
Page 47

Operating additional equipment
Sound components wizard
The sound components wizard helps you to configure the components
used to play the TV sound.
The TV speakers alone or with active subwoofer, active speakers, analogue
or digital HiFi/AV amplifier or the Loewe Individual Sound Projector can
be configured depending on what you want to use.
The sound components wizard is preset to playback via TV speakers at
the factory.
If a Loewe Preceiver Auro with link cable has been connected to the
TV set, you can only select between TV speakers and Auro in the sound
components wizard.
Upgradable Audio AC3/dts decoder
Your TV set may be equipped with an integrated Dolby Digital decoder.
This system has been introduced to the DVD video range and digital TV
stations can also broadcast in digital multi-channel sound.
For playback of 5 audio channels the surround sound is reinforced by the
deepest frequencies from the subwoofer channel (SUB), (5.1 reproduction
= 5 audio channels and 1 subwoofer). All 5 audio channels are reproduced
with the full frequency range from 20- 20,000 hertz and generate the
original theatre effect.
The upgrade kit decodes Dolby Digital, dts and MPEG. Stereo signals
can also be reproduced on multi-channel via Dolby Pro Logic and Dolby
Pro Logic II. This is regardless of whether the signal is transmitted by an
external device or received by the TV set.
Equipment / upgrade of the different set variants and accessories see
pages 60 and 61.
Play sound via active speakers
Connect your active speakers to the audio outputs AUDIO OUT L/R of the
TV set with cinch cables.
Switch the TV set to playback via active speakers.
Call TV menu.
Select Connections,
go to the menu line below.
Select Sound components.
OK calls the sound components wizard.
Select Active speakers.
Sound components
Sound playback via ...
TV speakers
TV speakers + active subwoofer
Active speakers
HiFi/AV amplifier
Sound projector
Sound projector or TV speakers (swichable)
OK
End of wizard
OK Exit wizard.
OK
END
Play sound via TV speakers and active
subwoofer
Connect your active subwoofer to one of the audio outputs AUDIO OUT
L/R with cinch cables.
Set the TV set to playback via TV speakers and an active subwoofer.
Call TV menu.
Select Connections,
go to the menu line below.
Select Sound components.
OK calls the sound components wizard.
Select TV speakers + active subwoofer.
Sound components
Sound playback via ...
TV speakers
TV speakers + active subwoofer
Active speakers
HiFi/AV amplifier
Sound projector
Sound projector or TV speakers (swichable)
OK
Proceed
OK Continue to the settings for the subwoofer.
Explanations of the setting options:
Adjust
subwoofer level
crossover
frequency
Subwoofer
Adapt the volume of the subwoofer to the volume of the
TV speakers.
Specify
Set the transfer frequency of the subwoofer so that it
corresponds to the lower limit frequency of the TV speakers. 90 Hz in this device.
Switch to a station with music or start playback with
phase
music on a DVD player with P+/P–.
Test both values (0° and 180°) with and select the
one where you get a clearer bass reproduction.
OK
END
47 -
33156_024_Xelos_A32_42_GB_9_00_B47 4733156_024_Xelos_A32_42_GB_9_00_B47 47 03.07.2008 15:39:1003.07.2008 15:39:10
Page 48

Operating additional equipment
Connecting audio amplifiers
The sound component wizard permits configuration of different audio
amplifiers (stereo amplifiers, surround amplifiers, analogue or digital) with
different digital audio formats (Dolby Digital, dts, MPEG, and stereo/PCM).
See the operating manual for the audio amplifier for more information.
Call TV menu.
Select Connections,
go to the menu line below.
Select Sound components.
OK calls the sound components wizard.
Mark the HiFi/AV amplifier.
Sound components
Sound playback via ...
TV speakers
TV speakers + active subwoofer
Active speakers
HiFi/AV amplifier
Sound projector
Sound projector or TV speakers (swichable)
OK
Proceed
OK Proceed.
Select whether the sound is to be transmitted
digitally or analogue to the the amplifier.
Continue, depending on the amplifier, see right column.
Explanations of the setting possibilities:
HiFi/AV
amplifier
Select the setting when an amplifier is connected and the
TV speakers are not used.
Playback can be switched between TV speakers and
amplifiers in the sound menu after logging in a hi-fi
amplifier under Sound via....
Sound formats
Specify sound formats which can be decoded with the
digital amplifier (see operating manual of the used amplifier).
Type of
Select either stereo or surround amplifier.
amplifier
TV loudsp. as
centre speaker
For every connected surround amplifier, select whether the
TV speakers are to be used as centre speakers.
If so, make a connection between the centre output of
the amplifier and the centre input of the TV set AUDIO
IN1 C with a cinch cable.
Attention: Do not use the centre speaker connection of
the amplifier, use the centre pre-amp output instead!
OK
END
Connecting digital audio amplifiers
Continuation of the left column above ...
For digital audio transmission: Select yes.
Connect the digital audio output of the TV set AUDIO
DIGITAL OUT with the digital audio input of the amplifier
via a cinch cable:
AUDIO DIGITAL OUT
PREOUT
FL
SL SRSUB
AUX1 IN
C
FR
LL
RR
Set sound formats, amplifier type and other settings, see
explanations of the setting possibilities (left hand
column).
Connecting analogue audio amplifiers
Continuation of the left column above ...
For digital audio transmission: Select no.
Connect the analogue audio output of the TV device
AUDIO OUT L/R via a stereo cinch cable to the analogue
audio input of the amplifier:
PREOUT
FL
SL SRSUB
AUX1 IN
C
FR
LL
RR
Select amplifier type and other settings, see explanations
of the setting possibilities (left hand column).
AUX OUT AUX 2
AUX OUT AUX 2
DIGITAL
IN
DIGITAL
OUT
DIGITAL
IN
DIGITAL
OUT
AUDIO OUT L/R
TV set
Digital amplifier
TV set
Analogue amplifier
- 48
33156_024_Xelos_A32_42_GB_9_00_B48 4833156_024_Xelos_A32_42_GB_9_00_B48 48 03.07.2008 15:39:1203.07.2008 15:39:12
Page 49

Operating additional equipment
M
Assignment of the digital audio input
In order to be able to hear the digital sound of an external device connected to an AV input, an AV input can be assigned to the digital audio
input socket AUDIO DIGITAL IN. When switching to this AV input, the
digital audio signal applied to the AUDIO DIGITAL IN input is passed on
to the upgradable integrated Dolby Digital decoder and the digital audio
output socket AUDIO DIGITAL OUT. You will then hear the digital sound of
the assigned AV input instead of the analogue sound if available.
Connecting devices to the digital audio input
For the digital audio playback from an external device, e.g. the DVD player,
you have to feed the digital audio signal to the TV set.
The external digital audio signal can be played back via the upgradable
Dolby Digital decoder in the TV set, via an externally connected digital
audio amplifier, Loewe Individual Sound Projector or Loewe Auro.
➠ An external audio amplifier or Loewe Individual Sound
Projector must already be set in the sound components
wizard (see page 48).
Call TV menu.
Select Connections,
go to the menu line below.
Select Miscellaneous,
go to the menu line below.
Select Assign digital audio input,
go to the menu line below.
Select AV input.
TV menu
Connections
Miscellaneous
Assign digital audio input
no
to AV2to AV1
to AVS to HDMI1/DVI to HD
To connect a DVD player to the digital audio input of the
TV set for example, connect the digital output socket of
the DVD player (DIGITAL OUT) via a cinch cable to the
AUDIO DIGITAL IN socket on the TV set.
ENDINFO
TV set
AUDIO DIGITAL IN
AV1
DVD player
The DVD player is already registered at AV1 in the connection wizard at the factory.
If new devices are connected and registered in the
connection wizard, the digital audio input AUDIO DIGITAL
IN is assigned in the connection wizard (see page 41).
Audio connection in HDMI (DVI) devices
External devices with DVI connection
If an external device with DVI interface is connected to the HDMI1/DVI or
HDMI2/DVI socket of the TV set by an HDMI/DVI adapter, you can con-
nect the digital sound of the external device to the digital audio input
socket AUDIO DIGITAL IN.
The assignment of the digital audio input to the corresponding HDMI
socket of the TV set takes place as described in the column on the left.
If you want to use the analogue sound of the external device, connect
this to the AUDIO IN1 socket.
External devices with HDMI connection
If external devices with HDMI interface are connected to the HDMI1/DVI
or HDMI2/DVI socket of the TV set, no assignment of the audio input is
necessary because in HDMI the digital transmission of picture and sound
takes place via one connection.
RS-232C interface (upgradable interface)
You can connect either the Loewe Individual Sound Projector or a home
network system of different manufacturers (e.g. AMX, Crestron) to your
TV set via the upgradable RS-232C interface.
For the configuration of the RS-232C interface and further information
about the different home networking systems, please contact your
dealer.
49 -
33156_024_Xelos_A32_42_GB_9_00_B49 4933156_024_Xelos_A32_42_GB_9_00_B49 49 03.07.2008 15:39:1303.07.2008 15:39:13
Page 50
Operating additional equipment
The direct way to record
You can programme timer recordings for Digital Recorder or connected
recorders available according to the equipment on the TV set. The recording wizard is integrated at several places for programming a recording.
You will find further information about recording with Digital Recorder
in a separate user guide.
Programming a timer recording with the EPG
➠ You are in EPG mode; if not, press the EPG button.
EPG (Electronic Programme Guide) Mon 31.07./16:05
Date
Mon 31.07.
Time
now
Stations
all
Topics
all
arte 15:57-16:59 Charmed - Zauberhafte Hexen
Das Erste 16:00-16:10 Tagesschau
ZDF 16:00-16:10 heute - in Europa
WDR Köln 16:00-16:15 WDR aktuell
Bayerisches... 16:00-16:05 Rundschau
2 ZDF
TEXT
Detail View Record
P+
Page ↑↓ Select time Select date, ... , topics
P–
hr-fernsehen 16:00-16:30 Schlemmerreise Spanien
MDR FERNS... 16:00-16:15 Hier ab vier
NDR FS HH 16:00-16:30 Tipps und Trends - Der Verbraucher...
SWR Fernse... 16:00-16:05 Baden-Württemberg aktuell
Charmed - Zauberhafte Hexen
OK
09
-
Mark the desired broadcast.
Red button: Call Timer data.
Change or confirm Timer data as necessary.
Programming a timer recording via teletext
➠ You are in teletext mode; if not, press the TEXT button.
301 302 ARDtext Do 14. 09. 06 09: 36 : 42
14.00 Tagesschau
14.10 In aller Freundschaft UT . . . . . . . . . . . 316
Zweite Begegnung (D, 2005)
15.00 Tagesschau
15.10 Sturm der Liebe (221) . . . . . . . . . . . . . 317
16.00 Tagesschau UT
16.10 Eisbär, Affe & Co. . . . . . . . . . . . . . . . 318
17.00 Tagesschau um fünf UT
17.15 Brisant . . . . . . . . . . . . . . . . . . . . . . . 319
17.47 Tagesschau
17.55 Verbotene Liebe . . . . . . . . . . . . . . . . 320
18.20 Marienhof . . . . . . . . . . . . . . . . . . . . . 321
18.50 Das Geheimnis meines . . . . . . . . . . . . 322
Vaters (19)
19.20 Das Quiz mit Jörg Pilawa . . . . . . . . . . 384
bis 19.50 Uhr
300 << Abend > 303
– +
Select programme Record
Jetzt im TV ARD morgen
Call the programme pages of the current station.
Change preset page numbers, see page 33.
Green button: Go to the appropriate page.
Select desired broadcast,
OK calls Timer data.
Change or confirm Timer data as necessary.
until 17:00 17:00 18:00 19:00
OK
Do 14. 09. 06 Das Erste
OK
MENU
END
Enter timer data
Timer data are displayed after selecting the broadcast you
want to record. You can change these before confirming.
Timer data
12.00 Brisant
Recorder DVD-REC
Station 01 Das Erste
Date 14.09.2006
Recording time 17.15 until 17.45
VPS no
Recording type once only
Switch recorder to AUX!
OK
confirm
OK
DR
END
INFO
OK confirms Timer data,
or change if necessary:
Select Recorder.
Select Date.
Enter the recording date with the numeric buttons.
Select Recording time.
Enter the recording time with the numeric buttons.
Select VPS.
Set yes/no.
Select Recording type.
Set once only, Mon-Fri, daily, weekly.
OK Confirm the Timer data.
Setting possibilities in the Timer data menu:
Selection of the connected/integrated recorder.
Recorder
Recording time
Day of recording.
Date
Time of recording.
Use VPS data, yes/no.
VPS
(Some stations do not broadcast a VPS signal).
Recording type
once, Mon–Fri, daily or weekly.
In timer recordings via EPG, Serial can also be selected.
➠ If you use an external recorder without Digital Link Plus, you have
to select the recording source (e.g. AUX) in the recorder. This is also
the case when DVB broadcasts are to be recorded. The TV's receiver
is used.
➠ When you use an external recorder with Digital Link Plus or a compa-
rable system (e.g. P50), this is controlled automatically.
- 50
33156_024_Xelos_A32_42_GB_9_00_B50 5033156_024_Xelos_A32_42_GB_9_00_B50 50 03.07.2008 15:39:1403.07.2008 15:39:14
Page 51

Operating additional equipment
Timer list Mon 14.09./11:28
Mon 14.09. 17:15-17:45 Das Erste Brisant
Wed 16.09. 14:00-15:50 ZDF Biathlon-Weltcup
Thu 22.09. 20:15-22:25 3sat wissen spezial
Change
Delete
New recording
Programming the timer with the timer overview
A timer recording can also be programmed manually.
Call Timer list.
You see a list of all previously programmed timers:
END
INFO
Green button: Change timer recording.
Yellow button: Delete timer recording.
Red button: New timer recording.
Programming the timer manually
➠ The timer list is open.
Red button: Call the Recording wizard.
END
Recording wizard
OK
Via teletextVia EPG
Manual
INFO
Select Manual,
OK call Station selection.
Select station.
OK calls the Timer data.
For time data input, see page 50.
After confirming the timer data, the new recording is
transferred to the timer overview.
Explanation of the setting possibilities of the recording wizard:
Via EPG Timer programming via EPG (see Programming a timer
recording with the EPG, page 50).
Via Teletext Timer programming via Teletext (see Programming a timer
recording via teletext, page 50).
Manual Programming timer manually (see above).
Timer recording with external devices
➠ It is not possible to record HDTV broadcasts with external devices. Use
the internal Digital Recorder for this if it is installed.
Recorder with Digital Link Plus
If you use an externally connected recorder with Digital Link Plus or a
similar system, the TV set and connected recorder exchange data (e.g.
compare station lists TV set/recorder or timer data of analogue stations).
Please consult the operating manual of your recorder to find out of your
recorder is Digital Link Plus compatible. In addition use only Euro AV
cables for the connection between TV set and recorder.
Analogue stations
The timer data are transmitted automatically from the TV set to
the recorder after programming is complete. (For DVD recorders
in addition the recording quality SQ or EQ is also transmitted.)
The recording is then controlled by the recorder and the recorder
tuner is used for reception of the programme.
The recording data are not saved in the timer overview of the TV
set. Consequently if you want to change or delete the timer data
then you must do so on the recorder.
Digital stations
If you want to record digital stations with an externally connected
recorder, then the DVB tuner is used and the TV device takes over
control of the recorder. Then the station on the TV set is locked during
the timer recording. It is not possible to switch over to another DVB
station.
Recorder without Digital Link Plus
If the programmed timer cannot be transmitted to the external recorder
(no Digital Link Plus) but supports Digital Link (Loewe-own system), the
TV receiver is always used.
Digital Link must be switched on on the recorder. Read the operating
instructions of your Loewe recorder.
In addition use only fully wired Euro AV cables for the connection between
TV set and recorder.
Analogue and digital stations
You can control the recording from the TV set. The recorder must
be set manually to the AV input, to which the TV device is connected. The station on the TV set is locked during the timer recording.
It is not possible to switch over to another station.
Copy protection
33156_024_Xelos_A32_42_GB_9_00_B51 5133156_024_Xelos_A32_42_GB_9_00_B51 51 03.07.2008 15:39:2203.07.2008 15:39:22
Copy-protected programmes will not be output on the EURO AV sockets
for legal reasons.
51 -
Page 52

Operating additional equipment
PhotoViewer
You can view photos in the standard JPEG format stored on a USB stick or a
memory card in a card reader. You can also collect photos in a slide show.
Connecting
➠ Certain USB memory media may not be supported by this set under
some circumstances.
Plug a card reader (via a USB cable) or a USB stick into the USB port on
the TV set (see pages 5 and 6).
Use a USB extension cable (available from your dealer) for the USB stick
if the USB socket is difficult to access (e.g. wall mounting) or the USB
stick is too big to be plugged in.
Starting the PhotoViewer
➠ No photos can be displayed which are available in progressive JPEG
format.
A memory card or the USB stick should contain data in standard JPEG
format with the file extension ".jpg".
Call the Assist+ menu.
Mark PhotoViewer,
OK continue.
If only one memory medium is available, the PhotoViewer
is started. You see the first page of the photo overview
(see right column).
If several media are available, select with
memory medium and then with
OK start PhotoViewer.
Ending the PhotoViewer
Remove used memory medium.
Or:
Press END button (when photo list is displayed).
Or:
Press TV or RADIO button.
Or:
Press the ASSIST button and call another function in the
Assist+ menu.
Viewing photos
➠ The photo overview is displayed.
Folder_1
OK
USB 1:\picture_024.jpg 38 pictures
OK
View picture
Mark picture
Slide show
P+
scroll ↓↑ (1/3)
P–
MENU
END
INFO
Mark a photo, page with P+/P– if necessary.
OK Display as full picture.
or P+ Next photo.
or P– Previous photo.
END: Show/hide photo information.
Yellow button: Zoom photo.
Enlargement factors x2, x4, and x8 are possible.
Press the key several times.
At the 4th press return to original size.
Select photo section in zoom mode with .
Exit the zoom mode to the photo overview with OK or
the STOP button.
Rotate picture by 90 degrees to the left/right.
➠ Photos shown in a slide show can only be turned to
view in the pause mode.
OK or STOP button: Back to the photo overview.
- 52
33156_024_Xelos_A32_42_GB_9_00_B52 5233156_024_Xelos_A32_42_GB_9_00_B52 52 03.07.2008 15:39:2703.07.2008 15:39:27
Page 53
Operating additional equipment
s
Open folder
➠ Folders will only be displayed if they were created on the
memory card / USB stick.
Mark a folder in the photo overview.
OK Open folder.
The photos in this folder are displayed.
OK
USB 1:\Folder _1\ 29 pictures
OK
Open folder
Slide show
P+
scroll ↓↑ (1/2)
P–
Marking photos for slide show
Mark the photos that you want to display in a slide show.
Navigate to a photo.
OK
USB 1:\Folder_1\picture_017.jpg 29 pictures
OK
View picture
Unmark picture
Slide show (marked pictures)
P+
scroll ↓↑ (1/2)
P–
Blue button: Mark photo for slide show.
Start slide show
➠ No pictures are marked: All photos of the folder that
was just opened will be displayed.
➠ Photos marked: Only marked photos will be displayed.
PLAY button: Start / continue slide show.
OK calls the photo overview.
PAUSE button: Pause / continue the slide show.
Yellow button: Zoom picture (only in pause mode).
Rotate picture to left/right in 90º steps (only in
Pause mode).
or P+ Next photo.
or P– Previous photo.
STOP button: End slide show.
MENU
MENU
Calling the PhotoViewer menu
In the PhotoViewer menu you can make picture settings and select the
memory medium.
➠ The photo overview is displayed.
Call PhotoViewer menu.
Ordner_1
OK
INFO
PhotoViewer menu
END
INFO
Picture 001 ...
Picture display
Picture changeGo to ...
END
Picture crossover
Explanations of the setting possibilities:
Go to...
Within the folder select a photo directly or go to the
beginning or end of the folder.
Picture display
With Optimum size the photo is reduced or enlarged in
size so that the screen is optimally filled.
With Original resolution each pixel of the photo represents
one pixel on the screen. If the photo resolution is higher
than that of the screen, then portions of the photo will
END
INFO
Picture change
be cropped.
Set the display time per photo in a slide show to between
3 and 60 seconds.
The loading time of the photo depends on the photo size,
the number of saved files and the transmission speed of
the memory medium. Therefore a photo change may
take longer than specified.
Picture
crossovers
There is a choice of four different photo transitions for
changing slides. You can also have the photo transitions
run in sequence.
Photo info
Display additional information about the picture: Recording
time and date, resolution and picture size.
Picture settings
Set picture adjustment, contrast, colour intensity, colour
temperature, brightness, sharpness, DNC.
Sound
Select whether or not the previously heard sound is to
be heard during the PhotoViewer operation.
Select memory
medium
Select memory medium from which the photos are to be
reproduced. This menu item is only displayed if at least
two memory media are available.
53 -
33156_024_Xelos_A32_42_GB_9_00_B53 5333156_024_Xelos_A32_42_GB_9_00_B53 53 03.07.2008 15:39:3303.07.2008 15:39:33
Page 54

Operating additional equipment
Operating Loewe equipment
Using the remote control for the TV mode of the TV set
Press the TV button, the display above it will light for
approx. 5 seconds.
Using the remote control for a recorder
Press the REC button, the display above it will light for
approx. 5 seconds.
Using the remote control for a DVD player
Press the DVD button, the display above it will light for
approx. 5 seconds.
Using the remote control for the radio mode of the TV set
Press the RADIO button, the display above it will light
for approx. 5 seconds.
As long as a button is pressed, the display of the selected operating
mode lights up (TV – REC – DVD – RADIO). This allows you to check
which operating mode the remote control is set to every time you press
a button.
Setting the remote control to other Loewe devices
The specified button combination must be kept pressed (for approx. 5 s)
until one of the LEDs flashes twice.
Device Button combination
10
11
1
17
2
3
4
5
18
19
20
6
21
22
23
7
8
9
24
25
26
27
28
Loewe TV
Loewe Centros 1102 / 1172
Loewe Centros 2102 HD / ViewVision + ¾
Loewe ViewVision DR+ / DVB-T
Loewe ViewVision 8106 H +
Loewe Auro 2216 PS / 8116 DT + ¾
Loewe Xemix 6222 PS
The devices marked by ¾ are preset in the remote control supplied with
the TV set.
- 54
33156_024_Xelos_A32_42_GB_9_00_B54 5433156_024_Xelos_A32_42_GB_9_00_B54 54 03.07.2008 15:39:4403.07.2008 15:39:44
+ ¾
+
+
+
12
13
14
15
16
29
30
31
32
33
Page 55

Operating additional equipment
Functions for the Loewe DVD player (Auro 2216 PS, 8116 DT)
1
Sound off/on
2
LED indicator for current operating mode
3
Switch over to operate TV set
4
Switch over to operate Recorder
5
Sleep timer
6
Set TV picture format; RADIO: Mono/Stereo
7
DISC: Repeat; RADIO: display RDS name/frequency of station
8
DISC: User interface of loaded DVD
9
Show/hide menu; MENU: close window
10
V–/V+ Volume down/up
11
DISC: Title/Chapter overview; RADIO: station table
MENU: confirm menu selection
12
Green button: Title/Chapter selection
13
Red button: DISC: camera position
14
DISC: short: beginning of chapter/title previous chapter;
long: search back;
RADIO: short: fine tuning back long: search back
15
no function
16
Pause; single frame; slow motion
17
Switch on/off - on stand by
18
short: TV Radio Digital; long: Auro FM/AM-Radio
19
Switch over to operate Auro
20
Select sound format
21
DISC: select chapter/title; RADIO: select stored station;
MENU: enter digits
22
MENU: enter numbers or letters
23
DISC: Repeat A-B; RADIO: FM/AM-mode
24
Select external audio source
25
DISC: menu bar
MENU: context help
26
DISC: Status display; RADIO: station table
MENU: hide menu
27
P+/P– DISC: next/previous chapter; RADIO: station forward/back
28
DISC: chapter up/down; MENU: select up/down;
DISC: search back/forward; MENU: select left/right
29
Yellow button: Zoom
30
Blue button: Set marker
31
Playback
32
DISC: short: next chapter/title; long: search forward
RADIO: short: fine tuning forward; long: search forward
33
Stop
Functions for the Loewe DVD recorder (Centros 1202, 2102 HD, ViewVision DR+)
1
TV Sound off/on
2
LED indicator for current operating mode
3
Switch over to operate TV set
4
Switch over to operate Recorder
5
Timer recording menu; timer recording list menu
6
STOP: Title List; PLAY: Edit thumbnail;
CARD: Photo-, Music-, Film-Mode
ViewVision DR+: Timeshift Mode
7
STOP: Call AV selection (AV1-AV4,DV,TV)
ViewVision DR+: PLAY: skip 15 Sec.
8
User interface of loaded DVD
MENU: original / playlist
9
Show/hide menu
10
V–/V+ TV Volume down/up
11
Status display (TV, DVD)
MENU: confirm the menu selection
12
Green button: ShowView menu
13
Red button: new chapter marker
14
PLAY: press short: Start of current chapter/previous chapter;
press long: search back; PAUSE: press short: slow motion back
15
Record
16
Pause /single frame
17
Switch on/off - on stand by
18
TV Radio Digital
19
Switch over to operate DVD-Player
20
TV Sound menu
21
STOP: Select station directly
MENU: enter numbers or letters
22
MENU: enter numbers or letters
ViewVision DR+: STOPP: Call AV selection
23
Card Reader operation
ViewVision DR+: „Home“ menu
24
PIP (picture in picture)
25
Info; PLAY: menu bar
26
MENU: hide menu
27
P+/P– PLAY: Next chapter; STOP: Select station up/down
28
MENU: select/set
29
Yellow button: Zoom
30
Blue button: DISC: short: Set marker; long: Marker search
31
Playback
32
PLAY: Press short: next chapter; Press long: search forward
PAUSE: Press short: slow motion forward
33
Stop
55 -
33156_024_Xelos_A32_42_GB_9_00_B55 5533156_024_Xelos_A32_42_GB_9_00_B55 55 03.07.2008 15:39:4903.07.2008 15:39:49
Page 56

Operating additional equipment
Rotating the TV set (upgradable interface)
Your TV set can be upgraded with the connection for a rotating foot
control. If the set is assembled with a Loewe stand with motor drive, you
can align it to suit your sitting position using the remote control.
➠ A motor unit is connected.
➠ In normal TV mode, without other displays.
Rotate the TV set.
Do not place any objects in the rotation range of the TV set that could
obstruct the rotation or that could be knocked over by the rotation
movement.
Setting the range of rotation
You can determine the range of rotation (maximum +/- 40°) of the TV set
by setting the maximum right and left stop.
Call TV menu.
Select Settings,
go to the menu line below.
Select Miscellaneous,
go to the menu line below.
Select Rotate TV,
go to the menu line below.
Select Basic adjustment,
OK calls the basic adjustment.
- 56
Rotate TV
Basic adjustment (right)
21
OK
Proceed
Basic adjustment (right)
Turn your TV set as far to the right as the installation
position allows. This will be the maximum right
rotation position in future.
OK confirms basic adjustment to right.
Rotate TV
Basic adjustment (left)
-30
OK
End of basic adjustment
Basic adjustment (left)
Rotate your TV set as fasr to the left as the installation
position allows. This will be the maximum left rotation
position in future.
OK ends the basic adjustment.
Close the menu.
END
END
Specifying the switch off position
This is where you specify the position that the TV will take when it is
switched off. In order for the TV set to return to the determined switch-off
position when switching it off, this must be activated (see below).
Call TV menu.
Select Settings,
go to the menu line below.
Select Miscellaneous,
go to the menu line below.
Select Rotate TV,
go to the menu line below.
Select Set switch-off position,
OK calls Set switch-off position.
TV menu
Settings
Miscellaneous
Rotate TV
Set switch-off position
0
OK
Adopt
INFO
END
Set the desired switch-off position.
The TV set rotates in the process.
OK Save the set position as the switch-off position.
Close the menu.
Activating the switch-off position
Call TV menu.
Select Settings,
go to the menu line below.
Select Miscellaneous,
go to the menu line below.
Select Rotate TV,
go to the menu line below.
Select Activate switch-off position,
go to the menu line below.
Select yes.
Close the menu.
If the TV set is switched off with the on/off key on the remote control or
with the switch integrated in the display then it will turn to the defined
siwtch-off position. When it is switched back on, it returns to the position
last set.
33156_024_Xelos_A32_42_GB_9_03_M56 5633156_024_Xelos_A32_42_GB_9_03_M56 56 04.07.2008 08:47:0104.07.2008 08:47:01
Page 57

Troubleshooting
Problem Possible cause Remedy
All menus are displayed in the wrong language. The menu language was set incorrectly. Set the menu language:
Press the INFO button in TV mode (Index).
Mark the first key word and call it with OK.
Then select the language and confirm it with
OK.
In the TV menu, Connections cannot be called
(displayed in grey ).
The control functions of the Loewe Recorder
and the Timer are not working or are not
working properly
General problems when connecting external
devices via an AV input.
The connection of a decoder does not
function or does not function properly.
A timer recording is in progress. Wait until the timer recording ends or delete
a) The Digital Link function is not activated or
not possible in the recorder.
b) EURO-AV cable is not connected.
c) Recorder is not logged in.
a) The device is not logged in to the connection
wizard or is connected differently than is shown
in the connection diagram.
b) The AV standard is set incorrectly.
c) The signal type is set incorrectly.
a) The signal is not decoded because the correct
decoder stations have not been selected in
the connection wizard.
b) In decoder mode the sound is missing
because the wrong decoder sound has been
assigned in the connection wizard.
the timer recording (page 51).
a) Activate Digital Link in the recorder (see
operating instructions of the recorder).
b) Connect EURO-AV cable (page 43).
c) Register recorder (page 40).
a) In the connection wizard (TV menu →
Connections → New devices/modifications)
compare the connection diagram with the
actual installation and connect as illustrated
(page 40).
b) Set the correct standard (page 17).
c) Set the correct signal type (page 41).
If for AV standard or AV signal is set to
"Automatic" then this can cause errors to
be detected with signals that do not
comply with standards. In this case
standard and signal must be set according
to the information in the operating manual
of the external device.
a) Follow the instructions in the connection
wizard (TV menu → Connections → New
devices/modifications) and select the
appropriate decoder transmitter (page 40).
b) Follow the instructions in the connection
wizard and select the right audio source
(Decoder, TV oder Autom.) (page 40), see
also decoder instructions.
57 -
33156_024_Xelos_A32_42_GB_9_00_B57 5733156_024_Xelos_A32_42_GB_9_00_B57 57 03.07.2008 15:39:5603.07.2008 15:39:56
Page 58

Troubleshooting
Problem Possible cause Remedy
Digital Link Plus does not work. a) EURO-AV cable is not fully wired (pin 10 not
With Teletext various character sets are
displayed incorrectly.
No sound via the external digital audio
amplifier.
The picture of a connected external recorder
is visible but the timer cannot be called.
The picture of a connected external recorder
is visible but the error message no recorder
available is still output.
Photo on the USB stick is not displayed
correctly in the PhotoViewer or a
"?“ appears.
wired).
b) Some recorders can only adopt stations
during the initial installation of the TV set.
The wrong character set has been set in the
Teletext menu.
a) The external digital audio amplifier does not
support the selected sound format (Dolby
Digital, dts, MPEG).
b) TV set and external digital audio amplifier are
not connected with each other.
The device is not registered in the connection
wizard or is connected differently to shown in
the connection diagram .
The device is not registered in the connection
wizard or is connected differently to shown in
the connection diagram .
The photo is not available in a displayable
format.
a) Replace the EURO-AV cable.
b) Restore the recorder to the as-delivered
state (see recorder's operating manual).
Set the right character set: Select Teletext
menu → Settings → Character set → Standard
or the appropriate character set.
a) Set PCM stereo on the DVD player in the
sound selection. For DVB stations on the
TV set switch to stereo in the status display
(END) – language/audio selection (green
button).
b) Connect AUDIO DIGITAL OUT from the TV
set to a digital input of the external digital
audio amplifier and select the appropriate
input to this.
In the connection wizard (TV menu → Connections
→ New devices/modifications) compare the
connection diagram with the actual installation
and connect as illustrated (page 40).
In the connection wizard
→ New devices/modifications) compare the
connection diagram with the actual installation
and connect as illustrated (page 40).
Convert photo file into a standard JPG format
on the PC.
( TV menu → Connections
- 58
33156_024_Xelos_A32_42_GB_9_00_B58 5833156_024_Xelos_A32_42_GB_9_00_B58 58 03.07.2008 15:39:5703.07.2008 15:39:57
Page 59

Technical data
General data
Type Xelos A32 HD+ 100 Xelos A37 HD+ 100 Xelos A37 Full-HD+ 100 Xelos A42 HD+ 100
Article number 67418xxx 67419xxx 68427xxx 67422xxx
Dimensions for device without stand (W x H x D) in cm
Dimensions for device with stand (W x H x D) in cm
Weight for device without stand (approx.) in kg
Weight for device with stand (approx.) in kg
Display HD-LCD technology HD-LCD technology FHD-LCD technology HD-LCD technology
Picture diagonal in cm/picture format 80 / 16:9 94 / 16:9 94 / 16:9 106 / 16:9
Resolution in pixels 1366 x 768 1366 x 768 1920 x 1080 1366 x 768
Dynamic contrast ratio 6,000:1 6,000:1 5,000:1 5,000:1
Static contrast ratio 1,200:1 1,200:1 1,200:1 1,000:1
Viewing angle horizontal and vertical 176° 176° 178° 178°
Power consumption (EN 62087)
in operation (watt)
in standby (watt)
Ambient temperature (Celsius) 5° – 35°
Relative humidity (non-condensing) 20 – 80%
Air pressure 800 – 1114 hPa (0 – 2000 m above sea level)
Electrical data
Chassis designation: ........................................................................................... L 2710
Power supply: ........................................................................220 V – 240 V/50–60 Hz
Tuner: .................................................................................. VHF/UHF/cable/hyperband
Range:.......................................................................................... 45 MHz to 860 MHz
Station storage locations incl. AV and radio: ......................................................... 4000
TV standards: .................................................................................. B/G, I, L, D/K, M, N
Colour standard: ........................................ SECAM, PAL, NTSC, NTSC-V, PAL-V (60 Hz)
Sound standard .....................................................Mono/Stereo/2-Ton/Nicam B/G, I, L
Audio nominal power (sine): ....................................................................... 2 x 20 watt
Lower limit frequency of the speakers ................................................................. 90 Hz
Teletext: .......................................................................................... TOP/FLOF Level 2.5
Page memory ........................................................................................................ 2000
Digital teletext (only in UK / IRL with active MHEG-5 software) .......................MHEG-5
Connections (max. equipment)
Mains socket: ......................................................................................... Supply voltage
EURO-AV 1 Video IN: ..........................................................................Y/C (S-VHS/Hi 8)
........................................................................CVBS (VHS/8 mm)
Video OUT: ...................................................................CVBS (VHS/8 mm)
.......................................................................Y/C (S-VHS/Hi 8)
Audio IN: ...............................................................................................L/R
Audio OUT: ...........................................................................................L/R
EURO-AV 2 Video IN: ..........................................................................Y/C (S-VHS/Hi 8)
........................................................................CVBS (VHS/8 mm)
..............................................................................................RGB
Video OUT: ...................................................................CVBS (VHS/8 mm)
................................................Y/C, (only with SVHS Link Plus)
Audio IN: ...............................................................................................L/R
Audio OUT: ...........................................................................................L/R
84.4 x 60.2 x 9.5
84.4 x 62.8 x 26.3
16.9
18.9
80 / 90
1.2
99.1 x 69.2 x 9.3
99.1 x 71.9 x 26.3
20.4
22.4
95 / 105
1.2
Jack 3.5 mm: ............................................................ Headphones 32-2000 ohm
Mini-DIN (AVS) Video IN: ................................................................Y/C (S-VHS/Hi 8)
............................................................CVBS (VHS/8 mm)
Cinch (yellow) Video IN: .............................................................CVBS (VHS/8 mm)
Cinch (white/red) Audio IN: ..............................................................L (white) / R (red)
2 x IEC socket 75 Ohm/5 V/80 mA: ............................... Antenna/cable/DVB-T/C
2 x F socket 75 Ohm 13/18 V/350 mA: ............................. ANT-SAT DVB-S/S2
Cinch Audio IN max. 2Vrms: .......................................................... Centre
2 x Cinch AUDIO IN1: ..........................................................L (white) / R (red)
Jack 3.5 mm AUDIO IN2: ................................................................................L/R
2 x Cinch AUDIO OUT (level configuration-dependent): ......L (white) / R (red)
Cinch COMPONENT IN: .........................................................Cb/Pb signal
Cinch COMPONENT IN: ...........................................................Cr/Pr signal
Cinch COMPONENT IN: ................................................................ Y signal
Cinch Audio Digital IN (SPDIF): ..............................................Digital audio
Cinch Audio Digital OUT (SPDIF): ...........................................Digital audio
SUB-D AUDIO LINK: ............................................................. Multi-sound
2 x HDMI Digital Video/Audio IN
Type A 19pole Standard 1.3: ......................Digital video and audio
SUB-D PC IN:................................................................ PC/STB video signal
SUB-D RS-232C:................................................................Serial interface
Mini-DIN SERVICE: .................................................................... Service/L-Link
Mini-DIN CONTROL: ................................................Rotating stand control
2 x USB USB 2.0: ..........................................................Standard JPEG files
CI-Slot Common Interface: ..........................................Slot for CA module
(1
Equipment variants and upgrade possibilities see page 61.
99.1 x 69.2 x 9.3
99.1 x 71.9 x 26.3
20.4
22.4
105 / 115
1.2
107.0 x 75.0 x 11.5
107.0 x 78.5 x 26.3
30.5
32.5
115 / 125
1.2
(1
(1
(1
(1
(1
(1
59 -
33156_024_Xelos_A32_42_GB_9_00_B59 5933156_024_Xelos_A32_42_GB_9_00_B59 59 03.07.2008 15:39:5703.07.2008 15:39:57
Page 60

Accessories
Accessories
Upgrade kit Digital Single Satellite Tuner (Art.No. 89565.081):
You can receive digital satellite and HDTV stations with the upgrade kit.
The tuner is integrated in the TV set and is operated with the remote
control/menu control.
You will find the upgrade options for your set in the table overleaf.
Upgrade kit Digital Single Satellite Tuner (Art.No. 89565.080):
You can have two digital satellite tuners installed in sets with Digital
Recorder. This enables reception of digital satellite and HDTV stations
and extends the display of PIP and the recording possibilities of Digital
Recorder for two digital satellite stations.
You will find the upgrade options for your set in the table overleaf.
Upgrade kit Motor Unit/RS232C (Art.No. 89634.080):
The Motor Unit / RS232C upgrade kit allows you to stand the TV set on
a table or floor stand solution with a motor-controlled rotating foot.
Then the Loewe Individual Sound Projector or a home network system
can also be connected to the TV set (see page 49).
Upgrade kit Audio AC3 / dts (Art.No. 89781.080):
A fully fledged Dolby Digital decoder can be integrated in the TV set with
the Audio AC3 upgrade kit. A surround system such as Loewe Individual
Sound can then be connected.
Adapter and cables:
AUDIO LINK adapter 1.5 m Loewe order no. 89954.001
AUDIO LINK 1.5 m Loewe order no. 89952.001
AUDIO LINK 6 m Loewe order no. 89952.002
AUDIO LINK 10 m Loewe order no. 89952.003
Cubic plug cable 1.5 m Loewe order no. 90418.930
Loewe Individual Sound:
Your TV set can be perfectly supplemented by the Individual Sound speaker
system in connection with the Audio AC3/dts upgrade kit. Numerous
speaker combination possibilities with standing speakers, satellite speakers
and a subwoofer can be implemented.
Loewe Individual Sound Projector:
With the Loewe Individual Sound Projector you can enjoy digital Surround
Sound without expensive installation and connection of several speakers.
The Sound Projector is easy to set and operate.
Loewe DVD Recorder:
The DVD recorders from Loewe feature forms and colours which match
the Loewe TV sets, an adapted user operation and technology. Combined
these devices form a system that offers many advantages.
Loewe Blu-ray Player:
With the Loewe Blu-ray Player “BluTech Vision“ you are ideally equipped
for the successor format to DVD. With the Loewe system integration
you control BluTech Vision and your Loewe TV set simultaneously with
the Assist remote control.
Subject to availability.
- 60
Setup possibilities
Table Stand
Floor Stand 4
Floor Stand 4 MU
Wall Mount WM 61
Wall Mount WM 50
(2
Floor Stand 5 MU SP
Screen Wall Mount 2
Screen Wall Mount 1
Xelos A 42 HD+ 100
•
Table Stand (delivery status)
•
Floor Stand 4 / Floor Stand 4 MU
Floor Stand 5 MU SP
•
Xelos A 42 Rack
•
Wall Mount WM 61
•
Screen Wall Mount 2
•
(1 (2
(1
Xelos A 37 HD+ 100 / Xelos A 37 Full-HD+ 100
Table Stand (delivery status)
•
Floor Stand 4 / Floor Stand 4 MU
•
Floor Stand 5 MU SP
•
Xelos Rack
•
Wall Mount WM 50
•
Screen Wall Mount 2
•
(1 (2
(1
Xelos A 32 HD+ 100
Table Stand (delivery status)
•
Floor Stand 4 / Floor Stand 4 MU
•
Xelos Rack
•
Wall Mount WM 50
•
Screen Wall Mount 1
•
(1
Only in conjunction with appropriate adapters that are sold separately.
(2
Only in connection with the Motor Unit / RS232C upgrade kit.
(1
(1 (2
Xelos Rack /
Xelos A 42 Rack
(1
(1
(2
(2
(2
33156_024_Xelos_A32_42_GB_9_00_B60 6033156_024_Xelos_A32_42_GB_9_00_B60 60 03.07.2008 15:39:5703.07.2008 15:39:57
Page 61

Accessories
Equipment variants and upgrade kits
TV type Xelos A 32 Xelos A 37 Xelos A 37 Xelos A 42
Variants HD+ 100 HD+ 100/
Digital Recorder –
Single DVB-T/C
Dual DVB-T/C –
USB port 1x 2x 1x 2x 1x 2x 1x 2x
Single DVB-S2
Art.No. 89565.081
Twin DVB-S2
Art.No. 89565.080
Audio AC3 / dts
Art.No. 89781.080
MU/RS232C
Art.No. 89634.080
ex factory
z
available as an upgrade kit
{
– not available
z
{{{{{{{{
–
{{{{{{{{
{{{{{{{{
DR
+
z
–
z
{
HD+ 100 HD+ 100/
–
z
–
–
DR
+
z
–
z
{
Full-HD+ 100 Full-HD+ 100/
–
z
–
–
DR
+
z
–
z
{
HD+ 100 HD+ 100/
–
z
–
–
DR
+
z
–
z
{
61 -
33156_024_Xelos_A32_42_GB_9_00_B61 6133156_024_Xelos_A32_42_GB_9_00_B61 61 03.07.2008 15:39:5803.07.2008 15:39:58
Page 62

Glossary
0-9
24p movie display: Modern movie makers produce movies with 24 (full)
pictures per second (24p), conventional TV sets (and most DVDs) show
50 (half) pictures per second. To play the movie, the original number of
pictures is doubled and the film sped up. This is optimal for sports broadcasts but for quieter movies it distorts the picture quality. Loewe TV sets
play 24p movies automatically in the original 24p format.
A
Active antenna: An antenna with its own power supply or amplification
that can improve reception in areas with poor reception.
AV socket: Socket for audio and video signals.
AV sources: Audio/video source.
AVS: Audio/video sockets on the TV set (cinch and Mini-DIN).
B
Band: Designation for a frequency range.
C
CA module: The Conditional Access module contains the coding system
and compares the transmitted code with the one on the Smart Card. If
they match, the appropriate stations or programmes are decoded.
Cinch cable: Cable for transmitting audio or video.
CI slot: See Common Interface.
Common Interface: The Common Interface (CI slot) is a standardised
interface. By inserting suitable decoding modules (CA modules) and a
Smart Card coded digital programmes can be used.
Component IN: Connection by which the video signal is transmitted via
three separate cinch connections. It is made up of the brightness signal
"Y" and the colour difference signals "Pb" and "Pr". YPbPr is the original
analogue version of the digital YCbCr with which, among other things,
video data stored on the DVD and transmitted by satellite, cable or antenna
in DVB are colour coded.
Conditional Access module: See CA module.
Digital Link HD: System for controlling devices via the HDMI connection
of the Loewe TV set in the case of concealed installation.
Dolby Digital: Digital multi-channel audio. The digital standard for high
quality home movie systems. The individual channels are broadcast separately in this standard. The three front channels right, left and centre, the
two surround channels right and left and the external subwoofer channels
are called a 5.1 signal. Another term for Dolby Digital is AC3.
Dolby Pro Logic: Analogue multi-channel audio. Converts a Dolby-coded
stereo signal into a surround sound. This usually contains four channels
(front left, centre, front right, surround channel). A special subwoofer
channel is not generated in this method.
Dolby Pro Logic II: Analogue multi-channel audio. Dolby Pro Logic II is
a further development of Dolby Pro Logic. This method generates a 6channel spatial sound from a stereo or Pro-Logic signal (front left, centre,
front right, surround left, surround right, subwoofer).
Dolby Surround: Analogue multi-channel audio system that brings four audio channels down to two audio tracks with the aid of a matrix coding.
Dolby Virtual Speaker: The Dolby Virtual Speaker technology simulates
the surround playback of a real 5.1-channel playback with only two
speakers.
DTS: Digital Theater Systems; digital multi-channel audio.
DVB-C/-S/-T: Digital Video Broadcasting stands for digital television.
Technical DVB is the standardised process for transmitting digital content
(television, radio, multi-channel audio, room sound, EPG, Teletext, and
other supplemental services) through digital technology. C stands for
transmission via cable, S for distribution via satellite and T for terrestrial
or antenna distribution.
DVD: Abbreviation of Digital Video Disk and later Digital Versatile Disk.
DVD preceiver: Combi-device of DVD player and radio without integrated
amplifier.
DVI: Digital Visual Interface, is an interface for transmitting digital video
and graphic data (without audio).
Dynamic contrast ratio: Here the light intensity of the display is adapted
in case of a high black portion in the picture. The so-called backlights
are dimmed automatically and the contrast ratio increases temporarily,
i.e. dynamically.
D
Decoder: Analogue, coded TV signals are passed through a decoder and
made visible again.
Digital Link: System for controlling recorders (for video and DVD recorders
from Loewe) via the Euro AV sockets of the Loewe TV set with concealed
setup. Controlling the recorder for timer recordings.
Digital Link Plus: System for controlling recorders according to protocol
50. For analogue stations the station and timer data are transmitted via
the EURO-AV socket to the recorder. The timer recording is executed
exclusively by the recorder. There is a different designation with different
manufacturers.
- 62
33156_024_Xelos_A32_42_GB_9_00_B62 6233156_024_Xelos_A32_42_GB_9_00_B62 62 03.07.2008 15:39:5803.07.2008 15:39:58
E
Electronic Programme Guide: See EPG.
EPG: Electronic Programme Guide is the electronic variant of a printed
television programme guide. Using the EPG you can watch the TV
programme of the TV stations which transfer the appropriate data. The
overview of the programmes contains the title, beginning and end and
the duration of the programme. In addition also a brief description of
respective content of the programme is displayed.
Euro AV socket: Interface for connecting video devices to a TV set. This
socket is also referred to as Scart socket.
Page 63

Glossary
F
FLOF: Full Level One Facilities. Teletext system in which names and
numbers of the jump destinations are transmitted in the bottom line
on every page. This guides the reader to related topics for example. An
information about which pages exist and which pages have sub-pages
is not available in FLOF.
H
HDCP: High-bandwidth Digital Content Protection. Coding system pro-
vided for the DVI and HDMI interfaces for secure transmission of audio
and video data.
HDMI: High Definition Multimedia Interface is a newly developed interface
for full digital transmission of audio and video data.
HDTV: High Definition Television is an umbrella term that covers a number
of high resolution television standards.
HD-Ready: A quality seal that is awarded to products that are capable of
displaying high-definition television (HDTV).
High band and Low band: Transmission ranges for satellites.
J
JPEG/JPG: Joint Photographic Experts Group is a committee which has
developed a standard method for the compression of digital photos. This
method JPEG (JPG for short), named after the committee, is a commonly
used graphic format for photos.
L
LCD: Liquid Crystal Display.
LCN: Logical Channel Numbers. In stations with LCN, the channel location
number belonging to the station is also transmitted by the provider. The
stations are sorted according to these channel location numbers.
L-Link: Intelligent system connection between Loewe devices for the
automatic exchange of information. Makes the operation of TV and
Loewe system components even more convenient.
LNB/LNC: The crucial electronic component of a satellite antenna is
referred to as an LNB (Low Noise Block Converter). It is mounted in the
focal point of a parabolic antenna. The designation LNC (Low Noise
Converter) indicates that conversion to lower intermediate frequency
takes place. The supplemental block in the LNB refers to the fact that a
whole frequency range (a block) is converted in each case.
M
MHEG-5: Digital teletext standard of the Multimedia and Hypermedia
Expert Group. At the moment only available in United Kingdom and
Ireland.
Modulator: Transmitter in the video or DVD recorder so that the devices
can receive signals via the tuner of the TV device.
Mono: Single-channel audio.
MPEG: Digital compression process for video.
N
Network ID: NID refers to the so-called programme ID number, also known
as network ID – a number between 0 and 8191. This specification is
necessary in specific cable networks of some countries. Then only DVB
signals of this station network are searched for.
NICAM: Audio standard. Is used in Denmark, England, France, Sweden,
and Spain.
NTSC: American colour standard.
P
Page Catching: For teletext, refers to going to and calling a page
number.
PAL: European standard.
PCM: Pulse Code Modulation for digital sound.
Picture in Picture: see PIP.
PIP: Picture in Picture; a function which displays two pictures on the
screen.
Pixel: Denotes both the smallest unit of a digital graphic grid and its
display on a screen with grid control.
Pixel error: A pixel error is a defective pixel, usually on an LCD. Pixel errors
may be caused by production errors. They are expressed for example by
a constantly lit pixel or a constantly black pixel. Single defective pixels
however are excluded from a guarantee.
Progressive JPEG: Progressive JPEGs are built up gradually. The quality of
the picture increases progressively during the loading process.
ProScan/Progressive Scan: Progressive Scan (abbr. PS) or full picture
method is a technique in the picture build-up of monitors, TV sets,
beamers, and other display devices in which the output device is not
sent line interlaced half pictures – unlike in the interlace technique – but
real full pictures.
R
RGB: Colour signals red, green and blue.
S
Satellite tuner: receiver for satellite programmes.
SDTV: Standard Definition TeleVision.
SECAM: French standard.
Set-Top-Box: Set-Top-Box (STB for short) refers to a device in entertain-
ment electronics which is connected to another device, usually a TV set,
and offers the user additional functional options.
63 -
33156_024_Xelos_A32_42_GB_9_00_B63 6333156_024_Xelos_A32_42_GB_9_00_B63 63 03.07.2008 15:39:5803.07.2008 15:39:58
Page 64

Glossary
Signal input groups: Depending on the applied signal, the signal sources
are divided into different groups. All signal input groups with their corresponding signal types are the possible inputs are listed below.
TV analogue:
Signal type: FBAS, YC, RGB-SD (480i/576i), Component-SD (480i/576i)
Input: Tuner analogue, AV1, AV2, AVS, COMP. In
TV digital:
Signal type: DVB-SD, HDMI-SD (480i/576i)
Input: Tuner digital, HDMI1/DVI, HDMI2/DVI
HD analogue:
Signal type: RGB-HD (video mode: e.g.1920x1080, 1280x720),
Input: COMP. IN, PC IN
HD digital:
Signal type: DVB-HD, HDMI-HD
Input: Tuner digital, HDMI1/DVI, HDMI2/DVI
PC:
Signal type: RGB
Input: PC IN
PhotoViewer:
Input: USB
Signal strength: strength of the received antenna signal.
Signal quality: quality of the incoming antenna signal.
Smart Card: The Smart Card is an electronic chip card issued by the respec-
tive programme provider or by the certification-free Pay-TV operators. It
contains the code which is decoded by the CA module.
Static contrast ratio: Describes the difference between the brightest and
darkest picture display.
Stereo: Dual-channel audio.
Switch voltage: Video devices specify this voltage to switch the TV device
to playback.
Symbol rate: describes the transmission speed for data transmission.
Component-HD (video modes: e.g. 1920x1080, 1280x720)
(PC modes: e.g. 800x600, 1024x768, 1280x1024, 1360x768)
T
Terrestrial: In data transmission a wireless transmission that does not use
satellites as intermediate station is referred to as terrestrial.
TFT: Thin Film Transistor. One widely distributed application is control of
liquid crystal flat screens, for which a signal transistor is used for each
pixel. This design of display is also referred to as active matrix, however
it is frequently also referred to as TFT display.
TOP: Table of Pages. Teletext system in which the individual pages are
divided into topics. The blocks stand for a higher hierarchy level (e.g.
News, Sport, Programmes) and the groups for the level below (e.g.
Home/Abroad, Football/Tennis). Abbreviations can be assigned to the
pages which are displayed in colour on the bottom line and can be
selected with the four coloured buttons on the remote control. Information is also transmitted about which pages exist and which of them
have sub-pages.
Tuner: Another term for receiver.
U
USB: Universal Serial Bus. Serial bus system for connecting external devices
(USB card reader, USB stick).
V
VGA: PC interface for connecting a monitor.
VPS: The Video Programming System (VPS) is a signal which transmits
some (but not all) TV stations in the blanking gap. The signal is used
by video and DVD recorders when recording programmes to react to
delays in start time, programme changes and excesses of the planned
programme time.
Y
Ycc/Ypp: Colour standards for Set-Top-Boxes.
YCbCr: Digital colour model, see COMPONENT IN.
YPbPr: Analogue colour model, see COMPONENT IN.
The code number 3001 cancels an access
✄
code and thus the parental
lock. Please keep
in a safe place.
- 64
33156_024_Xelos_A32_42_GB_9_00_B64 6433156_024_Xelos_A32_42_GB_9_00_B64 64 03.07.2008 15:39:5803.07.2008 15:39:58
Page 65

Index
33156_024_Xelos_A32_42_GB_9_00_B65 65
03.07.2008 15:39:58
0-9
24p format 44
A
Access code 38
Adjusting the picture 21
Adjusting the sound 20
Alarm 38
Assist+ 8, 16
Audio adjustment 20
Audio amplifi ers 48
Auro Loewe Preceiver 47
Auto format 21
Automatic diming 21
AV audio signal 20
AV selection 19
B
Batteries 11
Brightness 21
Button functions 22
C
CA module 35
Card reader 52
Change favourites lists 27
Change station 26
Delete station 26
Move station 26
Rename station 26
Restore station 26
CI slot 35
Code number 38
Coloured buttons 22, 23, 32
Component IN 46
Connecting the antenna 11
Connections 5, 6
Connection wizard 40
Contrast 21
Control panel 4
Copy protection 51
D
Data capture 31
Digital audio input 49
Digital Link 51
Digital Link HD 44
Digital Link Plus 50, 51
Digital teletext 33
Display 12
DVB character set 23
DVB software 36
DVD button 54
DVI 44
E
Encrypted stations 13, 24, 35
EPG 30
F
Factory settings picture/sound 21
Favourites 19
File folder 53
First installation wizard 12
FLOF 32
H
HDMI 44
Headphone volume 20
Help 15
HiFi/AV amplifi er 48
Home networking systems 49
I
Index in the TV set 16
Info display 15
iPIP 28
L
Language 12, 16, 17, 57
Language/audio selection 23
Last station 22
LNC/LNB 13
Loudness 20
M
Mains switch 12
Manual station search 25
Manual timer 51
Maximum volume 20
Memorise 30
Menu operation 15
Mobile phone keypad 15
Move picture vertically 22
Muting 20
N
New devices/modifi cations 40
Numeric buttons 15, 16, 18
O
On-screen displays 39
Overview diagram 17
P
Page selection 32
Parental lock 38
PC IN 45
Personal text pages 22, 33
PhotoViewer 52
Picture 21
Picture adjustment 21
Picture format 21, 22
Cinema 22
PALplus 22
Panorama 22
Zoom 22
Picture in Picture 28
PIN 38
PIP 28
Play sound via active speakers 47
Play sound via TV speakers and active
subwoofer 47
Programme info 22
R
RADIO button 12, 54
Radio menu 17, 34
Radio mode 12, 34
REC button 54
Recording 50
Recording wizard 50
Remote control 3, 11, 54
Repeat initial installation 12
Reset picture/sound 21
Rotating the TV set 56
S
Safety 9, 10
Satellite system 13
Scope of delivery 7
Search/update stations 24
Search wizard 24
Select station 18
Select video source 19
Service 66
Set balance 20
Settings 17
Signal type 41
Slide show 53
Small picture 28
Small PIP 29
Smart card 35
Software update 36
Sound 20
Sound adjustment 20
Sound components wizard 47
Sound effects 20
Sound off 20
Sound via 20
Split screen 28, 29
Standard PIP 28
Standby mode 12
Station list 18
Status display 23
Storage medium 53
Subtitles 23
Switching off 12
Switching on 12
Switch on volume 20
Switch voltage 17
T
Teletext 32
Teletext functions 22
Teletext subtitles 22
Time 22
Time and date 39
Timer data 50
Date 50
Recorder 50
Recording time 50
Recording type 50
VPS 50
Timer functions 38
Timer list 51
Timer recordings 50
TOP 32
TV base software 36
TV button 11, 54
TV menu 17
TV set equipment 7
U
USB stick 36, 52
V
Videotext subtitles 33
Volume 20
Volume adjustment 20
VPS times 33
65 -
33156_024_Xelos_A32_42_GB_9_00_B65 65
03.07.2008 15:39:58
Page 66

Service
33156_024_Xelos_A32_42_GB_9_00_B66 66
03.07.2008 15:39:59
Loewe Austria GmbH
Parkring 12
1010 Wien, Österreich
Tel +43 - 1 22 88 633 - 0
Fax +43 - 1 22 88 633 - 90
Email loewe@loewe.co.at
International Dynamics
Australasia Pty Ltd.
129 Palmer Street
Richmond 3121, Victoria,
Australia
Tel +61 - 3 - 94 29 08 22
Fax +61 - 3 - 94 29 08 33
Email mail@international
dynamics.com.au
Loewe Opta Benelux NV/SA
Uilenbaan 84
2160 Antwerpen, België
Tel +32 - 3 - 2 70 99 30
Fax +32 - 3 - 2 71 01 08
Email ccc@loewe.be
Darlington Service
Kn. Klementina Street, bl. 193
1618 Sofi a, Bulgaria
Tel +359 - 2 955 63 99
Fax +359 - 2 955 63 99
Email sac@audio-bg.com
Telion AG
Rütistrasse 26
8952 Schlieren, Schweiz
Tel +41 - 44 732 15 11
Fax +41 - 44 732 15 02
Email lgelpke@telion.ch
HADJIKYRIAKOS & SONS LTD.
121 Prodromos Str., P.O Box
21587
1511 Nicosia, Cyprus
Tel +357 - 22 87 21 11
Fax +357 - 22 66 33 91
Email savvas@hadjikyriakos.
com.cy
K+B PROGRES A.S.
U Expertu 91
25069 Klicany u Prahy,
Česko
Tel +420 2 72 12 21 11 (222)
Fax +420 2 72 12 22 39
Email loewe@kbexpert.cz
Loewe Opta GmbH,
Customer Care Center
Industriestraße 11
96317 Kronach, Deutschland
Tel +49 1801–22256393
Fax +49 9261–99500
Email ccc@loewe.de
Kjaerulff 1 A/S
C.F. Tietgens Boulevard 19
5220 Odense SØ, Denmark
Tel +45 - 66 13 54 80
Fax +45 - 66 13 54 10
Email mail@kjaerulff1.com
Gaplasa S.A.
Conde de Torroja, 25
28022 Madrid, España
Tel +34 - 917 48 29 60
Fax +34 - 913 29 16 75
Email loewe@maygap.com
TEDRA TRADING OY
Kuusemetsa 3
Saue 76506, Estonia
Tel +372 - 50 14 817
Fax +372 - 67 09 611
Email raivo@futurehifi .com
Loewe Opta France S.A.
13 rue du Dépôt,
Parc del l‘Europe, BP 10010
67014 Strasbourg Cédex, France
Tel +33 - 3- 88 79 72 50
Fax +33 - 3- 88 79 72 59
Email loewe.france@wanadoo.fr
Kjaerulff 1 OY
Uudenmaantie 100
20760 Piispanristi, Finland
Tel +358 - 20 751 3800
Fax +358 - 20 751 3801
Email loewetuki@kjaerulff1.com
Loewe UK Limited
Century Court, Riverside Way
Riverside Business Park, Irvine,
Ayrshire
KA11 5DD, UK
Tel +44 - 1294 315 000
Fax +44 - 1294 315 001
Email enquiries@loewe-uk.com
ISSAGOGIKI EMBORIKI ELLADOS
S.A.
321 Mesogion Av.
152 31 Chalandri-Athens, Hellas
Tel +30 - 210 672 12 00
Fax +30 - 210 674 02 04
Email christina@bose-onkyo.gr
Basys Magyarorszagi KFT
Tó park u.9.
2045 Törökbálint, Magyar
Tel +36 - 2341 56 37 (121)
Fax +36 - 23 41 51 82
Email basys@mail.basys.hu
Plug&Play
Bednjanska 8, 10000 Zagreb
Hrvatska (Kroatia)
Tel +385 1 4929 683
Fax +385 1 4929 682
Email loewe@loewe.hr
Loewe Italiana SRL
Largo del Perlar, 12
37135 Verona (VR), Italia
Tel +39 - 045 82 51 611
Fax +39 - 045 82 51 622
Email Stefano.Borgognoni@
loewe.it
PL Trading (pz 2004) Ltd.
27, Aliat Hanoar St.
Givataiim 53401, Israel
Tel +972 - 3 - 57 27 155
Fax +972 - 3 - 57 27 150
Email zeev@loewe.co.il
Origo Ltd
Unit 23 Magna Drive
Magna Business Park, City West
Dublin 24, Republic of Ireland
Tel +353-1-4666700
Fax +353-1-4666706
Email service@origo.ie
SAS
Hamad Al Haqueel Street,
Rawdah, Jeddah
Kingdom of Saudi Arabia
Tel +966 (2) 665 4616 ext: 666
Fax +966 (2) 660 7864
Email hrant@sas-syseng.com
A Cappella
Ausros Vartu 5, Pasazo skg.
01129 Vilnius, Lithuania
Tel +370 - 52 12 22 96
Fax +370 - 52 62 66 81
Email: aretas@acappella.lt
DONEO CO. LTD
34/36 Danny Cremona Street
Hamrun, HMR02, Malta
Tel +356 - 21 - 22 53 81
Fax +356 - 21 - 23 07 35
Email info@doneo.com.mt
SOMARA S.A.
377, Rue Mustapha El Maani
20000 Casablanca, Morocco
Tel +212 - 22 22 03 08
Fax +212 - 22 26 00 06
Email somara@somara.ma
CableCom AS
Ostre Kullerod 5
3241 Sandefjord, Norge
Tel +47 - 33 48 33 48
Fax +47 - 33 44 60 44
Email odd@cablecom.no
International Dynamics (NZ) Pty
Ltd
PO Box 109 317, Newmarket
Auckland, New Zealand
Tel +64 9 379 0179
Fax +64 9 379 0279
Email: enquiries@international
dynamics.co.nz
Mayro Magnetics Portugal, Lda.
Rua Professor Henrique de Barros
Edifício Sagres, 2º. C
2685-338 Prior Velho, Portugal
Tel +351 - 21 942 78 30
Fax +351 - 21 942 78 30
Email geral.loewe@mayro.pt
DSV TRADING SA
Plac Kaszubski 8
81-350 Gdynia, Polska
Tel +48 - 58 - 6 61 28 00
Fax +48 - 58 - 6 61 44 70
Email market@dsv.com.pl
Avitech Co. SRL
1/II Pipera Tunari St.
007190 Voluntari, Ilfov, Romania
Tel +40 - 21 200 64 64
Fax +40 - 21 200 64 65
Email andrei.silisteanu@avitech.ro
Service Center Loewe
ul. Verkhnaya Maslovka, d. 29
125083 Moscow,
Tel +7 - 495 612 50 43
Россия
Fax +7 - 495 612 47 10
Email service@atc.ru
Kjaerulff 1 AB
Ridbanegatan 4, Box 9076
200 39 Malmø, Sverige
Tel +46 - 4 06 79 74 00
Fax +46 - 4 06 79 74 01
Email Sweden@kjaerulff1.com
BaSys Czech & Slovak s.r.o.
Stará Vajnorská 17/A
831 04 Bratislava, Slovakia
Tel + 421 2 49 10 66 18
Fax + 421 2 49 10 66 33
Email: loewe@basys.sk
ENKAY ELEKTRONIK SAN. Ve Tic.
Ltd. Sti.
Alemdag Cad: Site Yolu No.: 10
81230 Ümraniye/ Istanbul, Türkiye
Tel +90 - 216 634 44 44
Fax +90 - 216 634 39 88
Email mhatipog@enkaygroup.com
Dubai Audio Center
P.O. Box 32836, Sheik Zayed Road
Dubai, UAE
Tel +971 - 4 343 14 41
Fax +971 - 4 343 77 48
Email dacdubai@emirates.net.ae
THE SOUNDLAB (PTY) LTD
P.O. Box 31952, Kyalami 1684
Republic of South Africa
Tel +27 - 1 14 66 47 00
Fax +27 - 1 14 66 42 85
Email loewe@mad.co.za
© by Loewe Opta 290508
66
33156_024_Xelos_A32_42_GB_9_00_B66 66
03.07.2008 15:39:59
 Loading...