

Page 1
Copyright LinPlug Virtual Instruments GmbH,
2002-2010 All rights reserved
Page 2
LinPlug ElementP
Percussion Synthesizer
Copyright LinPlug Virtual Instruments GmbH, 2002-2010
All rights reserved
Instrument & Manual by Peter Linsener
Presets by Paul Brown and Peter Linsener
All technical specifications and prices of the products specified in this manual may be subject to change
without notice. The documents may not be changed, especially copyright notices may not be removed or
changed. LinPlug and all LinPlug product names are trademarks of LinPlug Virtual Instruments GmbH. Mac
is a trademark of Apple Inc. registered in the U.S. and other countries. The Audio Units logo and the Audio
Units symbol are trademarks of Apple inc. Microsoft and Windows are trademarks of Microsoft Corp.
registered in the U.S. and other countries. VST plugin technology by Steinberg. All other trademarks are the
property of their respective owners.
Page 3
Thank you
for purchasing an ElementP license. ElementP is a “classic” linPlug synthesizer, originally
manufactured in 2002 and re-released in 2010. Its a flexible and easy-to-use percussion
instrument created specifically for percussive sounds of all kinds. This manual describes
all aspects of ElementP and is designed to help you learn and use this software as
efficiently as possible. Everyone at LinPlug hope you enjoy working with ElementP and
hope that it becomes an important part of your musical creativity.
Overview
ElementP is a percussion synthesizer. It has been designed to produce a specific range of
sounds. Although you can't create all imaginable percussive sounds, ElementP will allow
you to create a broad range with minimum effort. Typically you can easily create sounds
like real world percussion instruments, unique bass sounds, any kind of percussive noise,
some interesting kicks and snares and other sounds of this type.
ElementP is capable of playing each part all over the keyboard but some sounds will work
best in the octave they were designed in (kicks for example). Just audition the sound in
different octaves until you find the range where it sounds best and matches your taste.
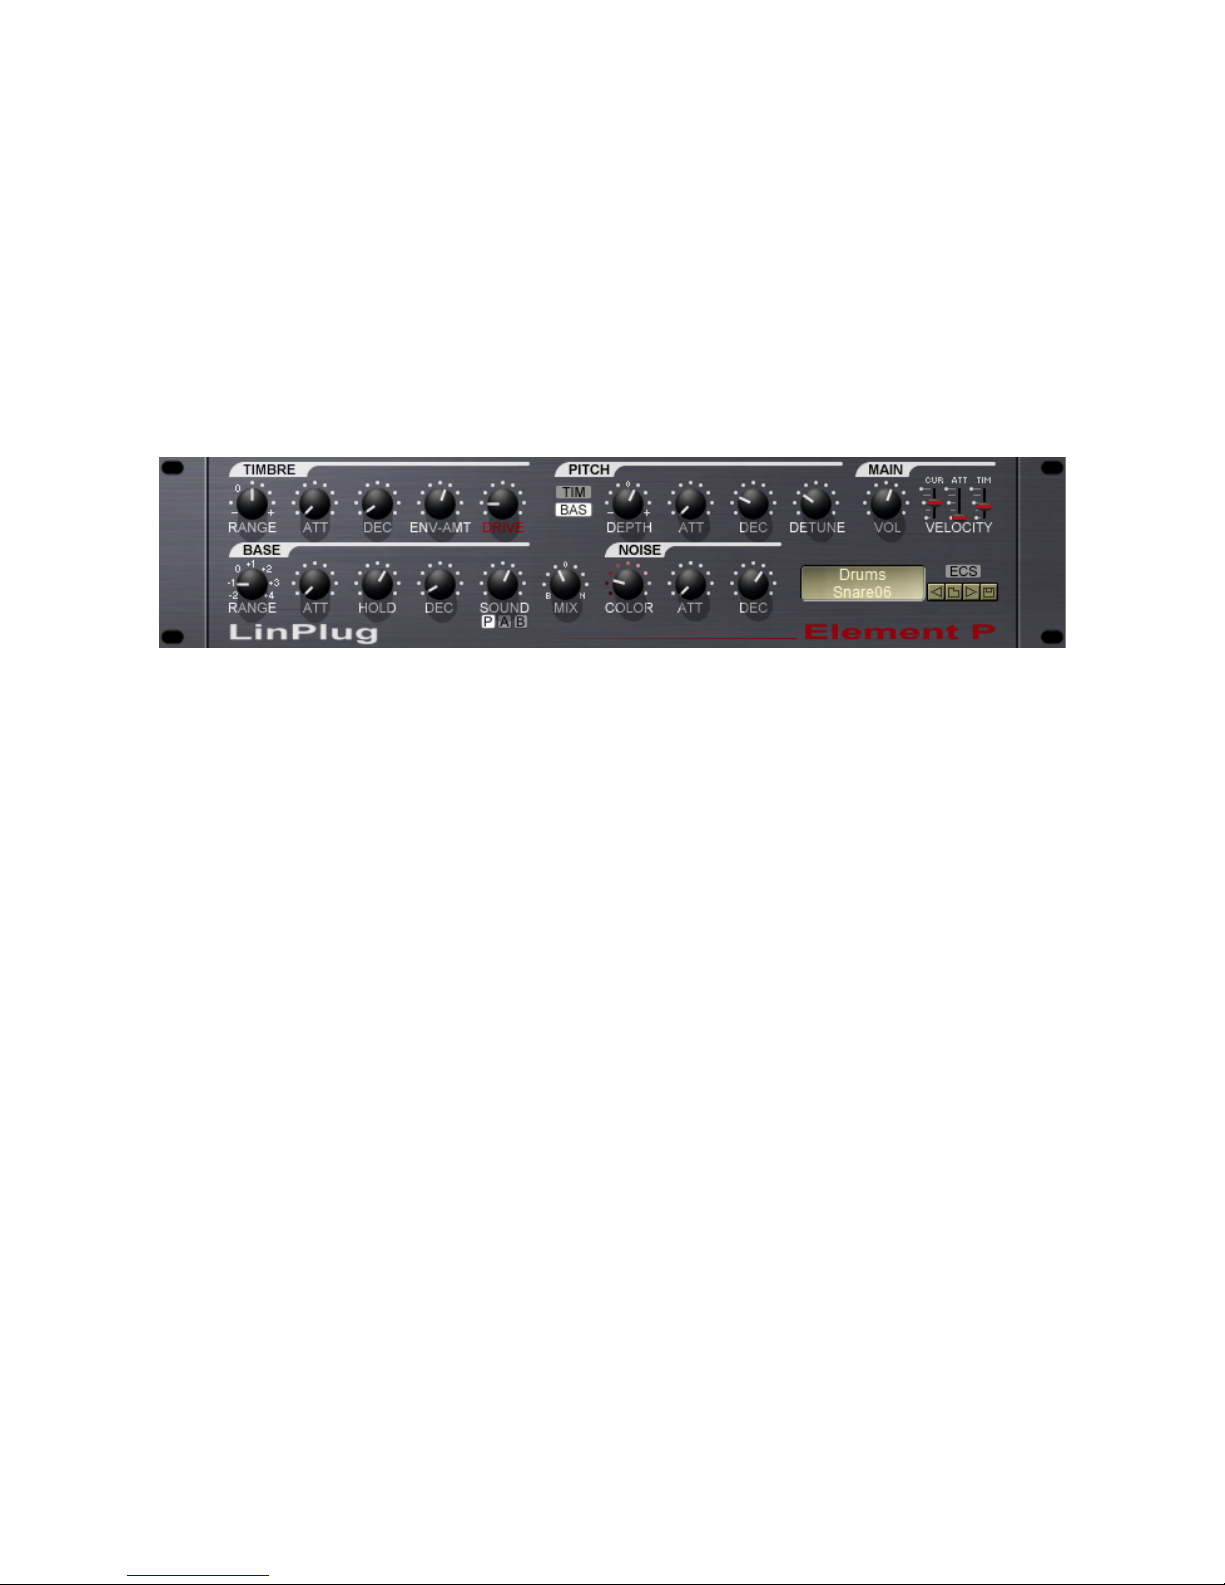
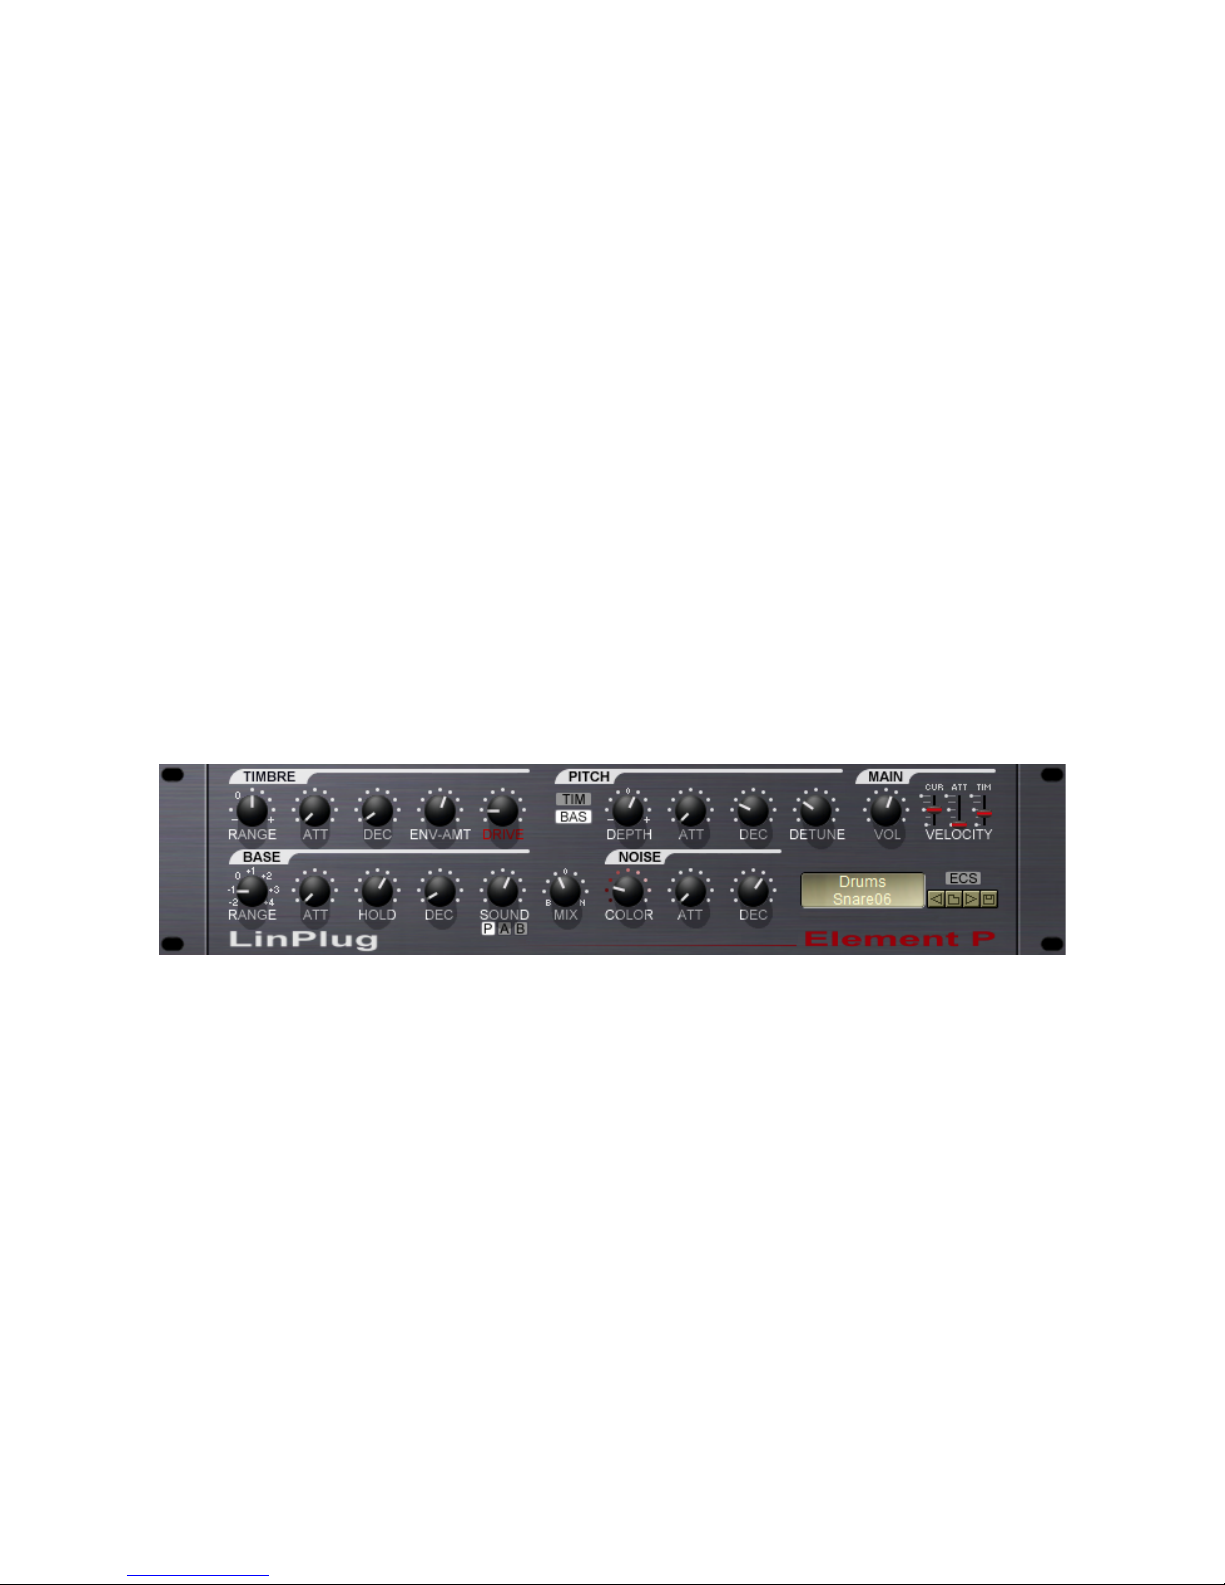
ElementP's panel is divided into several sections. First there is a Timbre section that forms
the variant timbre of the sound. The Base section that gives you control over the basic
sound and the amplitude shape of the sound. A Pitch section for pitch modulation effects
on both the Timbre and the Base. A Noise section to add some noise to your sounds, this
is what often gives the percussion instrument its typical sound. Finally there are some
general settings and the file handling in the Main section.
If you are familiar with FM synthesis you can think of ElementP as a two operator FM
synth with the Timbre being the operator that modulates the Base. This is technically not
absolutely correct, but it gives you a picture what these two sections do.
Page 4
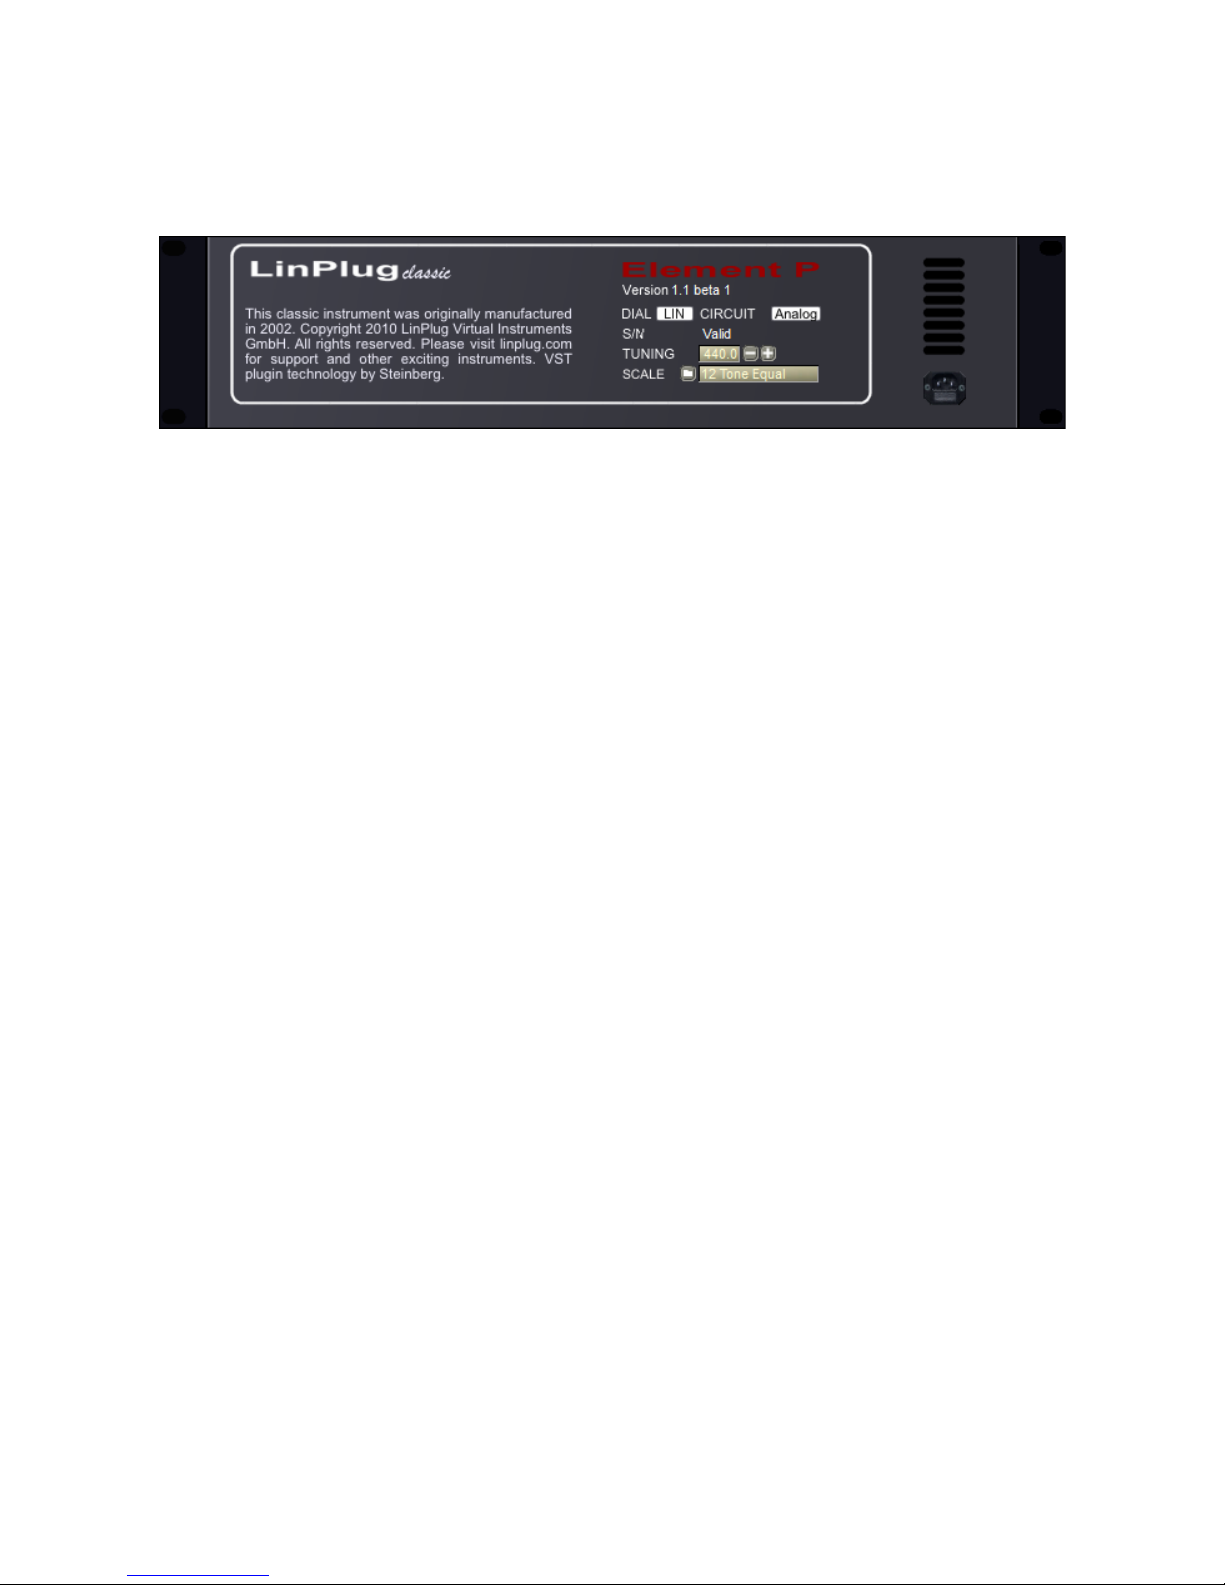
To enter your serial number or to obtain the version information turn around your ElementP
by clicking the ElementP logo in the edit window. You'll see the back side of ElementP with
the copyright notice, the version information and a couple of settings to adjust.
Settings:
Dial Mode
In linear dial mode the knobs of ElementP gets changed by moving the mouse up or down
after clicking on the respective knob. In circular mode you have to rotate the mouse
around the knob for moving it. Choose the one that matches your taste.
Circuit
The original Element P always run in “analog” mode, which mens its sound is not digitally
clean but varies subtle from note to note over time. Its variation gives the sound the typical
analog imperfection. However, with certain sounds or music you will need Element P to
respond 100% accurately with each note, to obtain this switch to “digital” as the precise,
“machine alike” sound.
Serial Number
Has to be entered here to turn the Demo into a full working product without “demo noise”.
Once the serial has been entered correctly (we recommend copy/paste) you see “valid”
here as confirmation.
Tuning
Allows you to change the tuning of Element P from the A = 440.0 Hz to any tuning you
require for a particular music piece.
Scale
Here you can load any alternative Microtonal scale provided as “TUN” file. Such files can
in example be created with the “Scala” software. Element P ships with many alternative
scalings.
Page 5

Base
The Base section allows you to form the basic shape of your sound.
RANGE: Hereby the pitch of the basic sound is controlled in the range from -2 to +4
octaves.
ATTACK: The Attack slider determines the length of time it takes for the amplitude
envelope to reach the full volume.
HOLD: The Hold slider determines the length of time the amplitude envelope is held at the
maximum volume. Note that the maximum value is limited to 100ms (0.1 second) as its a
sound shaping parameter for percussive sounds and not intended to program pad sounds.
DECAY: The Decay slider determines the length of time that the amplitude envelope takes
to return to zero. After the hold time has elapsed the amplitude fades out during the Decay
time.
SOUND: The Sound parameter lets you select a basic harmonic spectrum. Below the dial
you can select one of three spectrums:
- P is the classic Element P spectrum (the only spectrum available in the 2002 version)
- A alternative set A, sine to triangle spectrum
- B alternative set B, another new spectrum
Page 6

TIMBRE
RANGE: Hereby the harmonic content is controlled in a broad range in semitone steps.
This allows you to create harmonic or "clean" and inharmonic sounds.
ATTACK: The Attack slider determines the length of time it takes for the timbre envelope to
reach the full effect on the sound.
DECAY: The Decay slider determines the length of time that the timbre envelope takes to
return to zero effect on the sound. After the hold time has elapsed the timbre fades out
during the Decay time.
ENVELOPE-AMOUNT: Hereby you can control how much the timbre envelope affects the
timbre of the sound.
DRIVE: The Drive parameter lets you adjust how much the timbre is affected at all. If this
parameter is set to maximum the timbre envelope has no further effect.
Page 7

Pitch
You can further shape the sound by playing with the 4 octave ranging Pitch section.
TIM/BAS: You'll find a Timbre "TIM" and Base "BAS" button here. They decide on which
part the pitch envelope goes. To hear the effect of this section one or both switches must
be On and the Depth must be not zero.
DEPTH: With Depth you adjust how drastically the pitch effect is and if its up or down. The
unit is semitones. The range is +-24 semitones or 2 octaves. You can change this
parameter by one semitone at a time by holding the "ALT" key (or "Apple" key on a Mac)
while clicking with the mouse on the upper (increases) or lower (decreases) part of the
knob..
ATTACK: The Attack slider determines the length of time it takes for the pitch envelope to
reach its full intensity.
DECAY: The Decay slider determines the length of time that the pitch envelope takes to
return to zero effect on the sound. After the hold time has elapsed the pitch returns to its
original value during the Decay time.
DETUNE: With the detune you can further fine adjust the frequency relation of the Timbre
and Base section.
Page 8

Noise
COLOR: This parameter lets you change the color or sound of the noise. The rightmost
setting is white noise, the middle setting about pink noise and the leftmost setting quite a
dark rumbling noise. If you can't imagine what white and pink noise should be, don't worry,
try and you'll understand this parameter.
ATTACK: The Attack slider determines the length of time it takes for the noise to reach its
full amplitude.
DECAY: The Decay slider determines the length of time that the noise envelope takes to
return to zero volume. Note that the HOLD Parameter of the Base section does also
influence the noise envelope. After the hold time has elapsed the noise fades out during
the Decay time.
Left of the Noise section there is a parameter named MIX
MIX: Hereby the volume of the Base and Noise gets adjusted. Leftmost is Base only,
rightmost ist Noise only and in the middle you get both on the same level.
Page 9

MAIN
VOLUME: Controls the overall volume of an ElementP Instrument.
VELOCITY CURVE: Controls the response on MIDI Velocity information. The lowest
setting represents a linear response while the topmost setting is an extremely exponential
response.
VELOCITY ATTACK: This parameter controls how much the MIDI Velocity controls the
Attack phase of the sound. If this slider is moved upwards a higher velocity will significantly
shorten attack time. Note that with the Attack parameter set to minimum this parameter
does not have any further effect. If this slider is moved all way down velocity does not
affect the attack phase of the sound.
VELOCITY TIMBRE: Hereby you control how much the velocity controls the Timbre. If this
slider is moved upwards a higher velocity will increase the Drive parameter. So a higher
velocity makes the preset sound brighter. If this slider is moved all the way down, velocity
does not affect the timbre of the sound.
BANK / PRESET NAME: The preset bank and preset name is displayed for your reference
here, you may select another bank or preset by clicking on it.
LOAD: The button labeled with the "folder" icon allows you to load presets saved in
standard fxp format.
PREV/NEXT: Once you have loaded a preset you can use the "arrow" icons on either side
of the "folder" icon to browse within the currently selected directory..
SAVE: The button labeled with the "disk" icon enables you to export ElementP presets.
Clicking this button opens a file dialog allowing you to choose the directory and file into
which the preset is to be saved.
ECS: The Easy Controller Setup lets you control ElementP from nearly any hardware MIDI
controller, its described in the following section.
Page 10

ECS / MIDI Learn
The ECS (Easy Controller Setup) section makes it simple to control the Element P from an
external MIDI controller. All you have to do is switch on the ECS (a menu pops up when
you click at the ECS letters, choose Learn), select a Element P parameter with the mouse
and then send some MIDI messages to the Element P from you MIDI source. That's all
there is to it!
From now on you can change the parameter with that controller.
In addition to this, more than one controller can be defined to change a particular
parameter. In fact, you can define up to 128 parameter-controller-combinations. This does
not depend on the type of controller you have nor the particular MIDI Control Change
messages it sends.
Don't forget to switch off the ECS (pick Off from the menu) after you have finished using it
(the ECS button remains red during ECS activity as a reminder)!
ECS settings can be saved and restored using the "Load" and "Save" functions from the
menu. In addition, a single controller assignment can be cleared using the "Clear" menu
entry. All you have to do is select Clear and select a controls that you wish to be cleared
(deassigned from MIDI CC's). Don't forget to switch off the ECS control after you have
finished clearing assignments!
The “Clear All” function clears all controller assignments at once and the Rest.Fact.
Function means Restore Factory, thus restoring the factory settings as described below.
The following MIDI-CC-parameter-assignments are automatically set up on start-up of
Element P. Of course, the assignments can be replaced with your own preferences using
the Clear / Learn function.
Page 11

MIDI Implementation Chart
Product: LinPlug Element P Synthesizer Version 1.1x Date: 29.March 2010
Function Transmitted Recognized Remarks
Basic Channel
Default no no
Changed no no
Mode
Default no Omni
Changed no no
Note Number
no yes
True Voice no no
Velocity
Note On no yes
Note Off no no
Aftertouch
Poly (Key) no no
Mono (Channel) no no
Pitch Bend no no
Control Change no yes See ECS / MIDI Learn
Program Change no yes
System Exclusive no no
System Common
Song Position no no
Song Select no no
Tune Request no no
System Realtime
Clock no no
Commands no no
Aux Messages
Local On/Off no no
All Notes Off no yes
Active Sensing no no
System Reset no yes
 Loading...