

Linksys Desktop Phone User Manual

Linksys
DesktopPhoneSetup
User Guide
Version1.0
Updated
4/29/2008

Overview
This guide provides an overview of setting up and provisioning a Linksys phon e.
General Support
If you have questions or need technical assistance with Evolution PBX call (888)
587-5750 or send an Email to support@intuitivevoice.com
.
If you have questions about third party hardware or software please visit the following
Websites:
• Snap: http://www.snapanumber.com
• iView: http://www.i9technologies.com/
• Cisco VoIP Telephones: http://www.cisco.com
• CounterPath Software Telephones - http://www.counterpath.com
• Digium PCI Cards: http://www.digium.com
.
.
.
.
.
• Linksys Analog Terminal Adapters and VoIP telephones: http://www.linksys.com
• Polycom VoIP Telephones: http://www.polycom.com
.
My Evolution PBX Doesn’t Do That!
Some features and configuration options in this document may only be available with a
recent software upgrade available from Intuitive Voice Technology. Email
support@intuitivevoice.com
to learn more about Evolution PBX upgrades (please explain
the feature that you are interested in).
Errata
Please report errors or confusing descriptions by sending an Email to
support@intuitivevoice.com
.
.
Page 2 of 8
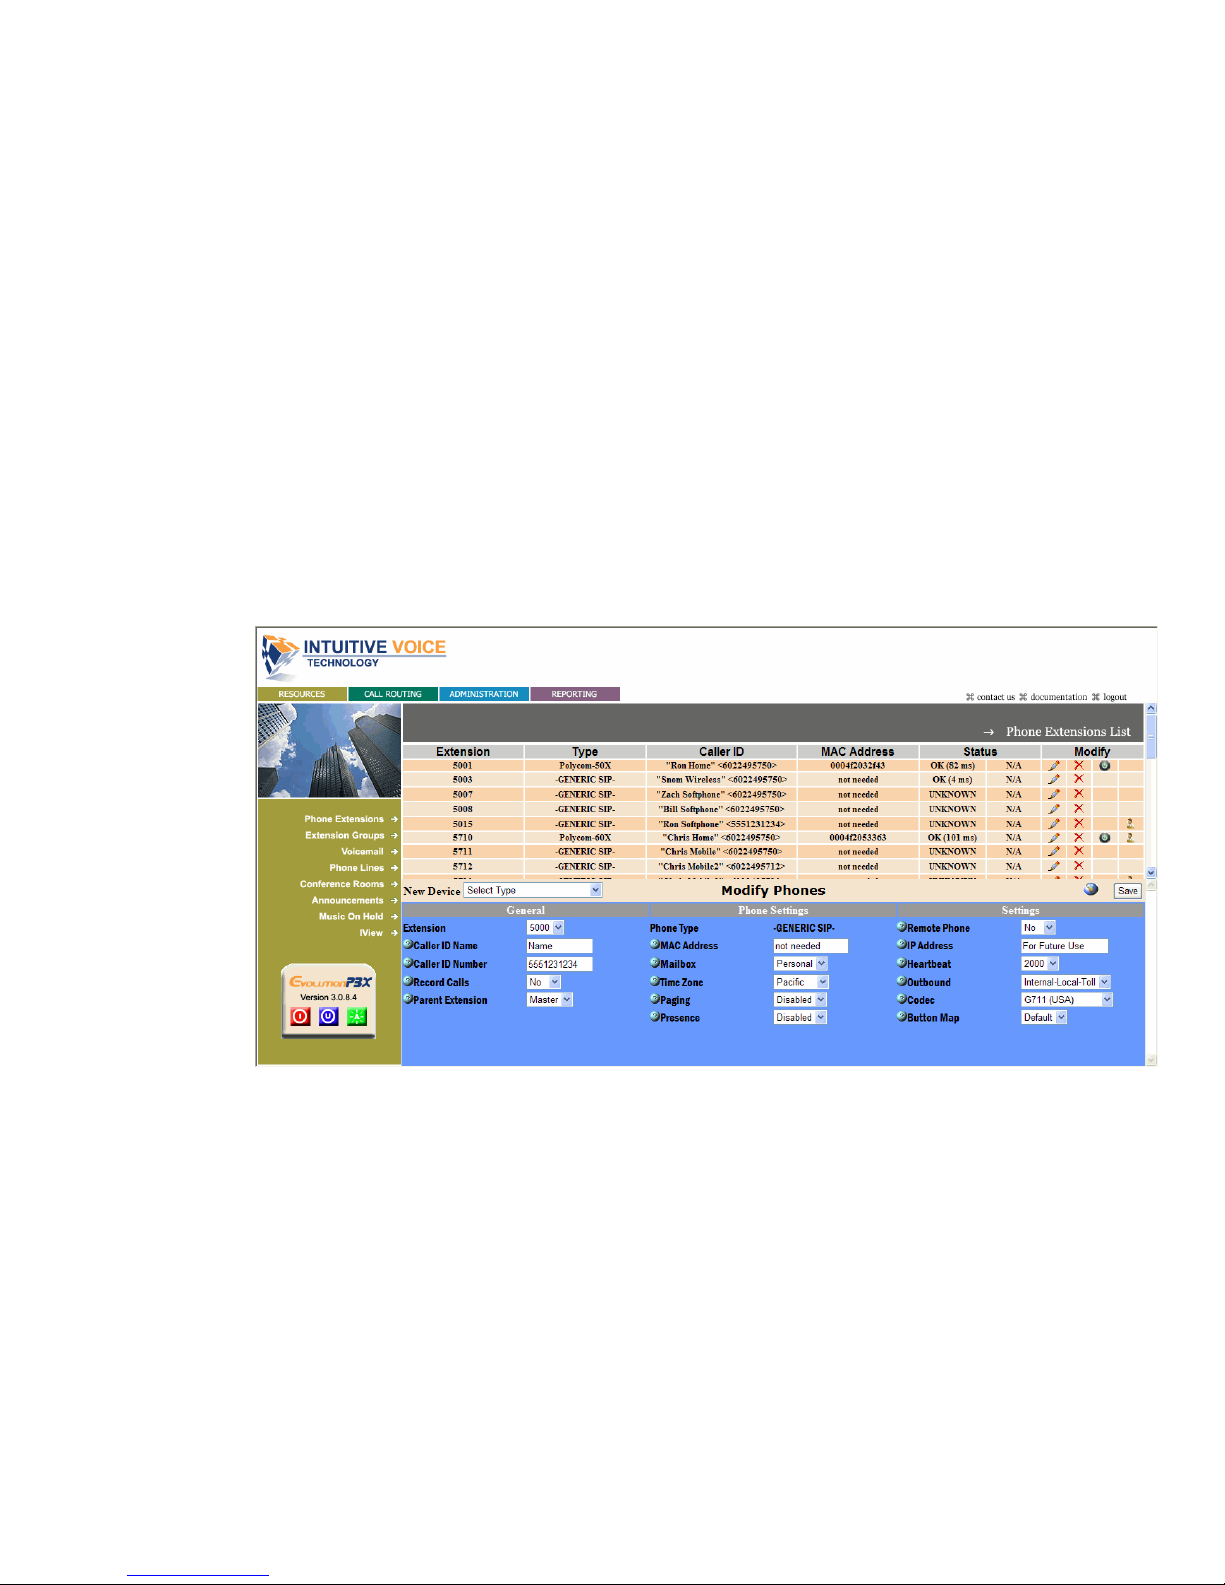
SettingUpaLinksysPhoneinEvolutionPBX
To Set up a Linksys Phone in Evolution PBX
1. Login to Evolution, Click the Resources tab, click Phone Extensions then click
on the Select Type field and select VoIP – GENERIC SIP.
2. In the Extension drop down, select an extension.
3. In the Caller ID Name field, enter a name to be displayed on caller ID for this
extension.
4. In the Caller ID Number field, enter a number that will be displayed on caller ID
for this extension.
5. In the Record Calls field, select Yes to record all calls made on this extension or
No to disable this feature.
6. In the Parent Extension field, select Master (available on the platinum version
of Evolution PBX).
7. In the MAC Address field, enter the MAC address from the back of the phone
configured for this extension.
8. In the Mailbox field, select Personal to create a personal mailbox for this
extension.
9. In the Time Zone field, select your time zone.
Page 3 of 8
 Loading...