

Linksys BEFW11S4 Quick Start Manual
This sheet will guide you through the basic steps needed to install the
EtherFast®Wireless Access Point + Cable/DSL Router with 4-Port
Switch onto your network. If you have any problems during installation,
refer to the Troubleshooting section of the User Guide.
Befor
Befor
e Y
e Y
ou Start...
ou Start...
You will need the following values from your ISP to install the
Wireless AP + Cable/DSL Router (if the information is applicable).
Your broadband-configured PCs fixed Internet IP Address
Your broadband-configured PCs Computer and Workgroup
Names
Your Subnet Mask
Your Default Gateway
Your ISPs DNS IP Address
Installing the EtherFast
Installing the EtherFast
®
®
WWirireless
eless
Access Point + Cable/DSL Router
Access Point + Cable/DSL Router
Onto Y
Onto Y
our Network
our Network
1. Power everything down, including your PCs, cable or
DSL modem, and the Router.
2. Connect a network cable from one of your PCs’ Ethernet
ports to one of the LAN Ports on the back of the Router.
Do the same with all the PCs you wish to connect to the
Router. (LAN Port 4 will become inactive if you use the
Uplink port.)
3. Connect the network cable from your broadband modem
to the WAN port on the rear of the Router.
4. Connect the power-supply cable to the Power port on the
rear of the router, then connect to a power outlet using the
power cord included in the router’s packaging.
• The Power LED will illuminate green as soon as the
power adapter is connected.
• The Diag LED will illuminate red for a few seconds
while the Router goes through its internal diagnostic test.
The LED will turn off when the self-test is complete.
5. Power on one of your PCs and login if you are asked to.
When you reach the desktop, click the Start button, select
Settings, then select Control Panel.
6. Double-click the Network icon.
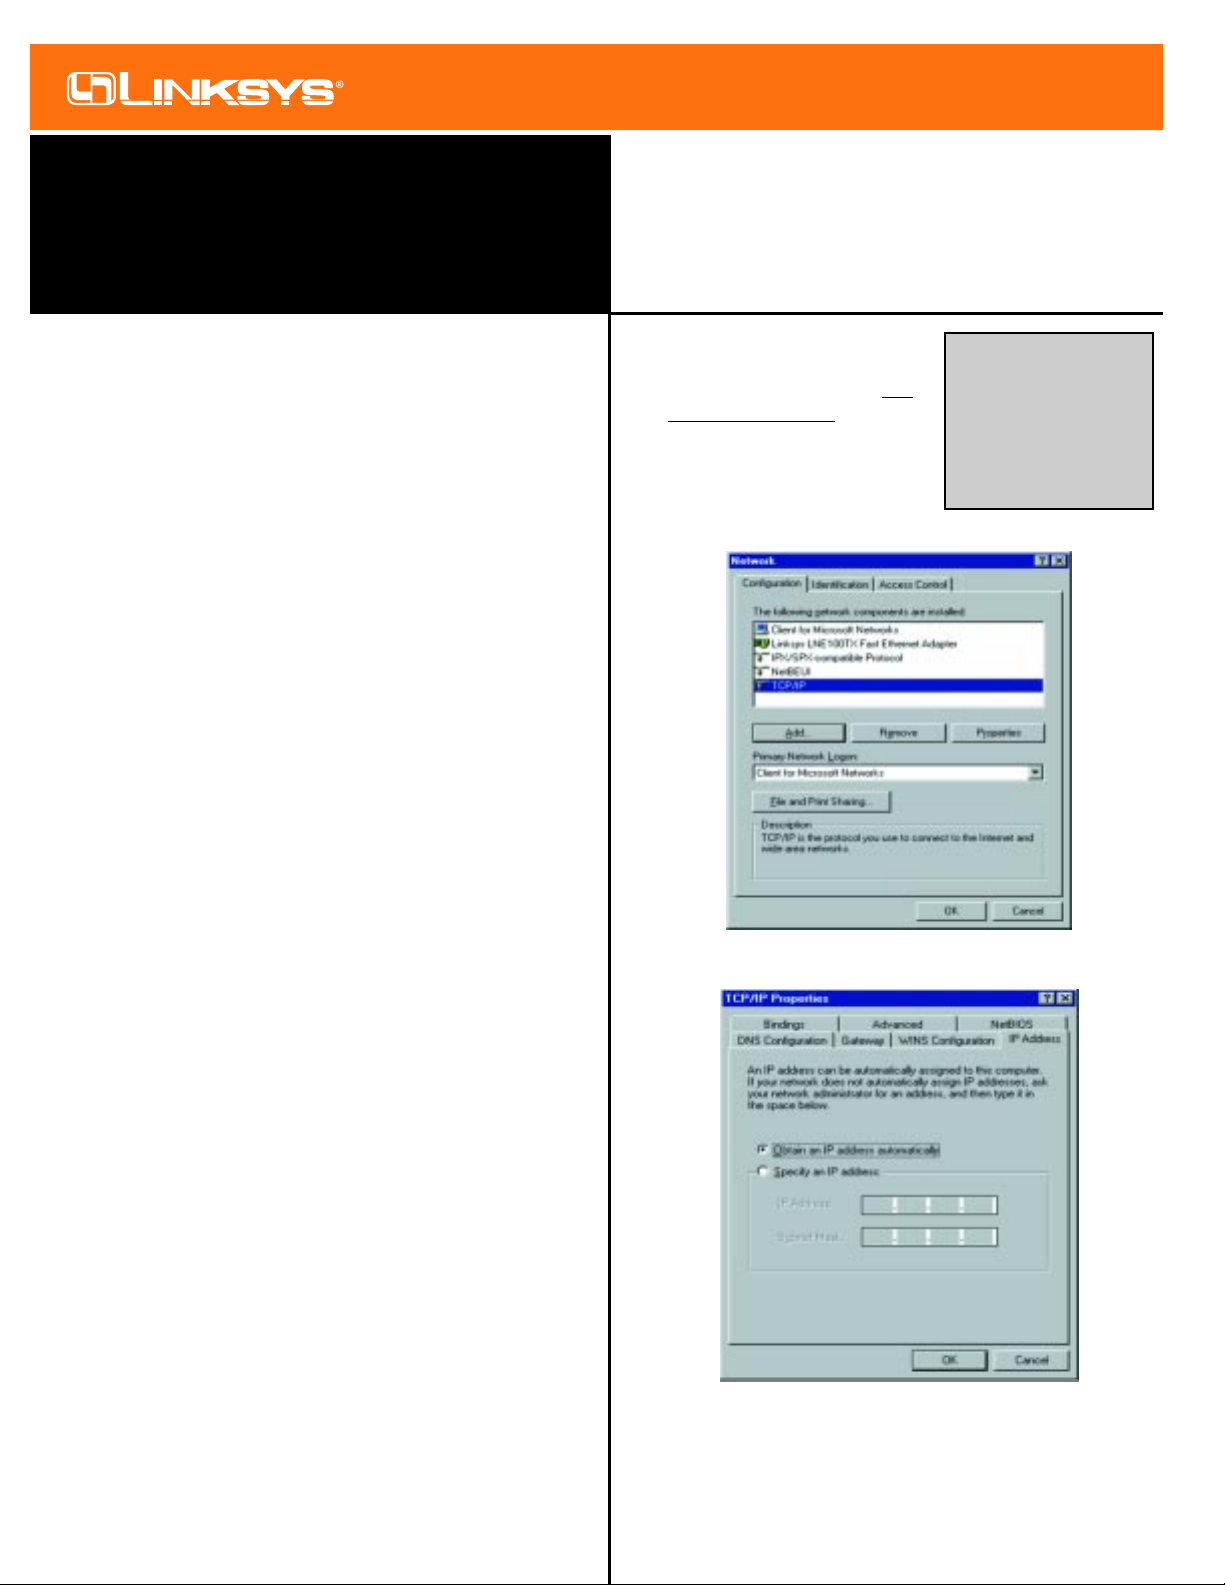
7. In the Configuration window,
highlight the TCP/IP that has
been associated with your net
-
w
ork card or adapter. (Do NOT
configure TCP/IP->Dial-up
Adapter.) Click Properties. If
the TCP/IP Protocol isn’t listed
in the Configuration window,
refer to the User Guide now.
8. Click the IP Address tab. Select Obtain an IP address auto-
matically. Click OK.
9. Click OK again. Windows may begin copying files to your
computer, and then will ask you to restart your PC. Click
Yes to restart your computer and initiate the new settings. If
you aren’t asked, manually restart the computer.
Model No.:BEFW11S4
EtherFast® Wireless Access
Point + Cable/DSL Router
(with 4-Port Switch)
Instant Broadband®Series
Quick Installation
Making Connectivity Easier
™
Continued on back...
NNoottee
: Steps 6-9 will only
work in Windows 95, 98 or
Millennium. If you are using
Windows NT or 2000,
please check your
Windows NT or 2000 documentation to configure
your TCP/IP protocol.
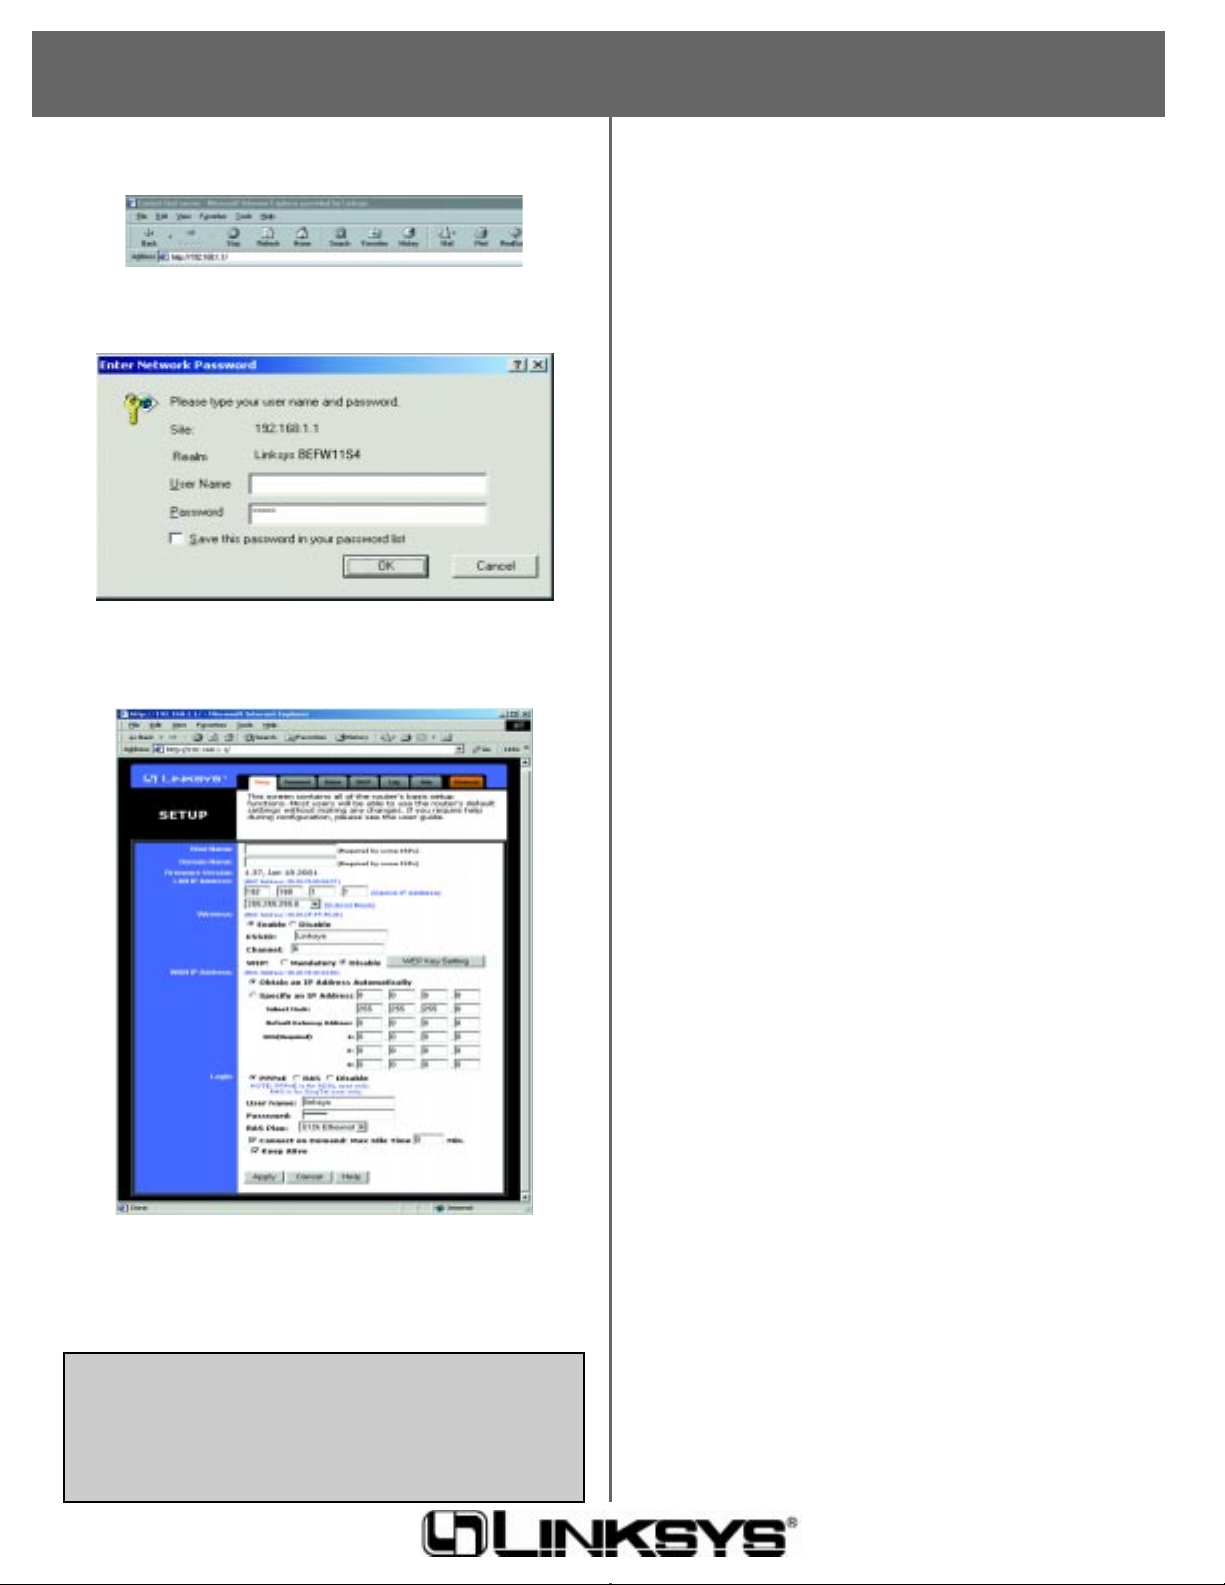
10. Open your PC’s web browser and type http://192.168.1.1 in
the browser’s Address box. Press Enter.
11. A username and password prompt will appear. Leave the
User Name box empty and type “admin” (the default password) in the Password box. Click OK.
12. Configure the following values into the Wir eless Access
Point + Cable/DSL Router’s Setup page. You can get these
values from your ISP. (Not everyone will require the follow-
ing settings. Check with your ISP.)
LAN IP Address These values refer to the internal network
you are creating with your Wireless Access Point +
Cable/DSLRouter. Unless you have specific internal needs,
there should be no reason to change these values.
Wireless These values refer to the wireless settings of your
Wireless Access Point + Cable/DSL Router. To enable wireless options, check the radio box next to Enable and enter
the ESSID and Channel for the Access Point. If you
already have a wireless network, these values must match
your present wireless network settings. If you do not
already have a wireless network, the default settings should
work well.
WAN IP Address These values refer to the outside network
you connect to every time you access your Broadband
Internet connection. Most Broadband ISPs assign their
clients with a different IP address each time they log on. If
this is the case with your ISP, click Obtain an IP Address
Automatically and continue on to step 14. If your PC has
been assigned a fixed IP address by your ISP, click Specify
an IP Address then enter address into the Subnet Mask,
Default Gateway Address and DNS fields. If you are
using PPPoE, select PPPoE and enter your User Name and
Password in the f ields provided. (RAS Settings are for
Singapore customers only. If you are a Singapore customer,
contact your ISP for further information concerning RAS.)
13. When you have properly configured the Setup page, click on
the Apply button. Click Continue.
14. Choose the DHCP tab.
15. Unless you already have a DHCP server on your internal
network, choose Enable from the DHCP Server field.
16. In the Number of DHCP Users box, enter the number of
PCs you plan on networking to the Router, then click
Apply.
17. Click the Continue button, then close your web browser.
Restart your computer to apply the new settings.
18. Before your PC reboots, power down your broadband
modem for three seconds, then power it back on.
19. After your PC reboots, open your web browser to test your
Internet connection.
20. Repeat steps 6-9 as necessary for each PC on your network.
Once you have configured all of the PCs on your network,
the Wireless Access Point + Cable/DSL Router Setup and
Installation is complete.
For instructions on Network Configuration or installing other
network components, refer to your User Guide.
NNoottee
: Check with your ISP to see if you need to enter
RRoouutteerr && DDoommaaiinn
NNaammeess
to be viewed by your ISP’s network. If you do, click on your
SSttaarrtt
button. Choose
CCoonnttrrooll PPaanneell
, then double-click the
NNeettwwoorrkk
icon. Choose the
IIddeennttiiffiiccaattiioonn
tab. There will be a
CCoommppuutteerr NNaammee
and a
WWoorrkkggrroouupp
name displayed here. Enter the
CCoommppuutteerr NNaammee
into
the
RRoouutteerr NNaammee
box on the
Setup Page
, and enter the
WWoorrkkggrroouupp
name into the
DDoommaaiinn NNaammee
box on the
Setup Page
.
QI-BEFW11S4-10123NC DG
 Loading...