

Lincoln TOWN CAR 1997 Owner Manual


Table of Contents
i

ii

iii

iv

Introduction
Ford’s Commitment to You
At Ford Motor Company, excellence is the
continuous commitment to achieve the best result
possible. It is dedication to learning what you want,
determination to develop the right concept, and
execution of that concept with care, precision, and
attention to detail. In short, excellence means being
the standard by which others are judged.
Our Guiding Principles
Quality comes first. For your satisfaction, the
❑
quality of our products and services must be our
number one priority.
You are the focus of everything we do. Our
❑
work must be done with you in mind,
providing better products and services than our
competition.
Continuous improvement is essential to our
❑
success. We must strive for excellence in
everything we do: in our products — in their
safety and value — and in our services, our
human relations, our competitiveness, and our
profitability.
Employee involvement is our way of life.
❑
We are a team. We must treat one another
with trust and respect.
Dealers and suppliers are our partners. We
❑
must maintain mutually beneficial relationships
with dealers, suppliers, and our other business
associates.
Integrity is never compromised. Our conduct
❑
worldwide must be pursued in a manner that is
socially responsible and commands respect for
its integrity and for its positive contributions to
society.
1
ThingstoKnowAboutUsingThis
Guide
Congratulationsonthepurchaseofyournew
vehicle.Thisguidehasinformationaboutthe
equipmentandtheoptionsforyournewvehicle.
Youmaynothaveboughtalloftheoptions
availabletoyou.Ifyoudonotknowwhich
informationappliestoyourvehicle,talktoyour
dealer.
Thisguidedescribesequipmentandgives
specificationsforequipmentthatwasineffectwhen
thisguidewasapprovedforprinting.Fordmay
discontinuemodelsorchangespecificationsor
designwithoutanynoticeandwithoutincurring
obligation.
NOTESandWARNINGS
NOTESgiveyouadditionalinformationaboutthe
subjectmatteryouarereferencing.
2
WARNINGSremindyoutobeespeciallycarefulin
thoseareaswherecarelessnesscancausedamageto
yourvehicleorpersonalinjurytoyourself,your
passengersorotherpeople.Pleasereadall
WARNINGScarefully.
WARNING
FindingInformationinThisGuide
Afteryouhavereadthisguideonce,youwill
probablyreturntoitwhenyouhaveaspecific
questionorneedadditionalinformation.Tohelp
youfindspecificinformationquickly,youcanuse
theQuickIndexortheIndex.
TheQuickIndexattheendofthebookprovides
apagenumberfollowingeachitemwhichindicates
wheredetailedinformationcanbefound.

To use the Index, turn to the back of the book
and search in the alphabetical listing for the word
that best describes the information you need. If the
word you chose is not listed, think of other related
words and look them up. We have designed the
Index so that you can find information under a
technical term.
Your Maintenance Schedule and
Record Booklet
The Maintenance Schedule booklet lists the services
that are most important for keeping your vehicle in
good condition. A record log is also provided to
help you keep track of all services performed.
Canadian Owners — French Version
French Owner Guides can be obtained from your
dealer or by writing to Ford Motor Company of
Canada, Limited, Service Publications, P.O. Box
1580, Station B, Mississauga, Ontario L4Y 4G3.
The Lincoln Commitment
The Lincoln Commitment is more than the prestige
of owning a superior luxury automobile, it is a
comprehensive owner benefits package that is
designed to provide you with services to support
your every driving need. Refer to the Lincoln
Commitment brochure for more information.
About the Warranties
Your vehicle is covered by three types of warranties:
Basic Vehicle Warranty, Extended Warranties
on certain parts, and Emissions Warranties.
Read your Warranty Information Booklet carefully to
find out about your vehicle’s warranties and your
basic rights and responsibilities.
If you lose your Warranty Information Booklet, you
can get a new one free of charge. Contact any Ford
or Lincoln-Mercury dealer, or refer to the addresses
and phone numbers on the first page of this
Owner’s Guide.
3

Ford Extended Service Plan
More Protection for Your Vehicle
You can get more protection for your new car or
light truck by purchasing a Ford Extended Service
Plan (Ford ESP). Ford ESP is the only extended
service program with the Ford name on it and the
only service contract backed by Ford Motor
Company.
Ford ESP is an optional service contract, backed and
administered by Ford. It provides:
protection against repair costs after your Bumper
❑
to Bumper Warranty expires;
and
other benefits during the warranty period (such
❑
as: reimbursement for rentals; coverage for
certain maintenance and wear items).
4
You may purchase Ford ESP from any participating
Ford Motor Company dealer. There are several Ford
ESP plans available in various time-and-mileage
combinations. Each plan can be tailored to fit your
own driving needs, including reimbursement
benefits for towing and rental. (In Hawaii, rules
vary. See your dealer for details.)
When you buy Ford ESP, you receive peace-of-mind
protection throughout the United States and
Canada, provided by a network of more than 5,100
participating Ford Motor Company dealers.
NOTE: Repairs performed outside the United States
and Canada are not eligible for ESP coverage.
This information is subject to change. Ask your
dealer for complete details about Ford ESP coverage.

Breaking Your Vehicle In
Your new vehicle goes through an adjustment or
break-in period during the first 1,000 miles
(1,600 km) that you drive it. During the break-in
period, you need to pay careful attention to how
you drive your vehicle.
Avoid sudden stops. Because your vehicle has
❑
new brake linings, you should take these steps:
—Watch traffic carefully so that you can
anticipate when to stop.
—Begin braking well in advance.
—Apply the brakes gradually.
The break-in period for new brake linings
lasts for 100 miles (160 km) of city driving
or 1,000 miles (1,600 km) of highway
driving.
Use only the type of engine oil that Ford
❑
recommends. See Engine oil recommendations
in the Index. Do not use special “break-in” oils.
5

Instrumentation
The instrument panel (dashboard) on your vehicle is
divided into several different sections. The
illustrations on the following pages show the major
parts of the instrument panel that are described in
this chapter. Some items shown may not be on all
vehicles.
The main controls for the climate control system,
clock, and radio are on the instrument panel.
If you have radio transmitting equipment in your
vehicle, be aware that it can interfere with your
vehicle’s electrical system and may cause the
instrumentation and/or convenience products to
have temporary, abnormal operation.
NOTE: Any cleaner or polish that increases the
gloss (shine) of the upper part of the instrument
panel should be avoided. The dull finish in this area
is to help protect the driver from undesirable
windshield reflection
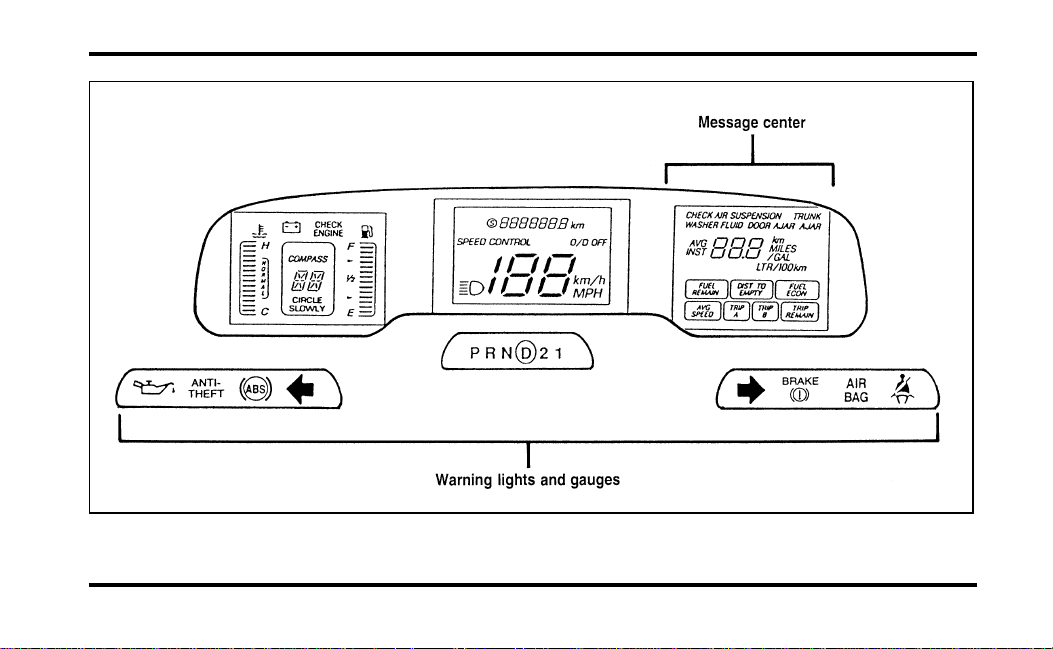
In your vehicle, the warning lights and gauges are
grouped together on the instrument panel. We call
this grouping a cluster. Your vehicle has an
electronic cluster.
7

The Electronic Cluster
The electronic cluster works only when your
ignition is in the ON position. Each time you start
your vehicle, the displays go through a self-test by
flashing on and off once before the actual readings
are displayed. (Neither the turn signals nor the high
beam indicator light will flash like the other
indicators do for the self-test.) Some of the warning
lights will flash on and remain on (will not
immediately flash off) until the normal cluster
display is lit. This self-test is used to indicate that
all of the warning/indicator lights are working
properly.
8
Your electronic cluster tells you about the condition
of your vehicle by using two types of equipment:
warning lights and gauges
❑
message center
❑
9
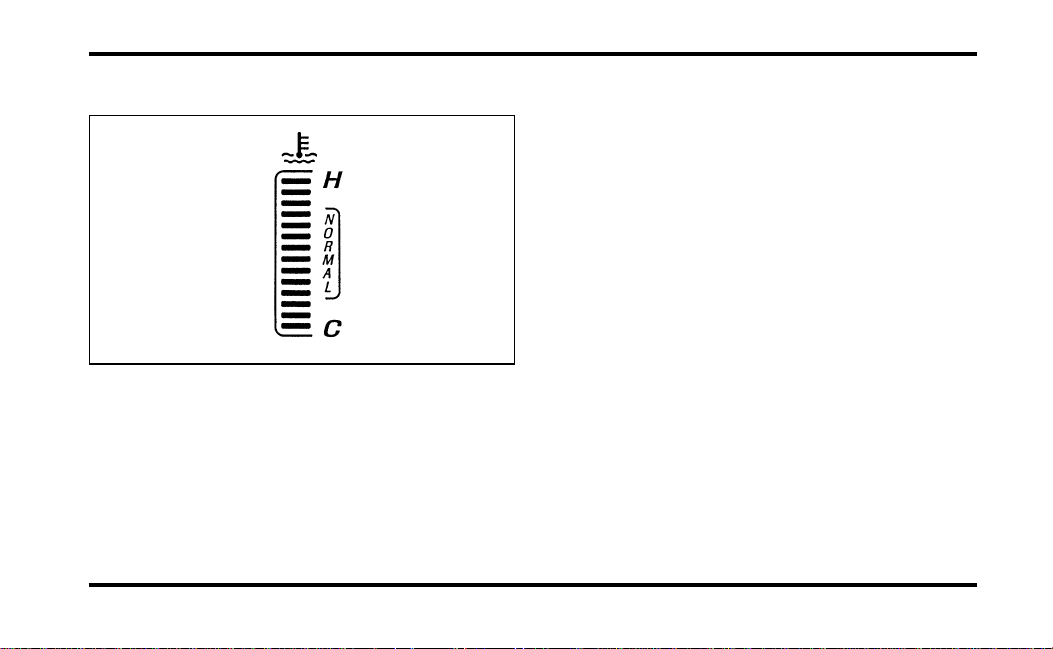
Engine Coolant Temperature Gauge
This gauge indicates the engine coolant temperature
not the coolant level. If the coolant is not at its
proper level or mixture, the gauge indication will
not be accurate. It is identified by a thermometer
symbol, an “H” (hot), and a “C” (cold). The
“NORMAL” indicates the normal operating range.
The bars will move into the normal operating range
10
as the engine coolant warms up. It is acceptable
under certain driving conditions such as, heavy stop
and go traffic, or driving up hills in hot weather, for
the gauge to indicate at the top of the NORMAL
band.
If, under any circumstance, the pointer moves
above the NORMAL band, the temperature symbol
flashes and a tone will sound to alert the driver
that the engine coolant is overheating and
continued operation may cause engine damage.
If your engine overheats:
1. Pull off the road as soon as it is safely possible.
2. Turn off the engine. If you do not stop the
engine as soon as safely possible, severe engine
damage could result.
3. Let the engine cool. DO NOT REMOVE
COOLANT SYSTEM FILL CAP UNTIL THE
ENGINE IS COOL.

4. Check the coolant level following the
instructions on checking and adding coolant to
your engine, see Engine Coolant in the Index.
If you do not follow these instructions, you or
others could be injured.
If the coolant continues to overheat, have the
coolant system serviced.
If only the top two and bottom two bars appear on
the gauge, then the system is indicating that it
requires servicing. Contact your dealer for service as
soon as possible.
Anti-Lock Brake System Light
This warning light will go on each time you start
your vehicle. If it remains on for longer than 5
seconds, you should shut off your engine and
restart. If the anti-lock brake light stays on, this
indicates that the anti-lock feature is disabled and
should receive immediate attention by a qualified
service technician. Normal braking is not affected
unless the brake warning light is also lit.
The Anti-Lock Brake System has self-check
capabilities. As previously described, the system
turns on the anti-lock light each time you start your
engine. After the engine is started and the anti-lock
light is out, the system performs another test the
first time the vehicle reaches 14 mph (22 km/h).
The system turns on the Anti-Lock Brake System
(ABS) pump motor for approximately 1/2 second.
At this time a mechanical noise may be heard. This
is a normal part of the self-check feature. If a
malfunction is found during this check the anti-lock
light will come on.
11
WARNING
Iftheanti-lockbrakesystemwarning
lightremainsonorcomesonwhile
driving,havethebrakingsystem
checkedbyaqualifiedservice
technicianassoonaspossible.
12
BrakeSystemLight
Thewarninglightforthebrakescanshowtwo
things—thattheparkingbrakeisnotfully
released,orthatthebrakefluidlevelislowinthe
mastercylinderreservoir.Ifthefluidlevelislow,
thebrakesystemshouldbecheckedbyaqualified
servicetechnician.
Thislightcomesonbrieflywhenyouturnthe
ignitionkeytoON,butitnormallygoesoffshortly
aftertheenginestartsandyoureleasetheparking
brake.Ifthelightstaysonorcomesonafteryou
havereleasedtheparkingbrakefully,havethe
hydraulicbrakesystemserviced.
WARNING
TheBRAKElightindicatesthatthe
brakesmaynotbeworkingproperly.
Havethebrakescheckedimmediately.
SafetyBeltWarningLightandChime
Thiswarninglightandchimeremindyoutofasten
yoursafetybelt.Thefollowingconditionswilltake
place:
Ifthedriver’ssafetybeltisnotbuckledwhen
❑
theignitionisturnedtotheONposition,the
lightwillturnonfor1to2minutesandthe
chimewillsoundfor4to8seconds.
Ifthedriver’ssafetybeltisbuckledwhilethe
❑
lightisonorthechimeissounding,boththe
lightandthechimewillturnoff.
Ifthedriver’ssafetybeltisbuckledbeforethe
❑
ignitionisturnedtotheONposition,neither
thelightnorthechimewillturnon.
HighBeamLight
Thislightilluminateswhentheheadlampsare
turnedtohighbeamorwhenyouflashthelights.
13
Check Engine Warning Light
This light illuminates when the engine’s Emission
Control System requires service. It will also
illuminate when the ignition key is in the ON
position and the engine is off.
14
Air Bag Readiness Light
The air bag system uses a readiness light and a tone
to indicate the condition of the system. The
readiness light is in the instrument panel. When
you turn the ignition key to the ON position, this
light will light up for six (6) seconds and then turn
off. This indicates that the system is operating
normally. NOTE: Regularly scheduled maintenance
of the air bag system is not required.
If the light fails to illuminate, continues to flash,
remains on, or you hear a beeping sound, have the
system serviced at your Ford or Lincoln-Mercury
dealer immediately.
Charging System Warning Light
This light comes on when you turn your ignition
key from OFF to ON (engine off). The light should
go out when the engine starts and the alternator
begins to charge.
If this light stays on or comes on while your engine
is running, this tells you that your battery is not
being charged and that you need to have the
electrical system checked as soon as possible.
Engine Oil Pressure Light
This light indicates the lack of engine oil pressure,
not the oil level. However, if your engine’s oil level
is low, it could affect the oil pressure. The light
should come on every time your ignition key is
turned to ON or START, and should go out when
the engine starts. If the light stays on or turns on
while the engine is running, you have lost oil
pressure and continued operation will cause severe
engine damage.
15
If you lose engine oil pressure:
1. Pull off the road as soon as safely possible.
2. Shut off the engine immediately. If you do not
stop the engine as soon as safely possible,
severe engine damage could result.
3. Check the engine’s oil level, following the
instructions on checking and adding engine oil,
see Engine Oil in the Index. If you do not
follow these instructions, you or others could
be injured. To assure an accurate reading, your
car should be on level ground.
4. If the level is low, add only as much oil as
necessary before you start the engine again. Do
not overfill. Do not operate the engine if the
light is on, regardless of the oil level. Contact
your nearest dealer for further service actions.
For more information about adding oil, see Adding
engine oil in the Maintenance and Care chapter of
this guide.
16
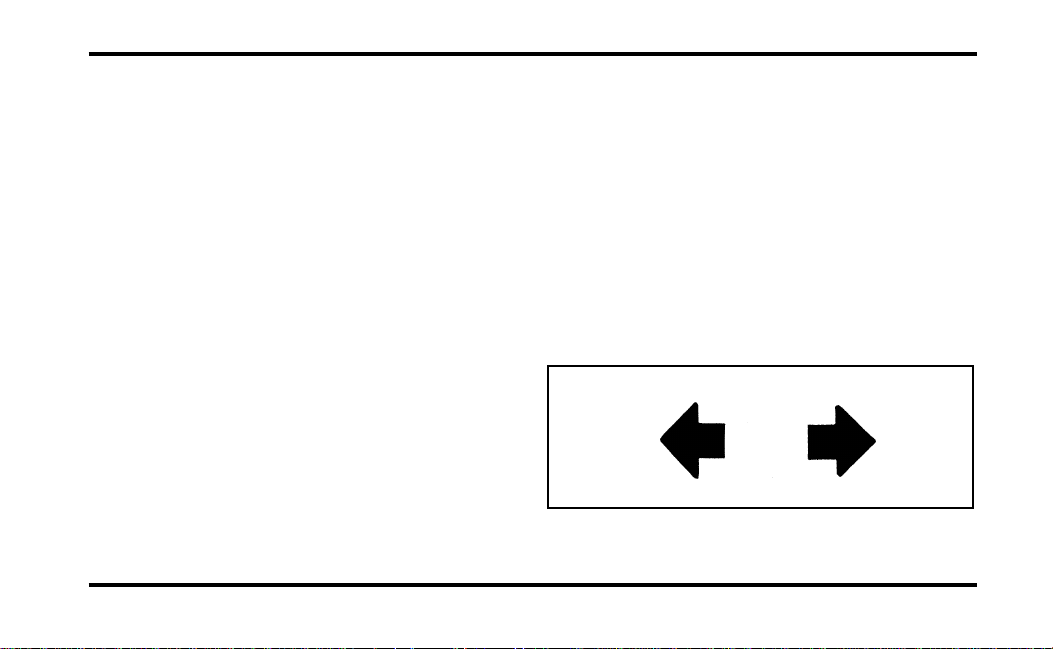
Turn Signal Indicator Lights
When you push the turn signal lever up before
making a right turn, the right side arrow on the
instrument panel flashes.
When you push the turn signal lever down before
making a left turn, the left side arrow on the
instrument panel flashes.
Usually, the turn signals turn off automatically after
you turn your vehicle. If the turn signal continues
to flash after you have made the turn, push the
lever back to the OFF position.
If one or both of your turn indicators do not flash
or stay on continuously, have them serviced as soon
as possible. In the meantime, be sure to use the
accepted hand signals.
Speed Control Indicator Light
This light comes on when the speed control system
is actively maintaining the set speed. It will go off
when the brakes are used or if the speed control is
turned off.
This light does not indicate any problems but is
only a convenience to tell when the speed control
is active.
Fuel Gauge
The ignition switch must be in the OFF position
before adding fuel to the tank for proper gauge
operation.
A problem is indicated if the fuel gauge bar graph
displays only the top two bars and the bottom two
bars and the digital “FUEL REMAIN” or “DIST TO
EMPTY” display “CO” or “CS”. If this happens,
contact your dealer for service as soon as possible.
17
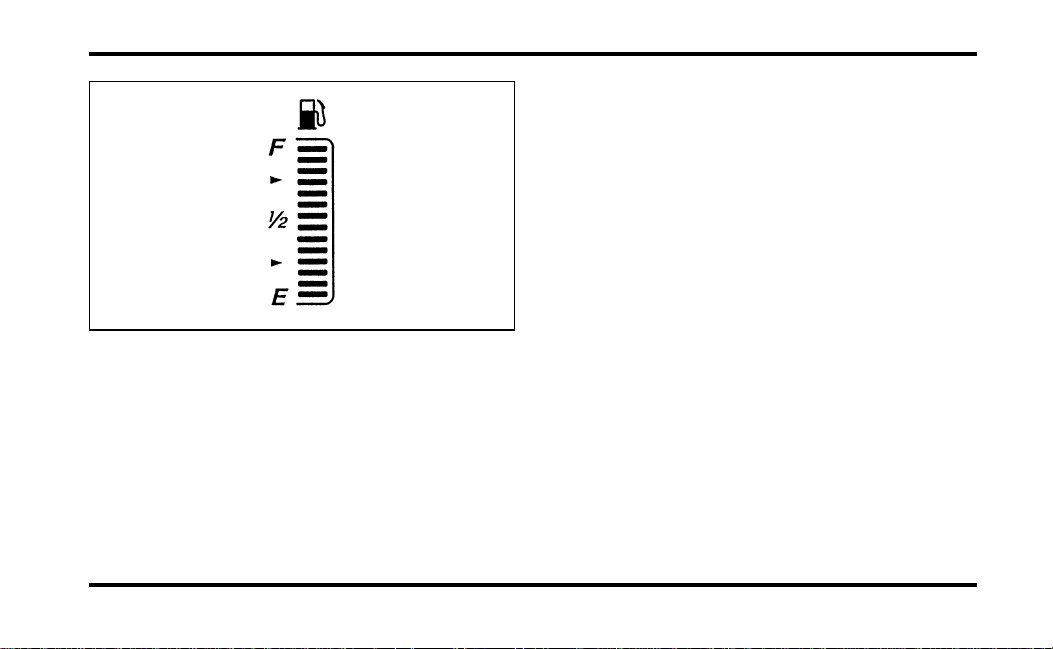
The fuel gauge symbols indicate the remaining fuel:
“F” means full, “1/2” means half-full and “E”
means empty.
18
Low fuel alert
When the fuel level drops to approximately 1/8 of
a tank, a flashing fuel pump symbol is displayed.
If you want to calculate fuel economy, use the
message center buttons instead of the fuel gauge bar
graph indicator. It is likely to give you a much
more accurate figure.
NOTE: At least 2.5 gallons (9.5 liters) of fuel must
be added for the fuel gauge to immediately show
the next level of fuel. If less than 2.5 gallons (9.5
liters) of fuel is added, the gauge will reach the
new level slowly.

Compass Display (If Equipped)
The Compass can display direction indicated by N,
S, E, W, NE, NW, SE and SW. The sensor for the
compass display is located on the back side of the
rear view mirror. The Compass can be set to one of
15 geographic zones.
To set the ZONE, first locate the compass module
on the center rear view mirror post. Press and hold
the reset button located on top of the compass
module until the display in the message center
changes to show the current zone setting (1-15).
Release the reset button and press it agian
repeatedly until the current zone is displayed (see
zone map). After 10 seconds the display will return
to normal. Your zone will then be updated.
The Compass is continually self-calibrating and
should not require calibration, however a
manual-calibrating mode can be initiated.
NOTE: Compass calibration requires that the
vehicle be driven 2-3 mph (3-5 km/h) in at least
two 360 degree circles. A safe location free of
vehicle and pedestrian traffic will be required. To
manually calibrate the compass, locate the reset
button on the top side of the compass module.
Press and hold the reset button until the Compass
display indicates “CIRCLE SLOWLY”. Once the
button has been released, slowly drive the vehicle
in circles until the “CIRCLE SLOWLY” indicator
disappears. This may require several complete
circles.
19
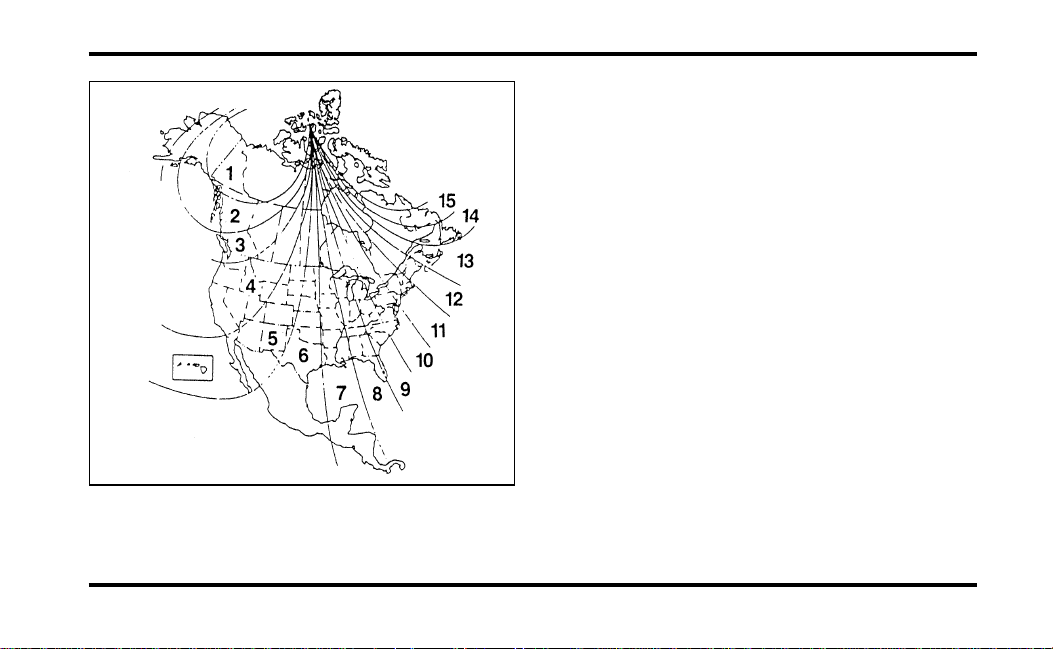
Zone map
20
Factors Affecting Compass Accuracy
The compass reading can be affected when you
drive near a number of things — such as large
buildings, bridges, power lines, and powerful
antennas.
Your compass can also be affected by magnetic or
metallic objects placed in or on the compass sensor
(the sensor is loacated on the inside rearview mirror
bracket). If the compass is giving inaccurate
readings, perform the calibration procedure.
Speedometer
The speedometer tells you how many miles
(kilometers) per hour your vehicle is moving. It
indicates the speed up to 120 mph or up to
199 km/h.
You can press the E/M (English/Metric) button
located just below the message center display to
show the speed you are going in either miles per
hour or kilometers per hour.

Odometer
The odometer tells you the total number of miles or
kilometers your vehicle has been driven. If the
cluster is replaced, and the accumulated mileage on
the odometer is unknown, the replacement cluster
will have the circled “S” illuminated with zero
miles on the odometer. If the actual vehicle mileage
can be verified, then an authorized service center
can program the actual mileage into the odometer
of the replacement cluster. The actual mileage (if
known) or an estimated mileage (if unknown) is
shown on a label affixed on the door pillar.
Press the E/M (English/Metric) button located just
below the message center display to show miles or
kilometers.
If the odometer displays the word “ERROR” contact
your dealer for service.
The Electronic Message Center
Along with information the warning lights and
gauges provide, the electronic message center lets
you:
see problems such as Door Ajar, Air Suspension,
❑
Trunk Ajar, Washer Fluid
see how many miles/kilometers you can drive
❑
with the fuel remaining in your tank
see how many gallons/liters of fuel are
❑
remaining
monitor your average fuel economy
❑
monitor your instantaneous fuel economy
❑
monitor your average speed
❑
check the distance you have travelled during a
❑
trip on either Trip A or Trip B
check the distance remaining from a set value
❑
during a trip
21
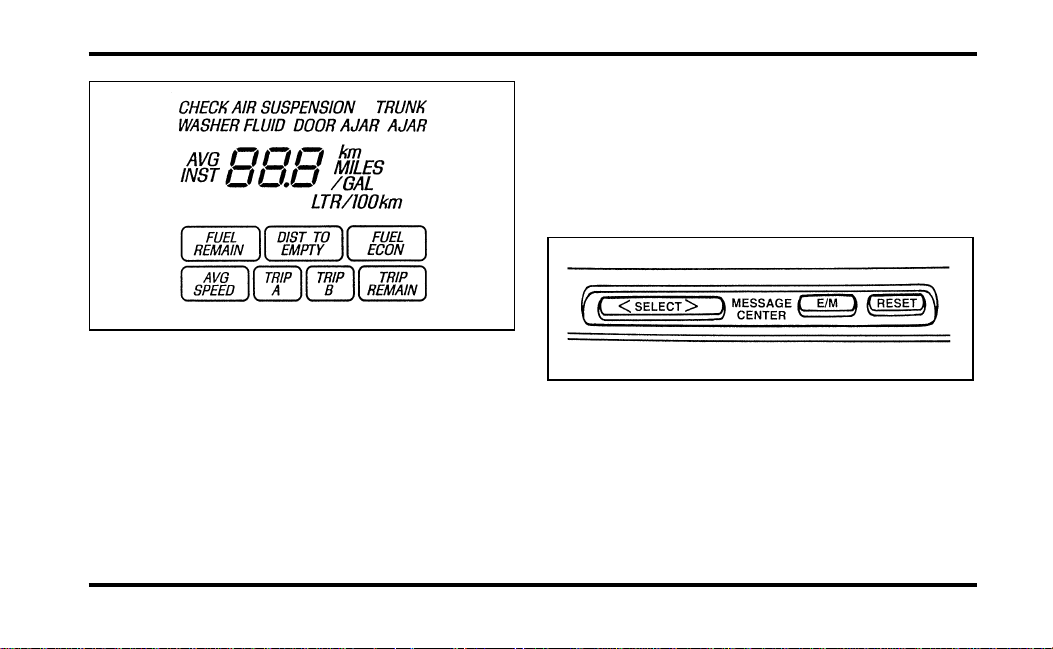
All of the message center functions are controlled
by the three switches located just below the radio
controls in the center of the instrument panel.
E/M — Changes the electronic instrument
❑
cluster and the electronic temperature control
display to read in either English or Metric units.
22
Reset — Sets the selected function to zero (if
❑
resettable).
Select — Selects the function. This is a dual
❑
action switch, the right side advances function
to the right, the left side advances function to
the left.
How to use the message center
To reset any function:
1. Push either the right or left side of the SELECT
button to choose the function you would like
to set.
2. Push the RESET button and the selected
message center function will be reset to zero.
(The only functions which can be reset to zero
are: AVG ECON, TRIP A or TRIP B, and AVG
SPEED.)
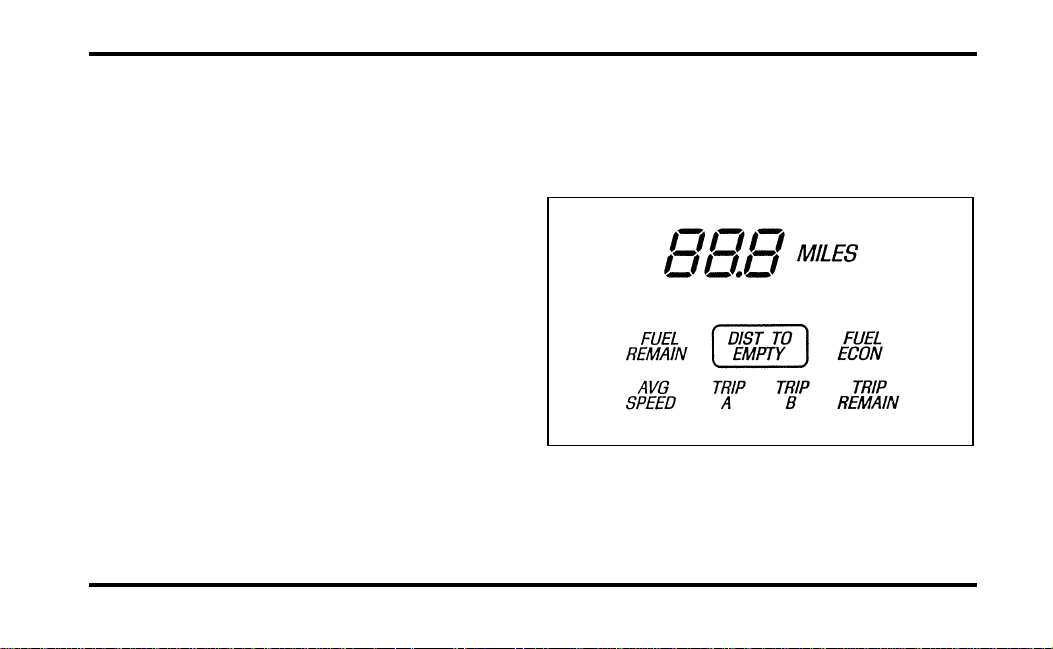
What the message center functions can
show you
DIST TO EMPTY — Distance to Empty
(DTE)
23
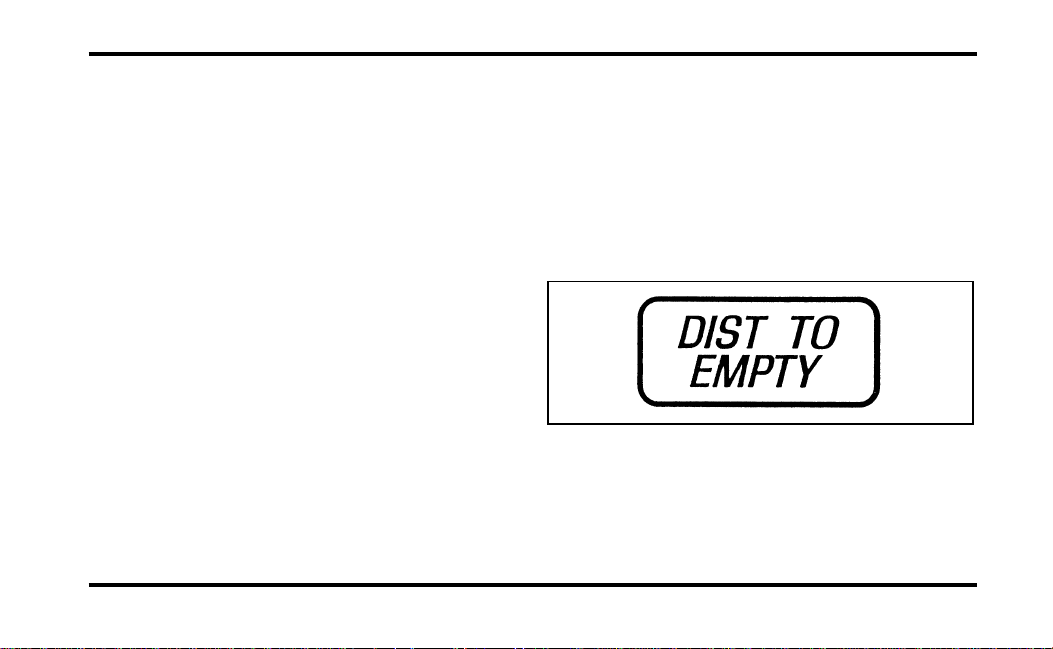
This function estimates how many miles or
kilometers you can drive with the fuel remaining in
your tank under standard driving conditions.
Remember to turn off the ignition when filling up
with fuel. Otherwise, the display will not show the
addition of fuel for a few miles.
When you have approximately 50 miles (80 km)
left before you run out of fuel, the DTE function
will flash for five (5) seconds and sound a tone for
one (1) second. The message center will remain in
the DTE function until you push the select button
to change it. This low fuel warning also happens at
25 miles (40 km), and 10 miles (16 km).
24
Displayed DTE will not be equal to AVG ECON
multiplied by the FUEL REMAIN value. This is
because DTE is calculated using a method that
takes into consideration the fuel economy of the
last 500 miles (800 Km) driven.
NOTE: When refueling, at least 2.5 gallons (9.5
litres) of fuel must be added for fuel gauge to
immediately show the next level of fuel.
If “CO” or “CS” is displayed, this means that there
is a problem with the fuel indication system and
you should contact your dealer for service as soon
as possible.
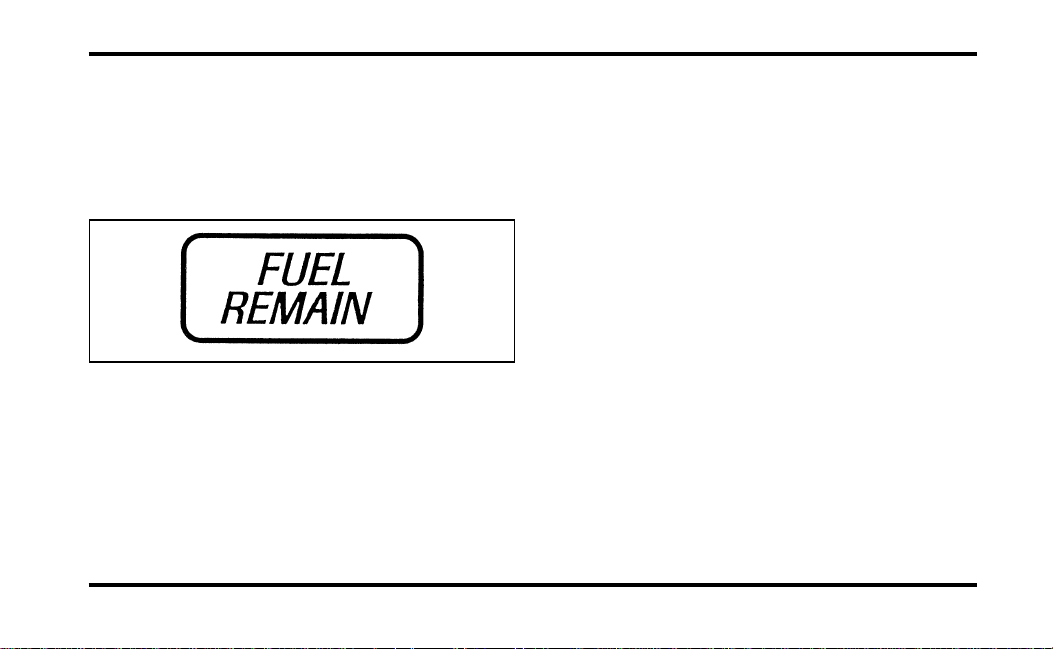
FUEL REMAIN — Fuel Remaining
This function shows you how many gallons (liters)
of fuel you have left in the fuel tank.
If your fuel level is above 20 gallons (75.7 liters),
the letter “F” (full) will appear on the display. But
if your fuel level has dropped to below 1 gallon (4
liters), the letter “E” (empty) will appear in the
display.
Because of factors like rounding of numbers and
fuel movement in the tank, your fuel gauge and the
service station fuel pump readings may disagree
slightly.
A problem is indicated if the fuel gauge bar graph
displays only the top two and bottom two bars and
the message center display for Distance To Empty
or Fuel Remaining functions display the letters
“CO” or “CS”. If this happens, contact your dealer
for service as soon as possible.
25
 Loading...