

Page 1

Navigation System
if equipped
Page 2

Table of Contents
Introduction
System introduction 5
Driving restrictions 6
What is SYNC威?7
Safety information 8
How to get going 8
System overview
Map display options 21
Display voice commands 22
Status bars 22
Home screen 22
Loading pictures 23
Reverse camera 24
Quick reference chart 25
Setting the clock 27
Voice recognition system overview
How to use voice commands 33
Adjusting the voice prompt volume 35
Voice recognition tutorial 36
Tutorial voice commands 37
Voice name tags 37
User profiles 37
5
14
31
Audio features
AM/FM 42
Satellite radio (if equipped) 47
CD 49
Playing a DVD in the system 53
Jukebox features 55
Recording (saving) music to your jukebox 56
Accessing the music in your jukebox 57
Creating a playlist 58
User Device (if equipped) 62
Rear DVD voice commands 63
DVD (if equipped) 64
2009 Centerstack (ng1)
Supplement, 2nd Printing
USA (fus)
41
1
Page 3

Table of Contents
Climate features (if equipped)
Climate voice commands 67
Information menu
Where am I? 69
Hybrid information (if equipped) 69
SIRIUS Travel Link 73
SIRIUS Travel Link voice commands 78
Accessing your calendar 79
Accessing the help screen 79
Sound menu features
Setting a destination
Setting a destination by voice 84
Quick destination options 84
Standard destination options 86
Destination voice commands 94
Quick touch buttons 97
Map icons 98
Navigation route preferences
Map preferences 102
Route preferences 103
66
69
81
83
100
General Information
Map updates 108
Navigation end user license agreement 108
Glossary 114
SYNC姞 phone features (if equipped)
Phone dependent features 118
Quickstart - How to get going 118
Pairing your phone through your navigation system 118
Making a call 120
2
2009 Centerstack (ng1)
Supplement, 2nd Printing
USA (fus)
108
118
Page 4

Table of Contents
SYNC威 phone features 121
Saving a contact or phone number as a Quick Dial 122
Accessing your phone book 123
Call history 124
System settings 124
Adding (pairing) a phone 125
Connecting a phone 126
Deleting a phone 126
Advanced settings 127
Turning Bluetooth on/off 128
911 assist™ 129
Vehicle health report 133
Setting a ring tone 137
Message notification 138
Automatically download your phone book 139
Modifying your phone book and call history 140
Turning prompts on/off 142
Returning to factory defaults 143
Performing a master reset 144
Installing new vehicle applications 144
Accessing SYNC威 system information 145
Text messaging with your navigation system 146
Forwarding a text message 150
Voice commands in phone mode 151
SYNC姞 media features (if equipped)
Connecting your digital media player to SYNC威 153
SYNC威 media features 154
What’s playing? 155
Supported player, media formats and metadata information 155
Accessing and using your USB port 155
Streaming music from your phone 156
Using the Auxiliary input jack (Line in) 157
Using the play all feature 158
Selecting and playing specific artists 159
Selecting and playing specific albums 160
Selecting different genres 160
Accessing your playlists 161
Playing a specific track 162
2009 Centerstack (ng1)
Supplement, 2nd Printing
USA (fus)
153
3
Page 5

Table of Contents
Exploring the USB device 162
Accessing BT devices 163
Adding a new device in discovery or discoverable mode 164
Voice commands in media mode 164
DVD interaction (if equipped)
SYNC姞 End user license agreement
Index
167
175
183
All rights reserved. Reproduction by any means, electronic or mechanical
including photocopying, recording or by any information storage and retrieval
system or translation in whole or part is not permitted without written
authorization from Ford Motor Company. Ford may change the contents without
notice and without incurring obligation.
Copyright © 2008 Ford Motor Company
4
2009 Centerstack (ng1)
Supplement, 2nd Printing
USA (fus)
Page 6

Introduction
MOBILE MEDIA NAVIGATION SYSTEM
Your vehicle is equipped with a mobile media navigation system which
allows you to listen to, record and save music, play DVDs (audio and
video), navigate the vehicle and operate climate control functions (if
equipped).
Your system has a large range of features, yet is easy to use. The display
screen is the primary means for operating the system through the use of
its vertically tabbed menus, text screens and menu displays. Screen
selections are made by touching the desired selection on the touch
screen. The “tabs” along the left side of the screen represent the major
components of the system. The status bars at the top and bottom of the
screen will stay present for the majority of the time once the system is
turned on and ready for operation. The top status bar will contain menu
names, icons, and a clock. The lower status bar contains climate
information (if equipped), icons and advisory messages. Please refer to
Status bars in the System Overview chapter for more information.
Navigation guidance is shown on the display touch screen and is
supplemented with voice prompts.
2009 Centerstack (ng1)
Supplement, 2nd Printing
USA (fus)
5
Page 7

Introduction
DRIVING RESTRICTIONS
In order to prevent the navigation system from distracting you while
driving, access to certain functions are restricted when the vehicle is
traveling above 5 mph (8 km/h). At this time, only the Quick Destination
menu items are available for destination entry. Restricted functions
include:
• Touchscreen keyboard during destination entry (Street address, POI,
Freeway Entrance/Exit, Intersection)
• Scrolling of long lists
• Travel Link subscriptions (if active) such as movie times, ski
conditions, sports scores and scrolling of the weather map
• Editing/Adding entries in the Address Book
• Editing/Adding entries in the Avoid Areas List
• Jukebox restrictions such as creating/editing playlists, sorting playlists,
editing track, artist and album names
• Uploading photographs
Note: If your vehicle is equipped with SYNC威, similar features will be
restricted also.
When the vehicle begins to move, and the Select Route Screen is shown,
the highlighted route is automatically selected and guidance begins.
When the vehicle speed is reduced to 5 mph (8 km/h) or less, system
restrictions are lifted and you have full access to the system.
6
2009 Centerstack (ng1)
Supplement, 2nd Printing
USA (fus)
Page 8

Introduction
SYNC姞 (IF EQUIPPED)
SYNC威 is a hands-free communications and entertainment system that
literally ‘syncs up’ with all other multimedia systems in your vehicle.
SYNC威 delivers convenience with voice activated calling and hands-free
conversations, digital media player command and control as well as easy
to use voice commands. The world outside your vehicle cabin may be
chaotic, but inside, with SYNC威, it’s always a smooth ride. All you have
to do is sync it and stow it. We’ll take care of the rest.
Welcome to the new world of ingenuity and passion - technology that is
both fun and functional. Welcome to SYNC威.
Please visit www.SyncMyRide.com.
SYNC姞 features
SYNC威 offers a variety of phone and media features, such as:
• Send and receive hands-free calls
• Play your digital music through voice activated commands
• Use voice recognition to access your cell phone’s contact list
• Transfer an active phone conversation to a hands-free environment
• Play music stored on your digital media player
• Use your device while charging through the USB port
2009 Centerstack (ng1)
Supplement, 2nd Printing
USA (fus)
7
Page 9

Introduction
•
Listen to music streaming from your Bluetooth威 enabled cellular phone
• Advanced voice recognition system fluent in English, French and
Spanish
SAFETY INFORMATION
WARNING: Driving while distracted can result in loss of vehicle
control, accident and injury. Ford strongly recommends that
drivers use extreme caution when using any device that may take their
focus off the road. The driver’s primary responsibility is the safe
operation of their vehicle. Only use cell phones and other devices not
essential to the driving task when it is safe to do so.
• Do not attempt to service or repair the system. See your authorized
dealer.
• Do not operate playing devices if the power cords and/or cables are
broken, split or damaged. Carefully place cords and/or cables where
they will not be stepped on or interfere with the operation of pedals,
seats and/or compartments, or safe driving abilities.
• Do not leave playing devices in the vehicle in extreme conditions as it
could cause damage to your device. Refer to your device’s user guide
for further information.
• For your safety, some functions are speed dependent and cannot be
performed when the vehicle is traveling at speeds 5 mph (8 km/h) and
below.
•
Ensure that you review your device’s user guide before using with SYNC威.
VOICE RECOGNITION (IF EQUIPPED)
Your navigation system may be equipped with a voice activated feature
which allows you to “speak” certain commands to the system. For further
information, please refer to the Voice recognition chapter. You can also
press
QUICK START
drivers use extreme caution when using any device that may take their
focus off the road. The drivers primary responsibility is the safe
operation of their vehicle. Only use cell phones and other devices not
essential to the driving task when it is safe to do so.
8
and say a command or “Help” after the prompt.
WARNING: Driving while distracted can result in loss of vehicle
control, accident and injury. Ford strongly recommends that
2009 Centerstack (ng1)
Supplement, 2nd Printing
USA (fus)
Page 10

Introduction
TO PLAY A RADIO STATION
1. Ensure that the navigation system is on.
2. Press the RADIO hard button.
3. Select the ‘AM’ or ‘FM’ tab on the
touchscreen.
• Turn the TUNE knob to the
right/left to go up/down the
frequency band in individual
increments.
• Or, press SEEK to find the next
strong station up/down the
frequency band.
Note: If RDS is ON and PTY (Program type) is selected, the station
selection will be limited to that specific genre. In satellite radio mode (if
activated), seek is limited to the selected genre.
TO PLAY SATELLITE RADIO (IF ACTIVATED)
1. Ensure that the navigation system is on.
2. Press the RADIO hard button on
the navigation system.
2009 Centerstack (ng1)
Supplement, 2nd Printing
USA (fus)
9
Page 11

Introduction
3. Select the ‘SAT’ tab on the
touchscreen. (If your vehicle is
equipped with Satellite Radio, the
SAT tab will be present on the radio
screen).
For further information on Satellite
Radio, refer to Satellite Radio in
the Audio Features chapter.
TO LOAD A CD OR DVD:
1. Insert a CD or DVD into the slot.
2. A CD will begin to play. A DVD will play audio and video if the vehicle
is in Park (P). Otherwise, only the audio will play.
3. Use the touch controls on the
screen to advance tracks, scan,
pause, view the track list, etc.
TO PLAY A PREVIOUSLY LOADED CD OR DVD:
1. Ensure that the navigation system is on.
2. Press the MEDIA hard button on
the navigation system.
3. Select CD/DVD tab on the
touchscreen (if there is not a CD or
DVD loaded into the system, the tab
will be disabled and NO DISC will
appear in the Status Bar when you
try to select it).
4. A CD will begin to play. A DVD
will begin to play audio and video if
the vehicle is in Park (P).
Otherwise, only audio will play.
10
2009 Centerstack (ng1)
Supplement, 2nd Printing
USA (fus)
Page 12

Introduction
TO SET A DESTINATION USING THE NAVIGATION SYSTEM:
1. Ensure that the navigation system is on.
2. Press the DEST hard button on
the navigation system.
3. Select the ‘Standard’ tab on the
touchscreen and then press ‘Street
Address’ to enter a specific street
address as your destination. (From
this screen you can also choose POI,
Address book entry, previous
destination, Phone number, Freeway
Entrance/Exit , Map or intersection
as your destination).
4. Enter the required information.
Please note that:
• The system uses a Smart Speller, which helps facilitate entering
information through the keyboard.
• Accented characters in English, Spanish and French are converted
internally to non-accented characters for search purposes.
5. The screen will show the point entered on a map. If this is the
intended destination, press ‘Set As Dest’. A message will pop up while
the system is computing the route.
2009 Centerstack (ng1)
Supplement, 2nd Printing
USA (fus)
11
Page 13
Introduction
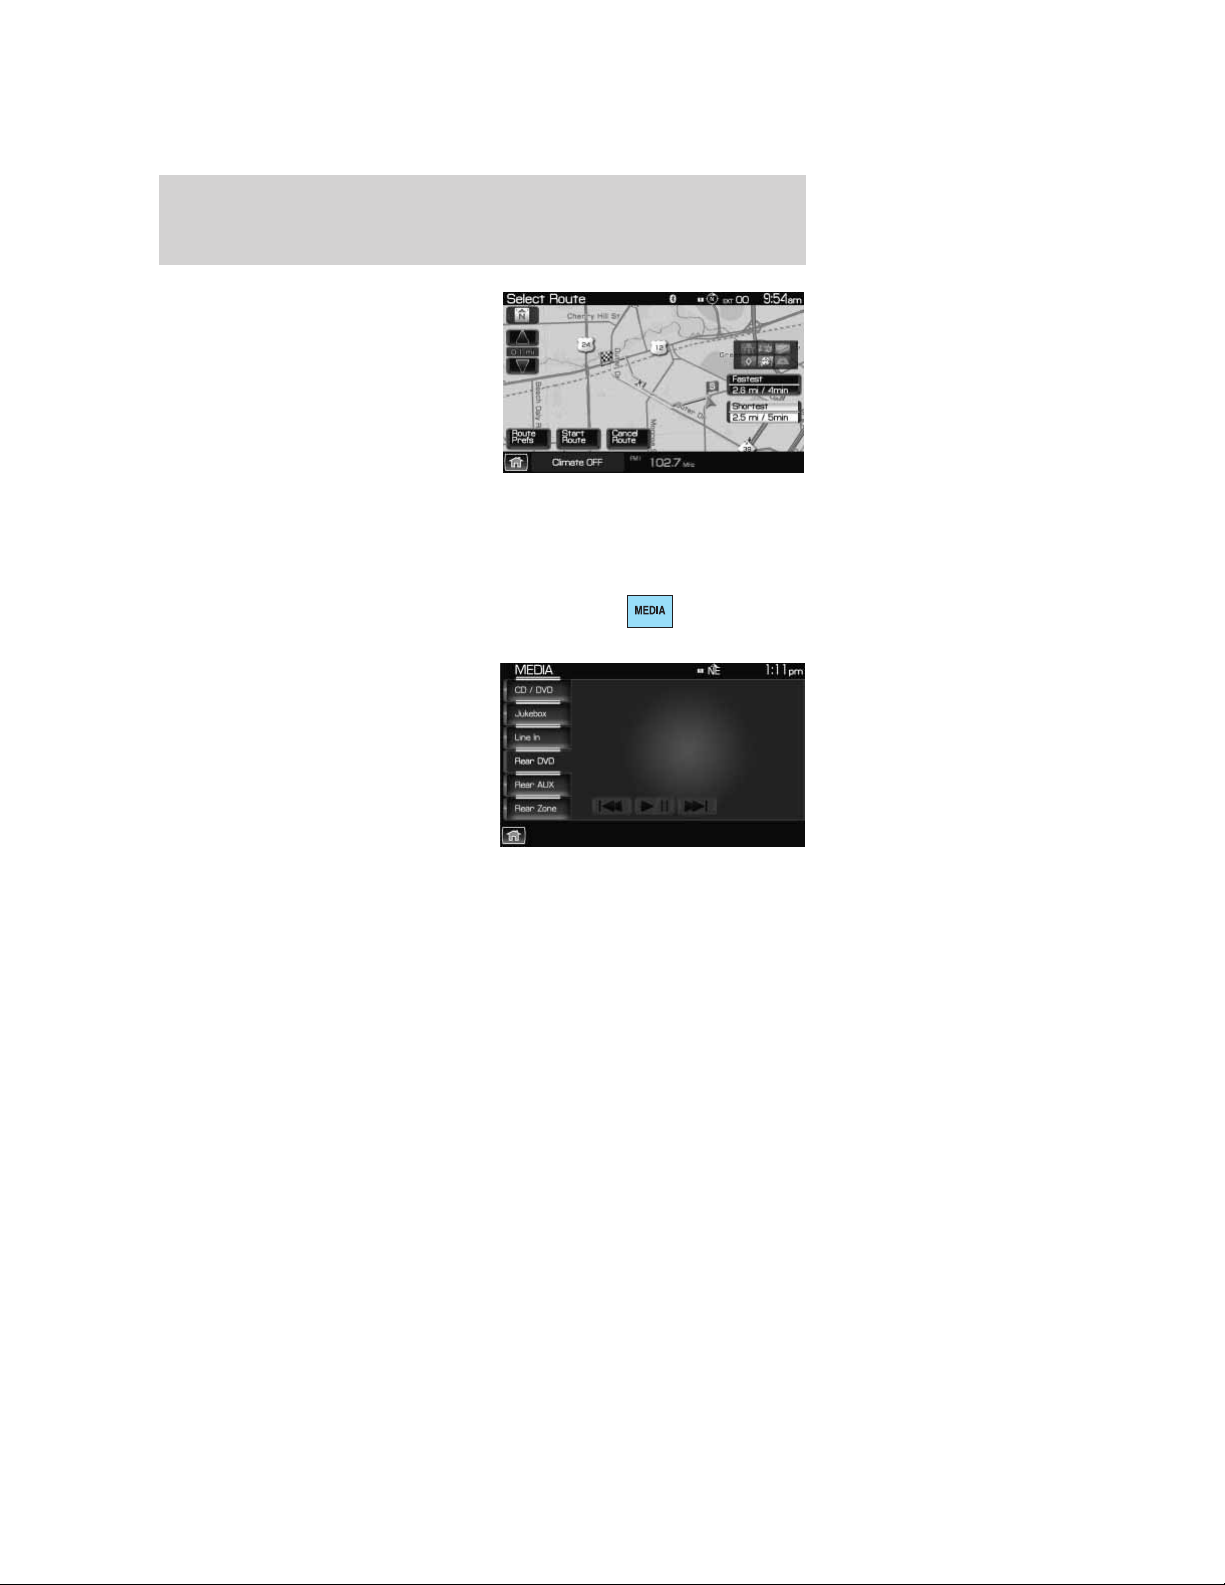
6. Select the desired route on the
right hand side of the screen. There
will be up to three routes possible
(fastest, shortest and unrestricted)
from which to choose, each
highlighted with a different color.
For each route, the overall distance,
route conditions and the estimated
travel time are displayed.
7. Press ‘Start Route’ and follow the
instructions.
TO PLAY A PREVIOUSLY LOADED DVD IN THE OVERHEAD MOUNTED FAMILY ENTERTAINMENT DVD SYSTEM (IF EQUIPPED)
1. Press MEDIA on the navigation
system.
2. Press the ‘Rear DVD’ tab.
The system will start playing the previously loaded DVD. If this DVD was
played, but not finished before, it will begin to play where it was left off
the last time it was played in the system.
12
2009 Centerstack (ng1)
Supplement, 2nd Printing
USA (fus)
Page 14

Introduction
USING THE AUXILIARY INPUT JACK:
Your vehicle is equipped with an auxiliary input jack which allows a
portable audio device to be listened to through your vehicle’s audio
system. To access the auxiliary input jack mode:
1. Press the MEDIA hard button on
the navigation system.
2. Select the ‘LINE IN’ tab on the
touchscreen.
Once a 3.5 mm input jack is plugged into the Line In jack, sound from
the device will be heard through the vehicle speakers.
For information on the auxiliary input jack location, please refer to
Auxiliary input jack in the Entertainment chapter in your Owner’s
Guide.
USING SYNC姞 (IF EQUIPPED)
Your vehicle may be equipped with
SYNC威 — a hands-free
communication and entertainment
system which allows you to connect
and use a portable media player
through a USB port located in your
vehicle, pair a Bluetooth威 enabled
cellular phone, and operate these
devices through your vehicle. Please
refer to the SYNC威 media chapter
for more information on using portable media players with SYNC威 and
refer to the SYNC威 phone chapter for information on pairing your
Bluetooth enabled cellular phone and using the phone features.
VOICE RECOGNITION (IF EQUIPPED)
Your navigation system may be equipped with a voice activated feature
that allows you to “speak” certain commands to the system. For further
information, please refer to Voice recognition system overview chapter.
2009 Centerstack (ng1)
Supplement, 2nd Printing
USA (fus)
13
Page 15

System overview
FORD AND MERCURY SYSTEM
LINCOLN SYSTEM
Note: If your navigation system does not appear as one of the systems
above, please refer to Navigation system in the next section.
14
2009 Centerstack (ng1)
Supplement, 2nd Printing
USA (fus)
Page 16

System overview
WARNING: Driving while distracted can result in loss of vehicle
control, accident and injury. Ford strongly recommends that
drivers use extreme caution when using any device that may take their
focus off the road. The driver’s primary responsibility is the safe
operation of their vehicle. Only use cell phones and other devices not
essential to the driving task when it is safe to do so.
1. I (Information): Press I to
access the information menu. Press
while the information menu is active
to step through the information tabs of: Where am I?, HEV (if equipped),
SIRIUS Travel Link (if activated), the Calendar, System Info (System
Information). and Help.
2. PHONE: Press PHONE to access
the phone menu (if equipped with
SYNC威).
3. CLIMATE: Press CLIMATE to
access the climate menu. Press the
button while the climate menu is
active to step through the climate menu tabs of Front Zone and Rear
Zone (if equipped).
(Eject): Press (Eject) to
4.
eject the disc in the slot.
5. TUNE: In radio or satellite
radio mode (if activated), turn to
advance in individual increments
up/down the frequency/channel
listing.
In MP3 mode, turn to advance to the next/previous folder.
RPT: In navigation mode, press the knob in while navigation guidance
is active to repeat the last spoken navigation guidance prompt.
6. DISP: Press the DISP button to
step through the following display
modes: On, Status Bar Only, and
Off.
2009 Centerstack (ng1)
Supplement, 2nd Printing
USA (fus)
15
Page 17

System overview
7. SOUND: Press SOUND to access
the sound menu. Press while the
sound menu is active to step
through the sound menu tabs of
Bass/Treble, Balance/Fade, SCV (Speed compensated volume), DSP
(Digital Signal Processing) and the Visualizer.
8. SEEK:In radio and satellite
radio mode (if activated),
press
previous/next available station or channel within the currently selected
Category/Genre.
In CD/DVD mode, press
chapter.
9. MEDIA: Press MEDIA to access
the media menu. Press while the
media menu is active to step
through the available media sources of CD/DVD, Jukebox, User Device,
Rear DVD (Rear overhead mounted DVD), if equipped, and Rear AUX
(Rear overhead mounted AUX inputs), if equipped.
10. RADIO: Press RADIO to access
the radio menu. Press while the
radio menu is active to step through
the available radio sources of AM, FM1, FM2, SAT1, SAT2, and SAT3
(satellite radio, if activated).
11. VOL (On/off/volume): Press to turn the audio system on/off. Press
and hold to turn the navigation radio completely off. Turn to adjust the
volume of the audio system or the navigation voice prompts as they are
being given.
Note: If a route is active when the navigation system is turned off, the
route is resumed when the system is turned on again.
12. Memory presets:In radio and
satellite radio mode (if
activated): Press 1-6 to access
your previously saved preset
stations/channels. To save to a preset: Tune to the desired
station/channel. Press and hold the desired preset button in which you
would like to store the station/channel. The sound will momentarily mute
and then return when the preset is saved.
/ to seek to the
/ to access the previous/next track or
16
2009 Centerstack (ng1)
Supplement, 2nd Printing
USA (fus)
Page 18

System overview
13. MENU: Press MENU to access
the system menu. Press while the
system menu is active to step
through the system menu tabs of
Display, Clock, Feedback Settings, System Settings and Valet Mode.
14. MAP: Press MAP to access the
navigation map. Press while the map
display is active to center the map
on the current vehicle position. Press while the map display is active and
a route is active to step through the different map guidance views.
15. DEST: Press DEST to access
the navigation destination entry
menu. Press while the navigation
destination entry menu is active to show additional destination entry
techniques.
16. NAV: Press NAV to access the
navigation menu. Press while the
navigation menu is active to step
through the navigation menu tabs.
17. CD/DVD slot: Insert a CD or DVD, label side up.
After the system initializes, the screen will be divided in two sections:
• Status bars: This is the top and bottom portion of screen that
displays the clock or date and useful information, depending on the
current mode.
• Display area: The interactive screen that is activated by finger touch
and changes depending on current system operation. Graphical
buttons are displayed in this area depending on the current screen for
you to make choices.
2009 Centerstack (ng1)
Supplement, 2nd Printing
USA (fus)
17
Page 19

System overview
Navigation system
Note: If your navigation system does not appear as this system, please
refer to the previous section.
WARNING: Driving while distracted can result in loss of vehicle
control, accident and injury. Ford strongly recommends that
drivers use extreme caution when using any device that may take their
focus off the road. The driver’s primary responsibility is the safe
operation of their vehicle. Only use cell phones and other devices not
essential to the driving task when it is safe to do so.
1. Memory presets: In radio and
satellite radio mode (if
activated): Press 1-6 to access
your previously saved preset
stations/channels. To save to a preset: Tune to the desired
station/channel. Press and hold the desired preset button in which you
would like to store the station/channel. The sound will momentarily mute
and then return when the preset is saved.
18
2009 Centerstack (ng1)
Supplement, 2nd Printing
USA (fus)
Page 20

System overview
2. CD/DVD slot: Insert a CD or
DVD, label side up.
(Eject): Press (Eject) to
3.
eject the disc in the slot.
4. TUNE: In radio or satellite
radio mode (if activated), turn to
advance in individual increments
up/down the frequency/channel
listing.
In MP3 mode, turn to advance to the next/previous folder.
RPT: In navigation mode, press the knob in while navigation guidance
is active to repeat the last spoken navigation guidance prompt.
5. MAP: Press MAP to access the
navigation map. Press while the map
display is active to center the map
on the current vehicle position. Press while the map display is active and
a route is active to step through the different map guidance views.
6. DEST: Press DEST to access the
navigation destination entry menu.
Press while the navigation
destination entry menu is active to
show additional destination entry techniques.
7. NAV: Press NAV to access the
navigation menu. Press while the
navigation menu is active to step
through the navigation menu tabs.
8. I (Information): Press I to
access the information menu. Press
while the information menu is active
to step through the information tabs
of: Where am I?, HEV (if equipped), SIRIUS Travel Link (if activated),
the Calendar, System Info., and Help.
2009 Centerstack (ng1)
Supplement, 2nd Printing
USA (fus)
19
Page 21

System overview
9. PHONE: Press PHONE to access
the phone menu (if equipped with
SYNC威).
10. DISP: Press the DISP button to
step through the following display
modes: On, Status Bar Only, and
Off.
11. SEEK:In radio and satellite
radio mode (if activated),
Press
previous/next available station or
channel within the currently selected Category/Genre..
In CD/DVD mode,Press
chapter.
12. MENU: Press MENU to access
the system menu. Press while the
system menu is active to step
through the system menu tabs of Display, Clock, Feedback Settings,
System Settings and Valet Mode.
13. SOUND: Press SOUND to
access the sound menu. Press while
the sound menu is active to step
through the sound menu tabs of
Bass/Treble, Balance/Fade, SCV (Speed compensated volume), DSP and
the Visualizer.
14. MEDIA: Press MEDIA to access
the media menu. Press while the
media menu is active to step
through the available media sources
of CD/DVD, Jukebox, User Device, Rear DVD (Rear overhead mounted
DVD, if equipped) and Rear AUX (Rear overhead mounted AUX inputs,
if equipped).
15. RADIO: Press RADIO to access
the radio menu. Press while the
radio menu is active to step through
the available radio sources of AM, FM1, FM2, SAT1, SAT2, and SAT3
(satellite radio, if activated).
/ to seek to the
/ to access the previous/next track or
20
2009 Centerstack (ng1)
Supplement, 2nd Printing
USA (fus)
Page 22

System overview
16. VOL (On/off/volume): Press to
turn the audio system on/off. Press
and hold to turn the navigation
radio completely off. Turn to adjust
the volume of the audio system or the navigation voice prompts as they
are being given.
Note: If a route is active when the navigation system is turned off, the
route is resumed when the system is turned on again.
After the system initializes, the screen will be divided in two sections:
• Status bars: This is the top and bottom portion of screen that
displays the clock or date and useful information, depending on the
current mode.
• Display area: The interactive screen that is activated by finger touch
and changes depending on current system operation. Graphical
buttons are displayed in this area depending on the current screen for
you to make choices.
SCREEN DIFFERENCES
Depending on your vehicle line and option package, your navigation
screen may vary in appearance from the screens shown in this
supplement. These differences could include: background color, tab
options, climate controls and other features. Your features may also be
limited depending on your market. (For example, SIRIUS Travel Link is
only available in the continental United States). Please check with your
authorized dealer for availability.
Display options
You can choose to turn your navigation screen on/off and also if you
would like to view the status bars on the top and bottom of the screen.
To access:
Press DISP on the navigation system repeatedly to cycle through these
options.
2009 Centerstack (ng1)
Supplement, 2nd Printing
USA (fus)
21
Page 23

System overview
Voice commands in display mode (if equipped)
While in display mode, press
controls. When prompted, you may say any of the following commands:
• Display on • Auto
• Day • Night
• Status bar • Display off
• Brighter • Dimmer
• Help
Note: If you are not in display mode, press
wheel controls. When prompted, say, “Display mode” and then any of the
above commands.
STATUS BARS
Your navigation screens may have status bars on the top and bottom of
each screen.
The status bar on the top of the
screen will tell your current mode,
the exterior temperature, the time
as well as display icons if you have
enabled Bluetooth, or are using headphones with your Rear overhead
mounted Family entertainment DVD system among other options.
The status bar on the bottom of the
screen may list the Home icon, the
current temperature selected for the
Driver and Passenger as well as the fan speed and air flow direction, the
current mode being used (if equipped), the Artist and Title of the
currently playing CD (if available), Artist and Title for Jukebox (if
available) and satellite radio (if activated).
Note: As climate controls are vehicle dependent, some vehicles may not
display climate readings in the status bar.
or VOICE on the steering wheel
or VOICE on the steering
HOME SCREEN
Your navigation system has a Home Screen where you can save/view
favorite pictures, view your current audio and climate control settings as
well as display the audio visualizer or the hybrid fuel economy (if
equipped). You can split the screen in to two or three different sections,
or you can choose to have one main view.
To access your home screen, press the house icon (
left hand corner of any screen.
22
)atthebottom
2009 Centerstack (ng1)
Supplement, 2nd Printing
USA (fus)
Page 24

System overview
The left side of the screen will
display an uploaded photo or the
map screen. The right side can also
display the uploaded photo. The
upper right panel will only display
the current audio settings. The
lower right panel displays the
vehicle’s climate settings (if
equipped), the visualizer or the
hybrid fuel economy (if equipped).
Press
the left or right side.
Loading pictures
Your navigation system allows you to save and view up to 32 photos. To
access:
1. Ensure that you are on the Home
Screen. (Press
left of any screen to access.)
2. Touch the left side of the home
screen to initiate the left screen
photo display and saved photos
screen.
on the bottom of the display to access the settings screen for
at the bottom
3. Select the ‘Add’ button on the
touchscreen. The following
disclaimer will appear, “Please
confirm the supported photo
formats”.
2009 Centerstack (ng1)
Supplement, 2nd Printing
USA (fus)
23
Page 25

System overview
4. When the pop-up dialog box with
the disclaimer appears, press OK
and ensure that you are using the
proper format.
5. Insert a CD-ROM which contains
your photos as jpegs.
6. Press OK. The photos will be
listed on the right half of the screen.
7. Select either ADD or ADD ALL.
The photos are now saved to the hard drive.
Photo display limitations:
• The file must be 1.5MB or less.
• The extension of the file must be one of JPE/JPG/JPEG.
• The CD or DVD must be ISO 9660 format, UDF format is not
supported.
• The file path must be 255 characters or less.
• Up to 256 files or folders can be displayed in one folder.
• Not compatible with discs written in Packet Write mode.
• Only the photograph(s) which meet these conditions will be displayed.
Note: When burning a CD, ensure that you ‘close’ or ‘finalize’ the disc
when the CD-burning process finishes (you should select this option
before you start burning). Consult your software manual or the program’s
Help files if you’re not sure how to finalize the disc. Also, write the audio
data into the first session of a multi-session CD as audio systems won’t
be able to sort through other sessions to find more audio tracks.
REVERSE CAMERA (IF EQUIPPED)
Your vehicle may be equipped with a reverse camera on the tailgate
which provides a video image of the area behind the vehicle. When the
transmission is in Reverse (R), an image will automatically display on the
navigation screen. Once the vehicle is back in Drive (D), the image will
continue to display until you are driving over 5 mph (8 km/h). To remove
this image from the screen, press any hard button on the navigation
system.
24
2009 Centerstack (ng1)
Supplement, 2nd Printing
USA (fus)
Page 26

System overview
When the vehicle is in Park (P), you
may press SETTINGS to make
adjustments to the brightness of the
display as well as the rear camera
display.
When the rear camera delay
function is ON, it extends the
display of the camera image into
Drive mode until vehicle speed is
greater than 5 mph (8 km/h). This
is useful when trying to
engage/disengage a trailer.
Prior to using, ensure that the camera lens is clear of any debris, mud,
etc. and that both reverse lamps are operational if using at night. For
further information, please refer to Reverse camera system in the
Driving chapter of your Owner’s Guide.
QUICK REFERENCE CHART
SYNC威 works with your navigation system, rear overhead mounted DVD
system (if equipped), voice commands and also through your steering
wheel controls. Below is a quick listing of the functions of your steering
wheel controls and navigation system controls.
2009 Centerstack (ng1)
Supplement, 2nd Printing
USA (fus)
25
Page 27

System overview
Navigation
bezel control
N/A
N/A VOICE
SEEK ,
N/A OK Press to confirm your selection.
MEDIA N/A Press repeatedly to access all
PHONE N/A Press to access SYNC威 PHONE
Steering wheel
control
,
Function
Press to answer an incoming call.
Press to send a call or text message
(if supported).
Press and hold to end a call.
Press it initiate a redial.
Press to activate Voice Recognition.
Press and hold to end an active
voice session.
Refer to the Voice recognition
system overview chapter for further
information.
Press to access the previous/next
preset radio station, preset satellite
channel (if activated) or CD track.
Press and hold to seek to the next
satellite channel (if activated).
available media sources in your
vehicle such as: CD, DVD, Jukebox,
Rear Zone, Rear AUX, Rear DVD
(Rear overhead mounted DVD), Line
In, and User Device (if equipped
with SYNC威).
features.
SYSTEM MENU FEATURES
Your system has many menu features such as allowing you to adjust the
touchscreen brightness, adjusting the time and languages, adjusting the
feedback and system settings. To access, press the MENU hard button on
the navigation system.
26
2009 Centerstack (ng1)
Supplement, 2nd Printing
USA (fus)
Page 28

System overview
Display options
1. Press the MENU hard button on
the navigation system.
2. Select the ‘Display’ tab on the
touchscreen. Select from the
following display options:
Brightness: Select AUTO DIM to
manually adjust the brightness by
pressing + or —.
Contrast: Press + to increase and
— to decrease the level of contrast on the screen.
Day/Night Mode: Select ‘Day’ to always display day mode or ‘Night’ to
always display night mode. Select ‘Auto’ for the screen to automatically
change between day and night mode.
Color Palette (Available on Lincoln vehicles only): Select between
four different background colors: 1. Black, 2. Blue, 3. Green, 4. Red.
Setting the clock
1. Press the MENU hard button on
the navigation system.
2. Select the ‘Clock’ tab on the
touchscreen. Select from the
following display options:
Time set buttons: To set the time, press +, — to increase/decrease the
time and select AM or PM.
Display clock: Press to turn the clock display on/off.
Format: Press to select between 12 hour and 24 hour format.
Auto time zone: If enabled, the system will automatically adjust the
time when you enter into a new time zone. If disabled, you will have to
manually adjust the time when entering different time zones. Note: The
system does not implement daylight savings time.
Restore defaults: Select ‘Reset’ to reset to the default settings.
2009 Centerstack (ng1)
Supplement, 2nd Printing
USA (fus)
27
Page 29

System overview
Feedback settings
1. Press the MENU hard button on
the navigation system.
2. Select the ‘Feedback Settings’ tab
on the touchscreen. Select from the
following display options:
Voice recognition user profile: You can ‘train’ the system to better
recognize your voice. Two profiles can be created. Refer to the Voice
Recognition section for more information.
Button tone: Select to select/adjust when the system will sound a tone.
Press ‘Button tone’ to then select from:
• All Buttons: Select to have the system sound a tone when any hard
or soft key is touched.
• Touch Screen: Select to have the system only sound a tone when a
selection is made on the touch screen.
• Off: Select to turn off all tones.
Voice volume: Press + to increase or — to decrease the volume level of
the navigation voice. Voice volume adjustment also includes the volume
level of chimes.
Voice recognition interaction mode: This feature determines the level
of interaction/feedback you will receive from the system.
• Standard: This is the default setting. The ‘Standard setting’ provides
you with the most interaction / feedback in the form of prompts.
• Advanced: This feature has less prompts and feedback.
Voice recognition confirmation:
• On: Select to have the system always ask to confirm/verify a
command.
• Off: Select to have the system ask less frequently to confirm /verify a
command.
28
2009 Centerstack (ng1)
Supplement, 2nd Printing
USA (fus)
Page 30

System overview
System settings
1. Press the MENU hard button on
the navigation system.
2. Select the ‘System Settings’ tab
on the touchscreen. Select from the
following display options:
Language: Select between ‘English’, ‘Francais’ or ‘Espanol’.
Units: Select between ‘English’ and ‘Metric’.
Keyboard layout: Select ‘ABC’ or ‘QWERTY’ for the keyboard layout in
the display.
Delete stored items: Select ‘View’ to see what areas contain stored
items. From each area, you can delete all of the entries.
Restore factory default settings: Press ‘Reset’ to return to the factory
default settings.
Valet Mode: Press to access Valet Mode.
• Enable Valet Mode: Select to lock the system with a four digit PIN.
The same PIN must be entered to unlock the system and disable valet
mode.
Valet mode
1. Press the MENU hard button on the navigation system.
2. Select the ‘Valet Mode’ tab on the
touchscreen. Press ‘Enable Valet
Mode’.
2009 Centerstack (ng1)
Supplement, 2nd Printing
USA (fus)
29
Page 31

System overview
3. Enter a four digit Personal
Identification Number (PIN) and
press ‘Enter’. The system will ask
you to re-enter the PIN. Once
entered, select ‘Enable’ to activate
Valet mode. The system is then
locked until the correct four digit
PIN is entered.
Note: The PIN can be reset by simultaneously pressing and holding
presets 1 and 5 while on the PIN entry screen. After approximately five
seconds, the system will transition to the Valet mode screen indicating
that the PIN is reset. Once you have reset the PIN, the system will then
allow you to set a new PIN.
30
2009 Centerstack (ng1)
Supplement, 2nd Printing
USA (fus)
Page 32

Voice recognition system overview
VOICE RECOGNITION (IF EQUIPPED)
Your vehicle may be equipped with an advanced interactive Voice
Recognition (VR) system. This system allows you to perform many
operations such as operating the navigation, audio, phone (if equipped),
media, climate (if equipped), display and voice settings by “speaking”
certain commands. The system will respond with a series of audible
tones, prompts, questions and spoken confirmations depending on the
situation and the chosen level of dialogue interaction.
Feedback through audible tones
Your VR system will respond through various audible tones. You may
hear a tone at the following times:
• When you press VOICE or
• When you access the help feature.
• When the VR system does not understand your request
• When a VR session is completed successfully
• When a VR session is ended unsuccessfully
• When a speed dependent feature has been accessed
• When a new device is connected
The navigation system has five different audible tones that will play
depending on the circumstance.
• Initial: Sounds when you are entering a new mode.
• Positive: Sounds for a positive recognition or a successful VR session
completion.
• Negative: Sounds for a negative recognition, an unsuccessful VR
session, or when a speed dependent feature has been accessed.
• Listening: Sounds when the system is ready to listen for a command.
• Help: Sounds when you ask for ’Help’.
on your steering wheel controls.
Confirmation prompts
Confirmation prompts are short questions asked by the system when the
system has not clearly understood your request or when there are
several possible responses to your request. For example, if you have
Confirmation prompts ON, the system may say, “Phone, is that correct?”.
The system will then listen for a “Yes” or “No” confirmation from you. If
you say “Yes”, the system will proceed. If you say “No”, the system will
ask you to say the command again. If you have Confirmation prompts
2009 Centerstack (ng1)
Supplement, 2nd Printing
USA (fus)
31
Page 33

Voice recognition system overview
OFF, the system may assume it understood your request or may ask you
to repeat your request. If the system is unsure of what was asked, it will
prompt you to try again or ask for help.
Note: Even with Confirmation prompts turned OFF, you may be asked to
confirm certain settings occasionally.
Clarification through candidate lists
Candidate lists are created when the system has several possible options
of similar level of confidence as a result of your request. The system will
submit back to you as many as five possibilities for your clarification.
This may happen either with your phone book and/or music selections.
Example #1:
You want to call John Doe at home, so you say, “Call John Doe at home”.
If the system has a similar confidence level for a few items, it may
respond with:
• (initial tone) “Say 1 after the tone to call John Doe at home. Say 2
after the tone to call Johnny Doe on mobile. Say 3 after the tone to
call Jane Doe at home.” (listen tone)
Example #2:
You want to listen to a certain artist, so you say, “Play Artist John”. If the
system has a similar confidence level for two possible options, it may
respond with:
• (initial tone) “Say 1 after the tone to play John Doe. Say 2 after the
tone to play Johnny Doe.” (listen tone)
HOW TO USE VOICE COMMANDS WITH YOUR SYSTEM (IF EQUIPPED)
Press
Recognition. Depending on the feedback setting, you will hear the
prompt, “Please say a command” followed by a tone, or you will hear a
tone, signaling that the system is ready to accept your command. Any
command spoken prior to the beep will not register with the system.
Speak the command clearly to ensure that the system is able to
recognize and perform the desired function. You can, at any time,
press
32
or VOICE on your steering wheel controls to activate Voice
or VOICE and say “Help” for a list of possible commands.
2009 Centerstack (ng1)
Supplement, 2nd Printing
USA (fus)
Page 34

Voice recognition system overview
The main categories of your voice commands are as follows:
• Navigation • Climate (if equipped)
• Audio • Jukebox
• Radio • Sirius (if activated)
• Travel link (if activated) • Display mode
• User profile • Disc
• CD • DVD
• Video CD • Line in
• Rear AUX (if equipped) • Rear DVD (if equipped)
• Phone (if equipped) • USB (if equipped)
• Voice settings • Bluetooth audio (if equipped)
• Dial (if equipped) • Confirmations
• Tutorial
To access a list of all available voice commands:
1. Press the i button (
2. Select the ‘Help’ tab on the touchscreen.
3. Select ‘Voice commands’ at the top of the screen.
4. Select the desired category.
Voice recognition visual feedback
When Voice recognition (VR) is activated, the following icons will appear
in the status bar.
) on the navigation system.
VR State VR Icon
Main Menu/Generic
VR recognition failure
VR session unsuccessful
Listening
Listening paused
Speaking instructions
For the best voice recognition, please ensure that:
• The interior of the vehicle needs to be as quiet as possible. Wind noise
from open windows and road vibrations may prevent the system from
correctly recognizing voice commands.
?
33
2009 Centerstack (ng1)
Supplement, 2nd Printing
USA (fus)
Page 35

Voice recognition system overview
• Press or VOICE and wait until the second tone sounds before
speaking a command.
• Speak naturally without large pauses in between words.
• Speak louder if background noise is preventing the system from
recognizing your command
• Only one person should speak while the system is listening for a
command.
• Please realize voice recognition performance is not 100% and varies by
user. The voice recognition system is meant to be a secondary
convenience control and if it doesn’t operate optimally, you can still
operate your navigation system via the touch screen and hard buttons.
To speak voice commands:
Depending on the feedback setting, the system will respond differently. If
the feedback settings are set to ‘Standard’, the system will respond with
a tone, a prompt and another tone. If the feedback settings are set to
Advanced, the system will respond without a prompt and with tones
only.
1. Press
2. The system will say, “Please say a command” and VOICE/Main Menu
and
3. A tone will sound and the ’Listening’ icon will appear in the status bar
signifying the system is ready for your command.
4. Speak your command loudly and clearly.
5. If the system is not confident that it recognized the command, it will
ask you for confirmation. If the system does not recognize or hear your
voice command, it will say, “Sorry, please say a command or say Help”
and will allow you to repeat the voice command. The ’voice failed’ icon
will appear in the status bar.
6. If the system does not recognize or hear your voice command a
second time, the system will say, “Sorry, please say a command” and will
allow you to repeat the voice command. The ’voice failed’ icon will
appear in the status bar.
7. If the system doesn’t recognize or hear your command a third time,
the voice session is terminated.
8. Once the system does understand your command, (and the feedback
settings are set to standard), a tone will sound and the system will say,
“<Command> Please say a command.” VOICE/Command and
appear in the status bar.
or VOICE on the steering wheel. A tone will sound.
will appear in the status bar.
will
34
2009 Centerstack (ng1)
Supplement, 2nd Printing
USA (fus)
Page 36

Voice recognition system overview
9. The listening tone will sound and the appropriate voice menu name
and the listening icon will appear in the status bar as the system waits
for your response. Speak the command clearly and loudly.
10. This sequence of events occurs until the voice recognition session is
complete.
ADJUSTING THE VOICE PROMPT VOLUME
There are three different ways you can adjust the voice volume:
• When the system is speaking, turn the volume knob to decrease or
increase the volume.
OR
1. Press the MENU hard button on
the navigation system.
2. Select the ‘Feedback Settings’
tab.
3. Press + to increase or — to
decrease the voice volume levels.
OR
1. Press
by the prompt, “Please say a command.” Another tone will sound
signaling the system is ready to accept your command.
2. Say “Voice volume decrease” or “Voice volume increase”.
Voice feedback / interaction
You can adjust the level of interaction and feedback you would like from
your voice recognition system. There are four different levels varying
from the most interaction/feedback to the least.
Standard Interaction Mode with Confirmation Prompts on: This
selection provides the most feedback and guidance from the system. You
will be prompted to say a command. The system will repeat your
command and ask, “Is that correct?”
or VOICE on the steering wheel. A tone will sound followed
2009 Centerstack (ng1)
Supplement, 2nd Printing
USA (fus)
35
Page 37

Voice recognition system overview
Standard mode with prompts off: This selection offers the second
highest level of feedback with the system. You will be prompted to say a
command. If the system is not certain of your command, the system will
repeat your command and ask, “Is that correct?”
Advance mode with prompts on: You will be prompted by two tones.
If the system is not certain of your command, the system may repeat
your command and ask, “Is that correct?”.
Advance mode with prompts off: This selection provides the least
interaction with the system. You will be prompted by two tones. You will
rarely be asked to confirm your command.
Standard interaction mode provides more detailed interaction and
guidance with confirmation prompts while the advanced mode has less
audible interaction and more tone prompts. Confirmation prompts are
short questions asked by the system when the system has not clearly
heard or understood your request. Tone prompts are audible sounds
signifying the system has entered a mode or is waiting for your
command.
To access these settings:
1. Press the MENU hard button on
the navigation system.
2. Select the ‘Feedback Settings’ tab
on the touchscreen to make
adjustments.
VOICE RECOGNITION TUTORIAL
Your navigation system has three different tutorials to help you become
better acquainted with the voice recognition system. There are as
follows:
• Lesson one: What you can do with speech
• Lesson two: How we’ll work together
• Lesson three: Getting accustomed to the system
36
2009 Centerstack (ng1)
Supplement, 2nd Printing
USA (fus)
Page 38

Voice recognition system overview
To access:
1. Press
A tone will sound and the system will prompt you, “Please say a
command.”
2. After the tone, say “Tutorial”. The system will begin with Lesson 1.
3. To listen to a different lesson, press
one of the voice commands on the screen.
Tutorial voice commands
While listening to the tutorial lessons, press
steering wheel controls and after the tone, you may say any of the
following commands:
• Lesson 1 • Lesson 2
• Lesson 3 • Next Lesson
• Previous Lesson • Help
Note: If you are not in tutorial mode, press
steering wheel controls. When prompted, say, “Tutorial” and then
press
the above commands.
VOICE NAME TAGS
Your voice recognition system includes a feature which allows you to
enter personal names for locations. These are called ’voice name tags’.
You can assign voice name tags to all locations entered in your Address
Book and then use them as destinations. Press
steering wheel controls and say, “Destination <nametag>” after the tone.
or VOICE on the steering wheel.
on the steering wheel and say
or VOICE on the
or VOICE on the
or VOICE on the steering wheel controls again to say any of
or VOICE on the
CREATING A USER PROFILE
You can create user profiles in your voice recognition system to help
train the system to fine tune its listening to a specific person (voice). To
access:
1. Press the MENU hard button on the navigation system.
2. Select the ‘Feedback Settings’ tab on the touchscreen.
3. Select ‘Edit’.
4. Select ‘Create’ to create either Profile 1 or Profile 2.
5. Follow the voice prompt instructions.
2009 Centerstack (ng1)
Supplement, 2nd Printing
USA (fus)
37
Page 39

Voice recognition system overview
CREATING A USER PROFILE USING VOICE RECOGNITION
1. Press
system will say, “Please say a command”. Another tone will sound
signaling the system is ready for your command.
2. Say “User Profile”.
VOICE/User Profile and
icon will change to the listening icon (
3. Say “Create”.
VOICE/User Profile and
icon will change to the listening icon (
4. Say “User Profile 1” or “User Profile 2”.
5. Follow the voice prompts.
Selecting a user profile
1. Press the MENU hard button on the navigation system.
2. Select the ‘Feedback Settings’ tab on the touchscreen.
3. Select the ’Profile 1’ or ’Profile 2’ icon.
Selecting a user profile using voice recognition
1. Press
system will say, “Please say a command”. Another tone will sound
signaling the system is ready for your command.
2. Say “User Profile”.
VOICE/User Profile and
icon will change to the listening icon (
3. Say “Select”.
4. Depending on the chosen level of feedback, you will need to select
which user profile.
Editing a user profile
1. Press the MENU hard button on the navigation system.
2. Select the ‘Feedback Settings’ tab on the touchscreen.
3. Scroll down and select ‘Edit’.
4. Select ‘Continue’ to edit either Profile 1 or Profile 2.
5. A pop-up window will appear to confirm and the system will prompt
“This profile has been partially created by <name>. Only <name>
should continue to create this profile. Would you like to continue to
create this profile?”
or VOICE on the steering wheel. A tone will sound and the
will appear in the status bar and then the
will appear in the status bar and then the
Listening
).
Listening
).
or VOICE on the steering wheel. A tone will sound and the
will appear in the status bar and then the
Listening
).
38
2009 Centerstack (ng1)
Supplement, 2nd Printing
USA (fus)
Page 40

Voice recognition system overview
Editing a user profile using voice recognition
1. Press
system will say, “Please say a command”. Another tone will sound
signaling the system is ready for your command.
2. Say “User Profile”.
VOICE/User Profile and
icon will change to the listening icon (
3. Say “Edit”.
4. Depending on the chosen level of feedback, you will need to
tell/confirm which user profile to edit.
Deleting a user profile
1. Press the MENU hard button on the navigation system.
2. Select the ‘Feedback Settings’ tab on the touchscreen.
3. Scroll down and select ‘Edit’.
4. Select ‘Delete’ to delete either Profile 1 or Profile 2.
5. Select YES when the confirmation pop-up window appears.
Deleting a user profile using voice recognition
1. Press
system will say, “Please say a command”. Another tone will sound
signaling the system is ready for your command.
2. Say “User Profile”.
VOICE/User Profile and
icon will change to the listening icon (
3. Say “Delete”.
VOICE/User Profile and
icon will change to the listening icon (
4. Depending on the chosen level of feedback, you will need to
tell/confirm which user profile to delete.
or VOICE on the steering wheel. A tone will sound and the
will appear in the status bar and then the
Listening
).
or VOICE on the steering wheel. A tone will sound and the
will appear in the status bar and then the
will appear in the status bar and then the
Listening
).
Listening
).
2009 Centerstack (ng1)
Supplement, 2nd Printing
USA (fus)
39
Page 41

Voice recognition system overview
User profile voice commands (if equipped)
In order to create, edit, delete, or select a user profile through voice,
press
tone, say, “User Profile”. A tone will sound and the system will say, “User
profile, please say a command” (if in ‘Standard mode’) and another tone
will sound. After the second tone, you may say any of the following
commands:
• Create user profile 1 • Create user profile 2
• Delete user profile 1 • Delete user profile 2
• Select user profile 1 • Select user profile 2
• Edit user profile 1 • Edit user profile 2
• Help
or VOICE on the steering wheel controls. After the second
40
2009 Centerstack (ng1)
Supplement, 2nd Printing
USA (fus)
Page 42

Audio features
THX AUDIO SYSTEM — IF EQUIPPED (LINCOLN VEHICLES ONLY)
Your vehicle may be equipped with
the THX威 certified premium audio
system. This system creates optimal
acoustic quality for all seating
positions and road conditions.
The system offers an advanced speaker system, amplifier, subwoofer and
equalizer.
SONY AUDIO SYSTEM (IF EQUIPPED)
Your vehicle may be equipped with
the SONY premium audio system.
This system creates optimal acoustic
quality and offers an advanced
speaker system, amplifier, subwoofer
and equalizer.
Voice commands in audio mode (if equipped)
When in audio mode, press
When prompted, you may say any of the following commands:
•On •Off
•Headphones •Headphones off
•Jukebox •Disc
•CD •DVD
•Video CD •Radio
•Sirius •Rear DVD
•Rear AUX •Line in
•SYNC •User Device
•USB •Phone
•Bluetooth audio •Read Message
•Help
or VOICE on the steering wheel controls.
2009 Centerstack (ng1)
Supplement, 2nd Printing
USA (fus)
41
Page 43

Audio features
Note: If you are not in audio mode, press or VOICE on the steering
wheel controls. When prompted, say, “Audio” and then any of the above
commands.
AM
1. Ensure that the system is on.
2. Press the RADIO hard button on
the navigation face.
3. Select the ‘AM’ tab on the
touchscreen. Once in AM mode, you may select from ‘Show options’ and
‘Show presets’.
4. Press ‘Show Options’ to select from:
• Scan: Press for a brief sampling
of all listenable stations. Press
again to disable and remain on
the current selection.
• Scan Presets: Press for a brief
sampling of all the stations held
in the memory presets.
• Autoset Presets: The autoset
feature allows you to set strong
radio stations without losing your
original preset stations. This feature is helpful on trips when traveling
between cities with different radio stations.
To enable, select AUTOSET PRESETS and the six strongest stations
in your current area will be set as presets. To return to your original
presets, press AUTOSET PRESETS again and the feature will disable.
• Rear Zone: Press to access the functionality of the Family
Entertainment System (if equipped).
5. Press SHOW PRESETS to view the preset stations. To set or change a
preset station, press and hold any of the memory presets buttons (1–6)
or any of the soft key memory preset buttons on the screen while on the
desired station. The new station will replace the previous one recorded.
42
2009 Centerstack (ng1)
Supplement, 2nd Printing
USA (fus)
Page 44

Audio features
FM
1. Ensure that the system is on.
2. Press the RADIO hard button on
the navigation system.
3. Select the ‘FM’ tab on the
touchscreen. Press again to toggle between FM1 or FM2. Once in FM
mode, you may select between ‘Show Options’ and ‘Show Presets’.
4. Press ‘Show Options’ to select
from:
• Scan: Press for a brief sampling
of all listenable stations. Press
again to disable and remain on
the current selection.
• Scan Presets: Press for a brief
sampling of all the stations held
in the memory presets.
• Autoset Presets: The autoset feature allows you to set strong radio
stations without losing your original preset stations. This feature is
helpful on trips when traveling between cities with different radio
stations.
To enable, select AUTOSET PRESETS and the six strongest stations
in your current area will be set as presets. To return to your original
presets, press AUTOSET PRESETS again and the feature will disable.
• RDS: This feature allows you to receive text information from
RDS-equipped FM radio stations. In FM mode, press RDS to
activate/deactivate. RDS must be activated in order to access PTY and
SET PTY.
Note: When RDS is active, the visualizer is not displayed.
• Rear Zone: Rear zone allows you to access the functionality of the
Family Entertainment System (if equipped and a disc is present).
• Set PTY: Press to select a program type, which, once selected, will be
displayed above the SET PTY button. Once PTY has been
programmed, press SEEK or SCAN to initiate a search up or down the
frequency. The search will stop when the desired program type has
been reached.
Note: The system will scan the frequency band three times for the
chosen program type. If the program type is unavailable in your
reception range, the system will return to the previous station.
2009 Centerstack (ng1)
Supplement, 2nd Printing
USA (fus)
43
Page 45

Audio features
5. Press ‘Show Presets’ to view the preset stations. To set or change a
preset station, press and hold any of the presets while on the desired
station. The new station will replace the previous one recorded.
Radio voice commands (if equipped)
While listening to the radio, press
controls. When prompted, you may say any of the following commands:
• On • Off
• <530–1710> • <87.7–107.9>
• AM <530–1710> • FM <87.7–107.9>
• AM • FM1
• FM2 • Preset <1–6>
• AM preset <1–6> • FM1 preset <1–6>
• FM2 preset <1–6> • Tune
• Help
Note: If you are not listening to the radio, press
steering wheel controls. When prompted, say, “Radio” and then press
or VOICE on the steering wheel controls again and you can say any of
the above commands.
*If you have said, “Tune”, you can then say any the following
commands:
•<530–1710> •<87.7–107.9>
•AM <530–1710> •FM <87.7–107.9>
•AM •FM1
•FM2 •Preset <1–6>
•AM preset <1–6> •FM1 preset <1–6>
•FM2 preset <1–6>
or VOICE on the steering wheel
or VOICE on the
SATELLITE RADIO (SAT) IF ACTIVATED
Once the Satellite Radio feature is activated, your navigation system will
have additional features.
1. Ensure that the navigation system is on.
2. Press the RADIO hard button on the navigation system.
3. Select the ‘SAT’ tab on the touchscreen to enter satellite radio mode
(if activated).
44
2009 Centerstack (ng1)
Supplement, 2nd Printing
USA (fus)
Page 46

Audio features
4. Press ‘Show Options’ to select from:
Sat 123: You will be able to access
three different Satellite Radio
modes, SAT1, SAT2 and SAT3.
Scan: Press to hear a brief sampling of satellite radio channels within
the currently selected genre. Press again to stop.
Scan Presets: Press to hear a brief sampling of all preset channels.
Channel Guide: Press to display a list of satellite radio channels sorted
by genre and also to skip or lock out certain channels. Select the desired
genre and choose a channel by pressing the channel name button. You
can then choose to ‘Skip’ or ‘Lock’ a certain channel. A ‘skipped’ channel
will not be accessible using the tune knob, scan or seek functions. (To
access the skipped channel, select ‘Direct Tune’ and enter the channel
number.) A ‘locked’ channel can only be accessed by entering the
‘Channel Guide’ and then entering the PIN.
Note: The PIN can be reset by simultaneously pressing and holding
presets 1 and 5 while on the PIN entry screen. After approximately five
seconds, the system will transition to the Channel Guide screen
indicating that the PIN is reset. Once you have reset the PIN, the system
will then allow you to set a new PIN.
Direct Tune: Press to enter a specific channel using the keypad and go
directly to that channel.
Set Genre: Press to choose from a list of possible satellite radio genres.
Once a genre is chosen and you press SEEK, it will only seek within the
selected genre.
Memo: The MEMO feature allows you to save a song title and artist to
the system. When the saved song is playing on any satellite radio
channel, the system will alert you with a pop-up in the lower status bar.
You can then choose to tune to the station or to ignore the pop-up.
When you are in the MEMO screen, the following options are available:
• Refresh: Press to refresh the current artist and title information.
2009 Centerstack (ng1)
Supplement, 2nd Printing
USA (fus)
45
Page 47

Audio features
• Song Alert: Press to store the song information displayed in the Title
Field. When the stored song is played in the future, an audio and
visual notification will be initiated.
• Artist Alert: Press to store the artist information currently displayed
in the Artist Field. When that artist is played again, the system will
alert you with a pop-up.
• Alert On/Off: Press to enable/disable the audio and visual song and
artists alerts.
Show Presets: Press to display presets at the bottom of the screen.
While listening to SIRIUS satellite radio, (if activated), press
VOICE on the steering wheel controls. When prompted, you may say any
of the following commands:
• On • Off
• < Channel name> • < 1–223 >
• SAT1 • SAT2
• SAT3 • Preset <1–6>
• SAT1 preset <1–6> • SAT2 preset <1–6>
• SAT3 preset <1–6> • Seek up
• Seek down • Store preset <1–6>
• Store SAT1 preset <1–6> • Store SAT2 preset <1–6>
• Store SAT3 preset <1–6> • Tune
• Help
Note: If you are not listening to SIRIUS satellite radio, press
VOICE on the steering wheel controls. When prompted, say, “SIRIUS”
and then press
you can say any of the above commands.
*If you have said “Tune”, you can then say the following
commands:
• < 1–223 > • < Channel name>
• SAT1 • SAT2
• SAT3 • Preset <1–6>
• SAT1 preset <1–6> • SAT2 preset <1–6>
• SAT3 preset <1–6>
or VOICE on the steering wheel controls again and
or
or
46
2009 Centerstack (ng1)
Supplement, 2nd Printing
USA (fus)
Page 48

Audio features
Satellite radio (if activated)
Your vehicle is equipped with satellite radio capability. The factory installed
SIRIUS satellite radio system includes a limited subscription term which
begins on the date of sale / lease of the vehicle. Extended subscription
terms are available, please contact SIRIUS at 1–888–539–7474.
You will need to give SIRIUS your Satellite Radio ESN Number for
activation. The ESN number is found on the System Information Screen
(SR ESN:XXXXXXXXXXXX). Press the I button (
system and select the ‘System Info’ tab on the touchscreen.
Satellite radio channels: SIRIUS broadcasts a variety of music, news,
sports, weather, traffic and entertainment satellite radio channels. For
more information and a complete list of SIRIUS satellite radio channels,
visit www.sirius.com in the United States, www.sirius-canada.ca in
Canada, or call SIRIUS at 1–888–539–7474.
Satellite radio reception factors: To receive the satellite signal, your
vehicle has been equipped with a satellite radio antenna located on the
roof of your vehicle. The vehicle roof provides the best location for an
unobstructed, open view of the sky, a requirement of a satellite radio
system. Like AM/FM, there are several factors that can affect satellite
radio reception performance:
• Antenna Obstructions: For optimal reception performance, keep the
antenna clear of snow and ice build-up and keep luggage and other
material as far away from the antenna as possible.
• Terrain: Hills, mountains, tall buildings, bridges, tunnels, freeway
overpasses, parking garages, dense tree foliage and thunderstorms can
interfere with your reception.
• Station overload: When you pass a ground based broadcast repeating
tower, a stronger signal may overtake a weaker one and result in an
audio mute.
Unlike AM/FM audible static, you will hear an audio mute when there is
a satellite radio signal interference. Your radio display may display
ACQUIRING...toindicatetheinterference.
SIRIUS satellite radio service: SIRIUS Satellite Radio is a subscription
based satellite radio service that broadcasts music, sports, news and
entertainment programming. A service fee is required in order to receive
SIRIUS service. Vehicles that are equipped with a factory installed
SIRIUS Satellite Radio system include:
• Hardware and limited subscription term, which begins on the date of
sale or lease of the vehicle.
) on the navigation
2009 Centerstack (ng1)
Supplement, 2nd Printing
USA (fus)
47
Page 49

Audio features
• Online media player providing access to all SIRIUS music channels
over the internet (Refer to your authorized dealer for availability.)
For information on extended subscription terms, contact SIRIUS at
1–888–539–7474.
Note: SIRIUS reserves the unrestricted right to change, rearrange, add
or delete programming including canceling, moving or adding particular
channels, and its prices, at any time, with or without notice to you. Ford
Motor Company shall not be responsible for any such programming
changes.
Satellite Radio Electronic Serial Number (ESN): This12digit
Satellite Serial Number is needed to activate, modify or track your
satellite radio account. You will need this number when communicating
with SIRIUS. While in Satellite Radio mode, you can view this number by
pressing the I button (
‘System Info’ tab.
Radio Display Condition Action Required
ACQUIRING Radio requires more
SAT FAULT Internal module or
INVALID CHANNEL Channel no longer
) on the navigation system and select the
No action required.
than two seconds to
produce audio for the
selected channel.
system failure
present.
available.
This message should
disappear shortly.
If this message does
not clear within a short
period of time, or with
an ignition key cycle,
your receiver may have
a fault. See your
authorized dealer for
service.
This previously
available channel is no
longer available. Tune
to another channel. If
the channel was one of
your presets, you may
choose another channel
for that preset button.
48
2009 Centerstack (ng1)
Supplement, 2nd Printing
USA (fus)
Page 50

Audio features
Radio Display Condition Action Required
UNSUBSCRIBED
CHANNEL
NO SIGNAL Loss of signal from
UPDATING Update of channel
CALL SIRIUS
1–888–539–7474
Subscription not
available for this
channel.
the SIRIUS satellite or
SIRIUS tower to the
vehicle antenna.
programming in
progress.
Satellite service has
been deactivated by
SIRIUS Satellite
Radio.
Contact SIRIUS at
1–888–539–7474 to
subscribe to the
channel, or tune to
another channel.
You are in a location
that is blocking the
SIRIUS signal (i.e.,
tunnel, under an
overpass, dense foliage,
etc). The system is
working properly. When
you move into an open
area, the signal should
return.
No action required. The
process may take up to
three minutes.
Call SIRIUS at
1–888–539–7474 to
re-activate or resolve
subscription issues.
PLAYING A CD/DVD
Note: CD units are designed to play commercially pressed 4.75 in
(12 cm) audio compact discs in the ISO 9660 format only. (UDF
format is not supported.) Due to technical incompatibility,
certain recordable and re-recordable compact discs may not
function correctly when used in CD players. Irregular shaped
CDs, CDs with a scratch protection film attached, and CDs with
homemade paper (adhesive) labels should not be inserted into
the CD player. The label may peel and cause the CD to become
jammed. It is recommended that homemade CDs be identified
with permanent felt tip marker rather than adhesive labels.
Ballpoint pens may damage CDs. Please contact your authorized
dealer for further information.
2009 Centerstack (ng1)
Supplement, 2nd Printing
USA (fus)
49
Page 51

Audio features
If you press CD/DVD and there is not a disc loaded into the system, NO
DISC will appear in the status bar and you will not be able to access the
CD screen.
• Insert a disc into the slot. The CD/DVD will begin to play.
You can access any of the following
options in CD mode:
Scan: Press for a brief sampling of all listenable CD tracks.
Compress (Compression) : Press to engage/disengage the compression
feature. Compression boosts more quiet music and lowers louder music
to minimize the need for volume adjustments.
Repeat: Press to engage / disengage the repeat feature. The system will
keep playing the same track continually.
Shuffle: Press to engage / disengage the shuffle feature. The system will
play all tracks on the disc randomly.
Track List: Press to view a list of tracks on the CD.
Record: Press to record and save the CD or any track(s) on the CD to
the Jukebox. You can then later access/play the saved tracks / CD.
: Press to access the previous track. Press and hold to reverse in
the current track.
/ (Play/Pause) : Press to play or pause the current track.
: Press to access the next track. Press and hold to advance within
the current track.
Press
the next (
50
SEEK hard button on your navigation system to listen to
) or previous ( ) track.
2009 Centerstack (ng1)
Supplement, 2nd Printing
USA (fus)
Page 52

Audio features
MP3
If you press the CD/DVD tab and there is not a disc loaded into the
system, NO DISC will appear in the status bar and you will not be able to
access the CD screen.
• Insert a disc into the slot. The disc will begin to play.
You can access any of the following
options in MP3 mode:
Scan: Press for a brief sampling of all listenable tracks.
Compress (Compression): Press to engage/disengage the compression
feature. Compression boosts more quiet music and lowers louder music
to minimize the need for volume adjustments.
Repeat: Press to engage / disengage the repeat feature. The system will
keep playing the same track continually.
Shuffle: Press to engage / disengage the shuffle feature. The system will
play all tracks on the disc randomly.
Folder mode: Press to activate folder mode. When activated, song play
and seeking stays within the current folder.
Folder List: Press to access/view a
list of folders on the disc. Select the
root folder (if available).
2009 Centerstack (ng1)
Supplement, 2nd Printing
USA (fus)
51
Page 53

Audio features
You may then select from all
possible folders on the disc.
You may also use the following:
: Press to access the previous track. Press and hold to reverse in
the current track.
/ (Play/Pause) : Press to play or pause the current track.
: Press to access the next track. Press and hold to advance within
the current track.
Press the
to the next ( ) or previous ( ) track.
CD voice commands (if equipped)
While listening to a CD, press
controls. When prompted, you may say any of the following commands:
• Play • Pause
• Repeat • Repeat off
• Shuffle • Shuffle off
• Play next track • Play previous track
• Play track <1–512> • Play folder <1–255>
• Play folder <1–255> track
<1–512>
• Play previous folder • Folder mode
• Folder mode off • Help
Note: If you are not listening to a CD, press
steering wheel controls. When prompted, say, “CD” and then any of the
above commands.
SEEK hard button on your navigation system to listen
or VOICE on the steering wheel
• Play next folder
or VOICE on the
52
2009 Centerstack (ng1)
Supplement, 2nd Printing
USA (fus)
Page 54

Audio features
PLAYING A DVD IN THE SYSTEM
Your navigation system allows you to play DVD audio and video discs. If
the vehicle is in Park (P), you will be able to view and hear the DVD. If
the vehicle is moving, you will only be able to hear the audio. To play a
DVD:
1. Ensure that the vehicle and the system are on.
2. Insert a DVD into the system, label side up. The system will
automatically go into DVD mode.
You can then select any of the
following options on the
touchscreen:
: Press to access the previous chapter. Press and hold to reverse in
the current chapter.
/ (Play/Pause) : Press to play or pause the DVD.
: Press to access the next chapter. Press and hold to advance
within the current chapter.
(Stop): Press to stop the current track.
Title: Goes to the main title screen stored on the disc.
Menu: Goes to the main menu of the disc.
Cursor controls: Use these controls to navigate to the desired menu
selections.
Search:: Press to select and go to a specific title or chapter using the
keypad.
Settings: Allows you to adjust the certain settings of the DVD player,
such as:
• Video Display Settings: Press to adjust the brightness and contrast.
You can also choose to return to the default settings by pressing
‘Restore Default’.
• Audio Language: Press to select which language you would like the
DVD to display.
2009 Centerstack (ng1)
Supplement, 2nd Printing
USA (fus)
53
Page 55

Audio features
• Subtitle Display: Press to turn subtitles on/off.
• Subtitle Language: Press to select in which language you would like
the subtitles to appear.
• Aspect Ratio: Press to select from wide, full, normal and cinema
display.
• Angle Mark Notification: Some DVD discs may have more viewing
angles from which to select. Once you have made your selection, press
ENTER to confirm. This is disc dependent feature.
Note: Some of the above settings are DVD dependent and
availability/operation will vary among DVDs.
Dolby威 noise reduction is manufactured under license from Dolby威
Laboratories Licensing Corporation. “Dolby威” and the double-D symbol
are registered trademarks of Dolby威 Laboratories Licensing Corporation.
During DVD play, you can also
touch the screen to access the
‘virtual remote’ which will allow you
to ‘Move controls’ on the screen as
well as use the cursor controls,
‘Enter’ and ‘Return’ to navigate and
make selections within the menus.
DVD voice commands (if equipped)
While watching a DVD, press
controls. When prompted, you may say any of the following commands:
• Play • Pause
• Menu • Menu title
• Play next title • Play previous title
• Play title <1–99> • Play next chapter
• Play previous chapter • Play chapter <1–999>
• Play next group • Play group <1–9>
• Repeat • Repeat off
• Play next track <1–512> • Play previous track
Note: If you are not watching a DVD, press
steering wheel controls. When prompted, say, “DVD” and then any of the
above commands.
or VOICE on the steering wheel
or VOICE on the
54
2009 Centerstack (ng1)
Supplement, 2nd Printing
USA (fus)
Page 56

Audio features
Video CD voice commands (if equipped)
While watching a video CD, press
controls. When prompted, you may say any of the following commands:
• Play • Pause
• Play previous track • Play next track
• Play track <1–512> • Help
Note: If you are not watching a video CD, press
steering wheel controls. When prompted, say, “video CD” and then any of
the above commands.
Disc voice commands (if equipped)
While watching a disc, press
controls. When prompted, you may say any of the following commands:
• Play • Pause
• Menu • Title menu
• Play next title • Play previous title
• Play title <1–99> • Play next chapter
• Play previous chapter • Play chapter <1–999>
• Play next group • Play previous group
• Play group <1–9> • Repeat
• Repeat off • Shuffle
• Shuffle off • Play next track
• Play previous track • Play track <1–512>
• Play folder <1–255> track
<1–512>
• Play previous folder • Folder mode
• Folder mode off • Help
Note: If you are not watching a disc, press
wheel controls. When prompted, say, “disc” and then any of the above
commands.
or VOICE on the steering wheel
or VOICE on the
or VOICE on the steering wheel
• Play next folder
or VOICE on the steering
JUKEBOX
Your mobile media navigation system has a Jukebox which allows you to
save desired tracks or CDs to the hard drive for later access. The hard
drive can store up to 10 GB* (164 hours; approximately 2,472 tracks) of
music. The system contains a Gracenote威 media database that allows for
2009 Centerstack (ng1)
Supplement, 2nd Printing
USA (fus)
55
Page 57

Audio features
display of song title, album title, and album cover art. After saving music
to the hard drive, you can access and play your music by specific tracks,
artists, albums or genres. You can even choose to create and access your
own playlists.
*Note: 1 GB equals one billion bytes (1,000,000,000B).
Recording (saving) music to your jukebox
To record (save) music to your jukebox:
1. Ensure that the system is on.
2. Insert a CD into the system. The CD tab will appear.
3. Select ‘Record’ on the
touchscreen.
4. Select either individual tracks or
press ‘Select All’ to record the entire
CD. Note: The system will default
to selecting all tracks if none are
selected.
5. Press ‘Start Recording’.
The progress will show at the
bottom of the screen.
When the recording process is finished, the system will save your
track(s) / CD to the Jukebox.
56
2009 Centerstack (ng1)
Supplement, 2nd Printing
USA (fus)
Page 58

Audio features
Note: If you are not actively listening to the disc being recorded, the
record rate is much quicker (as fast as five minutes).
Accessing the music in your jukebox
Once you have saved music to your jukebox, you can then choose
several ways to play your favorite music. To access:
1. Press the MEDIA hard button on
the navigation system.
2. Select the ‘Jukebox’ tab on the
touchscreen. You can then select
from the following options:
Scan: Press for a brief sampling of the currently selected CD, playlist,
genre, etc. Press again to disengage.
Repeat: Press to repeat the current CD, playlist, etc. Press again to
disengage.
Shuffle: Press to shuffle all the tracks on the current CD, playlist, etc. in
random order. Press again to disengage.
Music library: Press to access all of your saved music. You can choose
to view/play the material in the following ways:
• Play all tracks: Select to play all
tracks saved in the jukebox.
• Playlist: Select to play your own
playlist.
• Play genre: Select to have the
system play only music from a
specific genre.
• Play artist: Select to have the
system play only music by a
specific artist.
• Play album: Select to have the system play only music from a specific
album.
2009 Centerstack (ng1)
Supplement, 2nd Printing
USA (fus)
57
Page 59

Audio features
Options: Select to view your other
options:
• Edit Playlists: Select to edit your playlists.
• Edit Music Library Contents: Select to make changes to the
content in your music library.
• Update Album Information from CD Database: Select to update
the residing album information from the Gracenote威 database if a
recent software update was performed.
• Hard Disk Drive Information: Select to access the system’s hard
drive disc information such as used/free space and total capacity.
• CD Database Information: Select to access the CD database
information.
Creating a playlist
1. Press the MEDIA hard button on
the navigation system.
2. Select the ‘Jukebox’ tab on the
touchscreen.
3. Select ‘Options’.
58
2009 Centerstack (ng1)
Supplement, 2nd Printing
USA (fus)
Page 60

4. Select ‘Edit Playlists’.
5. Select which playlist you would
like to create.
6. Select which category you would
like to access from your saved
music.
Audio features
For example, say you chose one
saved album from which to select
songs.
2009 Centerstack (ng1)
Supplement, 2nd Printing
USA (fus)
59
Page 61

Audio features
7. Select the desired songs and then
press ‘Add’.
The system will show you your
currently selected songs. You can
choose to add more tracks to your
playlist, Sort the Playlist, Delete the
playlist or to edit the name of the
playlist.
8. When you are done making any
adjustment to the playlist, select
‘Edit Name’ to rename your playlist.
You can then access your playlist by
that name.
Jukebox voice commands (if equipped)
While listening to the music stored in the jukebox, press
on the steering wheel controls. When prompted, you may say any of the
following commands:
• Play • Pause
• Shuffle • Shuffle off
• Repeat • Repeat off
• Play next track • Play previous track
• Play genre <name> • Play artist <name>
60
or VOICE
2009 Centerstack (ng1)
Supplement, 2nd Printing
USA (fus)
Page 62

Audio features
• Play album <name> • Play track <name>
• Play playlist <name> • Play playlist <1–5>
• Help
Note: If you are not listening to the jukebox, press
steering wheel controls. When prompted, say, “Jukebox” and then any of
the above commands.
Search commands
Your jukebox has advanced search commands which allow you to have
the system search the stored music in your jukebox for a specific artist,
album or track. You can search for and play a specific type (genre) of
music, a specific album, a specific artist or a specific track.
To use the search commands
When listening to the jukebox, press
controls. When prompted, you may say any of the following commands:
• Search genre <name> • Search artist <name>
• Search album <name> • Search track <name>
Once the system is done searching for the type of music, artist, album,
or track, you can say any of the following commands:
• Play • Play album <name>
• Play track <name> • Play artist <name>
‘Refining’ your search
You can choose to ’refine’ your search even farther. For example, if you
told the system to search and play all music by a certain artist, you can
then tell the system to “Refine album” and choose a specific album when
prompted. If you then say “Play”, the system will only play music from
that specific album.
To refine your search, say any of the following commands after system
has finished searching for the type of music, artist, album, or track:
• Refine album <name> • Refine artist <name>
You can then select to:
• Play • Play track <name>
or VOICE on the steering wheel
or VOICE on the
2009 Centerstack (ng1)
Supplement, 2nd Printing
USA (fus)
61
Page 63

Audio features
USER DEVICE
If your vehicle is equipped with
SYNC威, there will be a ‘User Device’
tab in your media options. For more
information, please refer to the
SYNC威 media features chapter
later in this supplement.
LINE IN (AUXILIARY INPUT JACK)
Your vehicle is equipped with an audio input jack which will allow a
portable audio device to be listened to through your vehicle’s audio
system. To activate this feature:
1. Press the MEDIA hard button on the navigation system.
2. Select the ‘Line In’ tab.
Once a 3.5 mm input jack is plugged into the Line in jack, ensure that
the playing device is turned on with the volume set at the maximum
level. Press the play button and sound from the device will be emitted
through the vehicle speakers. Adjust the volume using the volume
control on the navigation system.
For information on the auxiliary input jack location, please refer to the
Auxiliary input jack (Line in) in the Entertainment chapter of your
Owner’s Guide.
62
2009 Centerstack (ng1)
Supplement, 2nd Printing
USA (fus)
Page 64

Audio features
REAR DVD (REAR OVERHEAD MOUNTED DVD SYSTEM, IF EQUIPPED)
Your navigation system allows you to access the Family Entertainment
DVD System (if equipped) as well as perform basic functions. To access:
1. Press the MEDIA hard button on
the navigation system.
2. Select the ‘Rear DVD’ tab on the
touchscreen. You may now select
from the following options:
: Press to access the previous track. Press and hold to reverse in
the current track.
: Press to access the next track. Press and hold to advance within
the current track.
/ (Play/Pause): Press to play or pause the current track.
Rear DVD voice commands (if equipped)
If the rear DVD is the only audio source playing, press
the steering wheel controls. When prompted, you may say any of the
following commands:
• Play • Pause
• Play previous chapter • Play next chapter
• Play previous track • Play next track
• Play previous folder • Play next folder
• Folder mode • Folder mode off
• Shuffle • Shuffle off
• Headphones • Headphones off
• Help
Note: If the Rear DVD is not the only audio source (i.e., the radio is on
also), then press
say, “Rear DVD” and then any of the above commands.
on the steering wheel controls. When prompted,
or VOICE on
2009 Centerstack (ng1)
Supplement, 2nd Printing
USA (fus)
63
Page 65

Audio features
REAR AUX (REAR OVERHEAD MOUNTED AUX INPUTS, IF EQUIPPED)
You can access and view the rear auxiliary mode which allows rear seat
passengers to plug in and play certain games. There is an external
video/audio input located on the rear DVD player (if equipped) for the
rear seat passengers to connect to an external video cassette player,
video games, camcorder, etc. To access:
1. Press the MEDIA hard button on the navigation system.
2. Select the ‘Rear AUX’ tab on the touchscreen.
Plug in the jacks to the Family
Entertainment DVD system (if
equipped) or the Rear seat controls
(if equipped).
REAR ZONE (IF EQUIPPED)
This screen allows front seat passengers to select/listen to a different
audio/video source than the back seat passengers. The only restriction is
that the front and back seat passengers cannot both listen to a different
frequency band (AM/FM1/FM2). The frequency band selected by the
driver is the band accessible by the rear passenger. To access:
1. Ensure that the navigation system is ON.
2. Press the MEDIA or RADIO hard button on the navigation system.
3. Select the ‘Rear Zone’ tab on the touchscreen.
The screen will show you the
selected playing media of the
different headsets (A and B). To
make adjustments, ensure that the
correct headset (A or B) is
highlighted. The appropriate
controls will appear to allow you to
make adjustments to your current
playing media.
•
64
(Reverse): Press for reverse play.
2009 Centerstack (ng1)
Supplement, 2nd Printing
USA (fus)
Page 66

Audio features
• / (Play/Pause): Press to play or pause the DVD.
•
SEEK: You may press the SEEK hard button on the navigation system
for the next (
• Media: Press to select the desired media in the selected headset (A
• Rear Controls Enabled/Disabled: Press to turn the Rear Controls
• Headphones On/Off: Press to turn the headphones on/off.
(Fast forward): Press for advance play.
) or previous ( ) chapter.
or B).
(if equipped) on/off.
2009 Centerstack (ng1)
Supplement, 2nd Printing
USA (fus)
65
Page 67

Climate features (if equipped)
REAR ZONE / CLIMATE CONTROL (IF EQUIPPED)
Your navigation system may allow you to access and make adjustments to
the front and rear zone climate controls. To access:
• Press the CLIMATE hard button on the navigation system.
From the ‘Front Zone’ screen, you
can select from / make adjustments
to the following:
• Driver temperature: Press to increase/decrease the airflow
temperature for the driver side of the vehicle. This control also adjusts
the passenger side temperature when dual zone operation is
disengaged.
• Passenger temperature: Press to activate separate passenger
temperature control and increase/decrease the airflow temperature for
the passenger in the front of the vehicle.
• +/- Fan speed: Press to increase/decrease the fan speed.
: Distributes air through the instrument panel vents.
•
• : Distributes air through the instrument panel vents, floor vents,
rear seat floor vents and de-mister vents.
•
• : Distributes air through the windshield defroster vents, de-mister
•
• Dual: Press to activate/deactivate separate driver and passenger
: Distributes air through the floor vents, rear seat floor vents.
vents, floor vents and rear seat floor vents. The system will
automatically provide outside air to reduce window fogging.
To return to full automatic control, press AUTO on the main bezel.
: Distributes outside air through the windshield defroster vents
and de-mister vents. Can be used to clear the windshield of fog and
thin ice. The system will automatically provide outside air to reduce
window fogging.
temperature controls.
66
2009 Centerstack (ng1)
Supplement, 2nd Printing
USA (fus)
Page 68

Climate features (if equipped)
• Max A/C: Distributes recirculated air through the instrument panel
vents to cool the vehicle. This re-cooling of the interior air is more
economical and efficient. Recirculated air may also help reduce
undesirable odors from entering the vehicle. Press the MAX A/C
button again for normal A/C operation.
From the ‘Rear Zone’ screen (if
equipped) you can select from /
make adjustments to the following:
• Rear Zone Power: Press to activate/deactivate the rear climate
system.
• Rear Control: Press to allow the rear passengers to control the rear
climate system using the rear mounted controls.
• Auto: Press to activate automatic mode and have the climate control
system automatically select air flow, fan speed and heating or cooling
to achieve the desired temperature.
• Temperature: Press up/down to increase/decrease the rear climate
temperature.
• +/- Fan Speed: Press to increase/decrease the rear climate airflow.
Note: The appearance of your rear zone screen may vary depending on
your vehicle. For more information on your climate control system,
please refer to the Climate Control chapter in your Owner’s Guide.
Climate voice commands (if equipped)
If the navigation screen is displaying the climate touchscreen, press
or VOICE on the steering wheel controls. When prompted, you may say
any of the following commands:
• On • Off
• Automatic • Dual off
• AC on • AC off
• Max AC on • Max AC off
2009 Centerstack (ng1)
Supplement, 2nd Printing
USA (fus)
67
Page 69

Climate features (if equipped)
• Defrost • Defrost off
• Rear Defrost • Rear Defrost off
• Recirc • Recirc off
• Fan speed increase • Fan speed decrease
• Temperature increase • Temperature decrease
• Temperature <16.0–32.0> • Temperature <60–90>>
• Help
Note: If the navigation system is not displaying the climate touchscreen,
press
“Climate” and then any of the above commands.
or VOICE on the steering wheel controls. When prompted, say,
68
2009 Centerstack (ng1)
Supplement, 2nd Printing
USA (fus)
Page 70

Information menu
INFORMATION MENU
Your navigation system has an Information menu which allows you access
to features such as: Where am I, HEV (Hybrid screen information, if
equipped), SIRIUS Travel Link (if activated), Calendar, System
Information and Help. These can be accessed by pressing the I hard
button (
WHERE AM I ?
Your navigation system is able to tell you your vehicle’s current location.
To use the ’Where am I?’ feature:
• Press the I button and select the
‘Where am I?’ tab.
The system will give you your current GPS location (latitude and
longitude), the current street you are on as well as the street in front
and behind the vehicle position along with distance information.
Note: Not all tab selections shown here will be available in all markets.
Check with your authorized dealer for availability.
) on the navigation system.
HYBRID INFORMATION (IF EQUIPPED)
If you have a Hybrid vehicle, your
navigation system has special Hybrid
screens which display Energy Flow
and Fuel Economy information. To
access these screens, press the I
button (
system, and then select the ‘HEV’
tab.
) on the navigation
2009 Centerstack (ng1)
Supplement, 2nd Printing
USA (fus)
69
Page 71

Information menu
ENERGY FLOW SCREEN
The Energy flow screen is a graphical representation of how power is
transferred within the Hybrid system to accelerate the vehicle or
recharge the battery. These screens are informational and do not require
any input from you.
Note: Due to the screen updates and simplification of the graphics, the
display may not show the actual vehicle status.
1. Engine Power: This line represents how much power is being
transferred from the engine to the wheels.
2. Engine: This icon represents the Internal Combustion Engine (ICE).
It will be highlighted only when the ICE is running.
3. Generator Power: This line represents how much power is being
generated by the engine for use by the High Voltage (HV) electric
system, or how much power is being used by the High Voltage (HV)
electric system to control/start the engine.
4. High Voltage (HV) Battery: This icon represents your High Voltage
Battery. It will be highlighted when power is transferred to and from the
battery. The fill level represents the state of charge of your HV Battery.
5. Battery Power: This line represents how much power the HV battery
is providing to accelerate the vehicle (discharging), or how much power
is being delivered from the motor to the battery (charging).
6. Electric motor: This icon represents the Hybrid Electric Motor. This
symbol will be highlighted to indicate that the vehicle is ready to be
driven.
70
2009 Centerstack (ng1)
Supplement, 2nd Printing
USA (fus)
Page 72

Information menu
7. Motor power: This line represents how much power is being
transferred between the wheels and the Hybrid Electric Motor.
The energy flow screens contain a title to indicate which mode is active
within the Hybrid system.
In Hybrid Drive mode, the vehicle
is being powered by both the
electric motor and the engine.
In Charging HV Battery mode,
power is being stored in the high
voltage (HV) battery by the Hybrid
system.
In Idle with Charging mode,
power is being generated to
recharge the high voltage battery.
2009 Centerstack (ng1)
Supplement, 2nd Printing
USA (fus)
71
Page 73

Information menu
In Idle mode, the vehicle is either
at rest, or is sharing very little
power between the Hybrid parts.
In Electric Drive mode, the vehicle
is driving in electric mode. The
power is coming from the electric
motor and not the engine.
FUEL ECONOMY SCREEN
The fuel economy screen displays
instantaneous fuel consumption,
overall average fuel economy and
also a graph of fuel economy
achieved in the last 15 minutes of
driving. To view this screen, select
‘Show Fuel Economy’ on the ‘HEV’
tab screen.
• Instantaneous Fuel Economy
(Inst Econ): This is displayed on
the vertical bar on the left of the screen ranging from 0–60 mpg. Your
vehicle must be moving to calculate instantaneous fuel economy. When
the vehicle is not moving, the Ins Econ function will display no bar on
the Inst Cons graph indicating 0 mpg. Conversely, if you are driving in
electric mode (Engine off), this function will display 60 mpg.
Instantaneous Economy cannot be reset.
72
2009 Centerstack (ng1)
Supplement, 2nd Printing
USA (fus)
Page 74

Information menu
• Overall Average Fuel Economy (AVG MPG): The AVG MPG is
displayed on the upper left hand corner of the screen. The AVG MPG
will be retained when the key is turned OFF and will continue
averaging when driving resumes. Pressing RESET will reset the AVG
MPG to zero.
• One minute average graph: The graph is updated each minute with
the fuel economy that was achieved during the prior minute of driving.
Each new one minute average will be added to the left side of the
graph, shifting the past data to the right. When the graph area is full,
the right most point will be deleted, keeping a running scroll from left
to right of the last 15 minutes of driving. The graph is intended to
provide a graphical representation of how driving habits/conditions can
affect fuel economy. Note that the graph will be cleared anytime the
key is turned out of RUN (however, the overall average fuel economy
will retain its value). Press RESET to clear the graph.
If the Navigation system has been set to units of Kilometer, the Fuel
Economy screen will display the equivalent Consumption Graph in units
of L/1000 KM. In Consumption (L/1000 KM) mode, the IFE function will
display MAX until the vehicle is moving. For more information on
Average Fuel Economy, refer to Message center in the Driver Controls
chapter in your Owner’s Guide.
SIRIUS TRAVEL LINK (IF ACTIVATED, U.S. ONLY)
Your navigation system contains SIRIUS Travel Link (if activated), a data
service feature which can help you locate the best gas prices, find movie
listings, get current traffic alerts, access the current weather map, get
accurate ski conditions as well as scores to current sports games.
Note: A paid subscription is required to access/use these features.
WARNING: Driving while distracted can result in loss of vehicle
control, accident and injury. Ford strongly recommends that
drivers use extreme caution when using any device that may take their
focus off the road. The driver’s primary responsibility is the safe
operation of their vehicle. Only use cell phones and other devices not
essential to the driving task when it is safe to do so.
2009 Centerstack (ng1)
Supplement, 2nd Printing
USA (fus)
73
Page 75

Information menu
Press the I button ( )onthe
navigation system and then select
the ‘Sirius Travel Link’ tab on the
touch screen.
From this screen you can select from the following options:
Traffic:
• On route: Select to identify
traffic incidents on your route.
You can select any of the list
items to view more details on that
incident. When viewing the
incident, you can select ‘Avoid’ to
have the system re-route you
around the incident.
Note: This button is disabled if a
route is not active or the vehicle
goes off route.
• Nearby: Select to identify traffic incidents around the vehicle’s
current location.
• My Places: Select to identify traffic incidents around your personal
traffic places (if programmed).
• With Travel Link, traffic
information will be displayed on
the map parallel to the road in a
different color. The color is
determined by the current ‘flow’
of traffic as shown on the Traffic
Legend Speed and Flow screen.
74
2009 Centerstack (ng1)
Supplement, 2nd Printing
USA (fus)
Page 76

Information menu
• Viewed and unviewed traffic
incidents are differentiated as
shown on the Traffic Legend
Traffic Incidents screen.
• An ‘incident’ which causes a road
closure will be noted by purple
dotted lines and will also have
direction and length information.
Note: Please visit www.sirius.com/traffic# and click on ‘coverage map
and details’ for a complete listing of all traffic areas covered by SIRIUS
Travel Link.
Weather:
• Current / 5 Day / Ski Info:
Select to view the current
weather, 5 day forecast or ski
information for a selected area.
To change the location, press
‘Location’ and select a location.
You can also select 5 favorite
current / 5 day location,
2009 Centerstack (ng1)
Supplement, 2nd Printing
USA (fus)
75
Page 77

Information menu
as well as 5 favorite ski locations
from the location selection screen.
• Weather Map: Select to view a
real time weather map. The map
can be displayed in three
different zoom levels: 500 mi
(1,000 km), 50 mi (100 km) and
5 mi (10 km). The weather map
shows the following information:
Storm: Available with the 500 mi
(1,000 km) and 50 mi (100 km)
zoom levels. Different storms have
different icons. To view storm information, press the desired storm icon.
Then press the ‘Info’ button.
Radar: Radar information is available in all three zoom levels and shows
weather fronts and precipitation.
Charts: Chart overlays show highs “H” and lows “L” and Isobars and are
available with the 500 mi (1,000 km), 50 mi (100 km) zoom levels.
Winds: Wind speed and direction are only shown at 5 mi (10km) zoom
level.
Press ‘Legend’ to view the meaning of the icons used on the map.
Press Blend +/- to adjust transparency of the weather map overlay.
76
2009 Centerstack (ng1)
Supplement, 2nd Printing
USA (fus)
Page 78

Information menu
Other Services:
• Fuel Prices: Select to show gas
prices at stations close to your
vehicle’s location or gas stations
on an active navigation route. You
can choose to sort the list by
distance, price or alphabetical
order.
You can also select to view Unleaded or Diesel fuel prices from the
‘Navigation Prefs’ (Preferences) tab under the NAV menu features. If you
select ‘Unleaded’, the navigation system will only show list items with
Unleaded fuel prices and if you select ‘Diesel’, the navigation system will
only show diesel prices. List items with ‘NA’ represent stations where
fuel prices are either not available or has a fuel price that is not selected
under ‘Navigation Prefs’ screen. The different hour glass icons indicate
the age of the collected data.
• Movie Listings: Select to display
movie theaters located nearby the
vehicle’s current location. Select
the clock icon to view the show
times. Show times are only
available for the list items which
have a clock next to them.
Fuel Station
Movie Theater
• Sports Information: Select to
display scores and schedules for a
variety of sports. You can even
save up to 10 favorite teams for
easier access. The score screen
automatically refreshes when a
game or event is in progress. On
the score screen, a TUNE button
is shown next to the list item
when a live radio broadcast is in
process.
2009 Centerstack (ng1)
Supplement, 2nd Printing
USA (fus)
77
Page 79

Information menu
Note: Neither SIRIUS nor Ford is responsible for any errors or
inaccuracies in the SIRIUS Travel Link services or its use in vehicles.
SIRIUS travel link (if activated) voice commands (if equipped)
When using SIRIUS Travel Link, press
wheel controls. When prompted, say, “Travel Link”, wait for the system
to sound two tones and you may say any of the following commands:
• Traffic • Weather map
• Weather • Five day weather forecast
• Movie listings • Fuel prices
• NFL scores • NFL schedule
• Baseball scores • Baseball schedule
• College football scores • College football schedule
• College basketball scores • College basketball schedule
• Motor sports results • Motor sports schedule
• Golf leaderboards • Golf schedule
• Sports schedules • Sports scores
• NBA scores • NBA schedule
• NHL scores • NHL schedule
• Help
If you say the command, “Sports scores” once, the system is
ready. You may then say any of the following commands:
• NHL scores • NBA scores
• NFL scores • Baseball scores
• College football scores • College basketball scores
• Motor sports results • Golf leaderboards
• Travel link help
If you say the command “Sports schedules” once, the system is
ready. You may then say any of the following commands:
• NHL schedule • NBA schedule
• NFL schedule • Baseball schedule
• College football schedule • College basketball schedule
• Motor sports schedule • Golf schedule
• Travel link help
or VOICE on the steering
78
2009 Centerstack (ng1)
Supplement, 2nd Printing
USA (fus)
Page 80

Information menu
CALENDAR
• Press the I button and then select
the ‘Calendar’ tab.
You can then select which month
you would like to view by
pressing
select ‘Go to Today’.
• You are able to view calendars
from one previous year and the
next 10 years.
Note: Not all tab selections shown here will be available in all markets.
Check with your authorized dealer for availability.
SYSTEM INFORMATION
• Press the I button (
navigation system and then select
the ‘System Information’ tab on
the touchscreen.
In this screen you can view the following options:
• Phone number for your Customer Service Center
• Current system versions installed
• Current SIRIUS Radio ESN
• SIRIUS Travel Link ESN
Note: Not all tab selections or features are available in all markets. (For
example, SIRIUS Travel Link is only available in the U.S., and SIRIUS
Satellite Radio is only available in the U.S. and Canada.) Please check
with your authorized dealer for availability.
HELP
The Help screen allows you to view basic information about controls and
driving restrictions as well as traffic legend information and basic voice
commands available in various modes. To access:
• Press the I button (
‘Help’ tab.
/ or you can also
)onthe
) on the navigation system and then select the
2009 Centerstack (ng1)
Supplement, 2nd Printing
USA (fus)
79
Page 81

Information menu
Select ‘Basic Operation’ at the top of
the screen to view hard buttons on
your navigation system. Press the
desired icon to view the button
description.
Select ‘Driving Restriction’ at the
top of the screen to view the
system’s driving restriction.
Select ‘Traffic Legend’ at the top of
the screen to view the color code
for the ‘Speed and Flow’ of roads on
the navigation system. You can also
select ‘Traffic Incidents’ to help you
differentiate between viewed and
unviewed incidents.
Select ‘Voice Commands’ at the top
of the screen. Select any of the
available categories on the screen.
When selected, the system will show
you a brief listing of possible voice
commands in that specific mode.
Please refer to the Voice
recognition system overview
chapter for information on the voice
recognition system.
80
2009 Centerstack (ng1)
Supplement, 2nd Printing
USA (fus)
Page 82

Sound menu features
SOUND FEATURES
The sound menu allows you to access and adjust settings such as Bass,
Treble, Fade, Balance, Digital Signal Processing (DSP), Speed
compensated volume (SCV) and the visualizer. To access:
1. Press SOUND on the navigation system.
2. Press the appropriate tab to select from:
Bass/Treble: Press + to increase or
— to decrease the levels.
Balance/Fade: Press to adjust the
sound between the left and right
speakers (Balance) and to adjust
the sound to the front and rear
speakers (Fade).
SCV (Speed compensated volume):
With this feature on, the radio
volume changes automatically with
vehicle speed to compensate for
road and wind noise. Select a level
of compensation between 1 and 7 by
pressing the corresponding button.
2009 Centerstack (ng1)
Supplement, 2nd Printing
USA (fus)
81
Page 83

Sound menu features
DSP (Digital Signal Processing):
Depending on your option package,
you may either select from ‘Stereo’
or ‘Surround Sound’.
Or, you may choose to optimize the
sound quality for ‘All Seats’, ‘Driver
Seat’ or ‘Rear Seat’.
Visualizer: Press to turn the audio
visualizer display on or off.
82
2009 Centerstack (ng1)
Supplement, 2nd Printing
USA (fus)
Page 84

Setting a destination
PROGRAMMING A DESTINATION
The Destination screen gives you many options. You can choose to
access ‘Quick’ selections (available while the vehicle is moving) such as
your preset favorites or emergency points of interest, you can choose to
set a destination using ‘Standard’ resources (such as street address, or
points of interest, etc.) or you can choose the ‘Edit Route’ tab which will
allow you to set any preferences you may have for your current
navigation route.
Note: The navigation system contains map coverage for North America;
including the United States, Puerto Rico and U.S. Virgin Islands, Canada
and Mexico.
To access:
1. Press the DEST hard button on the navigation system.
2. Select from the following on the touchscreen:
Quick: The Quick Destination
option will help you find the nearest
points of interest programming and
also Emergency destinations such as
a Hospital or Police. You can also
save and access your favorite
destination presets in this screen.
Standard: Your Standard
Destination screen allows you to set
a destination using any of the
following: Address Book, Previous
Destination, Phone Number, Map,
Street Address, POI, Freeway
Exit/Entrance or a specific
Intersection.
Note: This is a speed dependent
feature.
2009 Centerstack (ng1)
Supplement, 2nd Printing
USA (fus)
83
Page 85

Setting a destination
Edit Route: The ‘Edit Route’
screen allows you to make any
adjustments to the currently
selected navigation route such as:
Cancel route, Detour, View Route,
Edit Route Preferences, Edit Traffic
Preferences, Edit Destination / Way
Points and Edit Turn List.
Setting a destination by voice
Press
“Please say a command.”
VOICE/Main Menu and
tone will sound and the icon will change to
• To enter an address, say “Destination street address”.
• To find a POI by its category, say “Destination <POI category>”. (For
example, “Destination restaurants”). You may also say “Destination
POI category” and “Destination nearest POI”.
• To find a POI by its name, say “Destination POI”. Follow the prompts
to say a POI by name. (For example, “Starbucks”.) You will need to
specify the POI category when prompted.
• If you want to route to a previous destination, say, “Destination
previous destination”.
• If you have programmed a home entry, you may set this as your
destination by saying, ⬙Destination home”.
• If you have created nametags for any of your address book entries,
you may set any of them as your destination by saying, “Destination
<nametag>”.
• For Help, say, “Destination Help”.
Note: If the system’s language is set to French or Spanish, the city and
street names will need to be spelled. When in ‘Spelling mode’, you may
speak letters or say, “line # ”. The system is designed to work even if you
have made a spelling error.
or VOICE on the steering wheel. A tone will sound followed by
will appear in the status bar first. Then, a
Listening
.
ACCESSING YOUR QUICK DESTINATION OPTIONS
To access your Quick Destination options:
1. Press the DEST hard button on the navigation system.
84
2009 Centerstack (ng1)
Supplement, 2nd Printing
USA (fus)
Page 86

Setting a destination
2. Select the ‘Quick’ tab on the touchscreen to select from the following:
Emergency: Select to find Hospitals
and Police close to the vehicle’s
current location. The system may
list up to 25 locations.
Find nearest POI: Your navigation
system allows you to select up to
five different Point of Interest (POI)
icons which will appear on the
navigation map. You can change
these icons at any time but the
default icons are as follows:
• Gas Station
• ATM
• Restaurant
• Accommodations
• Parking Garage
Once one of these categories is selected, a list will be shown in order of
distance from the vehicle’s current location.
• List all categories: Select to have the system display a list of all
categories. Select the desired category and then the desired
subcategory. The system will show a list with name and your distance
to each POI from the current location. Once a specific location is
selected, the system will display the Destination map screen for
confirmation.
Favorite Destination Presets: This feature will store your home
location as well as five address book entries for quick access. To set a
favorite destination preset: press the desired preset location and follow
the system’s screens to choose the desired selection to store. The system
will display the icon and name associated with the location. Once a
destination has been programmed, the following button will become
available as quick touch button under the ‘Quick Dest’ tab:
• Cancel route: Select to cancel the current route. The system will ask
you for confirmation.
2009 Centerstack (ng1)
Supplement, 2nd Printing
USA (fus)
85
Page 87

Setting a destination
ACCESSING YOUR STANDARD DESTINATION OPTIONS
1. Press the DEST hard button on the navigation system.
2. Select the ‘Standard’ tab on the
touchscreen to access the following
options:
Address Book: Select to access
your ‘Address Book Entries List’.
The navigation system can store up
to 25 entries which can be used as
destinations, waypoints, and areas to
avoid.
Entries can be sorted alphabetically
(A-Z), by date or icon. Press the
ADD button to add entries to the
address book and select the desired
destination entry method.
Once address book entries are
input, they can be selected for
display. Once displayed on the
map/information split screen, you
can choose to ‘Set as Dest’, ‘Set as
Waypoint’, ‘Delete’ or ‘Edit’ the
address book entry.
86
2009 Centerstack (ng1)
Supplement, 2nd Printing
USA (fus)
Page 88

Setting a destination
Edit allows you to name/change the
entry, add/edit a phone number,
add/edit the icon or set the entry as
a favorite destination. (These are
destination presets which work
similarly to the audio presets. Once
set, the favorite destinations appear
at the bottom of the Quick
destination entry screen for
one-touch fast entry.)
Previous Destination: Select to access your ’Previous Destination List’.
The navigation system can store up to 20 recently used destinations and
waypoints. Destinations already present in the list will not be duplicated.
When a new entry is added to the list, the oldest one will be removed.
• Set as Dest: Select this feature to set the current entry as your
destination. The screen will display the destination map screen
showing the selected destination. You can then select to set it as a
final destination or a waypoint.
• Delete: Select to delete individual entries.
• Delete all: Select to delete all entries.
Phone Number: This feature allows
you to search for a destination using
the phone number of a saved POI or
Address Book entry by entering the
phone number on the keypad on the
screen. After the number is entered,
the system will ask you to confirm
the name under which the phone
number is registered.
Map: You can select any point on
the map to set as a destination or
waypoint by using the map cursor.
2009 Centerstack (ng1)
Supplement, 2nd Printing
USA (fus)
87
Page 89

Setting a destination
Street Address: You can enter any
street address as a destination or
waypoint.
• State/Prov: Type using the keyboard or select the area to search
from the list. The search is based on the current position or the
previous selection. You can also set the Auto Fill preference on or off.
Select USA, Canada or Mexico and then select the desired state,
province or territory (if applicable). Depending on your settings, this
may be automatically filled in.
• City: Enter the desired city name.
• Street: Enter the desired street name. Streets which include numbers
in their name can be searched if the name is input using digits or a
spelling of the number. This applies to street names containing whole
numbers from 1 (one) to 20 (twenty) or 1st (first) to 20th (twentieth)
only.
• Number: Select to enter a house number.
• List: Select to view and select from a list of State, Province,
Territories, Cities, and Names. The system will provide a list based on
the first letter you type into the system.
Point of Interest (POI): POIs can
be sorted alphabetically or in the
order of distance from the vehicle’s
position. You can view detailed
information such as name, city
name, street name, house number
and telephone number.
• State/Prov: Type using the keyboard or select the area to search
from the list. The search is based on the current position or the
previous selection. You can also set the Auto Fill preference on or off.
88
2009 Centerstack (ng1)
Supplement, 2nd Printing
USA (fus)
Page 90

Setting a destination
Select USA and then the desired state or select Canada and then any
province or territory. Depending on your settings, this may be
automatically filled in.
• City: Enter the desired city name.
• Category: Select the desired POI category or subcategory.
• Name: Select to search for a POI using a full or partial name.
• List: Select to view and select from a list of State, Province,
Territories, Cities, and Names. The system will provide a list based on
the first letter you type into the system.
Freeway Exit/Entrance: Your
navigation system allows you to
enter a freeway name and then you
can select an entrance or exit to
that freeway. The entrance/exit can
be sorted alphabetically or in the
order of distance from the vehicle’s
position. The selected entrance/exit
can then be selected as a final
destination or waypoint.
• State/Prov: Type using the keyboard or select the area to search
from the list. The search is based on the current position or the
previous selection. You can also set the Auto Fill preference on or off.
Select USA and then the desired state or select Canada and then any
province or territory. Depending on your settings, this may be
automatically filled in.
• Freeway: The Smart Speller will help enter a valid freeway in the
area specified.
• List: Select to view and select from a list of State, Province,
Territories, Cities, and Names. The system will provide a list based on
the first letter you type into the system.
2009 Centerstack (ng1)
Supplement, 2nd Printing
USA (fus)
89
Page 91

Setting a destination
Intersection: You can set an
intersection as a destination. Enter
the name of the first street and then
the first letter of the second. The
system will pull up a list of possible
matches based on that letter. Select
the desired street. You can sort the
list alphabetically or in order of
distance from the vehicle.
• State/Prov: Type using the keyboard or select the area to search
from the list. The search is based on the current position or the
previous selection. You can also set the Auto Fill preference on or off.
Select USA and then the desired state or select Canada and then any
province or territory. Depending on your settings, this may be
automatically filled in.
• City: Enter the desired city name.
• Street #1: Enter the desired street name. Streets which include
numbers in their name can be searched if the name is input using
digits or a spelling of the number. This applies to street names
containing whole numbers from 1 (one) to 20 (twenty) or 1st (first)
to 20th (twentieth) only.
• Street #2: Enter the name of the second street or simply the first
letter of the second street for a list of possible matches.
• List: Select to view and select from a list of State, Province,
Territories, Cities, and Names. The system will provide a list based on
the first letter you type into the system.
POI CATEGORIES
Your system offers a variety of POI (Points of Interest) categories.
Note: Some entries are present in multiple categories.
The main categories are as follows:
• Food / drink & dining • Automotive
• Travel & transportation • Shopping
• Financial • Entertainment & arts
• Emergency • Recreation & sports
• Community • Government
• Health & medicine • Domestic services
90
2009 Centerstack (ng1)
Supplement, 2nd Printing
USA (fus)
Page 92

Setting a destination
These main categories contain entries and also sometimes have
subcategories. The following are listings within the main POI categories.
Note: Italic listings denote a subcategory of entries.
The Food / drink & dining category contains:
• All restaurants • Banquet hall
• Coffee house & cafe • Convenience store
• Drinking establishments • Grocery
• Ice cream parlor • Speciality food
• Wine & liquor • Winery
The All restaurants sub-category contains:
• All • American
• Barbecue / Southern Sandwich • Bistro
• Brew Pub • British Isles
• Cafeteria • Cajun/Caribbean
• Canadian • Chinese
• Deli/Sandwich • Fast food
• French • German
• Greek • Grill
• Indian • Korean
• Italian • Mexican
• Japanese • Other
• Middle Eastern • Polish
• Pizza • Seafood
• Russian • Spanish
• Soul food • Thai
• Steak house • Vietnamese
• Vegetarian
The Automotive category contains:
• Auto parts •
• Car wash • Fuel station
• Oil change • Parking
• Rental car • Towing
Automobile dealership
2009 Centerstack (ng1)
Supplement, 2nd Printing
USA (fus)
91
Page 93

Setting a destination
The Automobile dealership sub-category contains:
• All • Ford
• Lincoln/Mercury • Mazda
The Parking sub-category contains:
• Park and ride • Parking garage
• Parking lot
The Travel & transportation category contains:
• Accommodations • Fuel station
• Historical monument • International border crossing
• Marina • Parking
• Public transit • Rental car
• Rest area • RV Park/Campground
• Tourist attraction • Tourist info.
The Public transit sub-category contains:
• Airport • Bus station
• Commuter rail • Ferry terminal
• Railway station
The Shopping category contains:
• Book store • Clothing store
• Computer & software • Convenience store
• Cosmetics/Beauty • Department store
• Discount store • Electronics
• Grocery • Home & Garden
• Office supply • RV park / campground
• Shoe store • Shopping center / mall
• Speciality food • Spectator sports complex
• Sporting goods • Used merchandise
• Wholesale club
The Home & Garden sub-category contains:
• Floor covering • Furniture store
• Florist • Garden center
• Glass & window • Hardware store
• Wine & Liquor
92
2009 Centerstack (ng1)
Supplement, 2nd Printing
USA (fus)
Page 94

Setting a destination
• Home center • Paint
• Major appliances
The Financial category contains:
• ATM • Banking
The Entertainment & Arts category contains:
• Amusement / Theme Park • Night Club
• Casino • Exhibition / Conference Center
• Movie Theater • Museum
• Performing arts • Video & DVD rentals
• Zoo & Botanical gardens
The Emergency category contains:
• Hospital • Police
The Recreation & Sports category contains:
• Bowling • Fitness center
• Golf course • Ice arena
• Marina • Ski resort
• Parks • Race Track
• Recreation facility
The Community category contains:
• Business facility • Community center
• Education • Fire department
• Library • Named place
• Parks • Police
• Religious facility
The Education sub-category contains:
• Higher education • K-12 school
The Government category contains:
• City hall • Court house
• Embassy • Government office
• International border crossing • Post office
2009 Centerstack (ng1)
Supplement, 2nd Printing
USA (fus)
93
Page 95

Setting a destination
The Health & Medicine category contains:
• Hospital • Pharmacy
• Retirement / Nursing Home • Urgent care center
The Domestic Services category contains:
• Personal care services • Cleaners / Laundry
• Florist • Funeral home
• Storage • Tailor & Alteration
• Vet service
The Personal care services sub-category contains:
• Barber shop • Beauty salon
• Cosmetics / Beauty • Nail salon
• Spa
Destination voice commands (if equipped)
When setting a destination by voice, press
wheel controls. When prompted, say “Destination” and then wait or the
system to sound two tones, and say any of the following commands:
• Home •<name tag>
• Nearest POI • <POI category>
• POI • POI category
• Street address • Previous destination
• Destination help
EDITING A NAVIGATION ROUTE
To edit your navigation route:
1. Press the DEST hard button on the navigation system.
2. Select the ‘Edit Route’ tab on the
touchscreen to select from the
following:
or VOICE on the steering
Cancel Route: Select to cancel an active route.
94
2009 Centerstack (ng1)
Supplement, 2nd Printing
USA (fus)
Page 96

Setting a destination
Detour: Select to set an avoid area on the current route.
View Route: Select to view the
entire current route. You can then
select from the following options:
• View Destination: The system will display a close up view of the
destination and surrounding area.
• View Next Waypoint: The system will display a close up view of the
next way point and surrounding area.
• View Turn list: The system will display the turn list computed for the
current destination. You can then select to avoid a road on the turn
list if desired.
Edit Route Preferences: Once you have selected a route to be
displayed as the shortest distance or fastest route, you can also select
from the following options:
• Avoid Freeways
• Avoid Toll Roads
• Avoid Ferries
• Avoid Time restrictions
Edit Traffic Preferences: Select to edit traffic preferences.Note:
Requires SIRIUS Travel Link (if activated).
Edit Destination/Waypoints: Select to edit the destination or
waypoints in a defined route.
Edit Turn List: Select to delete or avoid a road in the current turn list.
DISCLAIMER
The disclaimer will appear once per ignition cycle when the DEST button
is pressed. Press the ‘Accept’ button on the screen to concur and to
access navigaton functions. If you do not press ‘Accept’ you will only
have access to non-navigation functions. The disclaimer will be the
following or similar to the following:
• Always obey local traffic regulations.
95
2009 Centerstack (ng1)
Supplement, 2nd Printing
USA (fus)
Page 97

Setting a destination
• It is recommended to program the system only when stopped.
• Some functions are unavailable while the vehicle is in motion to help
minimize distraction.
• Please refer to your Owner’s Guide for further details.
• Periodic map updates are available at an additional cost.
MAP MODE
To enter map mode:
1. Ensure that the system is on.
2. Press the MAP hard button on the navigation system. The map screen
will display.
When in MAP mode, an icon appears on the upper left side of the
screen; this is a toggle button to change the view of the map displayed.
The following methods exist for orientation of the map:
• Heading up: In this mode, the
direction of forward travel is
always the upward direction on
screen. Available for map scales up to 2.5 mi /5km. For scales above
that, the setting for Heading-Up is remembered, but the map is shown
in North-Up only. If the scale returns below this level, then the
Heading-Up setting is restored.
• North up: In this mode, the
Northern Direction is always the
upward direction on screen.
MAP SCALE
The map display scale on the map
has 12 levels, ranging from
0.02 miles to 160 miles. In MAP
mode, you can also zoom in or out,
changing the display scale by pressing on one of the arrows on the
button appearing on the left side of the screen. When in Full Screen Map
Mode, touching this button will cause the Zoom Direct buttons to appear.
The Zoom Direct buttons represent the most common scales and can be
pressed directly to show the map at the desired scale. The scale is
approximate and based on the width of the display button (A). The size
of the scale will vary based on the screen size.
96
A
2009 Centerstack (ng1)
Supplement, 2nd Printing
USA (fus)
Page 98

Setting a destination
Map road colors and building representation on the map:
• Roads: Will be displayed in a variety of colors.
• Building footprints: Will display areas of major buildings in the 20
largest cities in the U.S. These areas will be displayed depending on
their size and the map zoom level.
Quick touch buttons
When in Map mode, you have the
ability to view six quick touch
buttons. In order to view these,
press and release anywhere on the
map display. The map position will
not change and they will appear on
the map. These buttons are:
•
Set as Dest: Press in order to select a scrolled location on the map as
your destination. (You may scroll the map by pressing your index finger
on the map display. When you reach the desired location, simply let go
and then press ‘Set as Dest’ to go to the Destination Map View Screen.
• Set as Waypoint: Press to set the current location as a waypoint.
• Save to Address Book: Press to save the current location to the
address book.
• POI Icons ON/OFF: Press to
view set POI icons to be
displayed on the map. Up to
three icons can be selected for
display on the map at the same
time.
• View Traffic: Press to adjust the map display to the right scale. This
scale allows the entire route to be visible in the screen.
• View/Edit Route: Press in order to adjust the following features of
the current active route:
Cancel route: Press cancel the current active route.
2009 Centerstack (ng1)
Supplement, 2nd Printing
USA (fus)
97
Page 99

Setting a destination
View route: Select to view the current route.
Edit route preferences: Press to adjust route preferences.
Edit traffic preferences: Press to adjust traffic preferences.
Note: Requires SIRIUS Travel Link (if activated). Check with your
authorized dealer for availability.
Edit destination/waypoints: Press in order to add, delete or adjust any
waypoints or your destination.
Edit turn list: Press to display the turn list screen and make any
desired adjustments.
Map scrolling
Single scroll: In single scroll mode, press and release on the map
display will bring the pressed position to the center of the screen. The
scroll mode will time out after five minutes of inactivity.
Continuous scroll: During scroll mode, press and hold to begin
scrolling continuously in one of eight directions closest to the point that
is pressed. The scroll will continue until the map is released, and will
increase in speed after three seconds. This is not possible if the vehicle
is moving. The scroll mode will time out after five minutes of inactivity.
Map icon descriptions
• Vehicle mark: This icon is shown
in scroll mode also. The ring
around the vehicle mark will
flash. The vehicle mark is shown in the center of the map display,
except when in scroll mode.
• Scroll cursor: This icon is fixed
in the center of the screen. The
map position closest to the cursor
is in a window on the top center
part of the screen.
• Address book entry default
icon: This icon indicates the
location on the map of an address
book entry. This is the default
symbol shown after the entry has been stored to the Address Book by
any method other than the map. A different icon can be selected from
the 22 icons available; each icon can be used more than once.
98
2009 Centerstack (ng1)
Supplement, 2nd Printing
USA (fus)
Page 100

Setting a destination
• Home: This icon indicates the
location on the map currently
stored as the home position. Only
one entry from the Address Book
can be saved as Home. This icon cannot be changed.
• POI (Point Of Interest) icon:
Icons such as this can be
displayed on the map and can be
turned on or off. There are about
56 subcategories of POIs that can
be selected to be displayed on the map one at a time.
• Starting point: This icon
indicates the starting point of a
planned navigation route.
• Waypoints: This icon indicates
the location of a waypoint on the
map. The number inside the
circle is different for each
waypoint and represents the
position of the waypoint in the route list.
• Destination symbol: This icon
indicates the location of the final
destination on the map.
S
2
• Next maneuver point: This icon
shows the location where the
next turn should occur on the
planned route. You may be able
to see up to the next three turns.
• No GPS symbol: This icon
Indicates that insufficient GPS
satellite signals are being received
for accurate map positioning. The symbol may be intermittently
displayed under normal operation in an area with poor GPS access.
Refer to Limited GPS reception in General Information.
2009 Centerstack (ng1)
Supplement, 2nd Printing
USA (fus)
99
 Loading...