

Page 1
Step 3: (Illustration 3). Thread the bell wire through
completed hole from inside the garage. Fasten wire to
the Key Switch terminal screws before attaching
mounting plate to jamb. In most cases, 4 screw nails will
hold the plate firmly in place. Drive a nail into jamb and
wind some wire around it before running wire to the
opener terminals.
NOTE: Instructions for attaching bell wire to opener
terminals are on Page 2.
CAUTION: Bell wire should be pulled taut to prevent
access to wiring from outside the garage.
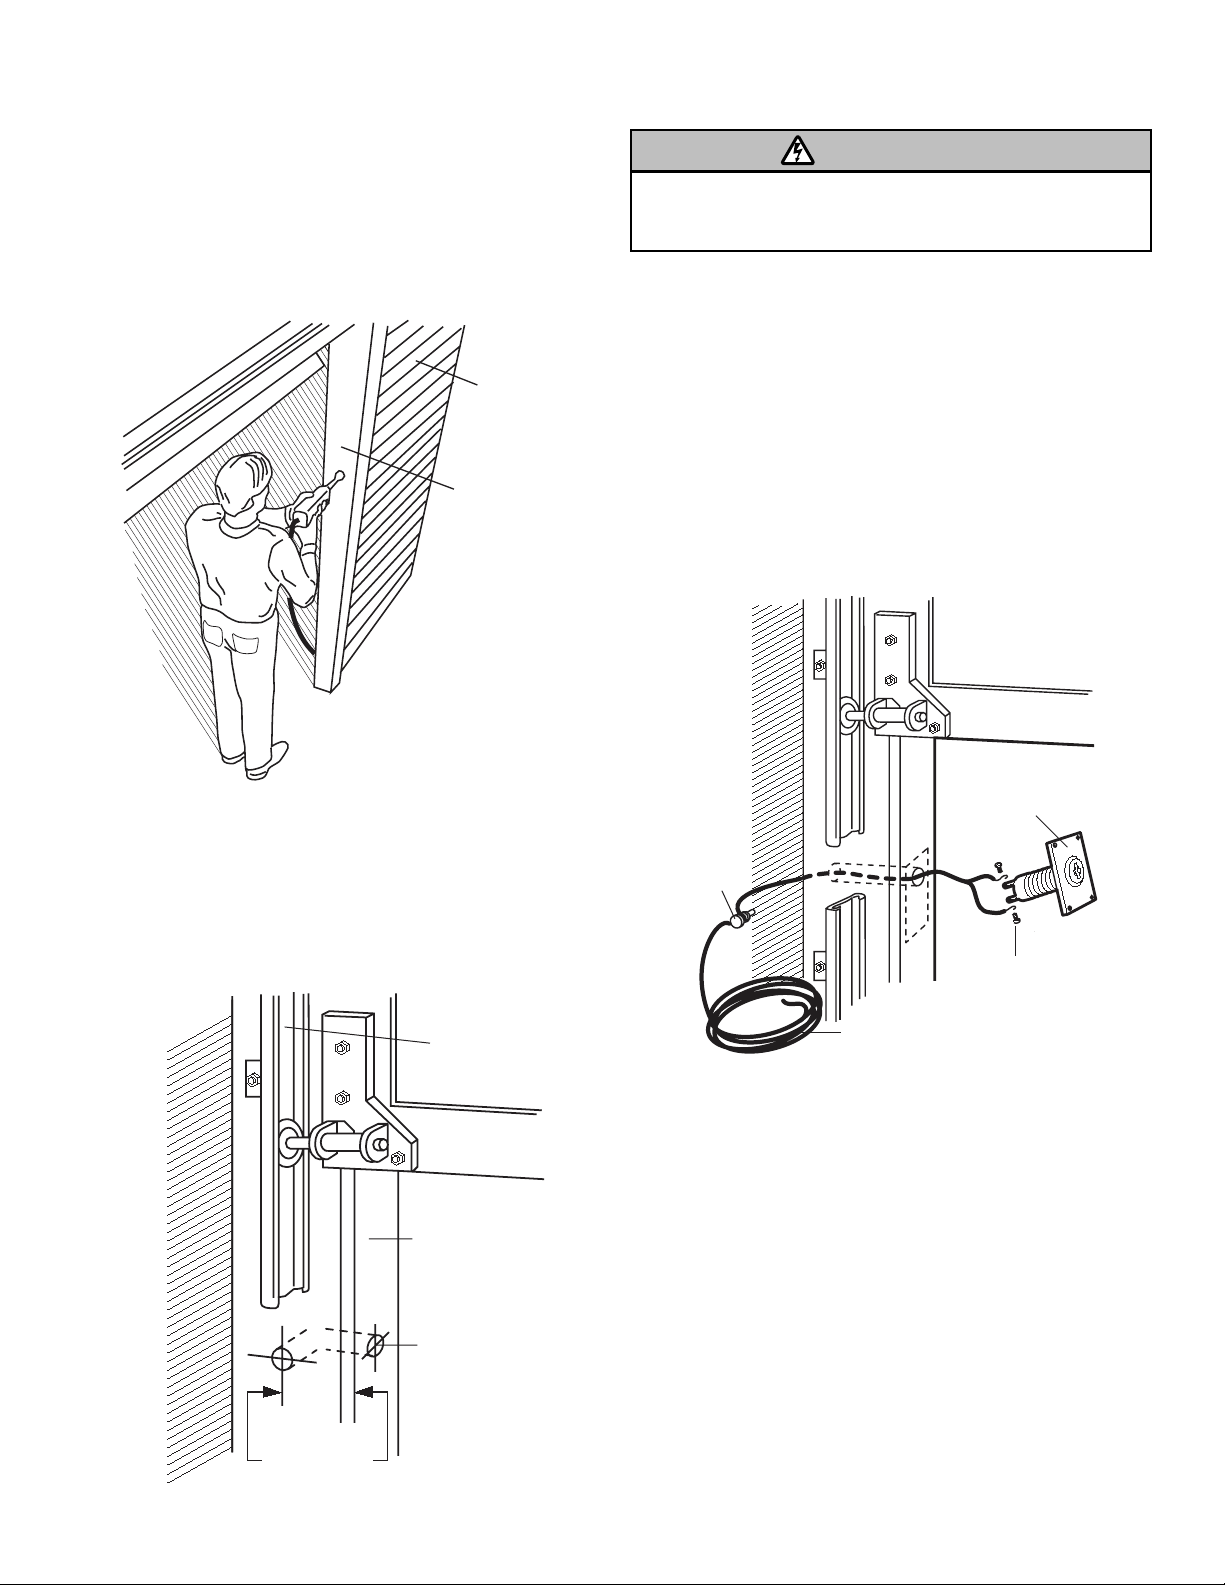
Step 2: (Illustration 2). If your garage has a built-up jamb,
drill the hole to a depth of 2" (5 cm). Then on the inside
jamb, drill a second hole into the first hole to complete
access.
Step 1: Disconnect power to operator. (Illustration 1)
Position key Switch in the upper half of garage door jamb.
Mark the location on horizontal center of jamb or to a
depth of 2" (5 cm) (see Step 2).
Step 4: If screw nails won’t hold the plate firmly in place,
use anchor and nut supplied with hardware. (See
illustration on page 2). If anchor and nut are used,
remove the Key Switch terminal screws.
Insert key Switch in drilled hole. Install anchor and nut.
Return screws to switch terminals. Fasten bell wire to
terminals. Drive a nail into jamb and wind some wire
around it before connecting to terminals on back of
opener.
NOTE: Instructions for attaching the bell wire to opener
are on page 2 (illustration 5).
1
KEY SWITCH INSTALLATION INSTRUCTIONS
FOR SECTIONAL DOORS
(FOR ONE-PIECE DOORS Refer to Page 2)
To prevent possible SERIOUS INJURY or DEATH from electrocution,
disconnect power to opener BEFORE proceeding.
(1)
Garage
Exterior
Door Jamb
WARNING
(3)
(2)
Door
Track
Door
Jamb
1" (2.5 cm)
Diameter
Hole
Mounting
Plate
Nail
Terminal
Screw
Bell Wire
2" (5 cm) Min.
Page 2

©2006, The Chamberlain Group, Inc.
114A0203M All Rights Reserved
STEP 5: (illustration 4). Install Key Switch in the exterior
away from door opening to avoid injury as door swings
out and up.
Drill a 1" diameter hole through wall. Remove terminal
screws from the Key Switch. Insert switch in hole and
fasten in place with screw nails and/or anchor and nut
hardware. Return screws to switch terminals. Fasten bell
wire to terminals. Drive a nail into jamb and wind some
wire around it before connecting to the terminals on the
back of the opener.
NOTE: Instructions for connecting bell wire to opener
terminals are explained below (illustration 5).
KEY SWITCH INSTALLATION FOR ONE-PIECE DOORS
STEP 6: If your garage is constructed of material other
than wood, install the Key Switch in door jamb as
explained on Page 1 with this important exception:
LOCATE KEY SWITCH ON EXTERIOR FACE OF DOOR
JAMB TO AVOID INJURY AS DOOR SWINGS OUT
AND UP.
NOTE: For brick or stone garage, locate key Switch on
exterior face of door jamb.
Illustration (5) shows various garage door opener terminal connection strips. They differ according to opener
model number. Locate the terminal illustration which matches your opener and attach bell wire as shown.
STEP 7: Reconnect power to opener.
(4)
Door Jamb
See Note 1
(5)
WHT WHT BLK
3-Screw Terminal
Attach Bell Wire to
WHT & WHT Terminals
Key Switch
Terminal Screw
RED WHT BLK
3-Screw Terminal
Attach Bell Wire to
RED & WHT Terminals
One Piece Door
Movement
Nut
Anchor
RED WHT BLK YEL
4-Screw Terminal
Attach Bell Wire to
RED & WHT Terminals
Exterior Wall Drill 1"
Diameter Hole
RED WHT BLK YEL
5-Screw Terminal
Attach Bell Wire to
RED & WHT Terminals
(4) Screw Nails
Key
Key Switch
Plate
ORG
 Loading...