


Use and Care
Manual
Combined fridge-freezer for
integrated use, door slider
Mode
d'emploi
Combiné réfrigérateur-
congélateur, intégrable, porte
oscillante
Instrucciones
de uso
Combinado frigorífico-congelador,
integrable, puerta orientable
HC 1011/1060 HC 1001/1050
7082698 - 00

The appliance at a glance
Contents
1 The appliance at a glance............................. 2
1.1 Additional benefits............................................ 2
1.2 Range of appliance use.................................... 2
1.3 Conformity........................................................ 3
1.4 Overview.......................................................... 3
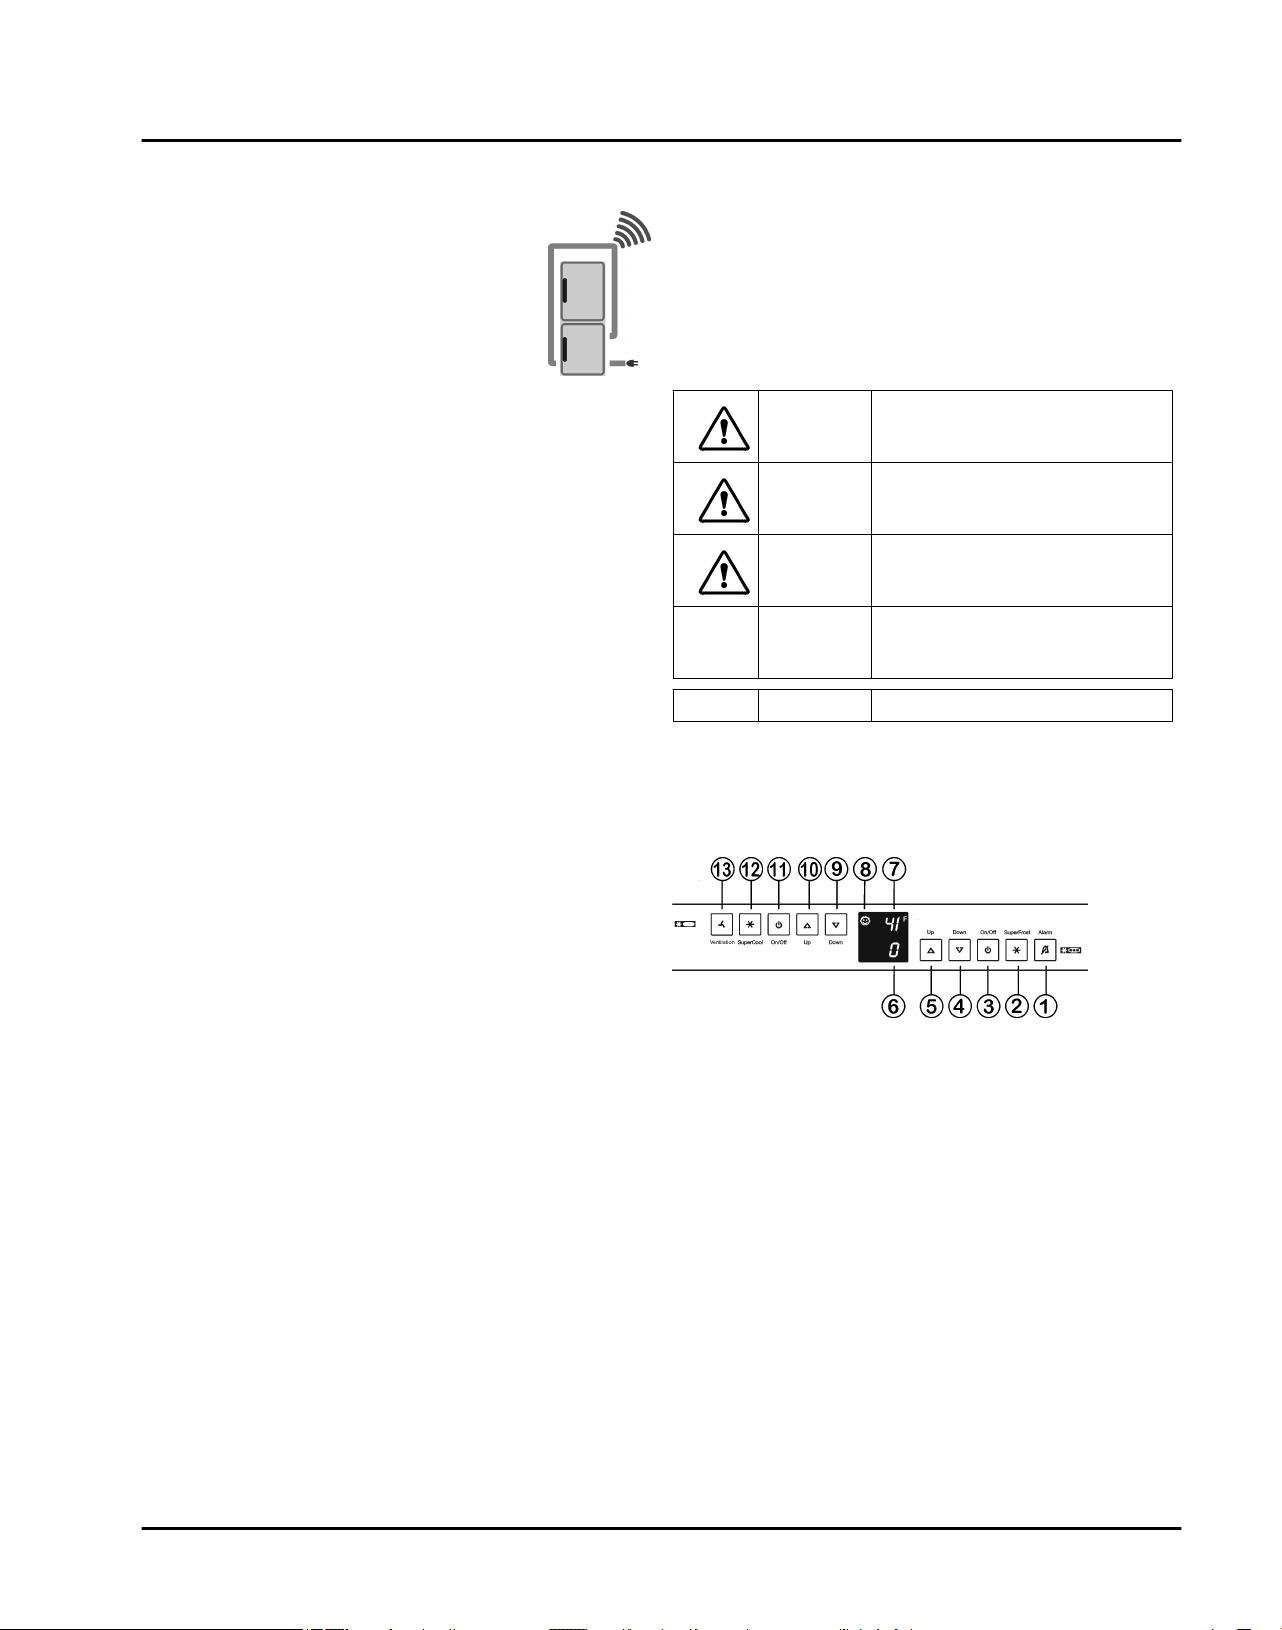
1.5 Net@Home....................................................... 4
2 General safety information........................... 4
3 Controls and displays................................... 4
3.1 Operating and control elements....................... 4
3.2 Temperature display........................................ 4
4 Start-up........................................................... 5
4.1 Transporting the appliance............................... 5
4.2 Setting up the appliance................................... 5
4.3 Disposal of packaging...................................... 5
4.4 Connecting the appliance................................. 6
4.5 Switching on the appliance............................... 6
5 Operation........................................................ 6
5.1 Energy saving.................................................. 6
5.2 Temperature display unit.................................. 6
5.3 Brightness of the temperature display.............. 7
5.4 Child-proof lock................................................ 7
5.5 Door alarm....................................................... 7
5.6 Temperature alarm........................................... 7
5.7 Fridge compartment......................................... 7
5.8 Freezer compartment....................................... 9
6 Maintenance................................................... 11
6.1 Defrosting with NoFrost.................................... 11
6.2 Cleaning the appliance..................................... 11
6.3 Cleaning the IceMaker..................................... 12
6.4 Replacing the interior light................................ 12
6.5 Customer service............................................. 12
6.6 Appliance Information...................................... 13
7 Troubleshooting............................................ 13
8 Putting appliance out of service.................. 15
8.1 Vacation Tips................................................... 15
8.2 Switching off the appliance............................... 15
8.3 Decommissioning ............................................ 16
9 Disposing of the appliance........................... 16
10 Liebherr Warranty Plan................................. 16
Congratulations on the purchase of your new appliance.
With this purchase, you have chosen all the advantages of
the latest refrigeration technology, guaranteeing you a highquality appliance with a long life span and high operating
safety.
The equipment of your appliance gives you the highest level
of day-to-day ease of operation.
Together we are making an active contribution to the conservation of our environment by purchasing this appliance
which is manufactured in an environmentally friendly process with the use of recyclable materials.
We hope you enjoy your new appliance.
The manufacturer is constantly working to improve all models. Therefore please understand that we reserve the right
to make design, equipment and technical modifications.
To get to know all the benefits of your new appliance, please
read the information contained in these instructions carefully.
The instructions apply to several models, so there may be
differences. Sections which only apply to certain appliances
are indicated with an asterisk (*).
Instructions for action are marked with a , the results
of action are marked with a .
1 The appliance at a glance
1.1 Additional benefits
CFC free
–
Energy-optimized refrigerant circuit
–
Energy-efficient insulation
–
Low energy consumption
–
User-friendly electronic controls
–
Active function indicators
–
Temperature can be controlled within climate rating
–
range, regardless of room temperature. Temperature
can also be displayed in degrees Fahrenheit or degrees
Celsius. Choose the unit of temperature °F or °C.
The appliance defrosts automatically - no need to spend
–
time defrosting
Variable and practical features
–
Large refrigeration capacity
–
Safety glass storage shelves
–
Practical door arrangement for tall bottles
–
Large freezing capacity
–
Shelves can be removed to make space for large items.
–
Freezer over-temperature alarm
–
Quick-freeze feature for fresh food (SuperFrost)
–
Power failure/“frost-control” display
–
All freezer drawers suitable for quick-freeze
–
Freezer compartment light
–
Bright LED interior light*
–
Door ajar alarm
–
Handle grips on all extra-large drawers for easy transport
–
Integrated transport grips on appliance housing
–
Transport castors at back
–
Easy to clean
–
Door hinges can be reversed
–
Door-on-door system for easy kitchen cabinet installa-
–
tion
Soft stop mechanisms on both doors*
–
1.2 Range of appliance use
The appliance is designed for refrigerating food, for freezing
and storing food and for making ice.
The appliance was designed for household use. It is not
intended for commercial use, in particular it is not intended
2

The appliance at a glance
for laboratory purposes and the like. There is the danger of
malfunctions.
The appliance is set to operate within specific ambient temperature limits according to its climate rating. The climate
rating for your appliance is printed on the rating plate.
Note
u
Compliance with the specified ambient temperatures is
required, otherwise the refrigeration performance is reduced.
Climate rating
SN 50 °F (10 °C) to 90 °F (32 °C)
N 61 °F (16 °C) to 90 °F (32 °C)
ST 61 °F (16 °C) to 101 °F (38 °C)
T 61 °F (16 °C) to 110 °F (43 °C)
for ambient temperatures from
1.3 Conformity
The refrigerant circuit has been tested for leaks. The appliance complies with the relevant safety regulations and the
directives UL250 and CAN/CSA C22.2 #63.
1.4 Overview
Fig. 1
(1) Operating and control
elements
(2) Butter and cheese
compartment
(3) Fan (12)Rating plate
(4) Shelf, moveable (13)Freezer compartment
(5) Storage rack for jars (14)IceMaker*
(6) Shelf, can be split (15)Info system
(7) Interior light* (16)Freezer compartment
(8) Door rack for tall bot-
tles
(9) Coldest zone
(10)Vegetable drawer
(11)Drain hole
light
(17)VarioSpace
3
General safety information
1.5 Net@Home
Depending on the model and equipment, the
appliance can be equipped with an additional
connection for a retrofitted Net@Home module. You can connect a TeleSafe module or
alternatively a home bus module. The modules are available from your specialized dealer.
The module may be connected by customer
service personnel only for warranty reasons.
You will find more information on the Internet
at www.liebherr.com.
2 General safety information
Read and follow these instructions. They contain safety advice which is important for safe and problem-free installation and operation. Always read and follow the safety
advice.
Dangers for the user:
This appliance is not designed for persons (or children)
–
with physical, sensory or mental impairment or persons
who do not have sufficient experience and knowledge,
unless they have been instructed in the use of the appliance by a person who is responsible for their safety and
supervised at first. Supervise children so that they do not
play with the appliance.
In the event of power failure, disconnect the power plug
–
(do not pull on the power cord to do this) or switch off the
fuse.
Repairs, work on the appliance and replacement of the
–
power cord should only be carried out by the customer
service department.
When disconnecting the appliance from the outlet, al-
–
ways take hold of the plug. Do not pull on the cable.
The appliance should only be assembled and connected
–
in accordance with the instructions.
Please keep the instructions and pass them on to any
–
new owner.
All repairs to or work on the IceMaker must only be car-
–
ried out by the customer service department or other
specialist engineers trained to do this.*
The manufacturer is not liable for damage arising from
–
incorrect connection to the water supply.*
Do not operate the appliance near explosive gases.
–
Do not store explosive materials or spray cans with flam-
–
mable propellants, such as e.g. butane, propane, pentane, etc. in the appliance. You can recognize such spray
cans by the printed contents or a flame symbol. Any leaking gasses can be ignited by electrical components.
High-proof alcohol should only be stored tightly sealed
–
and standing upright. Any leaking alcohol could be ignited by electrical components.
Tipover hazard:
Do not stand or climb on the plinth, drawers, doors, etc.
–
This applies in particular to children.
Do not use this appliance until it has been installed.
–
Risk of food poisoning:
Do not consume food that has passed its best before
–
date.
Danger of frostbite, feelings of numbness and pain:
Avoid continued skin contact with the cold surfaces or
–
chilled/frozen food or adopt protective measures, e. g.
use gloves. Do not consume ice cream (especially sherbets) and ice cubes immediately when they are too cold.
Follow the specific instructions in the other sections:
DANGER indicates a hazardous situation,
which if not avoided, will result in
death or serious injury.
WARNING indicates a hazardous situation,
which if not avoided, could result in
death or serious injury.
CAUTION indicates a hazardous situation,
which if not avoided, will result in minor or moderate injury.
NOTICE indicates a hazardous situation,
which if not avoided, could result in
damage to property.
Note indicates useful advice and tips.
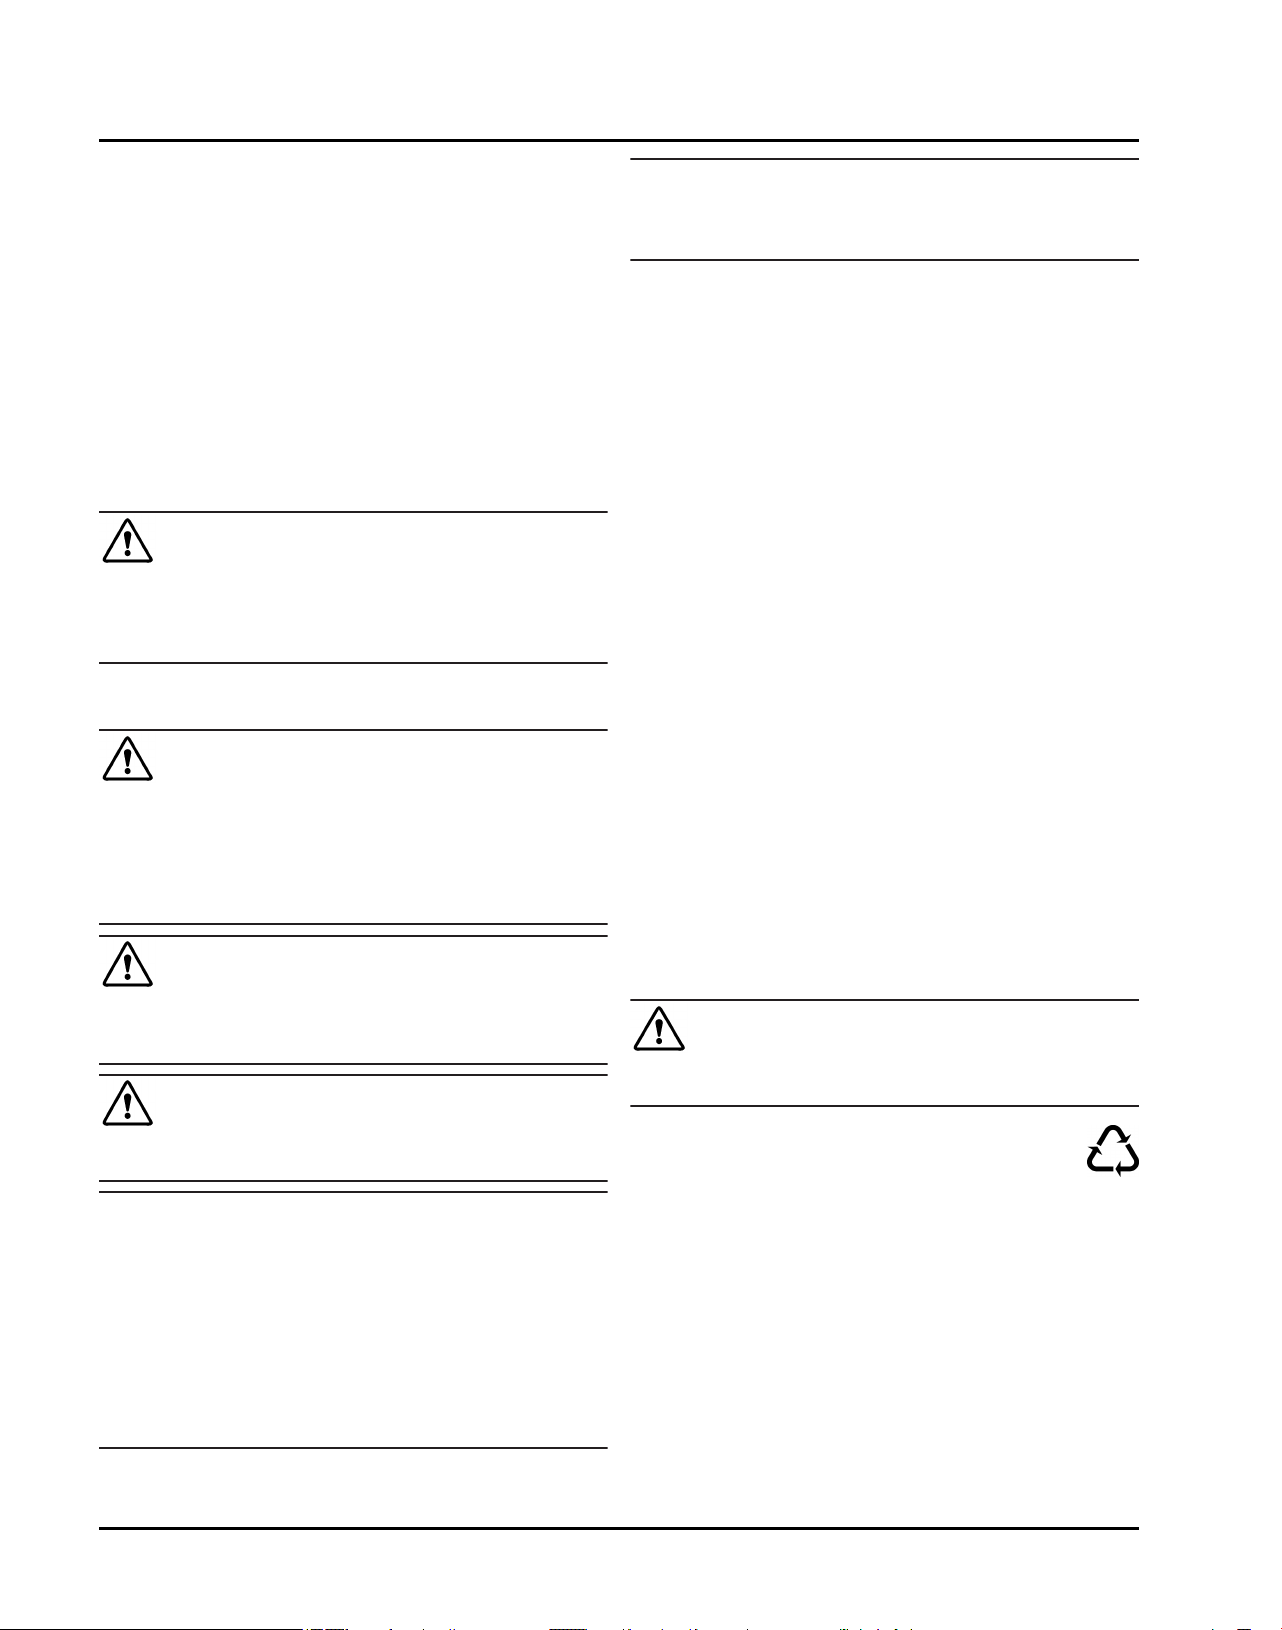
3 Controls and displays
3.1 Operating and control elements
Fig. 2
(1) Alarm button (8) Child safety symbol
(2) SuperFrost button (9) Fridge compartment
Down
(3) Freezer compartment
On/Off button
(4) Freezer compartment
Down button
(5) Freezer compartment
Up button
(6) Freezer compartment
temperature display
(7) Fridge compartment
temperature display
3.2 Temperature display
The following is displayed in normal operation:
the highest freezer temperature
–
the average fridge compartment temperature
–
The display is flashing:
the temperature setting has been changed
–
(10)Fridge compartment Up
(11)Fridge compartment
On/Off button
(12)SuperCool button
(13)Ventilation button
4
after switch-on the temperature is not yet cold enough
–
the temperature has risen by several degrees
–
Dashes are shown on the display:
the freezer temperature is above 32 °F (0 °C).
–
The following displays indicate malfunction. Possible causes and corrective actions are to be found in the Troubleshooting section.
nA
–
F0 bis F5
–
4 Start-up
4.1 Transporting the appliance
CAUTION
Risk of injury or damage if incorrectly transported.
u
Transport the appliance in its packaging.
u
Transport the appliance upright:
u
Do not move the appliance on your own:
4.2 Setting up the appliance
WARNING
Risk of fire due to moisture!
If live parts or the power cord get wet, this can cause a short
circuit.
u
The appliance is designed for use in enclosed spaces.
Do not operate the appliance in open space or in damp
areas or where there is spray.
Start-up
NOTICE
Risk of damage for the finished floor surface!
u
Protect the finished floor surface before you uncrate the
unit.
Verify that:
q
the floor under the appliance is flat and level.
q
the floor can support the appliance's weight plus approximately 1200 pounds (544 kg) of food weight.
q
the appliance is not placed in direct sunlight or near the
stove, range top, radiators and similar heat sources.
q
the kitchen cabinet that the appliance is installed in is
shimmed to the floor level if the floor heights are not
equal.
q
cutout dimensions are accurate.
q
electrical outlet is in correct location.
q
the air flow is not restricted. Air flow must be provided for
the appliance to operate properly. The factory air vents
provide 31 square inches (200 cm2) of air flow per appliance. If you are replacing the air vents with an overlay,
the air flow must be the same or greater than the factory
air vents.
u
Examine the unit and packaging for shipping damage.
Contact the carrier immediately if you suspect there is
any damage.
u
Note the type (model, number), index, appliance/serial
number, date of purchase and where purchased on the
spaces provided in see Appliance Information.
u
Remove anything attached to the rear or side walls of
appliance that would prevent proper installation or impede proper ventilation.
If the appliance is set up in humid areas, condensation may
build on the outside of the appliance.
u
Always ensure proper ventilation.
WARNING
Danger of fire and damage!
u
Do not place devices that give off heat, e.g. microwaves,
toasters, etc. on the appliance.
CAUTION
Risk of personal injury!
u
Have two people move this appliance into place.
NOTICE
Risk of damage caused by condensation
Installing the appliance next to any other refrigerator or
freezer can cause damage or condensation to the Liebherr
appliance.
u
Do not install this appliance next to any other refrigerator
or freezer except another Liebherr model. Liebherr models are designed to allow side-by-side installation. They
are equipped with a heating system to eliminate condensation when refrigerators or freezers are installed sideby-side.
4.3 Disposal of packaging
WARNING
Danger of suffocation from packaging materials and films!
u
Do not allow children to play with packaging materials.
The packaging is made from recyclable materials:
Corrugated card/cardboard
–
Preformed pieces from foamed polystyrene
–
Films and bags from polyethylene
–
Packing bands from polypropylene
–
u
Take the packaging material to an official collection point.
5

Operation
4.4 Connecting the appliance
WARNING
Electrical shock hazard!
u
Start-up should only take place once the appliance has
been installed according to these instructions.
u
Electrically ground appliance.
u
Do not ground to a gas pipe.
u
Check with a qualified electrician if you are not sure the
appliance is properly grounded.
u
Do not have a fuse in the neutral or grounding circuit.
u
Do not use an extension cord or a multiple socket.
u
Do not use a power cord that is frayed or damaged.
WARNING
Electrical shock hazard!
This appliance is equipped with a three-prong (grounding)
polarized plug for your protection against possible shock
hazards. Electrical Grounding Required.
u
Do not remove the round grounding prong from the plug.
u
Do not use a two-prong grounding adapter.
Wait 30 minutes up to 1 hour after installation before you
–
plug in the appliance. This allows the refrigerant and system lubrication to reach equilibrium.
Make sure incoming voltage is the same as the appliance
–
rating. A 110-120 Volt, 60 Hz, 15 Amp electrical supply
(20 Amp for side-by-side installations) circuit that is controlled by a circuit breaker or fuse is required.
We recommend using a dedicated circuit for this appli-
–
ance to prevent electrical overload.
Follow all Federal, State and local electrical, fire and
–
building codes and ordinances when installing the receptacle and / or the appliance.
In some communities, a wall switch is required to turn
–
power to the appliance ON and OFF.
To reduce the risk of fire, electric shock, or personal in-
–
jury, installation work and electrical wiring must be done
by a qualified electrician in accordance with all applicable
codes and standards, including fire-rated construction.
You are advised to clean the appliance before switching
–
it on the first time (see Cleaning).
The top of the electric outlet must be located within
–
82-5/8 in. (2100 mm) from the top of the base in the cabinet.
4.5 Switching on the appliance
Note
u
To switch on the entire appliance, only the freezer compartment needs to be switched on.
Note
u
Once the appliance is switched on, first the freezer compartment is cooled and then, 2-3 hours later, the fridge
compartment.
Put the appliance into operation about 2 hours before loading with frozen food for the first time.
Do not load frozen foods until the temperature display reads
0 °F (-18 °C).
4.5.1 Switching on the freezer compartment
u
PressOn/Off button, freezer compartment
w
The refrigerator compartment temperature display indicates the set temperature.
w
The freezer compartment temperature display and the
alarm button flash until the temperature is sufficiently
cold. If the temperature is above 32 °F (0 °C), dashes
flash. If it is below, the current temperature flashes.
Fig. 2 (3)
.
4.5.2 Switching on the fridge compartment
u
Press Fridge compartment On/Off button
w
The interior light comes on when the door is opened.
w
The temperature display flashes. The fridge compartment is switched on.
Fig. 2 (11)
.
5 Operation
5.1 Energy saving
u
Always ensure good ventilation to and from the appliance!
u
Avoid opening the appliance door for any longer then
neccesary.
u
Store food logically.
u
Storing hot food: let it cool to room temperature first.
u
Defrost frozen food in the fridge.
5.2 Temperature display unit
The temperature display can be changed from °F to °C.
5.2.1 To change the unit
u
Activate setting mode: Press SuperFrost button
Fig. 2 (2)
w
The SuperFrost button
w
c is displayed in the temperature display.
u
Using Freezer compartment Up button
Fig. 2 (5)
Fig. 2 (4)
u
To confirm: Briefly press SuperFrost button
Fig. 2 (2)
u
Using Freezer compartment Up button
Fig. 2 (5)
Fig. 2 (4)
u
To confirm: Briefly press SuperFrost button
Fig. 2 (2)
u
To exit setting mode: Press Freezer compartment On/Off
button
-or-
u
Wait 5 minutes.
w
The temperature is again displayed in the temperature
display.
for about 5 seconds.
Fig. 2 (2)
/ Freezer compartment Down button
select °.
.
/ Freezer compartment Down button
select °F or °C.
.
Fig. 2 (3)
.
will flash.
6

Operation
5.3 Brightness of the temperature display
You can adapt the brightness of the temperature display to
the light conditions in the room in which it is installed.
5.3.1 Setting the brightness
The brightness can be set between h1 (minimum luminosity) and h5 (maximum luminosity).
u
To activate setting mode: Press SuperFrost button
Fig. 2 (2)
w
c is shown on the display.
w
The SuperFrost button will flash.
u
Press Freezer compartment Up button
er compartment Down button to select
u
To confirm: Briefly press SuperFrost button
u
To set the display brighter: Press Freezer compartment Up button
u
To set the display darker: Press Freezer compartment Down button
u
To confirm: Press SuperFrost button
w
The brightness is set to the new value.
u
To deactivate setting mode: Press Freezer compartment
On/Off button
-or-
u
Wait 5 minutes.
w
The temperature is again displayed in the temperature
display.
for about 5 seconds.
Fig. 2 (5)
Fig. 2 (4)
Fig. 2 (3)
.
Fig. 2 (5)
Fig. 2 (4)
.
.
Fig. 2 (2)
or Freez-
h.
Fig. 2 (2)
.
.
5.4 Child-proof lock
You can use the child-proof lock to lock the buttons. This
means that children cannot accidentally switch off the appliance when playing.
5.4.1 Switching on the child-proof lock
u
To activate setting mode: Press SuperFrost button
Fig. 2 (2)
w
c is shown on the display.
w
The SuperFrost button will flash.
u
Press the SuperFrost button
u
To switch on: Using Freezer compartment Up
button
button
u
To switch off: Using Freezer compartment Up
button
button
u
To confirm: Press SuperFrost button
w
If the Child-proof lock symbol
proof lock is switched on.
u
To deactivate setting mode: Press Freezer compartment
On/Off button
-or-
u
Wait for 5 minutes.
w
The temperature is again displayed in the temperature
display.
for about 5 seconds.
Fig. 2 (5)
Fig. 2 (4)
Fig. 2 (5)
Fig. 2 (4)
or Freezer compartment Down
select c1.
or Freezer compartment Down
select c0.
Fig. 2 (3)
.
Fig. 2 (2)
Fig. 2 (8)
briefly to confirm.
Fig. 2 (2)
lights up, the child-
.
Door alarm
5.5
If the door is open for longer than 180 seconds, the acoustic
warning sounds.
The acoustic warning stops automatically when the door is
closed.
5.5.1 Switching off the door alarm
The acoustic warning can be switched off when the door is
open. The acoustic warning remains switched off as long
as the door is open. When the door is closed, the alarm
function is active again.
u
Press Alarm button
w
The door alarm stops.
Fig. 2 (1)
.
5.6 Temperature alarm
If the freezer temperature is not cold enough, the acoustic
warning sounds.
At the same time the temperature display will flash.
The cause of the temperature being too high may be:
hot fresh food was placed in the appliance
–
when sorting and removing food from the appliance, too
–
much warm ambient air got in
the power was cut off for a while
–
the appliance is experiencing difficulties
–
The acoustic warning automatically ceases and the tem-
perature display stops flashing when the temperature is
cold enough again.
If the alarm status remains, proceed according to the Faults
section.
Note
If the temperature is not cold enough, food may spoil.
u
Check the quality of the food. Do not consume spoiled
food.
5.6.1 Switching off the temperature alarm
The acoustic warning can be switched off. When the temperature is cold enough again, the alarm function is active
again.
u
Press Alarm button
w
The acoustic warning ceases.
Fig. 2 (1)
.
5.7 Fridge compartment
The natural circulation of air in the fridge compartment results in zones with differing temperatures. It is coldest directly above the vegetable drawers and at the rear wall. It
is warmest at the top front of the compartment and in the
door.
7

Operation
5.7.1 Arranging Food
Fig. 3
5.7.2 Refrigerating food
Note
u
Do not load the door with more than 35 lbs (16 kg) of food.
Note
Insufficient ventilation results in an increase in energy consumption and reduction of the refrigerating performance.
u
Never block the air slits in the fan.
u
Use recyclable plastic, metal, aluminum and glass containers and cling film to wrap foods.
u
Always use closed containers for liquids and for food that
may give off or be tainted by odor or flavor transfer, or
cover them.
u
Foods which give off a large amount of ethylene gas and
those that are sensitive to this gas, such as fruit, vegetables and salad, should always be separated or wrapped
so as not to reduce the storage life; e.g. do not storage
tomatoes together with kiwi fruits or cabbage.
u
Use the front floor area of the fridge compartment only to
temporarily to set down food to be refrigerated, e. g. when
rearranging or sorting the contents of the fridge. Do not
leave the food there, as it may be pushed back or tipped
over when the door is closed.
u
Do not store food too close together to enable good air
circulation.
u
To ensure bottles do not tip over: move the bottle holder.
w
When the button is pressed for the first time, the previous
value is indicated in the fridge compartment temperature
display.
u
To change the temperature in 1 °F (1 °C) steps: briefly
press the button.
u
To change the temperature continuously: Hold button
down.
w
The value is displayed flashing during the setting operation.
w
The actual temperature is displayed about 5 seconds after the last press of a button. The temperature slowly
adjusts to the new value.
5.7.4 SuperCool
With SuperCool you switch to the highest cooling performance to reach lower cooling temperatures. Use SuperCool
to rapidly cool large quantities of food.
SuperCool will use more energy than normal operation.
Cooling with SuperCool
u
Briefly press the SuperCool button
w
The SuperCool button
w
The cooling temperature drops to the coldest value. SuperCool is switched on.
w
SuperCool automatically switches itself off after about 6
hours. The appliance returns to work in the energy-saving normal mode.
To prematurely switch off SuperCool
u
Briefly press the SuperCool button
w
The SuperCool button
w
SuperCool is switched off.
Fig. 2 (12)
Fig. 2 (12)
Fig. 2 (12)
lights up.
Fig. 2 (12)
goes out.
.
.
5.7.5 Repositioning the shelves
CAUTION
Danger of lacerations!
The storage shelf can shatter if dropped or mishandled. You
could cut yourself on the pieces of broken glass.
u
Only remove storage shelves when there is nothing on
them.
Extension stops secure the shelves against being accidentally pulled out.
u
Lift the shelf and pull out forward.
5.7.3 Setting the temperature in the fridge compartment
The temperature can be set from 46 °F (7 °C) to (2 °C),
(5 °C) is recommended.
u
To set a higher temperature: Press Fridge compartment
Up button
u
To set a lower temperature: Press Fridge compartment
Down button
8
Fig. 2 (10)
.
Fig. 2 (9)
.
u
Insert the shelf with the raised edge to the back pointing
upwards.
w
This prevents food from contacting and freezing to the
back wall.

Operation
5.7.6 Using the split shelf
CAUTION
Danger of lacerations!
The storage shelf can shatter if dropped or mishandled. You
could cut yourself on the pieces of broken glass.
u
Only remove storage shelves when there is nothing on
them.
Fig. 4
u
Attach support bars supplied, ensuring right (R) and left
(L) parts are correctly positioned.*
u
The glass plate with raised edge
at the back.
u
To clean, remove the support bars for the half glass plate.
(2)
must be positioned
5.7.7 Repositioning the door racks
Note
u
Do not load the door with more than 35 lbs (16 kg) of food.
5.7.9 Fan
The fan allows you to rapidly cool large amounts of fresh
food or to achieve a relatively even distribution of temperature across all the storage levels.
Re-circulated air cooling is advisable:
at high room temperatures (from approx. 95 °F (35 °C) )
–
in the case of high humidity
–
Re-circulated air cooling has a somewhat higher energy
consumption. To save energy, the fan automatically
switches off when the door is open.
Switching on the fan
u
Briefly press Ventilation button
w
The Ventilation button lights up.
w
The fan is switched on.
Switching the fan off (default)
u
Briefly press Ventilation button
w
The Ventilation button lights up.
w
The fan is switched off.
Fig. 2 (13)
Fig. 2 (13)
.
.
5.8 Freezer compartment
You can store frozen food, make ice cubes and freeze fresh
food in the freezer compartment.
5.8.1 Freezing food
The maximum load for each drawer and the plate is
55.12 lbs (25 kg) of frozen food.
After the door is closed, a vacuum is created. After closing
the door, wait about 1 minute, then the door is easier to
open.
u
Push rack up, pull forward and reinsert in the reverse or-
der.
Always take the butter and cheese
compartment out together with the
cover.
u
To remove the cover: Press one
side of the butter and cheese com-
partment outwards until the hinge
pin of the cover is released, then
remove the cover sideways.
5.7.8 Removing the bottle holder
u
Remove the bottle holder as per the
illustration.
u
Always take hold of the bottle holder
by the plastic part.
CAUTION
There is a risk of injury from pieces of broken glass.
Bottles and cans containing drinks can split or crack when
frozen. This applies in particular to carbonated drinks.
u
Do not freeze bottles and cans containing drinks.
So that the food is rapidly frozen through to the core, do not
exceed the following quantities per pack:
– fruit, vegetables up to 2.2 lb (1 kg)
– meat up to 5.51 lbs (2.5 kg)
u
Pack the food in portions in freezer bags, reusable plastic, metal or aluminum containers.
5.8.2 Defrosting food
– in the fridge compartment
– at room temperature
– in the microwave
– in the oven/fan oven
WARNING
Danger of food poisoning!
u
Do not re-freeze defrosted food.
9

Operation
u
Only take out the amount of food that is required. Use
defrosted food as quickly as possible.
5.8.3 Setting the temperature in the freezer compartment
The appliance is set as standard for normal operation.
The temperature can be set between 8 °F (-14 °C) and
-14 °F (-26 °C), 0 °F (-18 °C)is recommended.
u
To set a higher temperature: Press Freezer compartment
Up button
u
To set a lower temperature: Press Freezer compartment
Down button
w
When the button is pressed for the first time, the previous
value is indicated in the freezer compartment temperature display.
u
To change the temperature in 1 °F (1 °C) steps: briefly
press the button.
-or-
u
To change the temperature continuously: hold the button
down.
w
The value is displayed flashing during the setting operation.
w
The actual temperature is displayed about 5 seconds after the last press of a button. The temperature slowly
adjusts to the new value.
Fig. 2 (5)
Fig. 2 (4)
.
.
w
The appliance returns to work in the energy-saving normal mode.
5.8.5 Drawers
Note
Insufficient ventilation results in an increase in energy consumption and reduction of the refrigerating performance.
For appliances with NoFrost:
u
Leave the bottom drawer in the appliance.
u
Never block the air slits in the fan on the rear wall.
u
To store frozen food directly on the shelves: pull the
drawer forward and lift it out.
5.8.6 Shelves
u
To remove shelf: lift it at the front and
pull out forward.
u
To reinsert shelf: simply slide it in as far
as it will go.
5.8.4 SuperFrost
With this function you can rapidly freeze fresh food through
to the core. The appliance works with maximum refrigerating performance. The sound of the refrigeration unit may be
temporarily louder as a result.
The maximum number of kilograms of fresh food that can
be frozen within a 24-hour period is indicated on the rating
plate under "Freezing capacity ... kg/24h". This maximum
amount of frozen food varies according to the model and
climate rating.
Freezing with SuperFrost
You do not need to switch SuperFrost on in the following
cases:
– when placing frozen food in the freezer
– when freezing up to about 2 kg of fresh food daily
u
Briefly press the SuperFrost button
w
The SuperFrost button
w
The freezer temperature drops, the appliance works with
maximum refrigerating capacity.
When a small amount of food is to be frozen:
u
Wait for about 6 hours.
u
Place the fresh food in the top drawers.
When the maximum amount of food is to be frozen:
u
Wait for about 24 hours.
u
Place wrapped food directly on the shelves and place in
the drawers once frozen.
w
SuperFrost is automatically switched off. At the earliest
after 30 hours, at the latest after 65 hours, depending on
the quantity placed inside the appliance.
w
The SuperFrost button
Fig. 2 (2)
Fig. 2 (2)
Fig. 2 (2)
lights up.
is dark.
once.
5.8.7 VarioSpace
In addition to the drawers, you
can also take out the shelves.
This gives you space for large
frozen items. Poultry, meat,
large joints of game and tall
bakery items can be frozen and
then presented whole.
u
The maximum load for each
drawer and the plate is
55.12 lbs (25 kg) of frozen
food.
5.8.8 Info system
Fig. 5
(1) Ready meals, ice
cream
(2) Pork, fish (5) Game, mushrooms
(3) Fruit, vegetables (6) Poultry, beef/veal
(4) Sausages, bread
10

Maintenance
The numbers indicate the storage time in months for different types of frozen foods. The storage times given are
guidelines.
5.8.9 IceMaker*
The IceMaker is in the top drawer of the freezer compartment. The drawer is labeled "IceMaker".
Make sure that the following conditions are fulfilled:
The appliance is level.
–
The appliance is connected to the electricity supply.
–
The freezer compartment is switched on.
–
The minimum freezer temperature is 14 °F (-10 °C).
–
The IceMaker is connected to the water supply.
–
Switching on the IceMaker*
Fig. 6
u
Pull out the drawer.
u
Press On/Off button
lights up.
u
Push in the drawer.
Note
u
The IceMaker only produces ice cubes when the drawer
is completely closed.
Fig. 6 (1)
so that the LED
Fig. 6 (2)
Note
u
Do not consume or use the first three batches of ice
cubes. This applies both to using the appliance for the
first time and using it when it has not been used for a long
time. This ensures that the water pipe is rinsed through.
6 Maintenance
6.1 Defrosting with NoFrost
The NoFrost system defrosts the appliance automatically.
Fridge compartment:
The defrosted water is evaporated by the heat of the compressor. Drops of water on the back wall are a functional
feature and completely normal.
u
Clean the drain opening regularly so that the defrosted
water can flow away. (see Cleaning section).
Freezer compartment:
The moisture condenses on the evaporator and is periodically defrosted and evaporated.
u
The appliance does not have to be defrosted manually.
6.2 Cleaning the appliance
Before cleaning:
WARNING
Danger of electric shock.
u
First, remove the plug or switch off the fuse.
Switching off the IceMaker*
If ice cubes are not required, the IceMaker can be switched
off independently of the freezer compartment.
When the IceMaker is not in operation, clean the IceMaker.
This ensures that no water or ice remains in the IceMaker.
When the IceMaker is switched off, the drawer of the IceMaker can also be used for freezing and storing food.
u
Press the On/Off button for about 1 second until the LED
goes out.
Producing ice cubes*
The production capacity depends on the freezer temperature. The lower the temperature, the more ice cubes can be
produced in a certain period.
The ice cubes fall out of the IceMaker into the drawer. When
the ice cubes reach a certain height in the drawer, no more
ice cubes can be produced.
If large quantities of ice cubes are required, the complete
IceMaker drawer can be swapped with the neighboring
drawer. When you close the drawer, the IceMaker automatically restarts production.
When the IceMaker is switched on for the first time, it may
take up to 24 hours for the first ice cubes to be produced.
CAUTION
Risk of injury or damage due to hot steam.
Hot steam can damage the surfaces and cause burns.
u
Do not use steam cleaners.
NOTICE
Incorrect cleaning damages the appliance.
u
Do not use concentrated cleaning agents.
u
Do not use steel wool or sponges that scour or scratch.
u
Do not use cleaning agents containing sand, chloride,
chemicals or acids.
u
Do not use chemical solvents.
u
Do not damage or remove the rating plate on the inside
of the appliance. It is vital for the customer service department.
u
Do not pull off, kink or damage any cables or other components.
u
Do not let cleaning water get into the drain gutter, the
ventilation grille and electrical parts.
u
Empty the appliance.
– Use soft cleaning cloths and a multi-purpose
cleaning agent with a neutral pH value.
– Only use food-compatible cleaning and care
agents inside the appliance.
11

Maintenance
Exterior surfaces and interior:
u
Clean the ventilation grilles regularly.
w
Dust deposits increase energy consumption.
u
Clean the plastic surfaces, outside and inside, by hand
using lukewarm water and a little dish washing liquid.
u
To clean the drain opening: remove
deposits with a thin instrument, e.g.
a cotton bud.
Items of equipment:
u
Clean the roller plates in the dishwasher.
u
Clean other items of equipment by hand using lukewarm
water and a little dish washing liquid.
u
To dismantle shelves: remove trims
and side parts.
u
To dismantle door racks: remove
protective films from the trims.
After cleaning:
u
Wipe dry the appliance and items of equipment.
u
Connect the appliance and switch it on again.
u
Switch on SuperFrost. (see section on SuperFrost)
When the temperature is sufficiently cold:
u
Put the food back in the appliance.
6.3 Cleaning the IceMaker*
u
Throw out the first three batches of ice cubes to get rid of
any dish washing liquid residues.
6.4 Replacing the interior light*
Light bulb data
q
max. 25 W (25 W)
q
120 V
q
Bulb fitting: E14
q
Current and voltage must agree with the details on the
rating plate.
WARNING
Danger of electric shock.
u
First, remove the plug or switch off the fuse.
CAUTION
Cutting hazard!
u
To prevent possible injury due to broken glass, use hand
protection when replacing the interior light.
u
Take hold of the light cover at the
top and bottom
u
Unclip light cover at the back
and unhook
u
Replace the light bulb
When turning it, use a little more
force to overcome the static friction
of the seal. Make sure the seal sits
cleanly in the light socket.
u
Hook the cover in again at the
back and clip in at the sides.
Fig. 8 (1)
Fig. 8 (2)
.
.
Fig. 8 (3)
.
Fig. 8
Fig. 7
The IceMaker must be switched on.
u
Pull out the drawer and take out the ice.
u
Clean the drawer with warm water and mild dish washing
liquid.
u
With the drawer pulled out, press and hold the On/Off
button (for about 10 seconds).
w
After about 1 second the LED goes out, the IceMaker is
switched off.
w
After about 10 seconds the LED flashes for about 60
seconds.
u
Push the drawer in while the LED is flashing.
w
The ice tray of the IceMaker rotates and tilts.
u
Take out the drawer.
u
Clean the ice tray with warm water. If necessary, use a
mild dish washing liquid. Then rinse.
To switch the IceMaker on again:
u
Press the ON/OFF button until the LED lights up, then
push the drawer in.
w
The IceMaker starts to produce ice cubes.
If dish washing liquid was used:
12
6.5 Customer service
First check whether you can remedy the fault yourself using
the summary in the Troubleschooting section. If this is not
the case, please contact the Customer Service department.
You can find the address in the enclosed customer service
list.
WARNING
Risk of injury from repairs by non-professionals.
u
Repairs and work on the appliance and the power cord,
which are not expressly named in the Maintenance section should only be carried out by the customer service
department.

u
Read the appliance
designation
service no.
and serial no.
from the rating plate.
The rating plate is lo-
cated inside the appli-
ance on the left-hand
side.
Fig. 9 (1)
Fig. 9 (2)
Fig. 9 (3)
Troubleshooting
,
Type Designation: _____________________
Service Number: _____________________
Appliance / Serial Number: _____________________
Date of purchase: _____________________
Where purchased: _____________________
7 Troubleshooting
Your appliance is designed and manufactured for reliable
operation and a long lifespan. If a malfunction nonetheless
occurs during operation, please determine if the malfunction is due to an operating error. If a service call determines
operator error, you will be charged for the costs incurred,
even during the warranty period. You may be able to rectify
the following problems yourself:
u
Notify the Customer Service department, specifying the
fault, appliance designation
Fig. 9 (2)
w
This will help us to provide you with a faster and more
accurate service.
u
Keep the appliance closed until the Customer Service
engineer arrives.
w
The food will stay cool longer.
u
Disconnect the power plug (do not pull on the power cord
to do this) or switch off the fuse.
and serial
Fig. 9 (3)
Fig. 9 (1)
no.
, service no.
Fig. 9
6.6 Appliance Information
Make a note of this information when the appliance is installed:
Problem Possible Cause Correction
The appliance
does not work.
The compressor
runs for a long
time.
A gurgling sound
A faint clicking
sound
→ The appliance is not switched on.
→ The power plug is not properly in-
serted in the wall socket.
→ The fuse in the wall socket is not
OK.
→ Power failure
→ When less refrigeration is required,
the speed-controlled compressor
switches to a low speed. Although
the running time is increased as a
result, energy is saved.
→ SuperFrost function is activated.
→ SuperCool function is activated.
→ This sound comes from the refrig-
erant flowing in the refrigeration circuit.
→ The sound always occurs when the
refrigeration unit (the motor) automatically switches on or off.
u
Switch on the appliance.
u
Check the power plug.
u
Check the fuse.
u
Keep the appliance closed.
u
Protect the food: place dry ice on top of the food or use
a use a decentral freezer, if the power failure persists
for some time.
u
Do not re-freeze defrosted food.
u
This is normal in energy-saving models.
u
The compressor runs long to rapidly cool food. This is
normal.
u
The compressor runs long to rapidly cool food. This is
normal.
u
The sound is normal.
u
The sound is normal.
13

Troubleshooting
Problem Possible Cause Correction
A hum. It is briefly a little louder
when the refrigeration unit (the
motor) switches
on.
A low hum
The temperature
display indicates: F0 to F5
The temperature
display indicates: nA
The outside surfaces of the appliance are
warm.
The IceMaker
cannot be
switched on.*
The IceMaker is
not making ice
cubes.*
The temperature
is not cold
enough.
→ The refrigeration increases auto-
matically when the SuperFrost
function is activated, fresh food
has just been placed in the appliance or the door has been left open
for a while.
→ The refrigeration increases auto-
matically when the SuperCool
function is activated, fresh food
has just been placed in the appliance or the door has been left open
for a while.
→ The ambient temperature is too
high.
→ The sound occurs as a result of fan
air flow.
→ There is a fault.
→ The freezer temperature rose too
high during the last hours or days
due to power failure or power interruption. When the power interruption is over, the appliance will
continue to operate at the last temperature setting.
→ The heat of the refrigerant circuit is
used to prevent condensate from
forming.
→ The appliance and therefore the
IceMaker are not connected.
→ The IceMaker is not switched on.
→ The drawer of the IceMaker is not
properly closed.
→ The water connection is not open.
→ This means that the door of the ap-
pliance is not closed properly.
→ Insufficient ventilation.
→ The ambient temperature is too
high.
→ The appliance was opened too fre-
quently or for too long.
u
The sound is normal.
u
The sound is normal.
u
See section Range of appliance use
u
The sound is normal.
u
Contact the customer care department. See Maintenance section.
u
Press the Alarm button
w
Thewarmest temperature reached during the power
failure is displayed in the temperature display for about
60 seconds. Then the electronics again indicate the
current freezer temperature.
u
To delete the display of the warmest temperature
ahead of time: Press the Alarm button
u
Check the quality of the food. Do not consume spoiled
food. Do not re-freeze defrosted food.
u
This is normal.
u
Connect the appliance. See also section on connecting the appliance)
u
Switch the IceMaker on.
u
Close the drawer properly.
u
Open the water connection.
u
Close the appliance door.
u
Clear ventilation grilles.
u
See Range of appliance usesection.
u
Wait to see whether the required temperature resets
itself by itself. If not, contact the customer service department See Maintenance section.
Fig. 2 (1)
.
Fig. 2 (1)
.
14

Putting appliance out of service
Problem Possible Cause Correction
u
See SuperFrost section.
u
Set to a colder temperature and check after 24 hours.
u
See Installation section.
u
Switch on the appliance.
u
The interior light automatically switches itself off if the
door has been open for about 15 minutes.
u
Replace the bulb according to the Maintenance section.*
WARNING*
Risk of injury from electrical shock.
Live parts are under the cover.
u
The LED interior light should only be replaced or repaired by the Customer Service department or by engineers trained to do so.
The interior light
is not on.
→ Too much fresh food was placed
inside without SuperFrost.
→ The temperature is incorrectly set.
→ The appliance is too near to a heat
source.
→ The appliance is not switched on.
→ The door was open for longer than
15 minutes.
→ If the interior light is not on but the
temperature display is lit, the bulb
is faulty.*
→ The LED interior light is faulty or the
cover is damaged.*
→ The LED freezer compartment light
is not on.*
8 Putting appliance out of service
8.1 Vacation Tips
Short vacations: If you will be away for less than four
weeks
u
Use all perishables.
u
Freeze other items.
u
Turn off the refrigerator compartment.
u
Turn off the icemaker.*
u
Shut down the water supply to the icemaker.*
Long vacations: If you will be away for a month or more
u
Remove all food from the appliance.
u
Turn OFF the appliance.
u
Clean the appliance. Refer to section on "Cleaning"
u
Leave the door open to prevent unpleasant odors.
w
This will also keep mold from building up.
u
Turn of the icemaker.*
u
Shut off the water supply to the icemaker.*
WARNING*
Risk of injury from class 1M laser radiation.
u
Do not look inside when the cover is open.
u
You can replace the light unit yourself. The replacement part is available from the customer service department. See Maintenance section.*
8.2 Switching off the appliance
Note
u
To switch off the entire appliance, only the freezer compartment needs to be switched off.
8.2.1 Switching off the freezer compartment
u
Press Freezer compartment On/Off button
about 2 seconds.
w
The temperature displays are dark. The appliance is
switched off.
8.2.2 Switching off the fridge compartment
Note
u
The fridge compartment can be switched off independently of the freezer.
u
Press Fridge compartment On/Off button
about 2 seconds.
w
The fridge compartment temperature display
dark. The fridge compartment is switched off.
Fig. 2 (3)
Fig. 2 (11)
Fig. 2 (7)
for
for
is
15

Disposing of the appliance
8.3 Decommissioning
u
Empty the appliance.
u
Put the IceMaker in the cleaning position. (see section
on cleaning IceMaker)*
u
Disconnect the power plug.
u
Clean the appliance (see section on cleaning).
u
Leave the door open to prevent bad smells.
9 Disposing of the appliance
Follow the local regulations for the disposal of appliances.
Old appliances can be dangerous. Contact the local refuse
collection department for additional information.
DANGER
There is a risk of suffocation.
Children playing can shut themselves in and suffocate.
u
Take the door(s) off.
u
Leave the storage shelves in the appliance so that children cannot easily climb into the appliance.
WARNING
Danger of electric shock.
u
Cut off the plug from the mains cable and discard.
u
Cut off the mains cable from the discarded appliance.
Dispose of separately from the appliance.
The warranty applies only to products installed in any one
of the fifty states of the United States or the District of Columbia. The warranty does not cover any parts or labor to
correct any defect caused by negligence, accident or improper use, maintenance, installation, service or repair,
including but not limited to improper removal and reinstallation of the condensing unit.
The remedies described above for each warranty are
the only ones which Liebherr will provide, either under
these warranties or under any warranty arising by operation of law. Liebherr will not be responsible for any
consequential or incidental damages arising from the
breach of these warranties or any other warranties,
whether express, implied or statutory.
Some states do not allow the exclusion or limitation of incidental or consequential damages so the above limitation or
exclusion may not apply to you. This warranty gives you
specific legal rights and you may also have other legal rights
which very from state to state.
To receive parts and/or service and the name of the Liebherr authorized service representative nearest you, contact
your Liebherr dealer or distributor or contact the Liebherr
designated national service provider:
in the US: Liebherr@adcoservice.com or call 1- 866 - LIEBHERR ( 1- 866 - 543-2437).
in Canada: www.euro-parts.ca or call 1-888-LIEBHERR
(1-888-543-2437).
10 Liebherr Warranty Plan
FULL TWO YEAR WARRANTY - For two years from the
date of original purchase, your Liebherr warranty covers all
parts and labor to repair or replace any part of the product
which proves to be defective in materials or workmanship.
FULL FIVE YEAR WARRANTY - For five years from the
date of original purchase, your Liebherr warranty covers all
parts and labor to repair or replace any components that
prove to be defective in materials or workmanship in the
sealed system. The “Sealed System” means only the compressor, condenser, evaporator, drier and all connecting
tubing.
LIMITED 6TH THROUGH 12TH YEAR WARRANTY -
From the 6th through 12th year from the date of original
purchase, your Liebherr warranty covers all parts that prove
to be defective in materials or workmanship in the Sealed
System (parts only).
TERMS APPLICABLE TO EACH WARRANTY
All service provided by Liebherr under the warranty must be
performed by authorized Liebherr service representatives,
unless otherwise specified by Liebherr. Service will be provided in the home during normal business hours. This warranty applies only to products installed for normal residential use. Details regarding a non-residential warranty are
available on request.
16
 Loading...