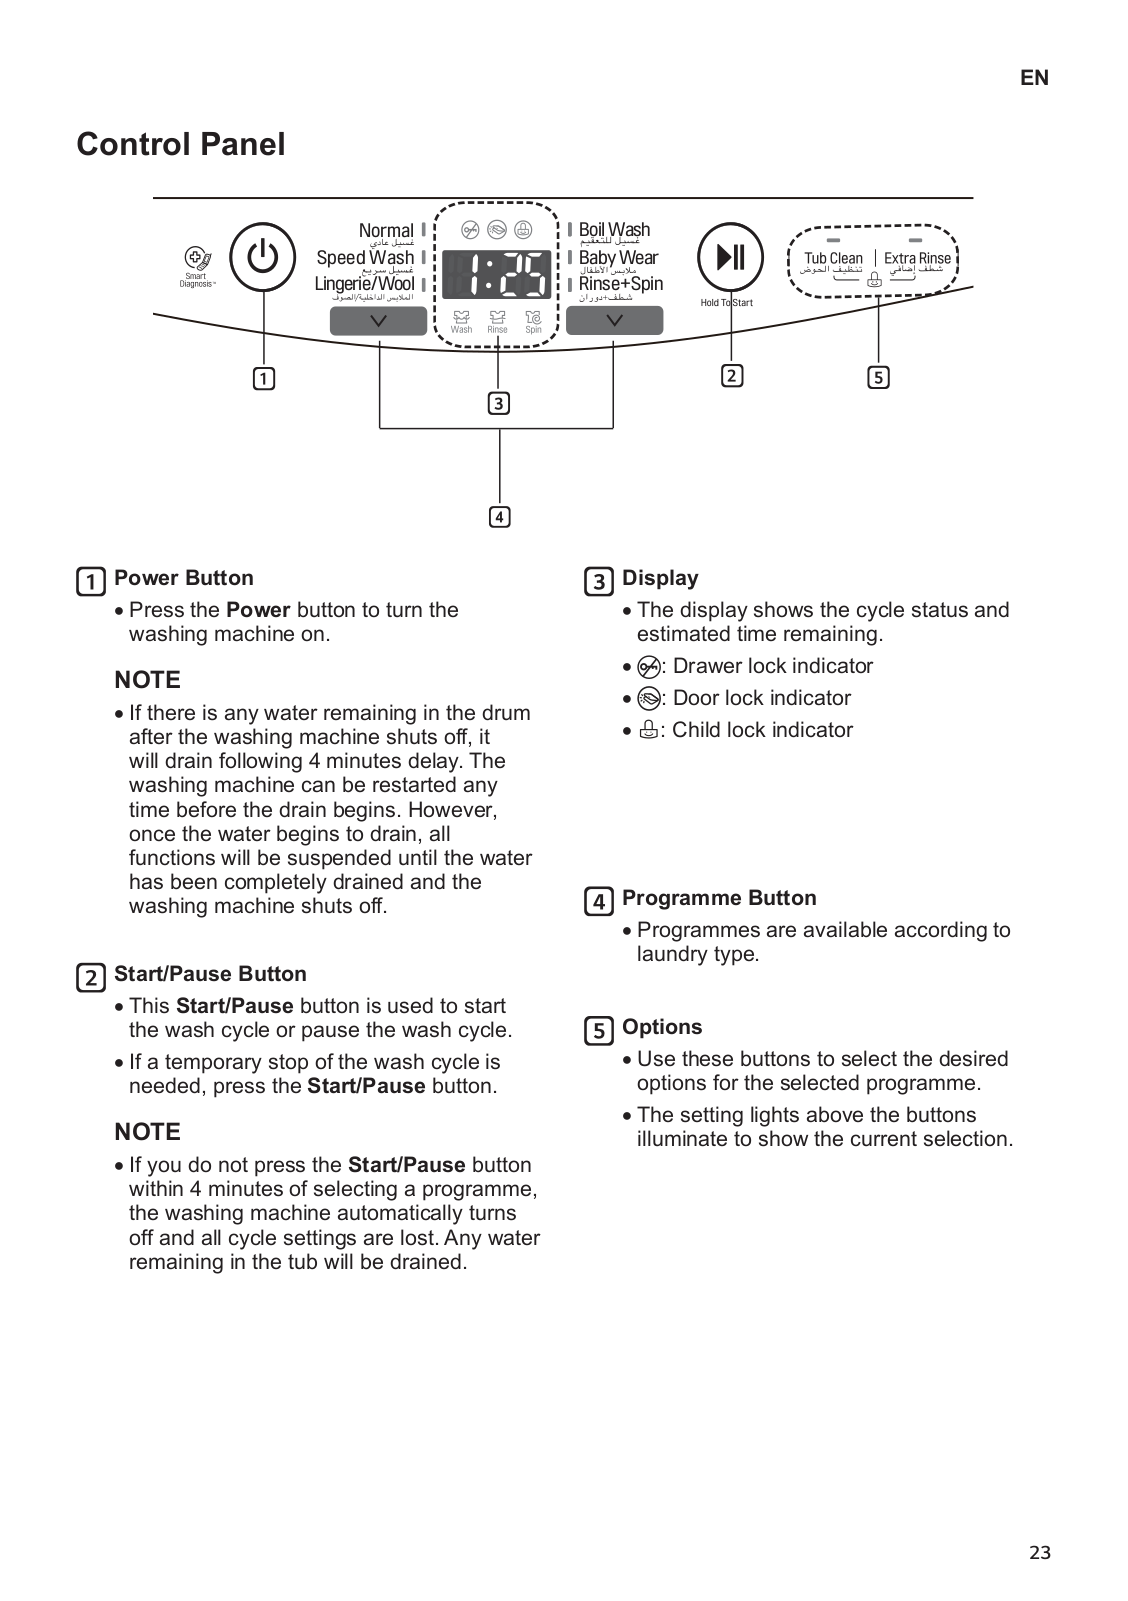
How it Works
Log In / Sign Up
Buy Points
How it Works
FAQ
Contact Us
Questions and Suggestions
Users
LG
Loading...
W
WTL-13KG10
WTL-14KG
WTL-15KG
WTL-8KG10
WTP10BSL
WTP20BK
WTP20WX
WTP357B
WTP60WH
WTP80BWH
WTR10686
2
WTR107
WTR1132BF
2
WTR1132WF
2
WTR11D80EP
WTR11D80EP1
WTR11D84EP
2
WTR1234WF
WTR206HM
WTR24DHB
WTR24DHM
WTR24HHB
WTR24HHB1
WTR854
WTS02TLWH
2
WTS02TLWHN
WTS09BSL
WTS09BWH
WTS09DBW
WTS09DHM
WTS11BSL
WTS11BWH
WTS11HHWK
WTS14HHWK
WTS16DHM
WTS17DHM
WTS18DHM
WTS19DHM
WTS19HHMK
WTS19HHMK1
WTS6520
2
WTSV07BWH
WTSV10BWHN
WTSV11BS
WTSV11BSLN
WTSV13BWHN
WTSV14BSLN
WTSV15BSL
WTT02TLXM
WTT02TLXMN
WTT03TLXM
WTT03TLXMN
WTT04PBW
2
WTT05PBW
2
WTT07PGW
WTT08PGW
2
WTT09PGW
2
WTT10PGW
2
WTT12PGW
2
WTT15PGW
2
WTT65PBW
2
WTV09BSL
WTV09BWH
WTW1409HCW
WTW1409VCB
WTW1409VCW
WTX09DBM
WTX16DBW
WUE100FL
WV5-1275W
WV5-1408W
2
WV5-1409W
2
WV5-1410W
WV5148SGP
2
WV5149SVP
2
WV7-1408W
WV7-1409W
2
WV9-1408B
WV9-1408W
WV9-1409B
WV9-1409W
WV9-1410B
WV9-1410W
WV9-1412W
WV9142BRP
2
WV9142WRP
2
WVC5-1409W
WVC9-1410W
WXL-1014E
WXL-1014W
WXLC-1116B
WZB1NP6
X
X CAM
2
X Charge
X Power
2
X Power 2
X Power 3
X SCREEN
X Style
X Style L56VL
Loading...
Loading...
Nothing found
WTT03TLXM
Owner’s Manual
80 pgs
7.28 Mb
0
Table of contents
Loading...
LG WTT03TLXM Owner’s Manual
...
LG Owner’s Manual
Download
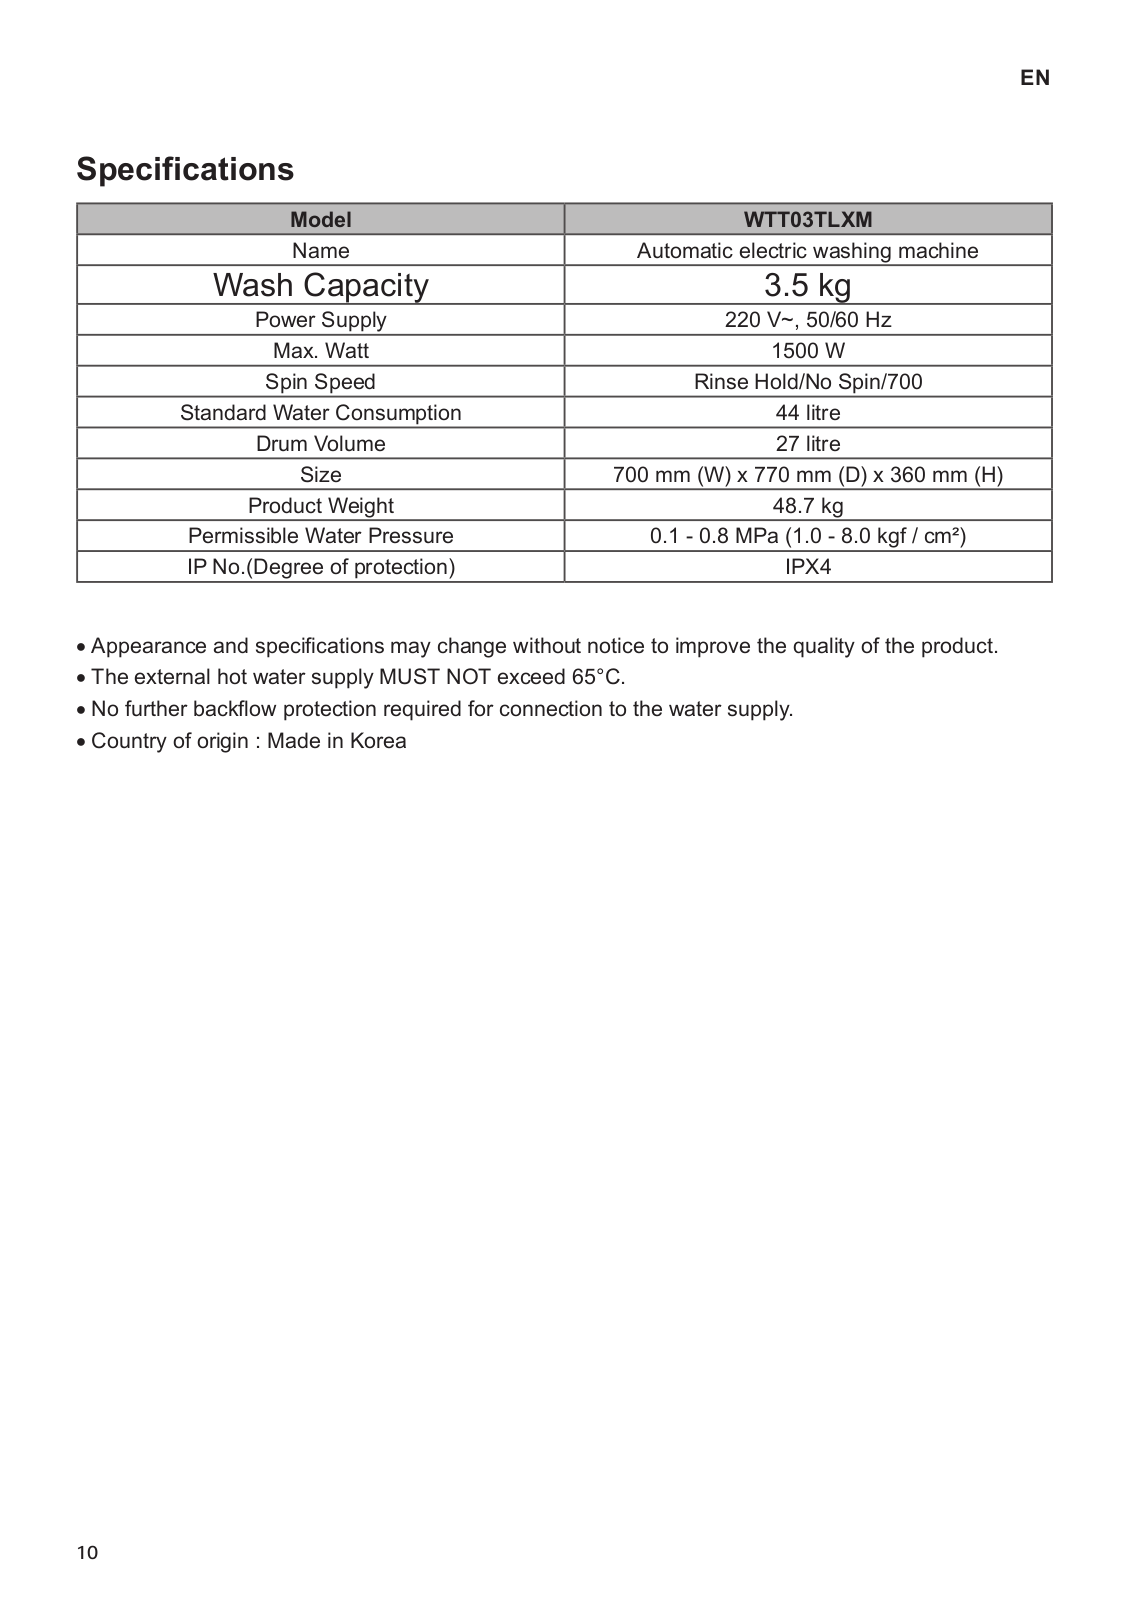
Specifications and Main Features
Frequently Asked Questions
User Manual
Download
Loading...
+
56
hidden pages
Unhide
You need points to download manuals.
1 point = 1 manual.
You can buy points or you can get point for every manual you upload.
Buy points
Upload your manuals
 Loading...