

LG WK7, WKM7 User Manual
OWNER’S MANUAL
MFL70521720
built-in
Please read this manual carefully before operating
your set and retain it for future reference.
MODEL
WK7 WKM7
www.lg.com
Copyright © 2018 LG Electronics Inc. All Rights Reserved
Getting Started2
Safety Information
1
Getting Started
CAUTION: TO REDUCE THE RISK OF ELECTRIC
SHOCK DO NOT REMOVE COVER (OR BACK)
NO USER-SERVICEABLE PARTS INSIDE REFER
SERVICING TO QUALIFIED SERVICE PERSONNEL.
CAUTION
RISK OF ELECTRIC SHOCK
DO NOT OPEN
This lightning ash with arrowhead
symbol within an equilateral triangle
is intended to alert the user to the
presence of uninsulated dangerous
voltage within the product’s
enclosure that may be of sufcient
magnitude to constitute a risk of
electric shock to persons.
The exclamation point within an
equilateral triangle is intended
to alert the user to the presence
of important operating and
maintenance (servicing) instructions
in the literature accompanying the
product.
WARNING: TO PREVENT FIRE OR ELECTRIC SHOCK
HAZARD, DO NOT EXPOSE THIS PRODUCT TO RAIN
OR MOISTURE.
CAUTION: The apparatus should not be exposed to
water (dripping or splashing) and no objects lled
with liquids, such as vases, should be placed on the
apparatus.
WARNING: Do not install this equipment in a
conned space such as a book case or similar unit.
CAUTION: Do not use high voltage products around
this product. (ex. Electrical swatter) This product may
malfunction due to electrical shock.
CAUTION: No naked ame sources, such as lighted
candles, should be placed on the apparatus.
CAUTION: Do not block any ventilation openings.
Install in accordance with the manufacturer’s
instructions.
Slots and openings in the cabinet are provided
for ventilation and to ensure reliable operation of
the product and to protect it from over heating.
The openings shall never be blocked by placing
the product on a bed, sofa, rug or other similar
surface. This product shall not be placed in a builtin installation such as a bookcase or rack unless
proper ventilation is provided or the manufacturer’s
instruction has been adhered to.

Getting Started 3
CAUTION concerning the Power Cord
The Power Plug is the disconnecting device. In case
of an emergency, the Power Plug must remain readily
accessible.
Check the specication page of this owner’s manual
to be certain of the current requirements.
Do not overload wall outlets. Overloaded wall outlets,
loose or damaged wall outlets, extension cords, frayed
power cords, or damaged or cracked wire insulation
are dangerous. Any of these conditions could result
in electric shock or re. Periodically examine the
cord of your device, and if its appearance indicates
damage or deterioration, unplug it, discontinue use of
the device, and have the cord replaced with an exact
replacement part by an authorized service center.
Protect the power cord from physical or mechanical
abuse, such as being twisted, kinked, pinched, closed
in a door, or walked upon. Pay particular attention to
plugs, wall outlets, and the point where the cord exits
the device.
NOTICE: For safety marking information including
product identication and supply ratings, please refer
to the main label on the bottom or the other surface
of the product.
CAUTION when using this product in environments
of low humidity
yIt may cause static electricity in environments of
low humidity.
yIt is recommended to use this product after
touching any metal object which conducts
electricity.
For models using an adapter
Only use the AC adapter supplied with this device.
Do not use a power supply from another device or
another manufacturer. Using any other power cable
or power supply may cause damage to the device and
void your warranty.
1
Getting Started
1
Getting Started
Getting Started4
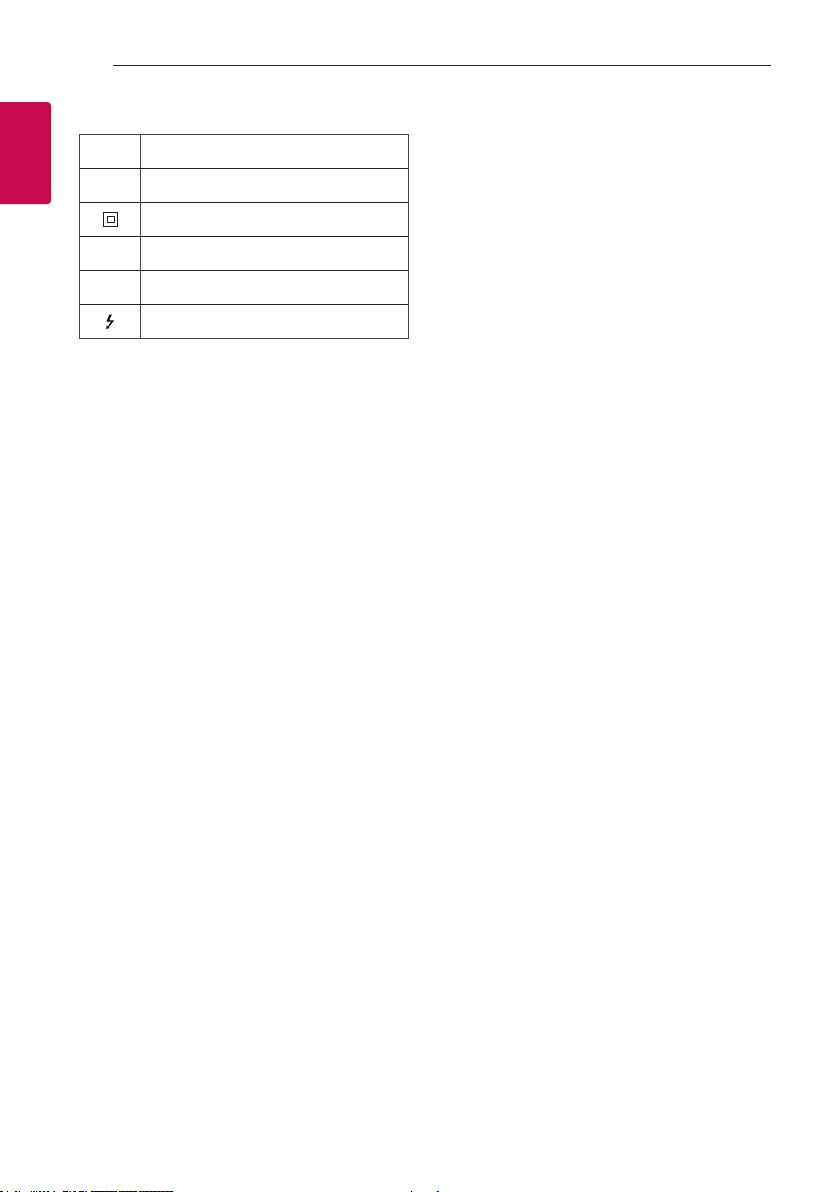
Symbols
~
0
1
!
Refers to alternating current (AC).
Refers to direct current (DC).
Refers to class II equipment.
Refers to stand-by.
Refers to “ON” (power).
Refers to dangerous voltage.

Table of Contents
1 Getting Started
2 Safety Information
6 Unique features
6 Introduction
7 Front
8 Rear
2 Connecting
9 Network connection
9 Setting up the Speaker
9 – Connecting the AC Adapter
10 – Installing “Google Home” App
10 – Launch the app to connect Wi-Fi
13 – Reference site for Google Assistant Help
3 Operating
14 Basic Operations
14 – Function LED status
15 – Simple Operation Guide
16 How to use the Google Assistant
16 – Google Assistant LED status
16 – Talk to the Google Assistant
17 – Control Smart Home devices
17 – Voice command
19 LG Wi-Fi Speaker
19 – Installing "LG Wi-Fi Speaker" App
20 – BLUETOOTH connection lock
20 – Sound adjustment
21 Using BLUETOOTH® technology
21 – Listening to music stored on the
BLUETOOTH devices
23 Other Operations
23 – Turn off the microphone temporarily
23 – Auto function change
24 – Edit speaker name
24 – Resetting
4 Troubleshooting
25 Troubleshooting
25 – General
26 – Network
26 – Application
5 Appendix
27 Trademarks and Licenses
27 Handling the Unit
28 OPEN SOURCE
29 Specifications
Table of Contents 5
1
2
3
4
5

Getting Started6
Unique features
BLUETOOTH®
1
Getting Started
Listen to music stored on your Bluetooth device.
"Google Home" application
You can enjoy various functions of this speaker by
connecting to network and your smart device with
"Google Home" app.
The speaker and your smart device must be
connected to the same network. Visit or "Google
Play” or “App Store” to search for "Google Home"
app. For detailed information, refer to page 10
Voice recognition
You can use a variety of voice commands to control
the speaker with Google Assistant.
"LG Wi-Fi Speaker" application
Listens to music stored on your smart device.
You can control this speaker with your iPhone or
Android device via "LG Wi-Fi Speaker" app. Visit
"Google Play” or “App Store” to search for "LG Wi-Fi
Speaker" app. For detailed information, refer to page
19
Introduction
Symbol used in this manual
Note
,
Indicates special notes and operating features.
Caution
>
Indicates cautions for preventing possible damages
from abuse.
yDepending on the application’s version and the
software of smart device, "LG Wi-Fi Speaker" app
may not be operated normally.
ySome smart devices may not be compatible with
this speaker.
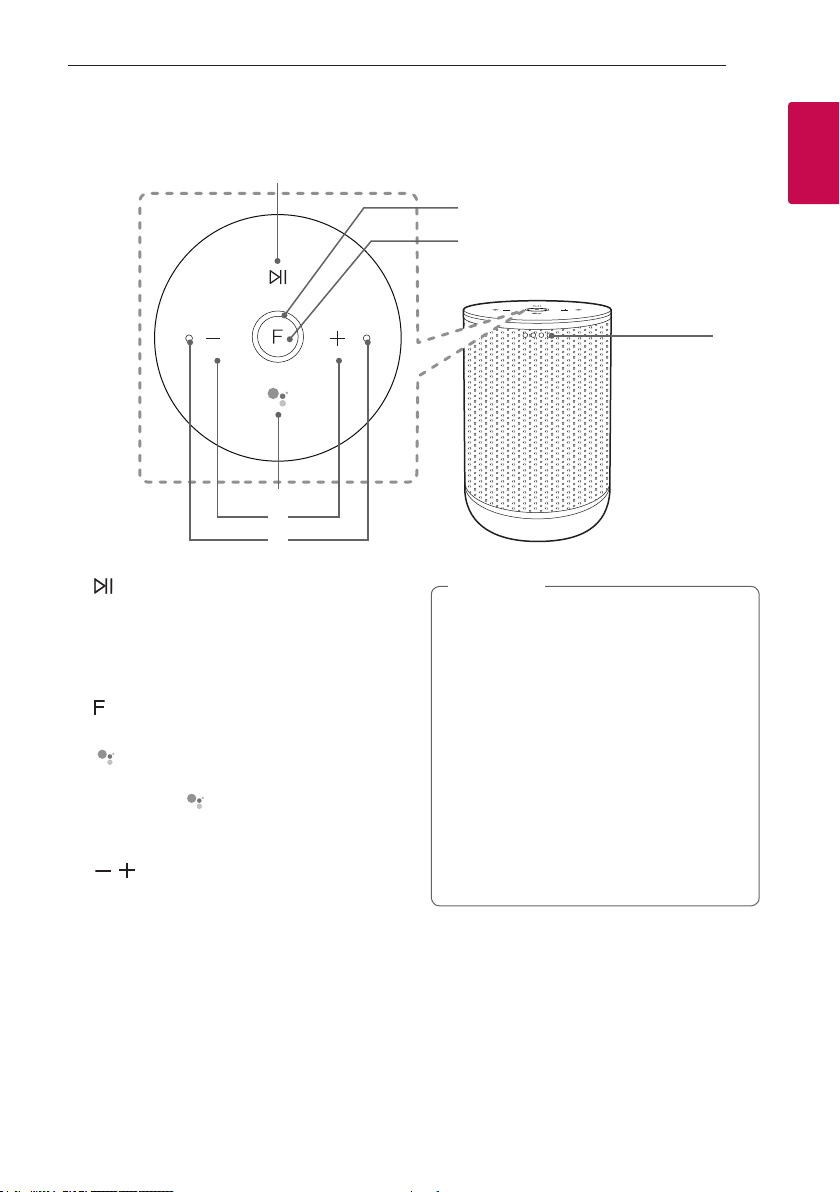
Front
Getting Started 7
a
d
e
f
a
Plays, pauses or skip playback.
Function LED
b
Changes LED status in according function.
Bluetooth: Blue / Wi-Fi: White (Page 14)
(Function)
c
Changes Wi-Fi or Bluetooth. (Page 15)
d
- Use in instead of saying "Hey Google" by long
pressing the (Page 16)
- Plays or pauses a music and stops the Google
Assistant feedback. (Page 15)
,
e
Adjusts the volume.
Built-in microphones
f
Google Assistant LED
g
Changes LED status according to Google
Assistant performance. (Page 16)
b
c
g
Note
,
Precautions in using the touch buttons
y Use the touch buttons with clean and dry
hands.
- In a humid environment, wipe out any
moisture on the touch buttons before using.
y Do not press the touch buttons hard to make
it work.
- If you apply too much strength, it can be
damaged the sensor of the touch buttons.
y Touch the button that you want to work in
order to operate the function correctly.
y Be careful not to have any conductive
material such as metallic object on the touch
buttons. It can cause malfunctions.
1
Getting Started
Getting Started8
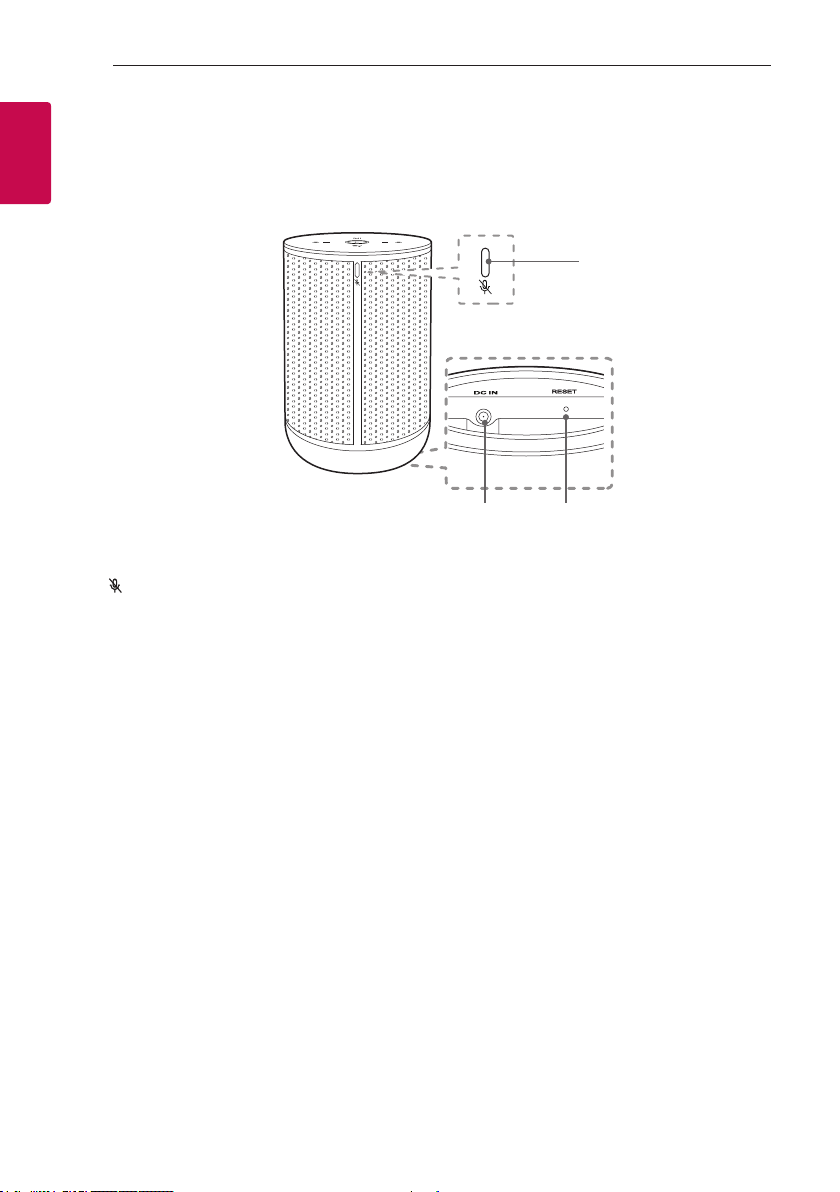
Rear
1
Getting Started
a
b c
(Microphone off) button
a
Enables or disables the Google Assistant
Microphone (voice recognition) (Page 23)
DC IN (AC adapter input)
b
RESET
c
Initialize information of existing connection.
(Page 24)
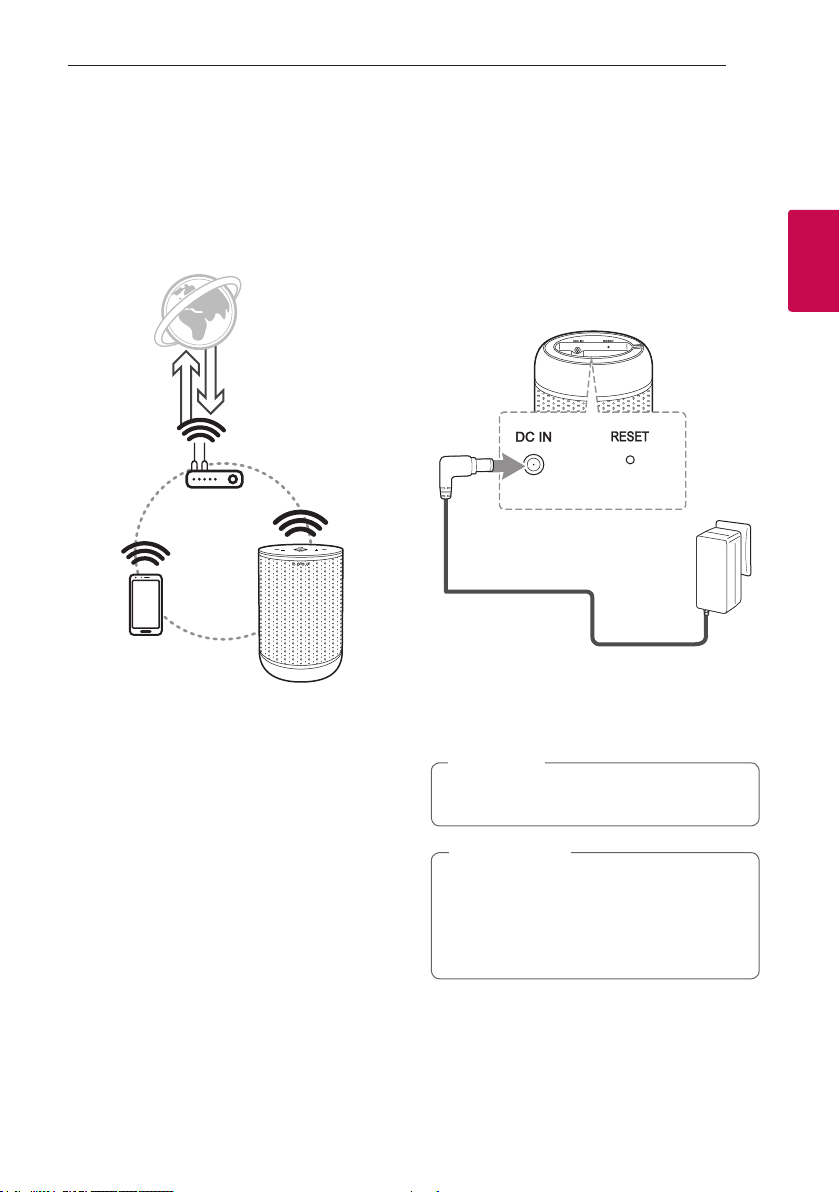
Connecting 9
Network connection
You can enjoy various functions of this speaker by
connecting to network and your smart device with
"Google Home" app.
Choose the connection method considering your
network environment.
The "Google Home" app is required to connect the
speaker wirelessly to the network.
Setting up the Speaker
Connecting the AC Adapter
Connect the speaker to the power supply with the
supplied AC adapter.
1. Connect the supplied AC power cord to DC IN
adapter input.
2. Plug the AC power cord into an AC outlet.
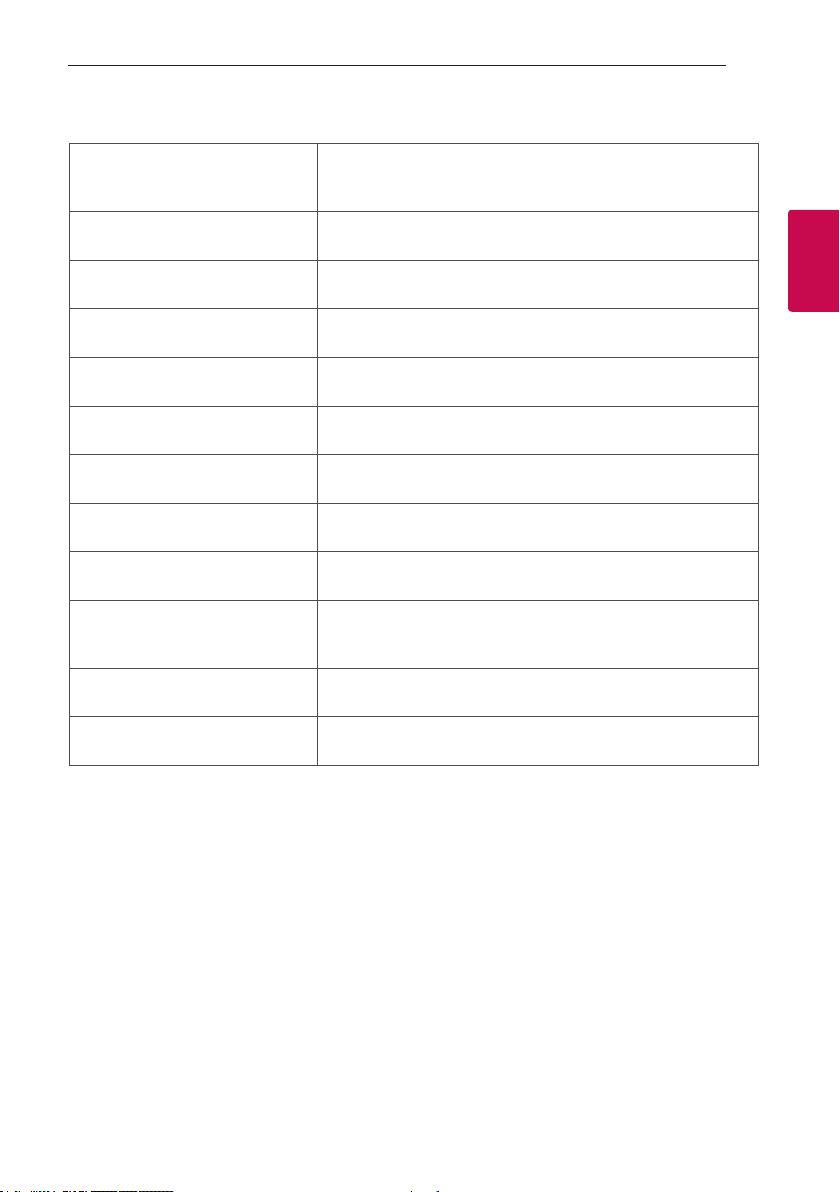
3. Function LED rotates for tens of seconds (Approx.
30 ~ 50 seconds) during booting.
4. The speaker has completed booting when
Function LED blinks in white with the sound.
Note
,
If the speaker is connected to Wi-Fi, Function
LED is solid white when booting is completed.
2
Connecting
Caution
>
Only use the AC adapter supplied with this
device. Do not use a power supply from another
device or manufacturer. Using any other power
cable or power supply may cause damage to the
device and void your warranty.
Connecting10
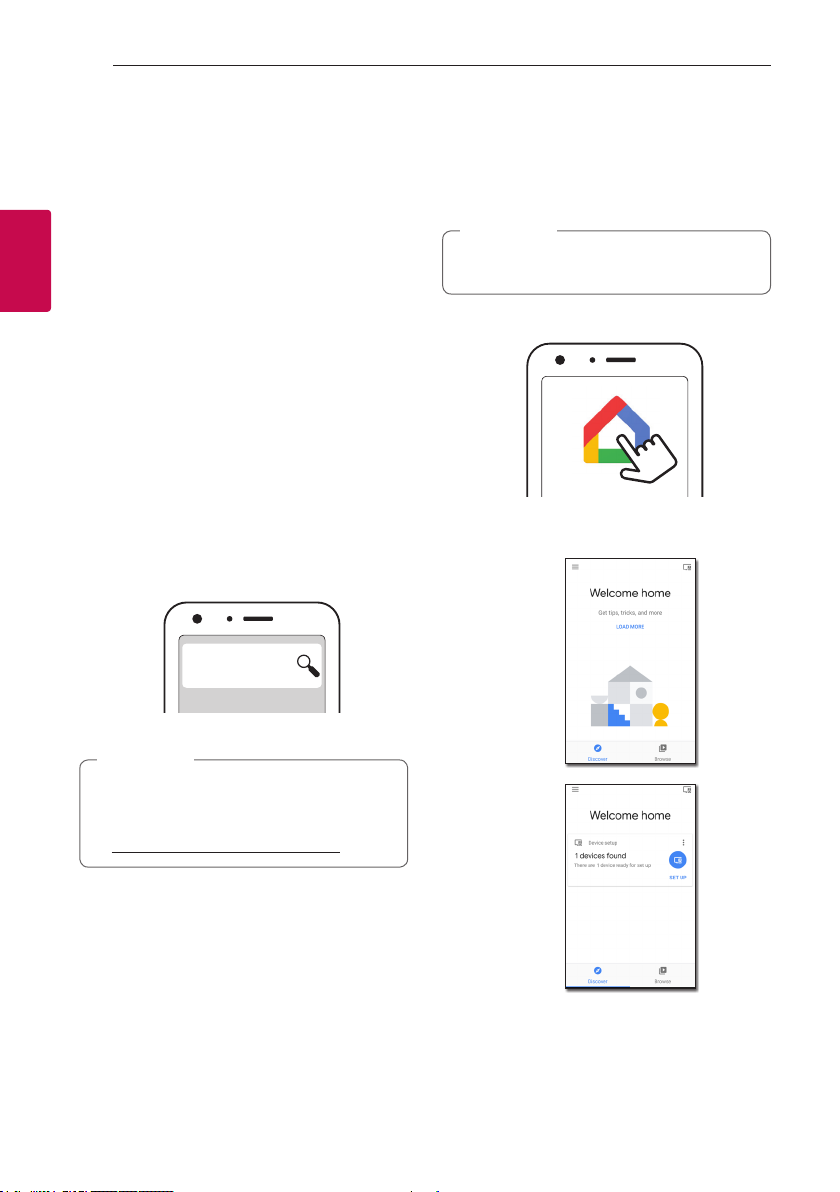
Installing “Google Home” App
The "Google Home" app allows you to use various
functions of this speaker through your smart device:
There are a ways to install “Google Home” app onto
your Smart device.
Requirements before setup
yA wireless router must be connected to the
2
Connecting
internet. A smart device such as Android or iOS
devices must be connected to the wireless router
via Wi-Fi connection.
yIt needs Google account to use this app. During
connect Wi-Fi, this app may request to create
Google account.
Through "Google Play or “App Store”
1. Tap the“Google Play Store” icon or “App Store”
icon on your smart device.
2. Type in “Google Home” in the search bar and tap
“Search” on “Google Play” or “App Store”
3. Select “Google Home” in the search result list to
download.
Google Home
Launch the app to connect Wi-Fi
Make sure your smart device Wi-Fi feature is turned
on. Once a connecting operation is performed, it does
not need to be performed again.
Note
,
In case of iOS devices, it should be turned on
Bluetooth setting on your smart device.
1. Tap the "Google Home" icon to launch the app.
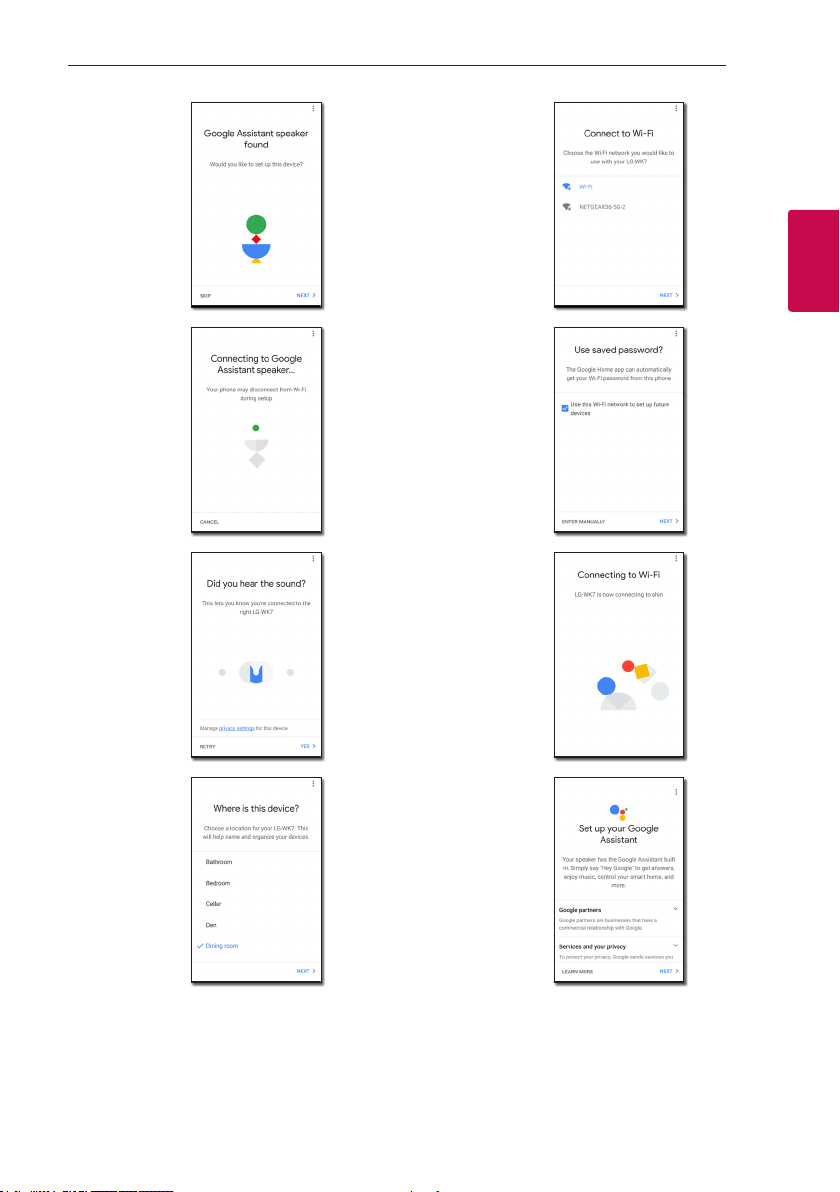
2. Follow the screen on app to set speaker. Follow
these instructions in order.
a
Note
,
yDepending on the device version, “Google
Home” app may not work.
yFor more information, visit the web site.
https://www.google.com/cast/setup/
b
Connecting 11
c
d
e
g
2
Connecting
h
i
f
i
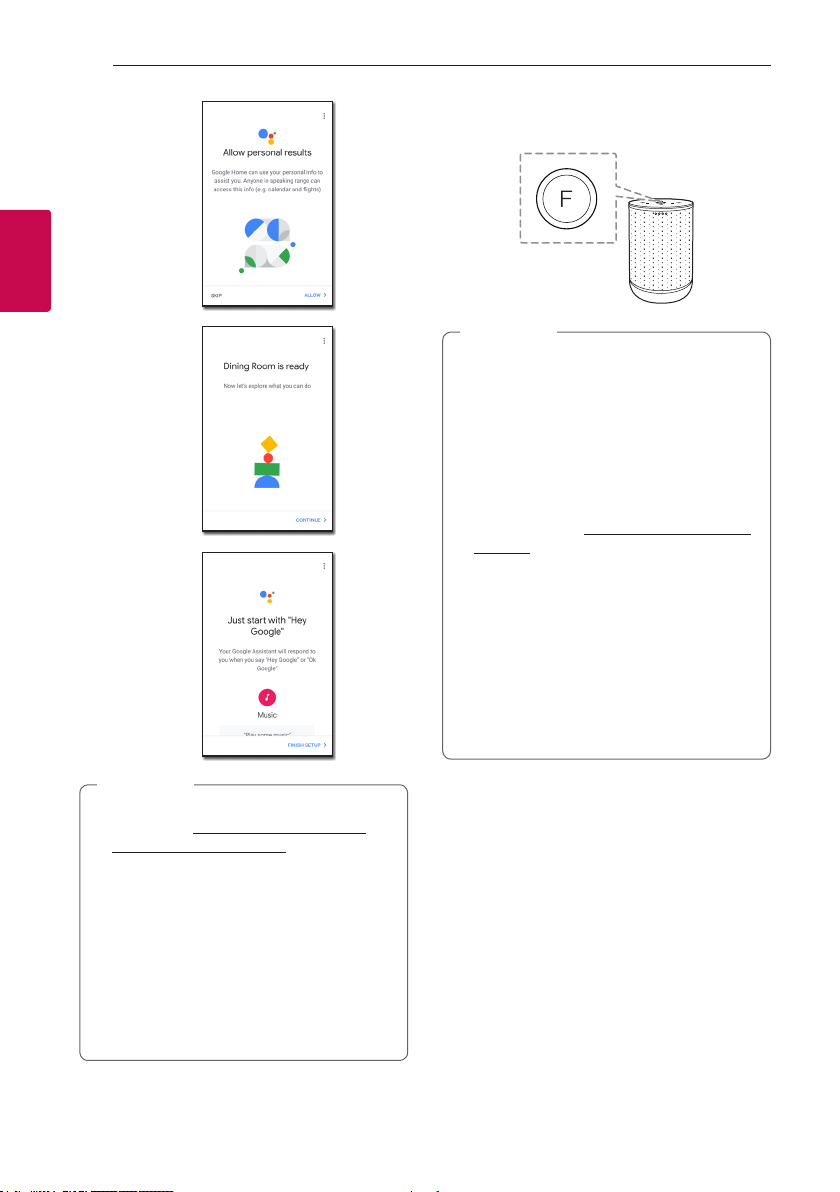
Connecting12
2
Connecting
j
k
l
Note
,
yFor more information on the setup, visit
the web site. https://support.google.com/
assistant/answer/7538816
yUse the same Wi-Fi connection to set the
speaker and your smart device.
yIf the Bluetooth setting turned on your
smart device, it will be easy to connect Wi-Fi.
yDuring installation, you should create a
speaker name. It is needed when pairing the
Bluetooth device. You can check and edit
the speaker name. Follow the “Edit speaker
name”. (Page 24)
3. When the speaker is properly connected to Wi-Fi,
the Function LED will be solid white with sound.
Note
,
yIf the app is already installed, this speaker is
display in main screen of the app.
yDepending on wireless router status, it might
not work well Wi-Fi connection.
yIt is recommended that you use WiFi Group
Play with less than 5 speakers.
yFor more information (Set up, Usage, Help
etc.), research “Google Assistant Help” or
visit the web site. http://support.google.com/
assistant
yThe speaker is not available for use on some
functions from the “Google Assistant Help”
site. (ex. Call etc.) (Page 13)
y“Google Home” app is provided by Google. It
might be revised by a change of Google Policy.
yThe speaker is not compatible with ”Smart
ThinQ" app. Therefore it is not available in
setup and cannot be controlled by using
"Smart ThinQ" app
Reference site for Google Assistant Help
Connecting 13
Set up the Google Assistant on your
speakers
Listen to music https://support.google.com/assistant/answer/7539710
Play music on your TV or speakers https://support.google.com/assistant/answer/7539867
Play TV shows & movies https://support.google.com/assistant/answer/7539991
Control smart home devices https://support.google.com/assistant/answer/7540703
Create a shopping list https://support.google.com/assistant/answer/7540969
Buy items on your shopping list https://support.google.com/assistant/answer/7384588#speaker
Set up and manage My Day https://support.google.com/assistant/answer/7393908#speaker
Listen to radio https://support.google.com/assistant/answer/7540307
See which Google Account is linked
to your Assistant
Control volume of your speakers https://support.google.com/assistant/answer/7538817
Change your language https://support.google.com/assistant/answer/7394513#speaker
https://support.google.com/assistant/answer/7538816
https://support.google.com/assistant/answer/7539992
2
Connecting
 Loading...