

LG WG6005R Owner’s Manual
wwwJ_ice.com
OWNER'S MANUAL
MANUAL DEL PROPIETARIO
AIR CON NER
AIRE ACONDIC
Mod,els/Modelo WG6005R 0R6004-i
su venti_dor de
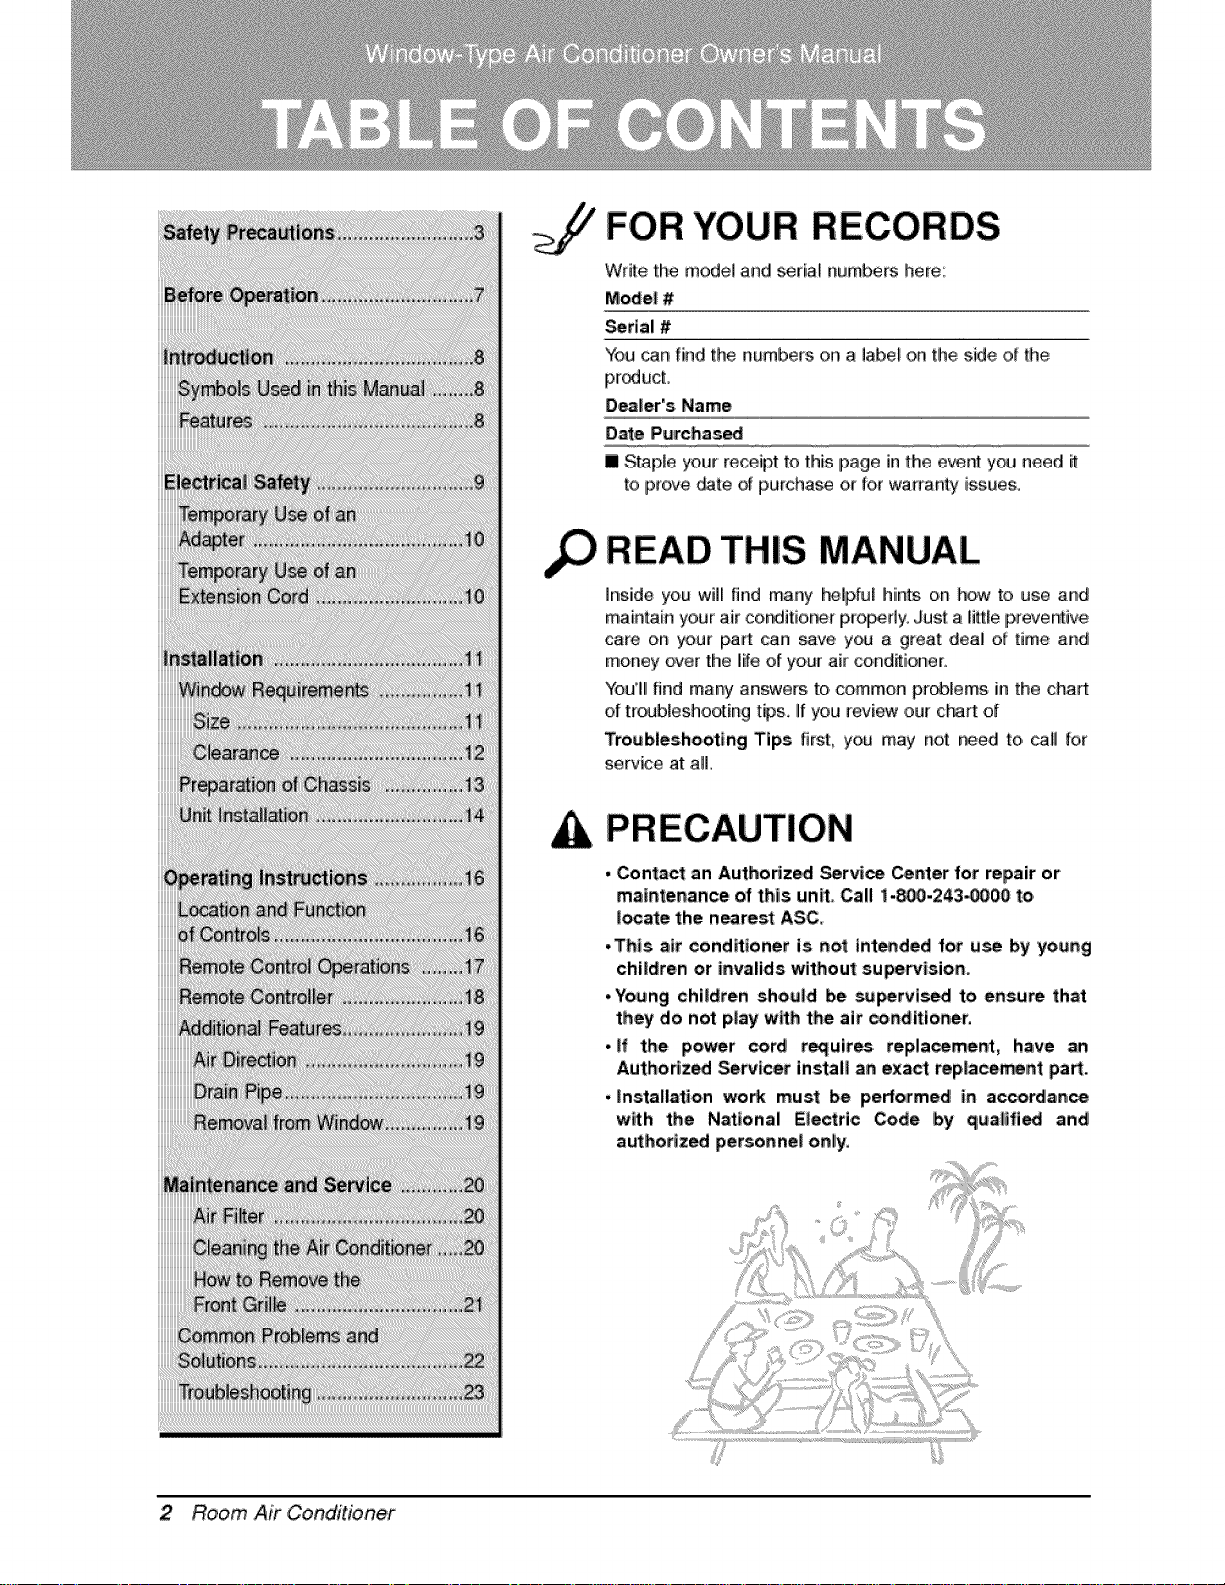
FOR YOUR RECORDS
Write the model and seria_ numbers here:
Mode! #
Serial #
"Youcan fi_'ld the numbers on a labe_ on the side of the
pr_uct,
Dealer's Name
Dale P'urchas_
IIi Staple your receipt to this Ipaglein the ewat yo_=need i_
to p_ove _te ,ofpurchase or for warranty issues,
READ THiS MANUAL
Inside you will {ind many _lp{u{ hints oin how to use and
maintain your .air conditio,r_r pro_dy. Just a little pr_entive
care on your _rt can save, y_ a great deal of' time and
money over the iife of your air cond_ioner.
htbulll find mar_/answers to, common problems in the chart
of troub[esho@ing t#s Ill you review ,our chart of
Troubleshooting Tips first, you may rlo¢ r_ed to, ca[I for
serv_e at a&
• Contact an Authorized _r_ Center for repair or
maintenance of this un_ Call i-_,-243_00 to
locate the nearest ASC
.,This air cond_toner is no_ int_ded for u_ by 'young
children or invalids without supervision.
•Young children shou|d be su_rvis_ to ensure that
they do not p|ay wRh the ai_,_nditioner,
• if the power cord r_uires rep,la_ment, have an
Author_z_ Servicer instal| _n exa_ rep|ace_nt pa_.
.,installation wo_ must be performed in ac_rdl_nce
with the National E|ectri,c Code by q_a||Ii_ and
authorlzed personnel on|y;
2 Room Air Conditioner
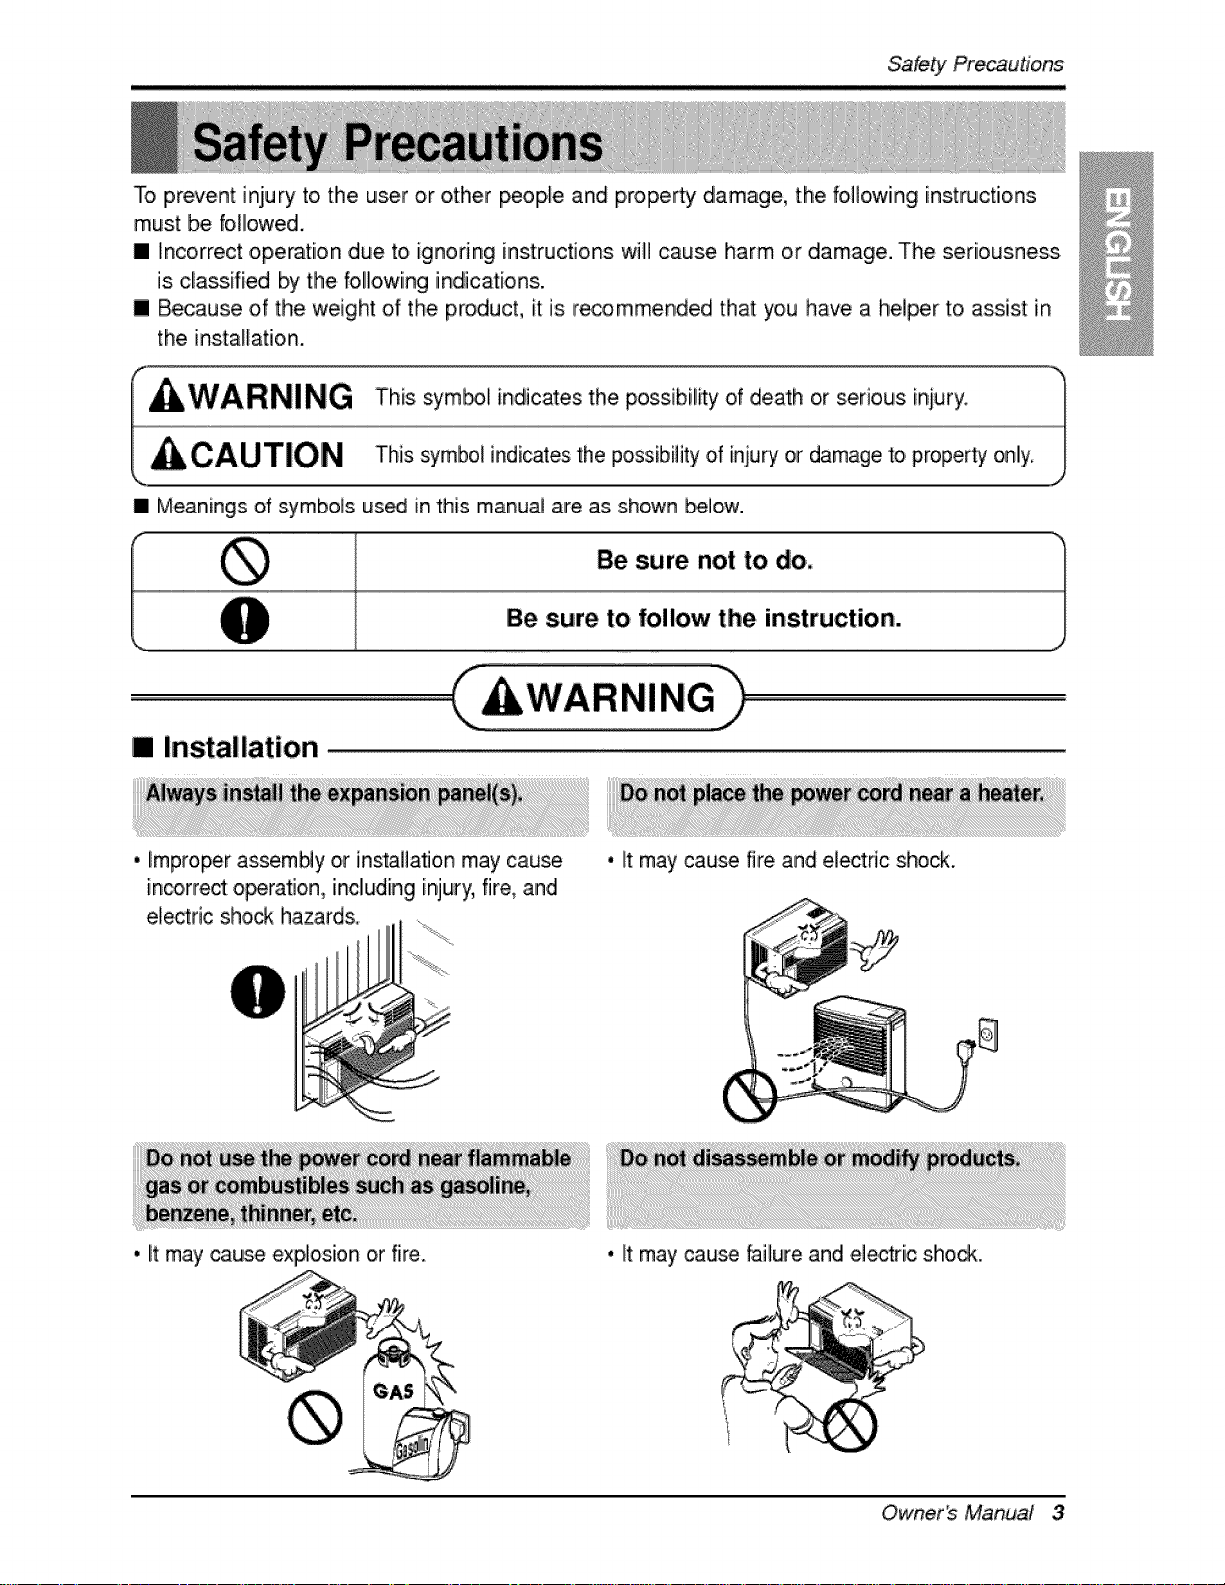
To prevent iniury to the user or other _op_e and property damage, the following instructions
must be folllowed.
[] incorrect operation due to ignoring instructions willl cause harm or damage. The seriousness
is classified by the following indications.
[] Because of the weight of the product, it is re_mmended that you have a helper to assist in
the installation.
[] Meanings of symbols us_ in this manual are as shown below.
Be sure not to do. "/
Be sure to follow t
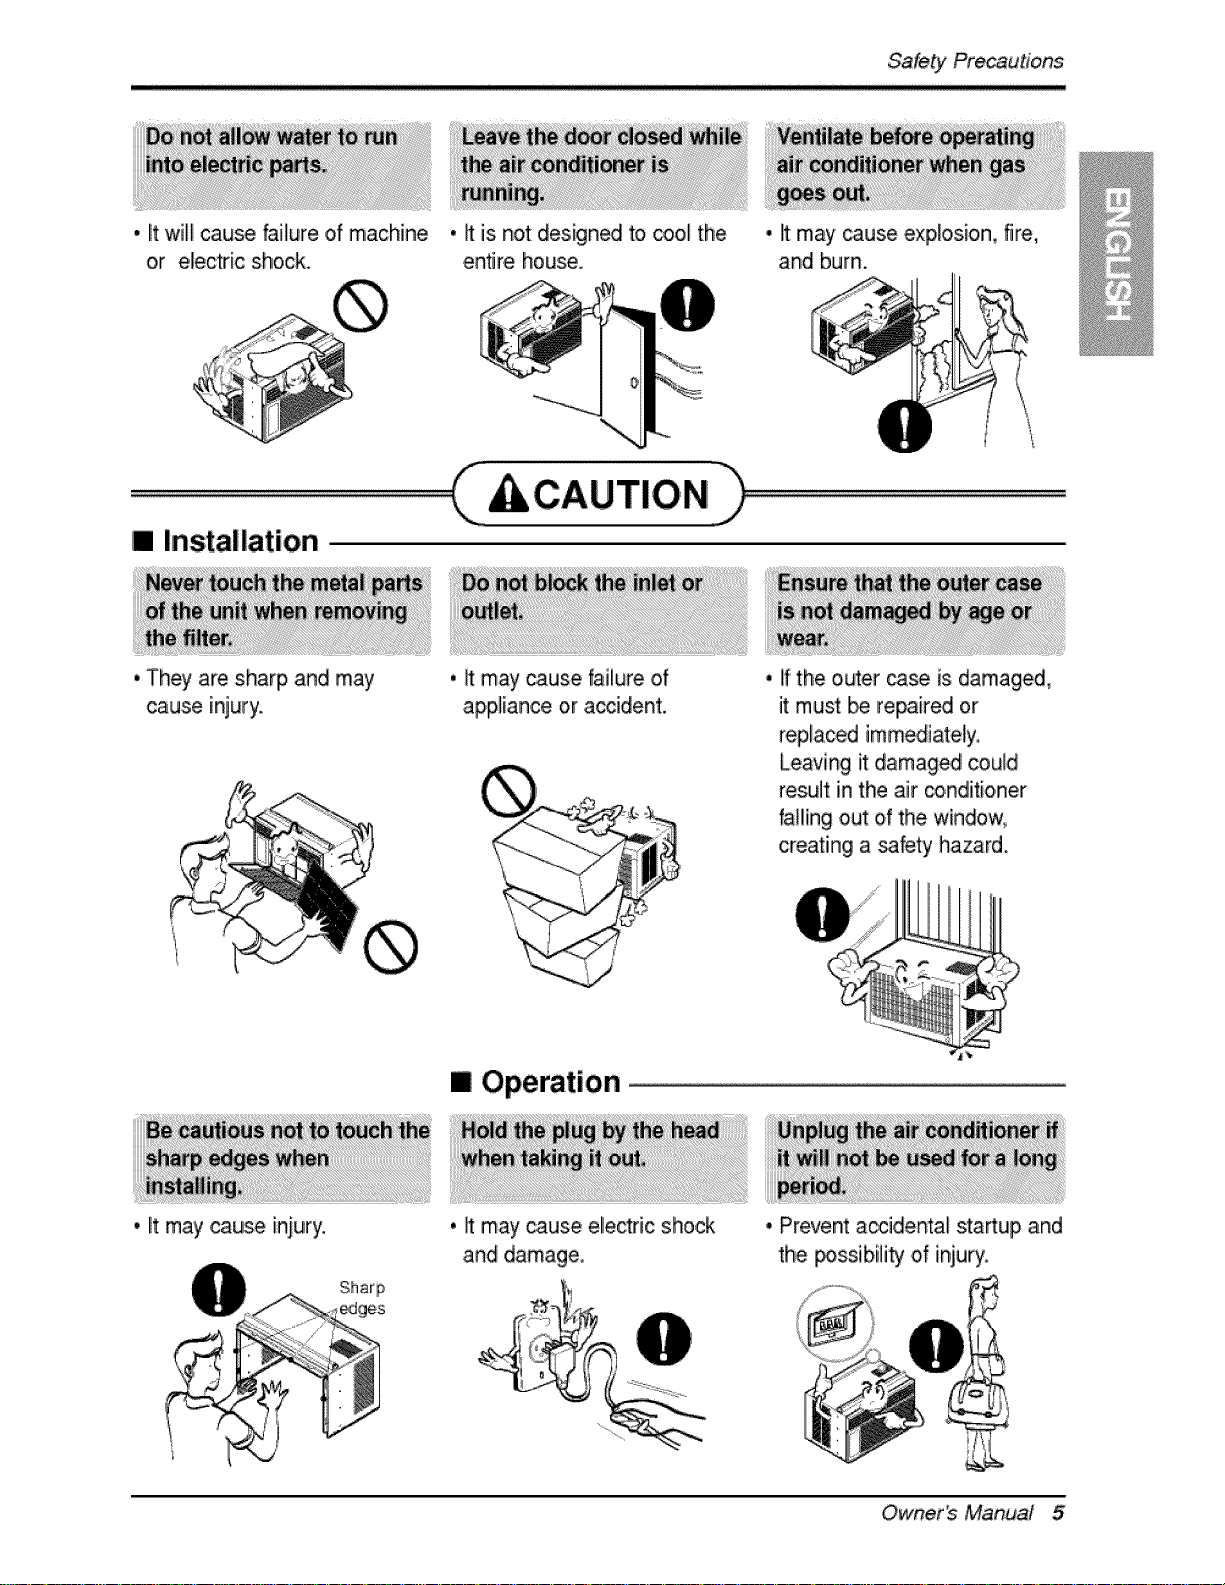
[] Installation
q
. improper assemNy or installation may cause
incorrect o_ration, inclluding injury,fire, and
electric shock hazards.
, It may cause explosion or fire.
. It may cause fire and electric shock.
• It may cause failure and ,ele_ric sho_.
Owner_ Manual 3
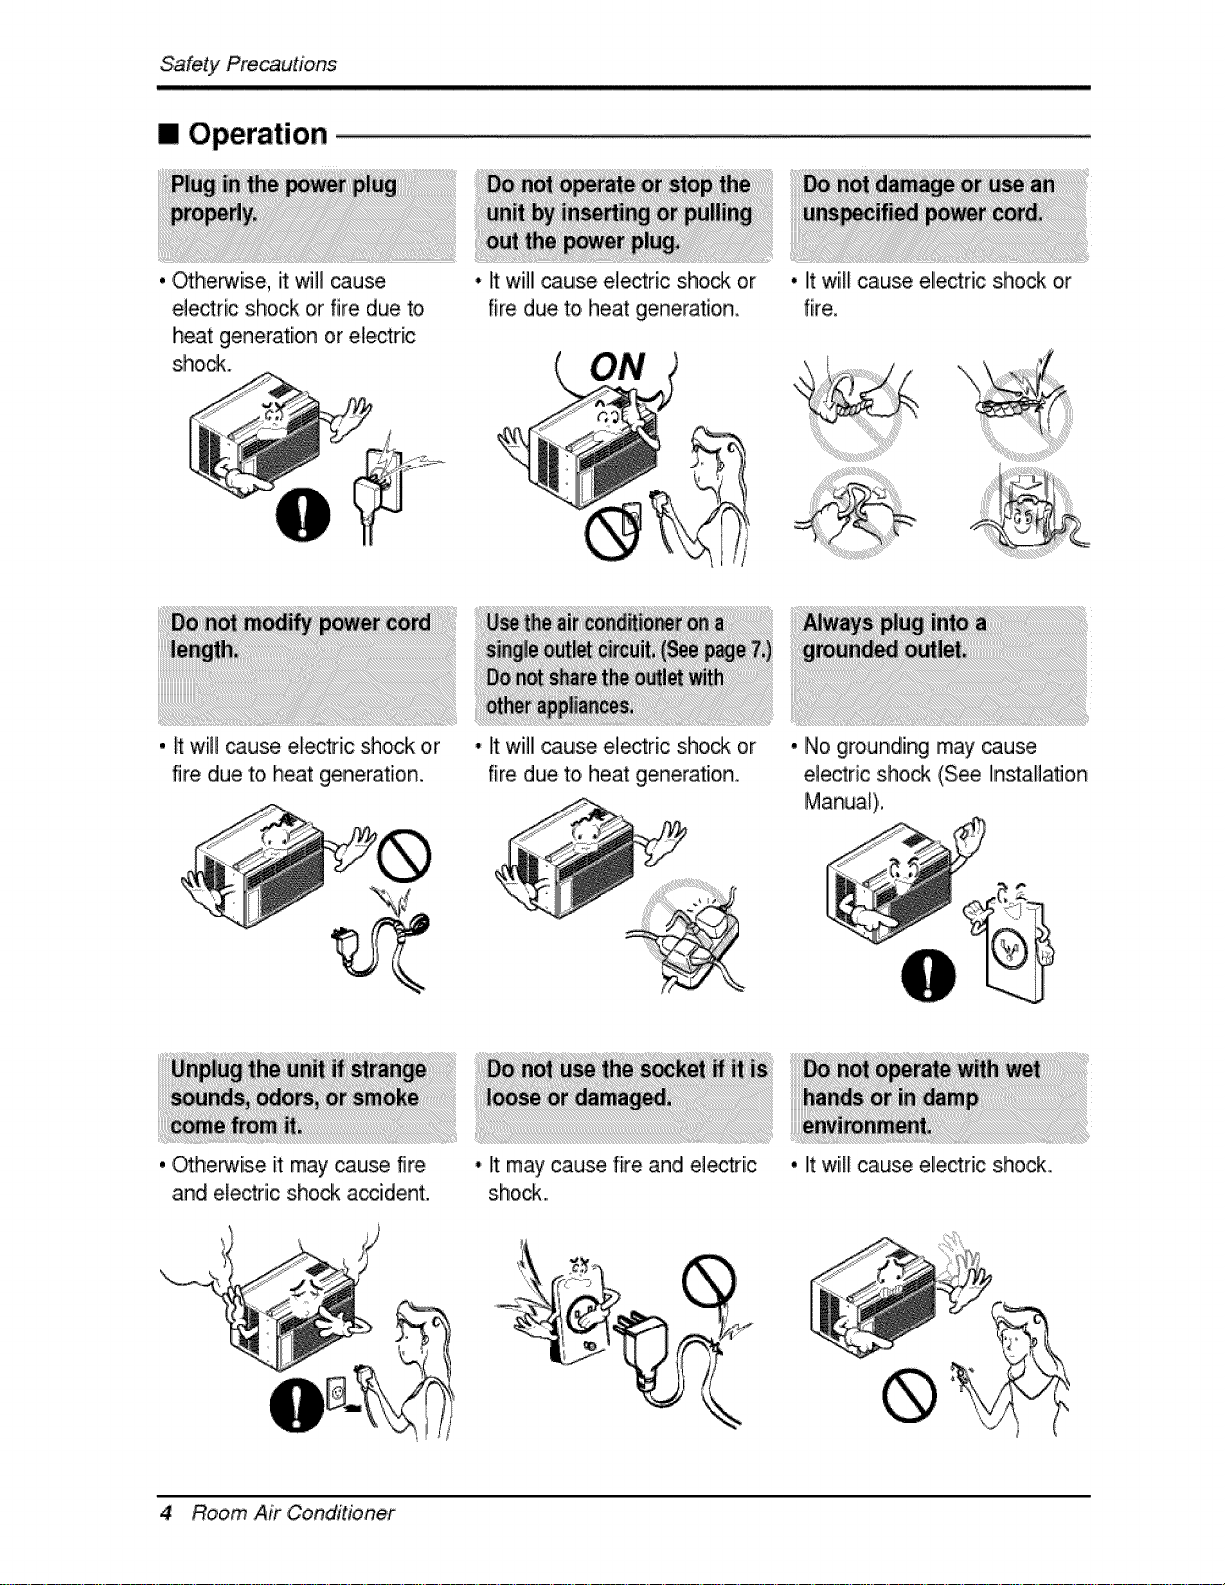
[] Operation
. ,_herwise, it will cause
electric shock or fire due toi
heat generation or electric
shock.
. _ will _use electric shock or
fire due to heat generation.
• Itwilll cause electric shock or
fire due to heat generation.
• Itwill cause electric she@ or
fire due to heat generation.
•litwill cause ellectric shock or
fire.
• No grounding may cause
electric sho_ (See Ilnstallation
IManual),.
. _hem_ise it may cause fire
and electric shock accident.
4 Room Air Conditioner
• It may cause fire and electri,c
shock,.,
• It will cause electric shock.
. It will cause failure of machine
or electric shock.
[] Installation
• It is not: designed to _ol the
enfire house.
CAUTION
• It may _use explosion, fire,
and burn.
. They are sharp and may
cause injury,
, It may cause iniury.
Sharp
edges
. _ may cause failure of
appliance or accident.
[] Operation
• _tmay cause elec#ic shock
and damage
• If the outer case is damaged,
it must _ repaired or
repEaced immediately.
Leaving it damag_ could
result in the air conditioner
falling out of the window,
creating a _fety hazard.
• Prevent a_idental sta_up and
the _ssibility of injury_
Owner_ Manual 5
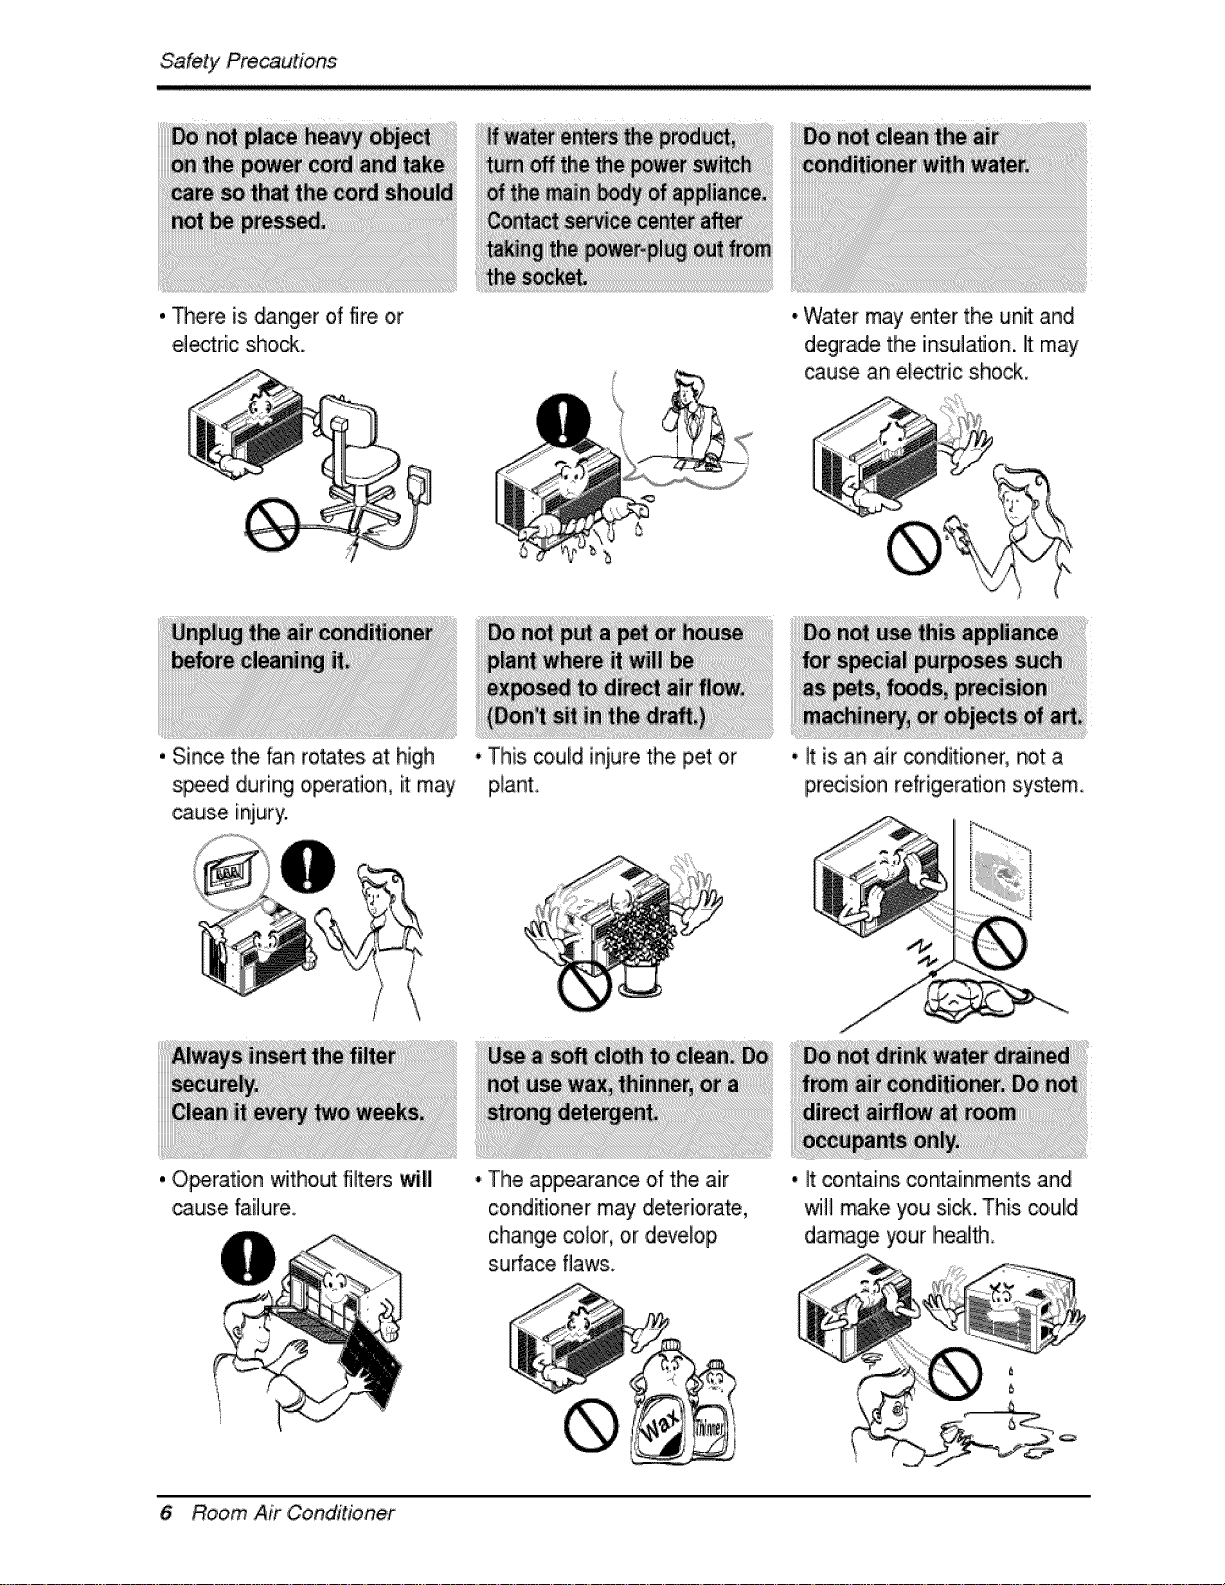
, There is danger of fire or
e]e_r[c sho_.
.,Water may enter the unit and
degrade the insulation. It may
cause an electric shock,
, Since the fan rotaries at high
speed during o_ration, it:may
cause [niury.
, Operation without filters will
cause failure,.
• This _,uUdiniurie the pet or
piant
• Tlhe ap_arance of the air
c:ond_i,oner may deteriorate,
change coJor, or develop
surface flaws.
'i it _S _n air _ndit[oner, not a
precision refrigeration system,,
.,It contains containments and
will make you sick.This co,ulld
diamage your ihealth,
6 Room Air Conditioner
BeforetoOperation
1i' Plug in the, power cord properly.
2. Use a dedicated circuit. Overloading the line could create a fire hazard.
3. Iao not use an extension cord. See page 10 for more detaii]s.
4. Do not staWstop operation by plugging/unplugging the power cord.
5. IIfthe power cord is damaged and requires, replacement, have an Authorized
Servicer install an exact replacement part.
1i_ Being exposed to direct airflow for .an extended period o,ftime could b,e
hazardous to your health, Do, not expose occupants, pets, or plants to direct
airflow for extended periods of time.
2i_Due to the possibility of oxygen deficiency, ventilate the room when used
together with stoves or other heating devices,
3 Do not use this air conditioner for non-specified special purposes (e.g.
preserving precision devices, food, peR, p,lan_, and art objects). Such usage
could damage the, items.
43The air conditioner is a consumer comfort appliance, not a precision climate
control system.
1. Do not touch the metal parts of the unit when removing the filter. Injuries ,can
occur when handling sharp metal edges.
2. Do not use water to clean inside the air conditioner. Exposure t,owater can
destroy the insulation, leading to possible electric shock.
3. When cleaning the unit, first make sure that the power and breaker are turned
off. The, fan rotates at a very high speed during operation. There is a
possibility of injury if the unit's power is accidentally triggered on while
cleaning inner parts of the unit.
For repair and maintenance, contact an Authorized Service Center. See the,
warranty page for details or call ,(800),243-000& Have your model number and
serial number available. They should be written on page, 2 of this manual.
Owner_ Manual 7

introduction
WARNING: This appliance should be install_ in accordance with the
National El_tric C_e.
This symbol alerts you to the risk of electric shock.
This symbol alerts you to hazards that could cause harm to the
air conditioner:
This symbol indicates s_cial notes.
Cabinet Guide
Cool Air Discharge
Front Grille
Air Deflector
Air Filter
Cabiinet
_ol Air Discharge
Horizontal
Air Defl_o,r Air Filter
Jpper Guide
Front Grille
Control Board
Remote controller i
8 Room Air Conditioner
_Ail Intake
Iinlet Grilile
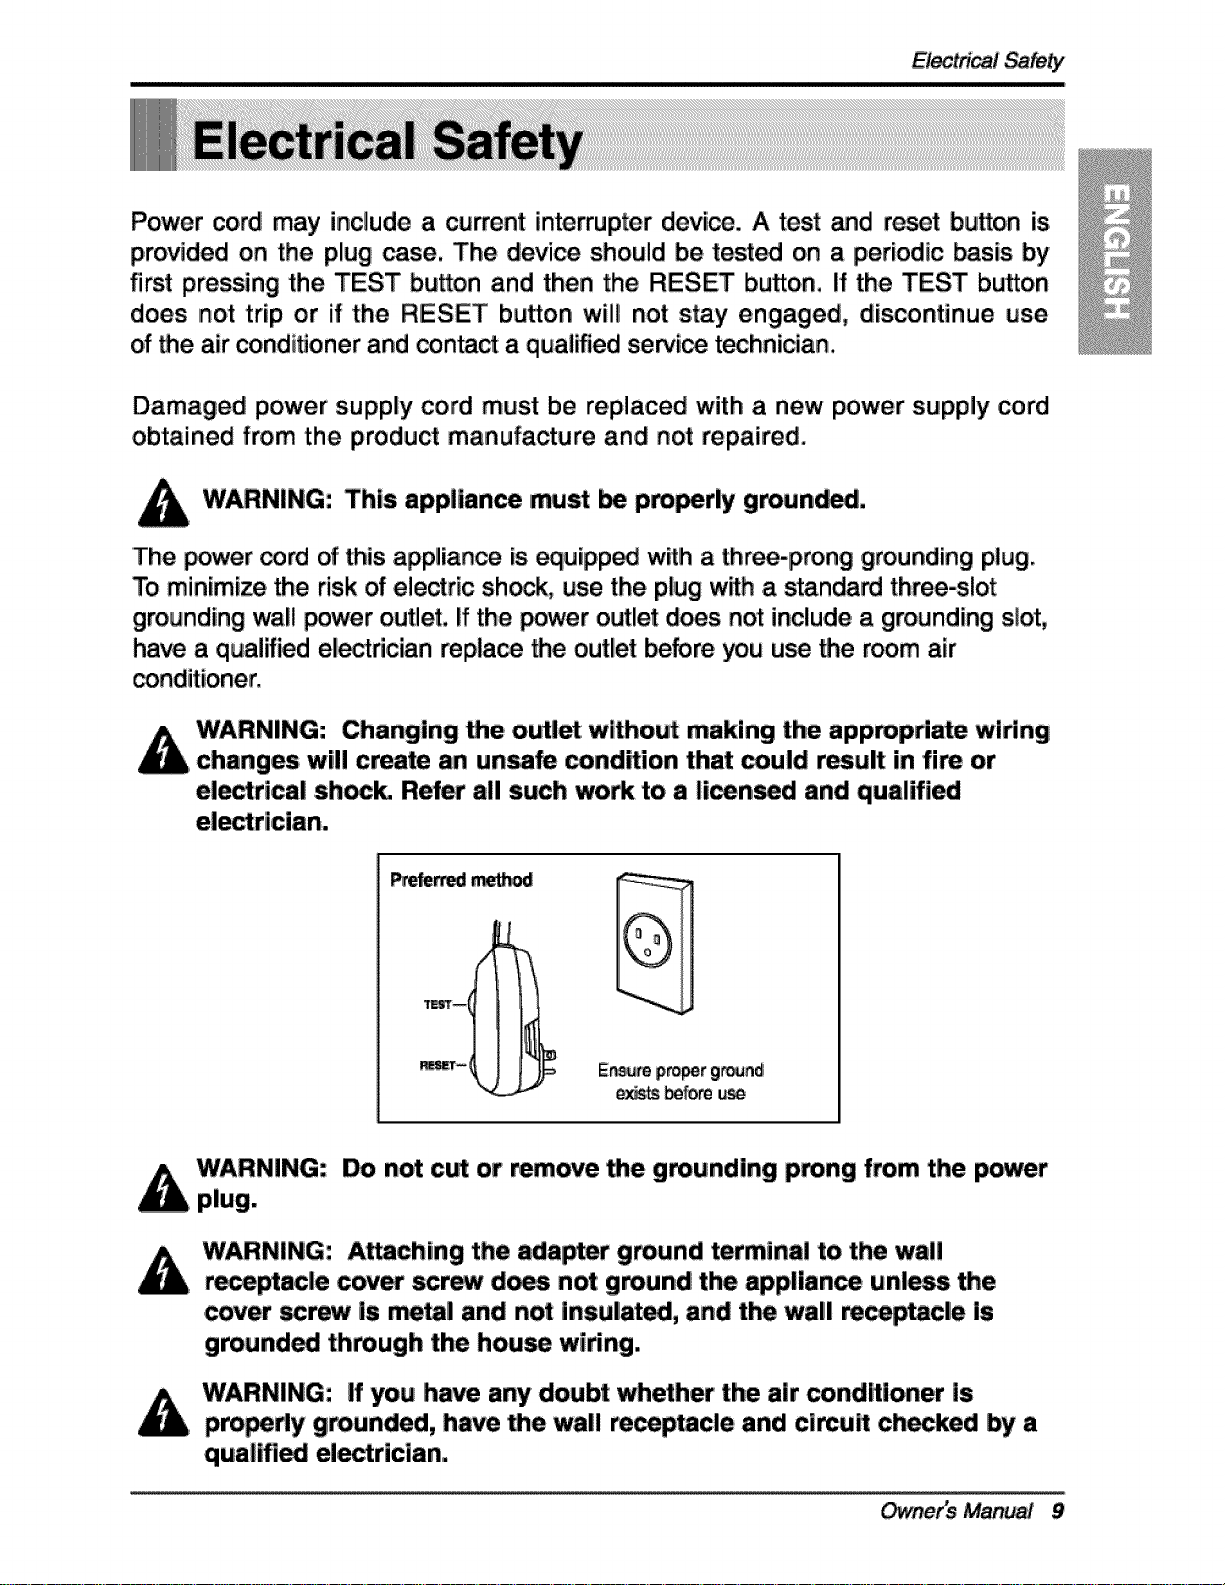
Power cord may inc+ude a currant interrupter device. A test and reset button is
provided on the plug _se. The devi_ should be test_ on a periodic basis by
first pressing the TEST bu_on and then the RESET bu_on, If the TEST button
does not trip or if the RESET button wiltl not stay engaged, discontinue use
of _e air condiUoner and contact a qualified se_i_ technician.
Damaged power supply cord must be replaced with a new power supply cord
obtained from the product manufacture and not repaired.
WARNING: This applian_ must be pm_riy ground.
The _wer cord of this app]ian_ is.equipp_ with a three-prong grounding plug.
To minimize the risk of ele_ric shako use the plug w_h a standard three-slot
grounding wall power outlet, If the power outlet does not include a grounding s+ot,
have a qualified electrician repla_ _e outlet before _u use _e room air
i
Changing Me oit._l_ without making the appmpda_ wiring
chang_ will create an unsa_ condEion that _uld _,ult in fire or
electrical .sh_k. Ref_ al! such wo_ to a limned and qualified
exi_ _ore
Do not cut or r,_ove Me grounding prong 'from the power
WARNING: Art.aching the adapter ground terminal to the wall
r_acle c_€_ scr_ d_s not ground the applian_ unless the
cover sct_ is n-total and not insulated, and tim wall receptacle is
grounded through the hou_ wiring.,
WARNING: !f you have any doubt whether the air condHioner !s
pro_dy grounded, have Me wall re_ptacle and c:i_uR ch_ed by a
qualmed el_rician..
C_Jvner's Manua!
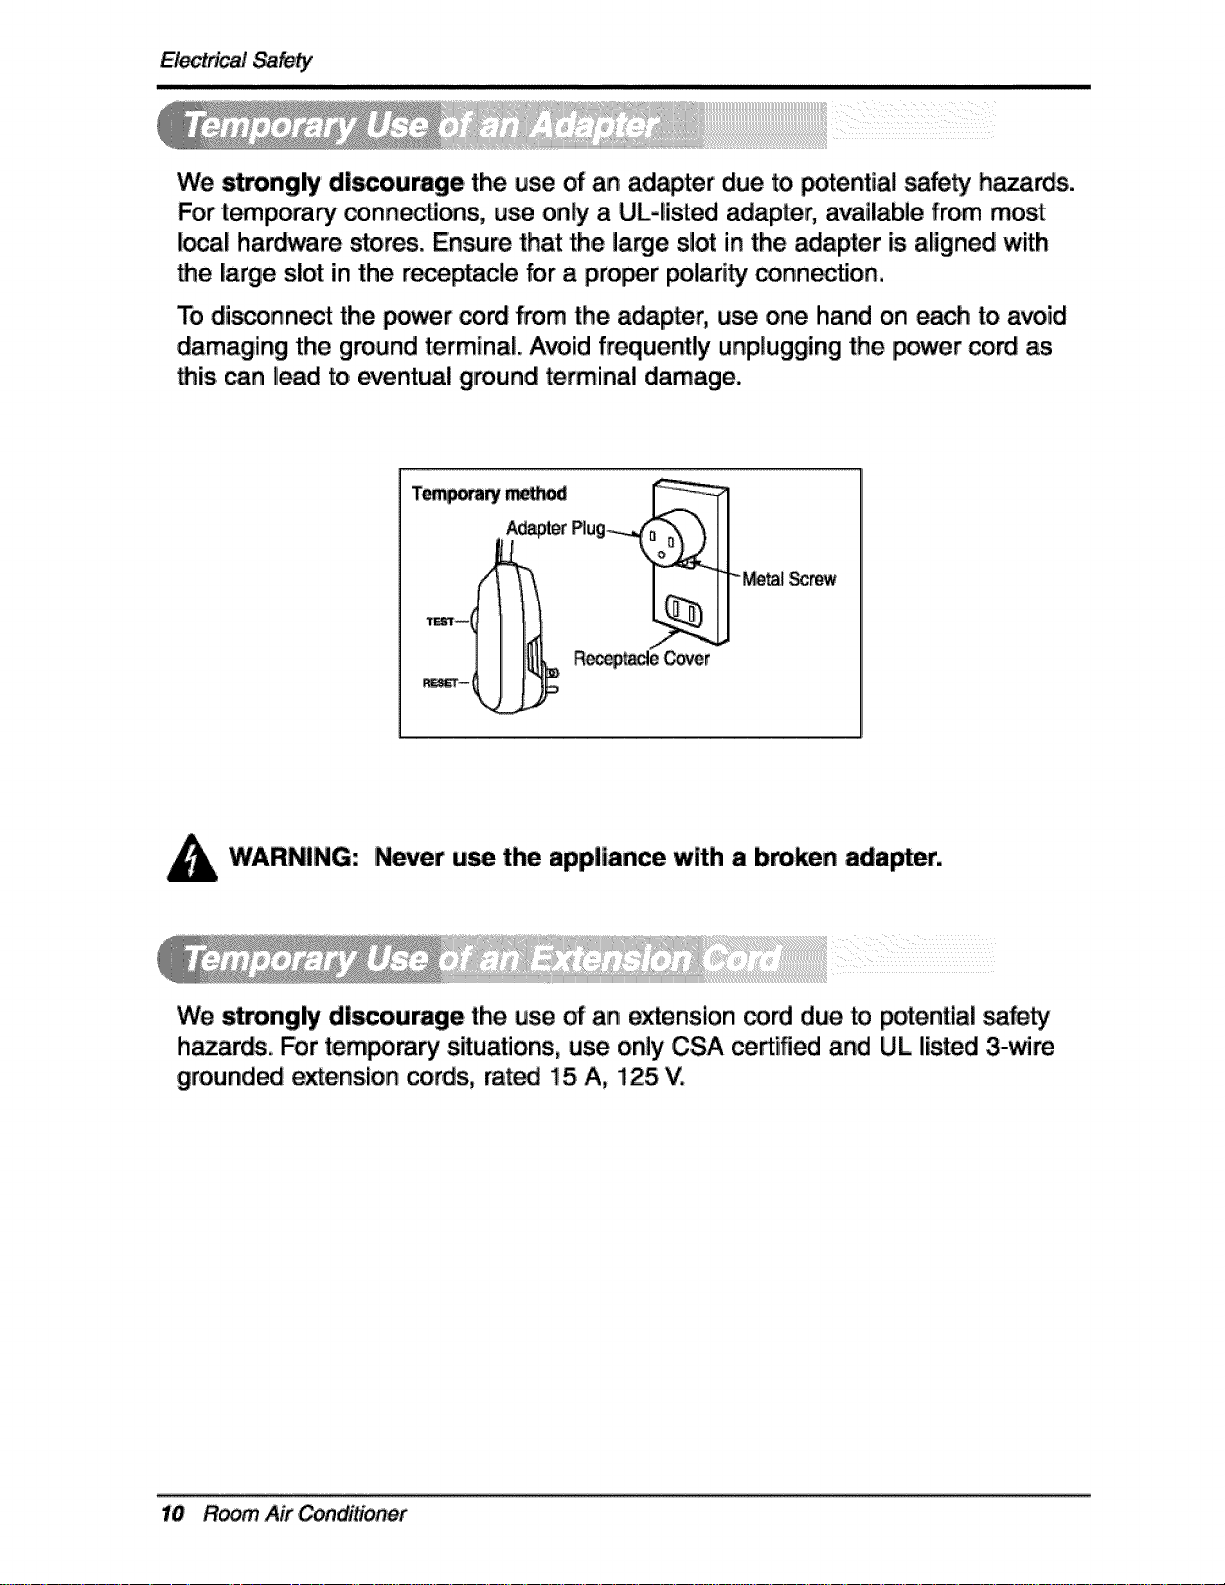
We strongly discourage the use of an r due to, _tential safe_ hazards.
For tempora_ conn_ions, use only a UL-listed adapter, available from most:
!_al hardware stores. Ensure that the large slot in the adapter is aligned with
_e large slot in the r_ep_cle for a proper polari_ conn_tion.
To dis_nnect the _wer cord from the adapter, use one hand on each to avoid
damaging the ground terminal. Avoid frequently unplugging the I_er cord as
• is _n Iiead to eventual ground terminal damage.
Te_ r_
WARNING: Never u_ the appliance with a broken adair.,
We strongly discourage the use of an e_ension _rd due to potential safe_
haza_s. For tem_rary situations, use only CSA ce_ified and UL listed 3-_re
grounded extension cords, rat_ 15 A, 125 V.
R_ Air _ditioner
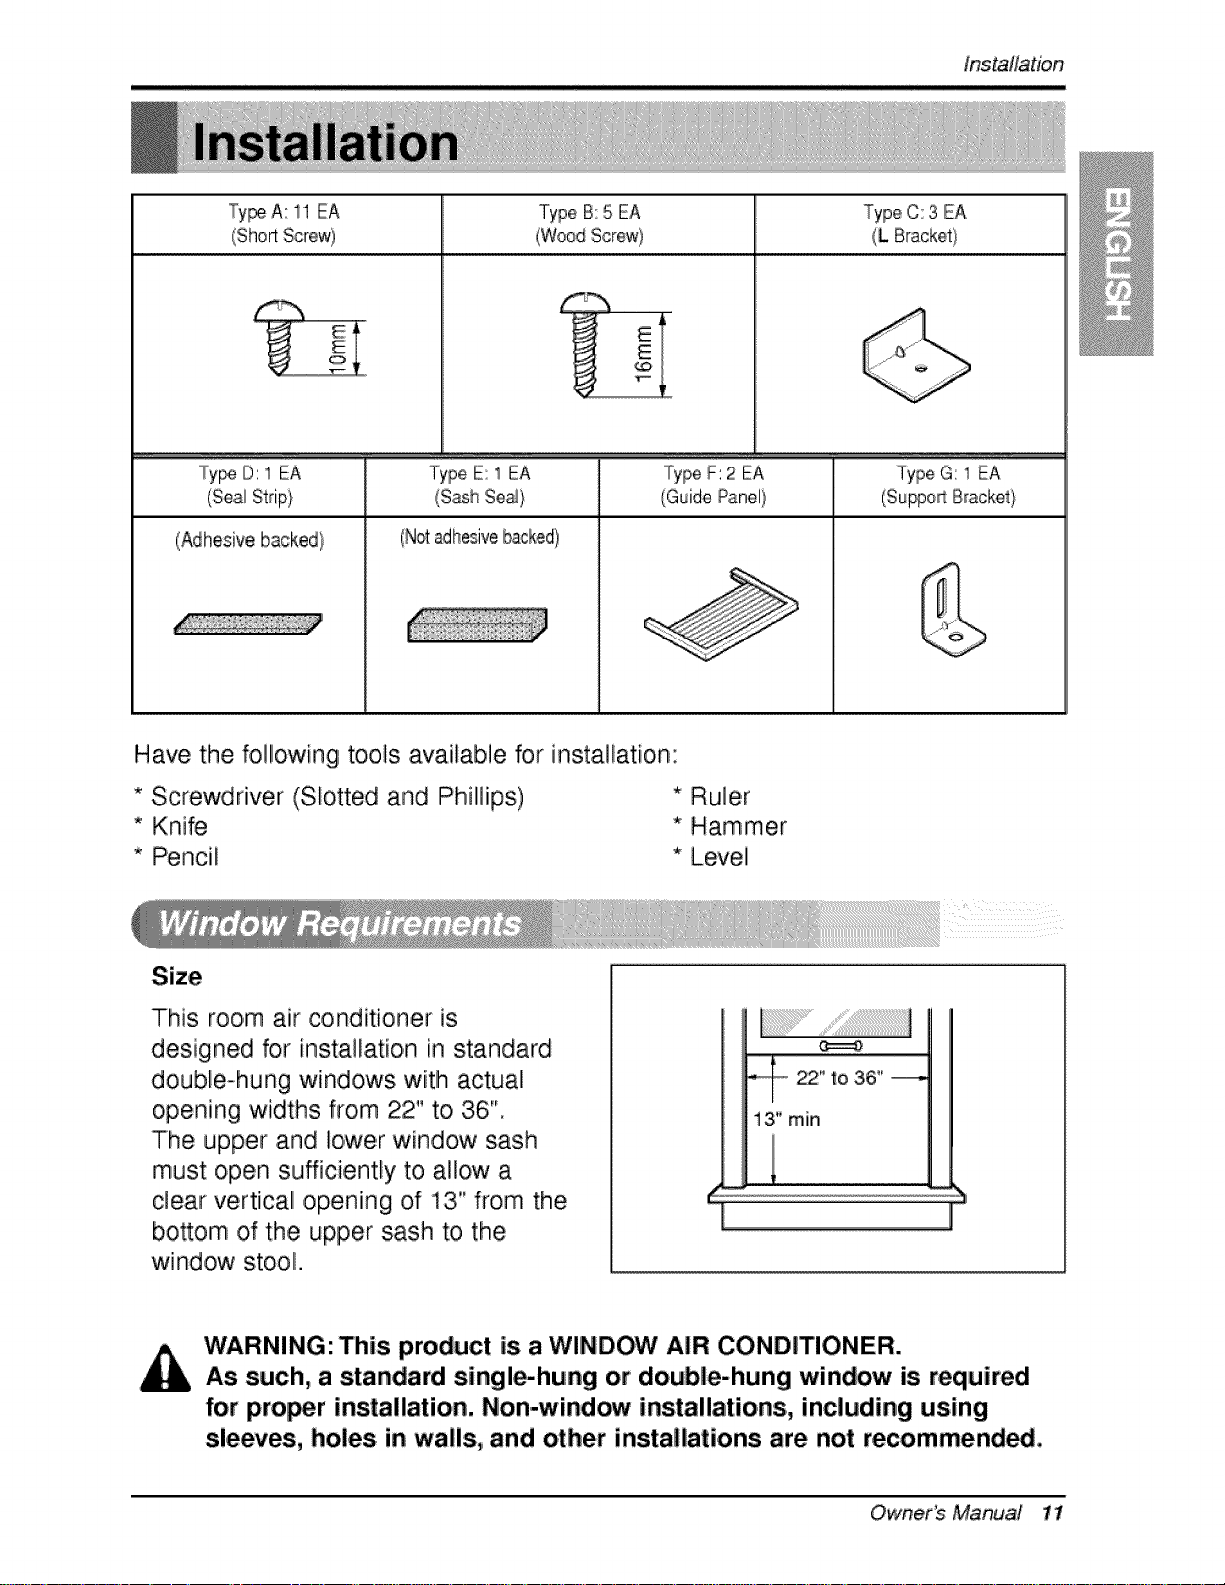
"I"yF_A: 11EA Type B:5 EA Type C:3 EA
(ShortScrew)
L
....ly_ D: 1 EA [ype E: 1 EA Type F: 2 EA lype G: 1 EA
(Seal Strip} (Sash Sei_}
(Adhesive backed} (No,tadhesivebacked)
Installation
Have the following tools available for installation:
* Screwdriver (,Slotted and Philips) * Ruler
* Knife * Hammer
* Pencil * Level
This room air conditioner is
designed for installation in standard
double-hung windows with actual
opening widths from 22" to 36",
"_........._" to 36" ---,,
13" mini
The upper ,and lower window sash
must open sufficiently to allow a
clear verticall opening of 13" from the
bottom of the upper sash to the
wi ndow s.tooli.
WARNING: This product is a WINDOW AIR CONDITIONER.
As such, a standard single-hung or double-hung window is required
for proper installation. Non-wind_ installationsi, including using
sleeves, holes in walls, and other installations are not recommended,
Owne, s Manua/ 11
Installation
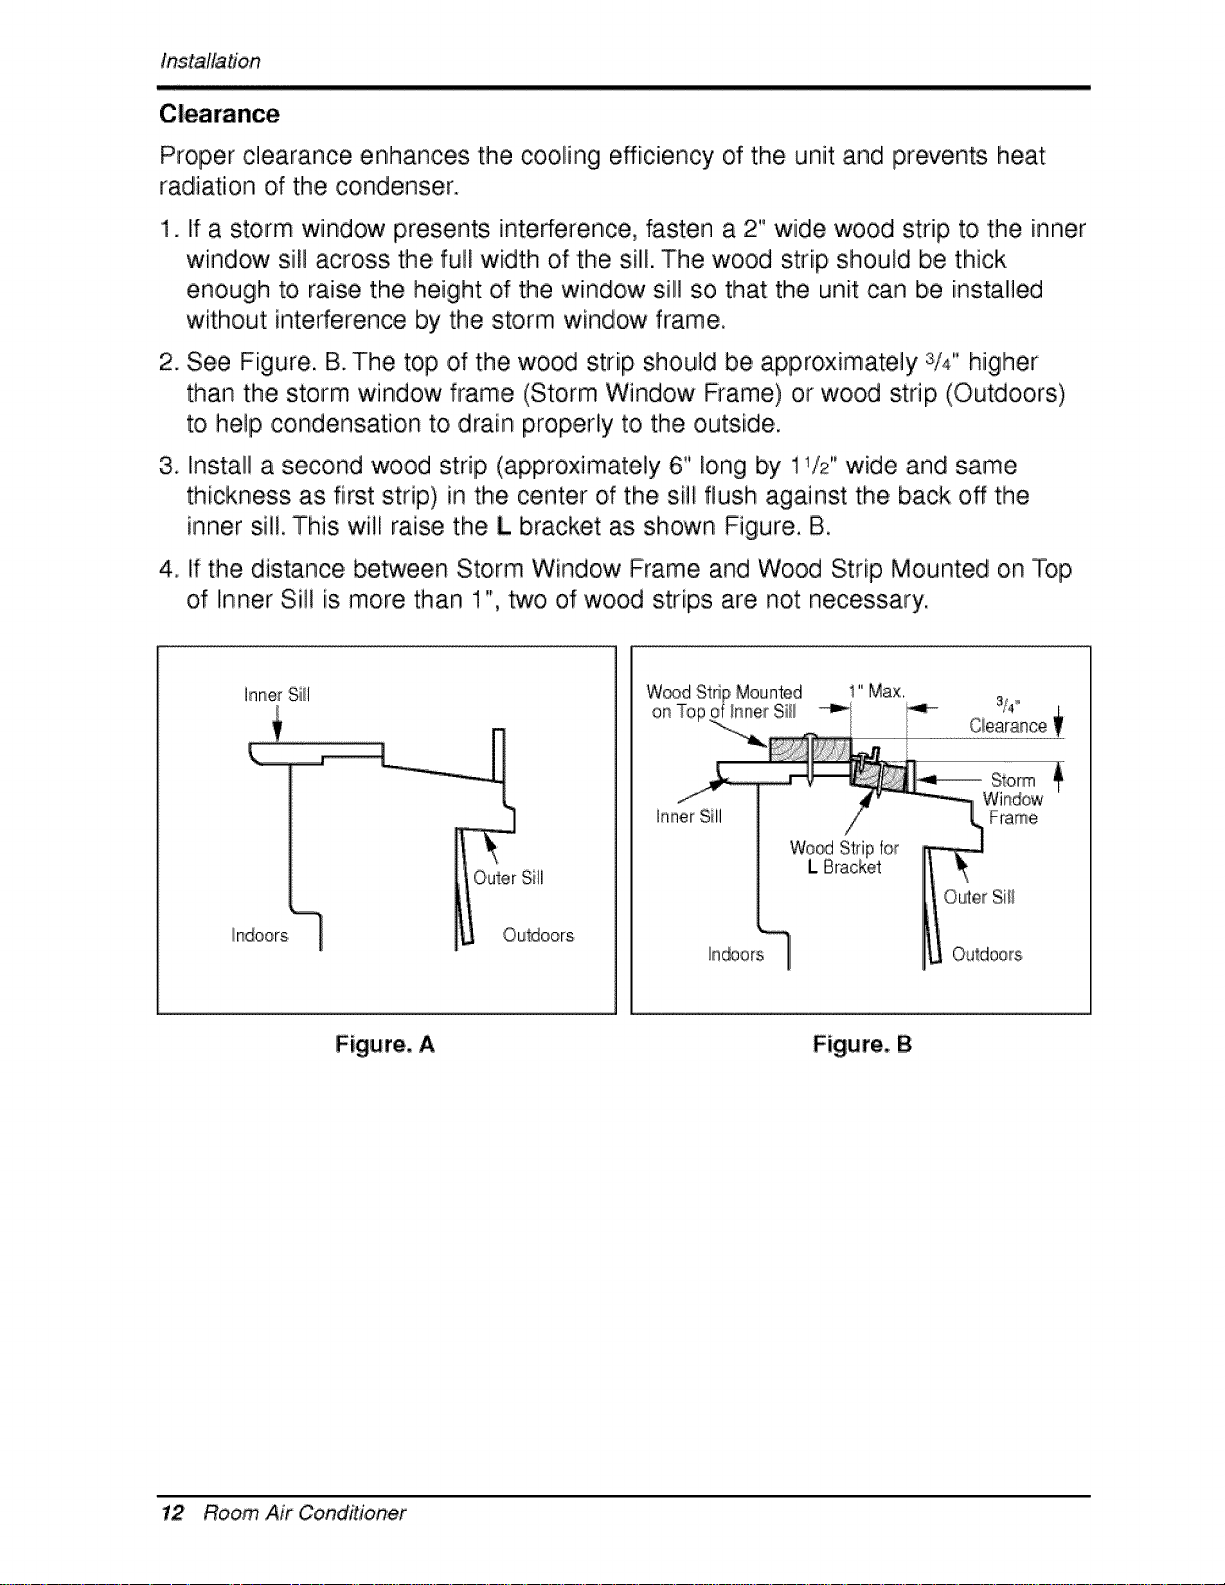
Proper clearance enhances the cooling! efficiency of the unit and prevents heat
radiation of the condenser.
1. If a storm window presents interference, fasten a 2" wide wood strip to the inner
window sill across the full width of the sill. The wood strip should be thick
enough to raise the height ,of the window sill so that the unit can b,e installed
without interference by the storm window frame.
2. See Figure. B. The top of the wood strip should be, approximately 3/4" higher
than the storm window frame (Storm Window Rame) or wood strip (Outdoors)
to help ,condensation to drain properly t,o the outside.
3. Install a second wood strip (approximately 6" long by 11/2"wide and same
thickness as first strip) in the center of the sill flush against the back off the
inner sill. This will raise the L bracket as shown Figure. B.
4. If the distance between Storm Window Frame and Wood Strip Mounted on Top
of Inner Sill is more than 1", two of wood strips are not necessary.
Inner Si_l
indoors
Figure, A Figure, B
12 Room Air Conditioner
1. insert the guide panels into the guides
of the air conditioner. Fasten the
curtains to the unit with screws
(Type A).
_: Use a long screwdriver and
installing the screws will be easier.
2oCut the adhesive-backed seal strip
(Type D) to the window width,
Remove the backing from the seai
strip and attach the seal strip to the
underside o,fthe bottom window,
tn$i_]/ation
T_e A
3. Locating unit in window
Open the window and mark center line
on the center o,fthe inner sill,
4 Attach L bracket
4-!. Ins.tatlithe L brackets behind the
inner window sill, with short side of
bracket as shown. Use the 2 screws
(Type A) provided.
4°2, The bracket helps to hold unit
securely in pliace. Be sure to place,
bracket edge flush against back of
inner sill.
A Inside
,CenCerLime
O{_id,e
ILBracket
Owne, s Manual 13
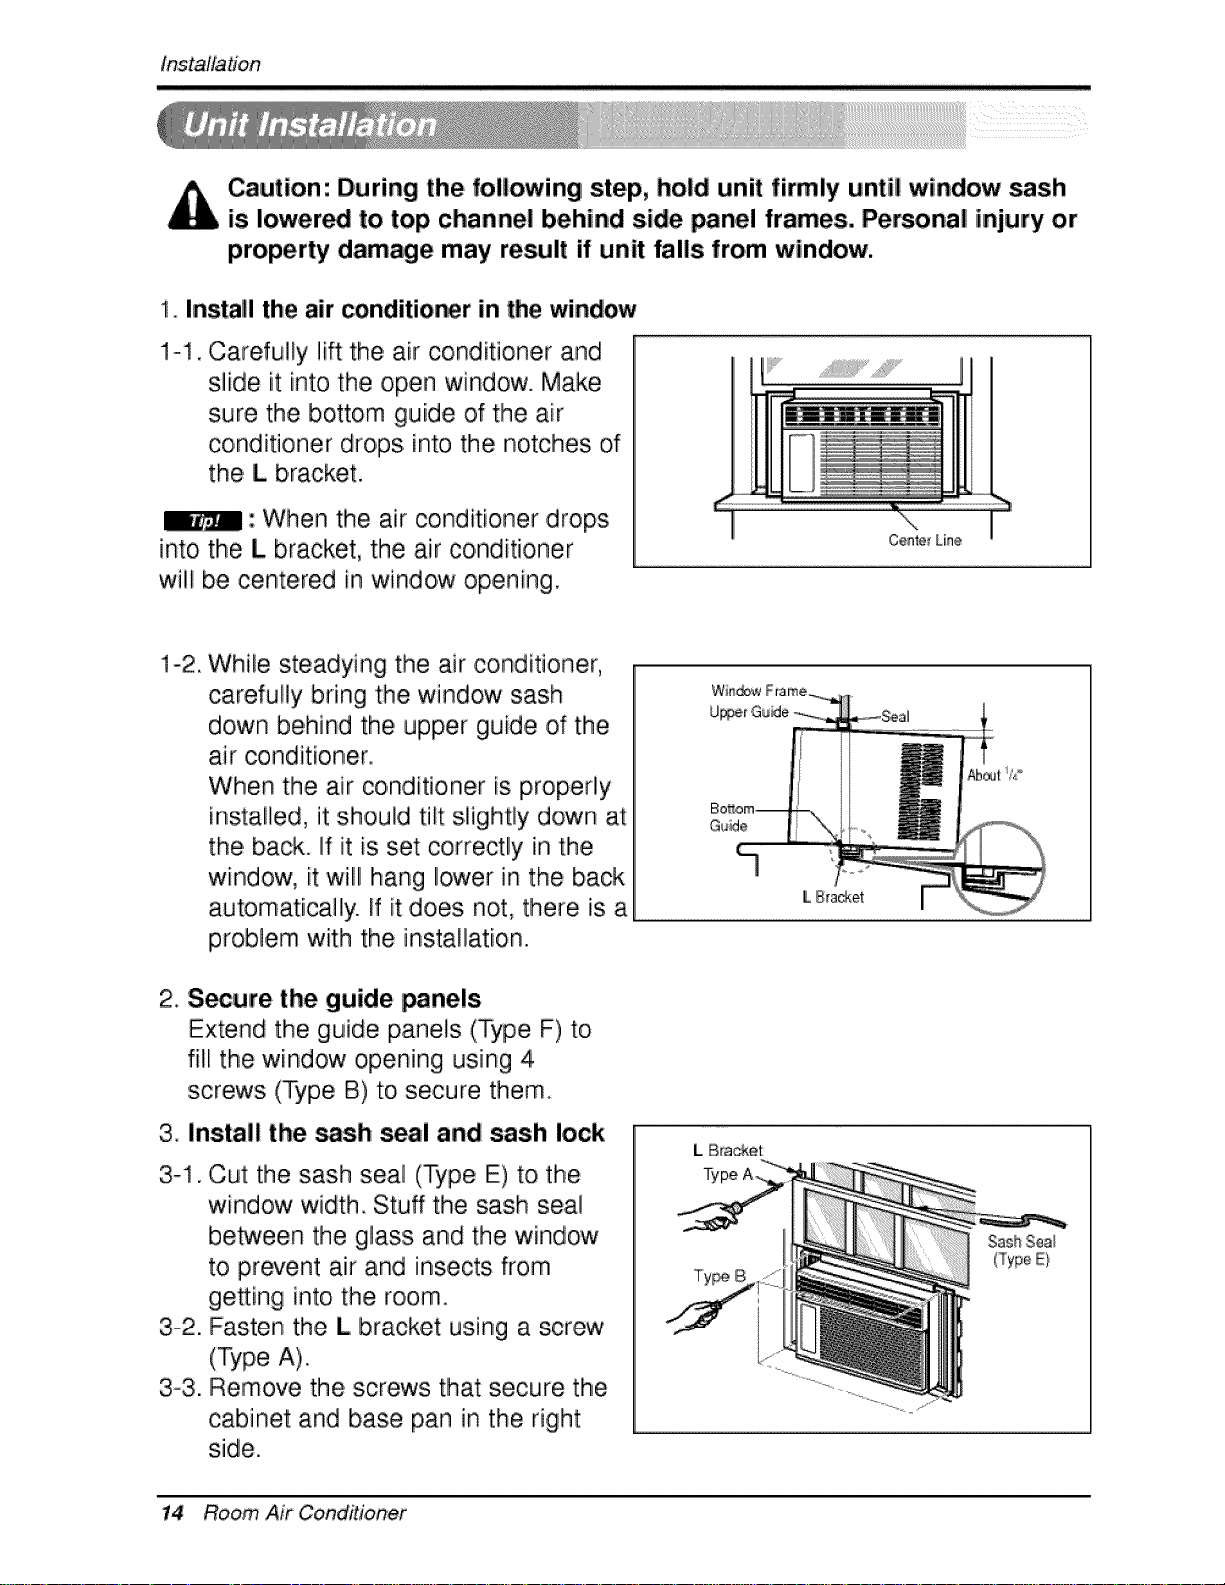
instaflation
Caution: During the following step, hold unit firmly until window sash
is lowered to top channel behind side panel frames, Personal injury or
property damage may result if unit falls from window.
1. Install the air conditioner in the window
1ol. Carefully lift the air conditioner and
slide it into the open window. Make
sure the bottom guide of the air
conditioner drops into the notches of
the L bracket.
: When the air conditioner drops
into the L bracket, the air conditioner
will be cent:ered in window opening.
i!)i¸i¸_':'_'..... !1
-2
While steadying the air conditioner,
carefully bring the window sash
down behind the upper guide of the
air conditioner.
When the air conditioner is propedy
installed, it should tilt slightly down at
the back. If it is set correctly in the
window, it wiii hang lower in the back
automatically, if it does not, there is a
probl,em with the installation.
2. S_ure the guide _neis
Extend the guide panels (Type F) to
filli the window opening using 4
screws (P/pe B) to secure them.
3 install tlhe _sh seal and sash lock
3-1.
Cut the sash seal (Type E) to the
window width Stuff the sash seal
be_een the glass and the window
to prevent air and insects from
geeing into the room.
3-2,
Fasten the L bracket using a screw
(Type A),.
3-3. Remove the screws that secure the
cabinet and base pan in the right
side.
_®'1:/4 °
14 Room Air ConditioRec

3-4. Fasten the support bracket (Type G)
using a screw removed from the air
conditioner cabinet. Attach the
support bracket (Type G) to the inner
window sili with a screw (Type B)_
4 Window installation of room air conditioner is now completed,,
S_ ELEi'CTRICAL DATA for attaching power cord to electrical outlet.
Installation
Owner_ Manual 15
 Loading...