


VX6000
VVXX66000000
VVXX66000000
Manual del Usuario
VX6000
User Guide
MMBB0088501
(1.1)
VX6000 Cellular Phone
VX6000
WARNING! To reduce the possibility of electric
shock, do not expose your phone to high
humidity areas, such as a bathroom,
swimming area, etc.
Caution: Use only LG-approved batteries and
desktop chargers to avoid the damage to the
phone. Using other batteries or chargers
voids your warranty and may cause an
explosion.
Caution: Do not use batteries and desktop
chargers for other than the intended
purposes.
Never store your phone in temperatures less
than -4° F or greater than 122° F, such as
outside during a snowstorm or in your car on
a hot day. Exposure to excessive cold or heat
may result in phone malfunction, damage
and/or failure.
Use caution when using your phone near
other electronic devices. RF emissions from
your mobile phone may affect nearby
inadequately shielded electronic equipment.
Consult manufacturers of any personal
medical devices such as pacemakers and
hearing aides to determine if they are
susceptible to interference from your mobile
phone. Turn off your phone in a medical
facility or at a gas station.
IMPORTANT! Please read the TIA safety
information in chapter 5 before using your phone.
VX6000
Contents
Introduction . . . . . . . . . . . . . . . . . . . . . . . . . . . . . . . . . . . . . .7
Important Information . . . . . . . . . . . . . . . . . . . . . . .7
Check Accessories . . . . . . . . . . . . . . . . . . . . . . . . .7
Bodily Contact During Operation . . . . . . . . . . . . . .8
Vehicle-Mounted External Antenna . . . . . . . . . . . . .9
FCC Part 15 Class B Compliance . . . . . . . . . . . . .9
Battery Safety . . . . . . . . . . . . . . . . . . . . . . . . . . . . .9
Battery Disposal . . . . . . . . . . . . . . . . . . . . . . . . . .10
Charger and Adapter Safety . . . . . . . . . . . . . . . . .10
Getting Started . . . . . . . . . . . . . . . . . . . . . . . . . . . . . . . . . .11
Phone Components . . . . . . . . . . . . . . . . . . . . . . .11
Phone Overview . . . . . . . . . . . . . . . . . . . . . . . . . . . . . .12
Using the Battery Pack . . . . . . . . . . . . . . . . . . . . . . . .14
Installing the Battery . . . . . . . . . . . . . . . . . . . . . . .14
Removing the Battery . . . . . . . . . . . . . . . . . . . . . .14
Battery Charge Level . . . . . . . . . . . . . . . . . . . . . .15
Using the Desktop Charger . . . . . . . . . . . . . . . . . . . . .15
Battery Information and Care . . . . . . . . . . . . . . . . . . . .16
Screen Icons . . . . . . . . . . . . . . . . . . . . . . . . . . . . . . . . .17
Phone Menu Reference . . . . . . . . . . . . . . . . . . . . . . . .18
Accessories . . . . . . . . . . . . . . . . . . . . . . . . . . . . . . . . .20
Travel Charger . . . . . . . . . . . . . . . . . . . . . . . . . . .20
Battery . . . . . . . . . . . . . . . . . . . . . . . . . . . . . . . . . .20
Desktop Charger . . . . . . . . . . . . . . . . . . . . . . . . . .20
Cigarette Lighter Charger . . . . . . . . . . . . . . . . . . .21
Hands-Free Car Kit (Portable) . . . . . . . . . . . . . . .21
USB Cable . . . . . . . . . . . . . . . . . . . . . . . . . . . . . .21
Holster . . . . . . . . . . . . . . . . . . . . . . . . . . . . . . . . . .21
Safety Information . . . . . . . . . . . . . . . . . . . . . . . . . . . .23
Explosion, Shock, and Fire Hazards . . . . . . . . . .23
General Warnings and Cautions . . . . . . . . . . . . . .24
Technical Details . . . . . . . . . . . . . . . . . . . . . . . . . . . . .26
Basic Functions . . . . . . . . . . . . . . . . . . . . . . . . . . . . . . . . .29
Turning the Phone On and Off . . . . . . . . . . . . . . . . . . .29
Turning the Phone On . . . . . . . . . . . . . . . . . . . . .29
Turning the Phone Off . . . . . . . . . . . . . . . . . . . . .29
2
3

VX6000
VX6000
Making a Call . . . . . . . . . . . . . . . . . . . . . . . . . . . . . . . .30
Correcting Dialing Mistakes . . . . . . . . . . . . . . . . .31
Receiving Calls . . . . . . . . . . . . . . . . . . . . . . . . . . . . . .31
Using Manner, Silence All, and Lock Mode . . . . . . . . .31
Manner Mode (Quick) . . . . . . . . . . . . . . . . . . . . . .31
Silence All Mode (Quick) . . . . . . . . . . . . . . . . . . .32
Lock Mode (Quick) . . . . . . . . . . . . . . . . . . . . . . . .32
Call Waiting . . . . . . . . . . . . . . . . . . . . . . . . . . . . . . . . .33
Mute . . . . . . . . . . . . . . . . . . . . . . . . . . . . . . . . . . . . . . .33
Redialing Calls . . . . . . . . . . . . . . . . . . . . . . . . . . . . . . .33
Adjusting the Volume . . . . . . . . . . . . . . . . . . . . . . . . . .34
Power Save Mode . . . . . . . . . . . . . . . . . . . . . . . . . . . .34
Signal Strength . . . . . . . . . . . . . . . . . . . . . . . . . . . . . . .34
Speed Dialing . . . . . . . . . . . . . . . . . . . . . . . . . . . . . . . .35
Caller ID . . . . . . . . . . . . . . . . . . . . . . . . . . . . . . . . . . . .35
Additional Functions . . . . . . . . . . . . . . . . . . . . . . . . . . . . .37
Entering information using T9 Text Input . . . . . . . . . . .37
Input mode . . . . . . . . . . . . . . . . . . . . . . . . . . . . . .37
Key Functions . . . . . . . . . . . . . . . . . . . . . . . . . . . .38
Changing Letter Case . . . . . . . . . . . . . . . . . . . . . .39
Example: Using T9 Text Input . . . . . . . . . . . . . . . .40
Using the NEXT Key . . . . . . . . . . . . . . . . . . . . . . .41
Adding Words to the T9 Database . . . . . . . . . . . . . . . .41
Examples Using Abc (Multi-tap) Text input . . . . . .42
Phone Book Features . . . . . . . . . . . . . . . . . . . . . . . . .42
Personal Phone Book Memory . . . . . . . . . . . . . . .42
Saving Numbers in Your Phone Book . . . . . . . . .43
Retrieving Numbers . . . . . . . . . . . . . . . . . . . . . . .44
Making a call from Your Phone Book . . . . . . . . . . . . . .44
Advanced Phone Book Features . . . . . . . . . . . . . . . . .45
Pause . . . . . . . . . . . . . . . . . . . . . . . . . . . . . . . . . .45
Storing a number with pauses . . . . . . . . . . . . . . .45
Prepending a Stored Number . . . . . . . . . . . . . . . . . . .46
Dynamic Search . . . . . . . . . . . . . . . . . . . . . . . . . .47
Menu Features . . . . . . . . . . . . . . . . . . . . . . . . . . . . . . . . . .49
General Guidelines . . . . . . . . . . . . . . . . . . . . . . . . . . .49
Camera . . . . . . . . . . . . . . . . . . . . . . . . . . . . . . . . . . . .50
Take Pix . . . . . . . . . . . . . . . . . . . . . . . . . . . . . . . .50
Gallery . . . . . . . . . . . . . . . . . . . . . . . . . . . . . . . . .51
Send Pix Msg . . . . . . . . . . . . . . . . . . . . . . . . . . .52
Pix Msg Inbox . . . . . . . . . . . . . . . . . . . . . . . . . . .52
Pix Msg Outbox . . . . . . . . . . . . . . . . . . . . . . . . . .53
Saved Msgs . . . . . . . . . . . . . . . . . . . . . . . . . . . . .54
Pix Settings . . . . . . . . . . . . . . . . . . . . . . . . . . . . .55
Erase All . . . . . . . . . . . . . . . . . . . . . . . . . . . . . . .56
Contacts . . . . . . . . . . . . . . . . . . . . . . . . . . . . . . . . . . .57
List Contacts . . . . . . . . . . . . . . . . . . . . . . . . . . . .57
New Number . . . . . . . . . . . . . . . . . . . . . . . . . . . .57
New E-mail . . . . . . . . . . . . . . . . . . . . . . . . . . . . .58
Groups . . . . . . . . . . . . . . . . . . . . . . . . . . . . . . . .58
Speed Dials . . . . . . . . . . . . . . . . . . . . . . . . . . . .59
Voice Dials . . . . . . . . . . . . . . . . . . . . . . . . . . . . .59
My contact Info . . . . . . . . . . . . . . . . . . . . . . . . . .60
Recent Calls . . . . . . . . . . . . . . . . . . . . . . . . . . . . . . . .61
Dialed Calls . . . . . . . . . . . . . . . . . . . . . . . . . . . . .61
Received Calls . . . . . . . . . . . . . . . . . . . . . . . . . . .62
Missed Calls . . . . . . . . . . . . . . . . . . . . . . . . . . . .62
Erase Calls . . . . . . . . . . . . . . . . . . . . . . . . . . . . .63
Call Timer . . . . . . . . . . . . . . . . . . . . . . . . . . . . . .63
Messages . . . . . . . . . . . . . . . . . . . . . . . . . . . . . . . . . .64
Message Menu . . . . . . . . . . . . . . . . . . . . . . . . . . .65
New Message Alert . . . . . . . . . . . . . . . . . . . . . . . .65
Voice Mail . . . . . . . . . . . . . . . . . . . . . . . . . . . . . . .66
New Message . . . . . . . . . . . . . . . . . . . . . . . . . .66
Inbox . . . . . . . . . . . . . . . . . . . . . . . . . . . . . . . . .69
Out of Memory Warning . . . . . . . . . . . . . . . . . . . .70
Outbox . . . . . . . . . . . . . . . . . . . . . . . . . . . . . . .71
Message Status Reference . . . . . . . . . . . . . . . . .73
Saved . . . . . . . . . . . . . . . . . . . . . . . . . . . . . . . . .73
Msg Settings . . . . . . . . . . . . . . . . . . . . . . . . . . .74
Erase All . . . . . . . . . . . . . . . . . . . . . . . . . . . . . .76
Get It Now . . . . . . . . . . . . . . . . . . . . . . . . . . . . . . . . .77
Get Apps . . . . . . . . . . . . . . . . . . . . . . . . . . . . . .79
Get Info . . . . . . . . . . . . . . . . . . . . . . . . . . . . . . .80
Mobile web . . . . . . . . . . . . . . . . . . . . . . . . . . . . . . . .81
Start Browser . . . . . . . . . . . . . . . . . . . . . . . . . .81
4
5

VX6000
Web Messages . . . . . . . . . . . . . . . . . . . . . . . . .85
Web Settings . . . . . . . . . . . . . . . . . . . . . . . . . . .85
My Media . . . . . . . . . . . . . . . . . . . . . . . . . . . . . . . . .86
Graphics . . . . . . . . . . . . . . . . . . . . . . . . . . . . . .86
Music . . . . . . . . . . . . . . . . . . . . . . . . . . . . . . . .86
Tools . . . . . . . . . . . . . . . . . . . . . . . . . . . . . . . . . . . . . .87
Schedule . . . . . . . . . . . . . . . . . . . . . . . . . . . . . .87
Alarm Clock . . . . . . . . . . . . . . . . . . . . . . . . . . . .88
Voice Memo . . . . . . . . . . . . . . . . . . . . . . . . . . .89
My Shortcut . . . . . . . . . . . . . . . . . . . . . . . . . . .89
Notepad . . . . . . . . . . . . . . . . . . . . . . . . . . . . . .89
Ez Tip Calc . . . . . . . . . . . . . . . . . . . . . . . . . . . .90
Calculator . . . . . . . . . . . . . . . . . . . . . . . . . . . . .90
World Clock . . . . . . . . . . . . . . . . . . . . . . . . . . .90
Settings . . . . . . . . . . . . . . . . . . . . . . . . . . . . . . . . . . .91
Sounds . . . . . . . . . . . . . . . . . . . . . . . . . . . . . . .91
Display . . . . . . . . . . . . . . . . . . . . . . . . . . . . . . .94
System . . . . . . . . . . . . . . . . . . . . . . . . . . . . . . .99
Security . . . . . . . . . . . . . . . . . . . . . . . . . . . . . .101
Call Setup . . . . . . . . . . . . . . . . . . . . . . . . . . . .104
1X Data . . . . . . . . . . . . . . . . . . . . . . . . . . . . . .107
Voice Services . . . . . . . . . . . . . . . . . . . . . . . . .109
Phone Info . . . . . . . . . . . . . . . . . . . . . . . . . . . .111
Safety Guidelines . . . . . . . . . . . . . . . . . . . . . . . . . . . . . . . . .113
TIA Safety Information . . . . . . . . . . . . . . . . . . . . . . . .113
Exposure to Radio Frequency Signal . . . . . . . . .113
FDA Consumer Update . . . . . . . . . . . . . . . . . . . . . . .118
Consumer Information on SAR . . . . . . . . . . . . . . . . .130
LIMITED WARRANTY STATEMENT . . . . . . . . . . . . .132
Index . . . . . . . . . . . . . . . . . . . . . . . . . . . . . . . . . . . . .135
VX6000
Introduction
Congratulations on your purchase of the advanced
and compact VX6000 cellular phone, designed to
operate with the latest digital mobile communication
technology, Code Division Multiple Access (CDMA).
Along with the many advanced features of the
CDMA system such as greatly enhanced voice
clarity this phone offers:
Large, easy-to-read, 8-line backlight LCD with
status icons.
Paging, messaging, voice mail, and caller ID.
19-key keypad.
Long battery stand-by and talk time.
Menu-driven interface with prompts for easy
operation and configuration.
Any key answer, auto answer, auto retry, one-
touch and speed dialing with 199 memory
locations.
Bilingual (English and Spanish).
Important Information
This user’s manual provides important information on
the use and operation of your phone. Please read all
the information carefully prior to using the phone for
the best performance and to prevent any damage to or
misuse of the phone. Any unapproved changes or
modifications void your warranty.
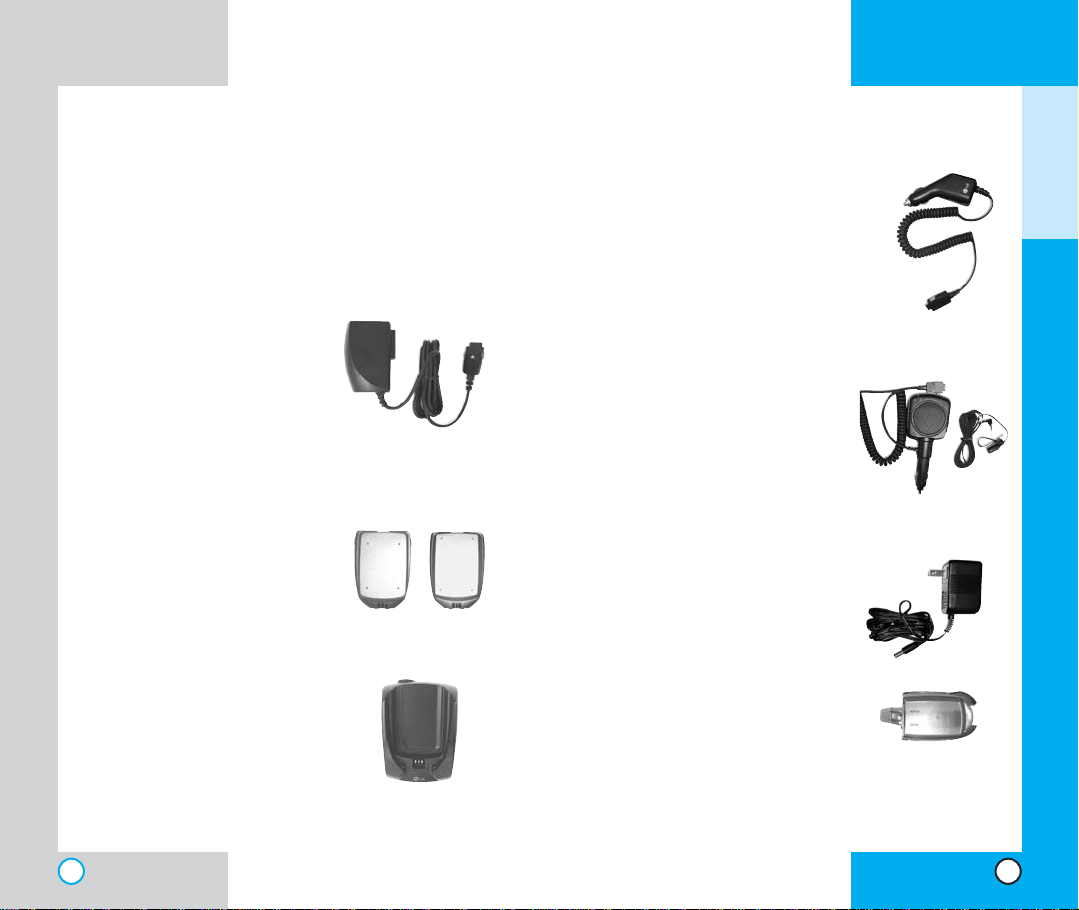
Check Accessories
Your mobile phone comes with a one-slot desktop
charger and a rechargeable battery. Please verify
that these accessories are included.
6
7

VX6000
VX6000
FCC RF Exposure Information
WARNING! Read this information
before operating the phone.
In August 1996, the Federal Communications
(FCC) of the United States, with its action in Report
and Order FCC 96-326, adopted an updated safety
standard for human exposure to radio frequency
(RF) electromagnetic energy emitted by FCC
regulated transmitters. Those guidelines are
consistent with the safety standard previously set
by both U.S. and international standards bodies.
The design of this phone complies with the FCC
guidelines and these international standards.
CAUTION
Use only the supplied and approved antenna. Use
of unauthorized antennas or modifications could
impair call quality, damage the phone, void your
warranty and/or result in violation of FCC
regulations.
Do not use the phone with a damaged antenna. If a
damaged antenna comes into contact with the skin
a minor burn may result. Contact your local dealer
for a replacement of antenna.
Bodily Contact During Operation
the back of the phone, including the antenna
whether extended or retracted. Third-party belt-clips,
holsters, and similar accessories containing metallic
components should not be used. Avoid the use of
accessories that cannot maintain 3/4 in (2 cm)
distance between the user’s body and the back of
the phone and have not been tested for compliance
with FCC RF exposure limits.
Vehicle-Mounted External Antenna
(Optional, if available.)
A minimum distance of 8 in (20 cm) must be
maintained between the user / bystander and the
vehicle-mounted external antenna to satisfy FCC RF
exposure requirements. For more information about
RF exposure, visit the FCC website at www.fcc.gov.
FCC Part 15 Class B Compliance
This device and its accessories comply with part 15
of FCC rules. Operation is subject to the following
two conditions: (1) This device and its accessories
may not cause harmful interference, and (2) this
device and its accessories must accept any
interference received, including interference that
causes undesired operation.
This device was tested for typical use with the back
of the phone kept 3/4 in (2 cm) from the body. To
comply with FCC RF exposure requirements, a
minimum separation distance of 3/4 inches (2 cm)
must be maintained between the user’s body and
8
Battery Safety
Do not disassemble.
Do not short-circuit.
Do not expose to high temperatures :60 °C (140 °F)
Do not incinerate.
9
VX6000VX6000
Battery Disposal
Please dispose of your battery properly or take
it to your local wireless carrier for recycling.
Do not dispose of your battery in fire or with
hazardous or flammable materials.
Charger and Adapter Safety
Using the wrong battery charger could damage
your phone and void your warranty.
The charger and adapter are intended for
indoor use only.
Do not expose the battery charger or adapter to
direct sunlight or use it in places with high
humidity, such as a bathroom.
1 Getting Started
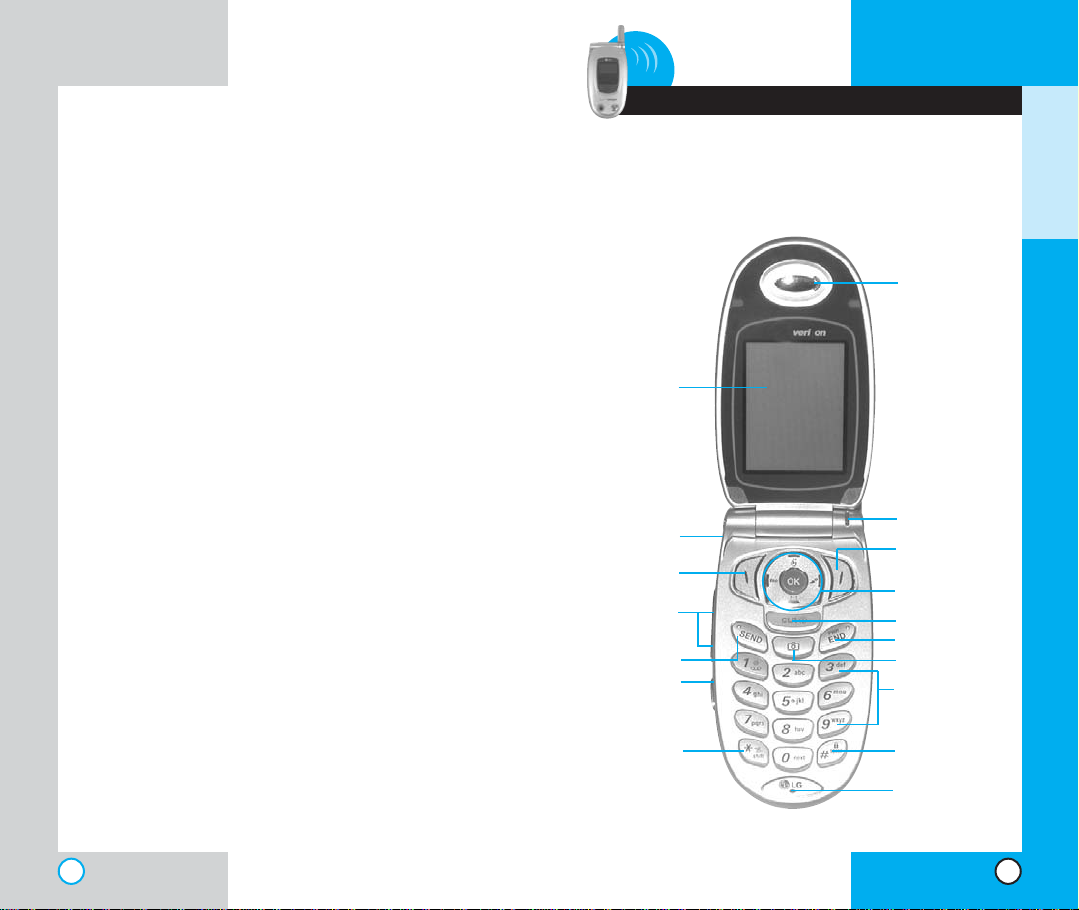
Phon e Compon en ts
The following shows key components of your mobile
phone.
Earpiece
LCD screen
Headset Jack
Left Soft Key
Side Key
SEND
Voice Dial
Lamp
Right Soft Key
Navigation Key
CLR
END/POWER
Camera Key
Alphanumeric
Keypad
GETTING STARTED
Manner/Silence
All Mode Key
10 11
Lock Mode Key
Microphone
VX6000
Phone Overvie w
1. Earpiece
2. Flip Design Flip open the case to answer an
incoming call and close to end the call.
3. Message Key Use to retrieve or send voice
and text messages.
4. SEND Use to place or answer calls.
5. Side Keys Use to adjust the key beep volume
in standby mode and the earpiece volume
during a call.
6. Headset Jack
7. Manner Mode/Silence All Mode Key
set the Manner Mode by pressing and holding
the key for about 3 seconds while in
standby mode.
Note: The manner mode you select remains in
effect even when you turn the phone off and
back on.
8. LCD Screen Displays messages and indicator
icons.
9. Soft Keys
Left Soft Key
Use to display the function setting menu.
Right Soft Key
Use to select an action within a menu.
10. Lamp The red light illuminates when you turn
the power on and when you have an incoming
call or message.
Use to
VX6000
GETTING STARTED
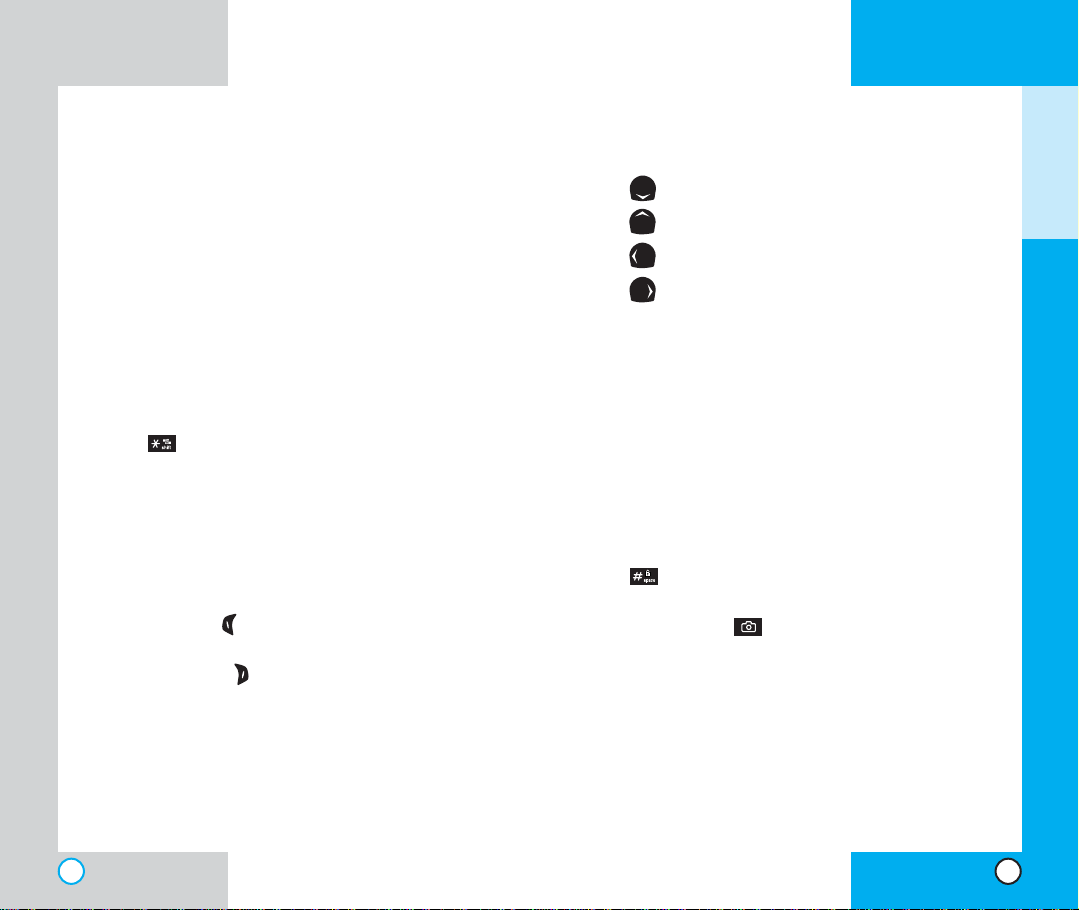
11. Navigation Key Use for quick access to phone
functions:
Text and voice mail notification messages.
Schedule
Mini Browser
Get It Now.
12. END/PWR Use to turn the power on/off and to
end a call. Using this key, you can return to the
main menu display screen.
13. Clear Key Press to delete a single space or
character. Press and hold to delete entire
words. Press this key once in a menu to go
back one level.
14. Alphanumeric Keypad Use to enter numbers
and characters and choose menu items.
15. Lock Mode Key Use in standby mode to set
the lock function by pressing and holding the
key for about 3 seconds.
16. Microphone
17. Camera Key Use to take pictures.
12
13
VX6000
Using the Batte ry Pac k
Note: It is important to charge the battery fully
before the initial use of the phone.
The phone comes with a rechargeable battery.
Keep the battery charged while not in use in order
to maximize talk and standby time when using the
phone.
Installing the Battery
To install the battery, insert the bottom of the
battery into the opening on the back of the phone.
Then push the battery down until the latch clicks.
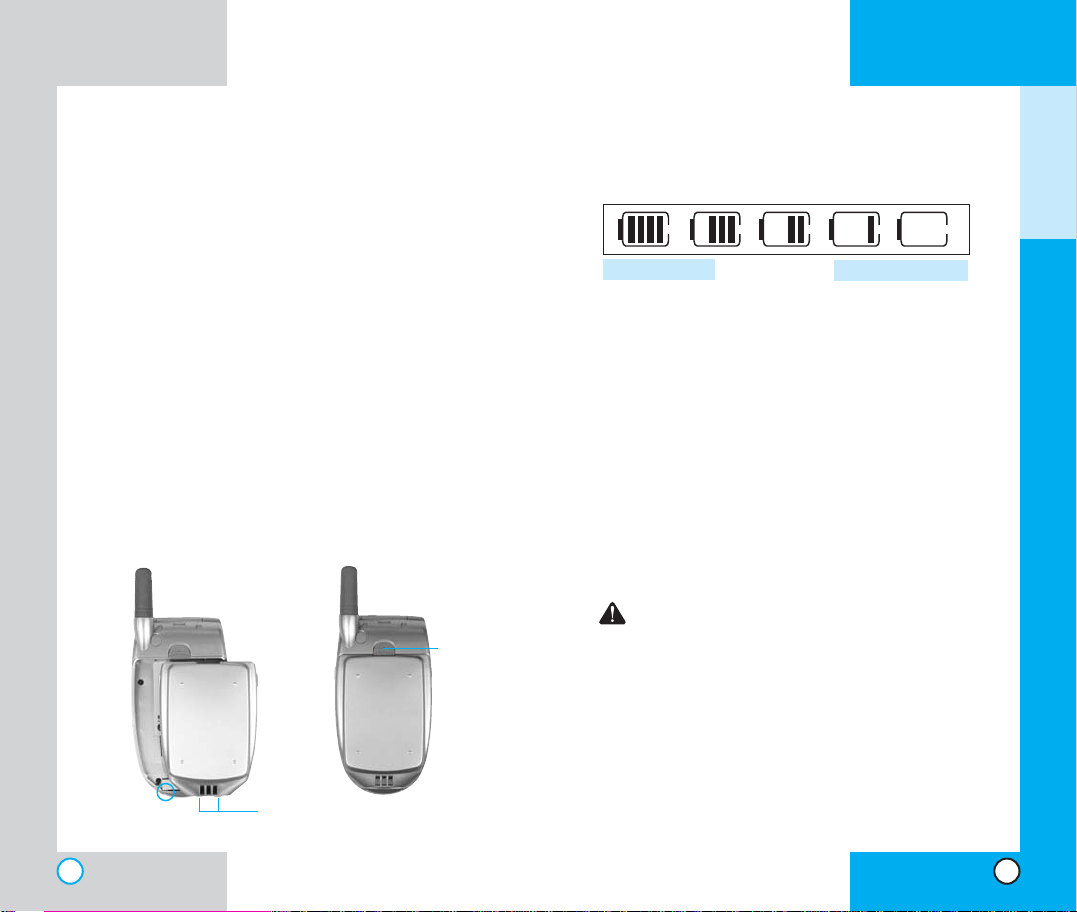
Removing the Battery
Turn the power off. Lift the release latch to detach
the battery.
release
slot
latch
VX6000
Battery Charge Level
The battery charge level is shown at the top right of
the LCD screen.
Fully Charged
Fully Discharged
When the battery charge level becomes low, the low
battery sensor alerts you in three ways: sounding an
audible tone, blinking the battery icon, and displaying
LOW BATTERY WARNING! If the battery charge level
becomes exceedingly low, the phone automatically
switches off and any function in progress is not saved.
Using the Desktop Charger
The desktop charger has a slot for recharging batteries
that accommodates the phone and battery for
charging.
Warning! Use only the desktop charger
provided with the phone. Using any charger
other than the one included with the VX6000
may damage your phone or battery.
1. Plug the charger into a wall outlet. The phone must
be charged from a 120 VAC power source.
2. Insert the phone with an installed battery or the
battery by itself into the slot of the charger.The red
light indicates the battery is charging and the green
light indicates the battery is fully charged.
The charge time varies depending upon the
battery level and the maximum charge time for a
fully discharged battery is 3 hours.
GETTING STARTED
14
15
VX6000
Battery Informat i on and Care
VX6000
GETTING STARTED
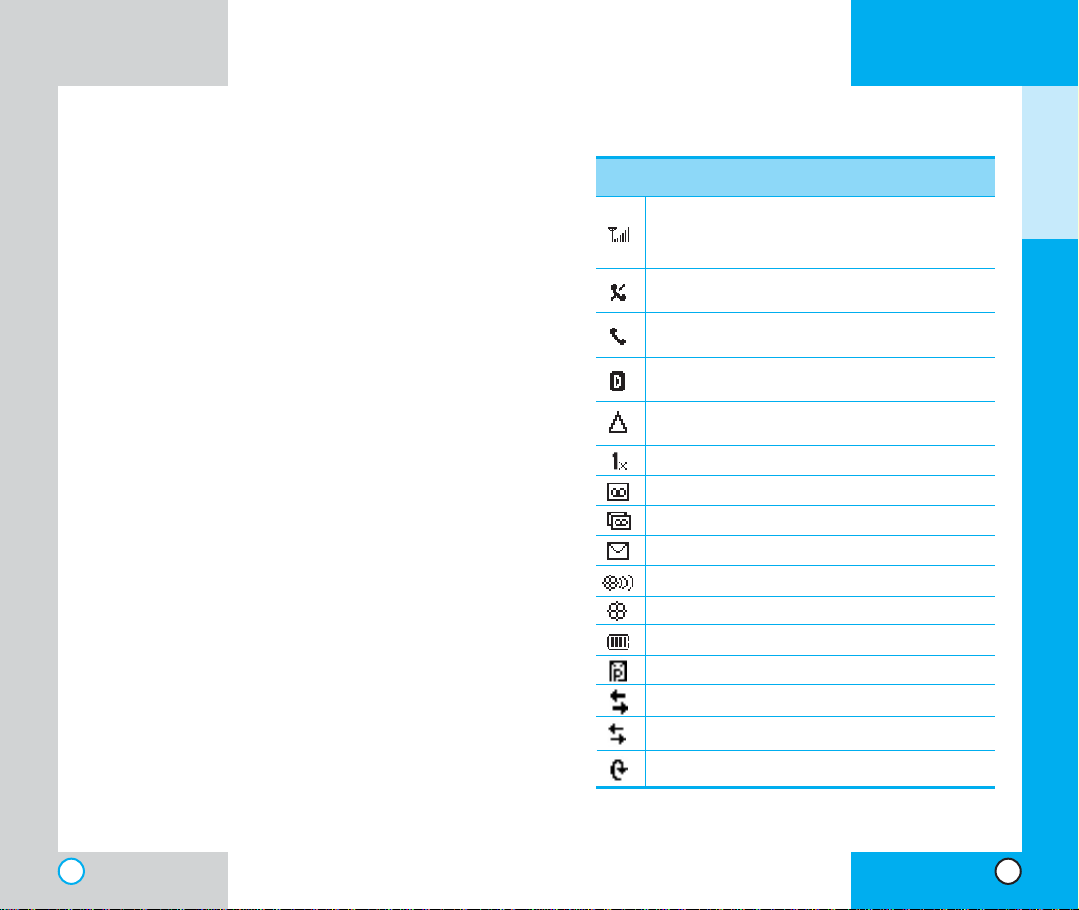
Screen Icons
1. Never use an unapproved battery since this
could damage the phone and / or battery and
could cause the battery to explode.
2. The battery does not need to be fully
discharged before recharging.
3. Use only LG approved chargers specific to your
phone model since they are designed to
maximize battery life.
4. Do not disassemble or short-circuit the battery.
5. Keep the battery’s metal contacts clean.
6. Replace the battery when it no longer provides
acceptable performance. The battery can be
recharged several hundred times before
replacement.
7. Recharge the battery after long periods of nonuse to maximize battery life.
8. Do not expose the battery charger to direct
sunlight or use it in areas of high humidity such
as a bathroom.
9. Battery life will decrease if exposed to extreme
hot or cold temperatures.
10. Battery life will vary due to usage patterns and
environmental conditions.
11. The use of extended backlighting, MiniBrowser,
and data connectivity kits affect battery life and
talk/standby times.
Icons
Displays the strength of the signal received by the
phone and current signal strength is indicated by
the number of bars displayed on the screen.
No service. The phone is not receiving a system
signal.
In use. Acall is in progress.
* No icon indicates the phone is in standby mode.
Digital indicator
Digital service is available.
Roaming The phone is outside of the home
service area.
1x service.
New voicemail.
New text & voice message.
New text message.
Location on mode.
E911 only mode.
Charge level: Indicates battery charge level.
New picture message.
Transmit/Receive(Packet data mode).
Transmit/Receive(Dormant mode).
Descriptions
Transmit/Receive(Circuit data mode).
16
17
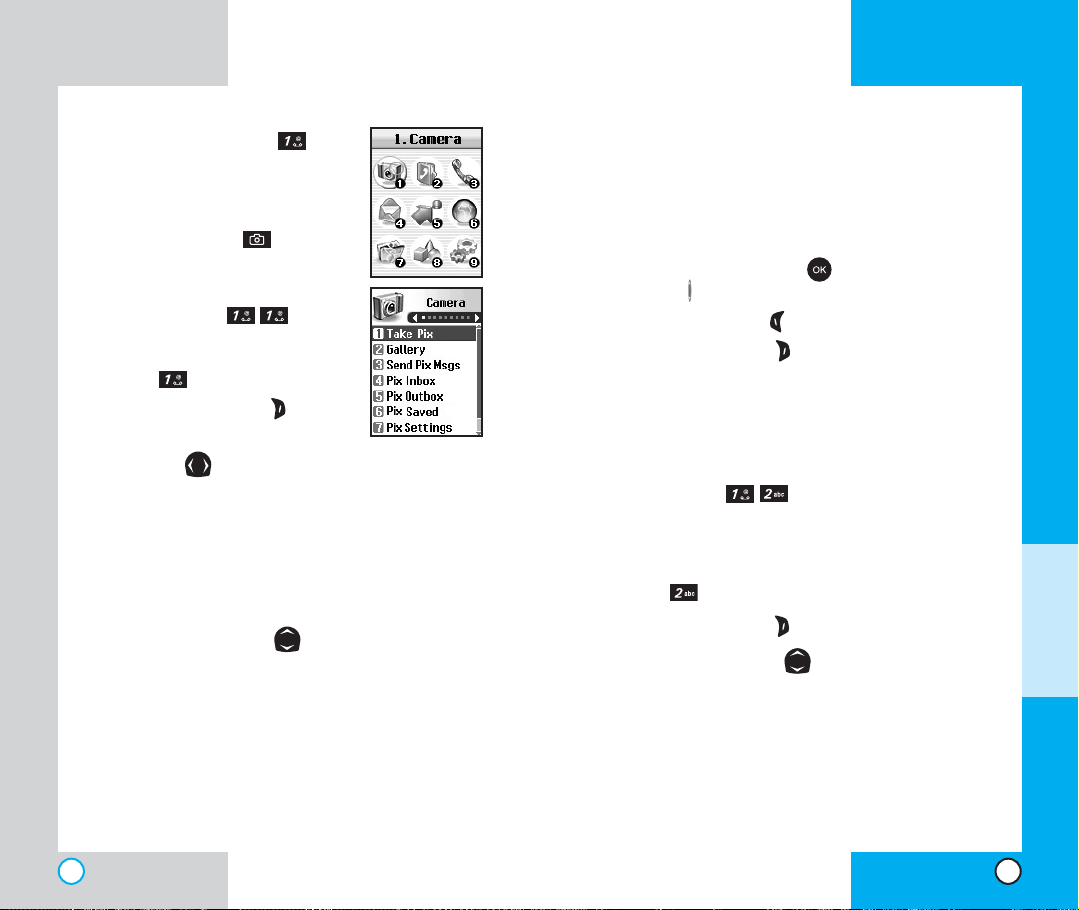
Phon e Men u Referen ce
Press Left Soft Key Menu. Press to Scroll.
Camera
1. Take Pix
2. Gallery
3. Send Pix Msg
4. Pix Inbox
5. Pix Outbox
6. Pix Saved
7. Pix Settings
8. Erase all
Contacts
1. List Contacts
2. New Number
3. New E-mail
4. Groups
5. Speed Dials
6. Voice Dials
7. My Contact Info
Recent Calls
1. Dialed Calls
2. Received Calls
3. Missed Calls
18
1. Auto Save
2. Auto Delete
3. Auto Receive
4. Pix Msg Alert
5. Text Entry Mode
6. Delivery Ack
7. Quick-Text
1. Inbox
2. Outbox
3. Saved
4. All
4. Erase Calls
1. Dialed Calls
2. Received Calls
3. Missed Calls
4. All Calls
5. Call Timer
1. Last Call
2. Home Calls
3. Roam Calls
4. All Calls
6. 1x Packet Counter
Messages
1. Voice Mail
2. New Message
3. Inbox
4. Outbox
5. Saved
6. Msg Settings
1. Auto Save
2. Auto Delete
3. Callback #
4. Msg Alerts
5. Signature
6. Direct View
7. Entry Mode
8.
Edit Voice Mailbox #
9. Quick-Text
7. Erase All
1. Inbox
2. Outbox
3. Saved
4. All
Get It Now
1. Get Apps
2. Get Info
VX6000
Mobile Web
1. Start Browser
2. Web Messages
3. Web Settings
1. Prompt
2. Alert Beep
My Media
1. Graphics
2. Music
Tools
1. Schedule
2. Alarm Clock
1. Alarm 1
2. Alarm 2
3. Alarm 3
4. Quick Alarm
3. Voice Memo
4. My Shortcut
5. Notepad
6. Ez Tip Calc
7. Calculator
8. World Clock
Settings
1. Sounds
1. Ringers
2. Key Tone
3. Volume
4. Alerts
5. Power On/Off T one
2. Display
1. Banner
2. Backlight
3. Screens
4. Menu Style
5. Clocks
6. Theme Colors
7. Fonts
8. Language
9. Power Saver
8. Status Light
3. System
1. Select System
2. Set NAM
3. Auto NAM
4. Serving System
4. Security
1. Lock Phone
2. Restrict
3. Emergency #s
4. Change Code
5. Erase Contacts
6. Reset Default
5. Call Setup
1. Auto Retry
2. Answer Call
3. Auto-Answer
4. One-Touch Dial
5. Voice Privacy
6. Auto Volume
7. TTY Mode
6. 1X Data
1. Data/Fax
2. Select Port
3. Port Speed
7. Voice Services
1. Voice Dial Prompt
2.
Answering Machine
3. Train Words
8. Location
1. Location On
2. E911 Only
9. Phone Info
1.
My Phone Number
2. S/W Version
3. Icon Glossary
4. Shortcut Help
VX6000
GETTING STARTED
19
VX6000
VX6000
GETTING STARTED
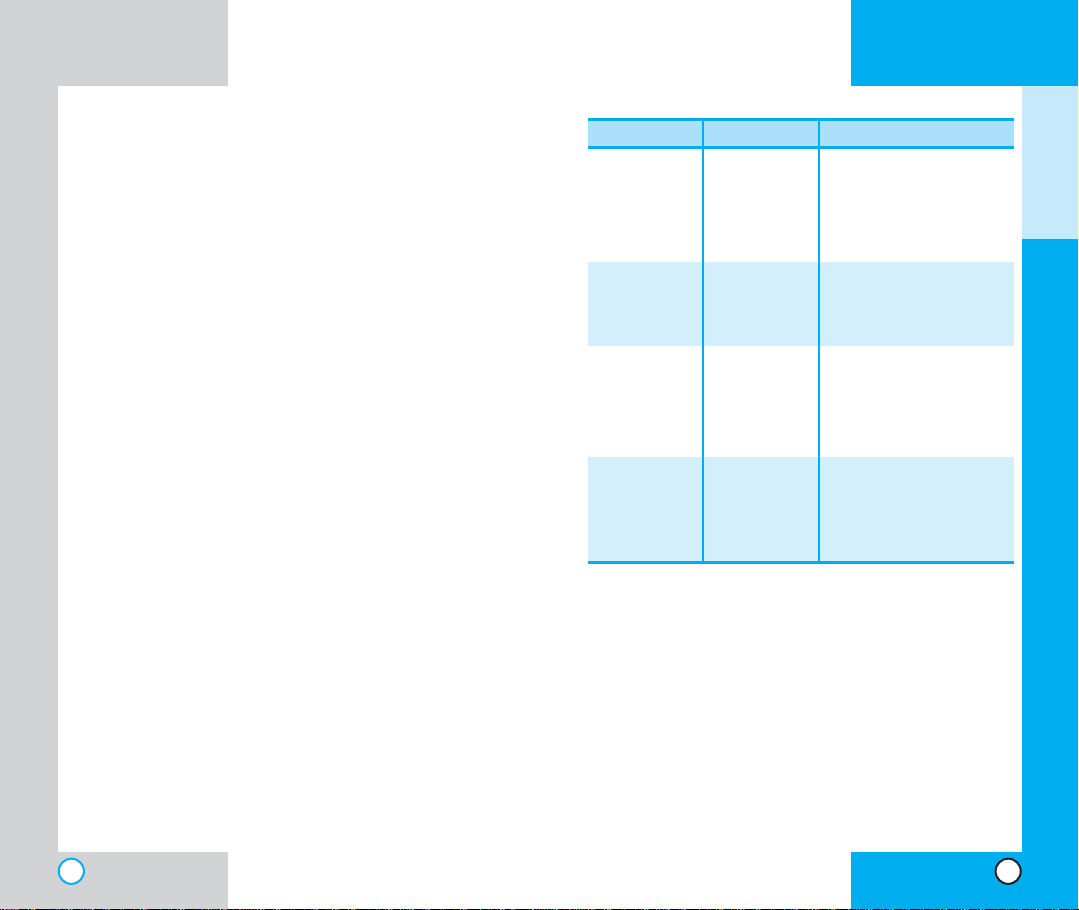
Access ori es
There are a variety of accessories available for
your mobile phone. You can select these options
according to your personal communication
requirements. Consult your
local dealer for availability.
Travel Charger
This charger allows you to
charge the battery while
away from home or your
office. It supports standard
U.S. AC120 Volt 60 Hz
outlets. It takes 5 hours to
charge a completely
discharged battery.
Battery
Two batteries are available
for standard and extended
battery charge.
Desktop Charger
The desktop charger allows
you to place the phone in the
stand for charging. It can
charge a completely
discharged battery in 3
hours.
Standard
Extended
Cigarette Lighter Charger
You can operate the phone and
trickle charge the phone’s battery
from your vehicle by using the
cigarette lighter charger.
It takes 5 hours to charge a
completely discharged battery.
Hands-Free Car Kit
(Portable)
The hands-free car kit enables
you to attach the phone to the
power jack in your car, providing
you with hands-free operation. It
can charge a completely
discharged battery in 5 hours.
AC Adapter
Holster
20
21

VX6000
VX6000
Safe ty Informa ti on
Please read and observe the following information
for the safe and proper use of your phone and to
prevent any unanticipated damage. Also, keep the
user’s manual in an accessible place at all the
times after reading it.
Explosion, Shock, and Fire Hazards
Unplug the power cord and charger during lightning
storms to avoid electric shock or fire.
Do not use your phone in high explosive areas as the
phone may generate sparks.
Do not put your phone in a place subject to excessive
dust and keep the minimum required distance between
the power cord and heat sources.
Unplug the power cord prior to cleaning your phone,
and clean the power plug pin when it is dirty.
Do not damage the power cord by bending, twisting,
pulling, or heating. Do not use the plug if it is loose as
it may cause a fire or an electric shock.
When using the power plug, ensure that it is firmly
connected. If it is not, it may cause excessive heat or
fire.
Do not place any heavy items on the power cord. Do
not allow the power cord to be crimped as it may cause
fire or electric shock.
Do not disassemble the phone.
D
o not place or answer calls while charging the
phone as it may short-circuit the phone and/or cause
electric shock or fire.
GETTING STARTED
22
23

VX6000
VX6000
f you put your phone in a pocket or bag without
I
covering the receptacle of the phone (power plug
pin), metallic articles (such as a coin, paperclip or
pen) may short-circuit the phone. Always cover the
receptacle when not in use.
Do not short-circuit the battery. Metallic articles such as a
coin, paperclip or pen in your pocket or bag may shortcircuit the + and – terminals of the battery (metal strips on
the battery) upon moving. Short-circuits of the terminal
may damage the battery and cause an explosion.
Do not disassemble the battery as it may cause electric
shock, short-circuit, or fire.
Do not expose the phone to excessive vibration or a
sharp impact.
Never place your phone in a microwave oven as it
will cause the battery to explode.
General Warnings and Cautions
Store the battery in a place out of reach of children.
Using a damaged battery or placing a battery in your
mouth may cause serious injury.
Do not place items containing magnetic components such
as a credit card, phone card, bank book or a subway ticket
near your phone. The magnetism of the phone may
damage the data stored in the magnetic strip.
Do not hold or let the antenna come in contact with
your body during a call.
Talking on your phone for a long period of time may
reduce the call quality due to heat generated during
use.
When the phone is not used for a long period time,
store it in a safe place with the power cord unplugged.
Only use the batteries, antennas, and chargers
provided by LG. The warranty will not be applied to
products provided by other suppliers.
Using the phone in proximity to receiving equipment
(i.e., TV or radio) may cause interference in this phone.
Only authorized personnel should service the phone
and its accessories. Faulty installation or service may
result in accidents and consequently invalidate the
warranty.
Use only the antenna provided or approved by LG.
Unauthorized antennas, modifications or attachments
may affect the quality of phone call, damage the phone
or result in a violation of FCC regulations.
Do not use the cellular phone if the antenna is
damaged. If the damaged antenna gets in contact with
the skin, it may cause a slight burn. Please contact LG
Authorized Service Center to replace the damaged
antenna.
Do not use the cellular phone in areas where its use is
prohibited. (For example: aircraft).
Do not expose the cellular phone to high temperatures
or high humidity.
Do not immerse your cellular phone in water. If this
happens, turn it off immediately and remove the
battery. If the phone does not work, take it to an LG
Authorized Service Center.
GETTING STARTED
24
25
VX6000
VX6000
Technic a l Details
The VX6000 is a dual-band phone that operates on
both Code Division Multiple Access (CDMA)
frequencies: cellular services at 800 MHz, and
Personal Communication Services (PCS) at 1.9
Ghz.
CDMA technology uses a feature called DSSS
(Direct Sequence Spread Spectrum) that enables the
phone to keep communication from being crossed
and to use one frequency channel by multiple users
in the same specific area. This results in a 10-fold
capacity increase when compared with analog mode.
In addition, features such as soft / softer handoff,
hard Handoff, and dynamic RF power control
technologies combine to reduce call interruptions.
The Cellular and PCS CDMA networks consist of
MSO (Mobile Switching Office), BSC (Base Station
Controller), BTS (Base station Transmission System),
and MS (Mobile Station). The following table lists
some major CDMA standards.
CDMA Standard
Basic Air Interface
Network
Service
Performance
TSB -74: Protocol between an IS-95A system and ANSI J-
*
STD-008
1xRTT system receives twice as many subscribers in the
wireless section as IS-95. Its battery life is twice as long as IS-
95. High-speed data transmission is also possible.
Designator Description
TIA/EIA-95A
TSB-74
ANSI J-STD-008
TIA/EIA-IS2000
TIA/EIA/IS-634
TIA/EIA/IS/651
TIA/EIA/IS-41-C
TIA/EIA/IS-124
TIA/EIA/IS-96-B
TIA/EIA/IS-99
TIA/EIA/IS-637
TIA/EIA/IS-657
IS-801
TIA/EIA/IS-97
TIA/EIA/IS-98
ANSI J-STD-018
ANSI J-STD-019
TIA/EIA/IS-125
CDMA Dual-Mode Air Interface
14.4kbps radio link protocol and
inter-band operations
IS-95 adapted for PCS
frequency
band cdma2000 1xRTT
Air Interface
MAS-BS
PCSC-RS
Intersystem operations
Nom-signaling data comm.
Speech CODEC
Assign data and fax
Short message service
Packet data
Position Determination
Service (gpsOne)
Cellular base station
Cellular mobile station
PCS personal station
PCS base station
Speech CODEC
GETTING STARTED
26
27
VX6000
VX6000
2 Basic Functions
Turning the Phone On and Off
Turning the Phone On
1. Install a charged battery pack or connect the
phone to an external power source such as a
cigarette lighter adapter or car kit.
2. Press for a few seconds until the red light
in the middle of the phone flashes.
NOTE: Like any other radio device, avoid any
unnecessary contact with the antenna while
your phone is on.
Turning the Phone Off
1. Press and hold until the display turns off.
BASIC FUNCTIONS
28
29
VX6000
VX6000
Makin g a Cal l
When you make a call, follow these simple steps:
1. Make sure the phone is turned on. If not, press
.
2. Enter the phone number, with area code (if
needed).
3. Press . lf the phone is locked, enter the
lock code.
Call Failed - indicates that the call did not go
through.
Restricted - indicates outgoing calls are in
restricted mode. You can only dial phone
numbers saved in the Emergency or Phone
Book list.
To turn off this function:
Menu-> Settings-> Security-> Enter
Lock Code -> Restrict -> Off -> OK
4. Press to make the call.
If one-touch is enabled, type in the phone book
speed dial number or hold the last digit until the
call is made.
NOTE: The phone number and entry name
appear on the display when you type in the
speed dial number and hold the last digit.
Correcting Dialing Mistakes
If you make a mistake while dialing a number,
press once to erase the last digit entered or
hold down for at least two seconds to delete
all digits.
BASIC FUNCTIONS
Receivi ng Calls
1. When the phone rings or vibrates press to
answer.
If you press or the side keys while the
phone is ringing, the ringing or vibration is
muted for that call.
2. Press or twice to end the call.
Usin g Mann e r, Silenc e All, and
Lock Mode
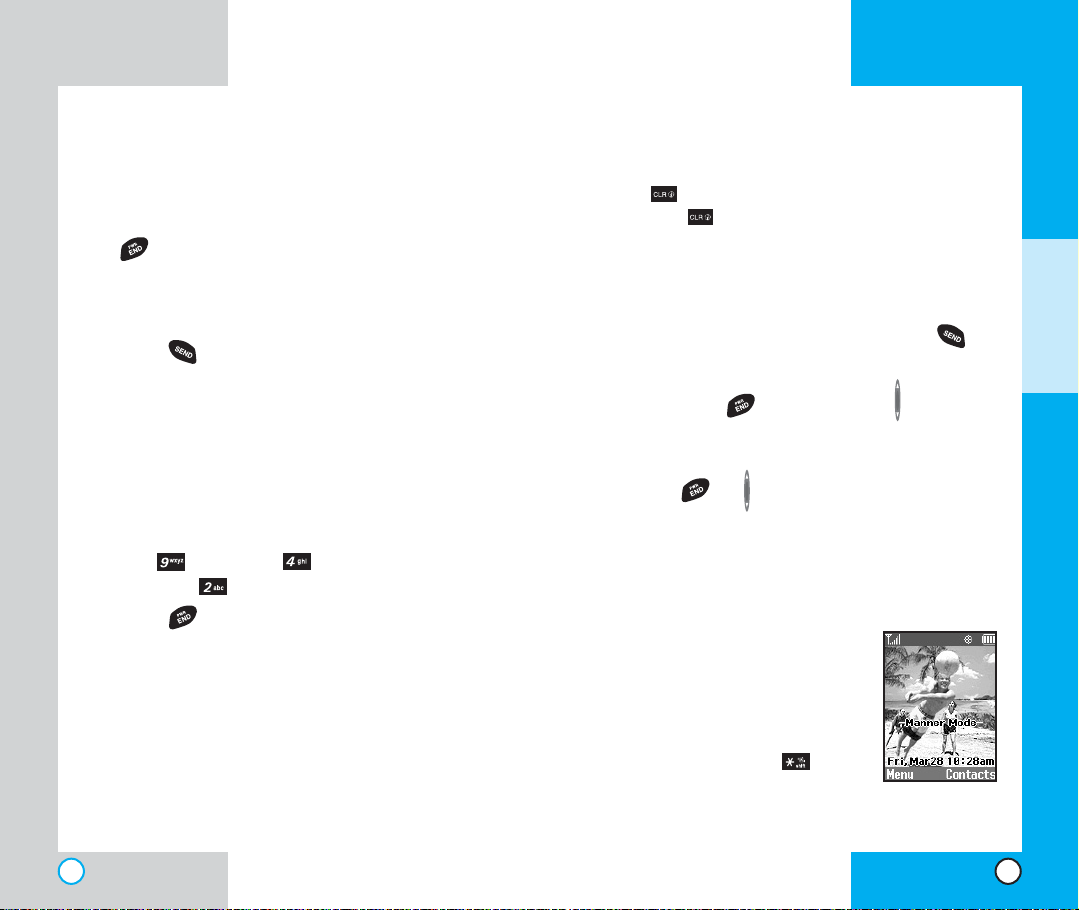
Manner Mode (Quick)
Use the Manner Mode in public
places.
1. When in the Standby Mode,
activate the Manner Mode
quickly by pressing for 3
seconds.
30
31
VX6000
VX6000
When the Manner Mode is set, the key tones
are silent, and the phone is set to vibrate.
NOTE: The phone remains in Manner Mode
even if you turn it off and back on.
NOTE: To cancel Manner Mode, press to
switch into Silence All or Normal Mode.
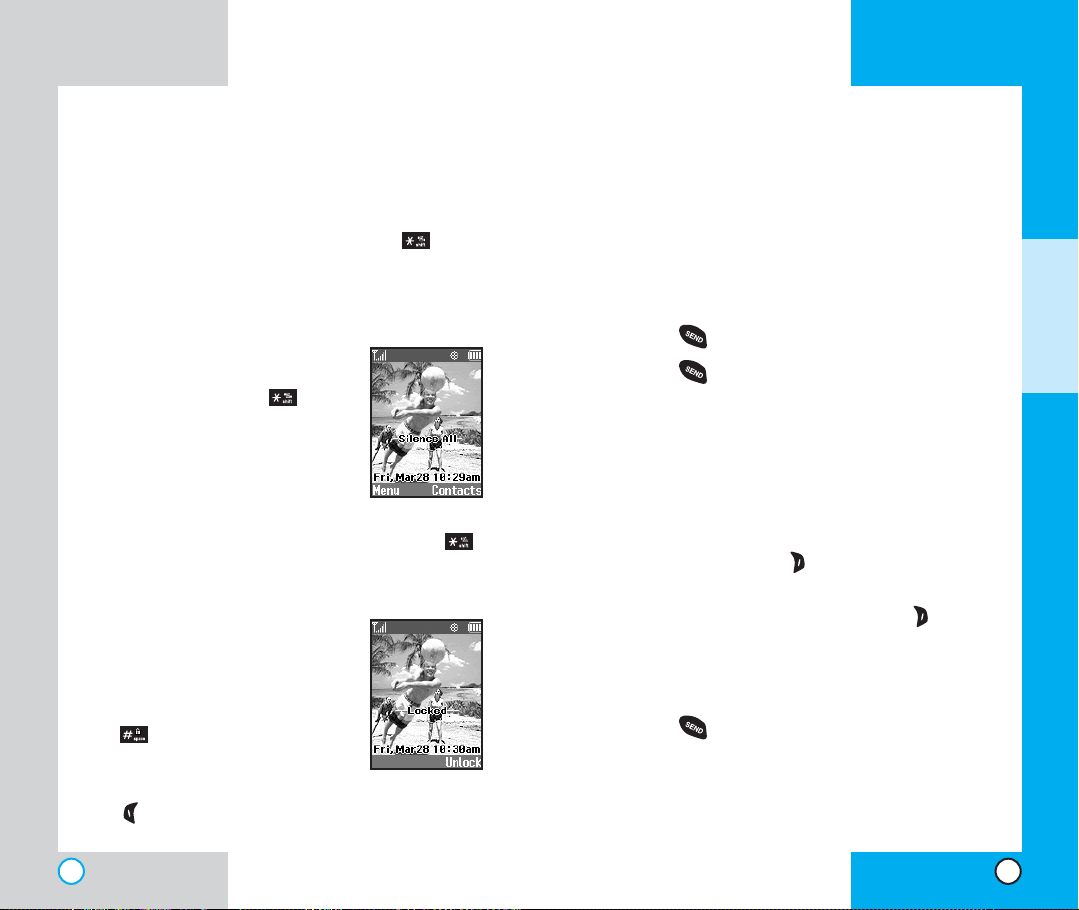
Silence All Mode (Quick)
1. From the Manner Mode you can
activate the Silent All Mode
quickly by pressing for 3
seconds.
When the Silence All Mode is
set, the key tones are quiet and
the lamp blinks instead of the
phone ringing or vibrating.
NOTE: To cancel the Silent All Mode, press
to switch into Manner Mode or Normal Mode.
Lock Mode (Quick)
Use the Lock Mode to prevent
others from using your phone.
1. In standby mode, to activate
the lock mode quickly, press
for 3 seconds. Lock mode
setting is displayed.
NOTE: To cancel the Lock Mode, Press Left Soft
Key , Unlock, then enter your 4 digit password.
Call Waitin g
If your cellular service offers call waiting, while a
call is in progress you may hear two beeps
indicating another incoming call. When call waiting
is enabled, you may put the active call on hold
while you answer the other incoming call. Check
with your cellular service provider for information
about this function.
1. Press to receive a waiting call.
2. Press again to switch between calls.
Mut e
The mute function prevents the other party from
hearing your voice, but allows you to hear the other
party.
1. Press Right Soft Key , Mute, during a call.
2. To cancel Mute, press Right Soft Key again.
Redia l in g Calls
1. Press to redial the last number in your call
history. The last 30 numbers are stored in the
call history list and you can also select one of
these to redial.
BASIC FUNCTIONS
32
33
VX6000
VX6000
Adjusti ng the Volu m e
Use the side keys to adjust the earpiece, ringer, and
key beep volumes. The upper key is used to increase
the volume and the lower key is used to decrease the
volume.
You may adjust the earpiece volume during a call.
The ringer volume can be adjusted through the
menu.
The key beep volume is adjusted through the menu.
Power Save M ode
When the phone is in an area without service for 15
minutes, it stops searching for service and enters into
Power Save Mode. When your phone activates this
feature, Power Save is displayed on the screen.
The phone automatically checks for service
periodically or you can check manually by pressing
any key.
Signal Strengt h
Call quality depends on the signal strength in your
area. The signal strength is indicated on the screen
as the number of bars next to the signal strength
icon: The more bars, the better the signal strength.
If the signal quality is poor, move to an open area.
If you are in a building, the reception may be better
near a window.
Speed Dialin g
Speed dialing is a convenient feature that allows
you to make phone calls quickly and easily
(Number 1 is always for Voicemail).
1. Enter a speed dial number from 2 to 199.
2. Press .
OR
Press the first digit and then press and hold the key
of the last digit.
Your phone recalls the phone number from your
personal directory, displays it briefly and then dials
it.
Calle r ID
Caller ID lets you know who is calling by displaying
the number of the person calling when your phone
rings. If the caller’s name and number are already
stored in your phone book, the corresponding name
appears with the number.
Check with your service provider to ensure they
offer this feature.
BASIC FUNCTIONS
34
35
VX6000
VX6000
3 Additional Functions
Entering informat i on using T9
Text Input
You can edit the Banner, Scheduler, Short
Message, and Phone Book using T9 Text Input.
Input mode
T9 Text Input provides five modes for entering text,
numbers, special characters, and punctuation.
T9Word (T9) Mode
Type text using one keystroke per letter. The phone
translates keystrokes into common words by using
the letters on each key and a compressed
database.
Abc (Multi-tap) Mode
Use Abc mode to add words to the T9 database.
123 (Numbers) Mode
Type numbers using one keystroke per number. To
change to 123 mode in a text entry field, press
Right Soft Key until 123 mode is displayed.
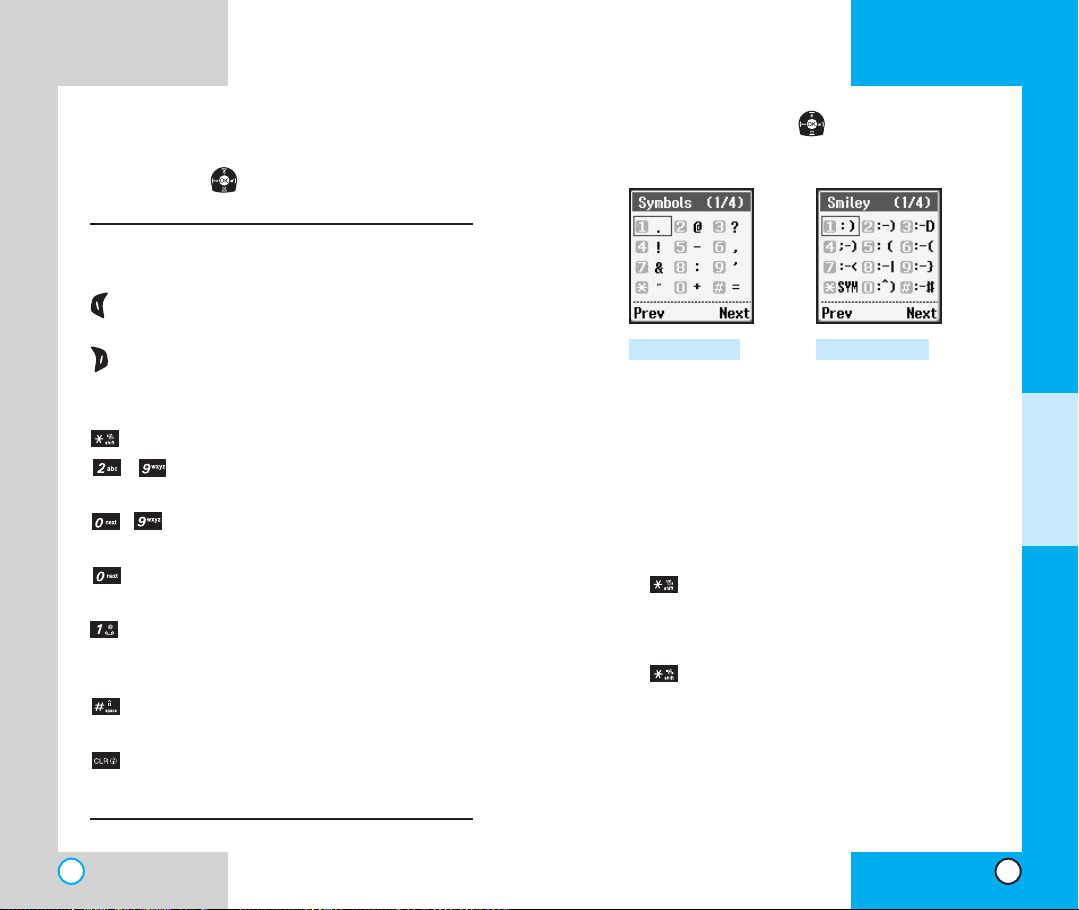
Symbol Mode
Insert special characters or punctuation.You may
use any of the 35 special characters. When the
cursor is located where you want the special
character, switch to Symbol mode. Press the
Navigation Key to cycle through and select the
characters.
ADDITIONAL F
UNCTIONS
36
37
VX6000
VX6000
Smiley Mode
(SMS and e-mail only)
When the cursor is located where you want to add
a smiley, switch to the smileys mode. Press the
Navigation Key to cycle through and select a
smiley.
Key Functions
Left Soft Key: Press to display or select
menu options.
Right Soft Key: Press to scroll through
the menus in the following order : Abc->
123-> Symbol-> Help-> T9En-> Abc.
Shift: Use to change case.
~ Type Text: In T9 mode, press one key
per letter to enter text.
~ Type Numbers: In 123 mode, press
once to enter numbers.
Next: In T9 mode, press to display
other matching words.
Punctuation In T9 mode, press to
insert punctuation in a word and
complete a sentence.
Space: Press to complete a word or
insert a space.
Clear: Press to delete a single space or
character. Hold to delete entire words.
Press the Navigation Key to cycle through and
select from the following characters:
Smileys ModeSymbol Mode
ADDITIONAL FUNCTIONS
Changing Letter Case
There are three options for selecting letter case:
Initial Cap (T9En/Abc)
Only the first letter is capitalized.
Caps Lock (T9EN/Abc)
Press to change to Caps Lock. All subsequent
letters are capitalized.
Lower case (T9en/abc)
Press again to change to lower case. All
subsequent letters are in lower case.
38
39
VX6000
VX6000
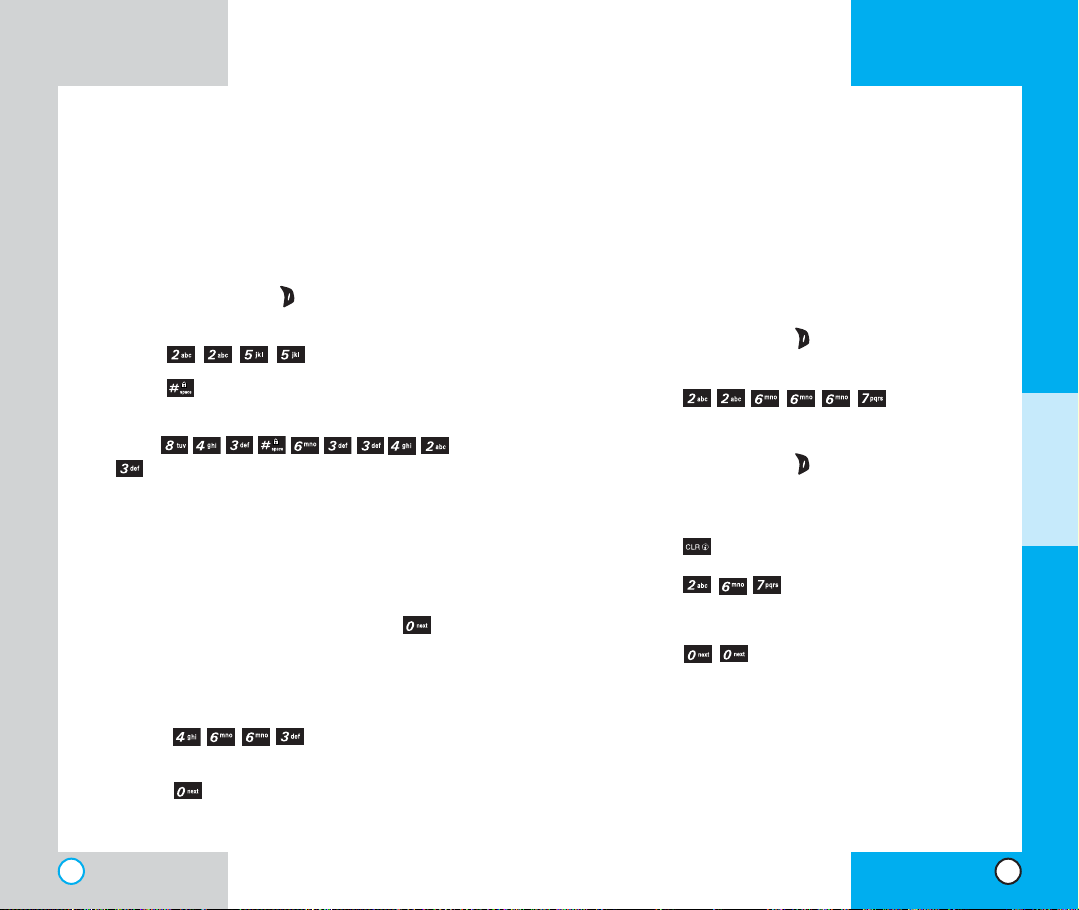
Example: Using T9 Text Input
Typing In T9 Mode
To type the message “Call the office” follow these
steps:
1. Press: Right Soft Key to change the case to
T9Word Mode.
2. Press: .
3. Press: to complete the word and add a
space.
Press:
4.
.
5. The display shows: Call the office.
Using the NEXT Key
After you have finished entering a word, if the word
displayed is not the one you want, press to
display additional choices of words from the
database.
For example:
Adding Words to the T9
Datab as e
If a word is not in the T9 database, add it by using
Abc (Multi-tap) mode text entry. The word is
automatically added to the T9 database when you
return to T9 mode.
For example, follow these steps:
1. Press: Right Soft Key to change case to Abc
(multi-tap) mode.
2. Press: .
3. Display: Bop
4. Press: Right Soft Key to change letter case
to T9 mode and then the word Bop is added to
the T9 database.
5. Press: to erase the existing word.
6. Press: .
7. Display: Cop
8. Press: .
9. Display: Bop
ADDITIONAL F
UNCTIONS
1. Press: .
2. The display shows the word Good.
3. Press: .
4. The display gives you additional choices such
as: Home, Gone, Hood, etc.
40
41
VX6000
VX6000
Examples Using Abc (Multi-tap) Text input
To type a new message, follow these steps:
1. Press: Right Soft Key to change case to Abc
mode.
2. Press: to change to Abc Caps Lock mode.
3. Press: .
4. Display: Lg
Phone Book F e at ur es
You can store up to 500 entries in your phone book
with easy access to your most frequently dialed
phone numbers.
Personal Phone Book Memory
The phone has 500 personal phone book memory
locations where you can store up to 5 phone
numbers of up to 48 digits.
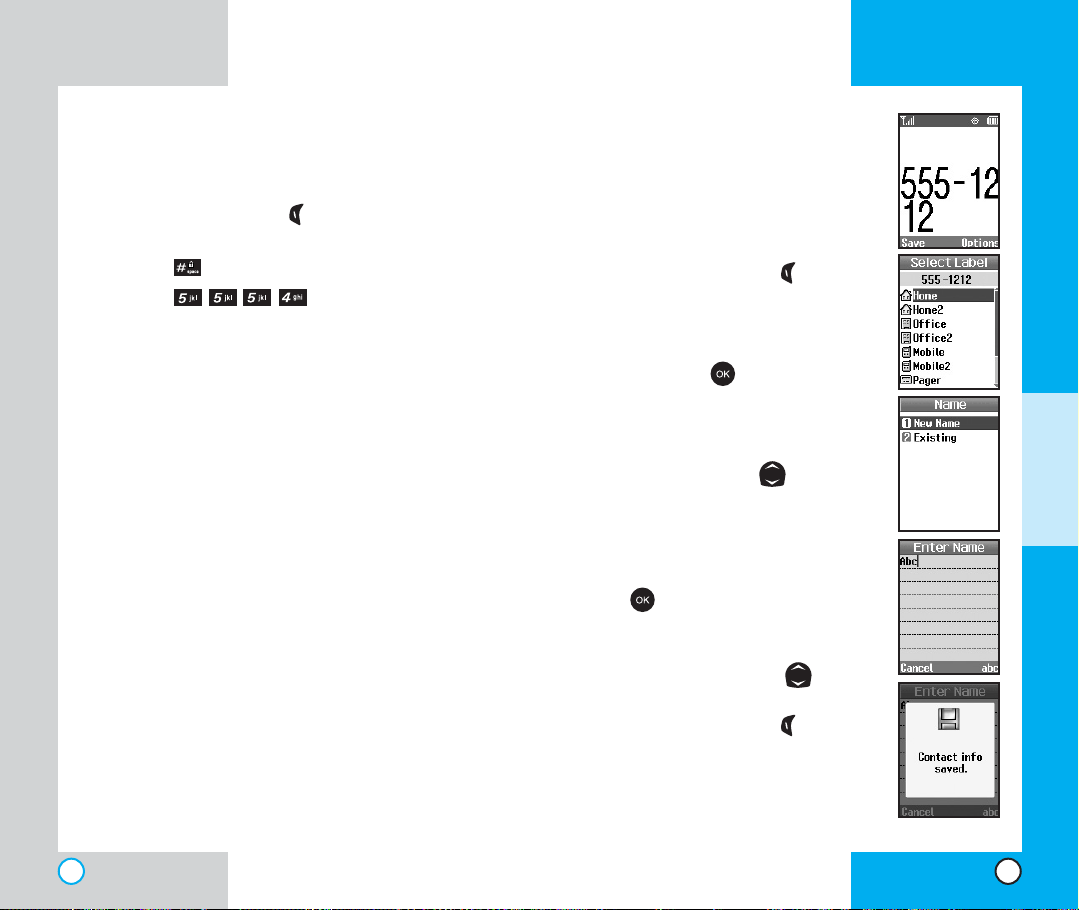
Saving Numbers in Your
Personal Phone Book
1. Input the phone number that you
want to save (up to 32 digits).
2. Press Left Soft Key Save, the
submenu appears.
3. Select Label on the sub-menu
and press .
ADDITIONAL FUNCTIONS
4. Select your desired label types
Home, Office, Mobile, Pager,
Fax, None using .
5. Enter a name for the phone
number(up to 22 characters). If you
do not want to enter a name, press
to go to the next step.
6. You may select the desired ID ring
type and secret and .
7. Press Left Soft Key Save.
A confirmation prompt displays.
42
43

VX6000
VX6000
Retrieving Numbers
Retrieving by Name Search
1. Press Right Soft Key Contacts.
2. Press Right Soft Key Options.
3. Select Find Name.
4. Enter the character(s) that you want to search
for such as the first letters of the name.
5. You see a list of matches.
6. Press to see more information in that entry,
or press to place the call.
Making a call from Your Phone
Boo k
You can place a call from any memory location
either by using speed dialing or by entering the
phone number and pressing .
Advanced Phone Book Features
Pause
When you call automated systems such as voice
mail or credit billing numbers, you often have to
enter a series of numbers. Instead of entering
these numbers by hand, you can store the numbers
in your phone book separated by pauses using
special characters (P, T)
There are two different types of pauses that you
can use when storing a number; hard and 2second:
ADDITIONAL FUNCTIONS
Hard pause (P)
The phone stops dialing until you press Left Soft
Key Resume to advance to the next number.
2-sec pause (T)
The phone waits two seconds before sending the
next string of digits.
Storing a number with pauses
1. Press Left Soft Key Menu.
2. Press Contacts.
3. Press New Number.
4. Enter the phone number.
5. Press Right Soft Key Option to select
hard/2-sec pause.
6. Enter additional number(s) (e.g., pin number or
credit card number).
44
45
VX6000
VX6000
. Press and choose select label by using .
7
8. Enter a name for the phone number(up to 22
characters). If you do not want to enter a name,
press to go to the next step.
9. You can select the desired Speed dial/Voice
dial/ Group/Ringer/Msg Ringer/Memo/Picture
Id/Secret/ URL using .
Press Left Soft Key Done. A confirmation
10.
prompt displays.
Prepen di ng a Stored Number
Prepend can be used if you are out of your home
system area and need to add the area code to an
existing phone book number. When a phone book
entry or message callback number shows up on the
display, you can add to the beginning of the original
number. However, you cannot edit the original
number.
1. Recall a number in memory.
2. Enter the prepend digits and the phone number.
3. Press .
Dynamic Search
Dynamic search compares entered letters against
the entries in the phone book and then displays a
matching list in descending order. You can then
select a number from the list to call.
ADDITIONAL FUNCTIONS
46
47
VX6000
VX6000
4 Menu Features
General Guideli n es
1. Press Left Soft Key Menu. Nine menu items
will appear on the display screen.
2. Press to go through the list of menu
features.
3. Press the appropriate number key
corresponding to the menu item that you want
to select. The sub-menu list will then appear on
the screen.
4. Press the appropriate number key
corresponding to the sub-menu you want to
access.
5. Use to select your preferred setting. Press
to go back one step while accessing the
menu or selecting a setting.
6. Press to save the settings or press to
cancel without saving.
MENU F
EATURES
48
49
VX6000
VX6000
Camera (Menu )
Quick Access to Camera Feature
You can access the camera feature
directly by pressing for
approximately 3 seconds.
Take Pix (Menu )
1. From the menu, select Camera.
2. Press Take Pix.
3. Press Right Soft Key Options
to view the list.
NOTE: Use to adjust the zoom function (x1,
x2 and x4 at Lo resolution, x1 and x2 at Med
resolution, and only x1 at Hi resolution).
NOTE: To take a photo of yourself, use the mirror
on the top front of the phone. When your image
is centered in the mirror, take the photo using
the volume control key.
4. Select an option with .
Self Timer -(5 sec/10 sec)
Resolution
Brightness -(EV-2 to EV+2)
White Balance -(Auto/Sunny/Cloudy/Tungsten/
-(Lo 160x120/Med 320x240/Hi 640x480)
Florescent/Darkness)
File Quality -(Economy/Normal/High)
Shutter Sound -(Shutter/Chime/No Sounds)
50
Color Effects -
Fun Frames - (Frame 1~5/None): Allows you to
(Normal/Antique/Black&White/Negative)
take photos with a pre-made foreground.
Multishot - (5 shots/3 shots): Allows you to take
multiple photos without interruption.
5. Take a picture by pressing , or you can press a
Side Key .
6. Press Left Soft Key Save to save the photo.
Press
Right Soft Key
Reject or retake the photo.
NOTE: “XX/XX” on the upper right corner of the
LCD screen shows how many photos you have
taken and the maximum number you can take.
Gallery (Menu )
Allows you to view photos that are stored in the phone.
1. From the menu, select Camera.
2. Press Gallery.
3. Press Right Soft Key Options to view the list.
4. Select an option with .
Send
Online Album
Set As -
Enlarge
Lock
Rename
Erase
Erase All
(Contacts/Wallpaper/Power On/Power Off)
MENU FEATURES
51
VX6000
VX6000
Picture Info
5. Press .
Press Left Soft Key Camera to take a photo .
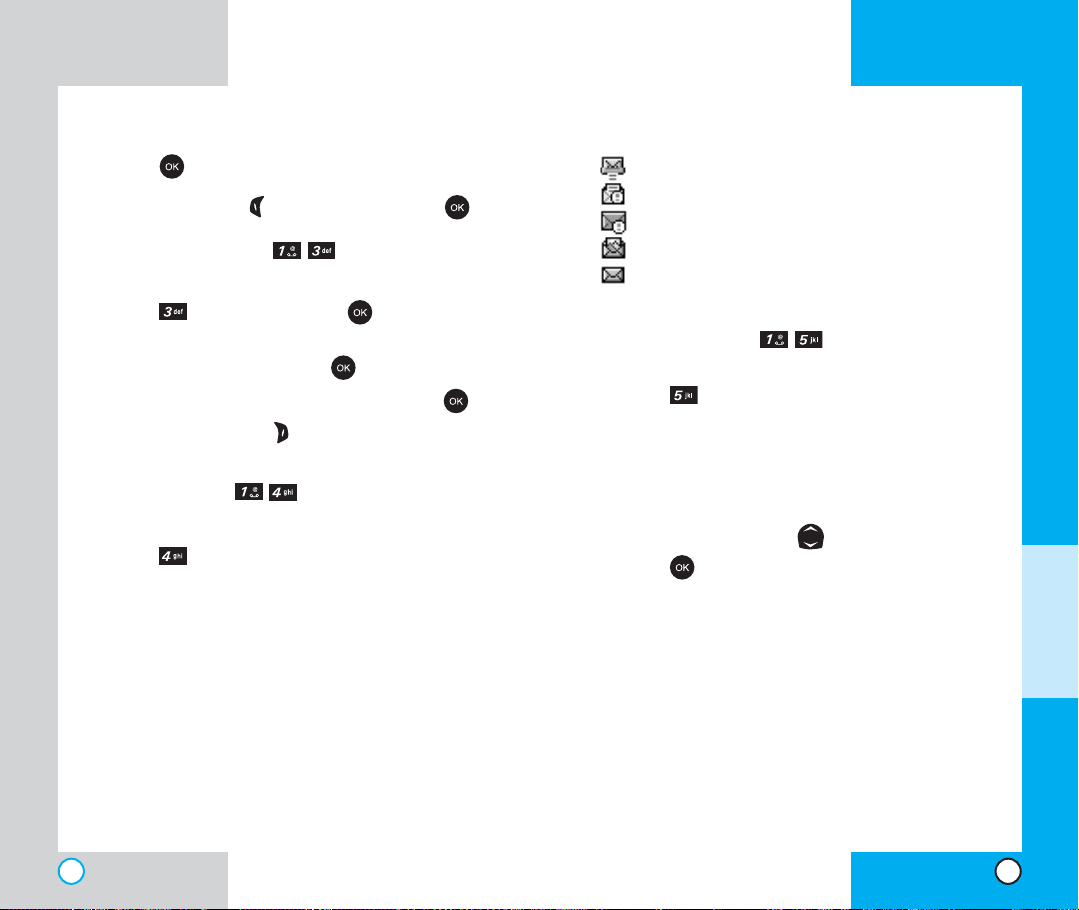
Send Pix Msg (Menu )
1. From the menu, select Camera.
2. Press Send Pix Msg.and to enter
mobile number and/or E-mail
3. Edit subject/text by selecting .
4. Select a picture file and sound file by selecting .
5. Press Right Soft Key Send (2).
Pix Inbox (Menu )
1. From the menu, select Camera.
2. Press Pix Inbox to view Pix Inbox.
Resend
Options
Pix Msg Info
Play Again -(5 sec/10 sec)
Save Photo
Save Sound
Save Address
Save Quick-Text
Save Pix Msg
Forward
Erase
Pix Msg Status Reference
: Notified Msg
: Urgent Read Msg
: Urgent Unread Msg
: Read Pix Msg
: Unread pix Msg
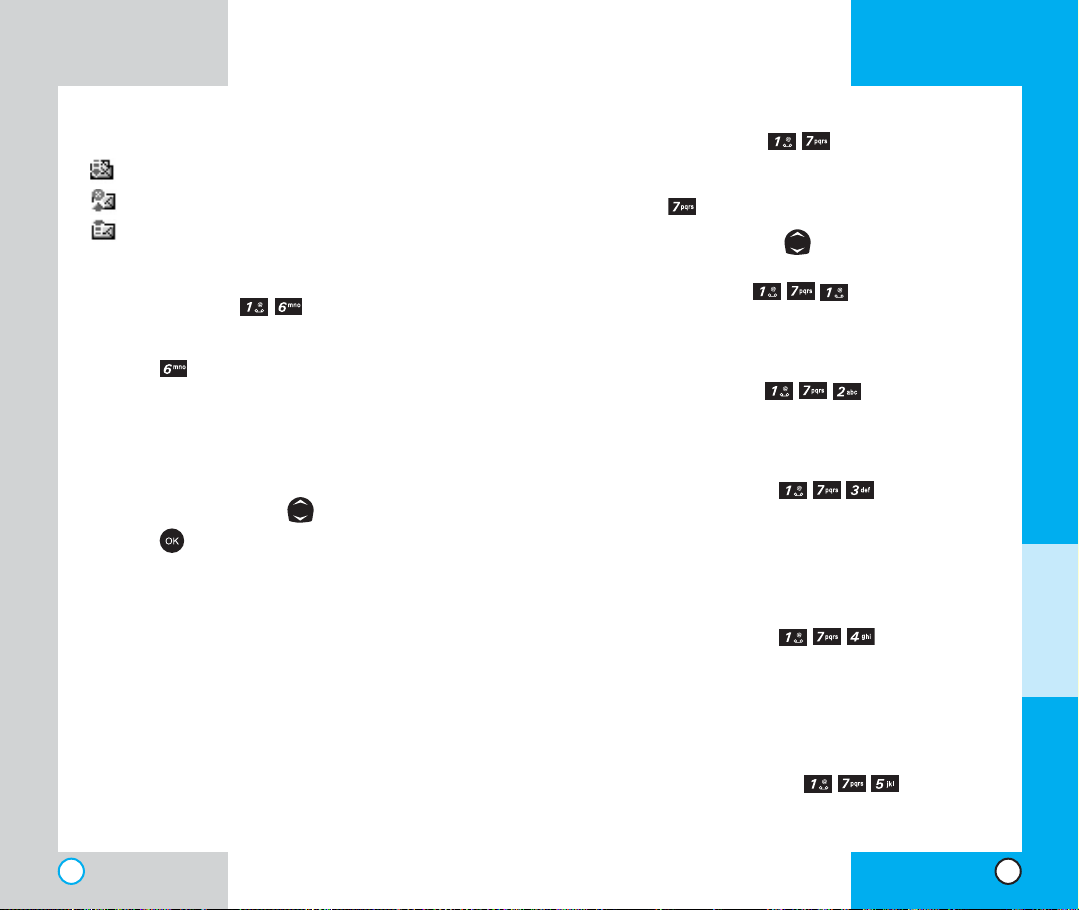
Pix Outbox (Menu )
1. From the menu, select Camera.
2. Press Pix Outbox to view Pix Outbox.
Resend
Options
Erase
Lock
3. Select a message with .
4. Press to view the message.
Send to
Options
Play again
Erase
Save photo
Save sound
Save addr
Save pix msg
Lock
Pix msg info
M
ENU FEATURES
52
53
VX6000
VX6000
Photo Msg Status Reference
: Delivered Msg
: Failed Msg
: Sent Msg
Pix Saved (Menu )
1. From the menu, select Camera.
2. Press Pix Saved.
Resend
Options
Erase
Lock
3. Select a message with .
4. Press to view the message.
Resend
Options
Play again
Erase
Save photo
Save sound
Save addr
Save quick-text
Lock
Pix msg info
Pix Settings (Menu )
1. From the menu, select Camera.
2. Press Pix Settings.
3. Select an option with .
Auto Save (Menu )
With this feature on, messages are automatically
saved in the outbox when transmitted.
Auto Delete (Menu )
With this feature on, old read messages are
automatically deleted when you exceed storage limit.
Auto Receive (Menu )
With this feature on, picture messages will
automatically be received by your phone. With this
feature off, you will be asked if you want to Accept
your new Pix Msg.
Pix Msg Alert (Menu )
Allows you to select the alert type for a new picture
message. Alert types are Silent, Vibrate Once, Vibrate
and Sound,Custom Ring Tone, Low Beep Once, Low
Beeps, Loud Beep once and Loud Beeps.
Text Entry Mode (Menu )
Allows you to select the default input method
including T9Word, Abc, 123.
MENU
FEATURES
54
55
VX6000
VX6000
Delivery Ack (Menu )
This service option allows you to be notified of the
successful delivery of a picture message.
Quick-Text (Menu )
Display, edit, and add Canned Messages.
Erase All (Menu )
This allows you to erase all picture messages stored in
your Inbox, Outbox or Saved Msgs folders. You can
also erase all messages stored in these folders at the
same time.
1. From the menu, select Camera.
2. Press Erase All.
Press Inbox to erase all messages stored
in the Inbox
Press Outbox to erase all messages stored
in the Outbox
Press Saved to erase all messages stored
in the Saved Items folder
Press All to erase all messages stored in
the Inbox, Outbox,and Saved Items folder
NOTE: Locked messages cannot be erased.
NOTE: If the memory is full, no more messages can
be received until enough memory space becomes
available. The message NOT ENOUGH MEMORY is
displayed and new messages are not accepted.
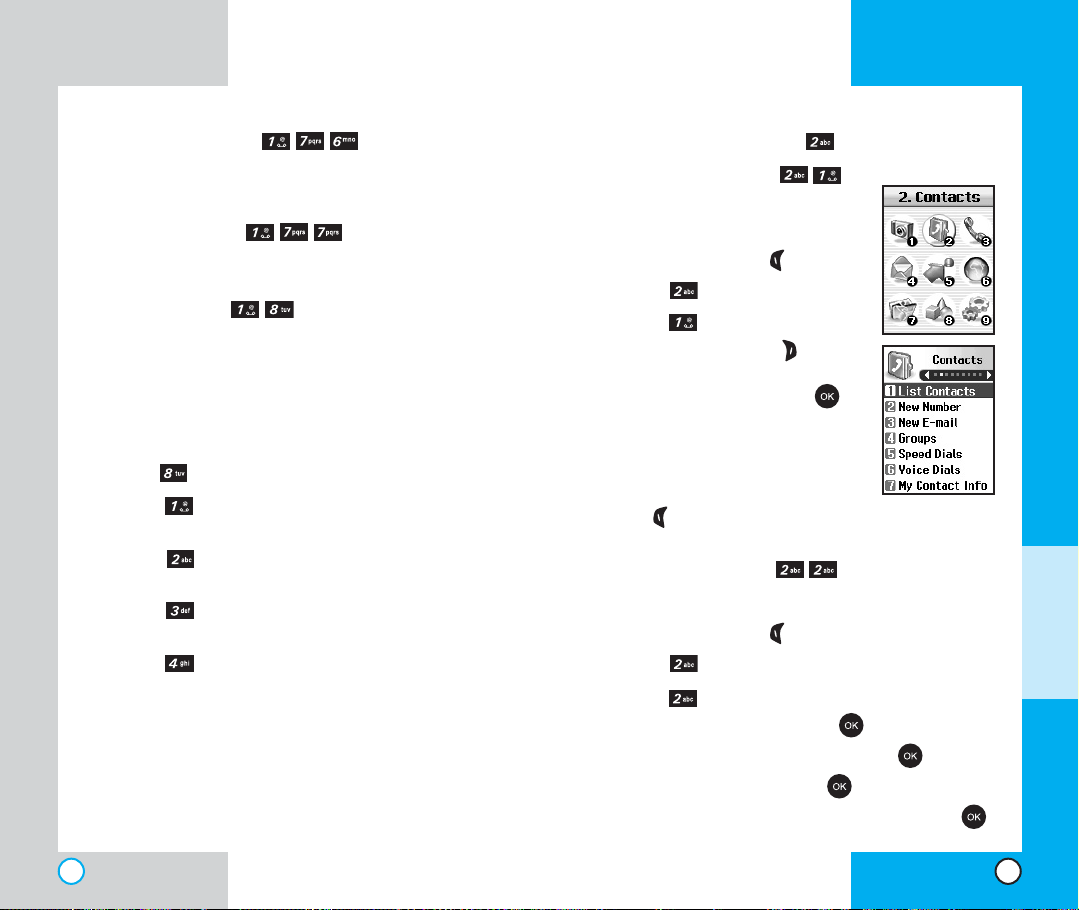
Contact s (Menu )
List Contacts (Menu )
Allows you to view the list of
entries in Contacts.
1. Press Left Soft Key Menu.
2. Press Contacts.
3. Press List Contacts.
4. Press Right Soft Key
Options, and then press .
Find Name/Find Number/Find
Speed Dial/Find Group
5. You may register a new phone
number by pressing Left Soft
Key New.
New Number (Menu )
Allows you to add a new number into Contacts.
1. Press Left Soft Key Menu.
2. Press Contacts.
3. Press New Number.
4. Enter the number and press .
5. Select the label you want and press .
6. Enter the Name and press .
7. Select either Speed Dial or Voice Dial and press .
MENU F
EATURES
56
57
 Loading...