

Page 1
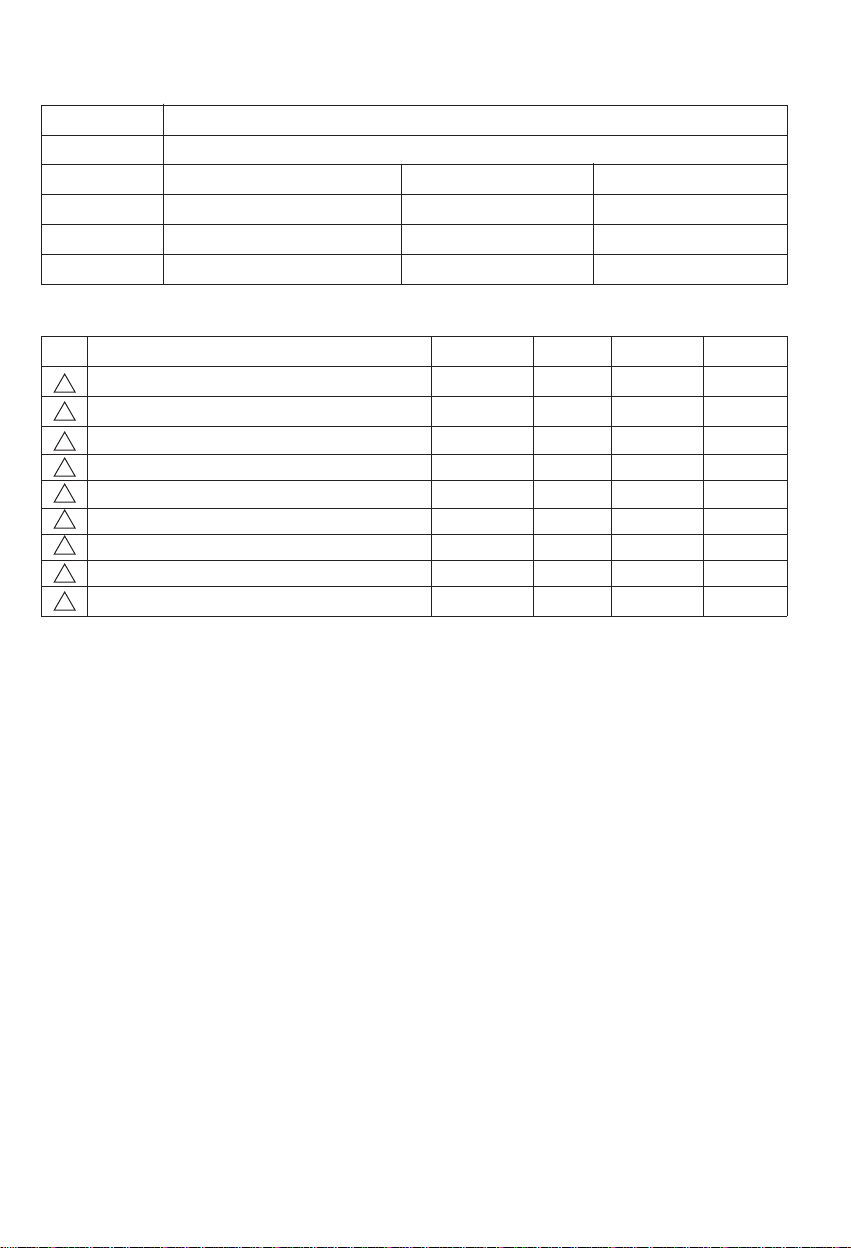
Model
Language
Page
Material Size(W*H)
Date
Part No. Description
CK3
ENGLISH
16 PAGE
Weight
100G
2006.09.04
Color(cover/body)
Designer
MFL32930801 MANUAL,OWNERS
Chage Record
No. Date
1
2
3
4
5
6
7
8
9
Change content
ECO No.
drawing realization ACTT702608 2007.04.14 SONG1 CUIYT
drawing realization ACTT703604 2007.06.01 SONG1 CUIYT
2/2
190*260
Wangzhenzhong
Designer
Confirm
Page 2
V-CD201H*
V-CD201N*
V-CD281H*
V-CD281N*
V-CD261H*
V-CD261N*
V-CD241H*
V-CD241N*
V-CD211H*
V-CD211N*
Page 3

Table of contents
2
Safety Information.....................................................................................................3
How to Use.................................................................................................................4
Assembling cleaner...............................................................................................................4
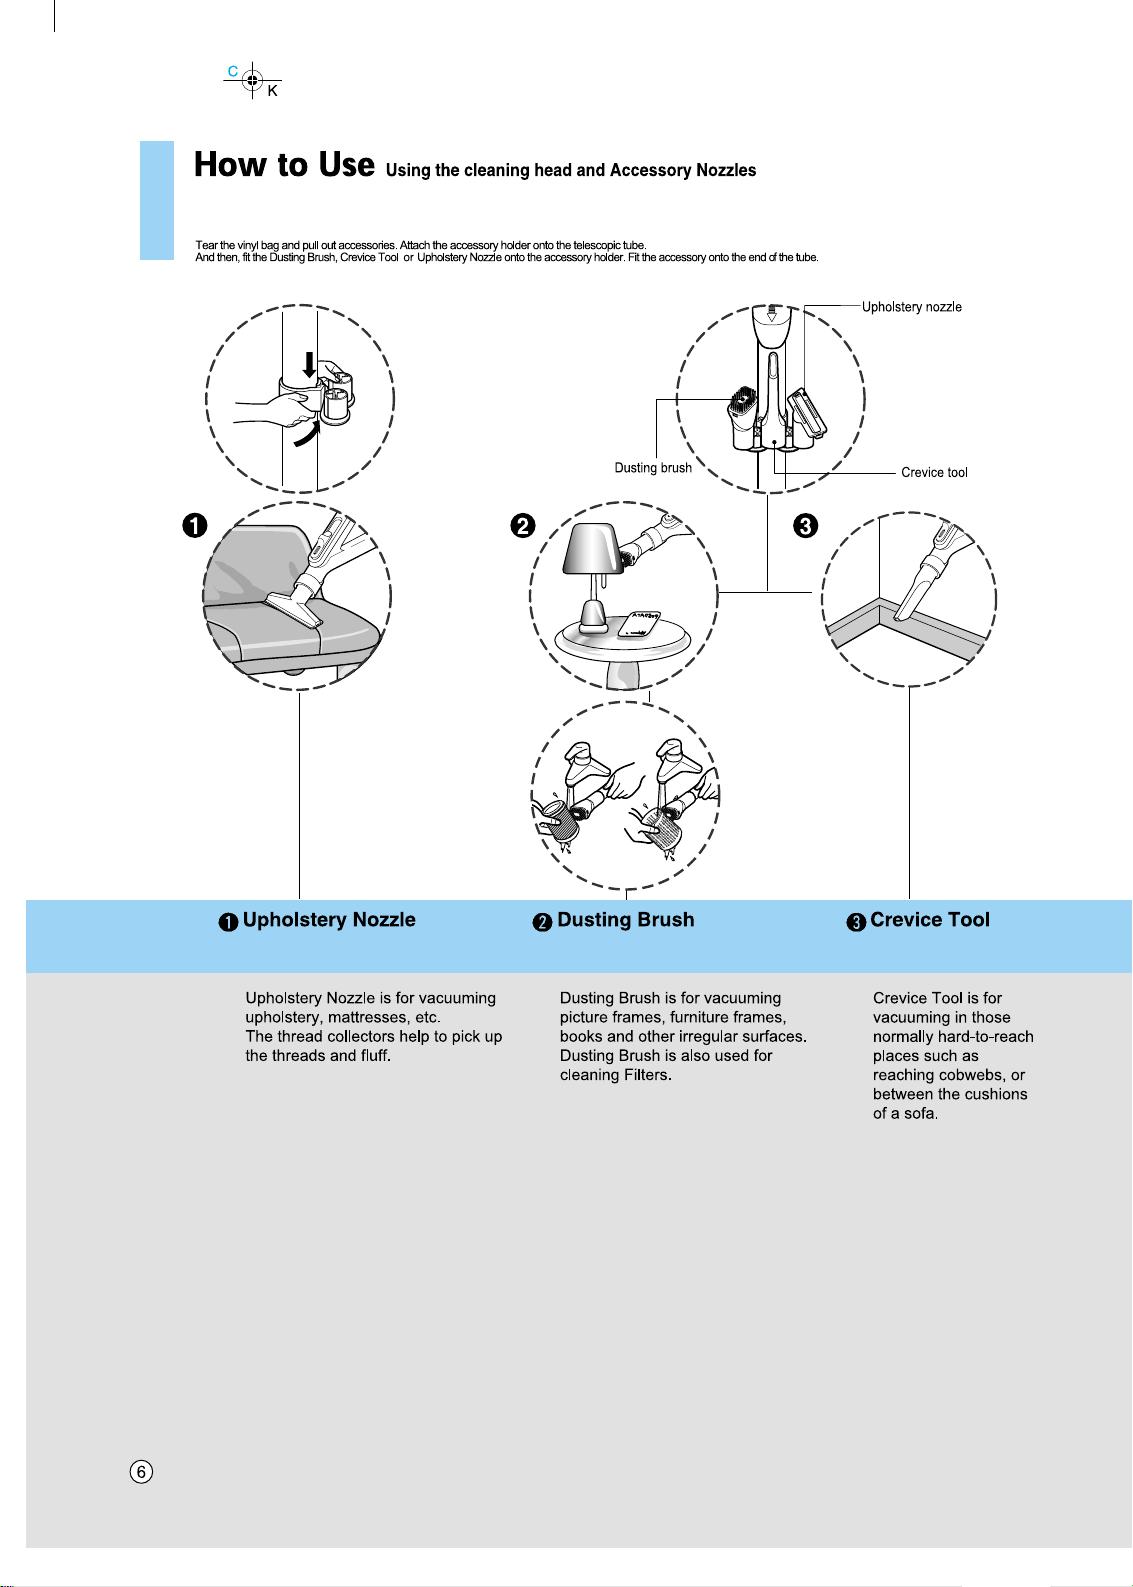
Using the cleaning head and Accessory Nozzles..................................................................6
Emptying the Dust Chamber .................................................................................................8
Operating the cleaner............................................................................................................9
Cleaning the Filter ................................................................................................................10
Cleaning the Exhaust Filter ....................................................................................................11
Troubleshooting...................................................................................................................12
Page 4

Safety Information
3
Please read the following information, which contains important instructions for
the use and maintenance of the appliance.
This appliance complies with the following EC Directives: -73/23/EEC,
93/68/EEC-Low Voltage Directive-89/336EEC -EMC Directive.
Do not use the appliance if the power cord is damaged or faulty.
If the power cord is damaged, it must be replaced by an approved LG Electronics Service Centre.
Always switch the vacuum cleaner off before:
Emptying the dust chamber.
Cleaning or changing the filters.
Do not vacuum flammable or explosive substances(liquids or gases).
Do not vacuum hot ash, embers etc. nor sharp objects.
Do not vacuum water or other liquids.
Do not unplug by pulling on cord.
Use only LG's recommended filters.
When you vacuum with an attachment appliance that has a rotating brush roller:
Do not reach into the running brush roller.
The application is not intended for use by young children or infirm persons without supervision.
Thermal protector: This vacuum cleaner has a special thermostat that protects the cleaner in
case of motor overheating. If the cleaner suddenly shuts off, turn off the switch and unplug the
cleaner. Check the cleaner for a possible source of overheating such as a full dust chamber, a blocked
hose or clogged filter. If blockage or obstruction is located, remove and wait at least 30 minutes
before attempting to use the cleaner. After the 30 minutes period, plug the cleaner back in and
turn on the switch. If the cleaner still does not run, please contact your approved LG service centre.
The appliance is not intended for use by young children or infirm persons without supervision.
Young Children should be supervised to ensure that they do not play with appliance.
If the appliance is supplied from a cord extension set or an electrical portable outlet device,
the cord extension set on electrical portable outlet device must be positioned so that it is not subject to splashing
or ingress of moisture.
Page 5
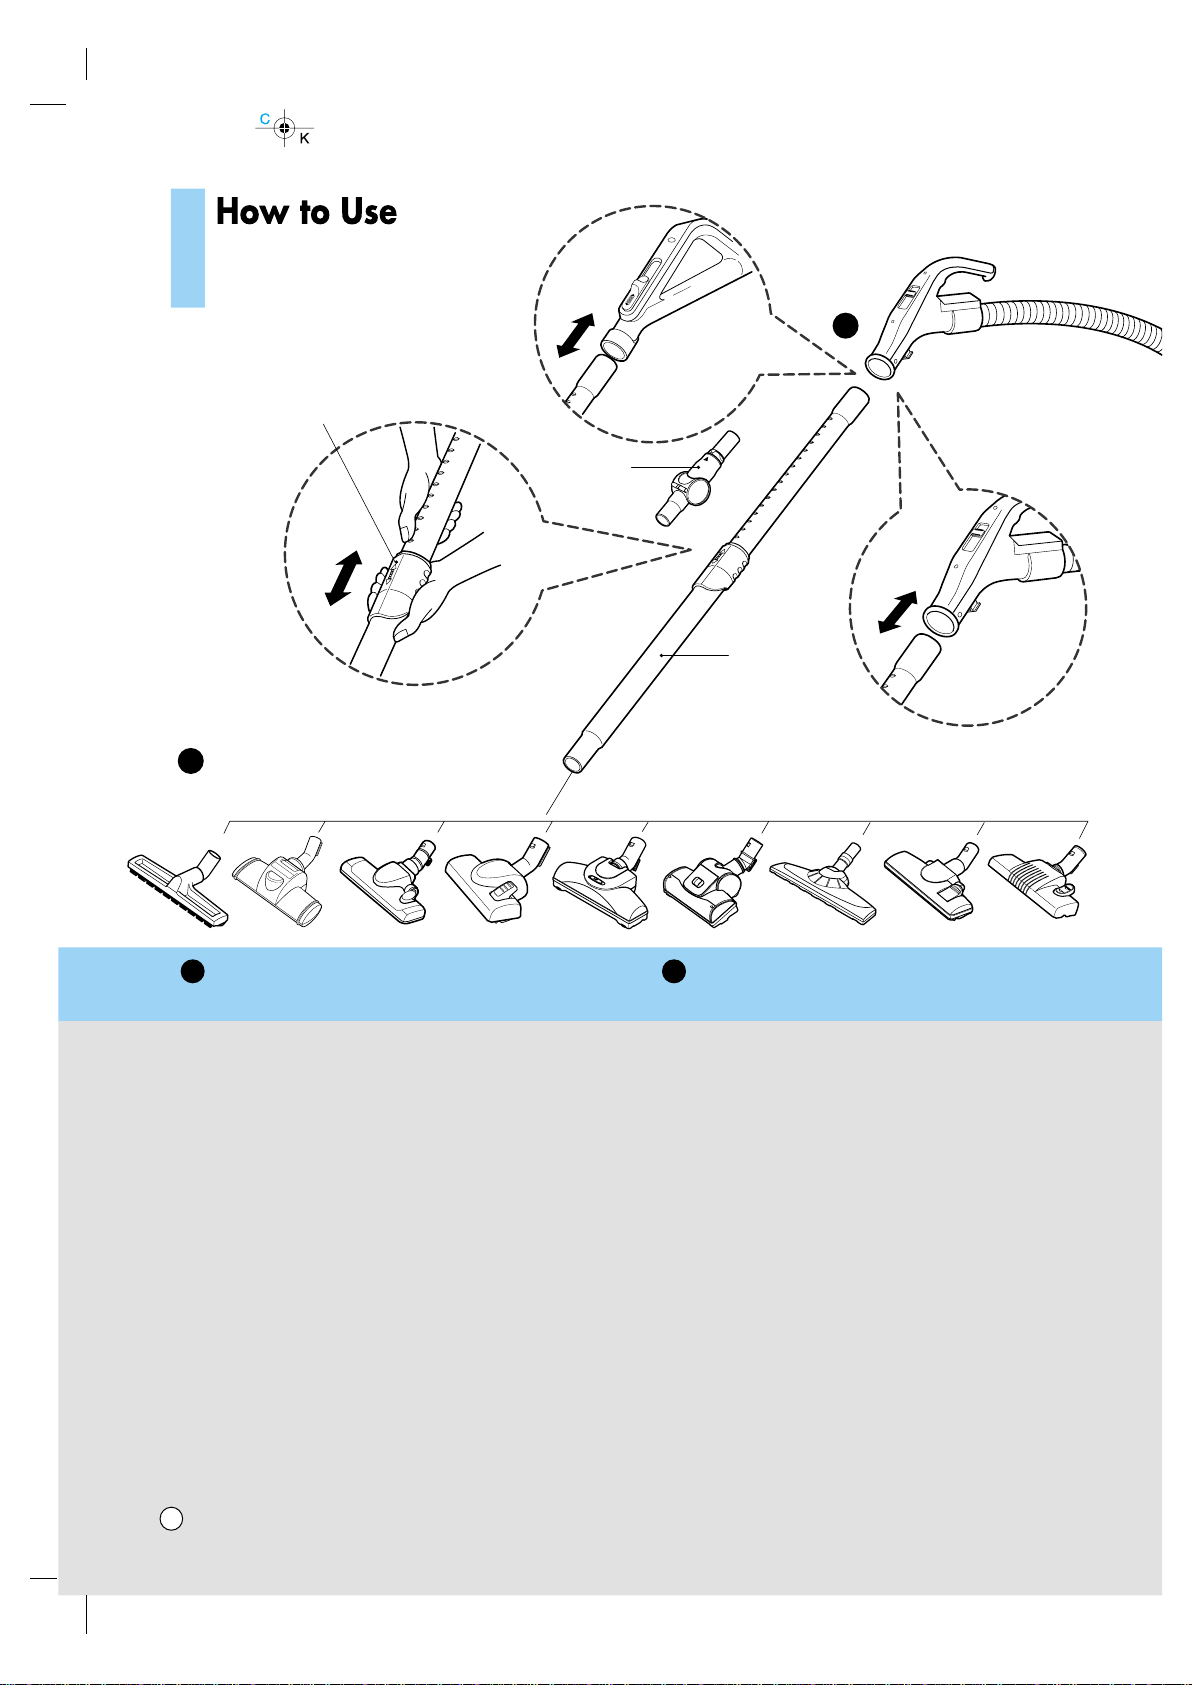
Assembling Cleaner
Fit the large cleaning head into the end of the tube.
Spring latch
1
Elbow
NT**
NE**
Telescopic
tube
2
HT**
HE**
The 2 position head
1
(depending on model)
Push telescoopic tube into
nozzle outlet.
4
Telescopic tube
2
(depending on model)
• Press the spring latch to release.
• Pull out the tube to the desired length.
• Release spring latch to lock the tube in
position.
• Push telescopic tube into hose handle firmly.
Page 6
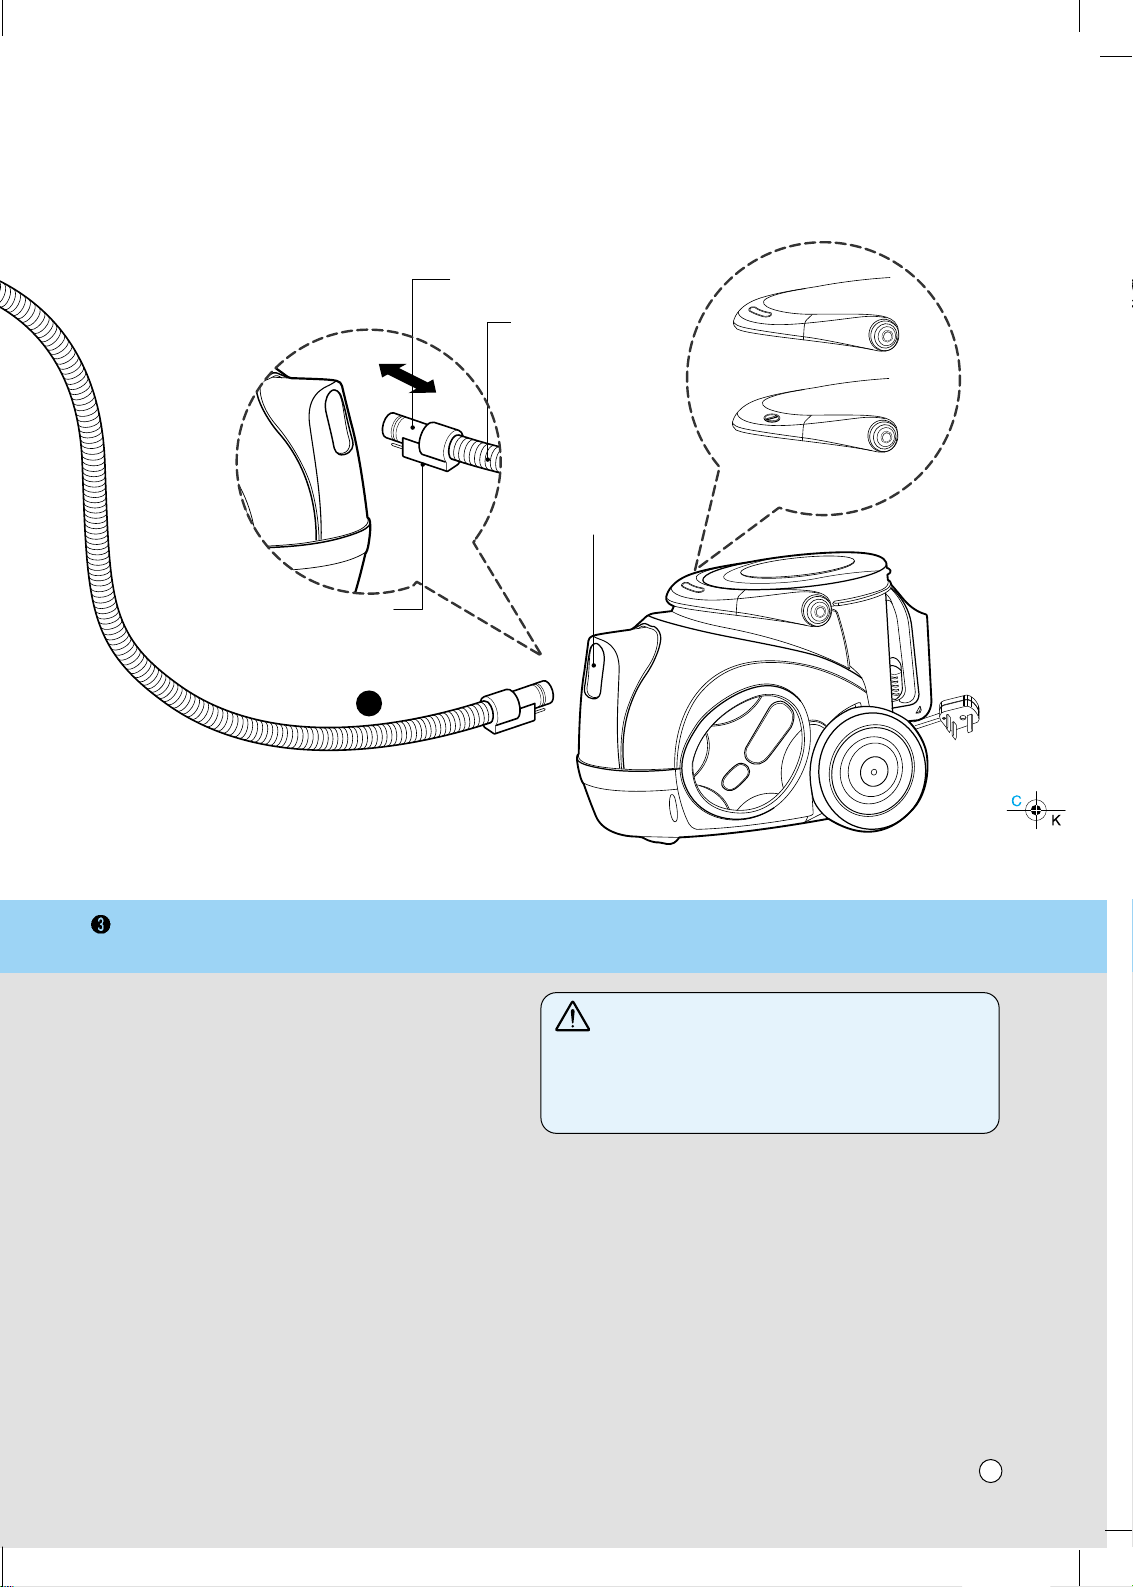
Button
3
Head
Flexible Hose
Attachment Point
HT**
HE**
NT**
NE**
Connecting the flexible hose
• Push the end of the head on the flexible hose
into the attachment point on the vacuum cleaner.
• To remove the flexible hose from the vacuum
cleaner, press on the button situated on the head,
then pull the head out of the vacuum cleaner.
CAUTION
• Suction power may be weakened when insignificant dusts
are sucked. In this case, clean the filter.
• Make the dust box empty if dusts are filled to the maximum
degree and then clean the filter when it becomes 5 times.
5
Page 7
Page 8

Page 9

Page 10

Page 11

Page 12

Page 13

Connect the nozzle to the telescopic tube.
User's Guide for Sani Punch Vacuum Nozzle
(Option)
Features
This nozzle picks up even dust inside through beating.
The bottom part can be separated to be cleaned.
Since the bottom does not stick to the surface, vacuuming is easy.
How to use
Follow the directions below for proper use.
Assembly
12
Use
Set the suction power control switch to MAX POWER before vacuuming.
Depending on the type of bedding, handling may be awkward or it may cause a lot of noise.
If this is the case, adjust the suction power control switch to a lower setting.
If the punch bar does not move, lift the nozzle slightly off the surface.
If it does not move, even after doing this, check if the suction power is too
low or if the nozzle base is clogged with a foreign object.
Page 14

This Sani Punch nozzle is for effective cleaning of beds and blankets to remove mites and dust.
Effective cleaning
Bed & blanket
Bulky & heavy blanket
Light blanket & sheet
When using on the bed
Lay out the blanket and vacuum
it on the bed.
When using on the floor
It is easier to clean a light blanket or sheet by
pushing the nozzle in the direction of the arrow.
To increase cleaning efficiency for light blankets,
lay on top of a bulky blanket and then clean.
13
Page 15

For simple cleaning of the vacuum nozzle, detach the Sani Punch nozzle from the telescopic
tube and attach the crevice tool to vacuum dust.
Since the vibrator inside is composed of precision parts, never disassemble the body.
Be careful not to let foreign objects clog the air suction part on top of the vacuum nozzle.
Since removal of the punch bar may cause performance problems, do not warp or remove it.
Attach the bottom plate properly before using. Without this bottom plate, it may not function.
Since this vacuum nozzle has been made exclusively for cleaning beds, blankets and upholstery,
use it only for these cleaning purposes.
(Using it to clean the floor may result soiling it or a drop in performance, do not use it for such purposes.)
Top Bottom
User's Guide for Sani Punch Vacuum Nozzle
Cleaning Vacuum Nozzle for Bedding (Option)
14
Page 16

Follow the instruction below for through washing.
(Do not soak the entire body of the vacuum nozzle in water, it may cause the vibrator to malfunction)
1 2 3
5 64
Press the button on the
rear side of the vacuum
nozzle to separate the
bottom plate.
Straighten the punch bar
on the lower section.
Wipe all the soiled parts
of the vacuum nozzle
body with a cloth.
Insert the attachment
projections on bottom
plate to the vacuum
nozzle grooves.
Wash the removed bottom
plate with water and dry it.
Push down the
tabs to secure.
15
Page 17

Troubleshooting
What to Do If Your Vacuum Cleaner Does Not Work
• Check that the vacuum cleaner is correctly plugged in correctly and that the electrical socket is working.
What to Do When Suction Performance Decreases
• Turn off the vacuum cleaner and unplug it.
• Check the telecsopic tube, flexible hose and cleaning tool for blockages or obstructions.
• Check that the dust chamber is not full. Empty if necessary.
• Check that the motor filter light is not on. Clean the motor filter, if necessary.
• Check that the exhaust filter is not blocked. Clean the exhaust filter, if necessary.
• If you are still experiencing problems, please contact your local service centre.
To locate your nearest service centre you can visit our web site www.lge.com.au
16
Page 18

Notes
17
Page 19

Notes
18
Page 20

Page 21

P/No.: MFL32930801
 Loading...