

LG TD-C70040E, TD-C70042E, TD-C70043E, TD-C70046E, TD-C70045E Use And Care Manual
...
Use and Care manual
TD-C70040E
TD-C70042E
TD-C70043E
TD-C70045E
TD-C70046E
TD-C70047E
Please read this manual carefully prior to use.
Keep it for future reference.
Write down model name and serial number of your product
Have all these details ready when you call for service.
Condensing Dryer
(2P~25P)
Manuale d’uso e manutenzione
Prima dell’uso leggere attentamente questo manuale
e conservarlo per consultazione futura.
Annotare il nome del modello e il numero di serie del prodotto.
Si consiglia di tenere questi dati a portata di mano, nel caso
occorra contattare l’assistenza.
Asciugabiancheria condensante
(26P~49P)
2
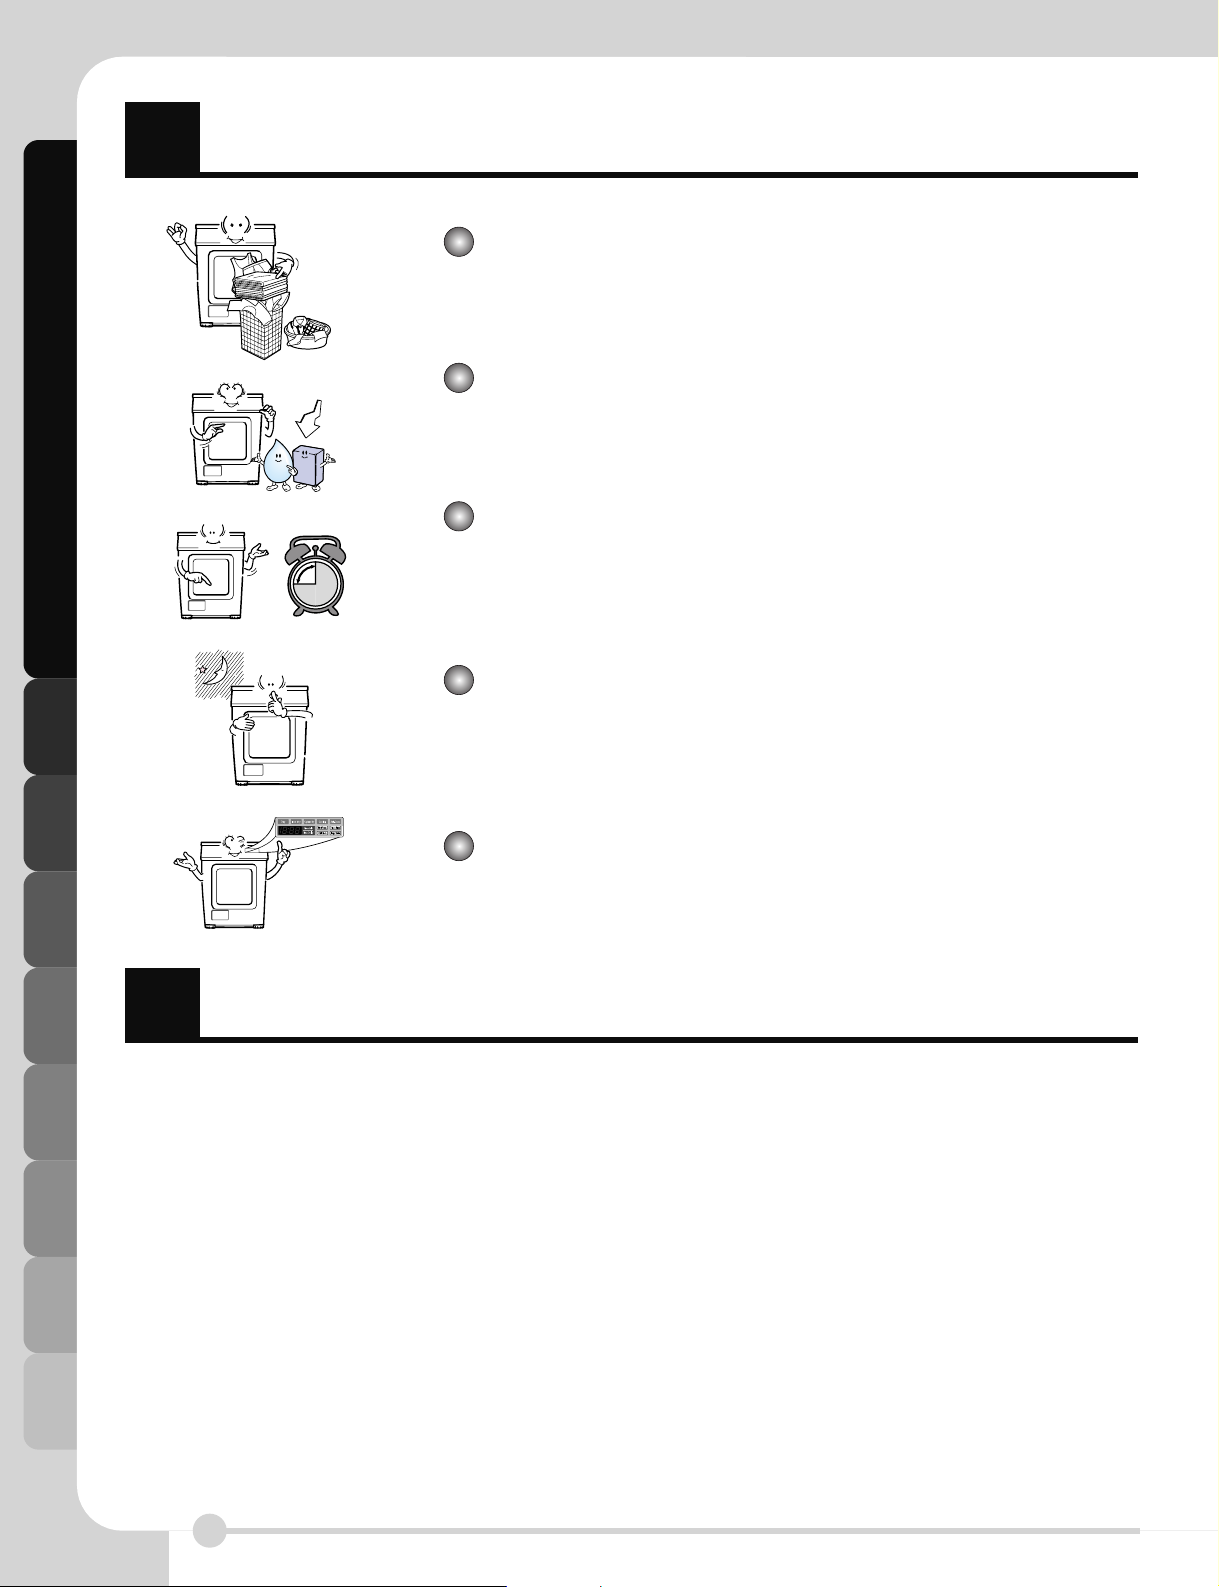
Ultra big Capacity Drum
LG Dryer has 7.0kg capacity which is the ultra big capacity.
Lower Energy Consumption
Energy is saved by Sirocco & Radial fan.
Reduced drying time
Drying time is shortened by efficient air flow mechanism and
optimized heater.
Innovative noise performance
Noise gets reduced by Noise-absorption & screening
technology.
Easy of Use
Wide LED display using electric control.
F
F
eatures
C
F
ontents
Safety Instructions ...................................................................... 3
Installation Instructions .............................................................. 6
Appearance & design ................................................................. 9
Operating your dryer ................................................................ 10
Additional Functions................................................................. 14
Caring for your dryer ................................................................ 15
Additional Tips for smart use .................................................... 20
Troubleshooting ....................................................................... 22
Technical Data ......................................................................... 24
Warranty .................................................................................. 25
Energy
save
Safety Instructions
3
S
F
afety instructions
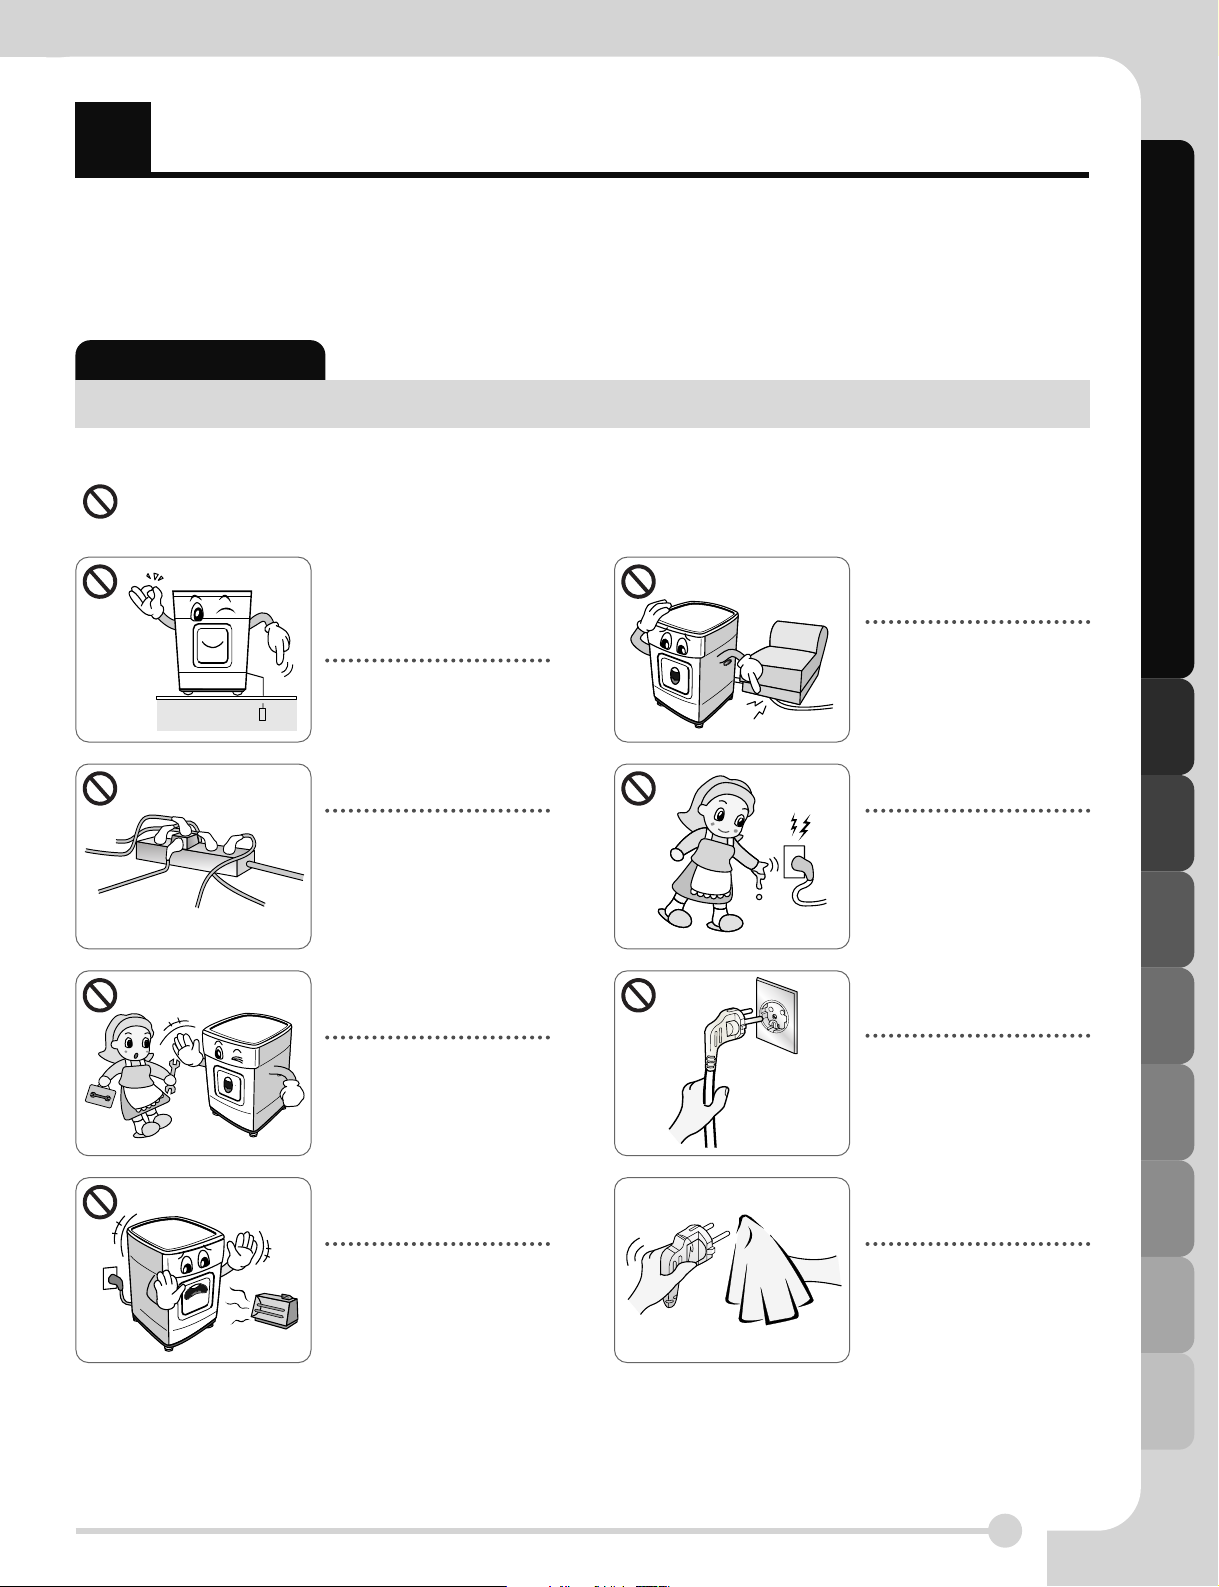
WARNING !
Serious injury or death may occur when not observing the following rules.
• Your dryer is only for 230V.
Before plugging power cord,
make sure cord is grounded
and connected to circuit
breaker.
No grounding may cause
breakdowns or an electric
shocks.
• Do not plug with several other
appliances power cords.
Abnormal heating of outlet
may cause an fire.
• Disassembly or revision
should be conducted by an
experienced service person.
It may cause breakdowns, a
fire and an electric shock.
• Keep the dryer away from
electric stove, candle and any
inflammable Objects.
It may cause melting of some
parts or an fire.
• Do not damage power cord
itself or place heavy objects
on the cord.
Cord damage may cause a
fire and an electric shock.
• Do not grasp power cord or
switch with wet hands.
It may cause an electric
shock.
• Disconnect the power cord by
grasping the plug, not the
cord.
It may cause cutting off
wires so results in hot heat
or a fire.
• Wipe out the dirts and stains
around the power cord and
insert firmly to the socket.
Dirts around it and improper
connection may cause a fire.
To help reduce any risk of electric shock, fire, or other personal or property injury
when using your dryer, please follow basic safety instructions.
Not allowed actions.

Safety Instructions
4
S
F
afety instructions
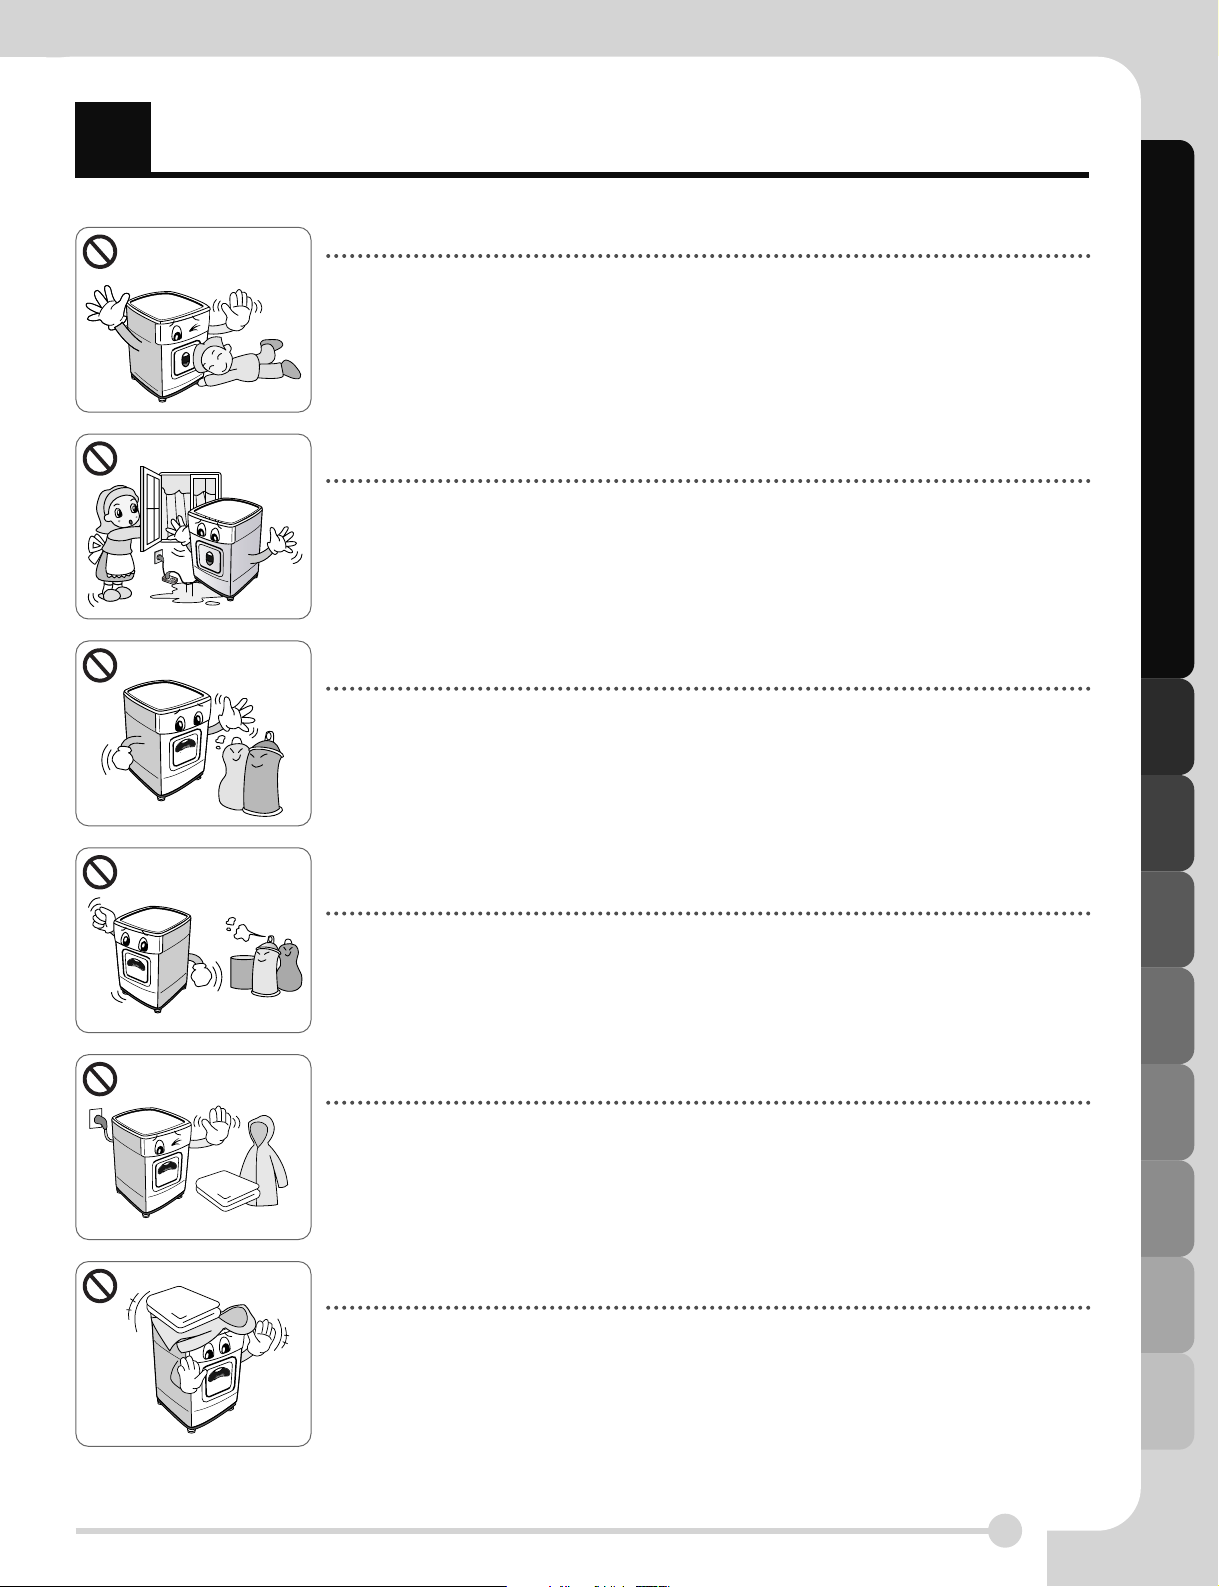
• Do not use damaged power
cord, plug and socket.
It may cause a fire and an
electric shock.
• Do not install or store the
dryer where it will be exposed
to the weather.
It may cause an electric
shock, a fire, malfunction
and deformation.
• Do not use an extension cord
or an adaptor to connect the
power cord.
It may cause an electric
shock and a fire.
• Do not splash water on to the
dryer.
It may cause a fire and an
electric shock.
• Unplug the power cord when
cleaning or not using the
dryer.
Water or dirts may cause an
electric shock.
• Do not allow children or pets
to play on or inside the dryer.
Children may fall off. Pets or
children may be wounded by
rotating parts or suffocated
inside drum.
• Be sure that pets eat off the
dryer.
Pets may die from an
electric shock and
appearance may be
damaged.
• Do not press the button with
sharp edged devices like a
screwdriver or a pin.
It may cause an electric
shock.
• Do not use dry cleaning
detergents for the dryer or
place the laundry with
cleaning detergents.
It may cause an explosion
and a fire.
• Do not place flammable items
near the dryer.
It may cause toxic gas, parts
damage, an explosion or a
fire.
• Keep the dryer away from the
reach of the cockroach and
other insects.
Pets may die from an electric
shock and appearance may
be damaged.
• Before the appliance is
removed from service or
discarded, dissemble the door
cut off the power cord to
prevent the future use.
It may cause cord damage
and breakdowns.
Safety Instructions
5
S
F
afety instructions
• Young children should be supervised to ensure that they do not play with the appliance.
Children may fall off. Pets or children may be wounded by rotating parts or suffocated inside
drum.
• If this appliance is supplled from a cord extension set or an electrical.
Portable outlet device must be positioned so that it is not subject to splashing or ingress of moisture.
It may cause an electric shock, a fire, malfunction and deformation.
• Items that have been Spotted or soaked with vegetable or cooking oil constitute a fire hazard and
should not be placed in a tumble dryer.
It may cause an explosion and a fire.
• Items that have been previously cleaned in washed in soaked in or spotted with petral/gasoline,
dry cleaning solvents or other flammable or explosive substances should not be placed in a tumble
dryer.
It may cause an explosion and a fire.
• Items containing foam rubber ( also known as latex foam ) or similarly textured rubber like materials
should not be dried in a tumble dryer on a heat setting.
Foam rubber materials can, when heated. produce fire by spontaneous combustion.
• Plastic articles such as shower caps or babies waterproof napkin covers should not be placed in a
tumble dryer.
It may cause an explosion and a fire.

Installation Instructions
6
I
F
nstallation Instructions
The following instructions will help guide you through the initial steps of setting up your dryer.
Please note that every section of this manual provides important information regarding the preparation and
use of your dryer, and it is important that you review this entire manual before proceeding with any
installation or use. Be sure to observe all listed warnings and cautions. These installation instructions are
intended for use by qualified installers. Read these installation instructions completely and carefully.
Safety information
Risk of injury
The dryer is very heavy so you shouldn’t try to
lift it alone.
Do not lift the dryer by grasping any of the
protruding parts e.g. or the jog dial or the door.
– they may break off
Risk of tripping
Risk of tripping caused by hoses hanging down or
cables. Ensure there are no loose hoses or cables.
Check the dryer for damage occurred
during Transportation
.
Do not connect the dryer if it has visible signs of damage.
If you are not in confidence, contact your local
agent. Always empty the dryer completely
before transporting it.
Your dryer should not be located near gas hob,
cooker, heater or eye level grill as flames from the
burners could cause damage to your dryer. When
the dryer is fitted under a work surface, allow 15
mm space from each side of the dryer for air to
exit the rear grille. This airflow is critical to
condense the water during drying.
If you use this dryer near or stacked on top of
washing machine, seperate main plugs and
sockets must be used for each appliance.
Do not use 2-way adaptor or extension lead.
You can stack the dryer on top of washing
machine to save the space. A stacking kit is
available from your local shop.
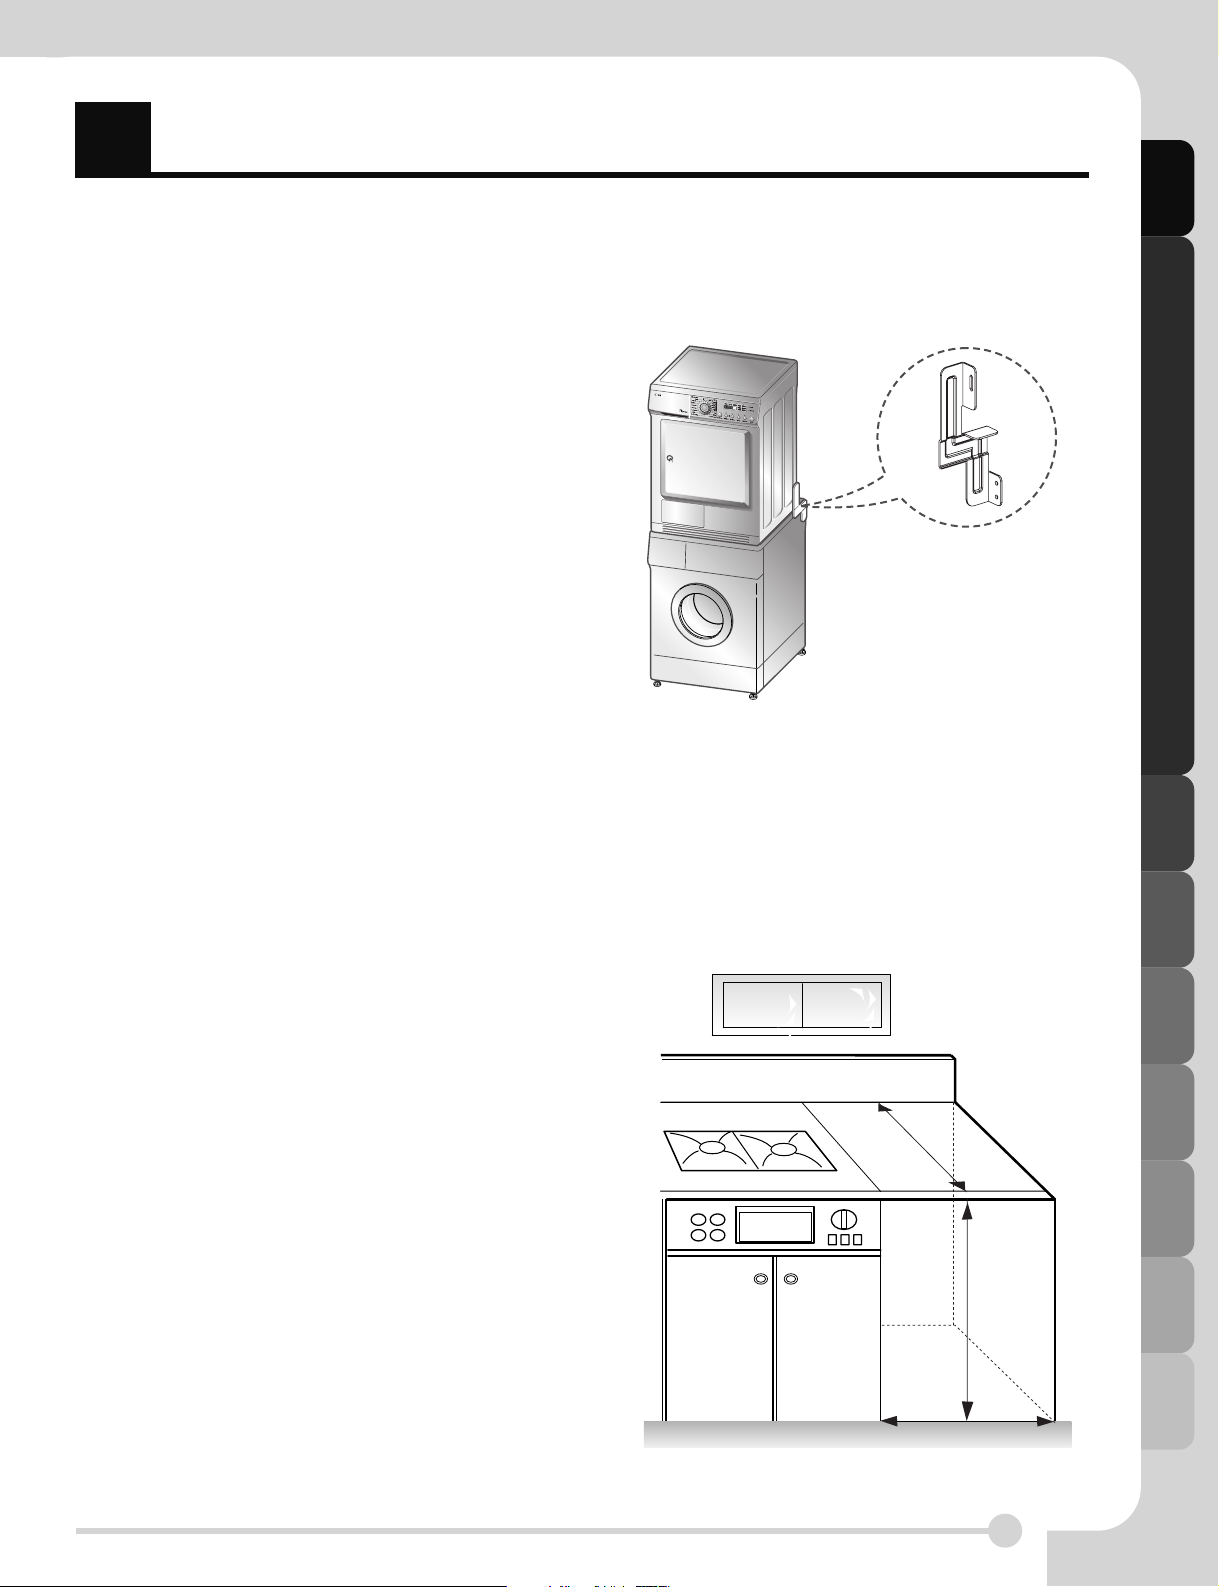
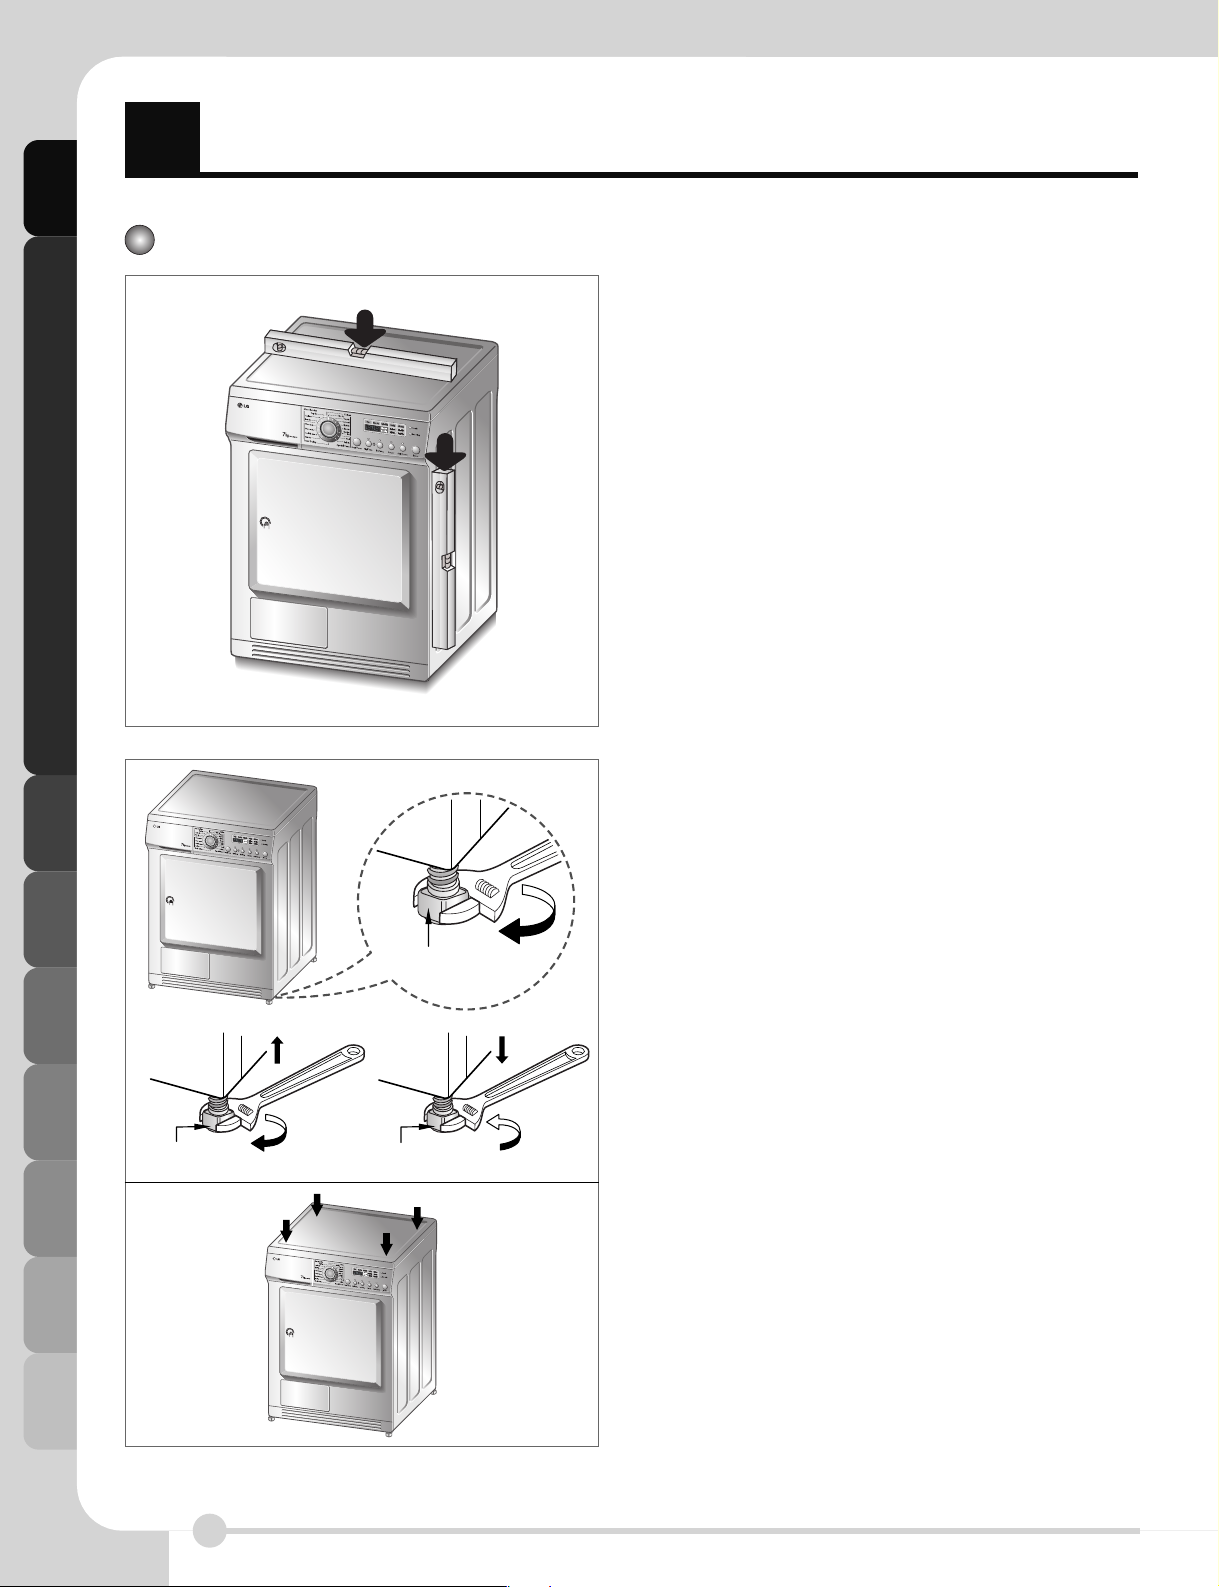
Closet installation instructions
The LG Dryer can be placed on the top of a front loading washing machine. They are sure to be fixed
with stacking kit (See the next page). This installation must be conducted by an experienced installer in
order to secure robust installation of both washer and dryer. If this work is done very carelessly, dryer
may fall off.
More importantly, a certain washer model has matching models for stacking so advice from the
experienced installer is very critical.
WARNING !
Power Cord
If the supply cord is damaged, it must be replaced by the manufacturer, service agents or similarly
qualified persons in order to avoid a hazard.
Power supply should be within reach of a user for the case of unplugging or plugging after installation.
Installation Instructions
7
I
F
nstallation Instructions
GROUNDING INSTRUCTION
This appliance must be grounded. In the event of
malfunction or breakdown, grounding will reduce
the risk of electric shock by providing a path of
least resistance for the electric current.
This appliance is equipped with a cord having an
equipment grounding conductor and a grounding
plug. The plug must be plugged into an appropriate
outlet that is properly installed and grounded in
accordance with all local codes and ordinances.
Additional Grounding Procedure
Some local codes may require a separate ground. In
such cases, the required accessory ground wire,
clamp and screw must be purchased separately.
Condensate Drain
The dryer can drain water without delivering to
water container. Water is directly pumped out of
the dryer.
Stacking Kit
In order to stack this dryer on a LG washing
machine, LG stacking kit is needed.
Built-in Installation
Your dryer can be built-in. You can fit the dryer
under-counter in a kicken cabinet opening.
Opening dimensions are shown as follows.
For your safety, metal cover must be tightly fitted.
This must be placed by an experienced service
person and installed under a continuous worktop.
600
850
595
8
Installation Instructions
I
F
nstallation Instructions
Level the dryer
1. Levelling the dryer is to prevent undesirable
noise and vibration.
When placing your dryer in an solid and level
area where water is not dripping and freezing,
flammable materials are not stored.
2. If the dryer is not properly level, adjust the front
levelling legs up and down as necessary.
Turn them clockwise to raise and
counterclockwise to lower until the dryer is not
wobbling both front-to-back and side-to-side.
❊ Diagonal Check
When pushing down the edges of the washing machine,
the machine should not move up and down at all. (Please,
check both of two directions)
If machine rocks when pushing the machine top plate
diagonally, adjust the feet again.
Adjustable feet
Adjustable feetAdjustable feet
Raise Lower
9
Appearance & design
A
F
ppearance & design
Control Panel
TD-C70040E/45E
Additional function
buttons
• High Temp. / Low Temp.
• Buzzer Off
• Anti-Crease
• Favourite
• Time Delay
LED Display
• Time Display
• Indicator lamps
Control panel
Start/PauseProgram selector
TD-C70042E/43E/46E/47E
Additional function
buttons
• High Temp. / Low Temp.
• Buzzer Off
• Anti-Crease
• Favourite
• Time Delay
LED Display
• Time Display
• Indicator lamps
Start/PauseProgram selector
Water container
Door
Condenser Cover
Air ventilation grill
Operating your dryer
10
O
F
perating your dryer
Cycle Selection Table
Electronic Auto Dry Cycles
Standard
Program
Mixed-Fabric cycles
(Note) press the "Low Temp." button for heat-sensitive items
Bed linen and table linen, tracksuits,
For thick and quilted fabrics which do not need to be ironed. Very Dry
anorak, blankets
shirts, blouses and sportswear For fabrics which do not need to be ironed. Cupboard dry
Trousers, dressers, skirts, blouses For fabrics which do need to be ironed. Iron Dry
Cotton (Whites and coloreds)
(Note) press the "Low Temp." button for heat-sensitive items
Towelling, dressing gowns
For thick and quilted fabrics. Extra Dry
and bed linen
Terry towelling, tea towels, towel,
For thick and quilted fabrics which do not need to be ironed. Very Dry
bed linen
Bath towels, tea towels,
For fabrics which do not need to be ironed. Cupboard dry
underwear, cotton socks
T-shirts, trousers, underwear,
For fabrics which do need to be ironed lightly, not completely. light Dry
work clothes
Bed linen, table linen, towels, T-shirts
For fabrics which do need to be ironed. Iron Dry
Polo shirts and work clothes
Bed linen, table linen, towels For fabrics which do need to be pressed. Machine Iron
Time Cycles for selected length of time
Bath towels, bath robes, dishclothes, Small clothes & pre-dried laundry Normal
Warm (20min.)
Quilted fabrics made of acrylic Normal fabrics using hot temperature for 20minutes
Small clothes & pre-dried laundry
Normal fabrics using hot temperature 40minutes
Warm (40min.)
All fabrics needing freshing, tumbles without heat
Cool Air (20min.)
Cool Air (40min.)
sweater, delicate, fabrics, sportshoes For the fabrics you do not want tumble dry. Rack dry
Special Fabrics
Wool For wool fabrics. Wool
Silk, Women's thin clothes, lingerie For fabrics which are heat-sensitive like synthetic fabrics. Delicates
CAUTION !
If the load is less than 1kg, please use "Timed Drying Course"
Your wool should be used in Wool program and heat-sensitive fabrics including silk, underwears,
lingerie should be used in delicates courses.
Otherwise, these clothes can cause undesirable drying results.
Operating your dryer
11
O
F
perating your dryer
Before first use of the dryer
※ Before you use the dryer for the first time, there are some points that you have to check.
After removing package, you will check the product has no problem and is properly installed.
1. Check the dryer is well balanced by using a leveller. In order to check this, you can see and adjust legs which
are suppose to stay put.
2. Check some major parts such as water container, condenser, control panel and drum.
3. It is needed to operate 5 minutes drying to make sure drum inside gets warm.
4.
In the early use of dryer, please leave it with door opened and power unplugged after operation to get rid of probable smell inside.
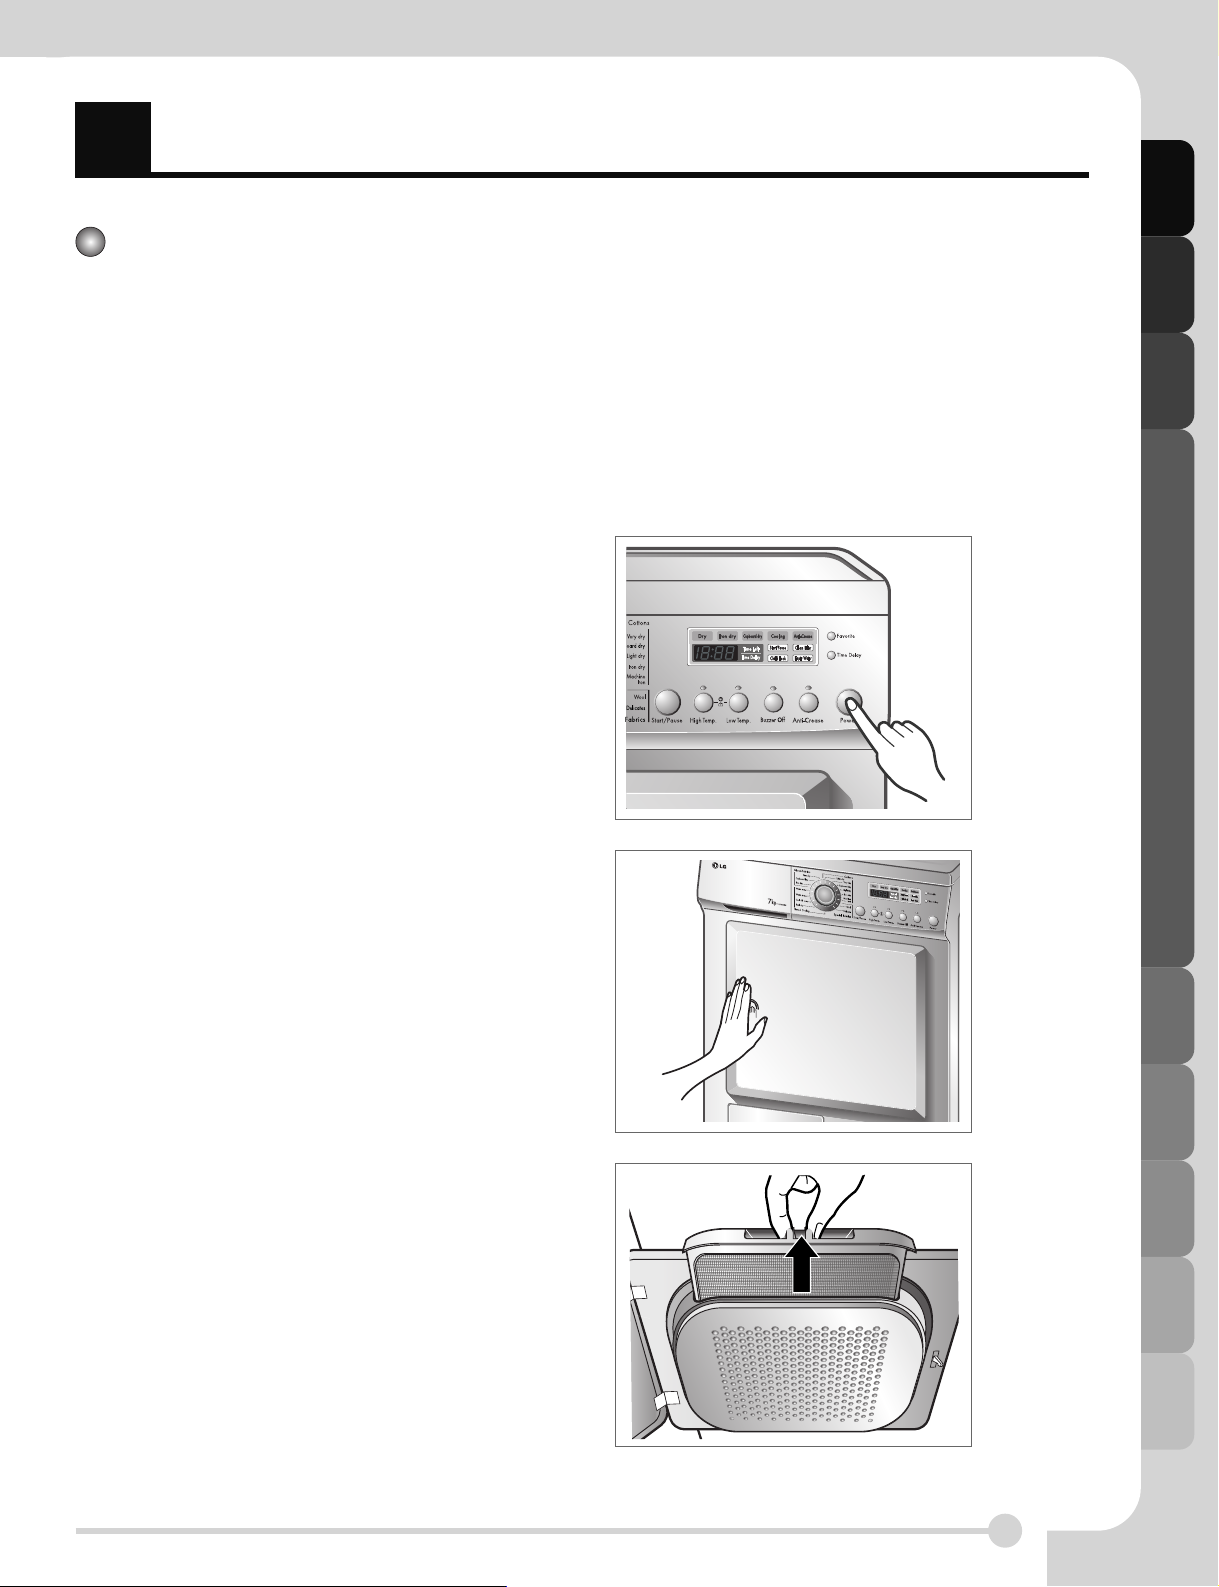
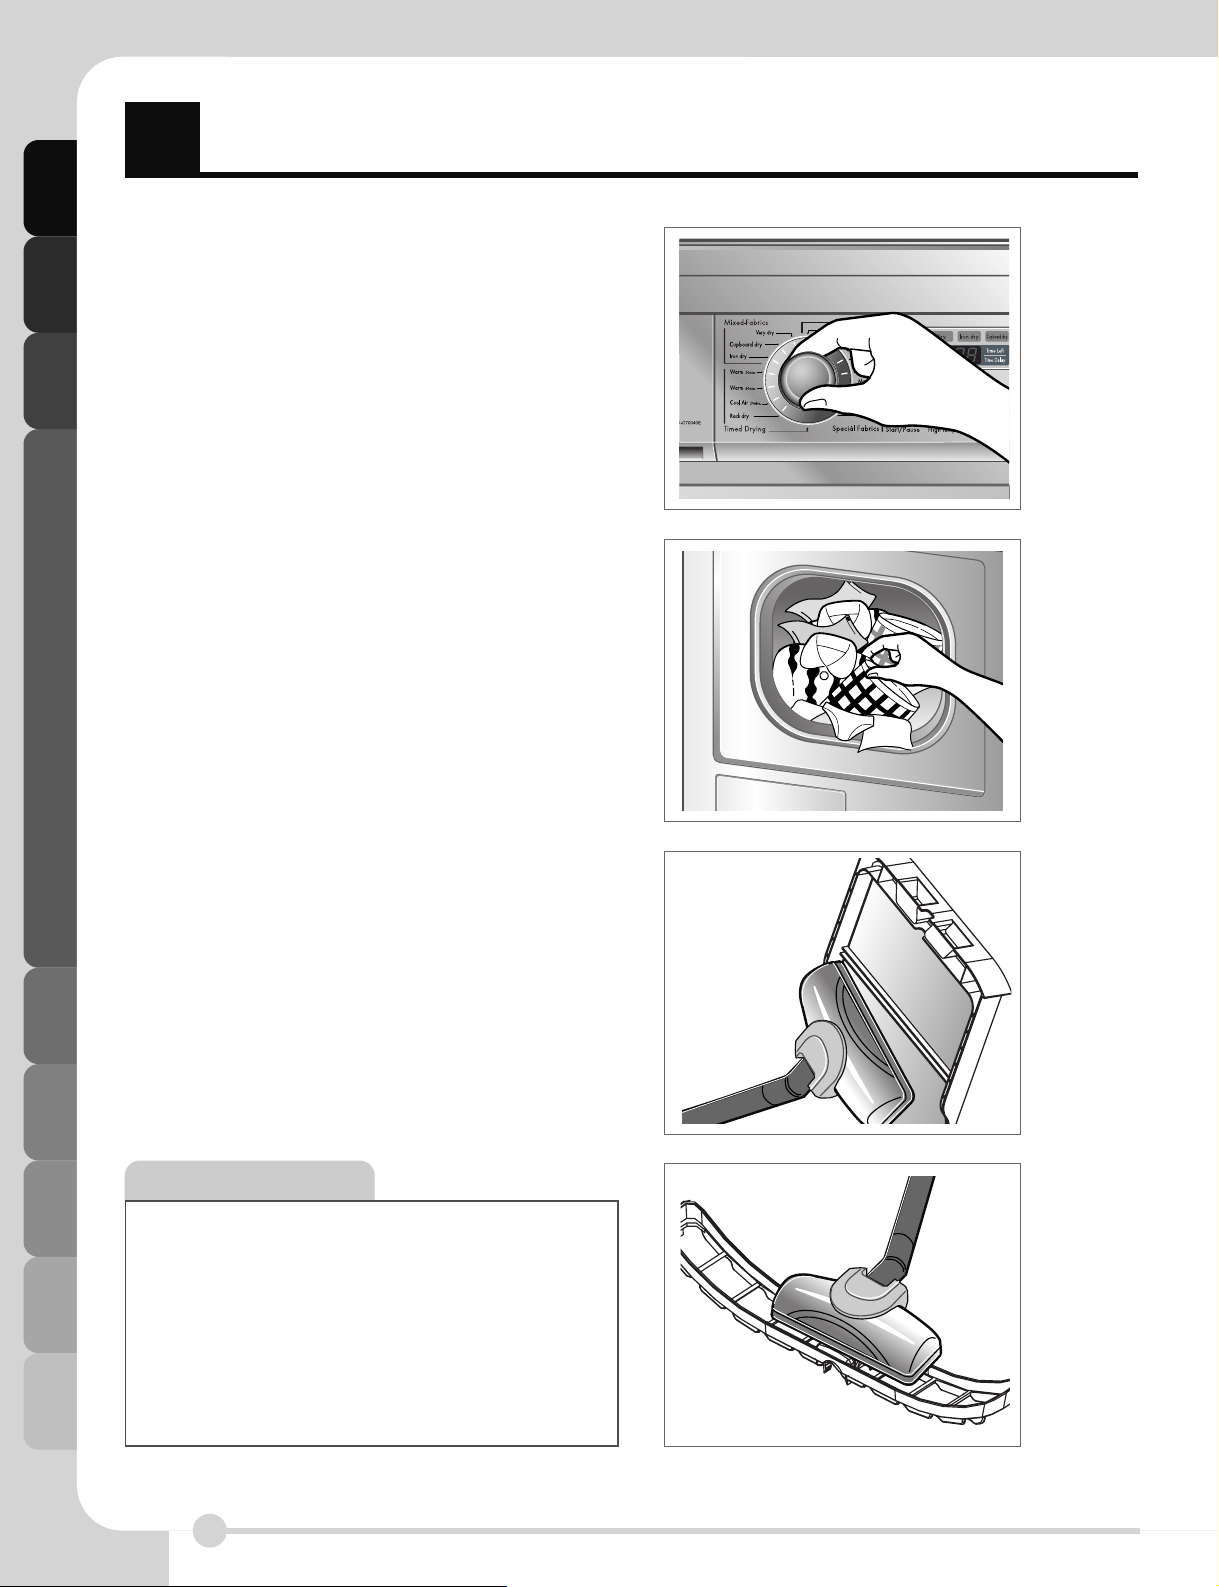
1. Turn power on.
First, press the ‘‘Power’’ button. The indicator
light above the button will become illuminated
indicating that the machine is all set to run.
2. Open the door.
3. Check the lint filter, water
container and condenser.
The lint filter near the door, should be emptied
after or before drying operation.
Open the door and check if lint filter is cleaned.
If not, please clean it referring to page 15.
Water container and condenser are also
checked to be emptied and cleaned for better
drying result.
4. Place laundry into the drum after
sorting.
The clothes should be sorted by its fabric type
and dryness level and all the strings and belts of
clothes should be well tied and fixed before
being put into the drum.
It is desired that you push laundry all the way
back to keep it away from the door seal.
If not, door seal and clothes may be damaged.
Turn on.
Open the
Door.
Check the
lint filter.
Operating your dryer
12
O
F
perating your dryer
5. Close the Door.
Before you close the door, make sure fabrics are well
placed inside and that foreign objects, especially
flammable ones, are not caught around door.
6.
Select the Drying Cycle you want.
You can choose a cycle by turning the program control
knob until the required program reaches to its indicator.
If you only press Start/Pause button without choosing any
cycle, the dryer will proceed with the Cupboard program.
[Please refer to following Cycle Selection table (page 10) for
the detailed information]
7 . Press the Start button.
You can hear drum rotating.
8.
After operation is completed, open
the door and remove the laundry.
Careful! the drum inside could be still hot.
(Operation time varies depending on your cycle
selection or options.)
9. Clean the Lint Filters and
empty water container.
The lint filter should be cleaned after each load.
10. Turn off the Dryer.
Press the ‘‘Power’’ button.
Select the
desired
Cycle.
Take out
the laundry.
Clean the
door lint
filter.
Clean the
lower lint
filter.
CAUTION !
- Be careful of the fact that filter should not be
torn when using a vaccum cleaner. If there
is a little residue buildup on filter, you can
scrub lint screen with the brush to remove.
- If you want to open the door while dryer is
operating, please press the Start/Pause
button first, wait until drum completely stops
and then open the door.
O
perating your dryer
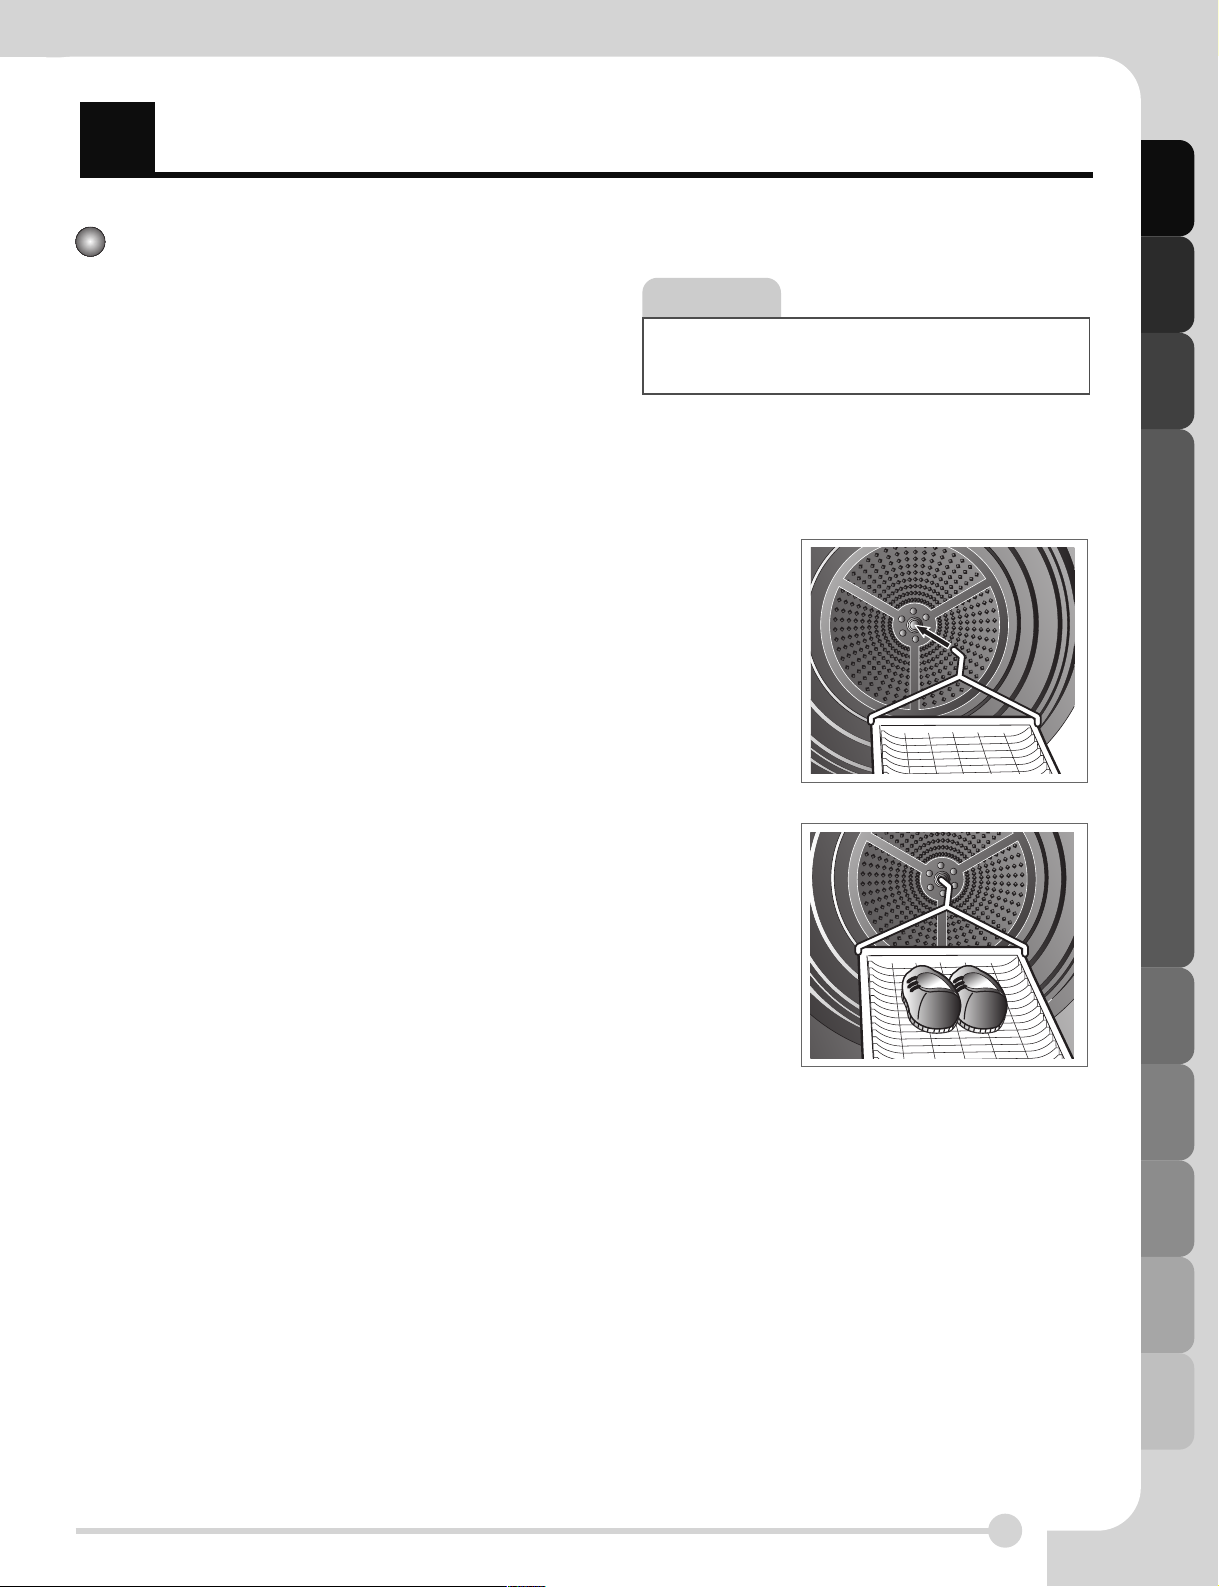
Rack Dry
※ Apply models : TD-C70040E/45E
The dryer Rack is placed inside the dryer like the picture.
Remove and discard packing material before use,
The Rack Dry is designed for use with items that
you do not want to tumble dry including sweaters and
delicate fabrics.
To use the Rack Dry :
F
NOTE
Check the lint filter and remove any lint
accumulated from items dried on the Rack.
1. Open the door.
2. Do not remove the lint screen.
3. Place dryer Rack over the bottom of
the dryer door opening.
Reset the Rack on the dryer back
lodge.
Push down on the frame front to
secure over lint screen.
4. Place wet items on top of the Rack.
Allow space around items for air to
circulate.
The Rack does not move, but the
drum will rotate.
5. Close the door.
1. Insert wire
edge to the
drum centre.
2. Place delicate
fabrics or
sportshoes.
Operating your dryer
6. Select Rack Dry.
13

Additional Functions
14
TD-C70040E/45E
TD-C70042E/43E/46E/47E
A
F
dditional Functions
High Temp. / Low Temp.
These are functioning to shorten or lengthen the
cycle time by increasing or decreasing
temperature.
Buzzer Off
This is about buzzer sound on/off.
After power is on and you select cycle, buzzer will
sound when you press a certain button on the
panel.
If you don’t like to hear that sound, just press
Buzzer Off button. The Buzzer is then turned -off.
Anti-Crease
Anti-Crease is functioning to prevent creases and
rumples that are formed when the laundry is not
unloaded promptly at the end of drying cycle. In
this function, the dryer repeatedly runs and
pauses to the cycle end.
If the door is open during Anti-Crease process,
this function is cancelled. But in case of door
open during normal operation without selecting
Anti-Crease, this function will be remembered
and processed.
Favourite
If there is some cycle you would like to make based
on your own drying habit, use “Favourite”.
Once favourite cycle is stored, you can repeatedly
use next time before changing the stored setting.
For instance, you turn power on and select Extra Dry
in Cotton Cycle and Low temp and Anti-Crease in
series and then lastly press “Favourite” until the dryer
beeps. It’s about 3 seconds. That’s all you have to do.
The next time, when turning the dryer on and
pressing “Favourite” you can see the above options
you select displays on the panel.
Time Delay
You can use the Time Delay function to delay the
finishing time of drying cycle.
Maximum Time Delay is 19 hours.
1. Turn the dryer on
2. Select cycle
3. Set time delay hour
4. Press Start/Pause button
Child Lock
For the safety of your children, press High Temp.
and Low Temp. buttons at the same time for about 3
seconds. You can check this function by seeing the
dryer display “ ” on LED window.
Caring for your dryer
15
C
F
aring for your dryer
How important Care and cleaning is~
It’s not very difficult to care for your dryer. All you
have to do is to follow the information below.
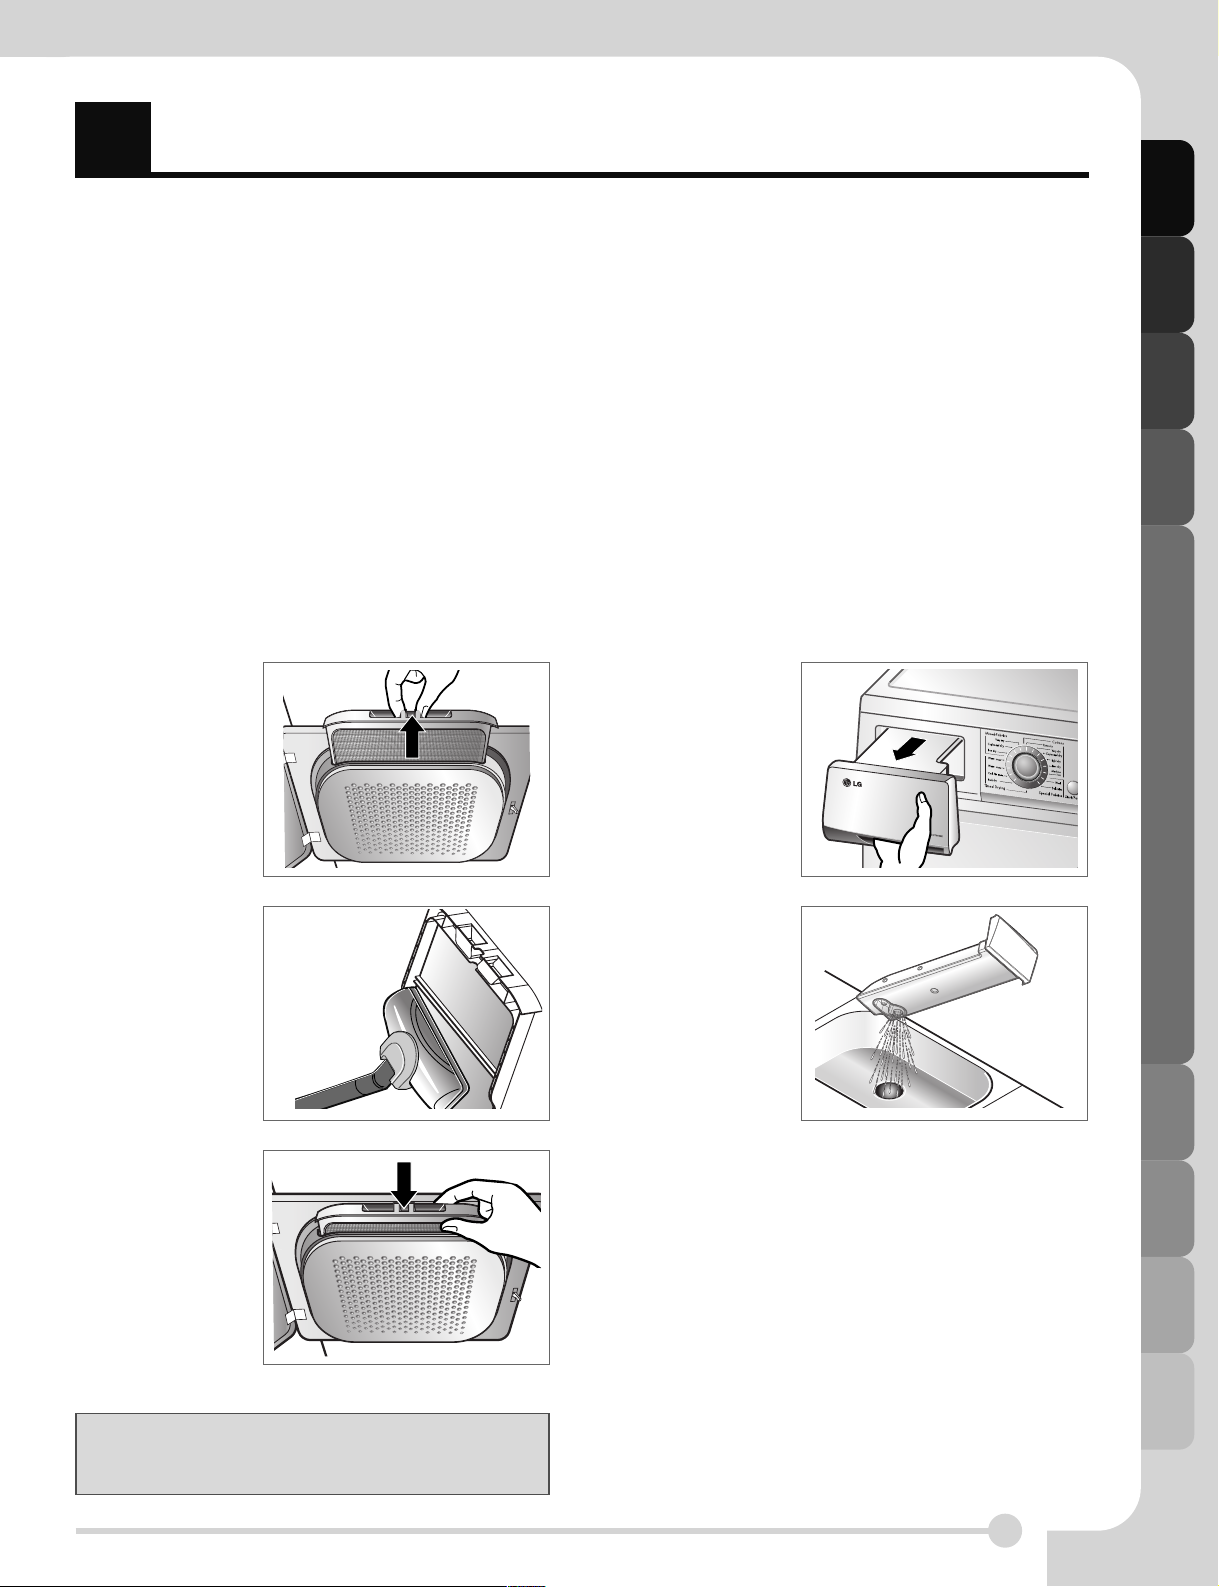
Clean Lint Filter
Clean lint filter after each use and check it before
each use. It should also be cleaned if the ‘‘Clean
Filter’’ light becomes illuminated and the buzzer
sounds during operation of the dryer:
Cleaning or emptying the filter will reduce drying
times and energy consumption and lengthen the
dryer life.
Clean lint filter during a cycle
If “Clean Filter ” indicator lamp flashes during
operation, clean the filter promptly.
1.
Cool the dryer down and follow the mentioned steps.
2. Press the Start/Pause button.
Empty Water container
Condensed water is collected to water container.
You should empty the water container after every
use. Not doing this may result in improper drying
performance.
If water container is full, “Empty Water”
Lamp glows and a buzzer sounds while the dryer is
operating. In this case, water container must be
emptied in 1 hour.
5. Close the door.
1. Open the door.
2. Pull the filter
out.
3. Clean the filter
by using a
vacuum
cleaner or
rinsing under
the tap.
4. Replace the
filter.
- Push the
filter all the
way down to
avoid
Interference
with the door.
1. Draw water
container out.
2. Empty water
container to
sink.
3. Push it back.
4. Press the Start/Pause button.
Wash the lint screen in warm, soapy Water.
Dry thoroughly and replace.
 Loading...