How it Works
Log In / Sign Up
Buy Points
How it Works
FAQ
Contact Us
Questions and Suggestions
Users
LG
Loading...
T
T9003AECT5
T9010TE
T9022PFFC
T9069NEFP
T9085NDKVH
T90BKF21P
T90CME21P
T90DB52HWC
T90DB5HHC
T90FRF21P
T90FS5HHS
T90GD52HWC
T90SJAS1Z
T90SJMB1Z
T90SJSF1Z
T90SS5HHS
T910B
15
T910BG
T910BU
10
T910SU
3
T930B
4
T930BU
9
T930BUAK
T930BUK
6
T930C
T94G1GWHS
T94J72WHST
T9501TECT
T9501TEPT
2
T9503TEDT1
2
T9503TEDT2
T9503TEET1
T9503TEFT
T9503TEFT0
T9503TEFT1
2
T9504TEDT1
T9504TEFT0
T9504TEFT1
T9507TEDT0
T9507TEFT0
T9508TEFTW
T9532AFFSP5
T9532AFPSP5
T9566NEFP
T9566NEFTF
T9566NEHV2
T9566NEHVF
T9568TEELJ
T9569NEFPS
2
T9577TEELJ
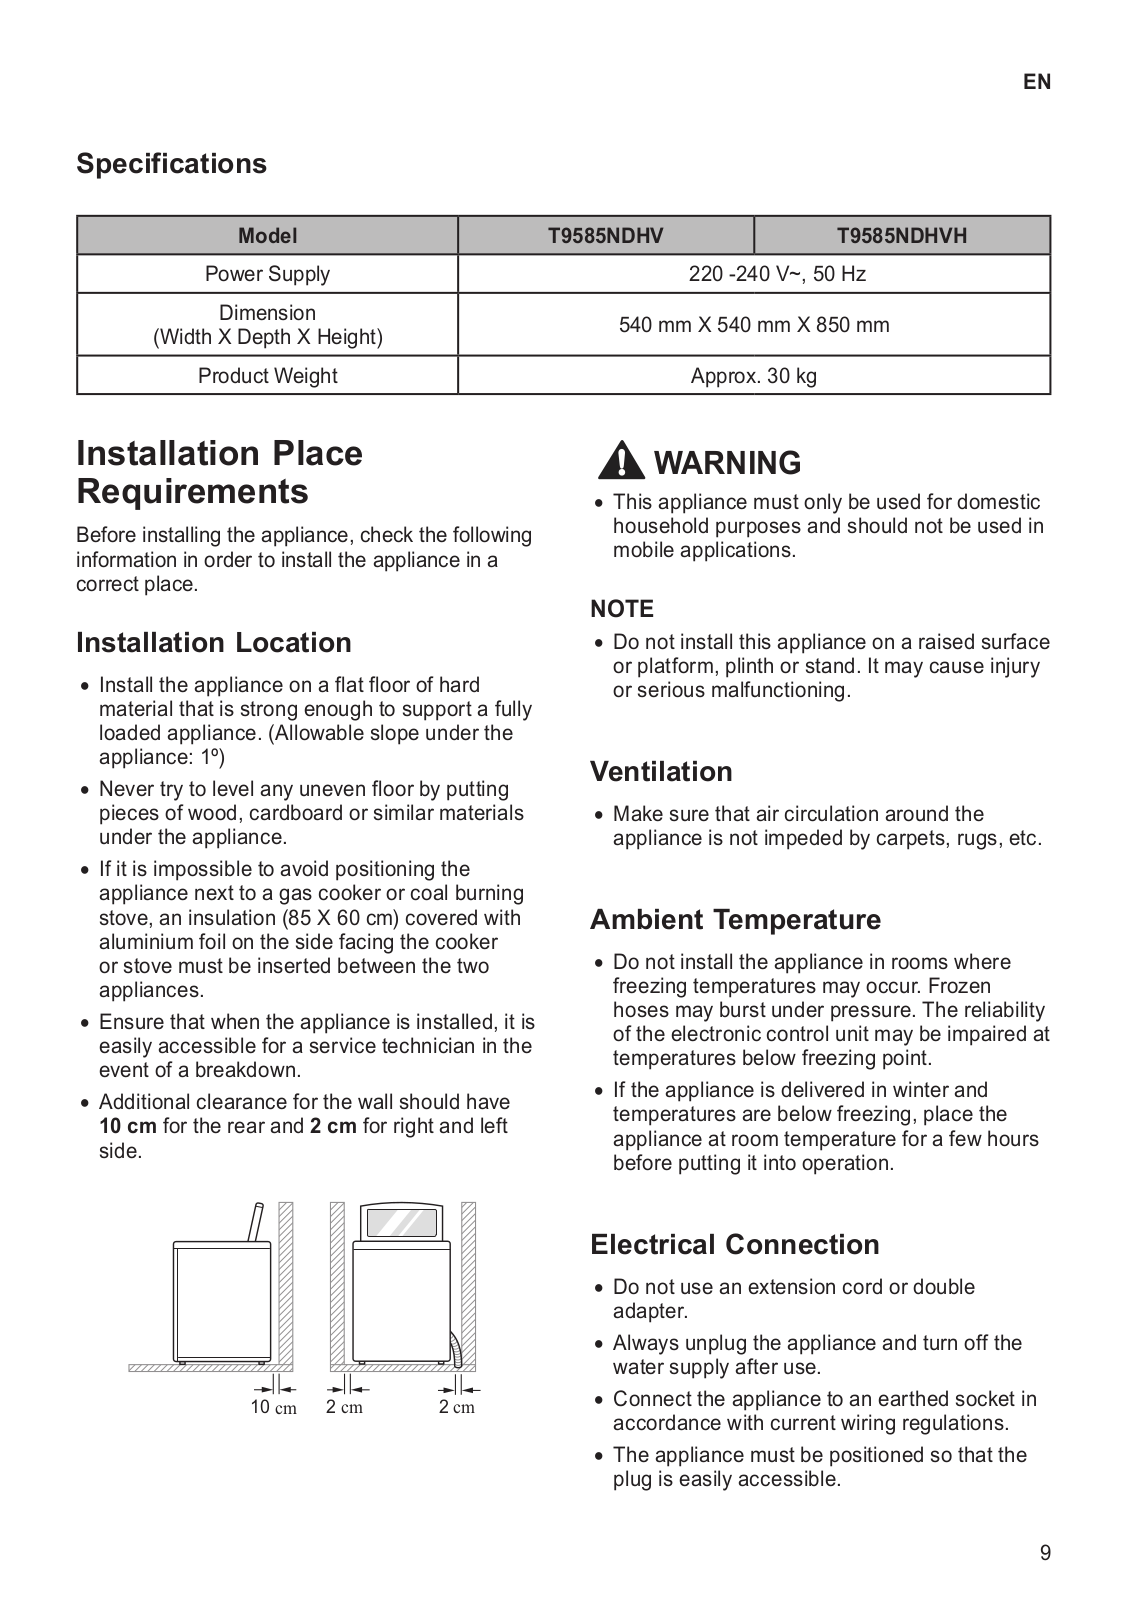
T9585NDHVH
T9585NDKVH
T9588NEHPA
T9588NEHVA
2
T9PETNBEDRS
TA106
12
TA4HEBW
TB100
TB106
12
TB200
TB260
TB307SK1
TBLT20
TBLT20A
TBNC096TSG2
2
TBNC186TSA0
TBNC186TSA1
TBNC602RSA0
TBNC72088T0
TBNC96088T5
TBNH096TSG0
TBNH126TSG0
2
TBNH246HSS0
TBR351ANBRWH
TBT5DNXRLG
TBUC096TSG2
TBUH096TSG0
TC07GQR
TC151
TC170
2
TC170H
2
TC-20LA6G
TC2402NTV
TC2402NTWV
4
TC51
TC71
TC80
TC91
TCAA19NANN
TCC-2010
2
TCC-2510
TCC-2515
TCC-3010
2
TCC-3020
2
TCC-5610
TCC-5620
TCC-5630
TCC-5650
TCC-5710
2
TC PL2110
Loading...
Loading...
Nothing found
T9585NDHVH
Owner's Manual
52 pgs
5.04 Mb
0
Table of contents
Loading...
LG T9585NDHVH Owner's Manual
...
LG Owner's Manual
Download
Specifications and Main Features
Frequently Asked Questions
User Manual
Download
Loading...
+
36
hidden pages
Unhide
You need points to download manuals.
1 point = 1 manual.
You can buy points or you can get point for every manual you upload.
Buy points
Upload your manuals
 Loading...