

LG OLED77W8PPA Owner’s Manual
Safety and Reference
Please read this manual carefully before operating your set and
retain it for future reference.
*MFL70346322*
(1803-REV01)
www.lg.com
Copyright ⓒ 2018 LG Electronics Inc. All Rights Reserved.
ENGLISH
Warning! Safety Instructions
CAUTION
RISK OF ELECTRIC SHOCK
DO NOT OPEN
CAUTION : TO REDUCE THE RISK OF ELECTRIC SHOCK, DO NOT
REMOVE COVER (OR BACK). NO USER-SERVICEABLE PARTS INSIDE.
REFER TO QUALIFIED SERVICE PERSONNEL.
This symbol is intended to alert the user to the presence of
uninsulated “dangerous voltage” within the product’s
enclosure that may be of sucient magnitude to constitute a risk
of electric shock to persons.
This symbol is intended to alert the user to the presence of
important operating and maintenance (servicing)
instructions in the literature accompanying the appliance.
WARNING : TO REDUCE THE RISK OF FIRE AND ELECTRIC SHOCK,
DO NOT EXPOSE THIS PRODUCT TO RAIN OR MOISTURE.
• TO PREVENT THE SPREAD OF FIRE, KEEP CANDLES OR OTHER ITEMS
WITH OPEN FLAMES AWAY FROM THIS PRODUCT AT ALL TIMES.
• Do not place the TV and/or remote control in the following
environments:
- Keep the product away from direct sunlight.
- An area with high humidity such as a bathroom
- Near any heat source such as stoves and other devices that
produce heat.
- Near kitchen counters or humidiers where they can easily be
exposed to steam or oil.
- An area exposed to rain or wind.
- Do not expose to dripping or splashing and do not place objects
lled with liquids, such as vases, cups, etc. on or over the
apparatus (e.g., on shelves above the unit).
- Near ammable objects such as gasoline or candles, or expose
the TV to direct air conditioning.
- Do not install in excessively dusty places.
Otherwise, this may result in re, electric shock, combustion/
explosion, malfunction or product deformation.
• Ventilation
- Install your TV where there is proper ventilation. Do not install in
a conned space such as a bookcase.
- Do not install the product on a carpet or cushion.
- Do not block or cover the product with cloth or other materials
while unit is plugged in.
• Take care not to touch the ventilation openings. When watching
the TV for a long period, the ventilation openings may become hot.
• Protect the power cord from physical or mechanical abuse, such as
being twisted, kinked, pinched, closed in a door, or walked upon.
Pay particular attention to plugs, wall outlets, and the point where
the cord exits the device.
• Do not move the TV whilst the Power cord is plugged in.
• Do not use a damaged or loosely tting power cord.
• Be sure do grasp the plug when unplugging the power cord. Do
not pull on the power cord to unplug the TV.
• Do not connect too many devices to the same AC power outlet as
this could result in re or electric shock.
• Disconnecting the Device from the Main Power
- The power plug is the disconnecting device. In case of an
emergency, the power plug must remain readily accessible.
• Do not let your children climb or cling onto the TV. Otherwise, the
TV may fall over, which may cause serious injury.
• Outdoor Antenna Grounding (Can dier by country):
- If an outdoor antenna is installed, follow the precautions below.
An outdoor antenna system should not be located in the vicinity
of overhead power lines or other electric light or power circuits,
or where it can come in contact with such power lines or circuits
as death or serious injury can occur.
Be sure the antenna system is grounded to provide some
protection against voltage surges and built-up static charges.
Section 810 of the National Electrical Code (NEC) in the U.S.A.
provides information with respect to proper grounding of the
mast and supporting structure, grounding of the lead-in wire
to an antenna discharge unit, size of grounding conductors,
location of antenna discharge unit, connection to grounding
electrodes and requirements for the grounding electrode.
Antenna grounding according to the National Electrical Code,
ANSI/NFPA 70
2

ENGLISH
• Grounding (Except for devices which are not grounded.)
- TV with a three-prong grounded AC plug must be connected to
a three-prong grounded AC outlet. Ensure that you connect the
earth ground wire to prevent possible electric shock.
• Never touch this apparatus or antenna during a lightning storm.
You may be electrocuted.
• Make sure the power cord is connected securely to the TV and wall
socket if not secured damage to the Plug and socket may occur
and in extreme cases a re may break out.
• Do not insert metallic or inammable objects into the product. If a
foreign object is dropped into the product, unplug the power cord
and contact the customer service.
• Do not touch the end of the power cord while it is plugged in. You
may be electrocuted.
• If any of the following occur, unplug the product
immediately and contact your local customer service.
- The product has been damaged.
- If water or another substance enters the product (like an AC
adapter, power cord, or TV).
- If you smell smoke or other odors coming from the TV
- When lightning storms or when unused for long periods of time.
Even the TV is turned o by remote control or button, AC power
source is connected to the unit if not unplugged in.
• Do not use high voltage electrical equipment near the TV (e.g., a
bug zapper). This may result in product malfunction.
• Do not attempt to modify this product in any way without written
authorization from LG Electronics. Accidental re or electric shock
can occur. Contact your local customer service for service or repair.
Unauthorized modication could void the user’s authority to
operate this product.
• Use only an authorized attachments / accessories approved by
LG Electronics. Otherwise, this may result in re, electric shock,
malfunction, or product damage.
• Never disassemble the AC adapter or power cord. This may result in
re or electric shock.
• Handle the adapter carefully to avoid dropping or striking it. An
impact could damage the adapter.
• To reduce the risk of re or electrical shock, do not touch the TV
with wet hands. If the power cord prongs are wet or covered with
dust, dry the power plug completely or wipe dust o.
• Batteries
- Store the accessories (battery, etc.) in a safe location out of the
reach of children.
- Do not short circuit, disassemble, or allow the batteries to
overheat. Do not dispose of batteries in a re. Batteries should
not be exposed to excessive heat.
• Moving
- When moving, make sure the product is turned o, unplugged,
and all cables have been removed. It may take 2 or more people
to carry larger TVs. Do not press or put stress on the front panel
of the TV. Otherwise, this may result in product damage, re
hazard or injury.
• Keep the packing anti-moisture material or vinyl packing out of
the reach of children.
• Do not allow an impact shock, any objects to fall into the product,
and do not drop anything onto the screen.
• Do not press strongly upon the panel with a hand or a sharp
object such as a nail, pencil, or pen, or make a scratch on it. It may
causedamage to screen.
• Cleaning
- When cleaning, unplug the power cord and wipe gently with a
soft/dry cloth. Do not spray water or other liquids directly on the
TV. Do not clean your TV with chemicals including glass cleaner,
any type of air freshener, insecticide, lubricants, wax (car,
industrial), abrasive, thinner, benzene, alcohol etc., which can
damage the product and/or its panel. Otherwise, this may result
in electric shock or product damage.
3
ENGLISH
Preparing
A
A
<
Separate Purchase
• If the TV is turned on for the rst time after it was shipped from the
factory, initialization of the TV may take a few minutes.
• Image shown may dier from your TV.
• Your TV’s OSD (On Screen Display) may dier slightly from that
shown in this manual.
• The available menus and options may dier from the input source
or product model that you are using.
• New features may be added to this TV in the future.
• The device must be easily accessed to a location outlet near the
access. Some devices are not made by turning on / o button,
turning o the device and unplugging the power cord.
• The items supplied with your product may vary depending on the
model.
• Product specications or contents of this manual may be changed
without prior notice due to upgrade of product functions.
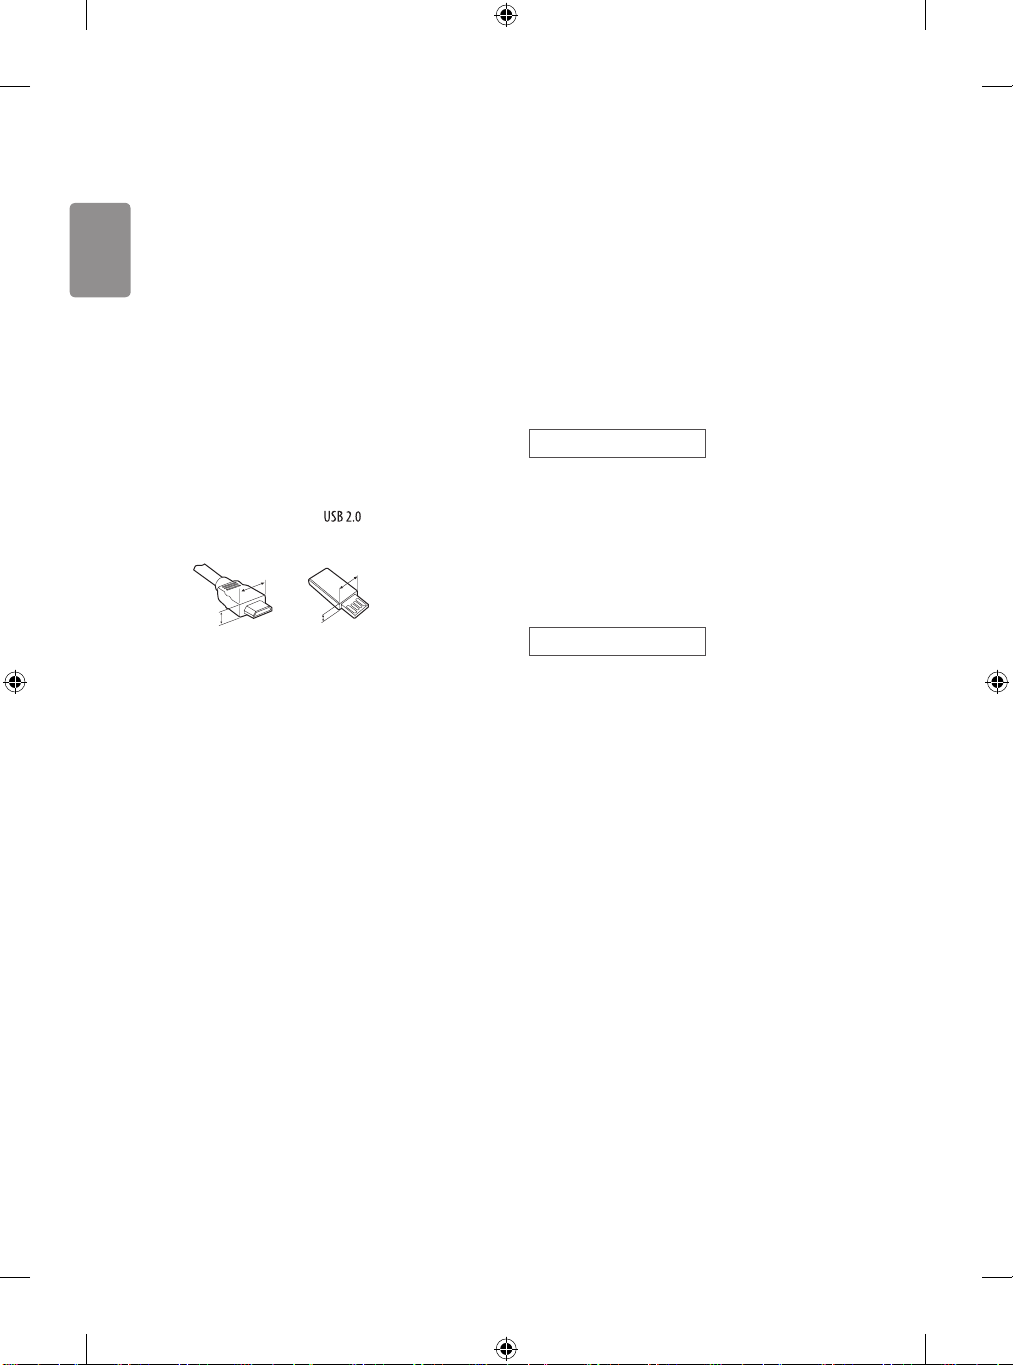
• For an optimal connection, HDMI cables and USB devices should
have bezels less than 10 mm thick and 18 mm width. Use an
extension cable that supports if the USB cable or USB
memory stick does not t into your TV’s USB port.
B
• Use a certied cable with the HDMI logo attached.
• If you do not use a certied HDMI cable, the screen may not display
or a connection error may occur. (Recommended HDMI Cable Types)
- High-Speed HDMI®/TM cable (3 m or less)
- High-Speed HDMI®/TM cable with Ethernet (3 m or less)
B
*A < 10 mm
18 mm
*B
Separate purchase items can be changed or modied for quality
improvement without any notication. Contact your dealer to buy these
items. These devices only work with certain models.
The model name or design may be changed depending on the upgrade
of product functions, manufacturer’s circumstances or policies.
The manufacturer shall not be held responsible for any injuries,
damages, or quality issues that may arise if an item that is not listed
below is purchased separately and used.
Magic Remote Control
(Depending on model)
AN-MR18BA
Check whether your TV model supports Bluetooth in the Wireless
Module Specication to verify whether it can be used with the Magic
Remote.
Companion Box (AV box) Wall
mount
(Depending on model)
W7AWB
4
ENGLISH
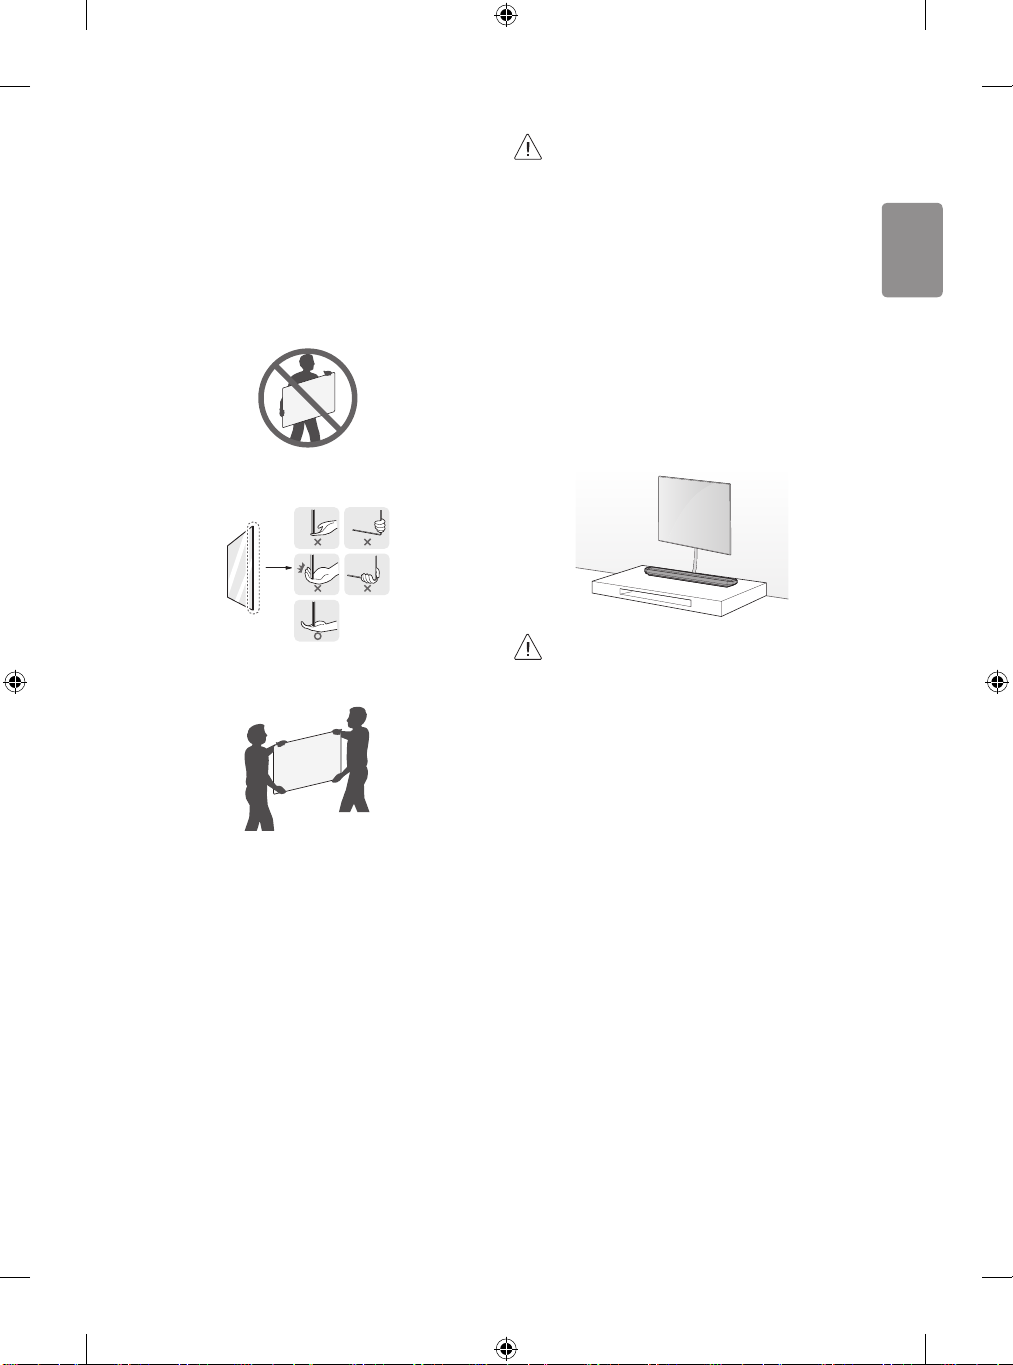
Lifting and moving the TV
Please note the following advice to prevent the TV from being scratched
or damaged and for safe transportation regardless of its type and size.
• It is recommended to move the TV in the box or packing material
that the TV originally came in.
• Before moving or lifting the TV, disconnect the power cord and
all cables.
• When holding the TV, the screen should face away from you to
avoid damage.
• Hold the top and bottom of the TV frame rmly. Make sure not to
hold the transparent part, speaker, or speaker grill area.
• Avoid touching the screen at all times, as this may result in
damage to the screen.
• Do not move the TV by holding the cable holders, as the
cable holders may break, and injuries and damage to the
TV may occur.
• When supported cable is not long enough to connect
TV set with Companion Box (AV Box), you can use an
extension cable.
• Please do not pile the stu up or press strongly the
speaker. This may result in product damage or degradation.
Mounting to the Wall
When you attach the TV to other building materials, please contact
qualied personnel.
• When transporting a large TV, there should be at least 2 people.
• When transporting the TV by hand, hold the TV as shown in the
following illustration.
• When transporting the TV, do not expose the TV to jolts or
excessive vibration.
• When transporting the TV, keep the TV upright, never turn the TV
on its side or tilt towards the left or right.
• Do not apply excessive pressure to cause exing / bending of frame
chassis as it may damage screen.
• When handling the TV, be careful not to damage the protruding
buttons.
• Do not apply foreign substances (oils, lubricants, etc.) to
the screw parts when assembling the product. (Doing so
may damage the product.)
• Do not use any unapproved items to ensure the safety
and product life span.
• Any damage or injuries caused by using unapproved
items are not covered by the manufacturer’s warranty.
• Make sure that the screws are inserted correctly and
fastened securely. (If they are not fastened securely
enough, the TV may tilt forward after being installed.)
Do not use too much force and over tighten the screws;
otherwise screw may be damaged and not tighten
correctly.
5
ENGLISH
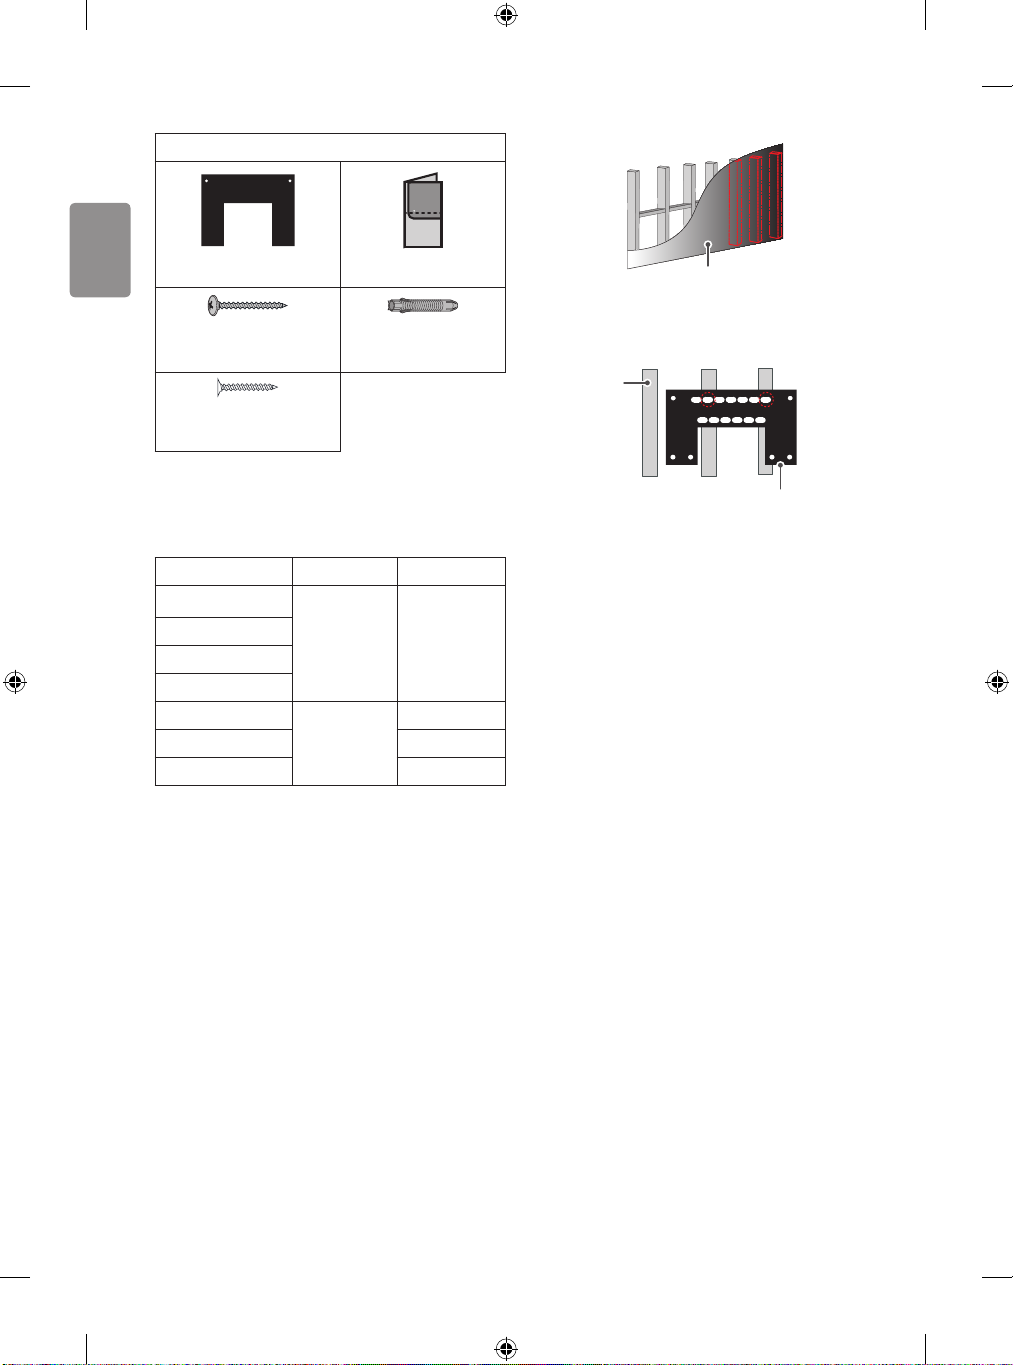
Provided item
Wall mount Punching Guide
Wall mounting screw
Ø5 x L65
Wall mounting screw for wood
Ø3 x L18
• Check the material of the wall and the thickness of the nishing.
• Use the Wall mount anchor for wall material of concrete, light
concrete, strong natural stone, soft natural stone masonry brick
and hallow block that do not crack.
Wall Material Tools Wall Width
Concrete
Brick
Natural stone
Metal Panel
Plywood
EPS Panel Penetrate the wall
Plasterboard + Plywood 30 mm
• When installing on a gypsum board or medium-density berboard
(MDF) wall, fasten the screws to the studs that support the wall. If
there are no studs, check the distance from the inner wall before
installing.
- 30 mm or below: Install directly on the inner wall using a 65
mm screw.
- 30 mm or above: Install using a separate hanger.
Wall mounting
anchor, Wall
mounting screw,
Ø 3/6/8 mm
Drill bit
Wall mounting
screw, Ø 1.8 mm
Drill bit
Wall mounting anchor
70 mm
30 mm
Wall
• When installing the wall mount, check the positions of the wooden
studs using a stud nder. Then, fasten the screws on at least two
separate studs before proceeding.
Stud
Wall mount
• When installing the product on wall material not designated,
install the product so that each location can withstand the pull out
load of 70 kgf (686 N) and shear load of 100 kgf (980 N) or above.
• Use the Ø 8 mm drill bit for concrete and hammer (Impact) drill.
Tools you will need
• Phillips head + driver (manual or motorized), Ø 3/6/8 mm Drill bit,
Level, Stud nder, Drill
6
ENGLISH
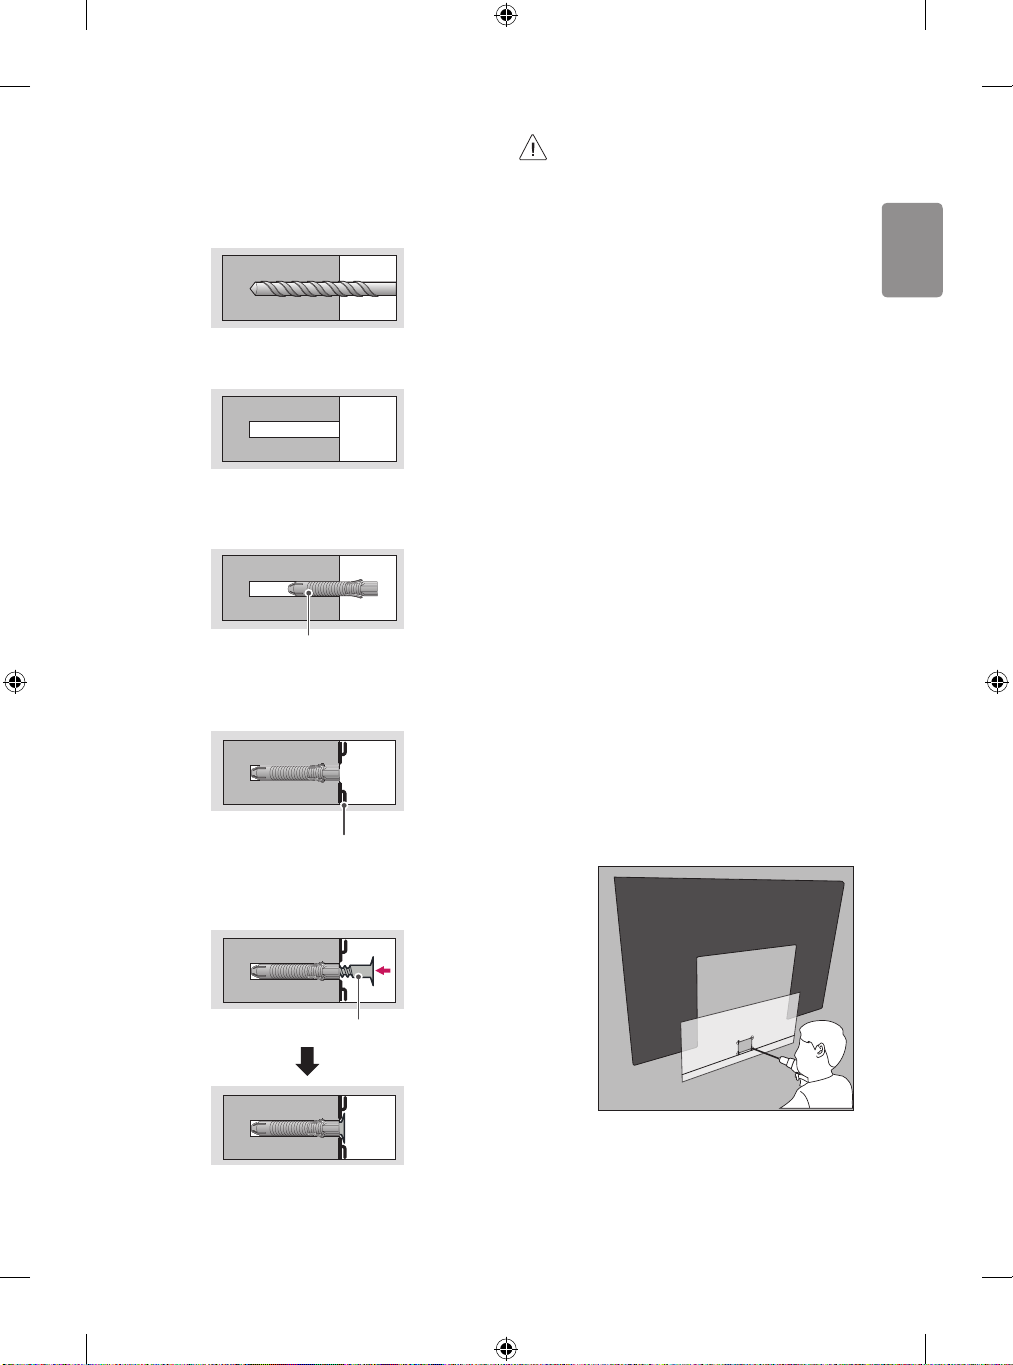
How to attach to masonry walls
Please follow the below direction.
1 Use a drill bit Ø 8 mm to drill a hole for the anchor location within a
depth of 80 mm to 100 mm.
2 Clean the drilled hole.
3 Insert the sealed wall mounting anchor to the hole. (When inserting
the anchor, use a hammer.)
Wall mounting anchor
4 Set the wall mount on the wall by aligning to the location of the
hole. And, set the angle adjusting part to face upward.
Wall mount
5 Align the wall mounting screw to the hole and tighten it. Then,
fasten the screws at torque of 45 kgf/cm to 60 kgf/cm.
• When mounting a TV on the wall, make sure not to
install the TV by hanging the power and signal cables
on the back of the TV.
• Do not install this product on a wall if it could be
exposed to oil or oil mist. This may damage the
product and cause it to fall.
• Make sure that children do not climb on or hang on
the TV.
• Use a platform or cabinet that is strong and large
enough to support the TV securely.
• When installing the product, rst check that the wall is
strong enough. Use the anchors and screws provided.
- If you use anchors and screws that are not
specied by the manufacturer, they may not hold
the weight of the product, causing safety issues.
• Be sure to use the accessory cable provided.
Otherwise, friction between the product and the wall
may cause damage to the connector.
• When drilling holes into the wall, make sure you use
a drill and drill bit with the specied diameter. Ensure
that you also follow the instructions regarding the
depth of the holes.
- Otherwise, the product may be installed
incorrectly and cause safety issues.
• Wear safety gloves when installing the product. Do
not use your bare hands.
- Otherwise, it may cause personal injury.
• If some parts of the wall mount do not touch the wall
after it is attached, use the double-sided tape included
in the accessory box to stick the mount to the wall.
• If some parts of the wall mount do not touch the wall
after using the wall mounting screws for wood, use
the remaining screws.
• Be sure to use only the exclusive wall mounting screws
provided as accessories.
• If you want to connect the TV Cable is connected to
the back panel partition, please use the enclosed
Punching Guide.
Wall mounting screw
7
ENGLISH
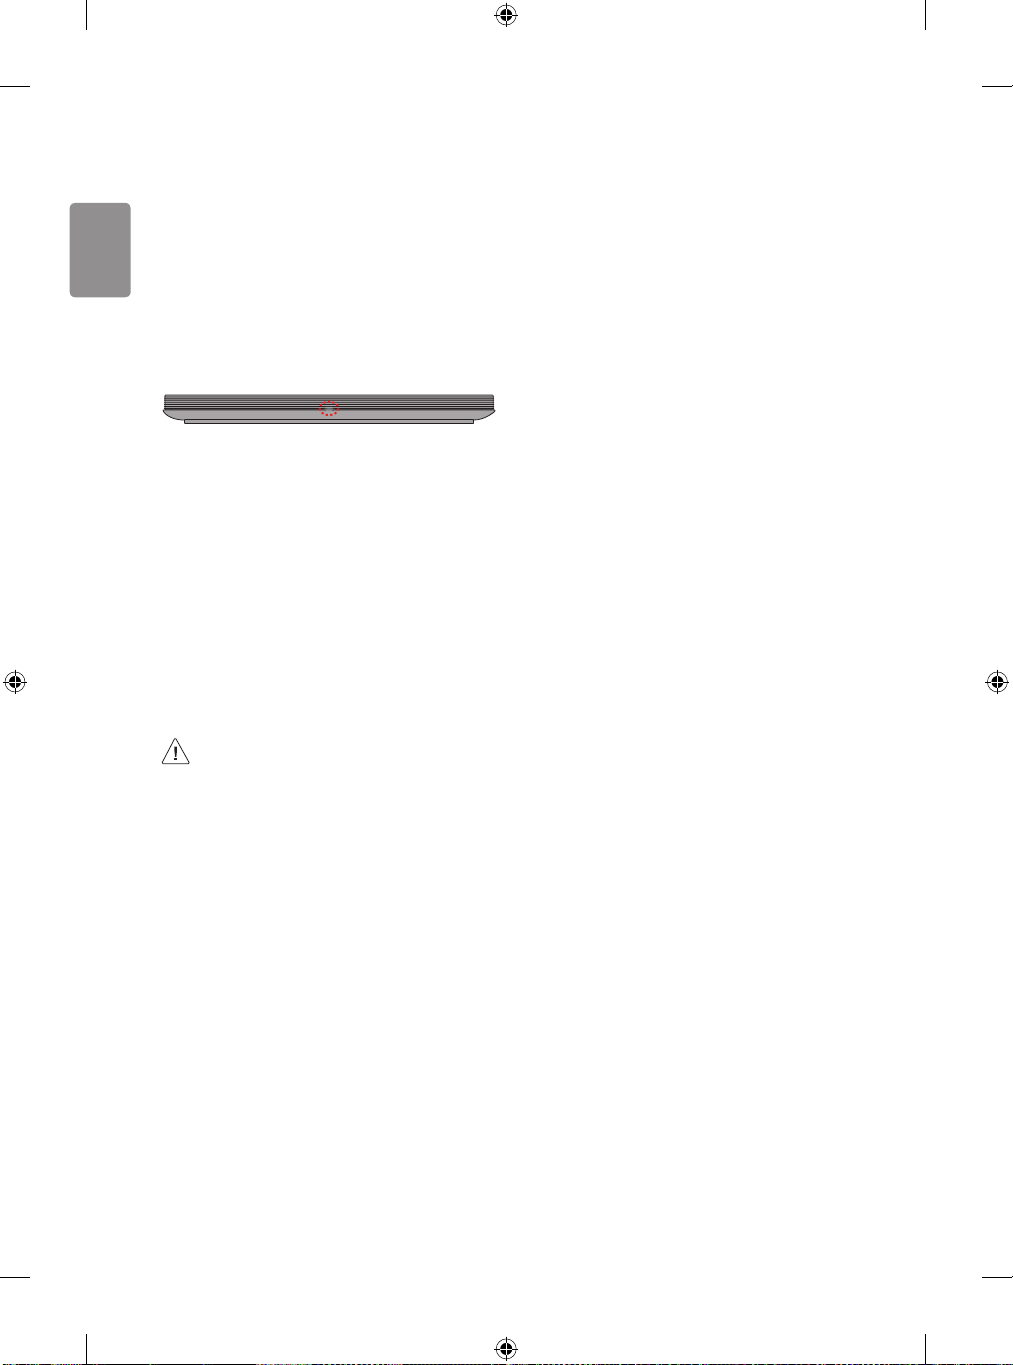
Using the kensington security
system
(Only OLED65W8*)
The Kensington security system connector is located at the rear of
the Companion Box (AV Box). For more information of installation
and using, refer to the manual provided with the Kensington security
system or visit http://www.kensington.com.
Connections
Connect various external devices to the TV and switch input modes to
select an external device. For more information of external device’s
connection, refer to the manual provided with each device.
Antenna/Cable
Connect the TV to a wall antenna socket with an RF cable (75 Ω).
• Use a signal splitter to use more than 2 TVs.
• If the image quality is poor, install a signal amplier properly to
improve the image quality.
• If the image quality is poor with an antenna connected, try to
realign the antenna in the correct direction.
• An antenna cable and converter are not supplied.
• For a location that is not supported with ULTRA HD broadcasting,
this TV cannot receive ULTRA HD broadcasts directly. (Depending
on model)
Other connections
Connect your TV to external devices. For the best picture and audio
quality, connect the external device and the TV with the HDMI cable.
Some separate cable is not provided.
HDMI
• Supported HDMI Audio format :
(Depending on model)
DTS (44.1 kHz, 48 kHz, 88.2 kHz, 96 kHz),
DTS HD (44.1 kHz, 48 kHz, 88.2 kHz, 96 kHz, 176.4 kHz, 192 kHz),
True HD (48 kHz),
Dolby Digital / Dolby Digital Plus (32 kHz, 44.1 kHz, 48 kHz),
PCM (32 kHz, 44.1 kHz, 48 kHz, 96 kHz, 192 kHz)
(Only UHD models)
• ( ) Pic ture Additional Settings
HDMI ULTRA HD Deep Color
- On : Support 4K @ 50/60 Hz (4:4:4, 4:2:2, 4:2:0)
- Off : Support 4K @ 50/60 Hz 8 bit (4:2:0)
If the device connected to Input Port also supports ULTRA HD Deep
Color, your picture may be clearer. However, if the device doesn’t
support it, it may not work properly. In that case, change the TV’s
HDMI ULTRA HD Deep Color setting to o.
USB
Some USB Hubs may not work. If a USB device connected using a USB
Hub is not detected, connect it to the USB port on the TV directly.
External Devices
Available external devices are: Blu-ray player, HD receivers, DVD players,
VCRs, audio systems, USB storage devices, PC, gaming devices, and
other external devices.
• The external device connection may dier from the model.
• Connect external devices to the TV regardless of the order of the
TV port.
• If you record a TV program on a Blu-ray/DVD recorder or VCR, make
sure to connect the TV signal input cable to the TV through a DVD
recorder or VCR. For more information of recording, refer to the
manual provided with the connected device.
• Refer to the external equipment’s manual for operating
instructions.
8
ENGLISH
• If you connect a gaming device to the TV, use the cable supplied
with the gaming device.
• In PC mode, there may be noise associated with the resolution,
vertical pattern, contrast or brightness. If noise is present, change
the PC output to another resolution, change the refresh rate to
another rate or adjust the brightness and contrast on the PICTURE
menu until the picture is clear.
• In PC mode, some resolution settings may not work properly
depending on the graphics card.
• If ULTRA HD content is played on your PC, video or audio may
become disrupted intermittently depending on your PC’s
performance.
• When connecting via a wired LAN, it is recommended to use a CAT
7 cable. (Only when port is provided.)
Remote RS-232C setup
Using Button
You can simply operate the TV functions, using the button.
To obtain the RS-232C external control setup information, please visit
www.lg.com. Download and read the manual.
• Do not drop the product or let it fall over when
connecting external devices. Otherwise, this may result in
injury or damage to the product.
• When connecting external devices such as video game
consoles, make sure the connecting cables are long
enough. Otherwise, the product may fall over, which may
cause injury or damage the product.
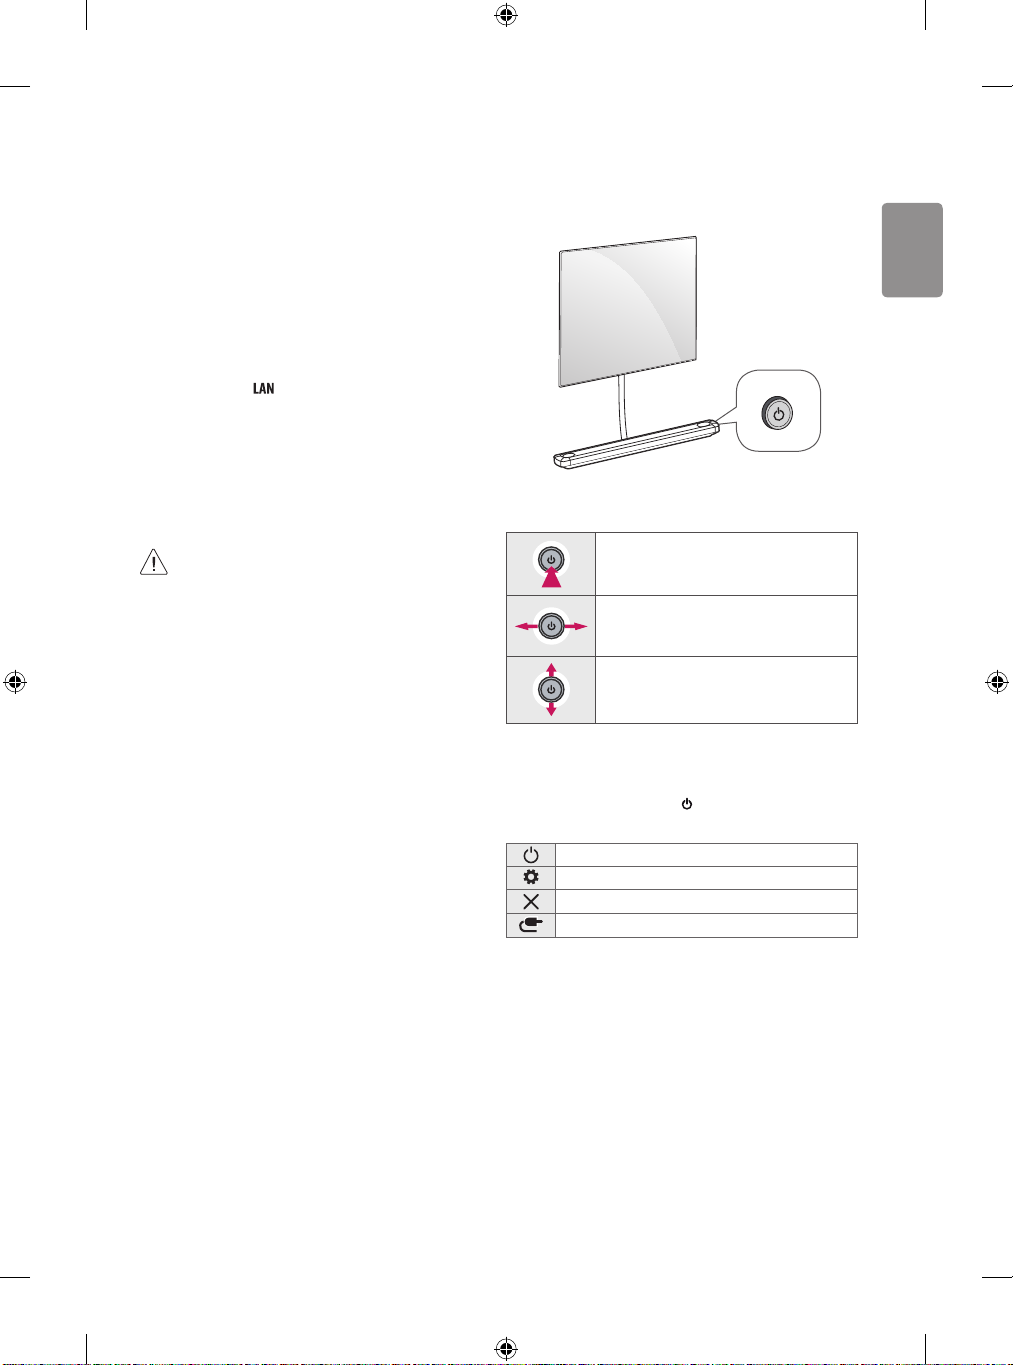
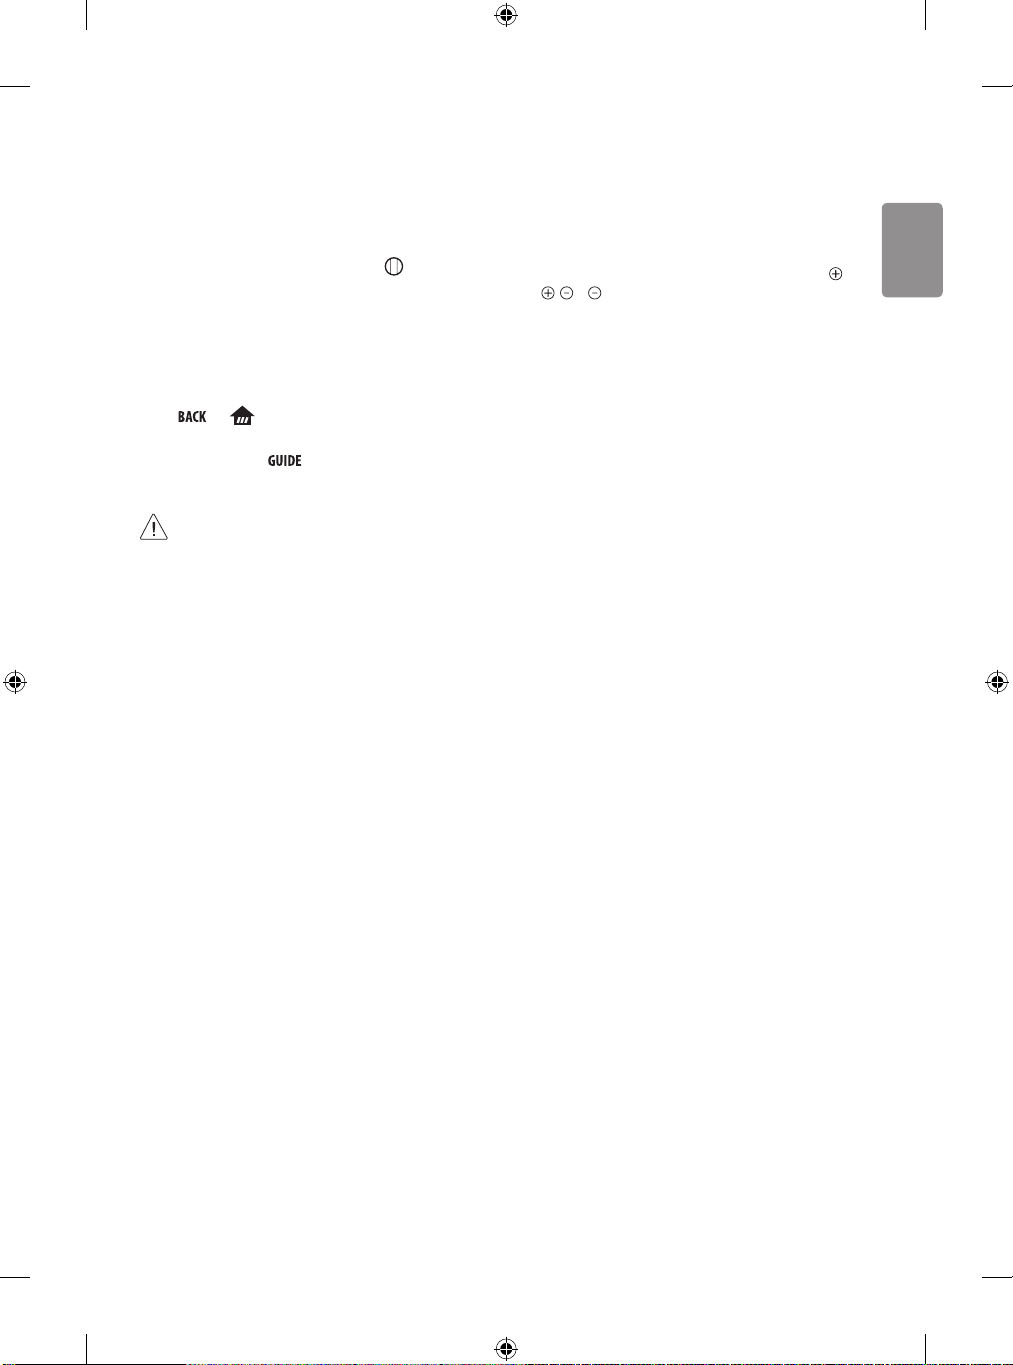
Basic functions
Power On (Press)
Power O 1 (Press and hold)
Volume Control
Channels Control
1 All running apps will close, and any recording in progress will stop.
Adjusting the menu
When the TV is turned on, press the button one time. You can adjust
the Menu items using the button.
Turns the power o.
Accesses the settings menu.
Clears on-screen displays and returns to TV viewing.
Changes the input source.
9

ENGLISH
Using Magic Remote
북미/멕시코/브라질/중남미/필리핀
Control
(Depending on model)
The descriptions in this manual are based on the buttons on the remote
control. Please read this manual carefully and use the TV correctly.
When the message “Magic Remote battery is low. Please change the
battery.” is displayed, replace the battery.
To replace batteries, open the battery cover, replace batteries (1.5 V AA)
matching the and ends to the label inside the compartment,
and close the battery cover. Be sure to point the magic remote toward
the remote control sensor on the TV. To remove the batteries, perform
the installation actions in reverse.
* To use the button, press and hold for more than 3 seconds.
(POWER) Turns the TV on or o.
You can turn your set-top box on or o by adding the settop box to the universal remote control for your TV.
Number buttons Enters numbers.
(DASH) Inserts a (DASH) between numbers such as 2-1 and 2-2.
Accesses the saved channels list.
* Press this button to bring up BML data broadcasting.
(Screen Remote) Displays the Screen Remote.
- Accesses the Universal Control Menu.
buttons corresponding to the features.
* (Voice recognition)
Network connection is required to use the voice recognition function.
Once the voice display bar is activated on the TV screen, press and hold
the button and speak your command out loud.
menu. You can change channels by using the wheel button.
button to scroll the menu. If you press buttons while the
pointer is in use, the pointer will disappear from the screen and Magic
Remote will operate like a general remote control. To display the
pointer on the screen again, shake Magic Remote to the left and right.
1 2
Streaming Service.
1
2
Control buttons ( , ) Controls media contents.
full screen.
pointed.
* You can access apps or Live TV using the number
Adjusts the volume level.
(MUTE) Mutes all sounds.
* (MUTE) Accesses the Accessibility menu.
Scrolls through the saved channels.
(HOME) Accesses the Home menu.
* (HOME) Shows the previous history.
(Q. Settings) Accesses the Quick Settings.
* (Q. Settings) Displays the All Settings menu.
Wheel (OK) Press the center of the Wheel button to select a
(up/down/left/right) Press the up, down, left or right
Returns to the previous level.
* Clears on-screen displays and returns to last input viewing.
Displays the program event according to time scheduler.
Streaming Service buttons Connects to the Video
(INPUT) Changes the input source.
* (INPUT) Displays a list of all the external inputs.
, , , These access special functions in some menus.
* (Red Button) Runs the record function.
By zooming in on the selected area, you can view it in
* You can zoom in on the area where the remote control is
(Some buttons and services may not be provided depending on models
or regions.)
10
ENGLISH
Registering Magic Remote Control
Troubleshooting
How to register the Magic Remote Control
To use the Magic Remote, rst pair it with your TV.
1 Put batteries into the Magic Remote and turn the TV on.
2 Point the Magic Remote at your TV and press the Wheel (OK) on
the remote control.
* If the TV fails to register the Magic Remote, try again after turning
the TV off and back on.
How to deregister the Magic Remote
Control
Press the and (HOME) buttons at the same time, for ve
seconds, to unpair the Magic Remote with your TV.
* Pressing and holding the button will let you cancel and re-
register Magic Remote at once.
• It is recommended that an Access Point (AP) be located
more than 0.2 m away from the TV. If the AP is installed
closer than 0.2 m, the Magic remote control may not
perform as expected due to frequency interference.
• In Analogue TV and some countries, some remote control
buttons may not work.
• Do not mix new batteries with old batteries. This may
cause the batteries to overheat and leak.
• Failure to match the correct polarities of the battery
may cause the battery to burst or leak, resulting in re,
personal injury, or ambient pollution.
• This apparatus uses batteries. In your community there
might be regulations that require you to dispose of these
batteries properly due to environmental considerations.
Please contact your local authorities for disposal or
recycling information.
• Batteries inside or inside the product shall not be
exposed to excessive heat such as sunshine, re or the
like.
Cannot control the TV with the remote control.
• Check the remote control sensor on the product and try again.
• Check if there is any obstacle between the product and the remote
control.
• Check if the batteries are still working and properly installed (
to , to ).
No image display and no sound is produced.
• Check if the product is turned on.
• Check if the power cord is connected to a wall outlet.
• Check if there is a problem in the wall outlet by connecting other
products.
The TV turns o suddenly.
• Check the power control settings. The power supply may be
interrupted.
• Check if the auto-o function is activated on the settings related
time.
• If there is no signal while the TV is on, the TV will turn o
automatically after 15 minutes of inactivity.
When connecting to the PC (HDMI), no signal is detected.
• Turn the TV o/on using the remote control.
• Reconnect the HDMI cable.
• Restart the PC with the TV on.
Abnormal Display
• If the product feels cold to the touch, there may be a small “icker”
when it is turned on. This is normal, there is nothing wrong with
product.
• This panel is an advanced product that contains millions of pixels.
You may see tiny black dots and/or brightly colored dots (white,
red, blue or green) at a size of 1ppm on the panel. This does not
indicate a malfunction and does not aect the performance and
reliability of the product.
This phenomenon also occurs in third-party products and is not
subject to exchange or refund.
• You may nd dierent brightness and color of the panel depending
on your viewing position(left/right/top/down).
This phenomenon occurs due to the characteristic of the panel.
It is not related with the product performance, and it is not
malfunction.
11
ENGLISH
• A blue light blinks on the front of the Companion Box (AV Box).
- The TV may have a problem with the cooling fan or the
temperature in the TV may be too high. Contact an authorized
service center.
• A magenta light blinks on the front of the Companion Box (AV Box).
- The TV may have a problem in the moving speaker. Contact an
authorized service center.
• An orange light blinks on the front of the Companion Box (AV Box).
- The cable from panel may not be properly connected to the
Companion Box (AV Box). Unplug the power cord and reconnect
the cable and then plug the power cord and press the power
button. If it still doesn’t work after the steps above, contact an
authorized service center.
Generated Sound
• “Cracking” noise: A cracking noise that occurs when watching or
turning o the TV is generated by plastic thermal contraction due
to temperature and humidity. This noise is common for products
where thermal deformation is required.
• Electrical circuit humming/panel buzzing: A low level noise is
generated from a high-speed switching circuit, which supplies a
large amount of current to operate a product. It varies depending
on the product.
This generated sound does not aect the performance and
reliability of the product.
12
• Make sure to wring any excess water or cleaner from
the cloth.
• Do not spray water or cleaner directly onto the TV screen.
• Make sure to spray just enough of water or cleaner onto a
dry cloth to wipe the screen.
• To clean the top of the Companion Box (AV box), spray a
soft cloth with water. Then, wipe the surface so that the
product does not come in direct contact with water. Next,
wipe it again so that no moisture remains.
 Loading...