

LG MP9488SCR Owner’s Manual
OWNER’S MANUAL
LIGHT OVEN “SolarDOM”
PLEASE READ THIS OWNER’S MANUAL THOROUGHLY BEFORE OPERATING.
MP9488SCR
P/No.: MFL30374537 |
www.lg.com |

Precautions
Precautions to avoid possible exposure to excessive microwave energy.
You cannot operate your oven with the door open due to the safety interlocks built into the door mechanism. These safety interlocks automatically switch off any cooking activity when the door is opened; which in the operation of microwave function could result in harmful exposure to microwave energy.
It is important not to tamper with the safety interlocks.
Do not place any object between the oven front face and the door or allow food or cleaner residue to accumulate on sealing surfaces.
Do not operate your oven if it was damaged. It is particularly important that the oven door closes properly and that there is no damage to the: (1) door(bent), (2) hinges and latches (broken or loosened), (3) door seals and sealing surfaces.
Your oven should not be adjusted or repaired by anyone except qualified service personnel.
 WARNING
Please ensure cooking times are correctly set as over cooking may result in the FOOD catching fire and subsequent damage to your oven.
When heating liquids, e.g. soups, sauces and beverages in your oven with microwave function, delayed eruptive boiling can occur without evidence of bubbling. This could result in a sudden boil over of the hot liquid. To prevent this possibility the following steps should be taken:
1Avoid using straight sided containers with narrow necks.
2Do not overheat.
3Stir the liquid before placing the container in the oven and again halfway through the heating time.
4After heating, allow to stand in the oven for a short time, stir or shake them(especially the contents of feeding bottles and baby food jars) again carefully and check the temperature of them before consumption to avoid burns (especially, contents of feeding bottles and baby food jars).
Be careful when handling the container.
 WARNING
Always allow food to stand after being cooked by waves and check the temperature of them before consumption. Especially contents of feeding bottles and baby food jars.
2

Contents
How the Microwave Function Works
Microwaves are a form of energy similar to radio and television waves and ordinary daylight. Normally, microwaves spread outwards as they travel through the atmosphere and disappear without effect. This oven however, have a magnetron which is designed to make use of the energy in microwaves. Electricity, supplied to the magnetron tube, is used to create microwave energy.
These microwaves enter the cooking area through openings inside the oven. A turntable or tray is located at the bottom of the oven. Microwaves cannot pass through metal walls of the oven, but they can penetrate such materials as glass, porcelain and paper, the materials out of which microwave-safe cooking dishes are constructed.
Microwaves do not heat cookware, though cooking vessels will eventually get hot from the heat generated by the food.
A very safe appliance
Your oven, SolarDOM, is one of the safest of all home appliances. When the door is opened, the oven automatically stops producing microwaves. Microwave energy is converted completely to heat when it enters food, leaving no “left over” energy to harm you when you eat your food.
Precautions ................................................................................ |
2 |
Contents .................................................................................... |
3 |
Unpacking & Installing................................................................. |
4 ~ 5 |
Control Panel ............................................................................. |
6 |
Setting the Clock ........................................................................ |
7 |
Child Lock .................................................................................. |
8 |
Quick Start ................................................................................ |
9 |
Micro Power Cooking ................................................................. |
10 |
Micro Power Level ...................................................................... |
11 |
Grill Cooking .............................................................................. |
12 |
Convection Cooking ................................................................... |
13 |
Speed combi Cooking ................................................................ |
14 ~ 16 |
Defrost ...................................................................................... |
17 ~ 18 |
Speed Auto Cook ....................................................................... |
19 ~ 25 |
Steam Cook ............................................................................... |
26 ~ 29 |
More or Less Cooking ................................................................. |
30 |
Ez Clean .................................................................................... |
31 |
Rotisserie Installation & Cooking .................................................. |
32 ~ 35 |
Rotisserie Assembly .................................................................... |
36 |
Important safety instructions ........................................................ |
37 ~ 38 |
Microwave - safe Utensils ............................................................ |
39 |
Food characteristics & Microwave cooking ................................... |
40 ~ 41 |
Questions & Answers .................................................................. |
42 |
Plug Wiring Information/Technical Specifications ......................... |
43 |
3

Unpacking &
Installing
By following the basic steps on these two pages you will be able to quickly check that your oven is operating correctly. Please pay particular attention to the guidance on where to install your oven. When unpacking your oven make sure you remove all accessories and packing. Check to make sure that your oven has not been damaged during delivery.
Unpack your oven and place it on a flat level surface. |
Place the oven in the level location of your choice with |
|
more than 85cm height but make sure there is at least |
|
20cm of space on the top and 10cm at the rear for proper |
|
ventilation. The front of the oven should be at least min. 8cm/max. |
|
22cm from the edge of the surface to prevent tipping. |
|
An exhaust outlet is located on bottom or side of the oven. Blocking |
|
the outlet can damage the oven. |
HIGH RACK |
STEAMER |
|
|
||
(For grill mode) |
STEAM COVER |
|
|
||
LOW RACK |
|
|
(For microwave and |
STEAM PLATE |
|
convection mode) |
STEAM WATER |
|
|
||
METAL TRAY |
BOWL |
|
(METAL TRAY) |
||
(For defrost) |
||
|
* THIS OVEN SHOULD NOT BE USED FOR COMMERCIAL CATERING PURPOSES.
ROTISSERIE |
HANDLE |
4
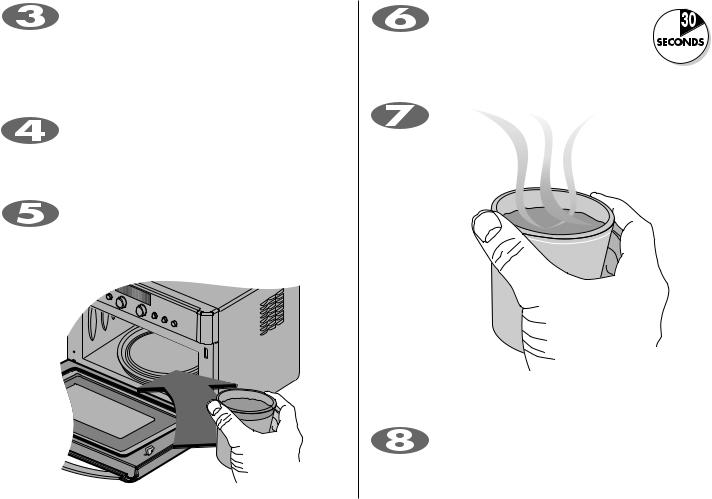
Plug your oven into a standard household socket. Make sure your oven is the only appliance connected to the
socket. If your oven does not operate properly, unplug it from the electrical socket and then plug it back in.
Open your oven door by pulling the DOOR HANDLE. Place the METAL TRAY inside the oven.
Fill a microwave safe container with 300 ml (1/2 pint) of water. Place on the METAL TRAY and close the oven
door. If you have any doubts about what type of container to use please refer to page 39.
Press the STOP/CLEAR button, and press the START button one time to set 30
seconds of cooking time.
The DISPLAY will count down from 30 seconds. When it reaches Zero it will sound BEEPS. Open the oven door
and test the temperature of the water. If your oven is operating the water should be warm. Be careful when removing the container it may be hot.
YOUR OVEN IS NOW INSTALLED
The contents of feeding bottles and baby food jars shall be stirred or shaken and the temperature checked
before consumption, in order to avoid burns.
5

Control Panel
1.DISPLAY WINDOW: You can show mode function, time of day, cooking time, power level and cooking categories.
2.STEAM COOK : Steam cook allows you to cook most of your favorite food quickly by selecting the food type and the weight of the food.
3.SPEED AUTO COOK: Speed auto cook allows you to cook most of your favorite food quickly by selecting the food type and the weight of the food.
4.FUNCTION DIAL: You can select the operating function.
5.CONTROL DIAL :
•You can set cooking time, temperature, weight and cooking categories.
•You can lengthen or shorten the cooking time at any point by turning the dial knob(except defrost mode).
6.ENTER/CLOCK: You can determine the selected cooking category, microwave power level or temperature and you can set the time of day.
7.START/QUICK START:
•In order to start cooking which is selected, press button one time.
•The quick start feature allows you to set 30 seconds intervals of HIGH power cooking with a touch of the quick start button.
8.STOP/CLEAR: You can stop over and clear all entries except time of day.
9.SPEED AUTO COOK MENU
6
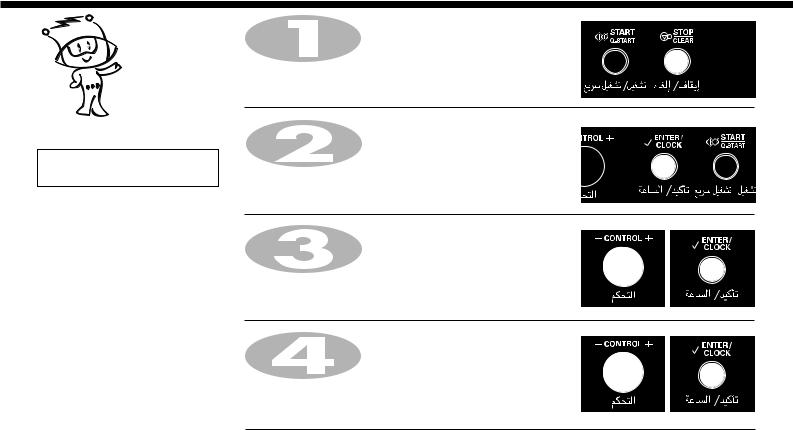
You can set either12 hour clock or 24 hour clock.
In the following example I will show you how to set the time for 14:35 when using the 24 hour clock. Make sure that you have removed all packaging from your oven.
Setting the
Clock
NOTE: Information Blink
For mode setting, blink will be guide to next step.
When your oven is plugged in for the first time or when power resumes after a power cut, a ‘0’ will be shown in the display; you will have to reset the clock.
If the clock (or display) shows any strange looking symbols, unplug your oven from the electrical socket and plug it back in and reset the clock.
Make sure that you have correctly installed your oven as described earlier in this book.
Press STOP/CLEAR.
Press ENTER/CLOCK once.
(If you want to use a 12 hour clock, Press ENTER/CLOCK once more. If you want to change different option after setting clock,
you have to unplug and plug it back in.)
Turn CONTROL dial knob until display shows “14:00”.
Press ENTER/CLOCK for hour confirmation.
Turn CONTROL dial knob until display shows “14:35”.
Press ENTER/CLOCK.
The clock starts counting.
7
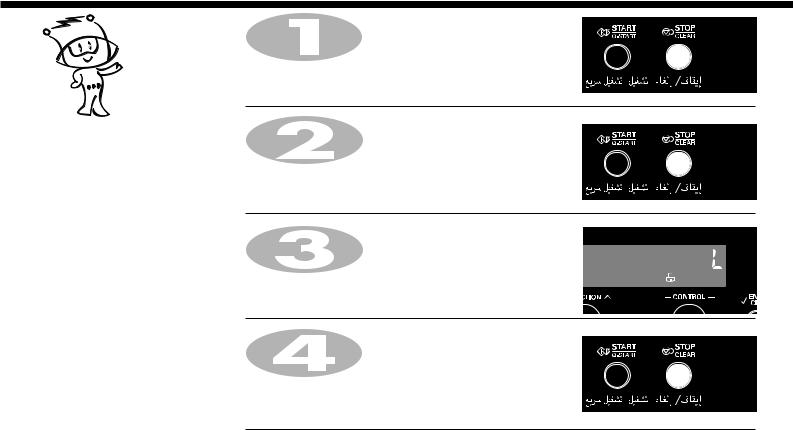
Child
Lock
Press STOP/CLEAR.
Your oven has a safety feature that prevents accidental running of the oven. Once the child lock is set, you will be unable to use any functions and no cooking can take place.
However your child can still open the oven door.
Press and hold STOP/CLEAR until “L” appears on the display and BEEP sounds.
The child lock is now set.
If any button is pressed, “L” will appear on the display.
To cancel child lock press and hold STOP/CLEAR until “L” disappears. You will hear beep when it’s released.
8

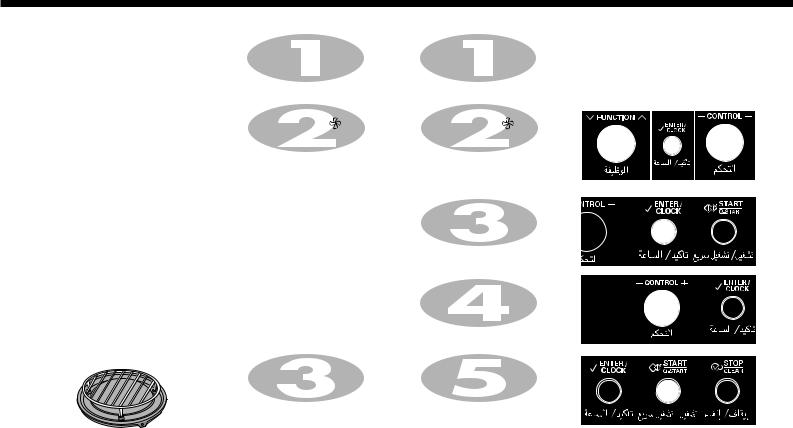
In the following example I will show you how to set 2 minutes of cooking on high power(900W).
Press STOP/CLEAR.
Quick
Start
The Quick Start feature allows you to set 30 seconds intervals of HIGH power(900W) cooking with pressing of the Q-START button.
Press Q-START four times to select 2 minutes on HIGH power(900W). Your oven will start before you have finished the fourth press.
9

Micro Power
Cooking
In the following example I will show you how to cook some food on 600W power for 5 minutes and 30 seconds.
Your oven has five microwave Power settings. High power is automatically selected and turning of the dial will select a different power level.
Make sure that you have correctly installed your oven as described earlier in this book.
Press STOP/CLEAR.
Turn FUNCTION dial to select micro(  ).
).
Press ENTER/CLOCK for micro confirmation.
POWER
HIGH |
900 W |
|
MEDIUM |
600 W |
|
HIGH |
||
|
||
MEDIUM |
360 W |
|
|
|
|
DEFROST |
180 W |
|
MEDIUM LOW |
||
|
||
LOW |
90 W |
|
|
|
Turn CONTROL dial knob until display shows “600W”.
Press ENTER/CLOCK for power confirmation.
Turn CONTROL dial knob until display shows “5:30”.
Press START.
When cooking you can increase or decrease cooking time by turning
CONTROL dial.
10
This oven is equipped with 5 power levels to give you maximum flexibility and control over cooking. The table below shows the examples of food and their recommended cooking power levels for use with this oven.
Micro Power
Level
POWER LEVEL |
OUTPUT |
USE |
ACCESSORY |
HIGH |
900 W |
* Boil Water |
Low Rack |
|
|
* Cook poultry pieces, fish, vegetables |
+ Metal Tray |
|
|
* Cook tender cuts of meat |
|
MEDIUM HIGH |
600 W |
* All reheating |
|
|
|
* Roast meat and poultry |
|
|
|
* Cook mushrooms and shellfish |
|
|
|
* Cook foods containing cheese and eggs |
|
MEDIUM |
360 W |
* Bake cakes and scones |
|
|
|
* Prepare eggs |
|
|
|
* Cook custard |
|
|
|
* Prepare rice, soup |
|
DEFROST/ |
180 W |
* All thawing |
Metal Tray |
MEDIUM LOW |
|
* Melt butter and chocolate |
|
|
|
* Cook less tender cuts of meat |
|
LOW |
90 W |
* Soften butter & cheese |
Low Rack |
|
|
* Soften ice cream |
+ Metal Tray |
|
|
* Raise yeast dough |
|
11

Grill
Cooking
In the following example I will show you how to use the Grill-1 to cook some foods for 12 minutes and 30 seconds.
Press STOP/CLEAR.
This feature will allow you to brown and crisp food quickly.
The grill rack is placed on the metal tray at the grill mode.
The high rack must be used during grill cooking.
Turn FUNCTION dial to select grill (  ).
).
Press ENTER/CLOCK for grill confirmation.
Turn CONTROL dial knob until display shows “Gr-1”.
Press ENTER/CLOCK for category confirmation.
Category |
Display |
Heater Operating |
|
Grill-1 |
Gr-1 |
Upper Heater(1950W) |
|
Grill-2 |
Gr-2 |
Upper Heater(1100W) |
|
Grill-3 |
Gr-3 |
Lower Heater(650W) |
|
|
|
|
|
Turn CONTROL dial knob until display shows “12:30”.
Press START.
When cooking you can increase or decrease cooking time by turning
CONTROL dial.
After cooking you must wear gloves and container to take metal tray out oven, because metal tray is very hot.
12
In the following example I will show you how to use the convection mode to cook some foods for 50 minutes at 220°C temperature.
Convection
Cooking
The convection oven has a temperature range.(40°C, 100~250°C)
The oven has a ferment function at the oven temperature of 40°C. You should wait until the oven is cool because you cannot use a ferment function if the oven temperature is over 40°C.
It is available to extend the cooking time up to 9 hours in the condition of 40°C at convection function for the operating microwave oven.
Your oven will take a few minutes to reach the selected temperature.
Once it has reached the correct temperature, your oven will BEEP to let you know that it has reached the correct temperature.
Then place your food in your oven: then set your oven to start cooking.
The low rack must be used during convection cooking.
1. To Preheat |
2. To Cook |
|
Press STOP/CLEAR. |
Press STOP/CLEAR. |
|
|
|
|
|
|
|
Turn FUNCTION dial to select |
Turn FUNCTION dial to select |
|
convection mode ( ). |
convection mode ( ). |
|
Press ENTER/CLOCK for convection |
Press ENTER/CLOCK for |
|
confirmation. |
convection confirmation. |
|
Turn CONTROL dial knob until |
Turn CONTROL dial knob until |
|
display shows “220°C”. |
display shows “220°C”. |
|
|
|
|
|
Press ENTER/CLOCK for temp. |
|
|
confirmation. |
|
|
|
|
|
Turn CONTROL dial knob until |
|
|
display shows “50:00”. |
|
|
|
|
Press START. |
Press START. |
|
Display shows “Pr-H”. |
After cooking you must wear |
|
|
gloves to take metal tray / |
|
|
container out of oven since |
|
|
its hot. |
|
|
|
|
13
Speed combi
Cooking
In the following example I will show you how to programme your oven at micro power 360W and grill for a cooking time of 25 minutes.
Speed Combi (Co-1, 2, 3)
Your oven has a combination cooking feature which allows you to cook food with heater and microwave at the same time or alternately. This generally means it takes less time to cook the food.
You can set three kinds of micro power level(180W, 360W and 600W) in speed combi mode.
* Speed combi Category
Co-1 |
Grill-1 + Microwave power |
|
|
|
|
Co-2 |
Grill-2 + Microwave power |
|
|
|
|
Co-3 |
Grill-3 + Microwave power |
|
|
|
|
Co-4 |
(Upper + Lower heater) |
|
+ Microwave power |
||
|
||
Co-5 |
Convection + Microwave power |
* Grill mode: Refer to page 12
Press STOP/CLEAR.
Turn FUNCTION dial speed combi(  ) to select grill combination mode(Co-1, 2, 3).
Press ENTER/CLOCK for speed combi confirmation.
Turn CONTROL dial knob until display shows “Co-1”.
Press ENTER/CLOCK for grill-1 confirmation.
Turn CONTROL dial knob until display shows “360W”.
Press ENTER/CLOCK for power confirmation.
Turn CONTROL dial knob until display shows “25:00”.
Press START.
When cooking you can increase or decrease cooking time by turning
CONTROL dial.
After cooking you must wear gloves to take metal tray / container out of oven since its hot.
14
 Loading...