

LG M3703CG Users manual

Order Number : GETEC-C1-09-151 FCC Class B Certification
Test Report Number : GETEC-E3-09-081 Page 1 / 1
APPENDIX G
: USER’S MANUAL
EUT Type: LCD Monitor
FCC ID.: BEJM3703CG

User's Guide
M3203C
M3703C
M
ake sure to read the
Keep the User's Guide(CD) in an accessible place for future reference.
S
ee the label attached on the product and give the information to your dealer when you ask
for service.
Sellers or users should understand that this device is for public use, not
home use.
Safety Precautions
before using the product.
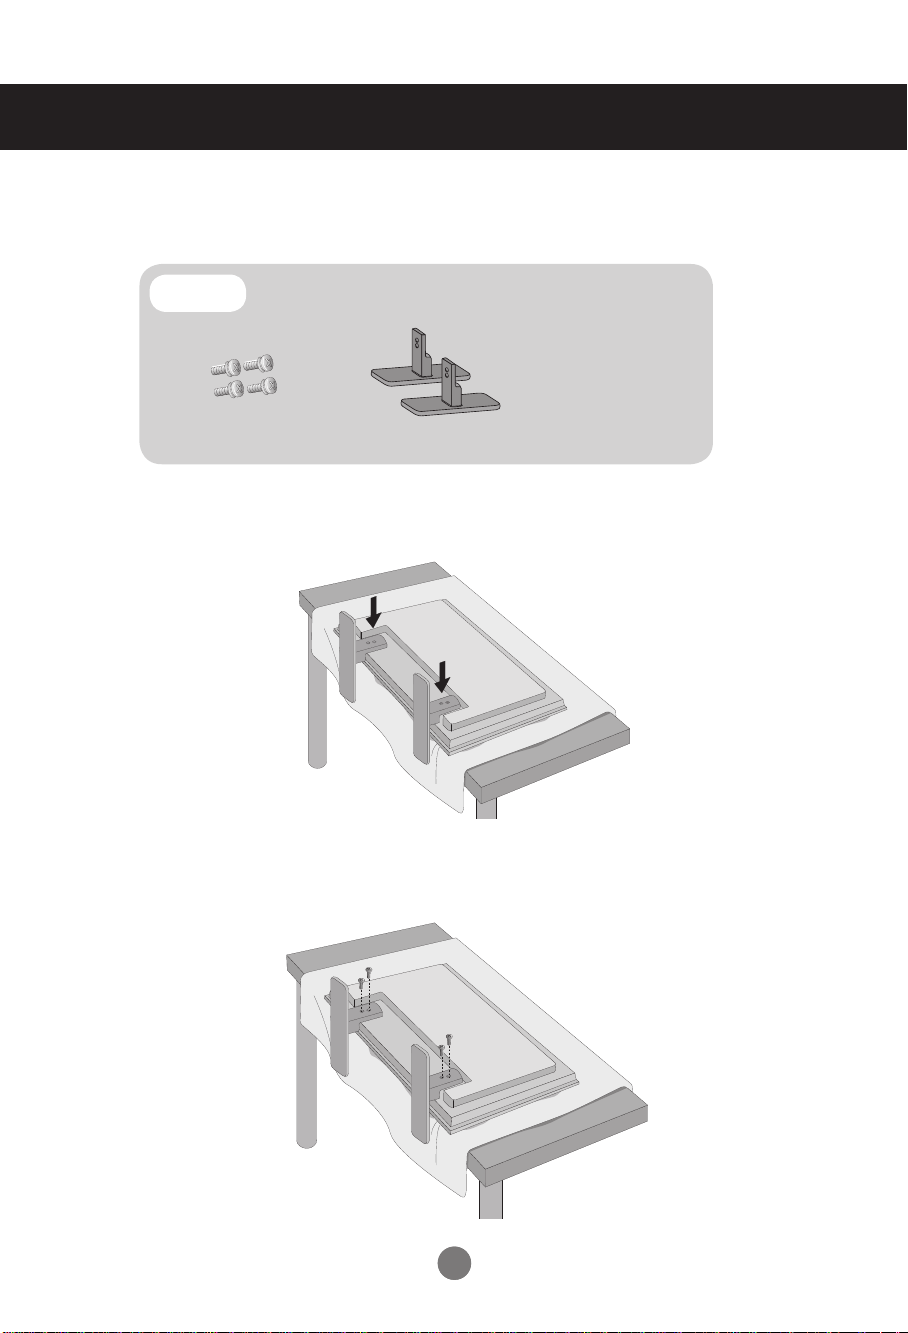
Connecting the stand
- Only on some models.
1. Take the parts for the stand out of the box and assemble them as
shown in the picture.
Parts
First, check if the following parts are all present.
Screws (4)
Stand (2)
2. Place a soft cloth on the table and put the product with the screen
facing downward. Connect the stand as shown in the following picture.
3. Use the screws to secure the stand on the rear side of the product as shown
in the diagram.
1
1
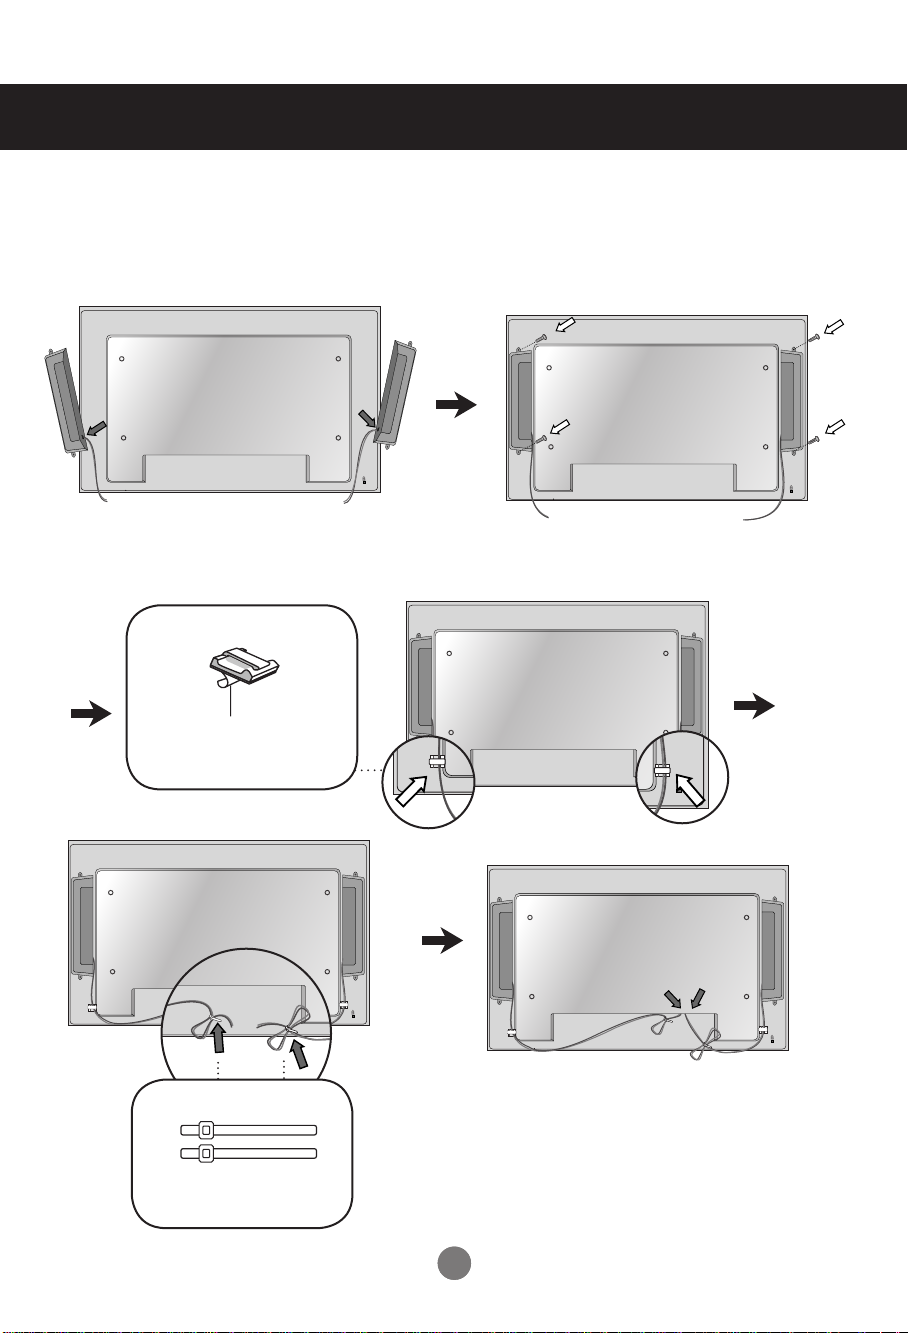
Connecting the Speakers
- Only on some models.
Mount the product onto the speaker by using a screw as shown in the following
connect the speaker cable.
After installing your speakers, use holders and cable ties to organize the speaker cables.
Cable holder
Remove the paper.
* This feature is not available in all model.
Cable tie
* This feature is not available in all model.
When the speaker is installed.
*Connect the input terminal with a proper color match.
22
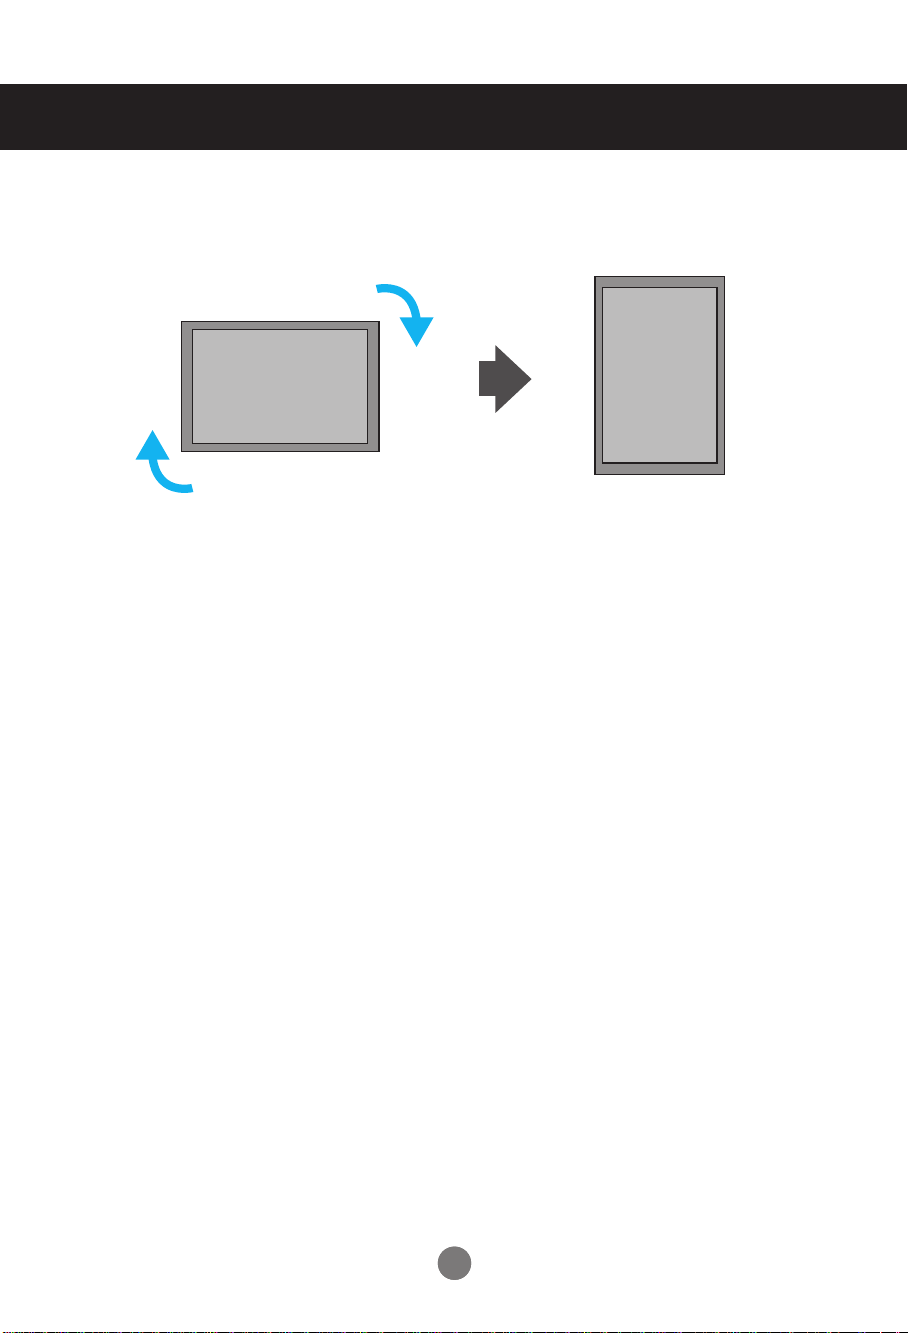
To install Portrait
- Only M3203C
"When installing Portrait, rotate it clockwise based on its front."
3
3
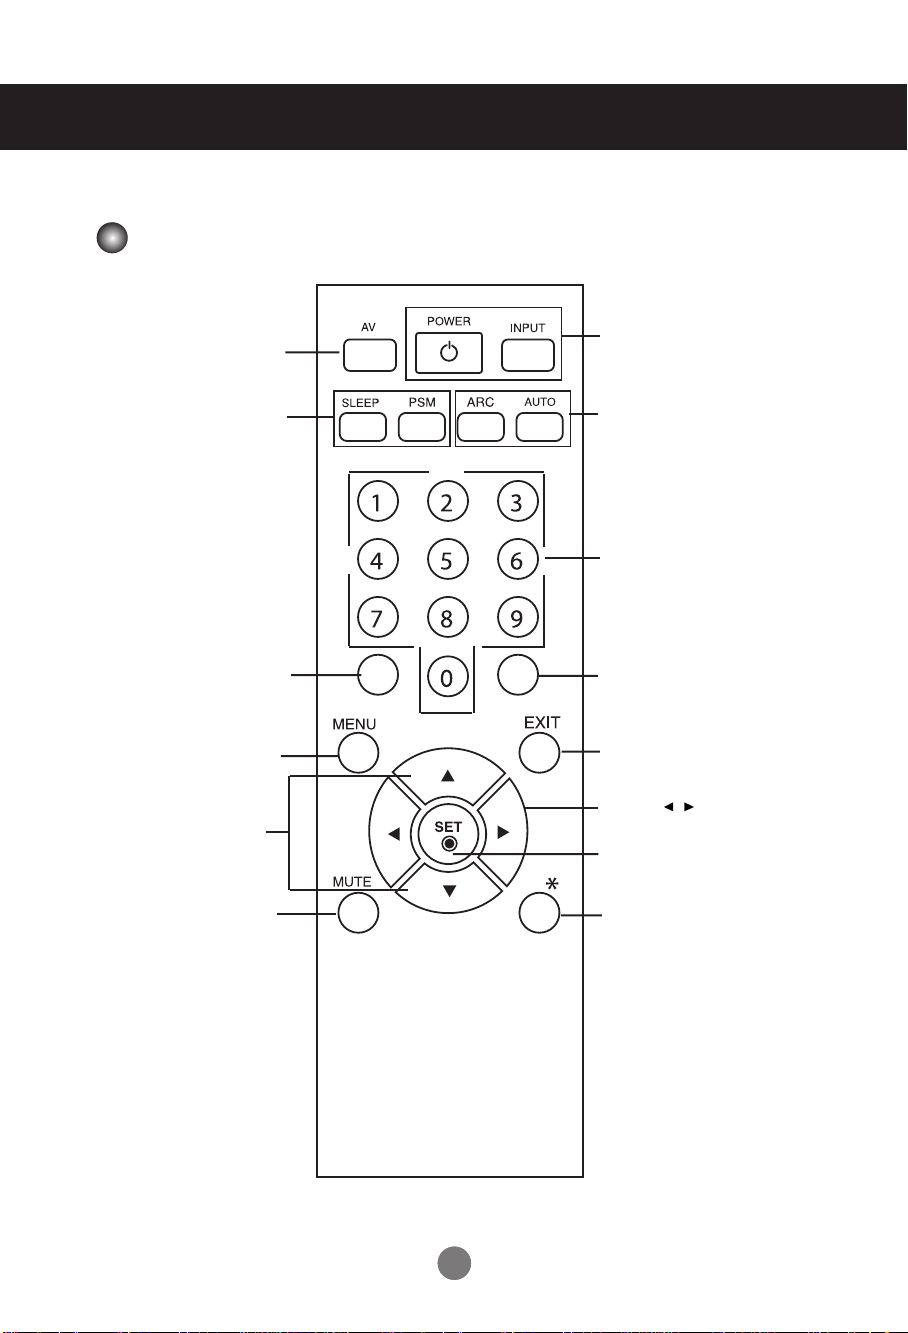
Using the Remote Control
Name of the Remote Control Buttons
•
AV Button
•
When watching AV, RGB PC,HDMI/DVI,
The product will be automatically turned
off after a certain period of time.
Press this button repetitively to
select an appropriate time duration
- Toggles through preset video
Sleep Button
Component
•
PSM Button
settings.
•
Power On/Off Button
•
Input Select Button
(See next page)
•
ARC button
Aspect Ratio Correction. Toggles
through aspect ratio options.
•
Auto Button
Automatic adjustment function
(Operational for the analog signal only)
There is not a function
which is supported
There is not a function
which is supported
•
Menu Button
•
UP and Down buttons
Bring up and down direction
adjustment.
•
Mute button
There is not a function
which is supported
•
Exit Button
•
Volume Button
Volume up and down
•
Check Button
There is not a function
which is supported
44
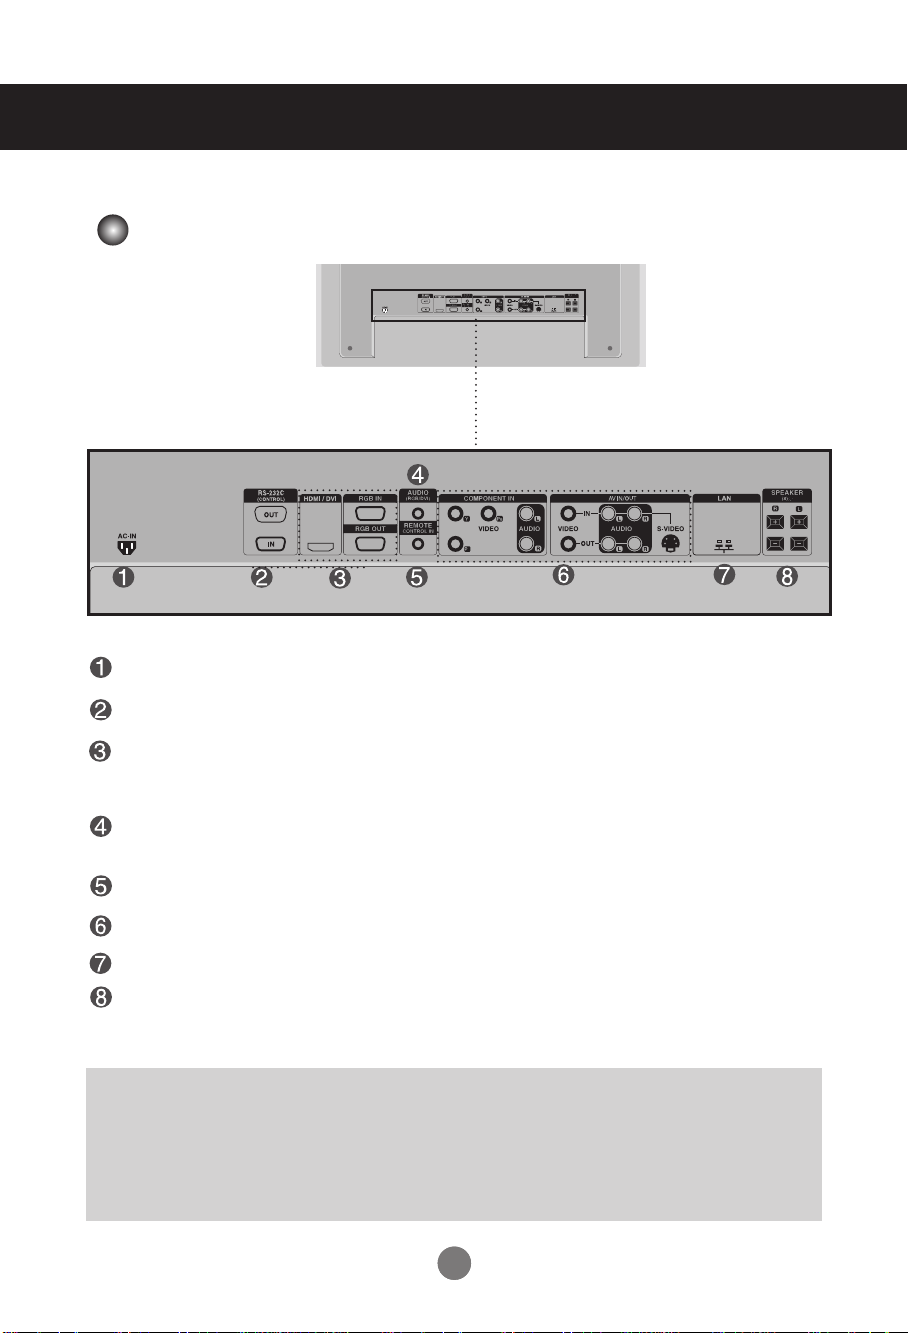
Name and Function of the Parts
* The product image in the user's guide could be different from the actual image.
Rear View
Power Connector : Connect the power cord
RS-232C Serial Ports
RGB PC, HDMI/DVI Ports
-HDMI Supports High Denition input and HDCP (High-bandwidth Digital Content
Protection). Some devices require HDCP in order to display HD signals.
PC Sound Jack
: Connect the audio cable to the *LINE OUT jack of the PC sound card.
Wired Remote Control Port
AV Ports
LAN Port
Speaker Ports
*LINE OUT
A terminal used to connect to the speaker including a built-in amplifier (Amp). Make sure that
the connecting terminal of the PC sound card is checked before connecting. If the Audio Out of
PC sound card has only Speaker Out, reduce the PC volume.
If the Audio Out of the PC sound card supports both Speaker Out and Line Out, convert to Line Out
using the card jumper of the program (Refer to the Sound Card Manual).
66
Connecting to External Devices
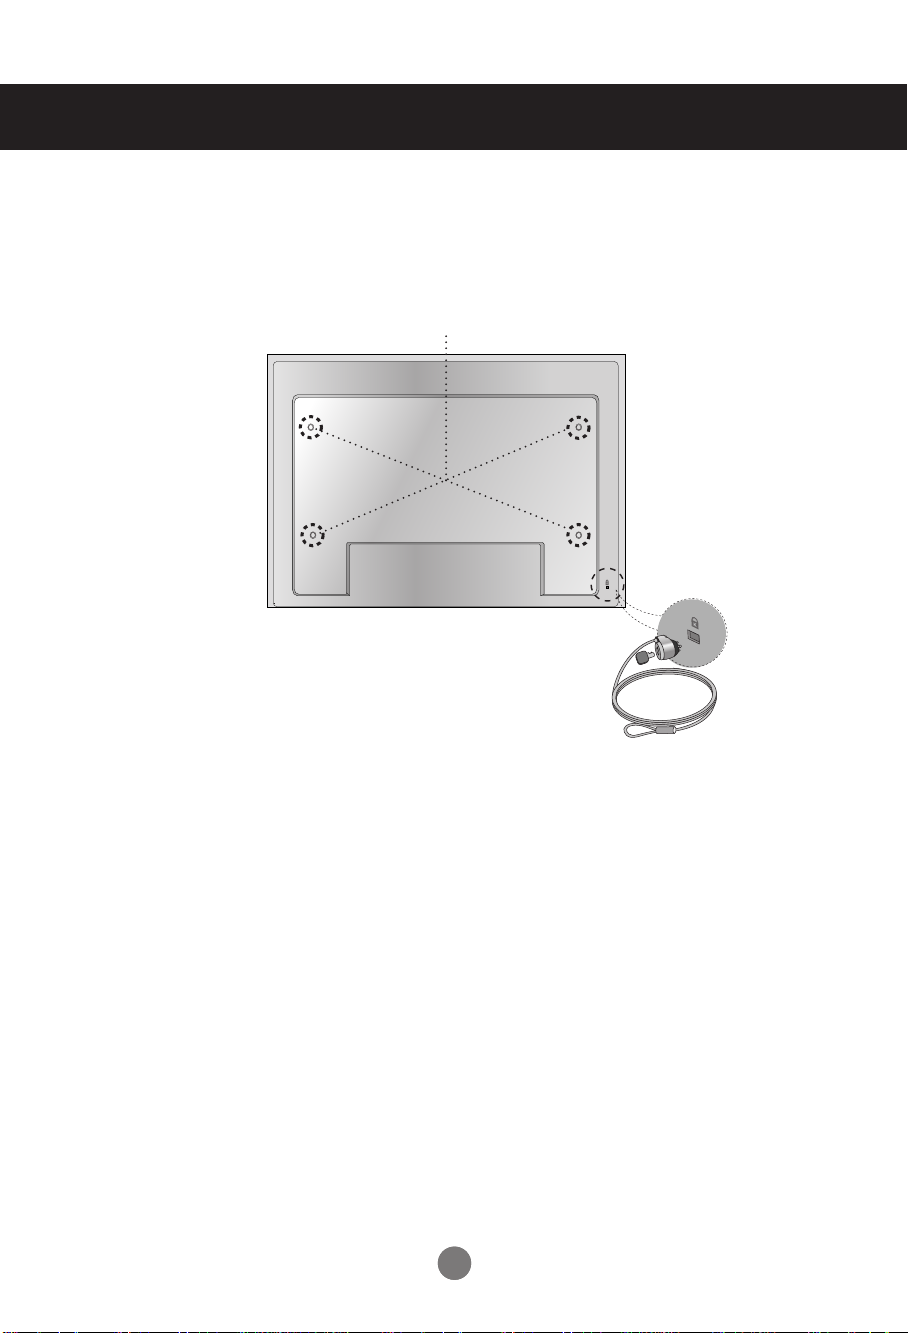
VESA FDMI wall Mounting
This product supports a VESA FDMI compliant mounting interface. These mounts are purchased
separately and not available from LG. Refer to the instructions included with wall mount for more info.
The Set is equipped with a kensington Security System
connector on the back panel. The cable and lock are
available separate and are not sold by LG. For more info,
visit http://www.kensington.com, the internet home page
of the Kensington company.
1111
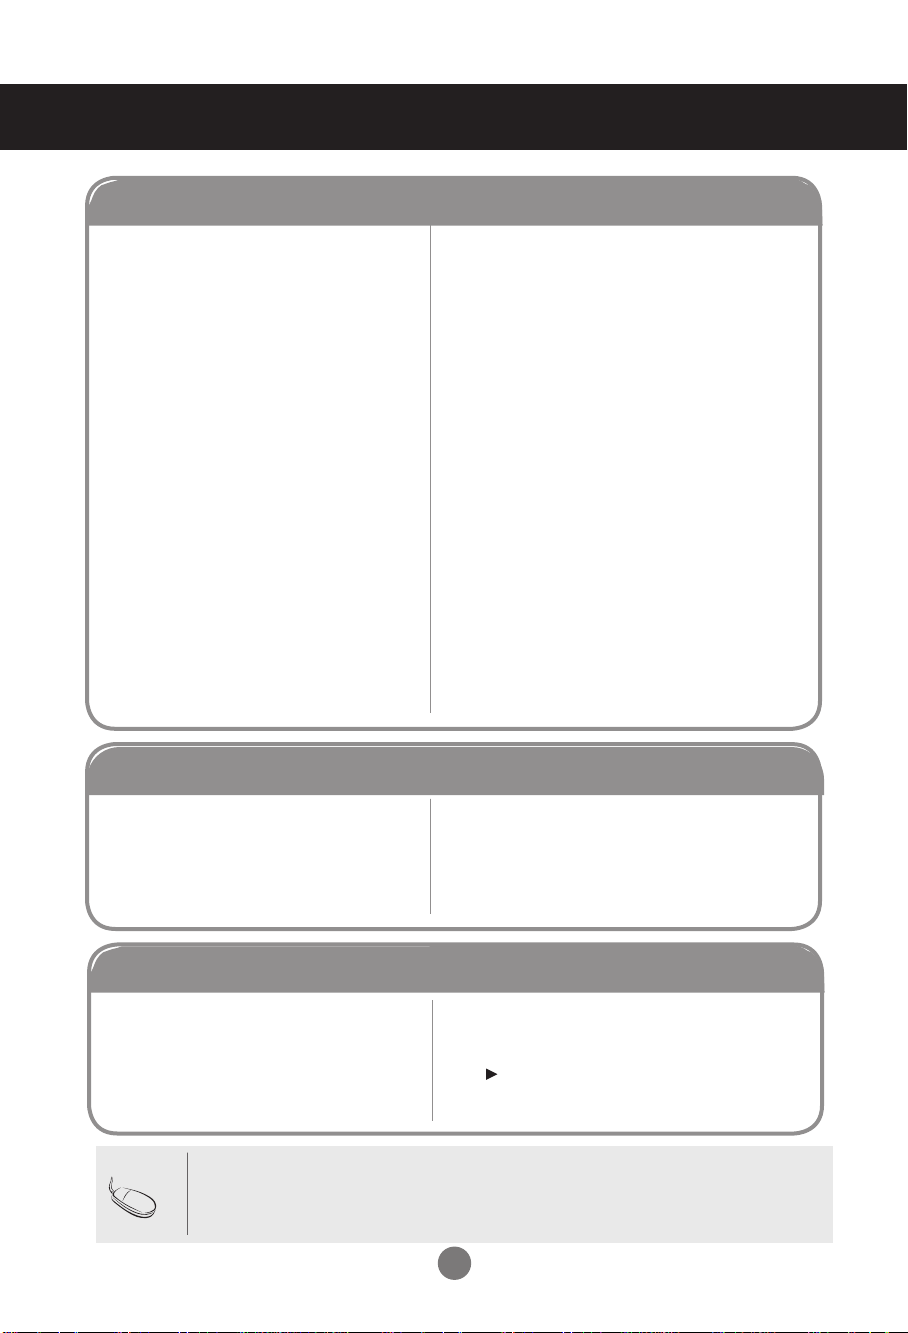
Troubleshooting
No image is displayed
●
Is the product power cord connected?
●
Is the power indicator light on?
●
Power is on, power
but the screen appears extremely dark.
●
The power indicator amber?
●
Does the 'Out of range' message
appear?
indicator
is Green
• See if the power cord is properly connected to the
outlet.
• See if the power switch is turned on.
• May need service.
• Adjust brightness and contrast again.
• Backlight may need repair.
• If the product is in power saving mode, move the
mouse or press any key.
• Turn both devices off and then back on.
• The signal from the PC (video card) is out of the
vertical or horizontal frequency range of the
product. Adjust the frequency range by referring
to the Specifications in this manual.
* Maximum resolution
RGB : 1600 x 1200 @60Hz
HDMI/DVI : 1920 x 1080 @60Hz
●
Does the 'Check signal cable' message
appear?
• The signal cable between PC and product is not
connected. Check the signal cable.
• Press the 'INPUT' menu in the remote Control to
check the input signal.
'Unknown Product' message appears when the product is connected.
●
Did you install the driver?
• Install the product driver, which is provided with
the product, or download it from the web site.
(http://www.lge.com)
• See if the plug&play function is supported by
referring to the video card user manual.
' Key Lock On' message appears.
●
The 'Key Lock On' message
appears when pressing the Menu
button.
Note
* Vertical frequency: T o enable the user to watch the product display, screen image should be changed tens of times
every second like a fluorescent lamp. The vertical frequency or refresh rate is the times of image display per second.
The unit is Hz.
* Horizontal frequency: The horizontal interval is the time to display one vertical line. When 1 is divided by the
horizontal interval, the number of horizontal lines displayed every second can be tabulated as the horizontal
frequency. The unit is kHz.
• The control locking function prevents unintentional
OSD setting change due to careless usage. To unlock
the controls, simultaneously press the Menu button
and button for several seconds. (Y ou cannot set
this function using the remote control buttons. You can
set this function in the product only.)
35
 Loading...