How it Works
Log In / Sign Up
Buy Points
How it Works
FAQ
Contact Us
Questions and Suggestions
Users
LG
Loading...
M
M227WAP
2
M227WAP-PM
3
M227WAP-PT
2
M227WD
30
M227WDP
13
M227WDP-PC
11
M227WDP-PZ
2
M227WDP-PZL
M227WD-PZ
12
M2280A
M2280AF
M2280A-PM
3
M2280D
31
M2280DB
25
M2280DB-PZ
7
M2280DF
29
M2280DFM
M2280DF-PC
M2280DF-PR
M2280DF-PZ
7
M2280DN
26
M2280DN-PZ
3
M2280D-PC
M2280D-PR
2
M2280D-PU
4
M2280D-PZ
14
M228WA
17
M228WA-BM
4
M228WA-BMH.AMLP
M228WA-BT
3
M228WA-BZ
10
M228WA-BZH.AQLP
M228WD
12
M228WD-BZ
12
M228WDP
16
M228WDP-BZ
11
M228WDP-BZJ
2
M2294A
5
M2294AJ
M2294A-PM
M2294A-PO
2
M2294A-PT
3
M2294D
17
M2294D-PZ
8
M22A2H
M2341A
M2343A
9
M2343A-BZ
9
M2343A-BZC.ANLF
M2350D
16
M2350D-PS
M2350D-PZ
4
M2352D
8
M2352D-PJ
M2352D-PU
M2352D-PZ
14
M2352J-PM
M2352T
11
M2362D
29
M2362DL
M2362DP
34
M2362D-PC
2
M2362DP-EM
2
M2362D-PM
3
M2362DP-PC
M2362DP-PX
M2362DP-PZ
8
M2362D-PT
M2362D-PZ
2
M2362D-WM
M237WA
7
M237WAP
2
M237WA-PM
M237WAP-PM
M237WAP-PT
2
M237WA-PT
M237WA-PZ
M237WD
35
M237WDJ
M237WDP
17
M237WD-PM
4
M237WD-PMJ
4
M237WDP-PC
3
M237WDP-PX
M237WDP-PZ
M237WDP-PZL
M237WD-PX
2
M237WD-PZ
11
M237WS
M237WS-PM
M2380A
2
M2380AF
M2380AF-PM
3
M2380A-PM
3
M2380A-PMM
M2380D
33
M2380D-PC
12
M2380D-PS
2
M2380D-PT
M2380D-PU
5
Loading...
Loading...
Nothing found
M2350D-PS
User Guide
106 pgs
17.24 Mb
0
Table of contents
Loading...
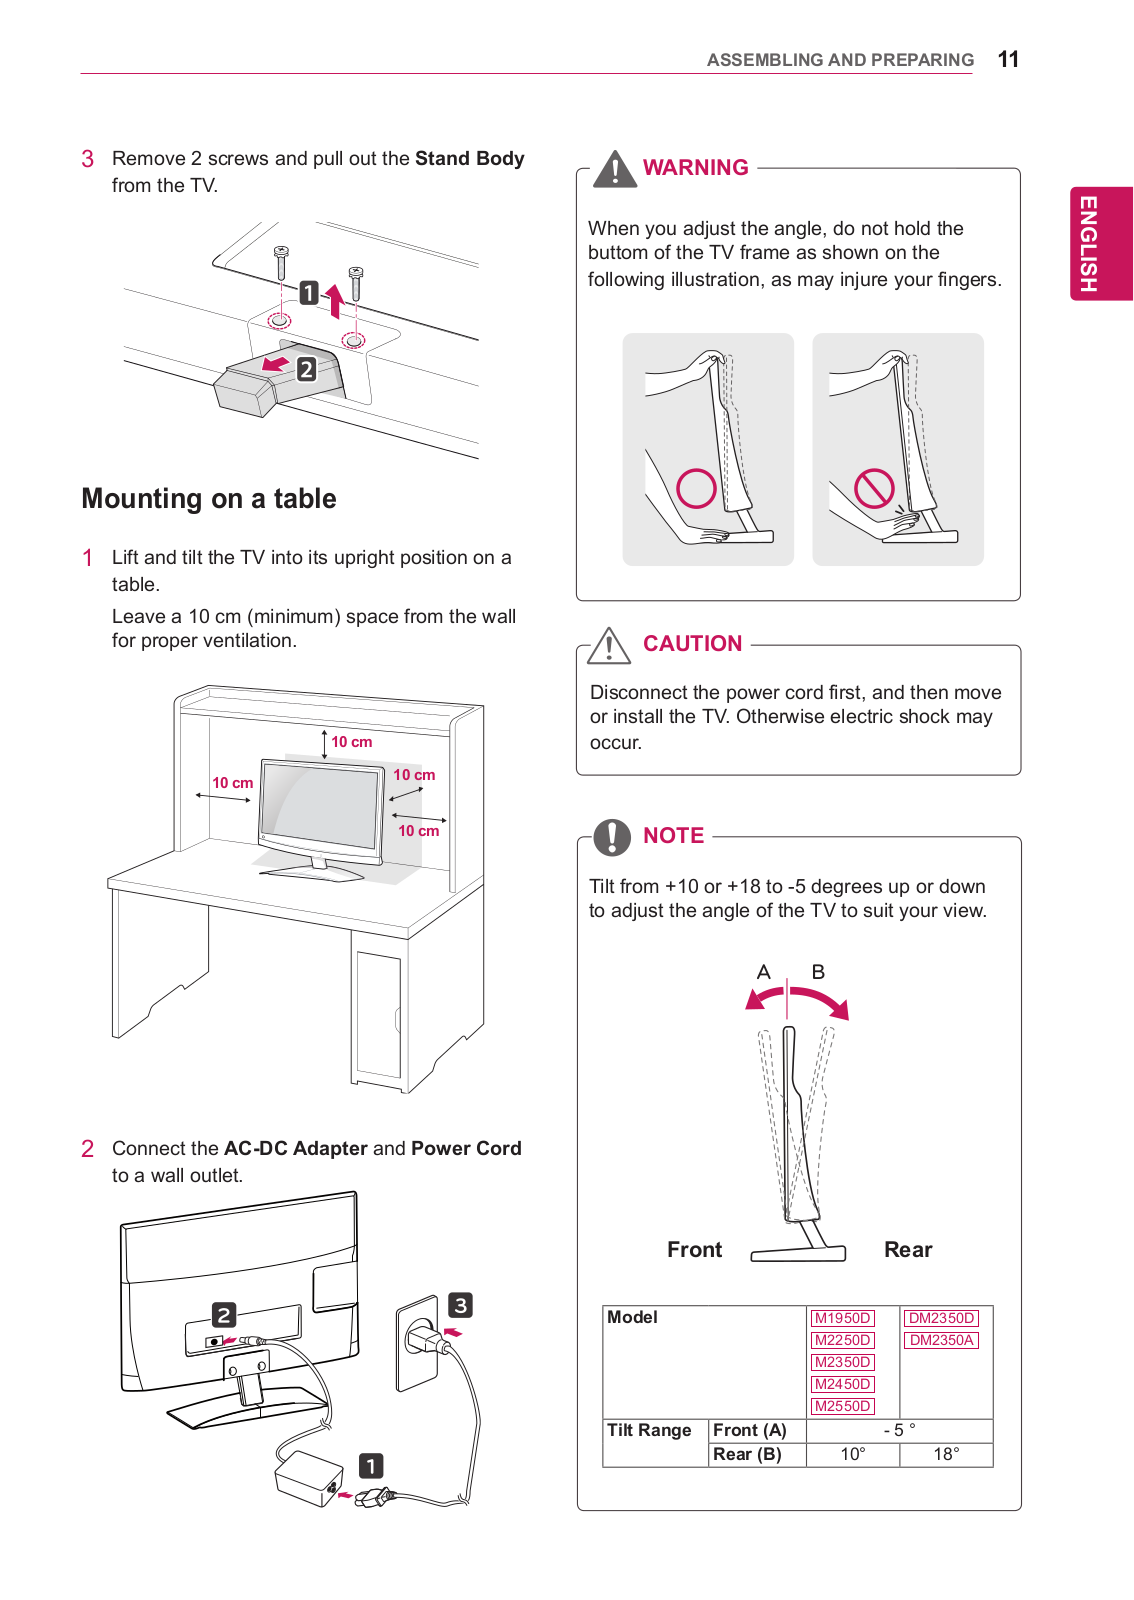
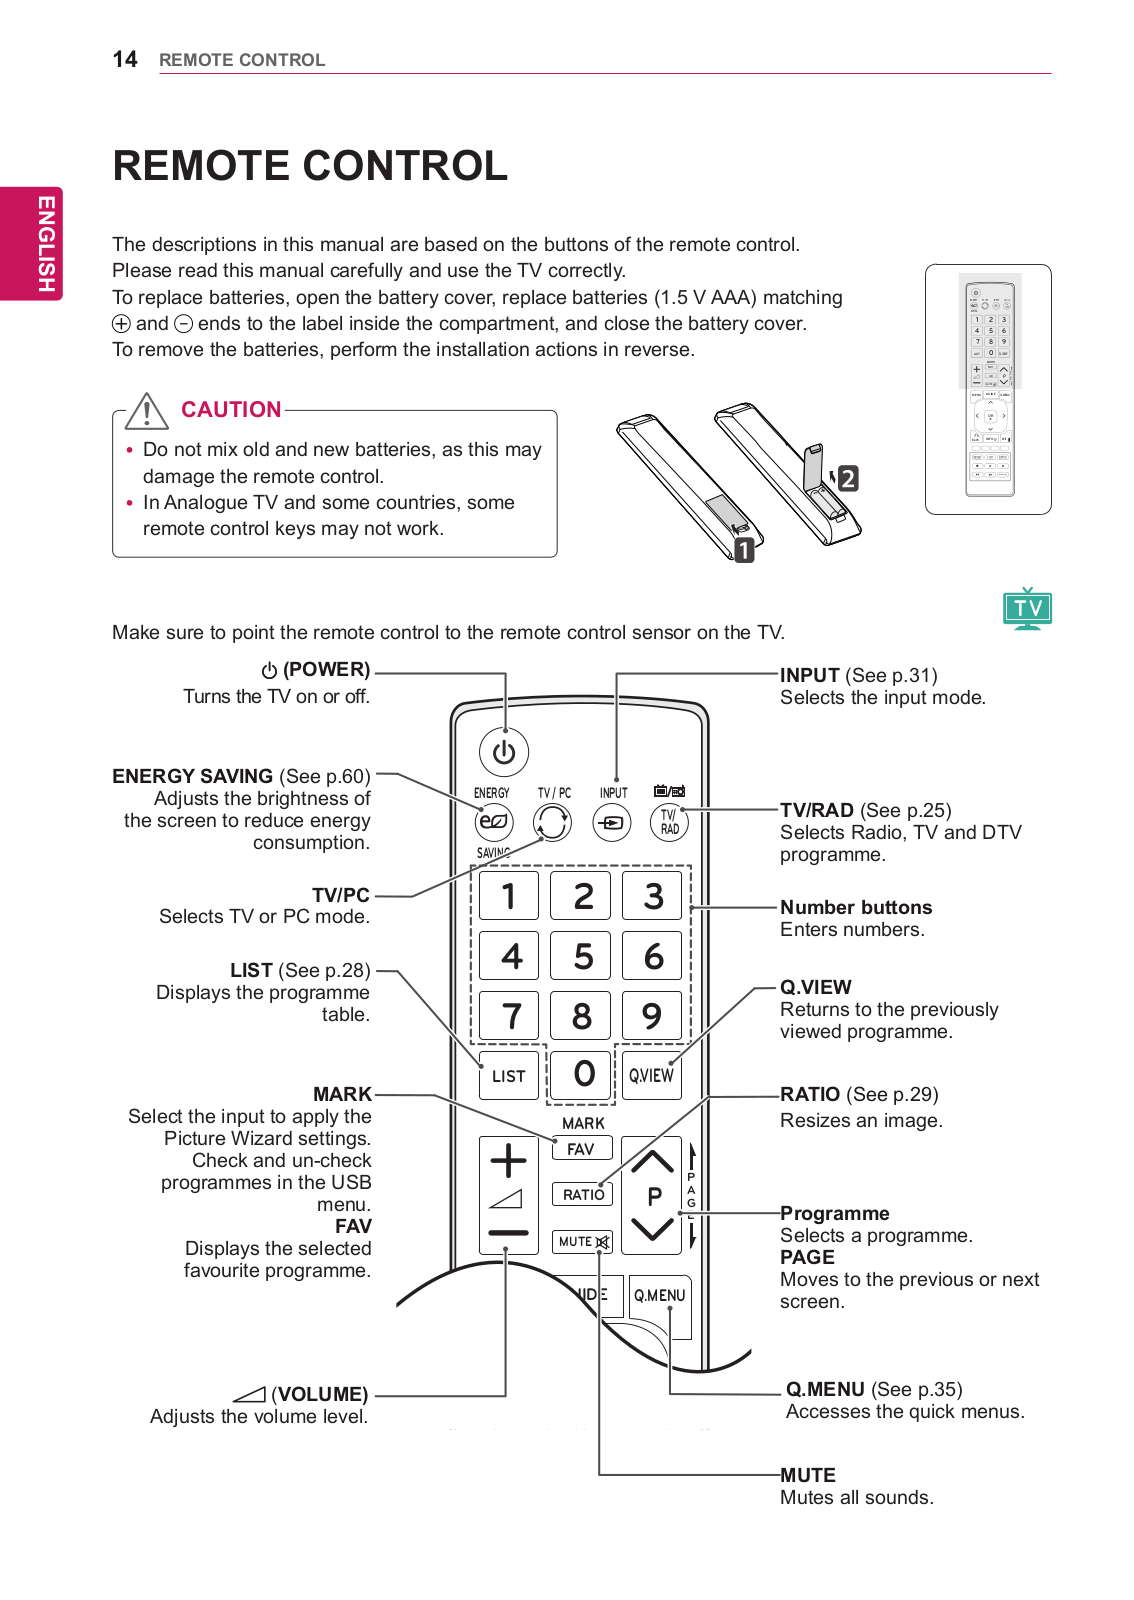
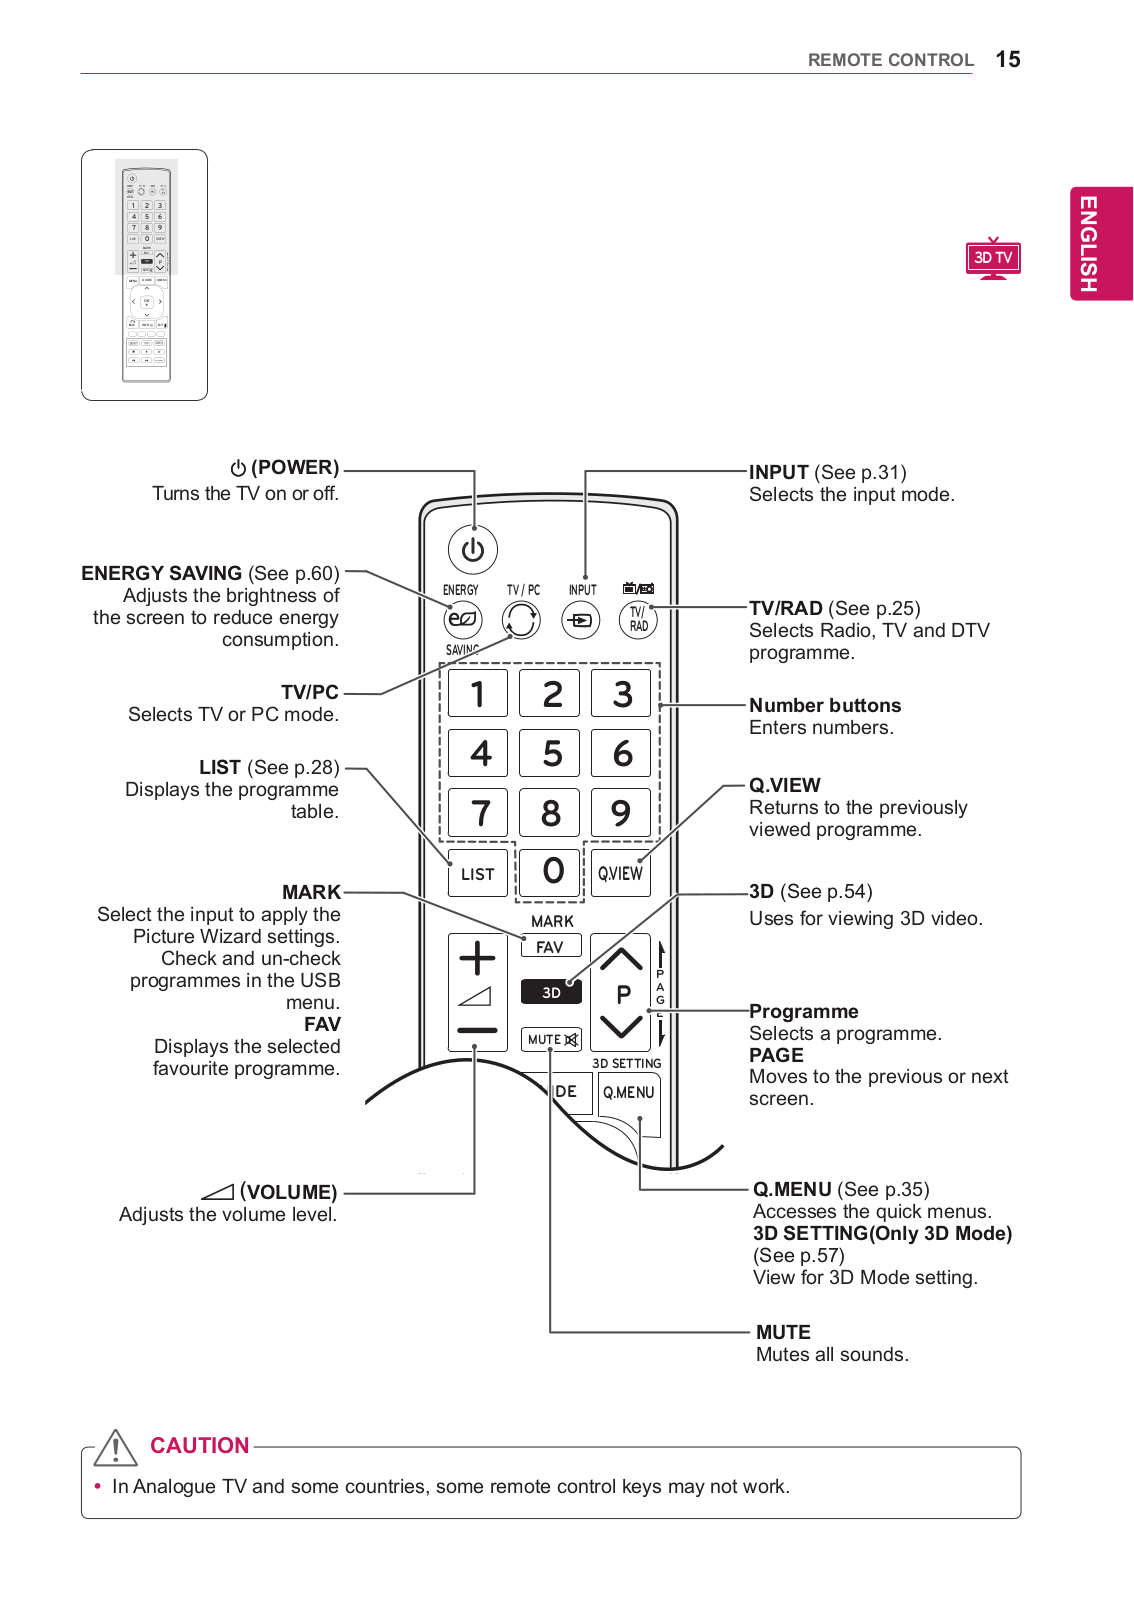
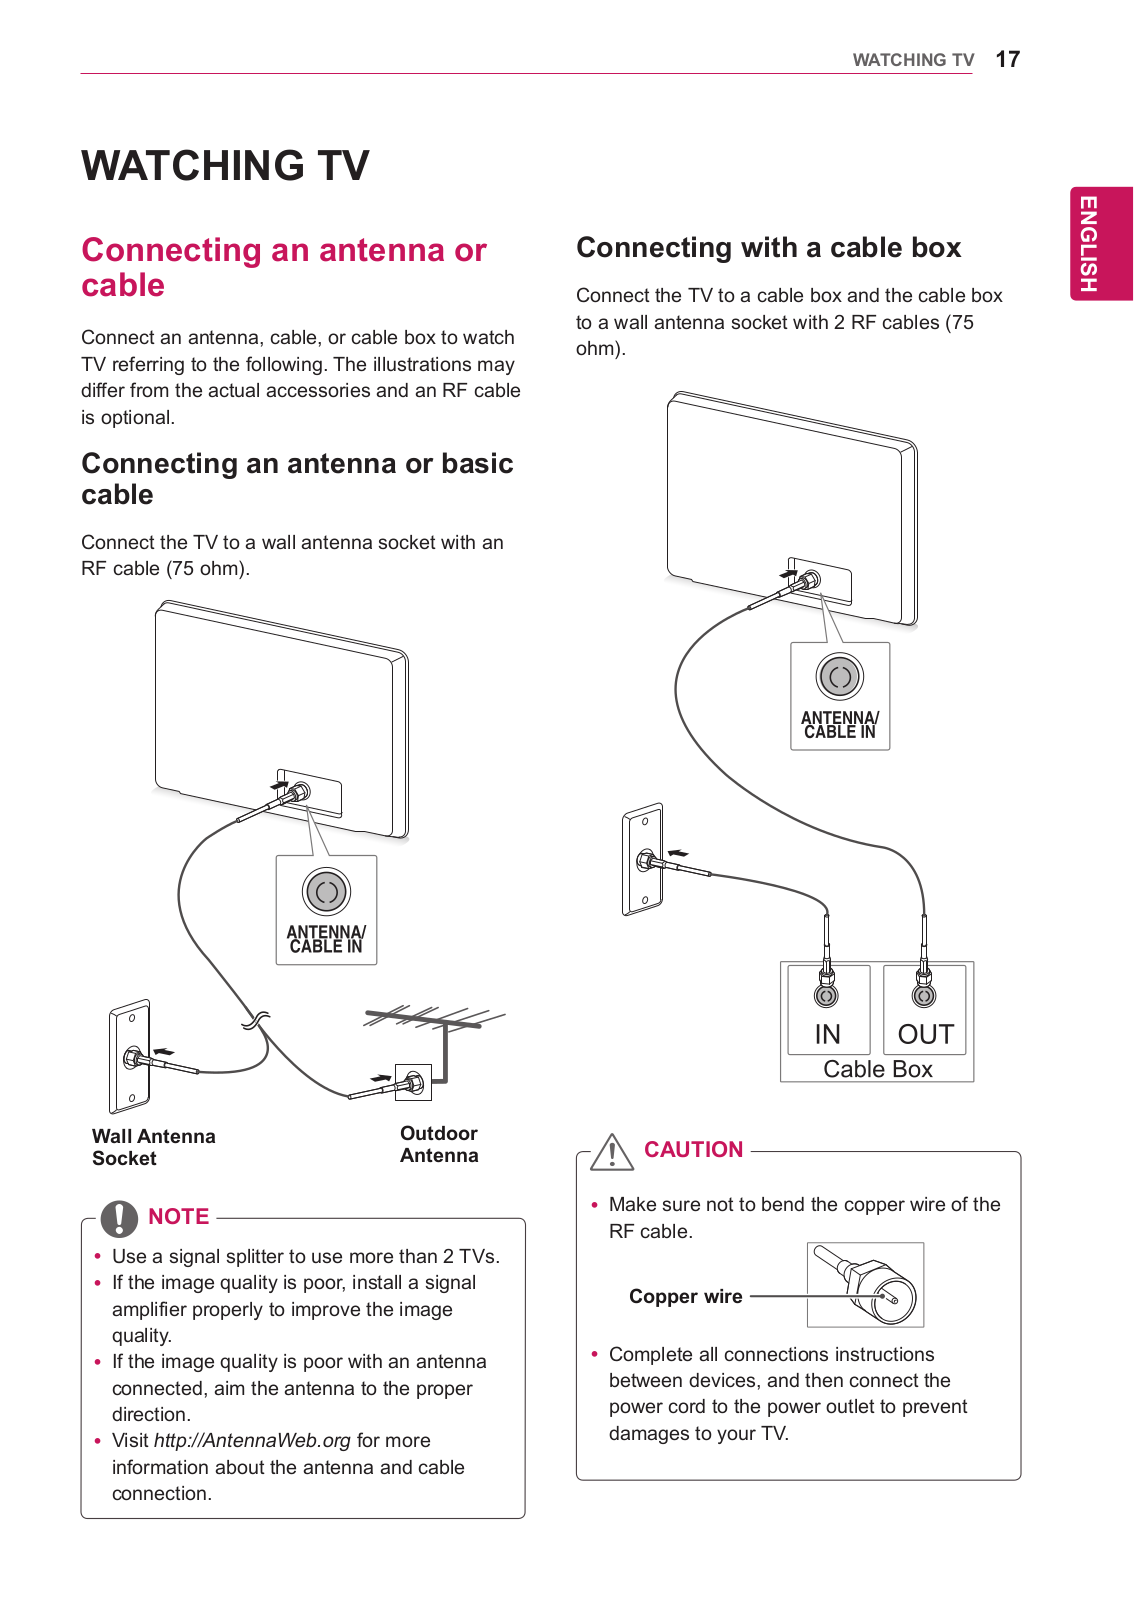
LG M2550D-PS, M2350D-PS, M2250D-PR, M2450D-PR User Guide
...
LG User Guide
Download
Specifications and Main Features
Frequently Asked Questions
User Manual
Download
Loading...
+
76
hidden pages
Unhide
You need points to download manuals.
1 point = 1 manual.
You can buy points or you can get point for every manual you upload.
Buy points
Upload your manuals
 Loading...