

Page 1

User’s Guide
M197WA
Make sure to read the
Keep the User's Guide(CD) in an accessible place for furture reference.
See the label attached on the product and give the information to your dealer when you ask for
service.
Safety
Precautions before using the product.
Page 2
Before Connecting to the PC
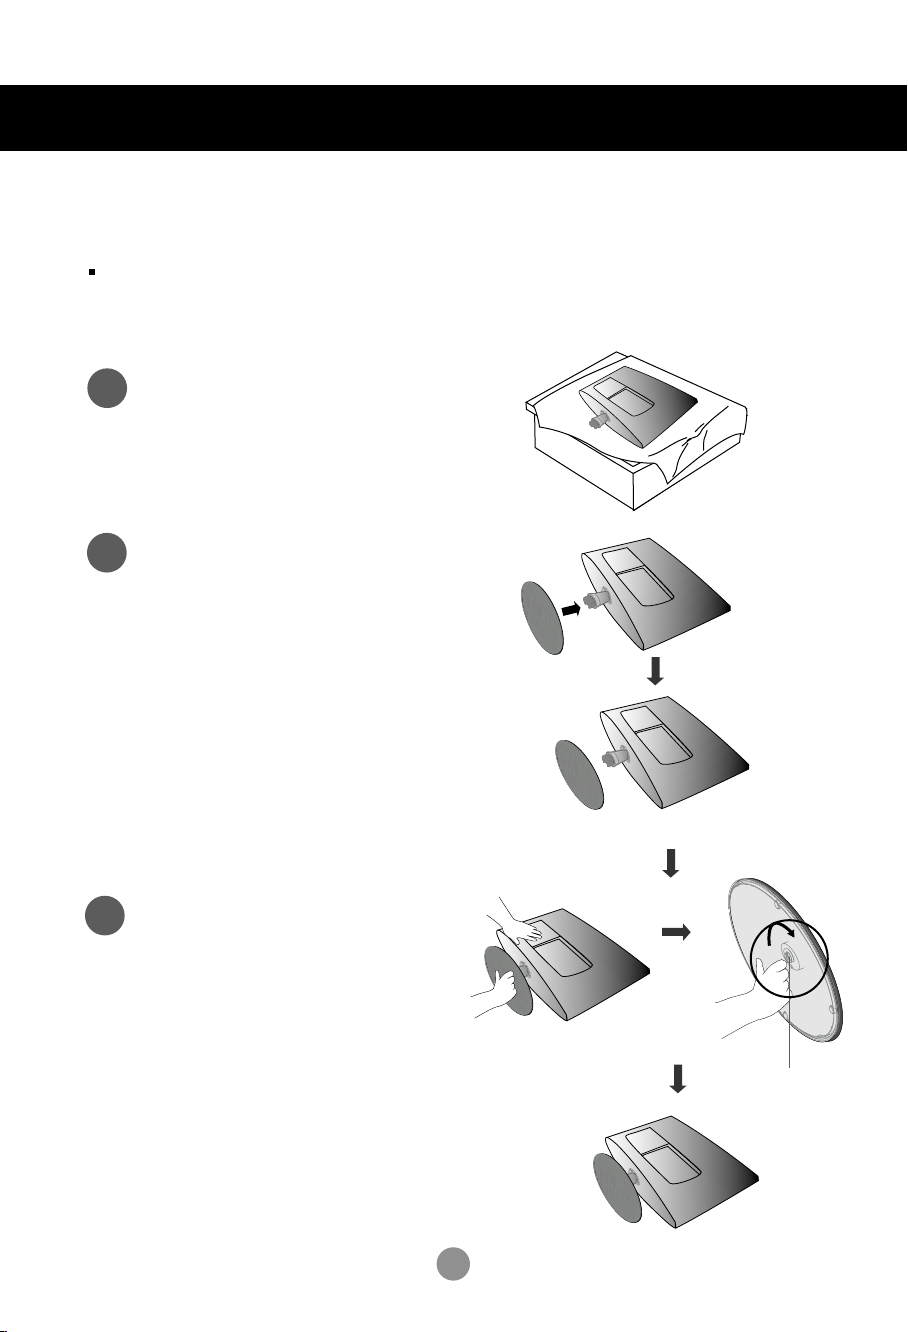
Stand Installation
Before setting up the product, ensure that the power supply, the computer system,
and other attached devices is turned off.
Carefully place the product screen side
1
down on a cushioned surface that will
protect product and screen from damage.
Insert the stand base into the product
2
Attach the monitor to the Stand Base
3
by turning the screw to the right.
* Turn the screw by using the screw
handle
Screw
1
Page 3
Before Connecting to the PC
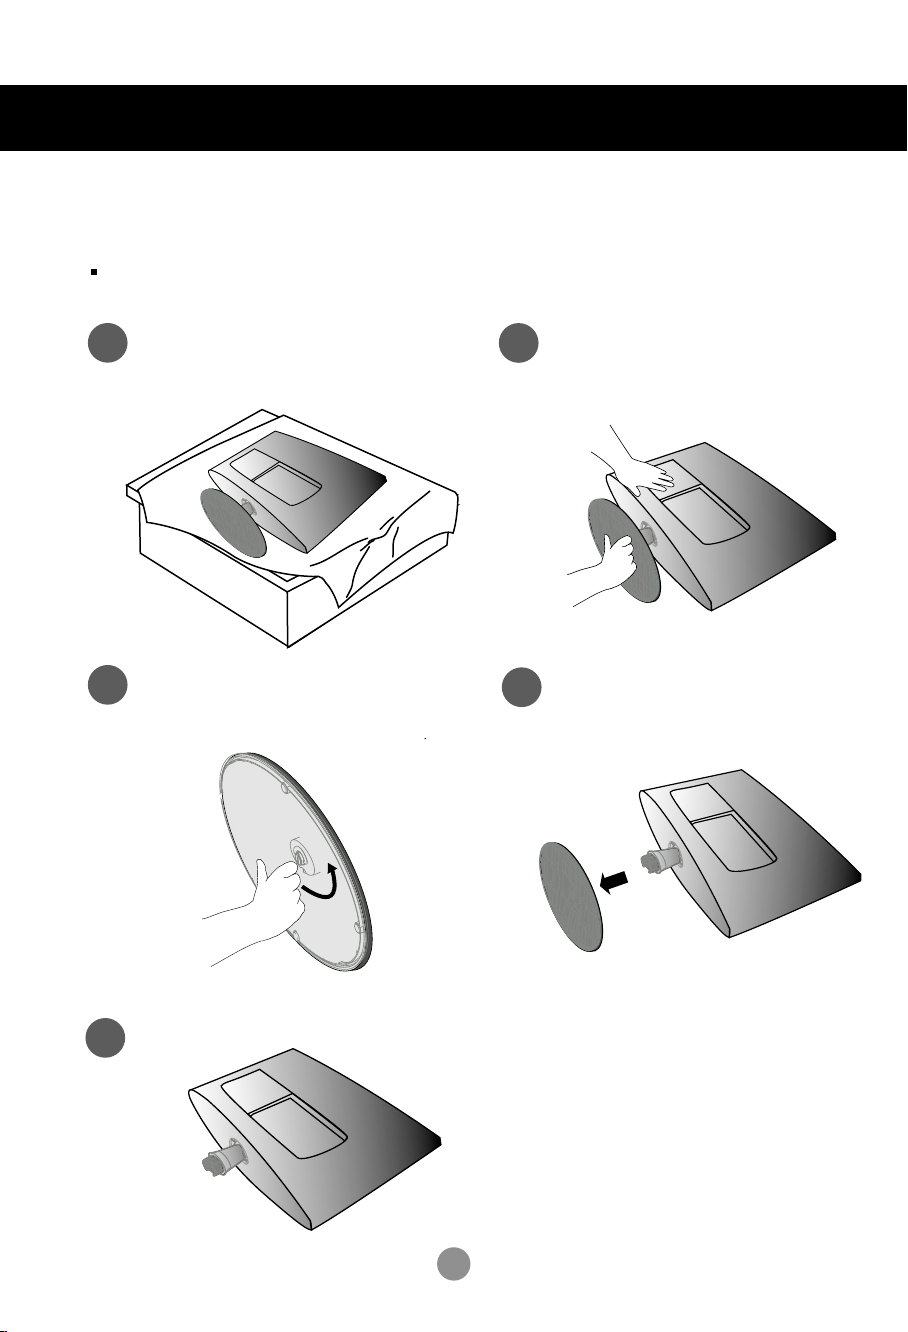
Detaching Stand
Before setting up the product, ensure that the power supply, the computer system,
and other attached devices is turned off.
Place the set screen side down on a
1
cushion or soft cloth.
Turn the screw by using the screw handle
3
Detach the monitor to the Stand
2
Base by turning the screw to the left.
Pull the stand base.
4
5
2
Page 4

Before Connecting to the PC
Before setting up the product, ensure that the power supply, the computer system,
and other attached devices is turned off.
Positioning your display
1. Adjust the position of the panel in various ways for maximum comfort.
Tilt Range
-6
~ -2
°
°
12°~ 18
°
Warning:
When adjusting the angle of the screen, do not put
your finger(s) in between the head of the monitor
and the stand body. You can hurt your finger(s).
Theft prevention locking device
Use this locking cable
separately if required.
Locking Device
(This has to be purchased
) to prevent theft.
3
Page 5
Before Connecting to the PC
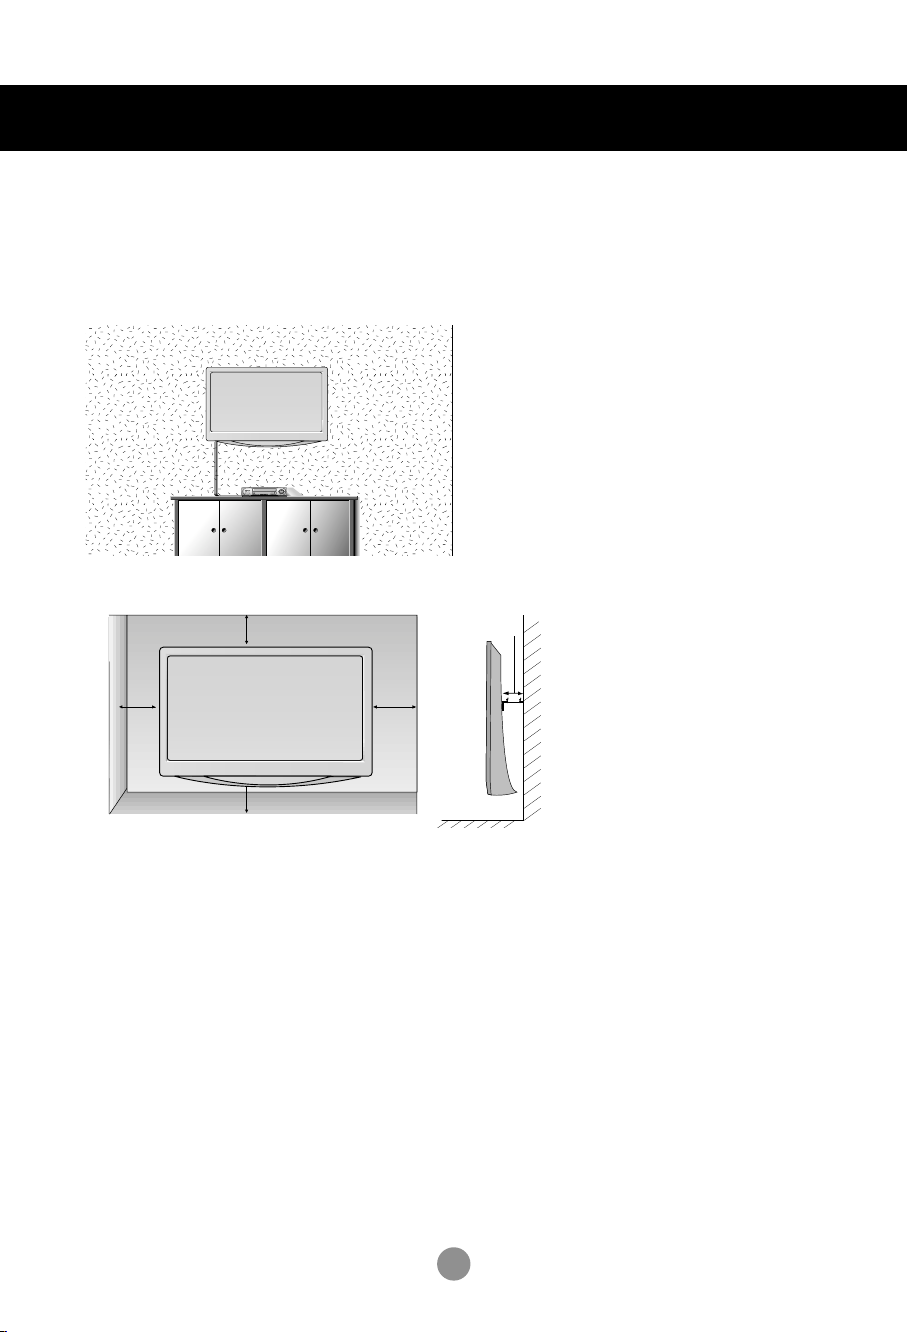
WALL MOUNT:HORIZONTAL INSTALLATION
For proper ventilation,allow a clearance of 4 inches on each side and from the wall. Detailed installation
instructions are available from your dealer,see the optional Tilt Wall Mounting Bracket Installation and
Setup Guide.
4 inches
4 inches
4 inches
4 inches
4 inches
4
Page 6
Name and Function of the Parts
POWER
INPUT
PR
PR
OK
MUTE
LIST Q.VIEW
SSM
PSM
VOL
VOL
I/II
TV/PC
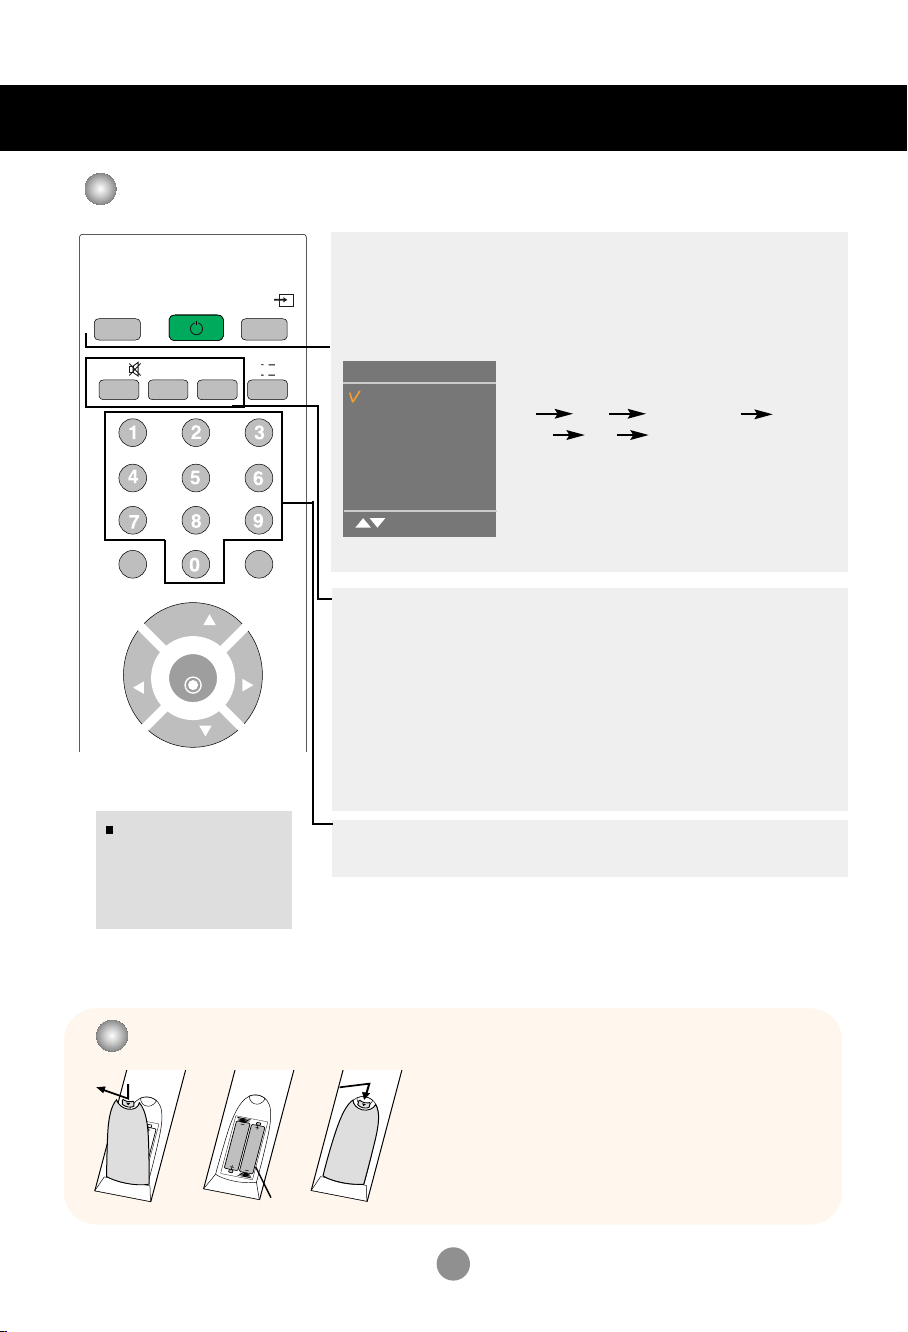
Name of the Remote Control Buttons
NOTE : In case of weak
stereo sound signals, with
stereo or Nicam stereo
transmission, select mono
reception.
TV/PC :
Selects TV or PC mode.
Switches the set on.
POWER
INPUT
Input
TV
AV
Component
RGB
DVI
HDMI
OK
Each time you press the Input button it will
change to
TV AV Component
RGB DVI HDMI
If nothing is inputted for several seconds the
screen will automatically move to the
selected menu.
MUTE
Switches the sound on or off.
PSM (Picture Status Memory)
Press repeatedly to select Dynamic, Standard, Mild, Game or User
picture mode.
SSM
(Sound Status Memory)
Button
Button
Use this button to select the sound tone.
Press repeatedly to select Flat, Music, Movie, Sports, User
sound tone.
Number buttons
Able to directly select and change channel.
Inserting batteries into remote control.
1. Take out the battery cap.
2. Insert the batteries with correct polarity (+/-).
3. Close the battery cap.
• Dispose of used batteries in the recycle bin to prevent
environmental pollution.
AAA Type
5
Page 7
Name and Function of the Parts
Name of the Remote Control Buttons
I/II : Bilingual choice and sound mode selection
[TV]
TV/PC
MUTE
POWER
PSM
SSM
LIST Q.VIEW
PR
OK
VOL
PR
INPUT
I/II
VOL
To switch from Stereo to Mono sound in case of stereo
or from Nicam Stereo to Nicam Mono, in case of digital
to switch from Nicam Dual I to Nicam Dual II or Nicam Dual I+II in
case of Nicam Dual transmission.
to choose between Dual I, Dual II or Dual I+II in case of bilingual
transmission :
Dual I sends the primary broadcast language to the loudspeakers ;
Dual II sends the secondary broadcast language to the loudspeakers ;
Dual I+II sends a separate language to each loudspeakers.
[AV / Component]
In AV/Component mode, you can select output sound for the left and
right loudspeakers. Repeatedly press the I/II button to
select the sound output.
L+R : Audio signal from audio L input is sent to left
loud-speaker and audio signal from audio R input is
sent to right loud-speaker.
L+L : Audio signal from audio L input is sent to left and right
loud-speakers.
R+R : Audio signal from audio R input is sent to left and
right loud-speakers.
transmission,
transmission.
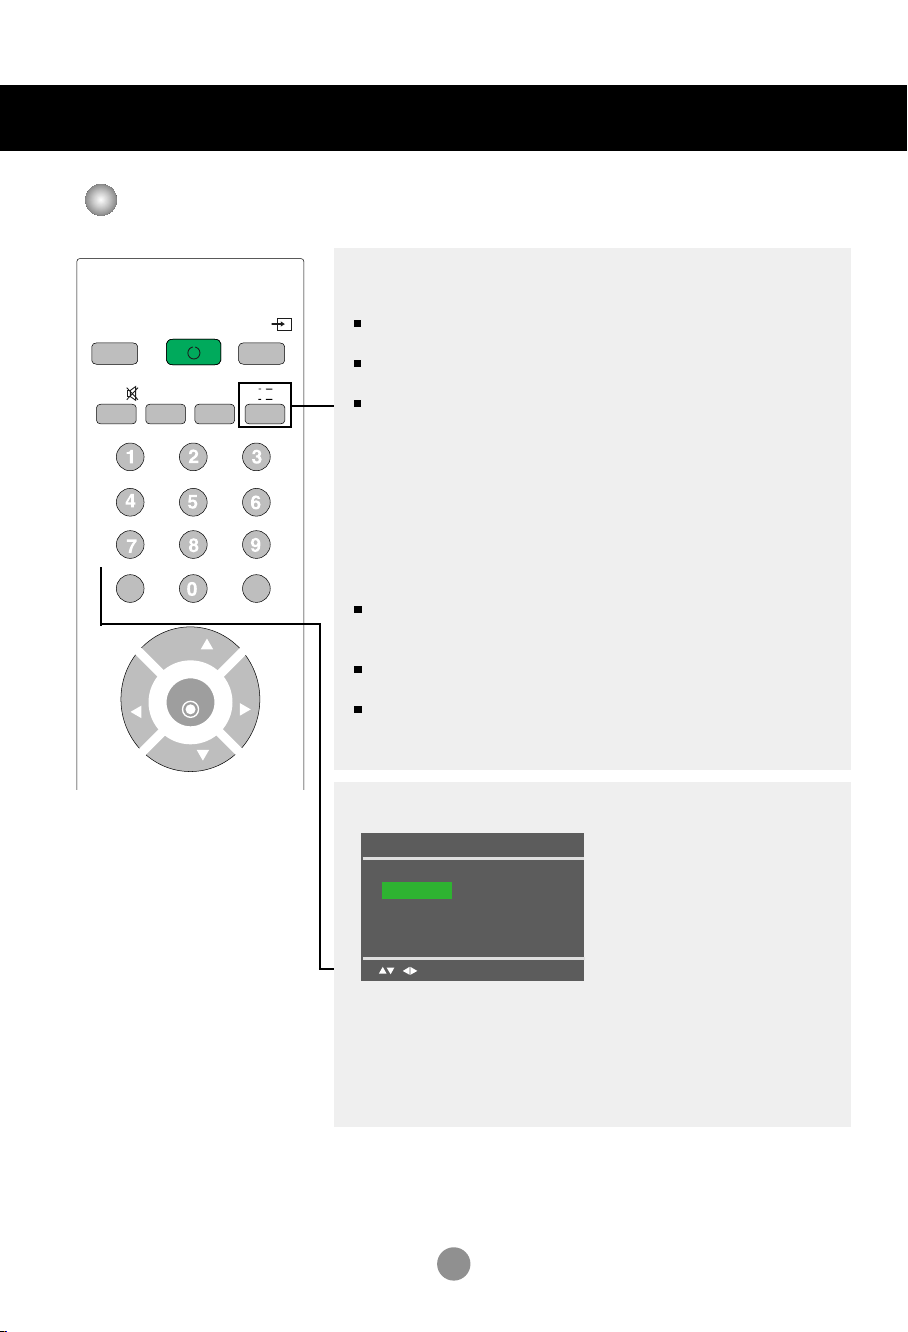
LIST : Programme list
To display the programme list (0~ 99).
Programme List
0 C 01 5 C 07
1 C 35 6 C 50
2 C 05 7 C 51
3 C 11 8 C 41
4 C 04 9 C 63
OK MENU
Note: TV channels displayed in blue have been setup
to be skipped in the Programme Edit menu.
Q.VIEW : QUICK VIEW Button
To display the previously selected TV channel
6
Page 8
Name and Function of the Parts
PR
PR
OK
MENU
SLEEP
*
VOL
VOL
ARC/
*
PR
PR
OK
MENU
SLEEP
UPDATE
SIZE
HOLD
INDEX
TEXT
TIME
MIX
REVEAL
MODE
VOL
VOL
M
X
?
i
ARC/
*
Name of the Remote Control Buttons
(Depends on the country the remote control can be provided different.)
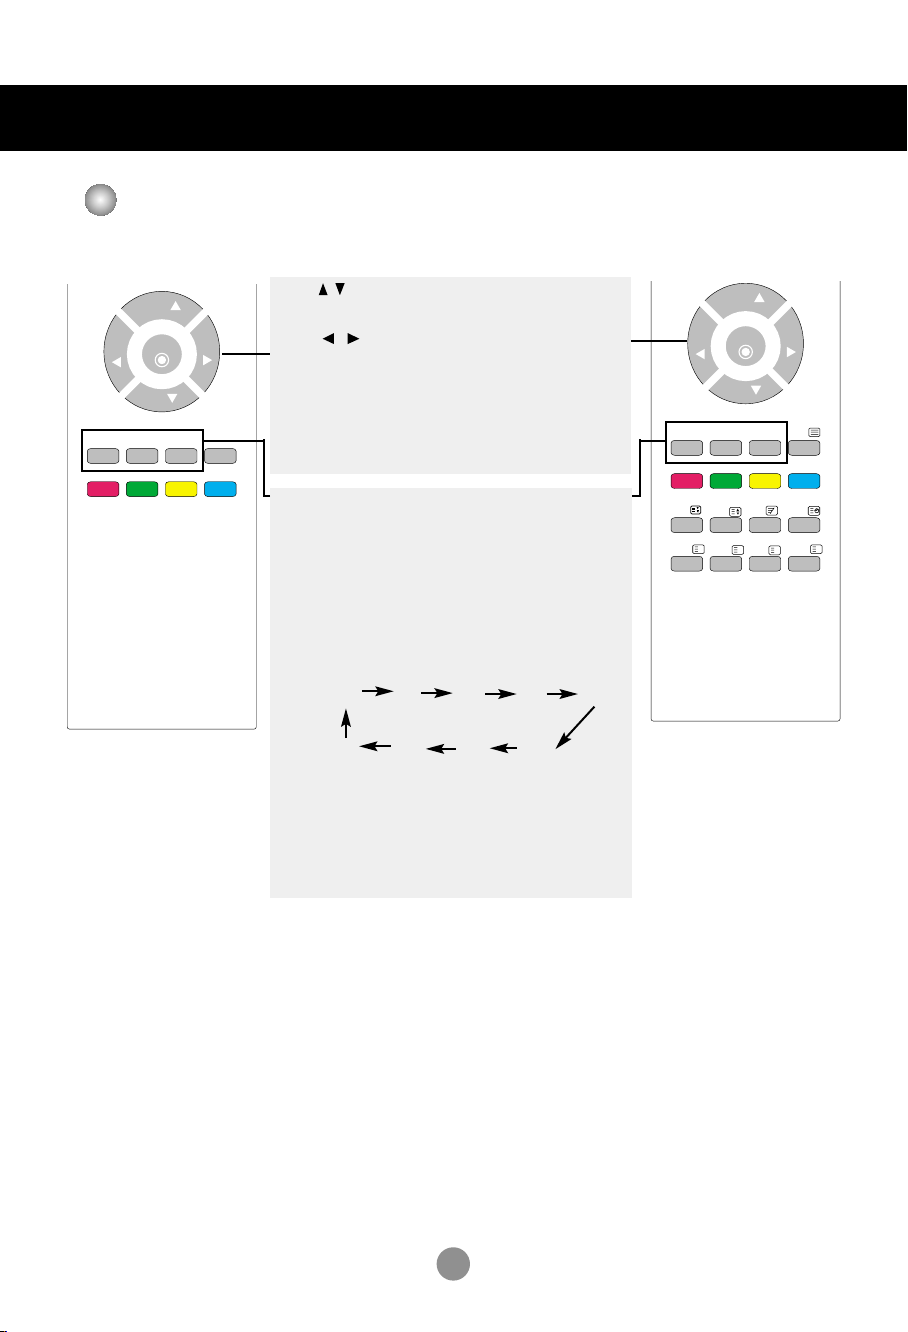
PR ( ) Buttons
Able to change channel.
VOL ( ) Buttons
Able to adjust sound.
OK Button
Use when functional adjustment is completed.
Double press the OK button, then Auto Config.
(Only RGB input)
MENU
Use this button to enter the On Screen Display
menu.
SLEEP : SLEEP Timer
You can set a time period after which the
TV / AV / RGB / Component / DVI / HDMI
should switch itself to standby. Press the key
repeatedly to select the number of minutes.
_ _ _ (off)
10
240 180
ARC/*
To select the image size of the screen.
•
When TV / AV mode: Spectacle, Original, 4:3, 16:9, 14:9,
20 30
120
60
90
Zoom1, Zoom2
• When RGB/DVI/HDMI/Component mode
: 4:3, 16:9
7
Page 9
PR
PR
OK
LIST
MENU
Q.VIEW
SLEEP
UPDATE
SIZE
HOLD
INDEX
TEXT
TIME
MIX
REVEAL
MODE
VOL
VOL
M
X
?
i
ARC/
*
Name and Function of the Parts
Remote Control - Using the Teletext function
If you don't, the teletext may not appear correctly on the screen.
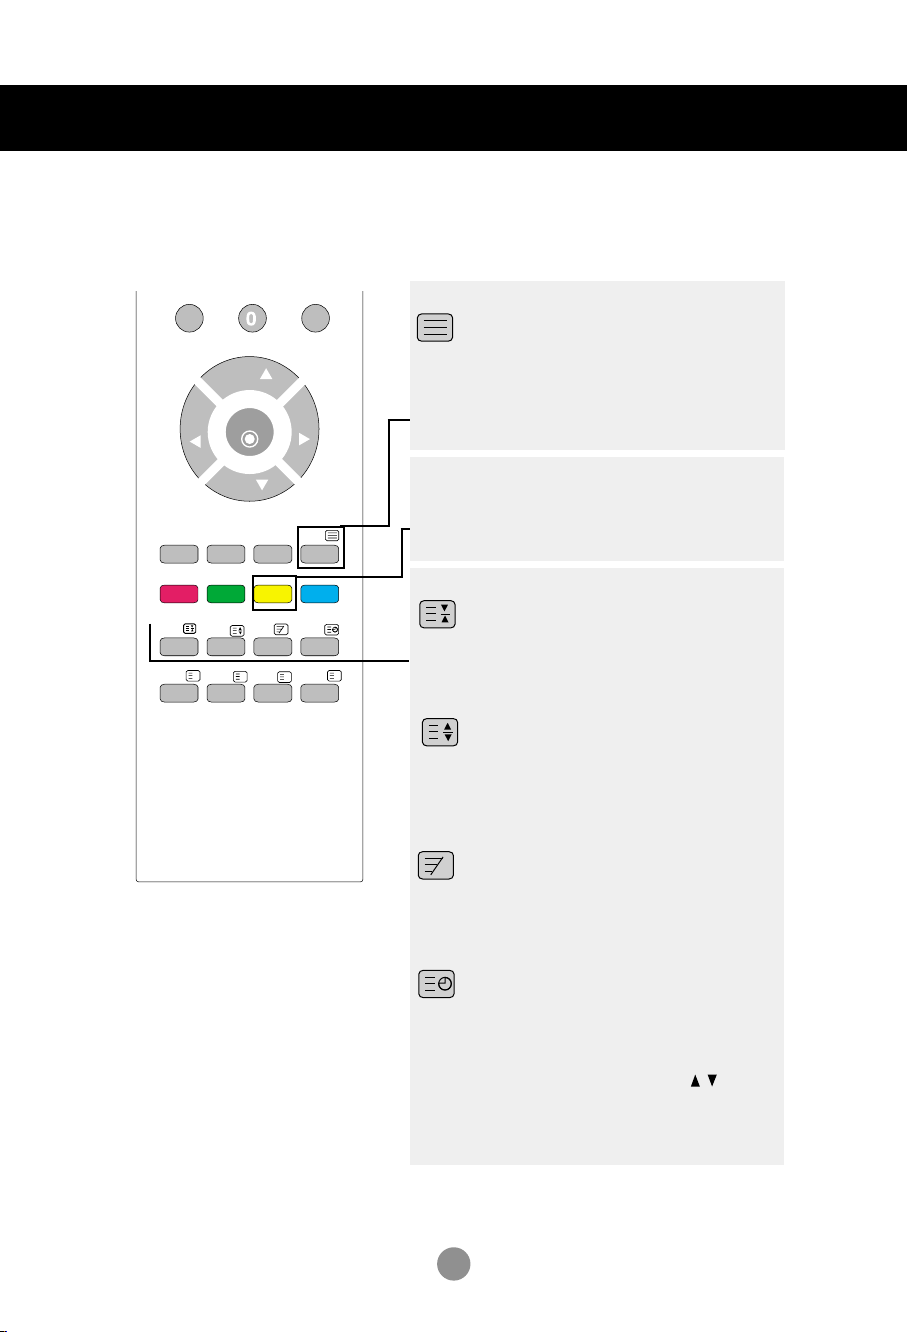
TEXT
To select the teletext on or off. The main index
page or the last selected page appears on the
screen together with an information headline and
an option line at the bottom of the screen.
Yellow key
Favourite Program On : Rotate favourite channel
Favourite Program Off : To display the previously
selected TV channel.
HOLD
Press the button to stop the automatically rotating
of the sub pages. Press the button again to
continue the automatic rotating again.
SIZE
Press the button repeatedly to display the upper
part, the lower part and then to return to the
normal page size.
MIX
Display the teletext pages superimposed on
the TV picture. To switch the TV picture off
press this button again.
TIME
Press this button to select a sub page number.
The sub page number is displayed at the
bottom of the screen. To hold or change the
sub page, press the RED/GREEN, or
NUMBER buttons. Press again to exit this
function.
8
Page 10
Name and Function of the Parts
MENU
SLEEP
UPDATE
SIZE
HOLD
INDEX
TEXT
TIME
MIX
REVEAL
MODE
M
X
?
i
ARC/
*
Remote Control - Using the Teletext function
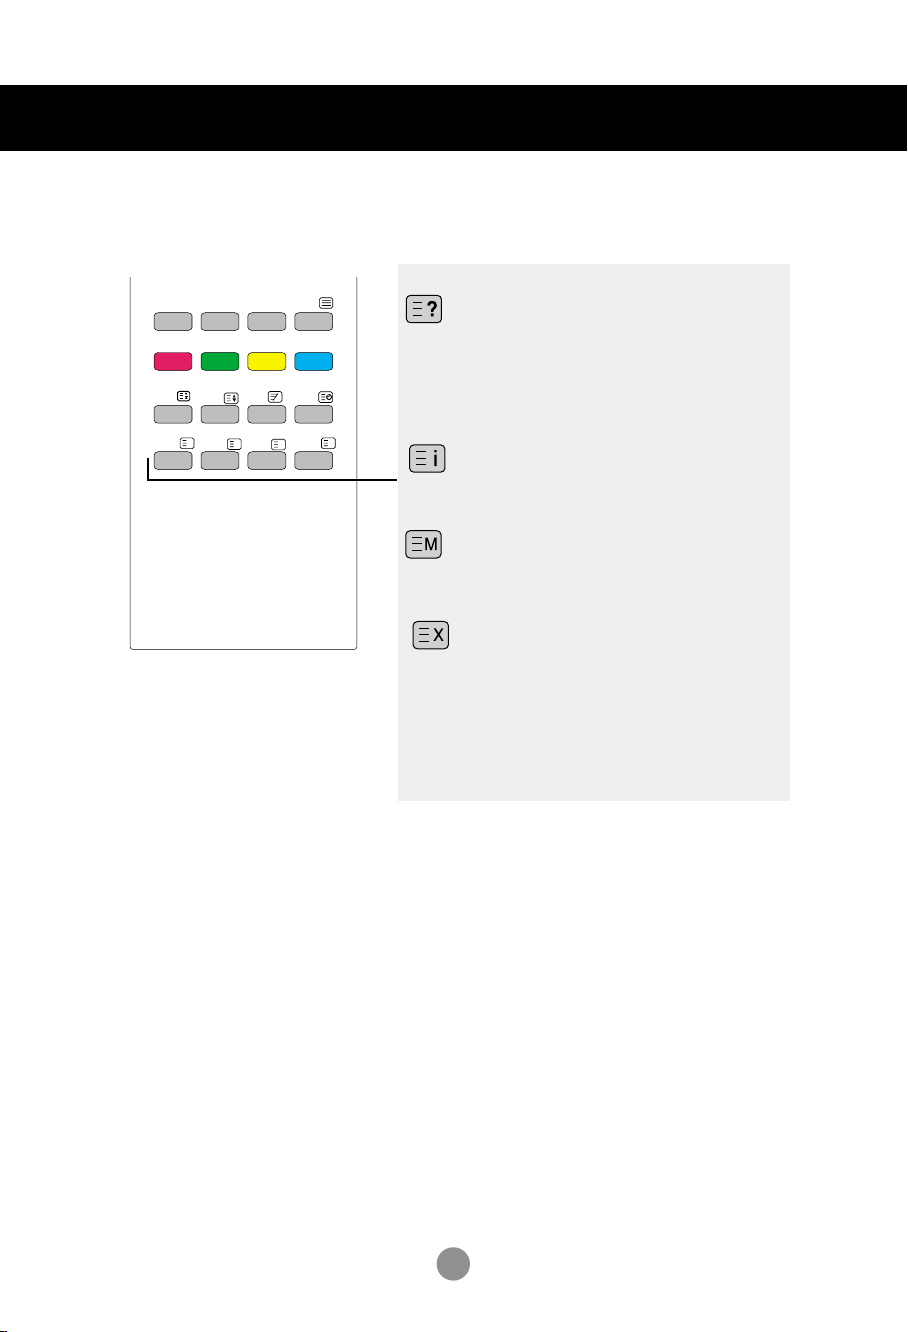
REVEAL
Press the button to reveal/conceal the hidden
information, such as solutions to riddles and
puzzles. Press this button again to remove the
information from the display.
INDEX
To display the main index.
MODE
The mode will be switched in the Teletext mode.
UPDATE
Press the button to appear the TV programme.
At the top of screen indicates that you are still in the
teletext mode. Before interrupting teletext, you may
select a page number. When the page has been
found, the information line appears briefly on your
screen. Press the button again to reappear teletext.
9
Page 11
Name and Function of the Parts
AC IN
AC IN
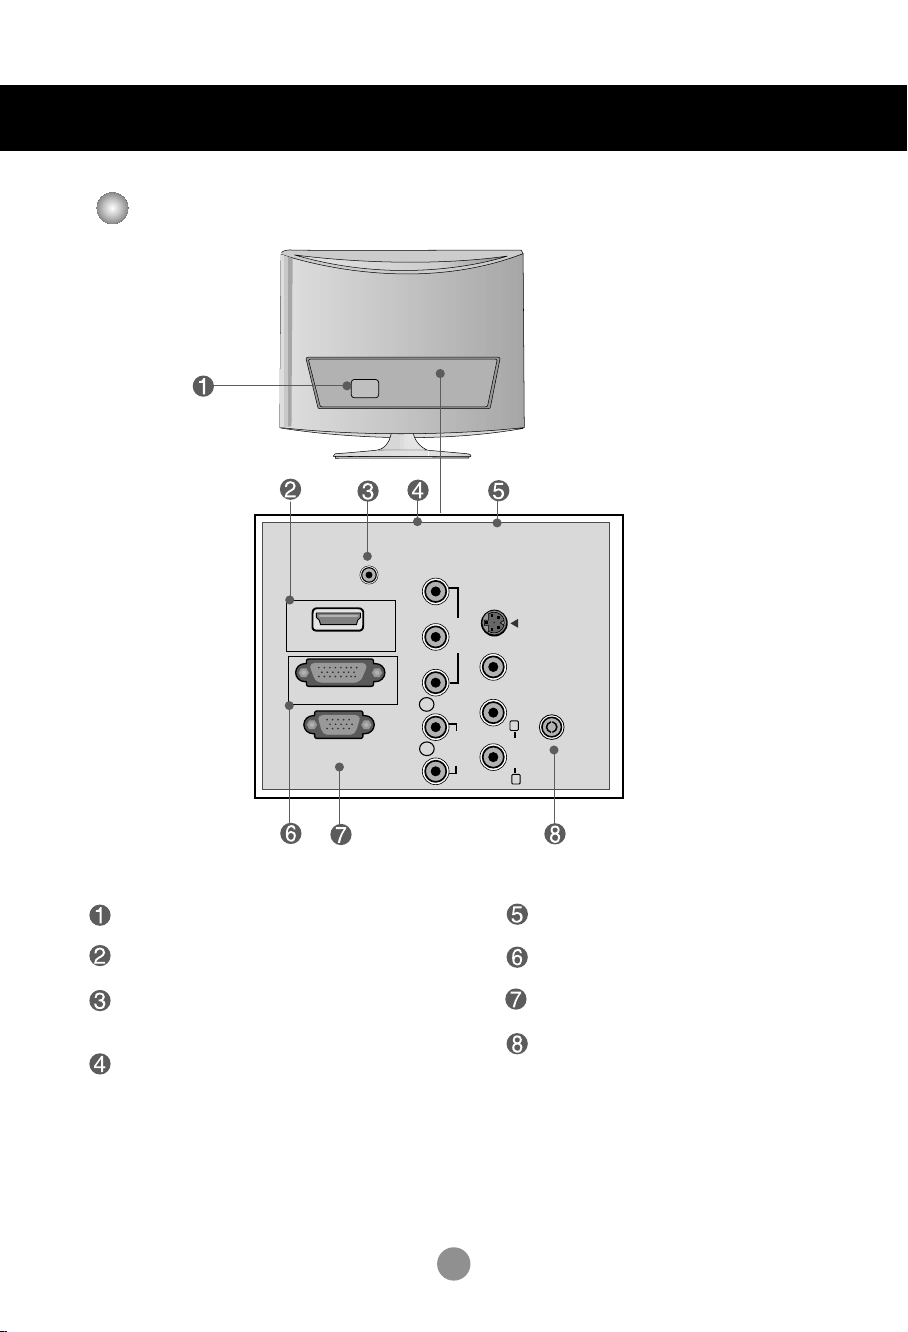
Rear View
COMPONENTINAV IN
AUDIO IN
(RGB/DVI)
HDMI IN
DVI-D IN (PC)
RGB IN (PC)
Y
S-VIDEO
P
B
VIDEO
AUDIO
VIDEO AUDIO
(MONO)
L
R
ANTENNA/
CABLE IN
P
R
L
R
Power Connector : Connect the power cord.
HDMI Digital Signal Connector
RGB, DVI Sound Jack : Connect to the jack in
the PC sound card.
Component Input Terminal
10
AV Input Terminal
DVI Digital Signal Connector
D-Sub Analog Signal Connector
TV Tuner Jack : Connect the antenna.
Page 12
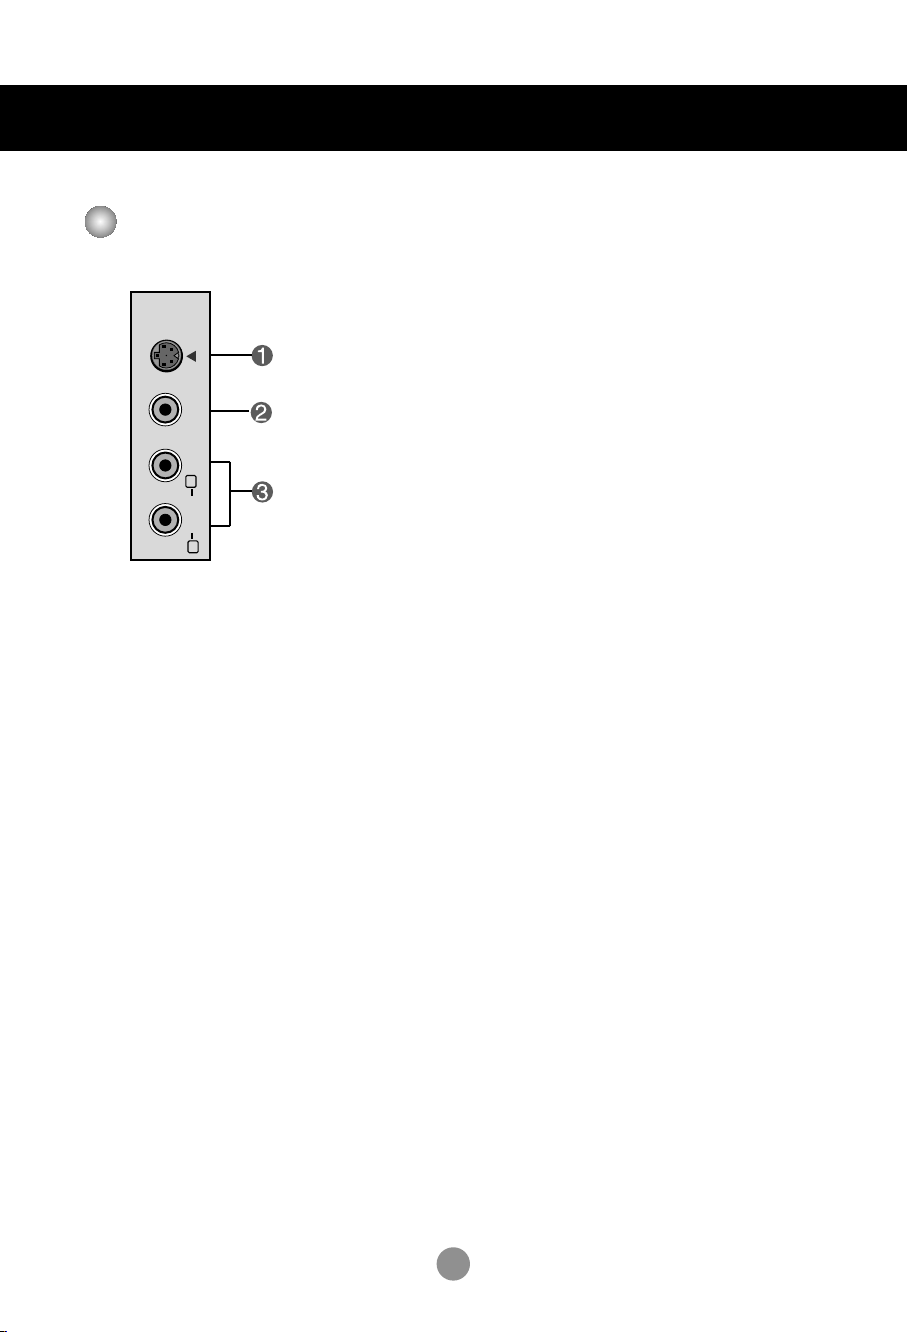
Name and Function of the Parts
VIDEO AUDIO
(MONO)
S-VIDEO
L
R
AC IN
AV Input Terminal
S-Video Input Terminal
Video Input Terminal
Audio Input Terminal
11
Page 13

Connecting to External Devices
RGB IN (PC)
AUDIO IN
(RGB/DVI)
VIDEO
COMPONENTINAV IN
VIDEO AUDIO
(MONO)
S-VIDEO
AUDIO
Y
P
B
P
R
L
R
DVI-D IN (PC)
HDMI
AC IN AC IN
ANTENNA/
CABLE IN
L
R
RGB IN (PC)
Connecting to your PC
First of all, see if the computer, product and the peripherals are turned off.
1.
Then, connect the signal input cable.
Rear side of the product.
Connecting with the D-Sub signal input cable.
A
Rear side of the product
.
Macintosh Adapter (Not included)
Use the standard Macintosh adapter since an
incompatible adapter is available in the market.
(Different signaling system)
Connecting with the DVI signal input cable.
B
DVI-D IN (PC)
Rear side of the product.
Connect the audio cable.
2.
AUDIO IN
(RGB/DVI)
Audio cable
Rear side of the product.
•
Make sure to check the sound card connection terminal in the PC before connecting to the product.
If the PC sound card supports both Speaker Out and Line Out, change it to Line Out by setting the jumper
or the PC application. (For more details, refer to the sound card user’s guide.)
- Speaker Out : The terminal connected to the speaker that is not equipped with an amplifier.
- *Line Out : The terminal connected to the speaker equipped with an amplifier.
If Audio Out in the PC sound card has only Speaker Out, reduce the PC volume. This product is integrated
with an amplifier.
12
12
Page 14

AUDIO IN
(RGB/DVI)
VIDEO
COMPONENTINAV IN
VIDEO AUDIO
(MONO)
S-VIDEO
AUDIO
Y
P
B
P
R
L
R
DVI-D IN (PC)
HDMI
AC IN AC IN
ANTENNA/
CABLE IN
L
R
RGB IN (PC)
Connecting to External Devices
Connect the power cord.
3.
Turn on power by pressing the
1
4.
5.
power button on the product.
Turn on the PC.
2
Select an input signal.
Rear side of the product.
Power button
Press the INPUT button on the remote control to select the input signal.
INPUT OK
Or, press the INPUT button at the top side of the product.
INPUT OK
A
•
Select RGB
Input
TV
AV
Component
RGB
DVI
HDMI
OK
B
•
Select DVI
Input
TV
AV
Component
RGB
DVI
HDMI
OK
Each time you press the Input button it will change to TV AV Component
RGB DVI HDMI
If nothing is inputted for several seconds the screen will automatically move to the selected menu.
PC Mode – Preset Mode
Horizontal
Preset mode
1
720 x 400
2
640 x 480
3
640 x 480
4
800 x 600
5
800 x 600
Note
• Directly connect to a grounded power outlet on the wall or a power bar with a ground wire.
Frequency
(kHz)
31.468
31.469
37.500
37.879
46.875
Vertical
Frequency
(Hz)
70
60
75
60
75
13
Preset mode
6
1024 x 768
7
1024 x 768
8
1280 x 768
9
1360 x 768
10
1366 x 768
Horizontal
Frequency
(kHz)
48.363
60.123
47.776
47.712
47.7
Vertical
Frequency
(Hz)
60
75
60
60
60
Page 15

Connecting to External Devices
VIDEO AUDIO
(MONO)
S-VIDEO
L
R
VIDEO
OUT
AUDIO
OUT
VIDEO AUDIO
(MONO)
S-VIDEO
L
R
VIDEO
OUT
AUDIO
OUT
Connecting to VCR/DVD
Connect the video/audio cable as shown in the figure below and then connect the power
1.
cord (See page 13).
When using the RCA cable.
A
•
Connect the input terminal with a proper colour match.
VCR/DVD
RCA Cable
(Not included)
When using the S-Video cable.
B
•
Connect to the S-Video input terminal to watch high image quality movies.
VCR/DVD
S-Video Cable
(Not included)
Rear side of the Product
Rear side of the Product
Note
RCA Cable
(Not included)
• In case the RCA cable is connected simultaneously as S-Video cable is connected, S-Video cable is first.
14
Page 16

Connecting to External Devices
Select an input signal.
2.
Press the INPUT button on the remote control to select the input signal.
INPUT OK
Or, press the INPUT button at the top side of the product.
INPUT OK
When connecting with a RCA cable.
A
•
Select AV
B
When connecting with a S-Video cable.
•
Select AV
Input
TV
AV
Component
RGB
DVI
HDMI
OK
Each time you press the Input button it will change to TV AV Component
RGB DVI HDMI
If nothing is inputted for several seconds the screen will automatically move to the selected menu.
15
Page 17

Connecting to External Devices
Connecting to Set-top Box /DVD (480p/576p/720p/1080i/480i/576i)
Connect the video/audio cable as shown in the figure below and then connect the power
1.
cord (See page 13).
•
Connect the input terminal with a proper colour match.
Rear side of the Product
Set-top Box /DVD
Y
VIDEO
Pb Pr
COMPONENT IN
L R
AUDIO
Component Cable
(Not included)
Audio Cable
(Not included)
COMPONENT
IN
Y
P
B
VIDEO
P
R
L
AUDIO
R
Select an input signal.
2.
Press the INPUT button on the remote control to select the input signal.
INPUT OK
Or, press the INPUT button at the top side of the product.
INPUT OK
•
Select Component
Each time you press the Input button it will change to TV AV Component
RGB DVI HDMI
If nothing is inputted for several seconds the screen will automatically move to the selected menu.
Input
TV
AV
Component
RGB
DVI
HDMI
OK
16
Page 18

Connecting to External Devices
HDMI OUTPUT
HD
M
I IN
DVI OUTPUT
AUDIO
R
L
A
U
D
IO
IN
(R
G
B
/D
VI)
H
D
M
I IN
When watching HDMI from the DVD/Set-top Box
Connect the HDMI cable as shown in the below figure and then connect the power
1.
cord. (see page 13)
[Rear side of the Product]
HDMI to DVI cable
(not included)
RCA Stereo cable
(not included)
[Rear side of the Product]
HDMI cable
(not included)
Select an input signal.
2.
[Set-top Box/DVD]
[Set-top Box/DVD]
Press the INPUT button on the remote control to select the input signal.
INPUT OK
Or, press the INPUT button at the top side of the product.
•
INPUT OK
Select HDMI
Each time you press the Input button it will change to TV AV
Component RGB DVI HDMI.
If nothing is inputted for several seconds the screen will automatically
move to the selected menu.
DTV -Timming
Preset mode
1
720 x 480/60p
2
720 x 480/60p
3
720 x 576/50p
4
1280 x 720/50p
5
1280 x 720/60p
Horizontal
Frequency
(kHz)
31.47
31.5
31.25
37.5
44.96
Vertical
Frequency
(Hz)
60
60
50
50
60
Preset mode
6
1280 x 720/60p
7
1920 x 1080/60i
8
1920 x 1080/60i
9
1920 x 1080/50i
Note
• HDMI Input does not support PC mode.If it is connected PC,the screen may not be displayed properly.
17
Input
TV
AV
Component
RGB
DVI
HDMI
OK
Horizontal
Frequency
(kHz)
45
33.72
33.75
28.125
Vertical
Frequency
(Hz)
60
60
60
50
Page 19

AUDIO IN
(RGB/DVI)
VIDEO
COMPONENTINAV IN
VIDEO AUDIO
(MONO)
S-VIDEO
AUDIO
Y
P
B
P
R
L
R
DVI-D IN (PC)
HDMI
AC IN AC IN
ANTENNA/
CABLE IN
L
R
RGB IN (PC)
ANTENNA/
CABLE IN
Connecting to External Devices
When Watching TV
Check if the antenna cable is connected at the rear side of the product and then, connect
1.
the power cord.
Rear Side of the Product
2.
Antenna Cable
(Not included.)
Select an input signal.
Press the INPUT button on the remote control to select the input signal.
INPUT OK
Or, press the INPUT button at the top side of the product.
INPUT OK
•
Select TV
Each time you press the Input button it will change to TV AV Component
RGB DVI HDMI
If nothing is inputted for several seconds the screen will automatically move to the selected menu.
18
Input
TV
AV
Component
RGB
DVI
HDMI
OK
Page 20

To arrange cables using cable management
1.
Tie cables together with a cable management as shown in the illustration.
Cable management
19
Page 21

Adjusting the Screen
INPUT
MENU
VOL PROK
Name of the Buttons in the Screen Adjustment Unit
Power Indicator
Power Button
OSD Select/Adjust Button
OK Button
• This Indicator lights up blue when the display operates normally
(On Mode). If the display is in Sleep (Energy Saving) Mode, this
indicator colour changes to amber.
• Use this button to turn the product on and off.
•
Use
• OK button is usually used in choosing the MENU.
When there is no MENU on the screen pushing the OK button will
give the information about the current input source.
this
button to select an icon or adjust the setting in the OSD screen.
• Use this button to control the channel for the TV signal.
• Adjust the volume.
20
Volume
30
Page 22

Adjusting the Screen
Name of the Buttons in the Screen Adjustment Unit
MENU Button
INPUT Button
Each time you press the Input button it will change to TV AV Component
RGB DVI HDMI
If nothing is inputted for several seconds the screen will automatically move to the selected menu.
• Use this button to show/hide the OSD (On Screen Display) menu
screen.
TV Television
AV CVBS, S-Video
Component HDTV, DVD
RGB D-Sub analog signal
DVI DVI Digital signal
HDMI HDMI Digital signal
Input
TV
AV
Component
RGB
DVI
HDMI
OK
21
Page 23

Adjusting the Screen
OSD (On Screen Display) Menu
Icon Function Description
Station
Picture
Sound
Time
Special
Screen
Set/Select the channel when using the TV
Adjusting the picture function.
Adjusting the sound function.
Adjusting the time function.
Selecting the special function.
Adjusting the screen function.
Note
OSD(On Screen Display)
The OSD function enables you to adjust the screen status conveniently since it provides graphical
presentation.
22
Page 24

Adjusting the Screen
MENU
MENU
PR
PR
OK
VOL
VOL
PR
PR
OK
VOL
VOL
OK OK
OSD (On Screen Display) Scree
Pop up the
menu screen
1
Press the MENU Button, then the main menu of the OSD will appear.
2
To access a control, use the Buttons.
3
When the icon you want becomes highlighted, press the OK Button.
Use the Buttons to adjust the item to the desired level.
4
Accept the changes by pressing the OK Button.
5
Move where
you want to
adjust
Select a menu icon
•
Use the remote control to adjust the OSD screen.
n Tracking Order
Adjust the status
Save
adjustment
Exit from the
menu screen.
6
Exit the OSD by pressing the MENU Button
repeatedly .
23
Page 25

Adjusting the Screen
STATION ID set/Select the channel when using the TV
Auto programme
Station
Auto programme
Manual programme
Programme edit
Favourite programme
System
Storage
from
Search
To set
OK MENU
It should be set before run auto searching.
Press the buttons to select the TV system of the country or part of the
world from where you want to receive the TV channels.
* Supporting channel : C(V/UHF 02~69) S(Cable 01~41)
BG : PAL B/G, SECAM B/G (Europe/East Europe)
I : PAL I/II (U.K/Ireland)
DK : PAL D/K, SECAM D/K (East Europe)
M : NTST M
To select a programme number or enter the programe number with the
number buttons from where you want to start searching for new channels.
If e.g. you want to keep the channels 1 to 10 stored earlier, enter programe
number 11. Your TV search for new channels from number 11 onwards.
* Numbers available to store : 0~99
Press OK or button to start automatic programming. All available TV
channels will be searched and stored automatically. To stop auto
programming, press the MENU button. When auto programming is
completed, the programme list menu appears.
Manual programme
Station
Auto programme
Manual programme
Programme edit
Favourite programme
Storage
System
To change the channel.
(Change each item in Manual
To set
OK MENU
Press the buttons to select the channel number or enter the
programme number with the number buttons in where you want to store
channel.
Press the buttons to select the TV system of the country or part of
the world from where you want to receive the TV channels.
BG : PAL B/G, SECAM B/G (Europe/East Europe)
I : PAL I/II (U.K/Ireland)
DK : PAL D/K, SECAM D/K (East Europe)
M : NTST M
24
Program and press the "MENU"
button to save the settings)
Page 26

Adjusting the Screen
STATION ID set/Select the channel when using the TV
Programme edit
Band
Channel
Fine
Search
Name
Press the buttons to select VHF/UHF for aerial channels or Cable for
cable channels.
To select the channel reception type. : VHF/UHF / Cable.
If you know the channel number, enter it directly with the digit buttons 0 to 9.
In case of poor reception, you can improve the reception by fine tuning. Use
the buttons to fine tune for the best picture and sound.
Use the buttons to search next channel backward or forward direction.
To see the assigned channel name.
It is possible to change the name stored in the memory or to assign a name
to a TV channel which has not yet been entered. A name with up 5 letters or
numbers can be given to the programme numbers 0 to 99.
Press the buttons to move cursor to be changed. -> Press the
buttons to select a character.(space, number 0~9, and alphabet A~Z, +,-) ->
Press OK button or MENU button.
Station
Auto programme
Manual programme
Programme edit
Favourite programme
OK MENU
To set
Programme edit
0 C 01 5 C 07
1 C 35 6 C 50
2 C 05 7 C 51
3 C 11 8 C 41
4 C 04 9 C 63
Delete Copy
Move Skip
OK MENU
Delete
Copy
Move
Skip
Press the buttons to select a TV channel to be deleted. ->
Press the red key on the remote control -> The background colour of
the selected channel will change to red.
Press the Delete button one more time to delete the selected channel.
All the following channels are shifted up one position.
Press the buttons to select a TV channel to be copied. ->
Press the green key on the remote control. All the following channel
numbers are shifted down one position.
Press the buttons to select a channel number to be moved. ->
Press the yellow key on the remote control. -> Press the
buttons to move the TV channel to the desired channel number. ->
Press the yellow key again to release this function.
Press the buttons to select a channel number to be skipped. ->
Press the blue key on the remote control. The skipped TV channel is
displayed in blue.
25
Page 27

Adjusting the Screen
STATION ID set/Select the channel when using the TV
Favourite
programme
Station
Auto programme
Manual programme
Programme edit
Favourite programme
OK MENU
This function lets you select your favourite programmes directly. (8 channel)
Press the buttons to select a channel.
*
Yellow key (remote control) :
Off
_ _ _ _ _ _ _
_ _ _ _ _ _ _
_ _ _ _ _ _ _
_ _ _ _ _ _ _
_ _ _ _ _ _ _
_ _ _ _ _ _ _
_ _ _ _ _ _ _
_ _ _ _ _ _ _
Favourite Program On : Rotate favourite channel
Favourite Program Off : To display the previously selected TV channel.
26
Page 28

PSM
CSM
Adjusting the Screen
PICTURE ID adjust the picture function(RGB/DVI)
Picture
PSM
CSM
XD
Cinema
Reset
Picture
PSM
CSM
XD
Cinema
Reset
OK MENU
OK MENU
<
Dynamic
Standard
Mild
Game
User
9300K
<
6500K
sRGB
User
The PSM function automatically adjusts the screen
image quality.
• Dynamic
Select this option to display with a sharp image.
• Standard
The most general and natural screen display status.
• Mild
Select this option to display with a mild image.
• Game
Select this option to enjoy dynamic image when
playing a game.
• User
Select this option to use the user-defined settings.
The CSM function automatically adjusts the screen
colour set.
• 9300K
Slightly purplish white.
• 6500K
Slightly bluish white.
• sRGB
Slightly lower brightness.
• User
Select this option to use the user-defined settings.
Red / Green / Blue
Set your own colour levels.
RESET
PSM
CSM
XD
Cinema
Reset
Picture
Reset
Return to the default settings PSM, CSM at the factory.
To Set
OK MENU
27
Page 29

PSM
CSM
Adjusting the Screen
PICTURE ID adjust the picture function (TV/AV/Component/HDMI)
Picture
PSM
CSM
XD
Cinema
Reset
Picture
PSM
CSM
XD
Cinema
Reset
OK MENU
OK MENU
<
Dynamic
Standard
Mild
Game
User
<
Cool
Normal
Warm
User
The PSM function automatically adjusts the screen
image quality.
• Dynamic
Select this option to display with a sharp image.
• Standard
The most general and natural screen display status.
• Mild
Select this option to display with a mild image.
• Game
Select this option to enjoy dynamic image when
playing a game.
• User
Select this option to use the user-defined settings.
The CSM function automatically adjusts the screen
colour set.
• Cool
Slightly purplish white.
• Normal
Slightly bluish white.
• Warm
Slightly reddish white.
• User
Select this option to use the user-defined settings.
Red / Green / Blue
Set your own colour levels.
XD
PSM
CSM
XD
Cinema
Reset
Cinema
Reset
Picture
<
Auto
Manual
OK MENU
(
Function works in the following mode - TV, AV, Component 480i/576i)
When you watch the movie, this function adjusts the set to the best picture appearance.
Return to the default settings PSM, CSM, XD, Cinema at the factory.
XD is LG Electronics unique picture improving
technology to display a real HD source through an
advanced digital signal processing algorithm.
It's not available to use this function in RGB-PC or
DVI-PC modes.
Manual is activated after selecting the user of PSM.
28
Page 30

Adjusting the Screen
SOUND ID to adjust the sound function
Sound
<
SSM
AVL
Balance 0
OK MENU
Flat
Music
Movie
Sports
User
SSM
AVL
Balance
The best sound tone quality will be selected automatically depending on the video type that
you're currently watching.
• Flat : The most commanding and natural audio.
• Music : Select this option to enjoy the original sound when listening to the music.
• Movie : Select this option to enjoy sublime sound.
• Sports : Select this option to watch sports broadcasting.
• User : Select this option to use the user-defined audio settings.
To adjust uneven sound volumes across all channels or signals automatically to the most
appropriate level. To use this feature, select On.
Use this function to balance sound from the left and right speakers.
29
Page 31

Adjusting the Screen
TIME ID to adjust the time function
Time
Clock
Off/On time
Auto sleep
Clock
Off time
On time
Auto sleep
OK MENU
This function is used to set up of current time.
You must set the time correctly before using On/Off time function.
1) Press the MENU button and then use
2) Press the button and then use
3
) Press
4
) Press
The default value is -- : --.
5) Press the OK/MENU button to save.
The Off time automatically switches the set to off mode at the pre-set time.
1) Press the MENU button and then use
2) Press the button and then use
3) Press the button and then use
4) Press the button and then use
5) Press the button and then use
6) Only On time function; Press the button and then
and programme number
7) Press the OK/MENU button to save.
If Auto sleep is active and there is no input signal, the set switches to off mode
automatically after 10 minutes. ( It is not working in PC)
1) Press the MENU button and then use
2) Press the button and then use
3) Press the OK/MENU button to save .
button and then use button to set the hour(00~23).
button and then use button to set the minutes(00~59).
-- : --
button to select the TIME menu.
button to select the Clock menu.
button to select the TIME menu.
button to select Off time or On time.
button to set the hour(00~23).
button to set the minutes(00~59).
button to select On or Off.
.
button to select the
button to select On or Off.
button to adjust volume level
Auto
sleep menu.
Note
• In the event of power interruption (disconnection or power failure), the Clock must be reset.
• Two hours after the set is switched on by the On time function it will automatically switch
back to off mode unless a button has been pressed.
• Once the On or Off time is set, these functions operate daily at the preset time.
• Off time function overrides On time function if they are set to the same time.
• The set must be in off mode for the On time to work.
• On time will move on to auto off if no activity is received in 2hours after setting the On time.
30
Page 32

Adjusting the Screen
SPECIAL ID to Select the special function
Special
Language
Child lock
DDC-CI
XD Demo
OK MENU
Language
Child lock
DDC-CI
XD Demo
To choose the language in which the control names are displayed
Use the buttons to select On or Off. It can be set up so that it can only be used with
the remote control. This feature can prevent unauthorized viewing.
In order to lock the OSD screen adjustment, set the Child lock tab to the 'On' position.
In order to unlock it, do the following :
* Push the MENU button on the remote control and set Child lock to the 'Off' position.
DDC/CI(Display Data Channel Command Interface) is communication protocol for
communications between PC and monitor.
DDC/CI makes it possible to adjust and setup detailed functions on PC instead of the
monitor OSD.
Monitor can be adjusted with PC by connecting communication between PC and
monitor when DDC/CI is ON, and monitor cannot be adjusted with PC because
communication between PC and monitor is disconnected when DDC/CI is OFF.
Use it to see the difference between XD demo on and XD Demo off.
(XD Demo function is not available in RGB PC/ DVI PC mode.)
.
31
Page 33

Adjusting the Screen
SCREEN ID to adjust the screen function
Screen
Resolution
Auto
config.
Manual
config.
ARC
Resolution
Auto config.
Manual config.
ARC
Reset
OK MENU
To view the best resolution of RGB-PC mode. Select the same resolution on OSD with
PC's. It's working at RGB-PC mode when vertical frequency is 60Hz.
This button is for the automatic adjustment of the screen Position, Clock and Phase.
(It is not working in DVI.)
This button is for the manual adjustment of the screen Position, Clock and Phase.
•
H-Position (It is not working In DVI-PC mode.)
To move the displayed image left or right.
•
V-Position (It is not working In DVI-PC mode.)
To move the displayed image up or down.
•
Clock (It is not working In DVI-PC mode.)
To minimize any vertical bars or stripes visible on the screen background.
The horizontal screen size will also change.
•
Phase (It is not working In DVI-PC mode.)
To adjust the focus of the display. This item allows you to remove any horizontal noise
and clear or sharpen the image of characters.
To select the image size of the screen.
•
When TV/Video mode: Spectacle, Original, 4:3, 16:9, 14:9, Zoom1, Zoom2
•
When RGB/DVI/HDMI/Component mode: 4:3, 16:9
1024 x 768
1280 x 768
<
1360 x 768
1366 x 768
Reset
Use this function to reset the product to the factory default. However, language selection
will not be initialized.(It is working in RGB-PC mode.)
32
Page 34

Troubleshooting
No image is displayed
● Is the product's power cord
connected?
● Is the power indicator turning on?
● Power is on, power indicator is blue
but the screen appears extremely
dark.
● Does the power indicator look amber?
● Does the 'Out of range' message
appear?
● Does the 'Check signal cable'
message appear?
• Check if the power cord is properly connected to
the outlet.
• See if the power switch is turned on.
• Adjust brightness and contrast again.
• If the product is in power saving mode, move the
mouse or press any key.
• In DVD Player or Settop Box, check the power
status of connected device.
• The signal from the PC (video card) is out of the
vertical or horizontal frequency range of the
product. Adjust the frequency range by referring to
the Specifications in this user's guide.
* Maximum resolution
1366 X 768 @60 Hz
• The signal cable between PC and product is not
connected. Check the signal cable.
• Press the 'INPUT' button in the remote control to
check the input signal.
'Unknown Product' message appears when the product is connected.
●
Did you install the driver?
Note
* Vertical frequency: To enable the user to watch the product display, screen image should be changed tens of times
every second like a fluorescent lamp. The vertical frequency or refresh rate is the times of image display per second.
The unit is Hz.
* Horizontal frequency: The horizontal interval is the time to display one vertical line. When the 1 is divided by
horizontal interval, the number of horizontal lines displayed every second can be tabulated as the horizontal
frequency. The unit is kHz.
• Install the product driver, which is provided with
the product, or download it from the web site.
(http://www.lge.com)
• See if the plug&play function is supported by
referring to the video card user's guide.
33
Page 35

Troubleshooting
The screen image looks abnormal.
● Is the screen position wrong?
● Do thin lines appear on the
background screen?
● Horizontal noise appears or the
characters look blurred.
After-image appears on the product.
● After-image appears when the
product is turned off.
• Adjust the Position menu in OSD .
• See if the video card resolution and frequency
are supported by the product. If the frequency is
out of range, set to the recommended resolution
in the Control Panel – Display – Setting menu.
• Adjust the Clock menu in OSD.
• Adjust the Phase menu in OSD.
• If you use a fixed image for a long time, the pixels
may be damaged quickly. Use the screen saver
function.
34
Page 36

Troubleshooting
The audio function does not work.
● No sound?
● Sound is too low.
The TV function does not work.
● The TV signal is not being received.
Screen colour is abnormal.
● Screen has poor colour resolution (16
colours).
• Check if the audio cable is connected properly.
• Adjust the volume.
• Check if the sound is set properly.
• Adjust the volume.
• See if you have selected the proper channel
mode.
• Use the automatic channel setup function.
• Check if the TV antenna is properly connected.
• Set the colour resolution to more than 24 bits (true
colour)
Select Control Panel – Display – Settings
– Colour Table menu in Windows.
● Screen colour is unstable or monocolour.
● Do black spots appear on the screen?
• Check the connection status of the signal cable.
Or, re-insert the PC video card.
• Several pixels (red, green, white or black colour)
may appear on the screen, which can be
attributable to the unique characteristics of the
LCD panel. It is not a malfunction of the LCD.
35
Page 37

Specifications
The product specifications can change without prior notice for product improvement.
LCD Panel
Video Signal
Input Connector
Power
Tilt
Dimension/Weight
Screen Type 18.51 inches Wide (47.01 cm) TFT (Thin Film Transistor)
LCD (Liquid Crystal Display) Panel
Visible diagonal size: 47.01 cm
Pixel Pitch 0.10(H) x 0.30(V) mm
Max. Resolution 1366 X 768 @60 Hz
Recommended Resolution
Horizontal Frequency 30 - 61 kHz
Vertical Frequency 56 - 75 Hz
Synchronization Type Separate Sync, Digital
S-Video, Composite video, TV, D-Sub Analog, DVI-D, HDMI, PC Audio In,
Headphone/Earphone, component
Rated Voltage AC 100-240V~ 50/60Hz 0.6A
Power Consumption On Mode : 35 W (Typ.)
Tilt Range -5˚ ~ 15˚
Size (WxLxH) 454.7 mm x 193.2 mm x 362.8 mm
Weight (excl. package) 3.8 kg (8.38 Ibs)
1360 X 768 @60 Hz
Sleep Mode ≤ 1 W
Off Mode ≤ 1 W
Environmental Conditions
Power Indicator
Mode
On Mode
Sleep Mode
Off Mode
Operational Condition Temperature: 10˚C ~ 35˚C , Humidity: 20% ~ 80%
Storage Condition Temperature: -10˚C ~ 60˚C , Humidity: 5% ~ 90%
Product
Blue
Amber
Off
36
 Loading...