

LG LVi510 Owner's Manual

Please read this manual carefully before operating
your set and retain it for future reference.
OWNER’S MANUAL
Video Management System
MODELS
LVi510
1205 (V1.0)

2
Contents
1
Introduction
4 Features
6 Recommended PC Requirements
6 Before install the Video Management System
2
Getting Started
7 Install the Video Management System
7 Starting the Video Management System
8 Management Tool Overview
9 Surveillance Client Overview
14 Management Server Overview
14 Recording Server Overview
15 Streaming Server Overview
3
Operation and settings
16 Using the Management Tool program
16 Using the overview window
17 Device Management
21 Server Management
28 User Management

3
30 Remote Setup settings
40 Device Upgrade settings
41 Map settings
43 License Management
44 Tool Configuration
45 Using the Surveillance Client Program
45 Starting the Surveillance Client Program
45 Using the icon button
49 Live
52 Playback
56 Event
59 Map
4
Reference
61 Troubleshooting

4 Introduction
The LG Video Management System is an IP-Surveillance software that works with the LG
Video Server and LG IP cameras to provide video monitoring, recording setting and event
management functions. The software has multiple search functions for recorded events.
Remote viewing and playback are also possible with the use of the Video Management
System.
This manual contains instructions on how to use and manage the LG Video Management
System in your networking environment. Some knowledge of networking environments
would be beneficial to the reader.
Should you require any technical assistance, please contact authorized service center.
Features
The LG Video Management System offers the following functions:
LG Management Server
• DB(Database) management
• User Authentication
Management Tool
• Device Finder
• Device grouping
• Multiple tree view
• Device Remote Setup
• Recording Server Setup
• User role & device access permission Setup
• Real-Time Recording Server Monitoring
• Map making & edition
• Recording Calculator
• Real-Time Streaming Server Monitoring
1
Introduction

5Introduction
• Multiple device firmware update
Surveillance Client
• 256 Channels Live monitoring with video buffering
• Multiple playback at the same time
• Event recording search
• Instant playback
• Digital Zoom
• Camera Pan/Tilt/Zoom Control (mouse, joystick support)
• 2 Way(Bidirectional) Audio support
• Map support
• Layout Sequence
• AVI File export
• Event Log
• Intelligent Video analytics event detection
• Map and Event Live Popup Display
• LG IP Camera and DVR Support
Streaming Server
• 64 channels streaming
• Real-Time live streaming

6 Introduction
Recommended PC Requirements
The LG Video Management System must be installed below operating systems for best
performance and stability.
Items
Management Server, Streaming
Server and Recording Server
Surveillance Client and
Management Tool
Operating
System
Windows 2008 Server Standard (32 bit) Windows7 (32 bit)
CPU Intel Xeon E5620 2.6 GHz or Higher Intel i7-880 3.07 GHz or Higher
Memory 4 GB or Higher 4 GB or Higher
HDD 500 GB or Higher 500 GB or Higher
VGA
NVIDIA Geforce GT440 512MB or
Higher
NVIDIA Geforce GTS450 1GB or
Higher
Before install the Video Management System
• The pictures used in this manual are based on Windows 7 Professional.
• Do not use other applications with this Video Management System program. This can
cause memory shortage and program malfunction.
• Check that the LG IP Device is(are) connected to the network and that power is supplied.
• For more information on product installation, see the user manual of your LG IP device.

7Getting Started
Install the Video Management System
You can install the Video Management System software following steps.
1. Insert the Program CD which will be started automatically.
If the disc does not run automatically on your PC, open the Program CD and install the
program manually.
2. Run the install file and install the programs to your computer following the on-screen
instructions.
3. After finishing installation, you will find the programs in the start menu or on the desktop.
Starting the Video Management System
You can select and run the Video Management System program from your
Start>Programs>LG Ipsolute or click the each program icon on your desktop.
1. Run the Management Server.
2. Run the Recording Server.
3. Run the Streaming Server program. (Option)
4. Run the Management Tool program.
5. Run the Surveillance Client program.
2
Getting Started
8 Getting Started
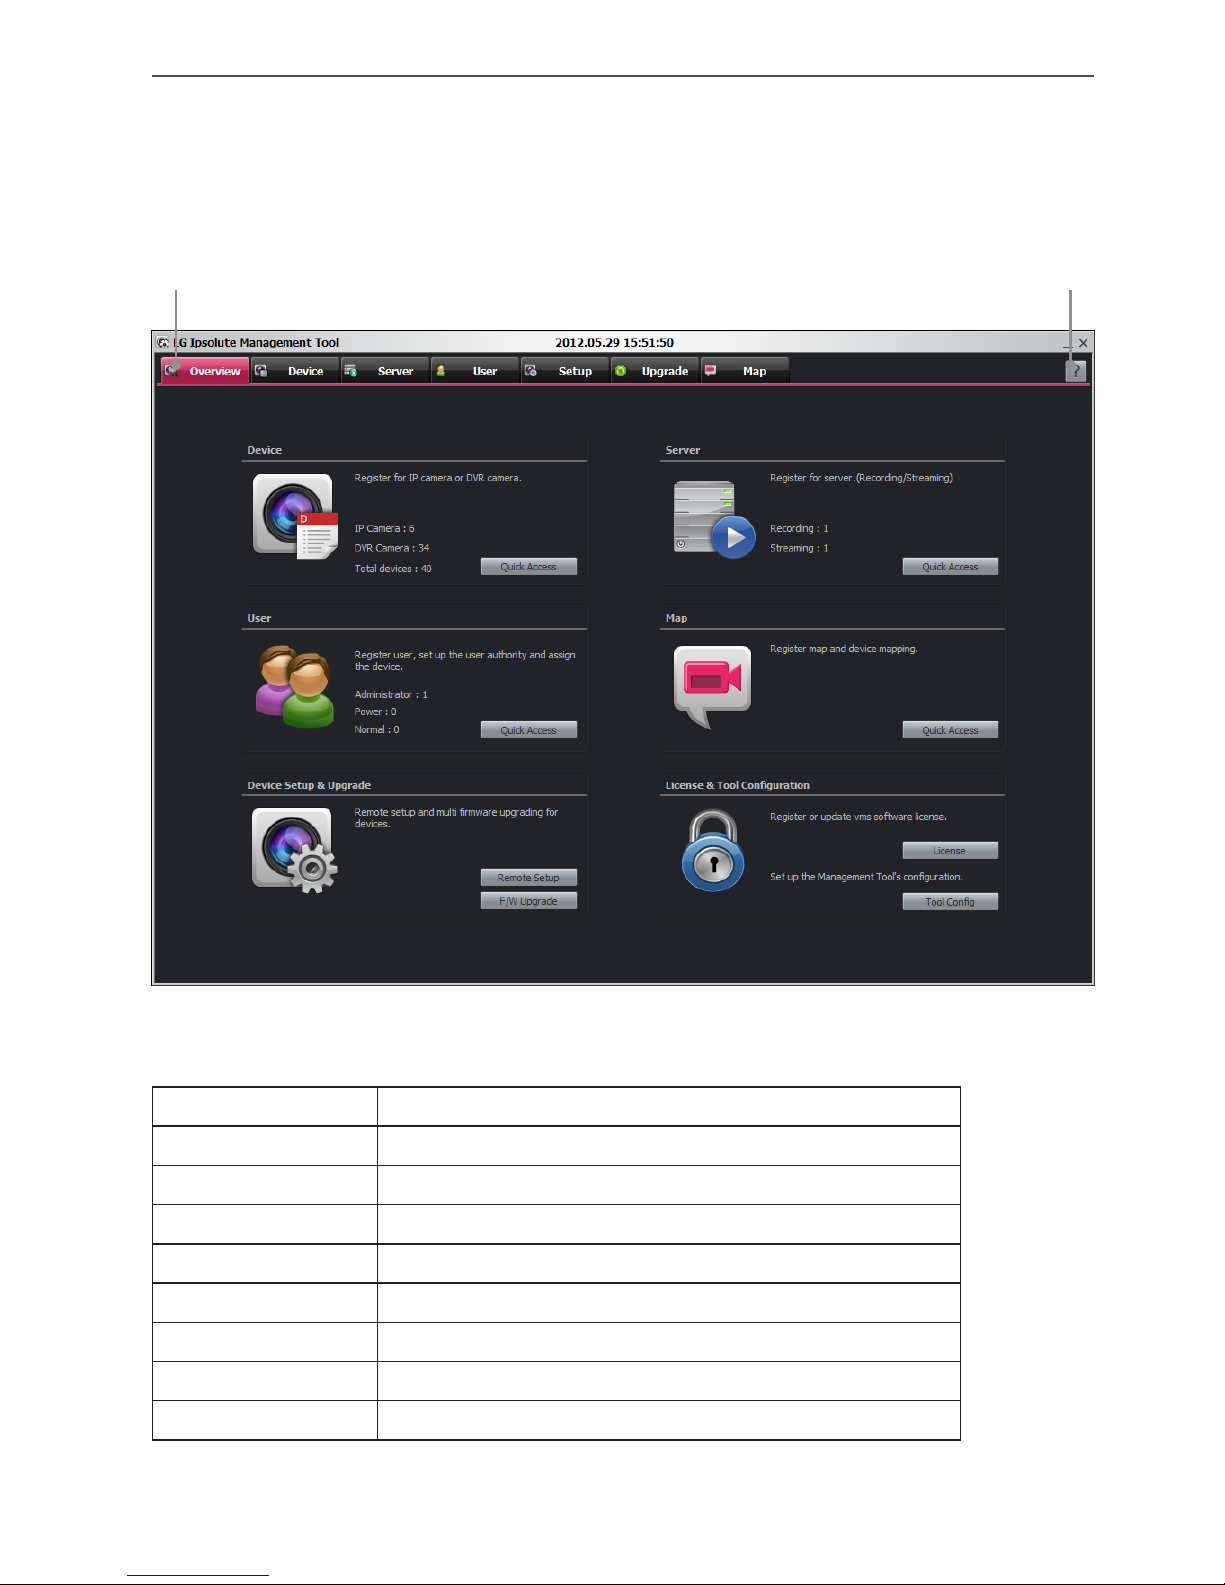
Management Tool Overview
Main menu Help
Main Menu Bar
Menu Description
Overview Displays the Camera Overview window.
Device Displays the Camera Registration window.
Server Displays the Server Registration window.
User Displays the User Registration window.
Setup Displays the Setup window.
Upgrade Displays the Upgrade window.
Map Displays the Map Registration window.
Help Displays the help.
9Getting Started
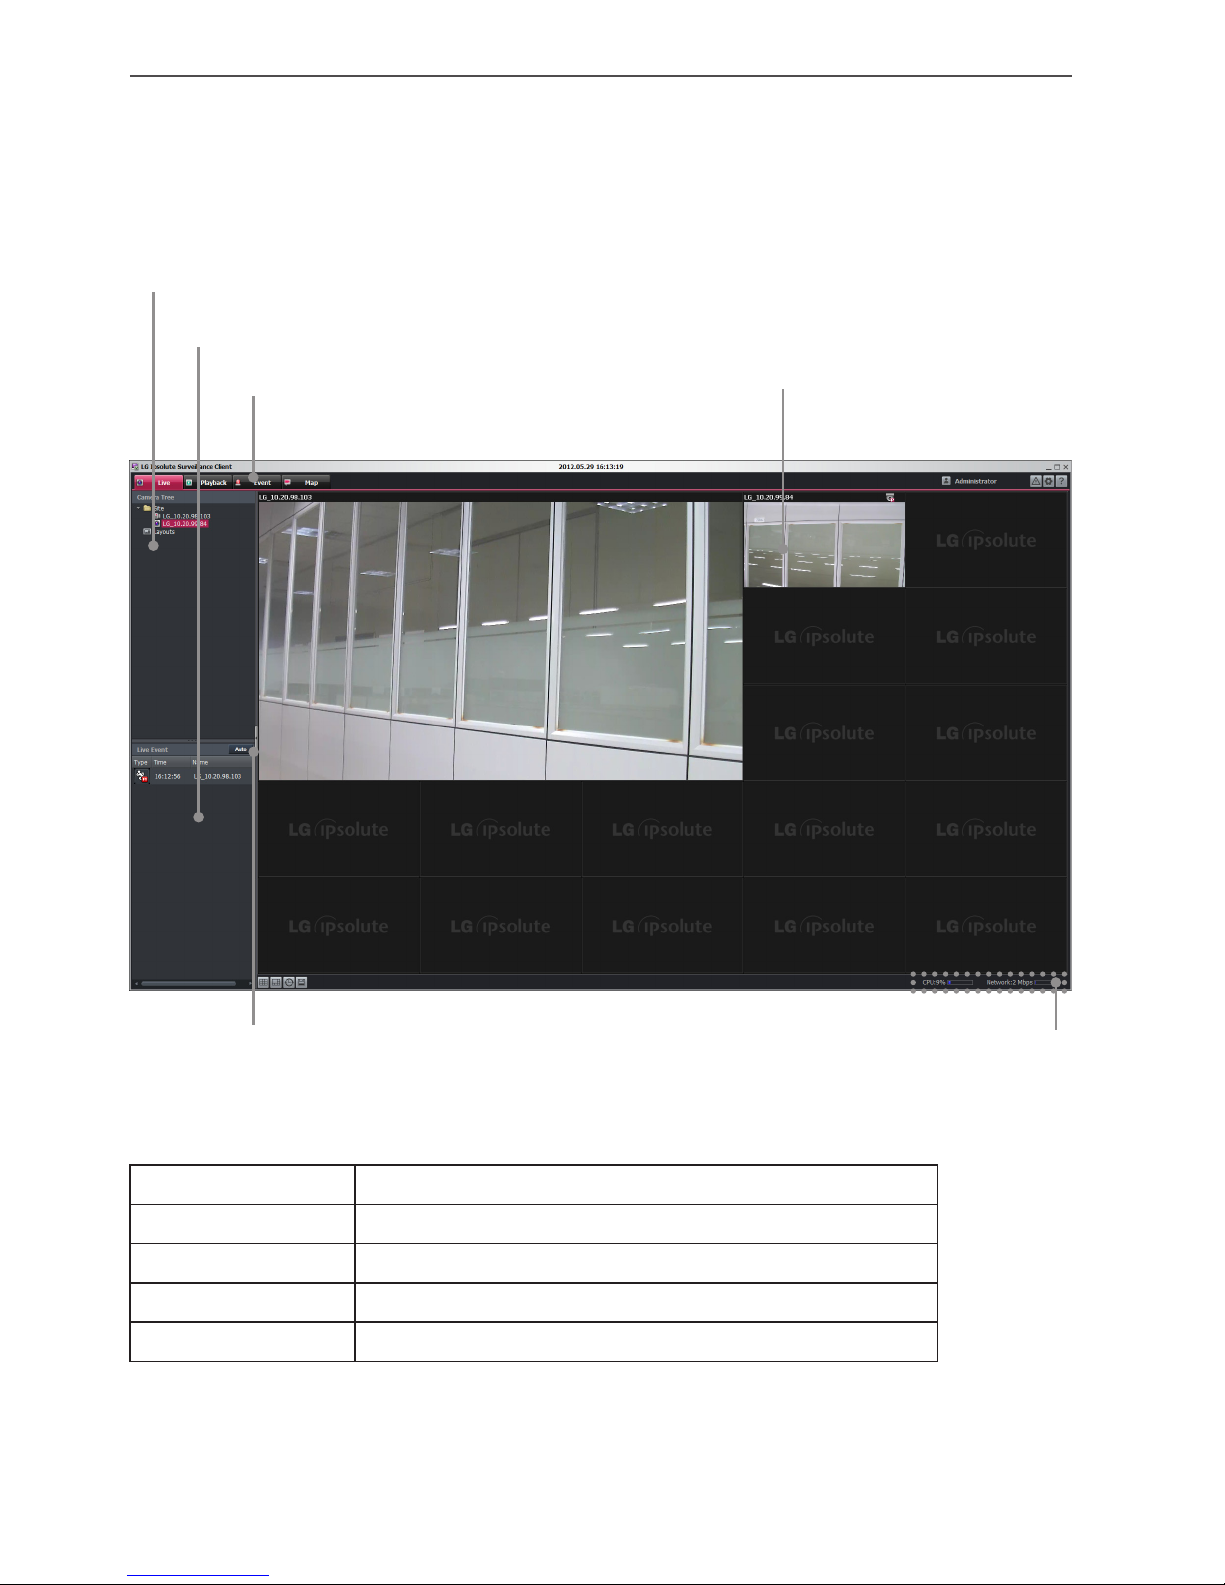
Surveillance Client Overview
Resource displayShow/Hide
Menu Bar
Device Tree window
Live Event window
Live window
Menu Bar
Menu Description
Live Displays the live view workspace.
Playback Displays the playback workspace.
Event Displays the event workspace.
Map Displays the map workspace.
10 Getting Started
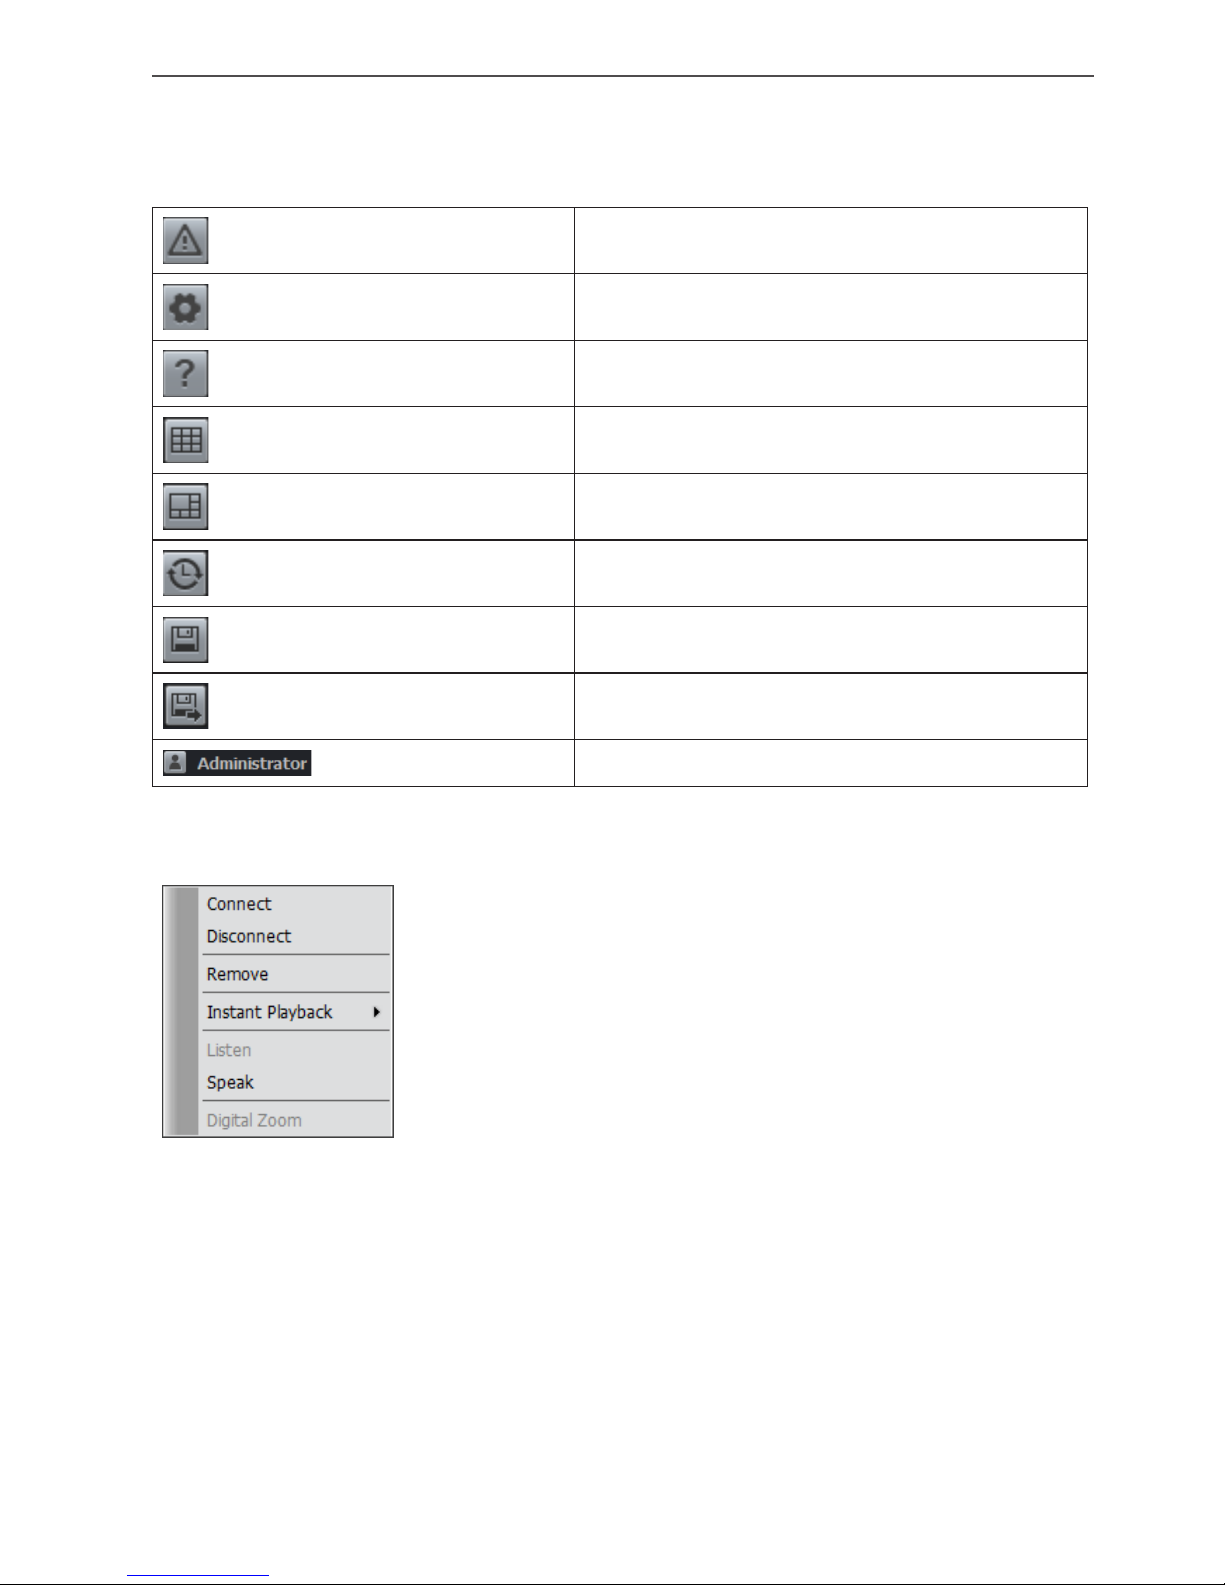
Icon Bar
Log
Display the system logs.
Client Setup
Displays the client setup window.
Help
Displays the help.
Division
Change the view division for the screen.
Hotspot
Displays the live view on the hotspot area.
Sequence
Displays the layout rotation’s setup window.
Save Layout
Displays the layout save window.
Export
Displays the Export file Window.
User Information
Displays the user group.
Liveview Pop-up menu
• Connect: Select to connect the device.
• Disconnect: Select to disconnect the device.
• Remove: Select to remove the selected device on the view.
• Instant Playback: Just the time(second) ago to play recording
data.
• Listen: Listen to audio from device.
• Speak: Speak for sending audio into device
• Digital Zoom: Enable digital zoom on images.
11Getting Started
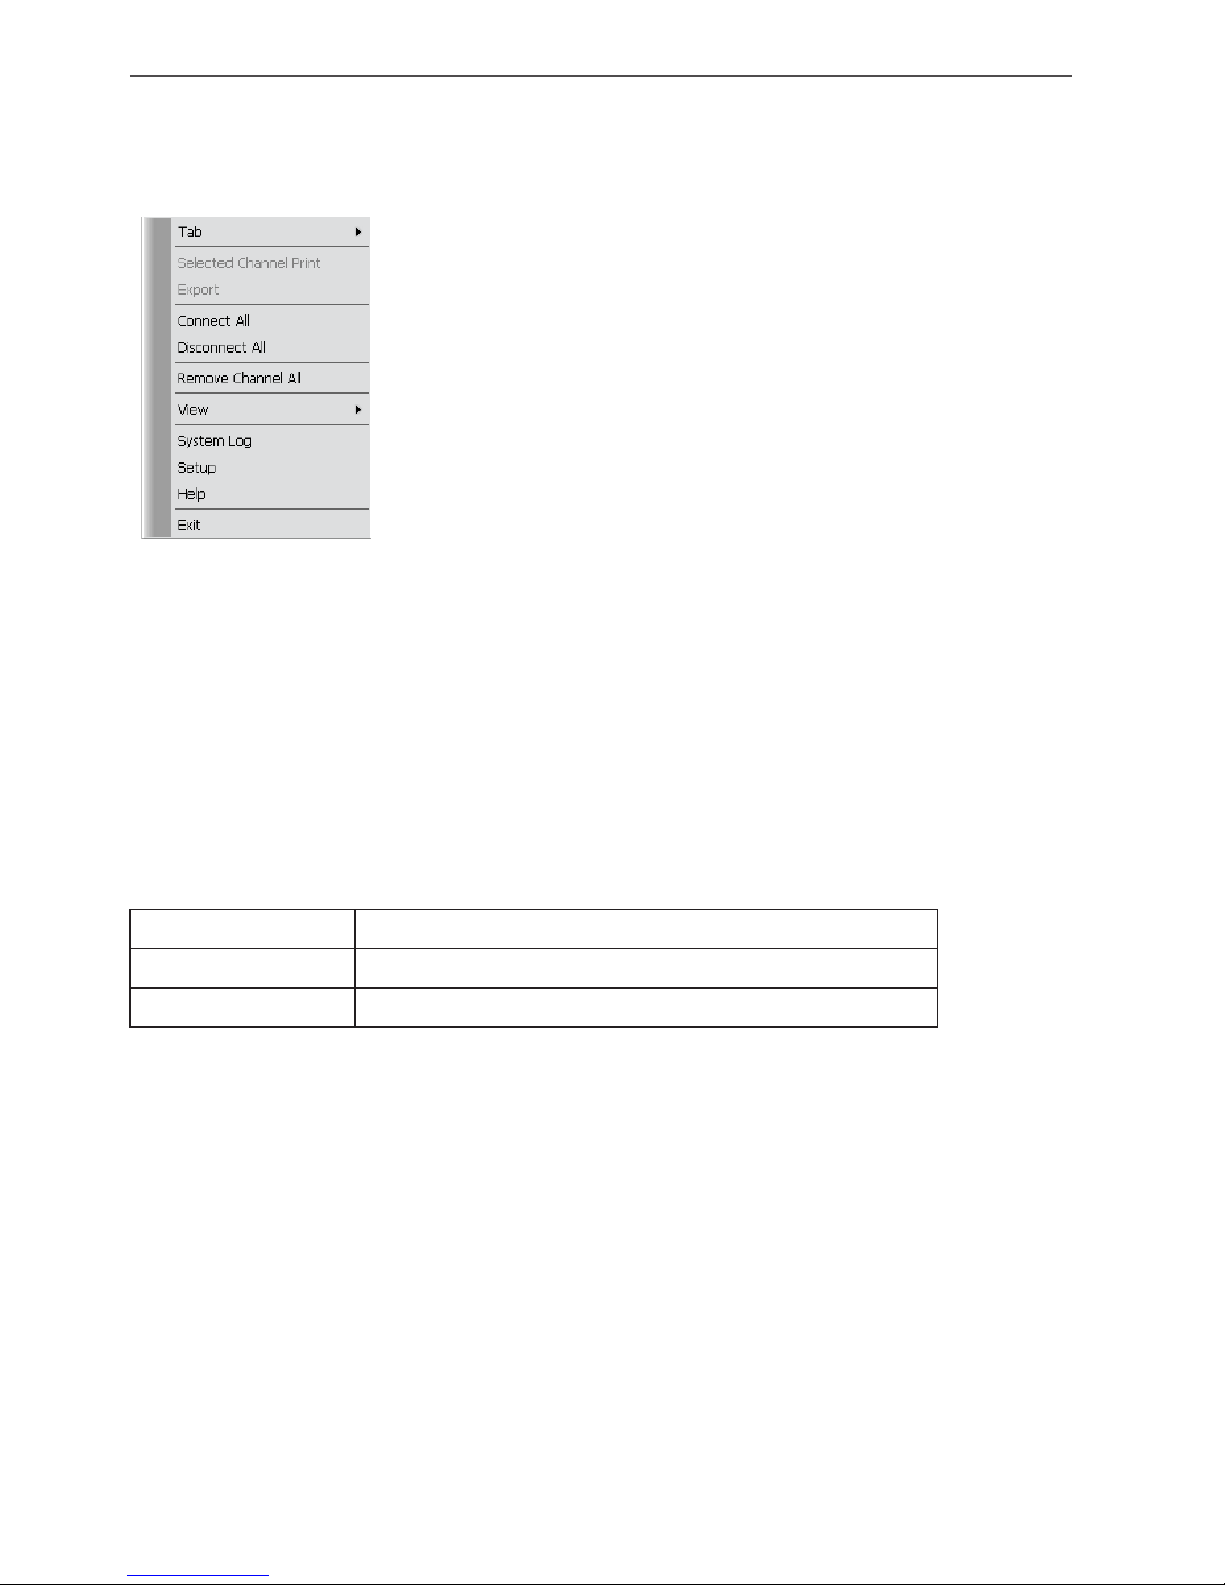
Main Frame Pop-up menu
• Tab: Select to main menu.
• Selected Channel Print: Displays the selected channel.
• Export: Exports the Data
• Connect All: Select to connect all device.
• Disconnect All: Select to disconnect all device.
• Remove Channel all: Select to remove the all channel on the
view.
• View: Selects the layout view.
• System Log: Display the system logs.
• Setup: Displays the client setup window.
• Help: Displays the help.
Show/Hide button
You can show and hide the Camera tree window, Map tree window and Live Event window at
once to click Show/Hide button.
Resource Display
Menu Description
CPU Displays the current CPU usage of client.
Network Displays the current Network usage of client.
12 Getting Started
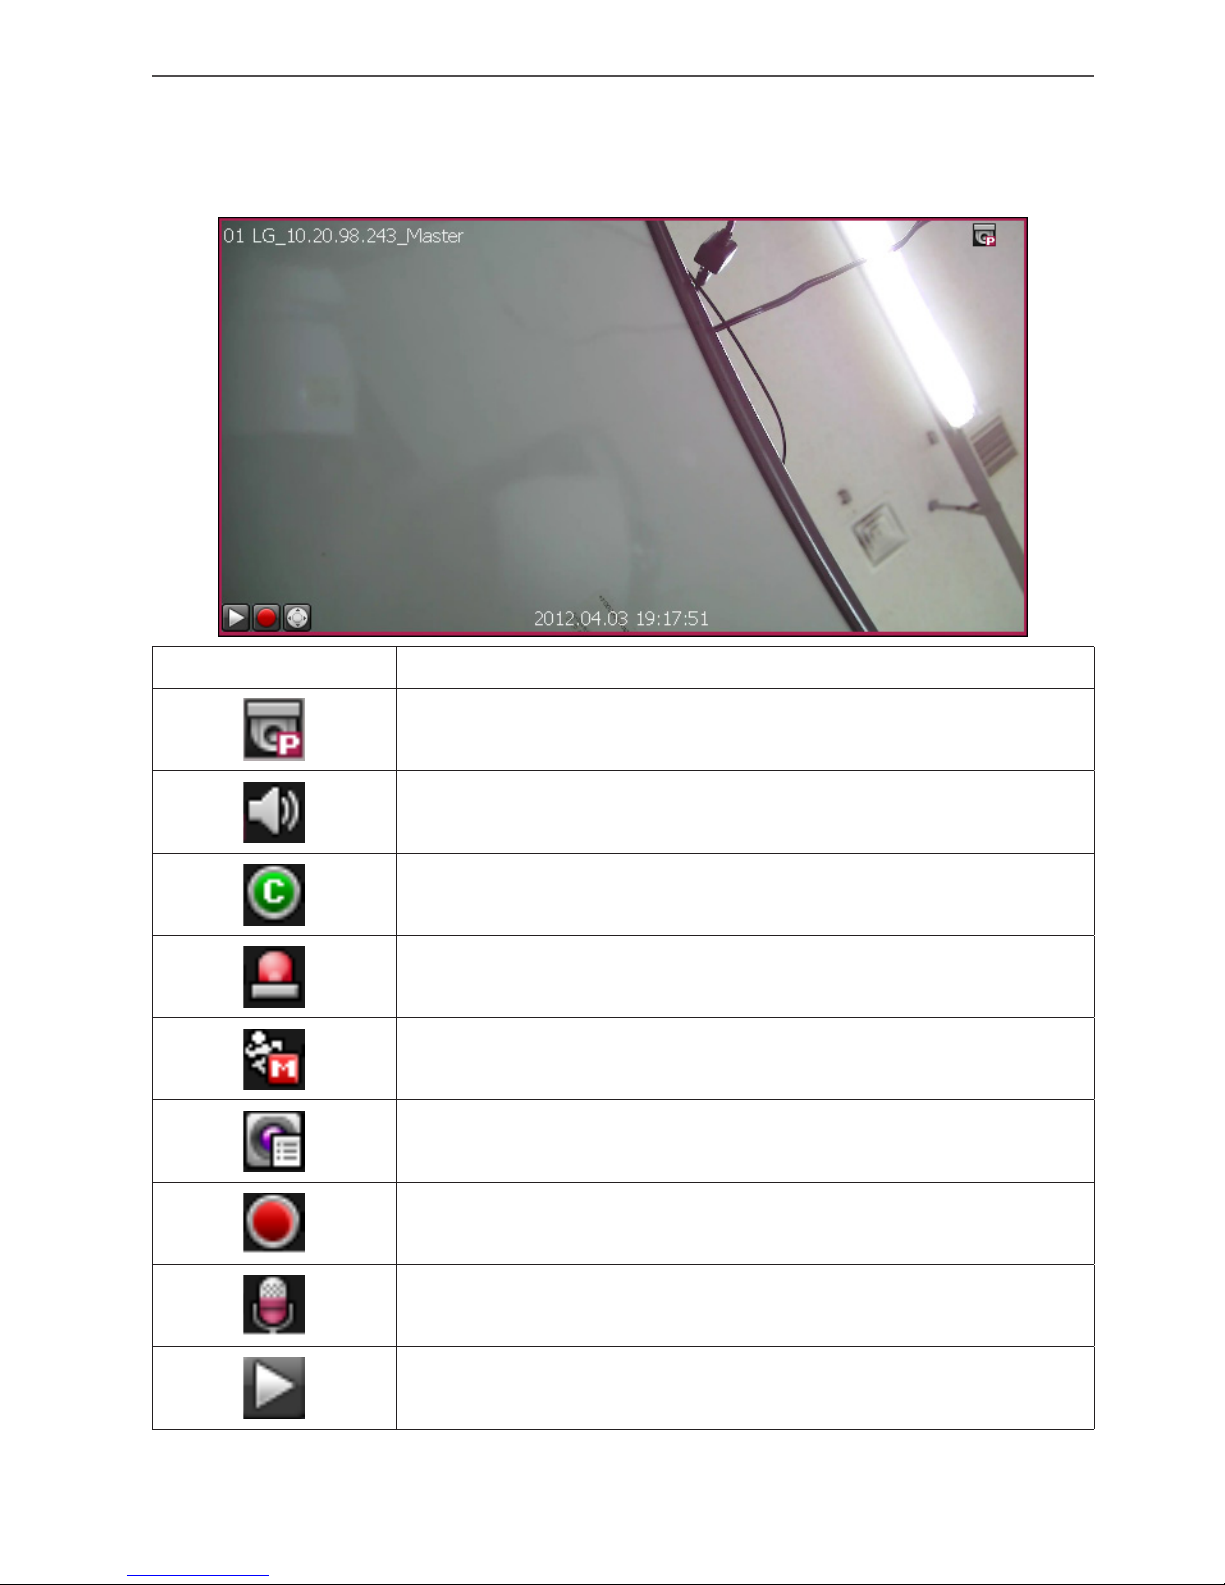
Live window icons
Icons Description
Displays when the PTZ device is connected.
Displays when the audio function is activated in the network
device.
Indicates Continuous recording.
Indicates sensor recording.
Indicates motion detection recording.
Indicates va event detection recording.
Indicates instant recording.
Displays when the audio input function is available in the network
device.
Start Instant Playback. This function is playback previous 1 minute
image.
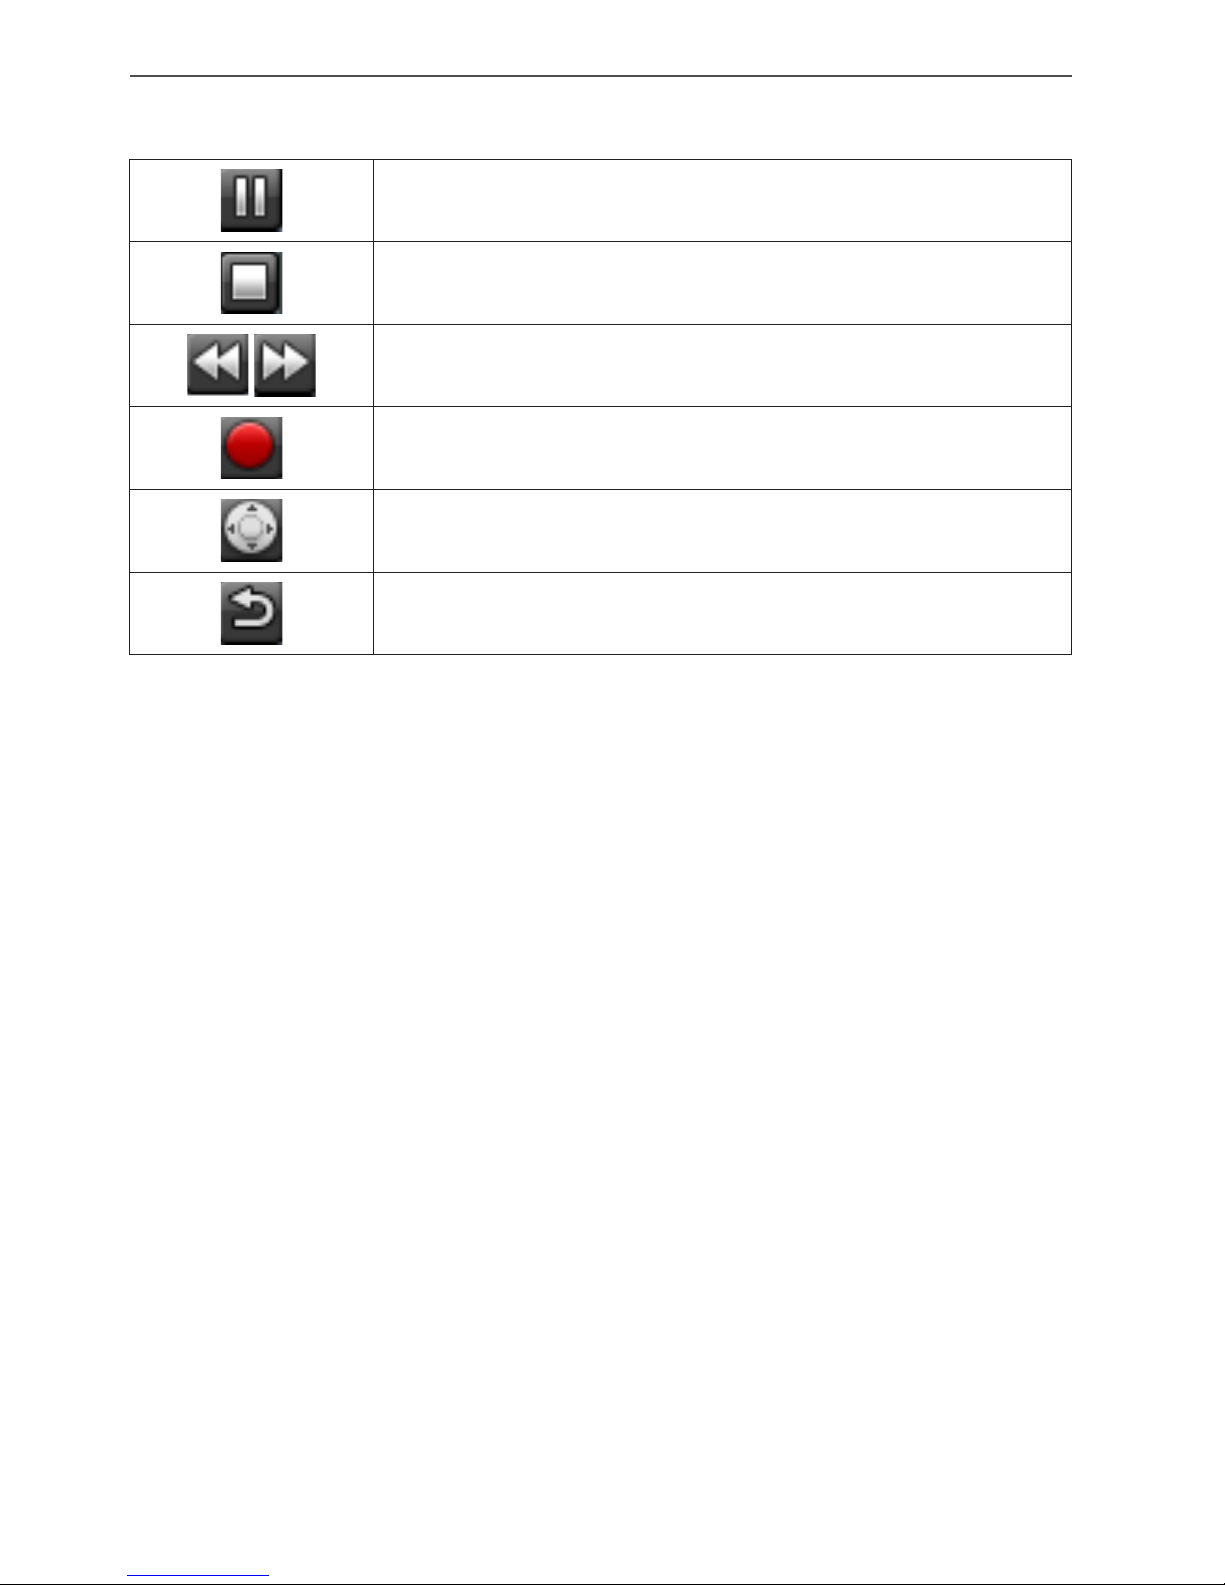
13Getting Started
Pause playback.
Stop Instant Action. (Playback, Recording)
Play backward or forward by double speed.
Start Instant Recording.
Enable PTZ Control Mode.
List refresh.

14 Getting Started
Management Server Overview
When you start the management server, management server icon is displayed on the task bar.
Click the icon to start or stop server.
Recording Server Overview
When you start the recording server, recording server icon is displayed on the task bar. Click
the icon to start or stop server. If you click the Open Recording Server, the Recording Server
Information window is displayed.
• Camera Name: Displays the Camera name.
• Framerate: Displays the frame rate. The frame rate is the number of transportable frames
per second.
• Biterate: Displays the Bit rate value.
• Record: Displays the recording status.
• Status: Displays the connection status.

15Getting Started
Streaming Server Overview
When you start the streaming server, streaming server icon is displayed on the task bar. Click
the icon to start or stop server. If you click the Open streaming Server, the streaming Server
Information window is displayed.
• Camera Name: Displays the Camera name.
• Framerate: Displays the frame rate. The frame rate is the number of transportable frames
per second.
• Biterate: Displays the Bit rate value.
• Status: Displays the connection status.
16 Operation and settings
Using the Management Tool program
The first time Management Tool is started, you should register a LG IP camera and Server(s) to
control it by the Video Management System.
Note:
The computer running Management Tool must be on the same network with device.
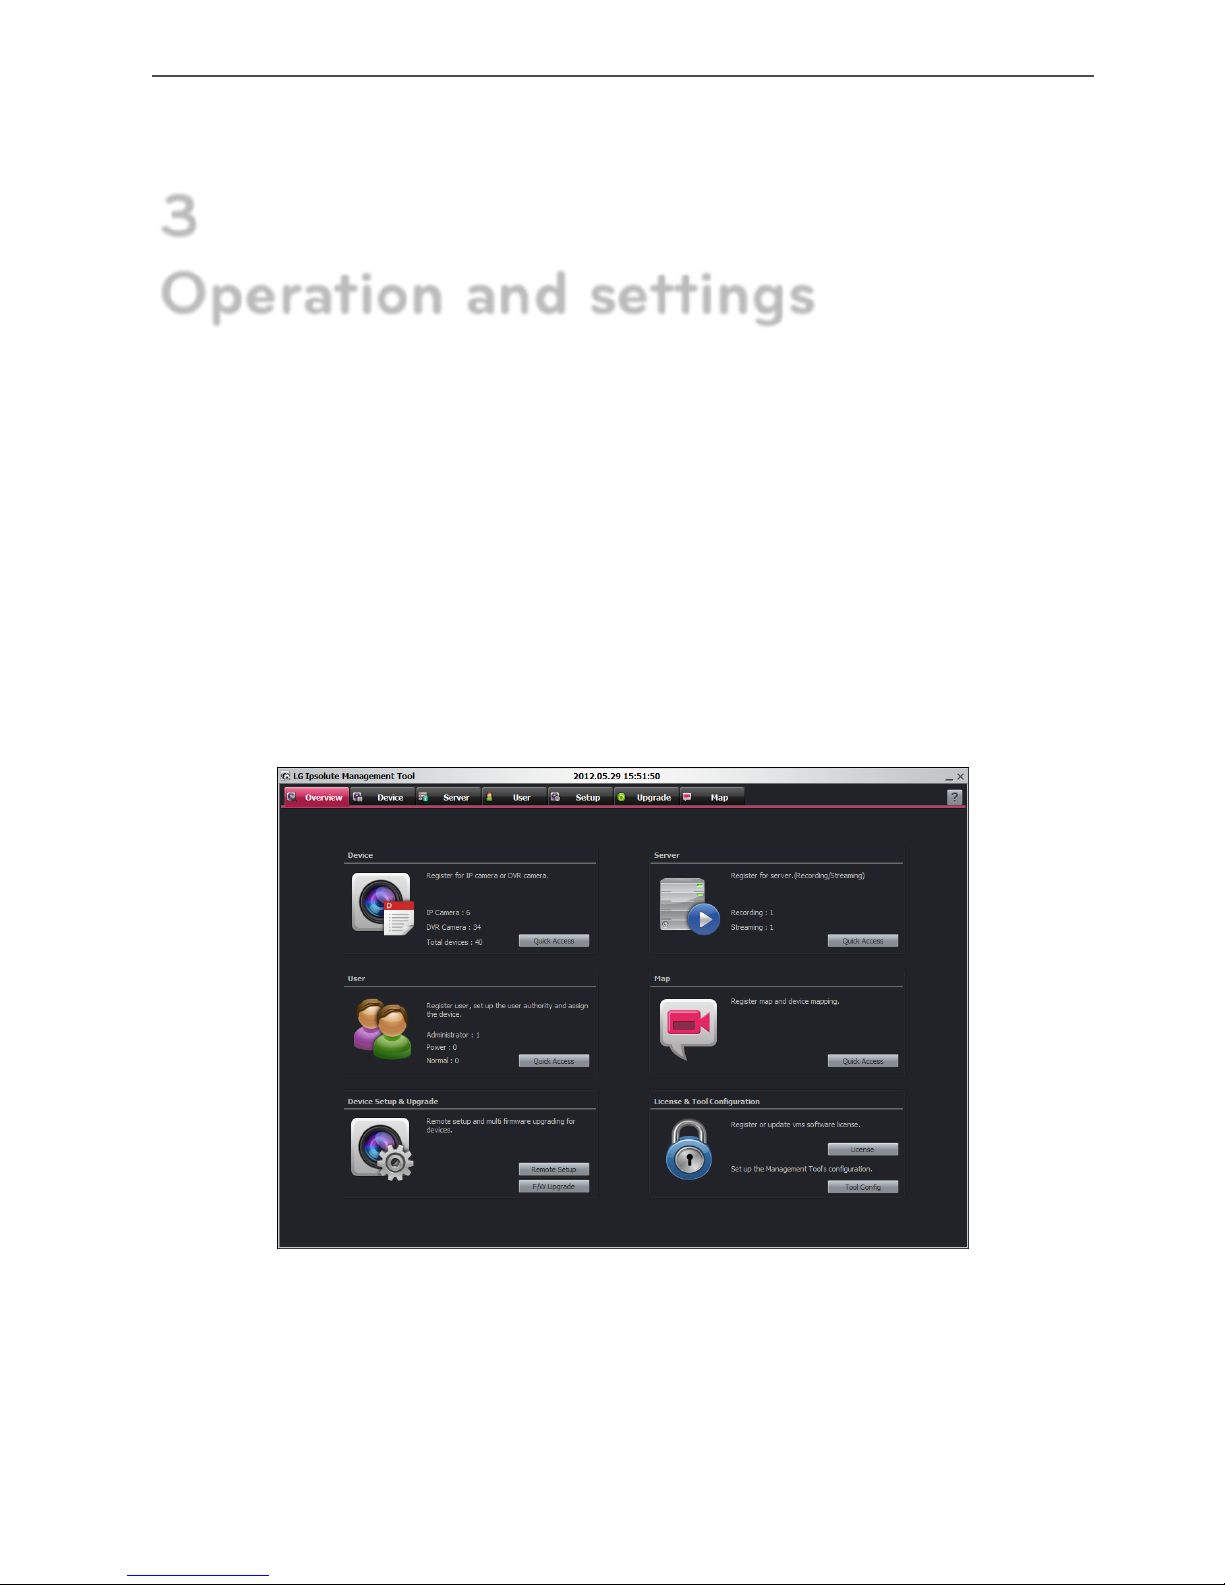
Using the overview window
• Device: Displays the number of registered IP Camera and DVR. You can access directly to
click [Quick Access] button.
• Server: Displays the number of registered Recording server and Streaming server. You can
access directly to click [Quick Access] button.
• User: Displays the number of registered User by User Group(Administrator, Power, Normal).
You can access directly to click [Quick Access] button.
• Map: You can access directly to click [Quick Access] button.
3
Operation and settings
17Operation and settings
• Device Setup & Upgrade: Click [Remote Setup] button to access the Setup menu. And also,
click [F/W Upgrade] button to access the Upgrade menu directly.
• License & Tool Configuration: Click [License] button to register or upgrade VMS software
license. If you click the [License] button, the license registration window will be displayed.
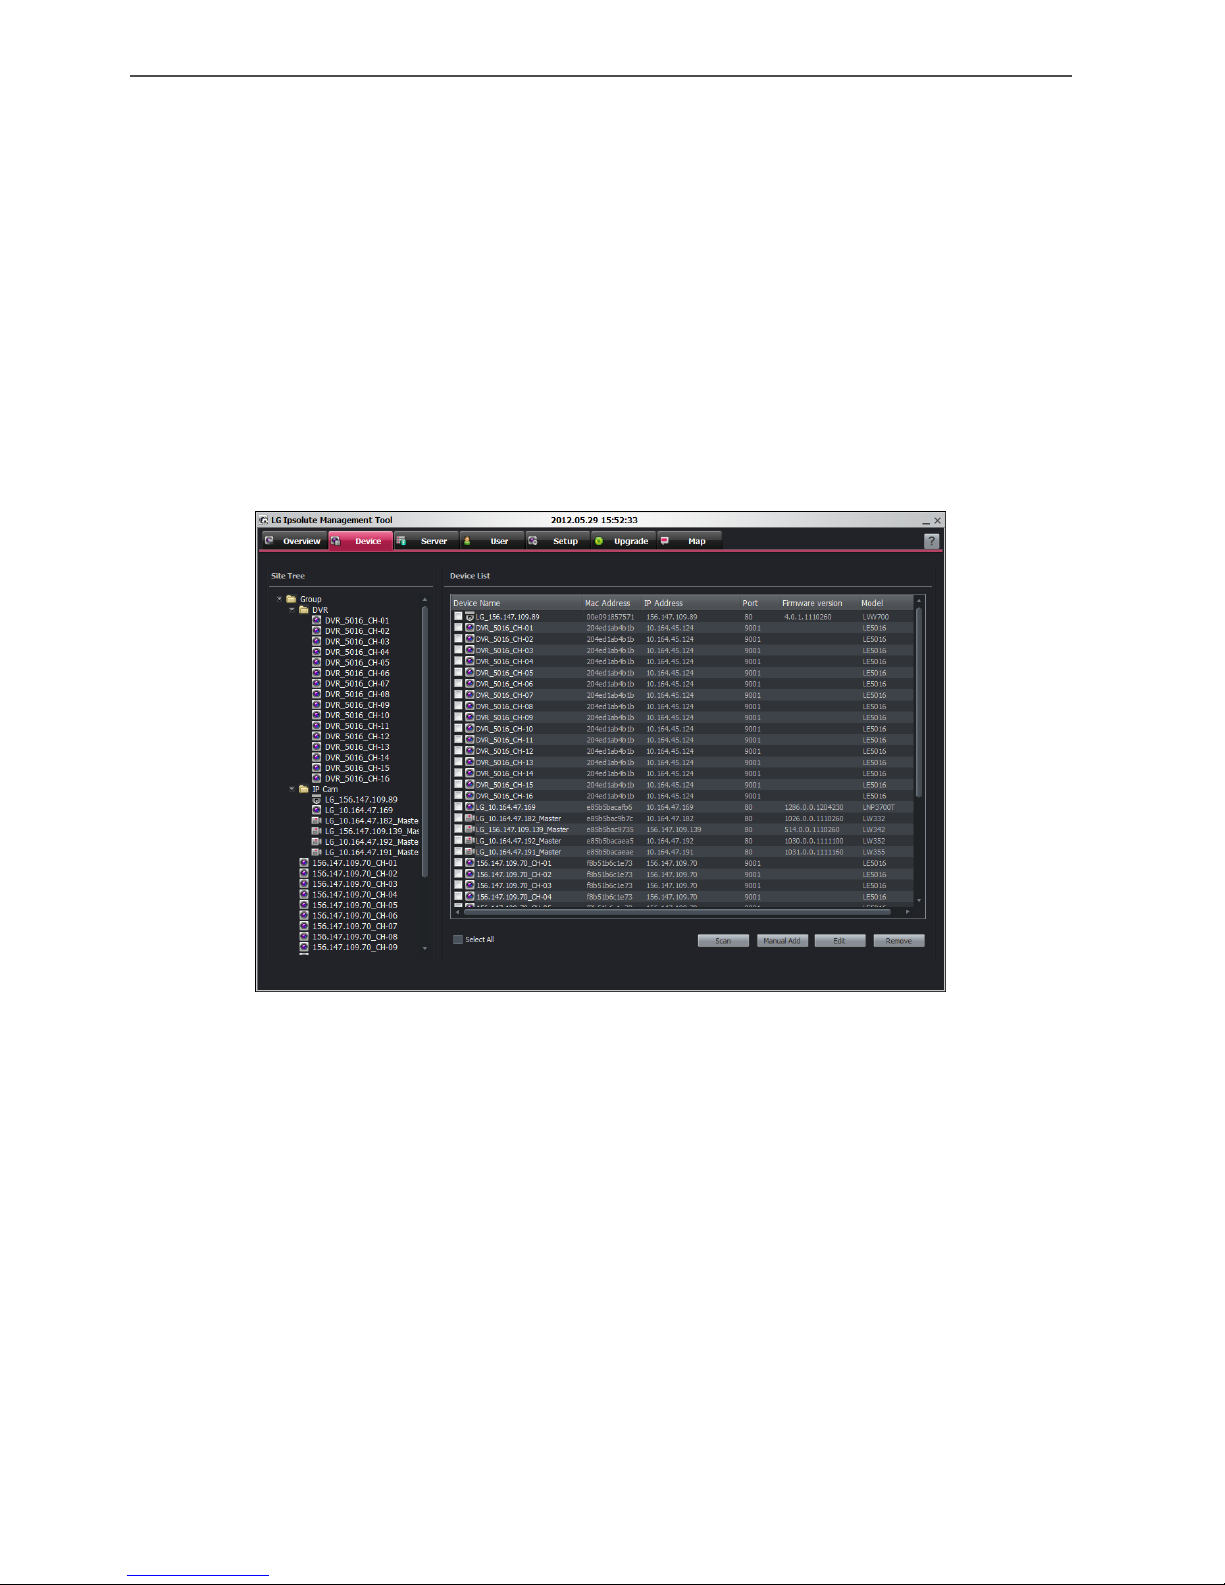
Device Management
Registration the device
1. Select the Device tab on the main menu or click the [Device] icon on the Overview
window. The Device window is displayed.
2. Click the [Scan] button. After a few seconds the found device is(are) displayed.
3. Select the device in the list. If you want to register the all device, check the [Select All]
option.
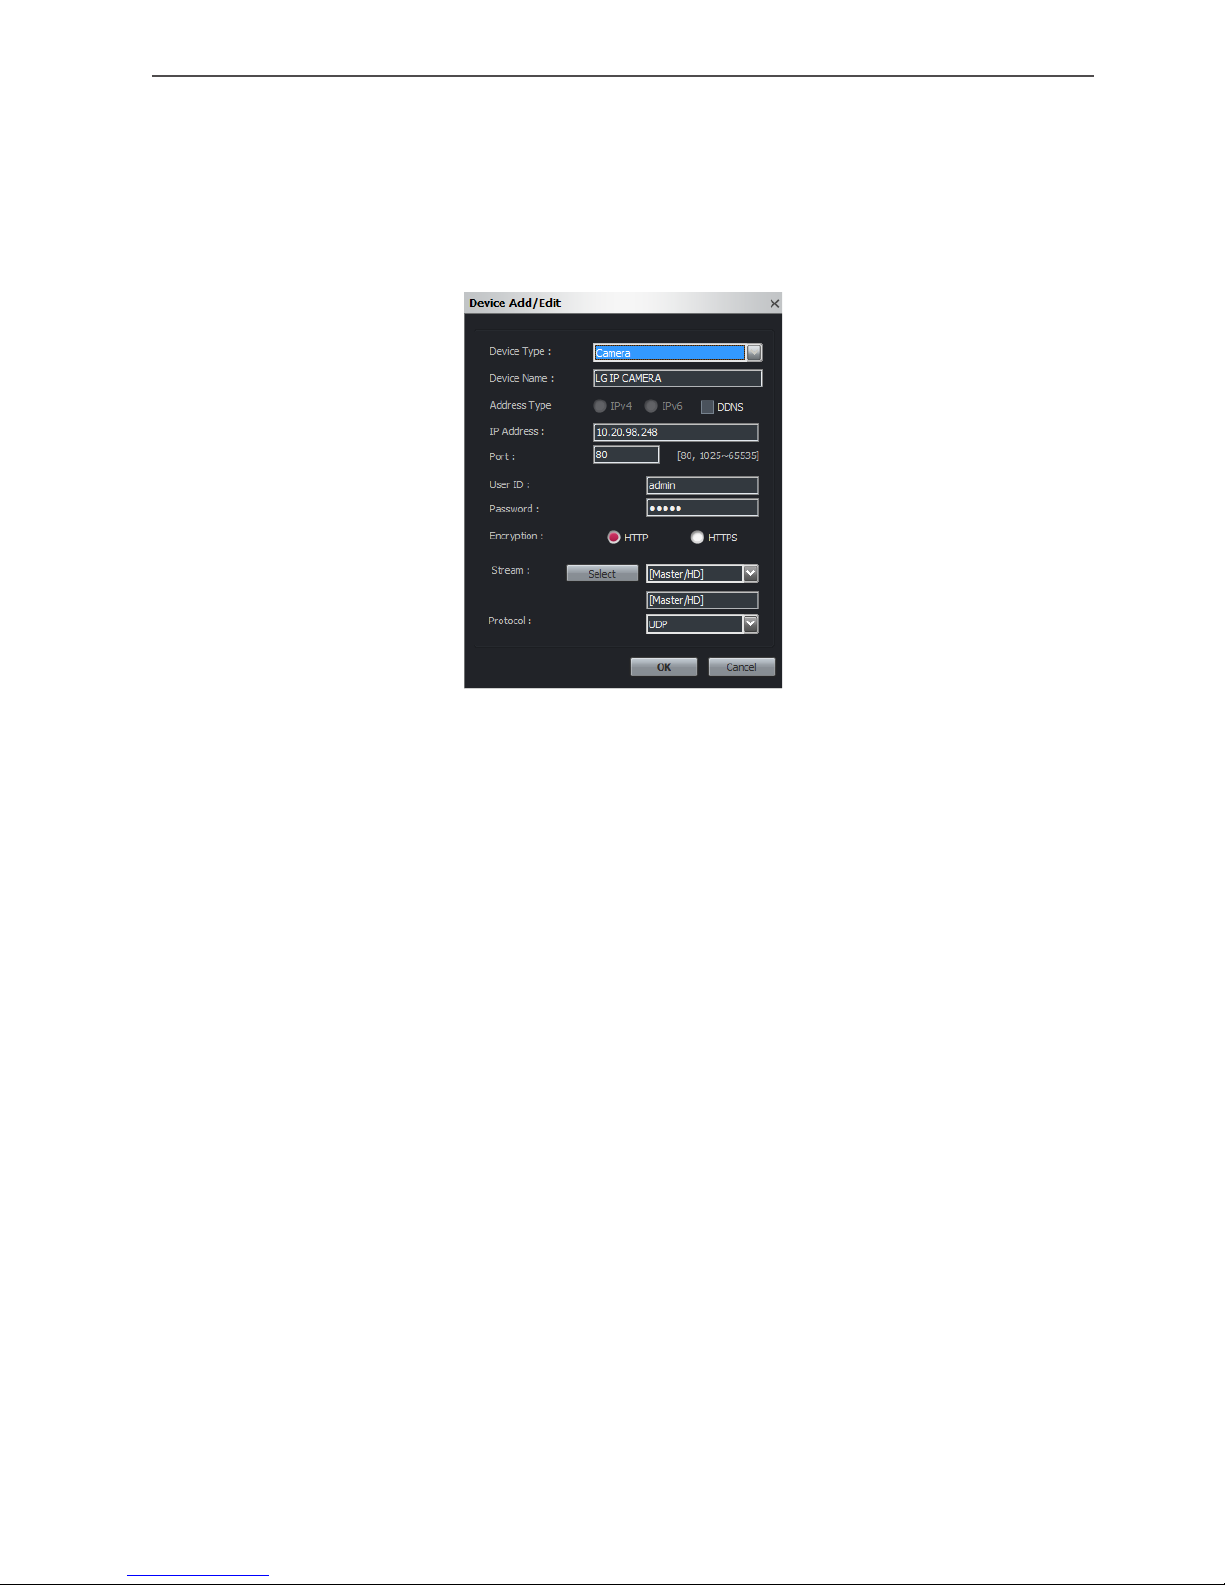
4. Click the [Add] button. The Device Add/Edit window is displayed.
5. Specify the Device Type, Device Name, Address type, IP Address, Port, User ID, Password,
Encryption, Stream, Protocol and click the [OK] button. If you select DVR on the Device
Type, Encryption, Stream and Protocol option is deactivated and you can select a DVR
model.
6. Click the [OK] button to exit the window.
The registered device is displayed in the Camera Group tree.
18 Operation and settings
Registration the device manually
1. Select the Device tab on the main menu or click the [Device] icon on the Overview
window. The Device window is displayed.
2. Click the [Manual Add] button. The Device Add/Edit window is displayed.
3. Specify the Device Type, Device Name, Address type, IP Address, Port, User ID, Password,
Encryption, Protocol and click the [Select] button then select the stream.
4. Click the [OK] button to exit the window.
19Operation and settings
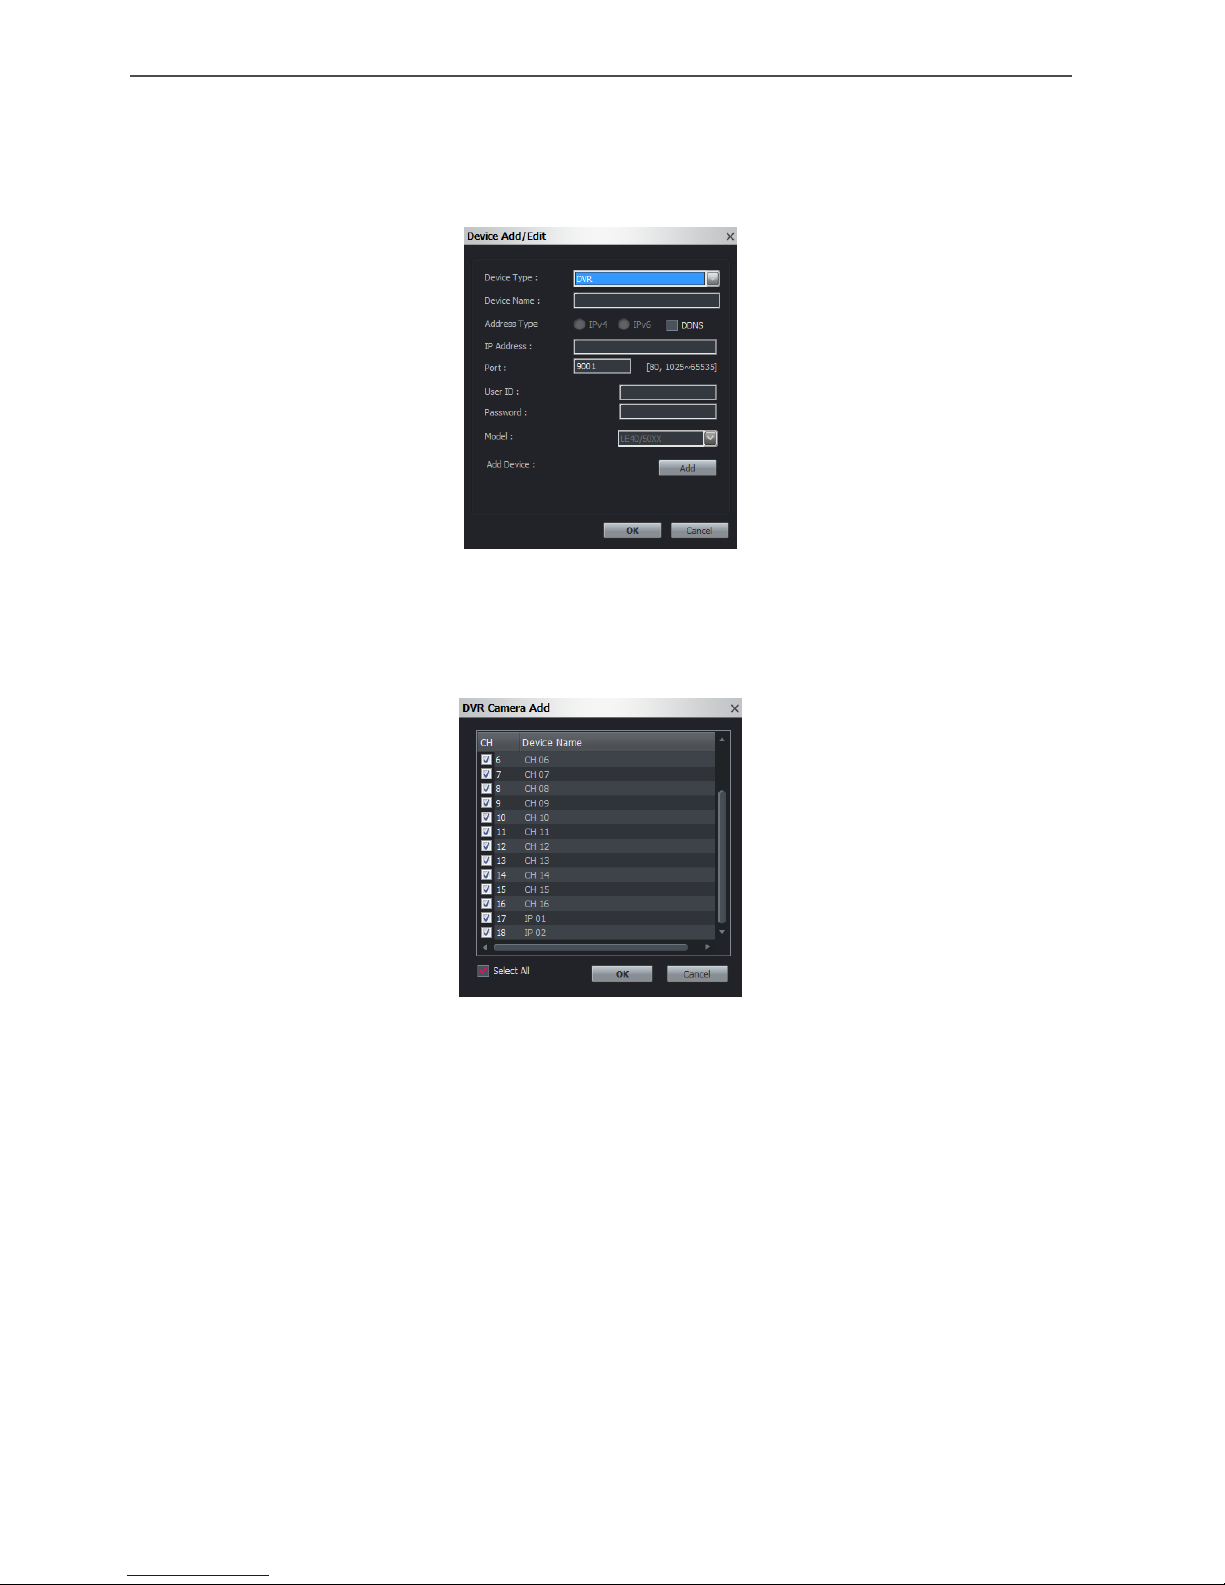
Registration the DVR
1. Follow steps 1-2 described in “Registration the device manually”.
2. Select to DVR on the Device Type.
3. Specify the Device Name, IP Address, Port, User ID, Password and Model. IP Address can
register IPv4 address only.
4. Click [Add] button. DVR Camera Add window is displayed.
5. Select to desired camera channel and click OK to add device.

20 Operation and settings
Edit the device
1. Select the device on the list.
2. Click the [Edit] button. The Device Add/Edit window is displayed.
3. Specify the Device Name, Port, User ID, Password, Encryption, Stream, Protocol and click
the [OK] button.
Remove the device
1. Select the device on the list.
2. Click the [Remove] button. The selected device is removed.
Create a new group folder and add the device
To create a device group under the selected folder, do the following on the Camera Group
Tree section:
1. Click the right mouse button on the folder.
2. Select the [Add Group] option. The Group Edit window is displayed.
3. Enter the group name.
4. Select the device to add the group folder.
5. Select the required device name that you want to group. If you want to add the all device,
check the [Select All] option.
6. Click the [<--] button.
7. Repeat steps 5 to 6 to group the other device.
8. Click the [Apply] button to confirm it.
The new group folder is created under the folder you selected.

21Operation and settings
Delete a group folder
1. Select the required group folder and click the right mouse button.
2. Select the [Remove Group] option.
Notes:
• It is not possible to delete the [System] folder.
• Deleting a group folder will delete all subgroup folders within the group folder as well.
If you delete the group folder, the device in the group folder will be moved to the upper
group folder automatically.
Edit a group folder
1. Select the required group folder and click the right mouse button.
2. Select the [Edit Group] option. The Group Edit window is displayed.
3. Overwrite the existing group name with a new name of your want.
4. Add or remove the device.
• If you add the device, select the device and click the [<--] button.
• If you remove the device, select the device on the group list and click the [Remove]
button.
5. Click the [Apply] button to confirm it.
Note:
You cannot edit the [System] folder.
Server Management
Registration the Server
1. Select the Server tab on the main menu or click the [Server] icon on the Overview window.
The Device window is displayed.
2. Click the [Add] button. The Server Add/Edit window is displayed.
3. Specify the Server Type, Server Name, Server IP and click the [OK] button.
4. Click the [OK] button to exit the window.
 Loading...