


Before You Start
Before You Start
1 2
1.1 Safety Instruction
WWAARRNNIINN GG //CCAAUUTTII OONN
To reduce the risk of fire or electric shock, do not
expose this product to rain or moisture. Do not use this
product near swimming pools or other water bodies.
IIMM PP OORRTTAANNTT
Before installing or operating this product read this
information.
1.2 Optimal Phone Performance
▶
Do not operate your product when holding the antenna,
or when someone is within four inches (ten centimeters) of
the antenna. Holding the antenna affects call quality and
may cause the telephone to operate at a higher power
level than needed.
▶
For the best call quality, keep the antenna free from
obstructions and position the antenna straight up.
▶
Do not use the phone with a damaged antenna. Have your
antenna replaced by a qualified technician immediately.
Use only the Authorized LGE Service Center-approved
antenna.
Nonapproved antennas, modifications, or attachments
could impair call quality or damage the phone.
▶
RF energy may affect improperly installed or inadequately
shielded personal medical devices such as pace makers,
hospital monitor. Consult the manufacturer of any
personal medical devices to determine if they are
adequately shielded from external RF energy. Turn your
terminal OFF in health care facilities when any regulations
posted in the areas instruct you to do so.
Hospitals or health care facilities may be using equipment
that could be sensitive to external RF energy.
▶
If this equipment does cause harmful interference to radio
or television reception, which can be determined by
turning the equipment off and on, the user is encouraged
to try to correct the interference by one or more of the
following measures:
- Reorient or relocate the receiving antenna.
- Increase the distance between the radio or television and
the telephone.
- Connect the equipment into an outlet on a circuit
different from that to which the terminal is connected.
- Consult your experienced radio/TV technician of the
Authorized LGE Service Center.
▶
Use only the battery, antenna and AC power supply
provided by LGE.
Using any other type will invalidate the warranty.
▶
Only authorized personnel should service the phone and
its accessories.
Faulty installation or service can be dangerous and may
invalidate the warranty.
Before You Start
Before You Start
▶
Do not use the phone in designated “no cellular phone use”
area.
Avoid exposure to high temperature or humidity.
▶
Avoid wetting the phone with any liquids. If the phone gets
wet, turn the power off immediately and remove the backup
battery and AC power supply.
If the phone is inoperable, then return to the service agent for
service.
▶
Avoid shock or impact.
▶
We recommend you to charge the backup battery before
initial use. Backup battery may be discharged during delivery.
▶
This phone complies with part 15 of the FCC Rules.
Operation is subject to the following two conditions:
- This phone may not cause harmful interference.
- This phone must accept any interference received, including
interference that may cause undesired operation.
1.3 Care and Service
▶
Unplug the telephone from the wall outlet and remove
antenna (or disconnect antenna cable) before cleaning. Do
not use liquid or aerosol cleaners.
Use a damp cloth for cleaning.
▶
If the phone fails for any reason, do not attempt to
disassemble; contact the Authorized LGE Service Center for
assistance.
▶
If any of the following conditions exist: unplug the phone from
the wall plug, remove battery, and call the service provider.
- The power supply cord is damaged or frayed.
- Liquid has been spilled into the phone.
- The phone has been exposed to rain or water.
- The phone has been dropped or damaged.
- The phone does not work normally by following the
operating instructions.
Before You Start
4
Before You Start
3
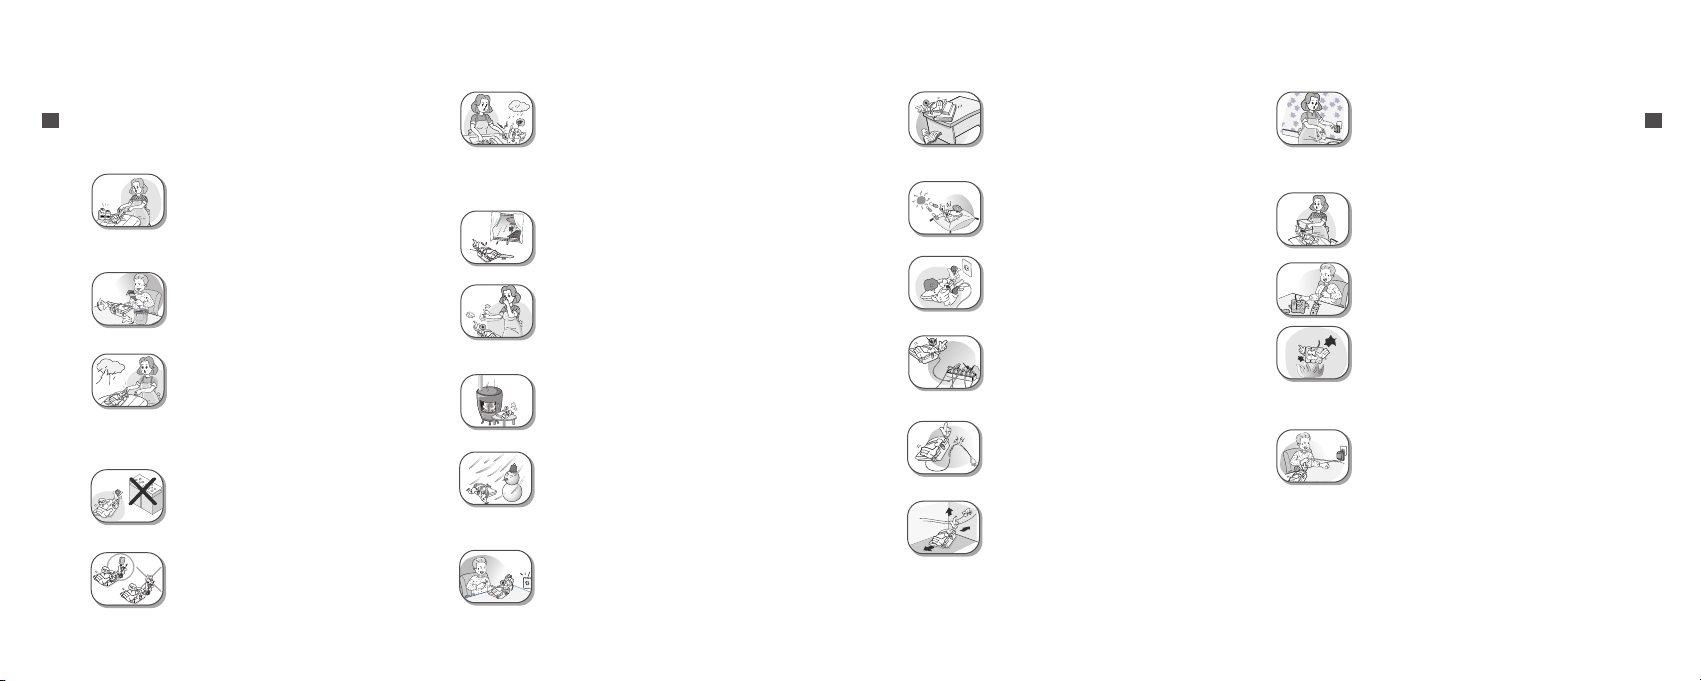
▶
Avoid exposure to high temperature or
humidity.
Avoid wetting the unit with any liquids. If
the unit gets wet, turn the power off
immediately and remove the backup battery
and AC power supply.
▶
Keep it dry. Precipitation, humidity, and
liquids contain minerals that may corrode
electronic circuits.
▶
Do not use or store it in dusty, dirty areas
as its moving parts can be damaged.
▶
Do not store it in hot areas. High
temperatures can shorten the life of
electronic devices, damage batteries, and
warp or melt certain plastics.
▶
Do not store it in cold areas. When the
phone warms up to its normal operating
temperature, moisture can form inside the
phone, which could damage the phone’s
electronic circuit boards.
▶
Do not attempt to open it. Non-expert
handling of the device could damage it.
Consult your authorized LGE Service Center
for help. It may be a cause of fire, electric
shock and breakdown.
Before You Start
Before You Start
▶
Do not drop, knock or shake it. Rough
handling can break internal circuit boards.
▶
Do not install under direct sunlight or on an
uneven surface.
▶
Before using plug, check with available
power voltage.
Inaccurate power voltage may be a cause of
fire.
▶
Do not plug many power cords in outlet. It
may be a cause of fire or electric shock.
▶
Do not remodel the power cord or
disassemble. If power cord or plug is
impaired, do not use it. It may be a cause of
fire or electric shock.
▶
Do not install in an ill-ventilated place. It
may be a cause of fire or breakdown.
▶
Do not touch the plug with wet hands.
When disconnecting the power cord of any
accessory, grasp and pull the plug, not the
cord. It may be a cause of fire or electric
shock.
▶
Do not put heavy things on the power cord.
Do not bend power cord too much. It may
be a cause of fire or electric shock.
▶
Do not short-circuit. It may start a fire or
may explode causing injury.
▶
Do not throw and impact battery. Do not
dispose of batteries by putting them in fire.
It may explode or catch fire by electrolyte.
▶
When you disconnect the power cord of any
accessory, grasp and pull the plug, not the
cord. It may cause an adapter breakdown.
WWAARRNNIINNGG
▶
Do not use harsh chemicals, cleaning
solvents, or strong detergents to clean it.
Wipe it with a soft cloth that has been
slightly dampened in a mild soap-and water
solution.
▶
Do not paint it. Paint can clog the device’s
moving parts and prevent proper operation.
▶
During lightning, do not touch power plug
or phone line. It may cause an electric shock
or death.
CCAAUUTT IIOONN
▶
Do not use with car battery. It may cause an
electric shock, fire, breakdown or
transformation.
▶
For safety use, use only adapter approved
by LGE.
To all problems arising from not following
this guide, LGE does not bear
responsibility.
1.4 Safety Information

Introduction
6
Introduction
Introduction
5
Introduction
2.1 Component List
< User Guide >
< AC/DC Power Adapter >
< Dipole Antenna >
< Terminal >
< Backup Battery(Built-in) >
Congratulations on your purchase of the LGE Fixed Wireless
Terminal that has been designed to operate on the latest digital
mobile communications technology, Code Division Multiple
Access (CDMA). The CDMA digital technology provides greatly
enhanced voice clarity and can provide various advanced
features. The terminal enables the normal operation and direct
connection of standard telephone equipment into the cellular
network.
The standard unit provides:
▶
A phone jack to plug in the telephone equipment (RJ-11P ort).
▶
Ring voltage used to ring the telephone connected to the unit,
with a Ringer Equivalence Number of 4.
▶
AC Power supply with barrel plug connector.
▶
Support Dial tone.
▶
Touch tone(DTMF) or Pulse Dialing.
▶
Support Caller ID Telephone(DTMF only, No FSK Support).
▶
One light (LED) to indicate the status of the unit.
▶
Dipole Antenna.
Some features may not be supported by the service provider.
For instance, the following features may not be supported:
▶
Speed Dial.
▶
Emergency Call.
▶
Hot Line Call.
▶
Alarm.
▶
Volume Level.
▶
Outgoing Call Lock.▶Restrict Call.
▶
Quick Dial Option with “J”.
Other features as determined by your service provider.
NNoott ee::
- Telephones with multiple terminating impedance should be set
for 600ohms.
Installation for Wall Mounting
▶
To mount terminal on the wall, please follow the procedure to
install it correctly.
1. Determine suitable location to mount terminal with
mounting template which is actual size.
2. Mark the two openings and select round or
pan-head type screw.
3. Drill out the holes with drill bit smaller in diameter than the
screws.
4. Secure two screws into the wall, leaving about 65mm gap
between the screw heads.
5. Insert the DC power jack into an electrical outlet and
attach the telephone line into the Phone Jack (RJ-11) of
the terminal.
6. Place the terminal over the two screws.
7. Slide the terminal downward until the screw head is locked
at the top of the opening and the terminal is secure.
8. Check that set is fixed on the screws.
2.2 Front, Side and Rear View of the Terminal
< Figure 1 >
II TTEEMM DDEE SS CC RR IIPPTTII OO NN
(1)
LED Indicate the status of the unit.
(2) DC IN 12V AC/DC Power Adapter.
(3) Battery Switch Battery On/Off Switch.
(4) TEL (RJ-11 Port)
Connecting Port for SLT
(Single Line Telephone).
(5)
Antenna Connector Connecting Port for TNC Antenna.

Introduction
8
Introduction
Introduction
7
Introduction
2.4 Installation
You should follow each step carefully as shown below in order to
guarantee proper operation of CDMA Fixed Wireless Telephone.
STEP I. Check Components
▶
Fixed Wireless Terminal is supplied with the following standard
unit and accessories:
1. LST-280 Terminal -1EA-
2. Dipole Antenna -1EA-
3. Backup Battery -1EA-
4. User Guide -1EA-
5. AC/DC Power Adapter -1EA-
▶
Please make sure that these components are present and
check for evidence of shipping before you begin the unit
installation.
▶
If components are missing or damage is found, contact your
authorized LGE Service Center immediately.
STEP II. Place the Terminal
▶
Place the terminal on the stable flat secure surface area (desk,
table, etc).
Avoid direct exposure to the sunlight and damp areas.
▶
Read the Safety Information located at the first part of this
document before you place the terminal.
STEP III. Connect Components
▶
Connect the Dipole antenna to the TNC connector located at
the topside of the terminal (See Figure 1 to locate the TNC
connector).
If you have placed the terminal on the flat surface, position the
antenna up side.
2.3 LED Indicator
< Table 1 >
II nn ff oo rrmm aattii oo nn AA cc ttiivvii ttyy MMee aa nnii nngg
Green(Solid). Good signal strength.
Service Yellow(Solid). Poor signal strength.
Red(Blink). No service Area.
PWR (AC/Batt) Red(Solid). Low Battery (Only battery mode).
Mode
Green(Blink).
Incoming ringing or Charger connection status
alternated.
Over charger
Red(Fast Blink). Over voltage charger connected.
warning
▶
Connect your phone cord to the RJ-11 port located at the
side of the terminal.
▶
Connect the battery cable to the DC battery connector at the
side of the terminal.
- Remove the battery compartment cover.
- Connect battery to the connector.
- Replace the battery cover.
▶
Connect the AC power supply cable to the DC input port
located at the side of the terminal.
““ RReeffee rr ttoo cc oo nnnneecc ttii oo nn DDiiaa ggrraa mm wwiitthh eexxtt eerrnn aall
eeqquuiippmmeenntt iinn FFiigg uurr ee 22 ””
STEP IV. Check LED Indicators
▶
When you have followed the installation instruction STEP I to
STEP III, please check the LED for normal operation.
▶
When DC power is fed at the first time, LED will operate as
follows:
If receiving signal strength is strong enough, then LED is GREEN.
If not, it is ORANGE solid or RED blinking.
< Figure2. Connection Diagram with External Equipment >
NNoott ee::
- Length between LST-280 and Telephone : over 1m.
- The adapter type(with power cord) may be different from
country to country.
Battery Switch
Before using the terminal, please check that the battery switch is "ON".
After switching it to "ON", use the phone.
When charging the battery, check that battery switch is "ON".
Notice
LST-280

109
Programming
Programming
Introduction
Introduction
2.5 Installation Steps
Please follow the below procedure to install the unit properly.
<Terminal Connection >
Connect the antenna to
the TNC connector Turn
right.
Connect your phone Cord.
Bend the antenna up
right.
Connect the DC Power
supply.
1 2
3 4
<Battery Connection >
▶
First, slow down the terminal slide switch.
▶
To connect battery, disassemble terminal as shown in the figure above.
▶
Battery connector’s groove must be slid into the jack as shown in the figure above.
LST-280 provides various convenience and various features to
user. This chapter describes how to program these features and
to use them.
The main features that can be used are as follows:
-
Speed Dial.-Emergency Call.-Hot Line Call.
-
Alarm.
-
Conversation Voice Level.
-
Outgoing Call Lock.
-
Restrict Call.
▶
Programming Instruction
1. Lift Handset and press “#” key twice and you will hear the
Menu Entering tone.
2. Enter the field number (1~ 9).
3. Press “#” key and you will hear confirmation tone.
4. Enter sub-fields and their options.
5. Press “
J
” key to save and you will hear confirmation tone.
NNoott ee::
- As to the characteristic quality of some telephones, confirm
tone or error tone could not be heard.
3.1 Speed Dial
LST-280 has 30 memory locations (1~30:1 or 2 digits) to store
frequently used phone numbers and you can make a call by
pressing memory location number only when the speed dial
feature is enabled.
*
Press “#” + “#” + “1” continuously to enter Speed Dial
programming mode.
Storing the Speed Dial Number
1. Press “#” and one of memory numbers (1~30).
2. Press “#” and the phone number (Max. 32 digits).
3. Press “
J
” to store.
Enable or Disable Speed Dial
1. Press “#” and “1” or “2” to Enable or Disable respectively.
“1” - Speed Dial Enable. “2” - Speed Dial Disable.
2. Press “
J
” to store.
Erase All Speed Dials
1. Press “#” and “3” to erase all Speed Dials.
2. Press “
J
” to store.
NNoott ee 11 ::
Speed Dial feature is disabled after erase operation
executed.
Operation
1. Enable the Speed Dial function.
2. Lift handset and dial tone will be heard.
3. Press Speed Dial number and wait for dial timeout.
If the user press “
J
” button after dialing the number, the
terminal will make a call immediately.

1211
Programming
Programming
Programming
Programming
3.2 Emergency Call
LST-280 has 3 emergency call numbers (1~3) and max. 3 digits
can be stored in each emergency call number.
*
Press “#” + “#” + “2” continuously to enter Emergency Call
programming mode.
Entering the Emergency Phone Number
1. Press “#” and one of the emergency memory location
numbers (1~3).
2. Press “#” and the phone number (Max. 3 digits).
3. Press “
J
” to save and enable this function.
Enable or Disable Emergency Call
1. Press “#” and Enable code “1” or Disable code “2”.
2. Press “
J
” to save.
Erase All Emergency Call Numbers
1. Press “#” and “3” to erase all Emergency Call Numbers.
2. Press “
J
” to store.
NNoott ee 11 ::
Emergency Call feature is disabled after erase
operation executed.
NNoott ee::
- If Emergency Call is disabled and Emergency Call number has been
already programmed, you can enable Emergency Call by pressing
“#” + “#” + “2” + “#” + “1”+ ”
J
” without entering an Emergency
Call Number again.
3.3 Hot Line
While the Hot line function is enabled, the programmed number
will be automatically dialed when you pick up the handset and
wait for the programmed hot line time (2~10sec) without any
key press.
*
Press “#” + “#” + “3” continuously to enter Hot Line
programming mode.
Programming the Hot Line Number
1. Press “#” and Hot Line Enable code “1”.
2. Press “#”and Hot Line phone number (Max. 3 digits).
3. Press “
J
” to save and enable this function.
Enable or Disable the Hot Line Feature
1. Press “#” and Hot Line Enable code “1” or Disable code
“2”.
2. Press “J” to save.
Programming the Hot Line Time
1. Press “#” and Hot Line Time code “3”.
2. Press “#” and enter desired Hot Line Time (2~10
seconds).
3. Press “
J
” to save.
NNoott ee::
- If Hot Line is disabled and Hot Line number has been already
programmed, you can enable the Hot Line feature by pressing
“#”+ “#”+ “3”+ “#”+ “1”+ “J” without entering a Hot Line
Number again.
3.4 Alarm
If alarm feature is enabled, you will hear ring at the programmed
alarm time every day for 1 minute.
Alarm does not ring on the state of hook off, conversation or no
service.
*
Press “#”+ “#”+ “4” continuously to enter Alarm Time
programming mode.
Entering Alarm Time (12-hour mode)
1. Press “#” and Alarm Time code “1” for 12-hour mode.
2. Press “#” and Alarm Time (HH:MM +Am “1” / Pm “2”).
*
In the forenoon, time range is 0000 ~1159, 1200
~
1259 and 0100 ~1159.
3. Press “
J
” to save and enable Alarm Time.
Entering Alarm Time (24-hour mode)
1. Press “#” and Alarm Time code “2” for 24-hour mode.
2. Press “#” and Alarm Time (HH:MM).
*
Time range is 0000 ~2359.
3. Press “
J
” to save and enable Alarm Time.
Disable Alarm Feature
1. Press “#” and Alarm Disable code “2”.
2. Press “
J
” to save.
NNoott ee::
- If Alarm is disabled and time has been already programmed, you
can enable the Alarm feature by pressing “#”+ “#”+ “4”+”#”+
“1” + “
J
” without entering Alarm Time again.
3.5 Volume Level
There are three kinds of volume to be controlled by software, and
you can set three levels for each volume.

Programming
14
Programming
13
Programming
Programming
Changing the Voice Volume Level,
Changing the Dial Tone Volume Level,
Changing the Busy Tone Volume Level
1. Press “#” + “#” + “5” + “#” + “1” + “2” + “3”
continuously to enter Volume Level programming mode.
2. Press “#” and Volume Level (1~3).
“1” - Low Level. “2” - Middle Level. “3” - High Level.
3. Press “
J
” to save.
Before pressing “
J
” you can enter Volume Level
continuously.
3.6 Outgoing Call Lock
If you try to make an outgoing call while outgoing call lock is
enabled, then you will hear warning tone after dial time-out as an
indication of entering the Lock code. You should enter Lock code
to make an outgoing call. Lock code is composed of 4 digits.
Outgoing Call Lock feature is disabled as a factory setting.
*
Press “#”+ “#”+ “6” + continuously to enter Outgoing Call
Lock programming mode.
Enable or Disable Outgoing Call Lock
1. Press “#” and “Lock code (4 digits)”.
2. Press “#” and Enable “1” or Disable “2” code.
3. Press “
J
” to save.
Changing Outgoing Lock Code
1. Press “#” and “Lock code (4 digits)”.
2. Press “#” and “3” to Change Lock code.
3. Press “#” and “New Lock code (4 digits)”.
4. Press “#” and re-enter “New Lock code (4 digits)”.
5. Press “
J
” to save.
NNoott ee::
- If Emergency Call has been enabled, then a call to the
Emergency Numbers stored can be made even when Outgoing
Call Lock has been activated on the terminal.
3.7 Restrict Call Mode Setting
While the Restrict Call function is enabled, the specified numbers
cannot be called. These specified numbers start with specific
digits. The specific digits are set according to the following
procedure (Storing the Deny dialed number).
Among these specified numbers you can permit some numbers by
designating start digits by following procedure (Storing the
Permit dialed number).
LST-280 has 10 Deny dialed numbers (1~10), and max. 32
digits can be stored in each Deny dialed Permit dialed number.
If you set Emergency Call, the emergency number is not applied
to this restrict call.
*
Press “#”+ “#”+ “8”+ continuously to enter Restrict Call
programming mode.
*
Press “#” and “Lock code”
(4 digits : set in Outgoing call lock / default is 0000).
Set Restrict Call Level
1. Press “#” and restrict level (1~4).
“1” - No restriction.
“2” - Restriction.
“3” - Emergency only (All excepting emergency are
restricted).
“4” - Clear restrict table.
2. Press “
J
” to save.
Storing the Permit Dialed Number,
Storing the Deny Dialed Number
(Restricted dial number)
1. Press “#” and “1”, “2” to enter Permit dialed number store
step.
2. Press “#” and one of “Memory number” for Permit dialed
number(1~10).
3. Press “#” and the “digits” (Max. 32digits).
4. If you want to store more Permit dialed numbers continue
from step 3.
If you want to finish at this point, Press “J” to save.
3.8 Auto Dial Time
LST-280 will automatically dial when the user waits for the
programmed Auto Dial Time(2 ~9sec) after any key press.
You can set the time to make a call after the last dialed digit.
Changing the Auto Dial Time
1. Press “#”+ “#”+ “9”+ continuously to enter Auto Dial
Time programming mode.
2. Press “#” and Auto Dial Time (2 ~9).
3. Press “
J
” to save.
Before pressing “
J
” you can enter Auto Dial Time
continuously.
The default time is 4 seconds.

16
LGE CDMA Fixed Wireless Phone LST-280
LGE CDMA Fixed Wireless Phone LST-280
15
General Information
General Information
▶
Main Unit
II tteemm DDee sscc rr iipp ttii oonn
Tx Frequency 824 ~ 849 MHz.
Rx Frequency 869 ~894 MHz.
Channel Bandwidth 1.25 MHz.
Frequency Stability
±
300 Hz.
Tx Power Max. 0.25W.
Rx Power Level -104 ~-25 dBm.
Size 139 x 90 x 34 mm.
Weight(g) 158g(w/o battery).
Operating Temperature -10 ~50°C.
▶
AC/DC Adapter
II tteemm DDee sscc rr iipp ttii oonn
Input Voltage 100V ~240V AC.
Input Frequency 50 / 60 Hz.
Output Voltage 12V(DC).
NNoott ee ::
Talk time condition: sector power -80dBm ~-85dBm full data rate.
Standby time condition: sector power -80 dBm ~-85dBm slot cycle index 2.
▶
Internal Back-up Battery(A)
II tteemm DDee sscc rr iipp ttii oonn
Capacity 3.7V Li-ion.
Talk duration time 2 Hours Min.
Standby duration time 30 Hours Min.
Charging duration time Normal/Trickle, 4 Hours 30Minuts.
Licensed by QUALCOMM Incorporated under one or more of the following Patents:
U.S, Patent No. 4,901,307 U.S, Patent No. 5,056,109 U.S, Patent No. 5,099,204
U.S, Patent No. 5,101,501 U.S, Patent No. 5,103,459 U.S, Patent No. 5,107,225
 Loading...