

Page 1

LG Smart AC
Smart Inverter
Remote Control System
User’s Manual
WLAN Module for
LG Smart Air Conditioning Application
Model: PCRCUDT2/ PCRCUDT3
Page 2
Proprietary Data Notice
This document, as well as all reports, illustrations, data, information, and other materials are the property of LG Electronics
U.S.A., Inc., and are disclosed by LG Electronics U.S.A., Inc.,
only in condence.
Do not throw away, destroy, or lose this manual.
Please read carefully and store in a safe place for future reference.
Content familiarity required for proper installation and operation.
Follow the instructions in this manual to prevent product malfunction, property
damage, injury, or death to the user or other people. Incorrect operation due to
ignoring any instructions will cause harm or damage. The level of seriousness
is classied by the symbols described below.
This symbol indicates a potentially hazardous situation which, if not avoided, could result in death or
serious injury
This symbol indicates situations that may result in equipment or
property damage accidents only.
This symbol indicates that the following action should not be performed.
A summary of safety precautions is on page 4.
UM-SmartAC-All-06-14
For continual product development, LG Electronics U.S.A., Inc.,
reserves the right to change specications without notice.
©LG Electronics U.S.A., Inc.
Page 3

Table of Contents
Safety PrecautionS .............................................................................. 4
LG Smart ac ....................................................................................... 6
uSer SmartPhone environment ............................................................. 7
inStaLLation Sequence .......................................................................... 9
Downloading and Installing the App
Install the Android App
Install the iPhone App
LG Smart ac reGiStration .................................................................11
WLAN Module Install
WLan connection ............................................................................. 14
Initial WLAN Module and Smart AC Connection
naminG the neW ac unit .................................................................... 19
uSinG Smart ac ................................................................................. 20
Initial Setup
controL functionS ............................................................................. 22
Cooling Function
Dehumidifying (Dry) Function
Heating Function
Auto Changeover Operation
Fan Function
creatinG favorite SettinGS ................................................................ 25
Deleting/Sorting Favorites
Modifying a Favorite
advanced functionS ........................................................................... 29
Purify Mode
Air Flow (Swing Direction)
Setting the Timer/Sleep
fiLter uSaGe and StatS ...................................................................... 32
Filter Usage - Monitoring
Setting Filter Renewal Date
additionaL SettinGS ............................................................................ 35
GeneraL SettinGS ............................................................................... 36
Registering an Air Conditioner
Changing the Temperature Unit Display
Account Settings
Help
About
troubLeShootinG LG Smart ac aPP oPeration .................................. 40
data Guide ......................................................................................... 46
notice ................................................................................................ 47
Page 4
LG Smart AC
Safety Precautions
LG Smart AC App is for use with LG Duct-free Split (DFS)
systems only. Do not attempt to use this app with any other
type of system.
The information in this manual is intended for use by an
end user (customer) of the DFS system installed in their
home environment.
Failure to carefully read and follow all instructions in this manual can
result in equipment malfunction.
Input power to the indoor unit remains connected and
on during procedures in this manual. Do not touch any
exposed indoor or outdoor unit wiring, terminals, or other
electrical components with tools or exposed skin. Only
qualied technicians should install, remove, or re-install
this unit.
Improper installation or use may result in re, explosion, electric shock, physical injury or death.
All electrical work must be performed by a licensed electrician and conform to local building codes or, in the absence
of local codes, with the National Electrical Code, and the
instructions given in this manual.
If the power source capacity is inadequate or the electric work is not performed properly, it may result in re, electric shock, physical injury
or death.
Do not install the LG Smart AC unit in a location exposed to
open ame or extreme heat. Do not touch the unit with wet
hands.
There is risk of re, electric shock, explosion, and physical injury or death.
4
Due to our policy of continuous product innovation, some specications may change without notication.
©LG Electronics U.S.A., Inc., Englewood Cliffs, NJ. All rights reserved. “LG” is a registered trademark of LG Corp.
Page 5
User Manual
Safely dispose of the packing materials.
Tear apart and throw away plastic packaging bags so that children may not
play with them and risk suffocation and death.
Do not store or use ammable gas or combustibles near
the unit.
There is risk of re, explosion, and physical injury or death.
LG Smart AC Terms and Conditions
In using LG Smart AC hardware and smartphone application you
agree to the LG Smart AC terms and conditions.
• LG Smart AC hardware and smartphone application are to
be used only with LG Electronics, Inc. inverter air conditioner
products.
• LG Smart AC hardware and smartphone application cannot be
sold/transferred/rented to any other parties.
• All data generated by LG Smart AC hardware and smartphone
application cannot be sold/transferred/rented to any other parties.
• A complete list of LG Smart AC terms and conditions is at
www.lghvac.com.
Due to our policy of continuous product innovation, some specications may change without notication.
©LG Electronics U.S.A., Inc., Englewood Cliffs, NJ. All rights reserved. “LG” is a registered trademark of LG Corp.
5
Page 6
LG Smart AC
LG Smart AC
This manual describes how to install and use the
LG Smart AC Models PCRCUDT2/PCRCUDT3.
LG Smart AC consists of a hardware Wireless
Local Area Network (WLAN) module, and a free
smartphone application (app). The user must
supply the smartphone; either an Apple® iPhone
or an Android® phone. LG Smart AC is not opti-
mized for tablets.
LG Smart AC will also be referred to as Smart AC in this manual.
Before using Smart AC, you must download and install the latest
version of the free LG Smart AC app from either the App store
(iOS) or the Play store (Android).
Figure 1 shows the Smart AC app and WLAN module communicating through the home setup wireless network. Direct communication to the WLAN module occurs during initial registration.
Figure 2 shows the Smart AC app communicating through a
remote internet access back to the LG duct-free system.
The hardware WLAN module and the smartphone app together
provide monitoring and remote control capabilities for LG duct-free
systems. Smart AC functions only with certain models of the LG
duct-free system products. This product is intended for customers of
DFS systems, that wish to control their indoor inverter units within
their home or remotely at other locations (provided they have wireless connection) through the LG Smart module.
Some functionality of the Smart AC App may be limited due to the duct-free
single zone model. Check your owner’s manual for your model’s capabilities.
6
Due to our policy of continuous product innovation, some specications may change without notication.
©LG Electronics U.S.A., Inc., Englewood Cliffs, NJ. All rights reserved. “LG” is a registered trademark of LG Corp.
Page 7
User Manual
Figure 1: LG Smart AC App Communication through Home Network
Figure 2: LG Smart AC App Remote Communication
User Smartphone Environment
Following minimum specifications are needed to successfully run
the LG Smart AC app on a smartphone:
• OS: Android 2.3 or higher; iOS 6 or higher
• Resolution: Android 320 x 480 or higher; iOS 960 x 640 or
higher
Normal operation may be hindered if the environment does not satisfy mini-
mum specications as outlined above. Some functions may not operate, may
be slow in performance, or part of the screen may be unclear.
Due to our policy of continuous product innovation, some specications may change without notication.
©LG Electronics U.S.A., Inc., Englewood Cliffs, NJ. All rights reserved. “LG” is a registered trademark of LG Corp.
7
Page 8
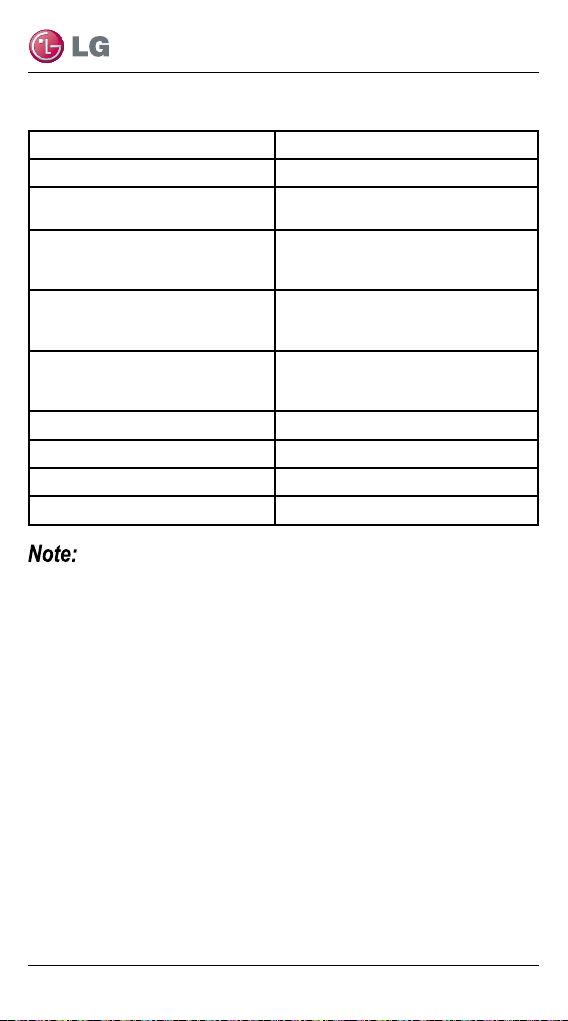
Table 1: LG Smart AC Wireless Network Requirements
Standard IEEE 802.11 b/g/n
Frequency Range 2.412 – 2.472 GHz
Security
Output Power
Data Rate
Sensitivity
Modulation QPSK + OFDM
Class of Emission G1D, D2D
Number of Channels 13
Oscillator/Communication mode Crystal/Half-duplex
This device is not available for laptop computers
or similar portable systems.
128 bits WEP, AES
WPA, WPA2
802.11b: 11 dBM (11 Mbps)
802.11g: 15 dBM (54 Mbps)
802.11n : 11 dBM (72.2 Mbps)
802.11b: 11 Mbps
802.11g: 54 Mbps
802.11n: 72.2 Mbps
802.11b: -88 dBm (11 Mbps)
802.11g: -74 dBm (54 Mbps)
802.11n: -69 dBm (72.2 Mbps)
LG Smart AC
8
Due to our policy of continuous product innovation, some specications may change without notication.
©LG Electronics U.S.A., Inc., Englewood Cliffs, NJ. All rights reserved. “LG” is a registered trademark of LG Corp.
Page 9
User Manual
Installation Sequence
To use LG Smart AC, you must install the app on your smartphone
and sign up for a new account (first time install) and then connect
the WLAN module to the indoor unit. This manual will show down-
load and installation of the app on both Android and Apple (iOS)
platforms, however, procedural screens will mostly be through the
iOS smartphone platform. Note that the app is not optimized to
work on tablets. Where there is a slight difference in procedural
steps, both platform screens will be shown.
Downloading and Installing the App
Follow the instructions for your smartphone, either Android or
iPhone.
Install the Android App
Follow these steps to install the app on an Android
smartphone.
Be sure your phone meets the speci-
cations listed on page 7.
1. Tap the Play Store icon on
the phone.
2. Type LG Smart AC in the
search window and search
for the app.
3. Tap the LG Smart AC icon in
the search results list.
Due to our policy of continuous product innovation, some specications may change without notication.
©LG Electronics U.S.A., Inc., Englewood Cliffs, NJ. All rights reserved. “LG” is a registered trademark of LG Corp.
9
Page 10
LG Smart AC
4. Tap the INSTALL button on the
LG Smart AC screen.
5. Tap the ACCEPT button on the
App permissions screen.
6. When the app is finished
installing, an OPEN button is
displayed on the screen.
7. If you are ready to begin Smart AC registration, tap OPEN and
the app will start.
Install the iPhone App
Follow these steps to install the Smart AC app on an iPhone.
1. Be sure your phone meets the specifications listed in
on page 10.
2. Tap the App Store icon on the iPhone screen.
3. Type LG Smart AC in the search window and
search for the app.
4. Tap the LG Smart AC icon in the search results list
and then tap the FREE button.
5. If asked, enter your Apple
iTunes password, and then
tap OK to proceed.
6. When the app is finished
installing, an OPEN button is displayed on the screen.
7. If you are ready to begin Smart AC
registration, tap OPEN to launch
the app.
10
Due to our policy of continuous product innovation, some specications may change without notication.
©LG Electronics U.S.A., Inc., Englewood Cliffs, NJ. All rights reserved. “LG” is a registered trademark of LG Corp.
Page 11
User Manual
LG Smart AC Registration
This step can be performed either right after the installation of the
app on your smartphone or after you proceed with the Smart AC
module installation on your indoor unit. It is helpful however to
sign up as a new user and go through the email verification prior
to module installation so that you can proceed easily with app and
module communication.
1. From your smartphone, launch the app by tapping on the icon.
• The LG Smart AC welcome screen will appear.
2. Select your country.
• The app will change to the
language selected.
3. Next, tap the Sign up button
to begin your registration
process (1).
1
• Each user in the household
can sign up for their own user
account and go through email
verification.
• A household may also share
one account.
Due to our policy of continuous product innovation, some specications may change without notication.
©LG Electronics U.S.A., Inc., Englewood Cliffs, NJ. All rights reserved. “LG” is a registered trademark of LG Corp.
11
Page 12
LG Smart AC
4. At the Terms and Conditions screen, accept all the terms, by
tapping each “I agree” box and then tap Apply (2).
2
5. Enter your email address, choose a password; and then retype
your password to conrm (3).
6. Enter your name in the elds as
shown. Note that your rst and last
name cannot exceed 15 characters.
7. Enter your phone number as
shown and then tap Next to
proceed.
3
12
Due to our policy of continuous product innovation, some specications may change without notication.
©LG Electronics U.S.A., Inc., Englewood Cliffs, NJ. All rights reserved. “LG” is a registered trademark of LG Corp.
Page 13
User Manual
8. At the Send E-mail Verication
screen, review the information
to be sure everything is correct,
and then tap OK (4).
9. Log into your email and click
on the link to confirm your
registration through the LG
website.
10. Proceed to LG Smart AC
Module Installation section in
this manual.
LG Smart AC
Module Installation
Before your app can communicate
successfully with your indoor unit(s), you must install the WLAN
module. Note that you will need one WLAN module for each indoor
unit that you plan to control through your app.
WLAN Module Install
1. Open the LG Smart AC box, and remove the
module from the plastic wrapper.
2. Verify that indoor unit is turned off and power is cut
off at the outdoor unit’s input power circuit breaker.
3. Open the front panel of the indoor unit and
remove the USB port plastic
cap (1) and insert WLAN
module (2). Close front panel
of unit.
4. Turn power on by turning
back on through the power
breaker and then turn indoor
unit on.
5. Optionally, place a WLAN
module into each indoor unit
as necessary before proceeding.
4
Due to our policy of continuous product innovation, some specications may change without notication.
©LG Electronics U.S.A., Inc., Englewood Cliffs, NJ. All rights reserved. “LG” is a registered trademark of LG Corp.
13
Page 14
LG Smart AC
WLAN Connection
To use LG Smart AC, the app must be installed on your smartphone and the WLAN module must be connected to the air
conditioning system’s indoor unit. The indoor unit must be turned
on. Follow the instructions for Android or for iPhone for first time
pairing of your smartphone to the WLAN module.
The initial connection setup must be done at your home
over your home wireless network.
Initial WLAN Module and Smart AC Connection
This WLAN connection step needs to be performed the rst time the WLAN module is installed into the indoor unit, so that it can establish communication with the
unit and your home’s wireless network connectivity. Under normal circumstances,
the WLAN Module remains connected to the indoor unit at all
times.
1. Tap the LG Smart AC icon.
2. Enter your account and password, then tap
Sign In.
3. A product connection error prompt
will display. Tap Ok to proceed.
• The product connection error
display is normal since you have not registered and paired
your connection to the WLAN at this time.
14
Due to our policy of continuous product innovation, some specications may change without notication.
©LG Electronics U.S.A., Inc., Englewood Cliffs, NJ. All rights reserved. “LG” is a registered trademark of LG Corp.
Page 15
User Manual
Initial WLAN Module and Smart AC Connection
(Continued)
4. The Register New Air Conditioner screen will display.
• Before tapping “Continue” you will have to set the registration
mode.
Remote Controller may appear slightly
different, depending on your model.
5. Point the remote control at the indoor
unit, and press the Jet Mode and Fan
Speed buttons simultaneously for 3
seconds.
6. Wait for the WLAN light to blink at the
indoor unit (this may take a couple of
minutes after the beep).
• If the WLAN light does not start to blink after three minutes,
reset the registration mode again, using the remote controller,
as in step 5.
Check the WLAN light once more. If the above pairing process has not been
successful, follow the instruction below:
• Turn off the indoor unit, wait 10 seconds and then turn the indoor unit
back on (power up). Then try the above registration steps after waiting three
minutes.
Due to our policy of continuous product innovation, some specications may change without notication.
©LG Electronics U.S.A., Inc., Englewood Cliffs, NJ. All rights reserved. “LG” is a registered trademark of LG Corp.
15
Page 16

LG Smart AC
WLAN Light Description
OFF:
• Not connected to the wireless network that communicates to the
external network.
• Connected to the wireless router, however the air conditioner unit
is not operating.
ON:
Air conditioner is connected to the wireless network and is operating properly.
BLINKING:
Air conditioner generates a wireless signal; same as a router.
(Soft AP mode = registration mode)
If registering through iOS, follow step 7, for Android smartphones
continue to step 8:
7. While on the LG Smart AC Registration screen, press the home
button of the iPhone twice quickly, to minimize the app.
• Tap Settings, and then tap Wi-Fi.
• Select the wireless named LG_AC-xx-xx-xx, where “x” repre-
sents numbers which will be exclusive to your module.
• A checkmark will ap-
pear when connection has
been made.
• Enter the following
password: lge12345
• Press the home button
on the iPhone twice quickly and then touch the LG
Smart AC miniature screen
to return to the app.
16
Due to our policy of continuous product innovation, some specications may change without notication.
©LG Electronics U.S.A., Inc., Englewood Cliffs, NJ. All rights reserved. “LG” is a registered trademark of LG Corp.
Page 17

User Manual
8. Once pairing is successful (WLAN light
is blinking on unit), tap Continue at the
AC Registration screen.
9. If asked to reset product, tap Ok.
If the Android smartphone does not connect
automatically, check the following:
• From the Advanced Wi-Fi settings, make sure
“Internet unavailable -
Disconnect Wi-Fi automatically when the Internet
is unavailable” is checked.
• Note that the wording of the above might be
slightly different, depending on your smartphone model.
• This setting is unavailable on iOS smart-
phones.
Due to our policy of continuous product innovation, some specications may change without notication.
©LG Electronics U.S.A., Inc., Englewood Cliffs, NJ. All rights reserved. “LG” is a registered trademark of LG Corp.
17
Page 18

LG Smart AC
10. From the smartphone, select the
wireless network that you want to
connect to.
11. If asked, type in your wireless
password and tap OK, to proceed.
• For specic conguration informa-
tion regarding your wireless network, consult the user manual of
your wireless router.
• The smartphone screen of the
wireless network password may
vary, depending on your wireless
network setup.
• If the wireless network router is setup as a WEP-open security,
you may not be able to complete the registration and set up your
network.
• You will have to make modifications to your wireless network, and
then go through the registration steps once more.
12. Once this procedure has completed, the WLAN light will stop blinking and be on (steady light) as it is connected to the server.
• Depending on your home network, connection to the unit could
take up to 30 minutes.
• If the wireless network router is physically too far from the unit, it
may fail to connect to the server.
18
Due to our policy of continuous product innovation, some specications may change without notication.
©LG Electronics U.S.A., Inc., Englewood Cliffs, NJ. All rights reserved. “LG” is a registered trademark of LG Corp.
Page 19

User Manual
Naming the New AC Unit
Once connection is established between the app and the new AC
through the registration process, you have the opportunity to give
your newly registered unit a unique name. This is helpful if you
have more than one indoor unit in your building. In this way, if you
have a WLAN module installed in more than one indoor unit, you
can register each one and give them unique names. For example,
one could be named Living room AC and the other could be
named Master Bedroom AC. You can run both through your app on
the smartphone by picking the AC unit names.
1. Once wireless password is entered as shown on previous
page, tap Ok.
2. At the A/C Registration
screen, enter a new descriptive name at the Display
name box (1).
3. Tap Select to the right of the
Country box (2).
• This step is optional and can
be performed at a later date.
4. Tap your country’s radio but-
ton and then tap Ok to commit
the change.
5. From the A/C Registration
screen, tap Complete (3).
Due to our policy of continuous product innovation, some specications may change without notication.
©LG Electronics U.S.A., Inc., Englewood Cliffs, NJ. All rights reserved. “LG” is a registered trademark of LG Corp.
19
Page 20

LG Smart AC
Using Smart AC
Using Smart AC with an Android smartphone or an iPhone is similar. The instructions given in this manual use iPhone screens.
You cannot be logged into two
smartphone devices at the same time
while using the same user account. If
you attempt to log in, you will see the
following message . Be sure you log
out from one device before logging in
with another.
Initial Setup
1. From the Sign In screen, tap
your country’s name at the top of the screen.
20
Due to our policy of continuous product innovation, some specications may change without notication.
©LG Electronics U.S.A., Inc., Englewood Cliffs, NJ. All rights reserved. “LG” is a registered trademark of LG Corp.
Page 21

User Manual
Using Smart AC - Continued
You can skip country selection steps,
if you have done this in the previous
sections of this manual.
2. Tap the country’s radio
button and then tap Ok to
commit the change.
3. Sign In, in the usual manner
as in previous sections.
4. If you have not done so
previously, tap Settings
at the bottom of the main
screen (1).
5. Verify that temperature is
set to your country’s unit of
measurement (°F or °C).
To change the unit, tap
Temperature display (2) and
then tap the °F or °C.
6. Tap Ok when done.
1
2
Due to our policy of continuous product innovation, some specications may change without notication.
©LG Electronics U.S.A., Inc., Englewood Cliffs, NJ. All rights reserved. “LG” is a registered trademark of LG Corp.
21
Page 22

LG Smart AC
Control Functions
Use the Control screen to make
instant updates to the temperature
and fan speed on your indoor unit.
Additionally, you may save any of
the settings to a Favorites screen.
2
Cooling Function
1. From the Control screen be sure
you have Power turned on (1).
• The current temperature setting
of your unit will display to the
top left of your control screen.
2. Tap the Cool Mode button (if not
already selected) (2).
3. From the Temperature “drum”
scroll to the new cool temperature setting (3).
4. Optionally, from the Wind Speed settings, tap a fan speed (4).
1
3
4
• Every time a setting is changed on this screen, you will hear a beep from
the indoor unit, acknowledging the change. This ensures successful com-
munication between your app and the WLAN module.
• If you do not hear the beeps, double check to be sure that your unit is
communicating with the app. You may need to re-establish communication
through previous pairing steps in this manual.
22
Due to our policy of continuous product innovation, some specications may change without notication.
©LG Electronics U.S.A., Inc., Englewood Cliffs, NJ. All rights reserved. “LG” is a registered trademark of LG Corp.
Page 23

User Manual
Dehumidifying (Dry) Function
This mode removes excess moisture from an environment with high
humidity or during local rainy seasons. This method prevents mold
from setting in. This mode adjusts
1
2
the room temperature automatically to maintain the optimal level
of humidity.
When indoor unit is in dehumidifying
mode, you cannot adjust the room temperature. Temperature is being adjusted
automatically.
1. From the Control screen be sure
you have Power turned on (1).
• The current temperature of
your unit will display to the
top left of your control screen. This temperature may uctuate during the Dehumidifying process, however, you cannot
control the temperature setting.
2. Tap the Dry Mode button (if not already selected) (2).
3. From the Wind Speed settings, tap a fan speed (3).
3
Due to our policy of continuous product innovation, some specications may change without notication.
©LG Electronics U.S.A., Inc., Englewood Cliffs, NJ. All rights reserved. “LG” is a registered trademark of LG Corp.
23
Page 24

Heating Function
1. From the Control screen be sure
you have Power turned on (1).
• The current temperature set-
ting of your unit will display
to the top left of your control
screen.
2. Tap the Heat Mode button (if not
already selected) (2).
3. From the Temperature “drum”
scroll to the new heat temperature setting (3).
4. Optionally, from the Wind Speed
settings, tap a fan speed (4).
Auto Changeover Operation
This functionality changes the
operation mode automatically to
maintain a set temperature of
± 3.6 °F (±2 °C), from the
temperature set on the Control
screen.
1. From the Control screen be sure
you have Power turned on (1).
2. Tap the ACO Mode button (if not
already selected) (2).
3. From the Temperature “drum”
scroll to the new auto cooling
temperature setting (3).
• The temperature range is 64 °F
(18 °C) through 86 °F (30 °C).
4. Optionally, from the Wind Speed
settings, tap a fan speed (4).
LG Smart AC
1
2
3
4
1
2
3
4
24
Due to our policy of continuous product innovation, some specications may change without notication.
©LG Electronics U.S.A., Inc., Englewood Cliffs, NJ. All rights reserved. “LG” is a registered trademark of LG Corp.
Page 25

User Manual
Fan Function
This mode only circulates the indoor air without changing the room
1
temperature.
• The cooling lamp lights up in air circu-
lation mode on the indoor unit.
• You cannot change temperature set-
tings while in this mode.
3
1. From the Control screen be
sure you have Power turned
on (1).
2. Tap the Fan Mode button (if not
already selected) (2).
3. From the Wind Speed settings,
tap a fan speed (3).
Creating Favorite Settings
You can create a favorite setting or save any existing setting
combination as a Favorite. Favorites allow you to save your most
frequently used congurations and
activate them quickly when launching
the app.
2
• An existing Favorite setting
can be edited and resaved.
• The controls on a Favorite screen cannot
be changed. They are static settings.
• The listed Favorites are based on the
user’s account and not based on the
particular indoor unit.
1
2
Due to our policy of continuous product innovation, some specications may change without notication.
©LG Electronics U.S.A., Inc., Englewood Cliffs, NJ. All rights reserved. “LG” is a registered trademark of LG Corp.
25
Page 26

Creating Favorite Settings - Continued
1. Create a Favorite setting by
doing one of the following:
• Tap one of the Control
modes, adjust temperature and Wind; and then
tap Add Favorite (1) (con-
tinue with step 4 below).
• Tap Favorite (2) on Menu
bar, and then tap Add
Favorite (3) on Favorite
screen (follow the steps
below).
2. Navigate to the mode
screen you want (4).
5
4
6
3. Make your temperature and
Wind Speed selections as
needed (some settings may
not be allowed in the mode
you are in).
4. At the name box, name your
new Favorite (5).
• It is helpful to give it a
descriptive name that is
associated with the mode
setting.
• Two Favorites cannot have
the same name given.
5. Tap Apply when done (6).
The newly named Favorite
setting will now be listed on the
Favorite screen.
LG Smart AC
3
26
Due to our policy of continuous product innovation, some specications may change without notication.
©LG Electronics U.S.A., Inc., Englewood Cliffs, NJ. All rights reserved. “LG” is a registered trademark of LG Corp.
Page 27

User Manual
Deleting/Sorting Favorites
You can re-order or delete your
Favorites from the Favorites
screen.
1. Tap the Edit button.
• To re-order your favorites in the list, tap and hold the ‘list bars”
that appear on the right side of the Favorite. Using your nger,
drag the Favorite, up or down until the placement (order) is correct and then release (1).
• To delete a Favorite, tap
the Del button to the left
of the listed Favorite (2).
2
1
3
Modifying a Favorite
Once you have created a favorite, you can make modifications to it
anytime. You can change the temperature settings, wind strength
and even give it a new name.
1. From the Favorites screen, tap Edit.
2. Tap on the name of the Favorite (see 3 above).
• The appropriate mode screen will launch with the current
favorite settings in place.
3. Modify the settings on the mode screen as needed.
• For example, scroll to a new temperature, or choose a new
wind speed.
• Tap a new mode screen if needed in your modications.
• Optionally, give the modifying Favorite a new name by tapping
the Name box and re-entering a name (see 5 on previous page).
4. Tap Apply (see 6 on previous page) when done.
Due to our policy of continuous product innovation, some specications may change without notication.
©LG Electronics U.S.A., Inc., Englewood Cliffs, NJ. All rights reserved. “LG” is a registered trademark of LG Corp.
27
Page 28

LG Smart AC
Modifying a Favorite - Continued
When making certain modications to an existing Favorite, such as changing
the mode screen, you might see the following message. This message alerts
you that all your previous settings will be overwritten by the new modications
that you are making. Tap Apply at the bottom of the screen to proceed with
your modications.
28
Due to our policy of continuous product innovation, some specications may change without notication.
©LG Electronics U.S.A., Inc., Englewood Cliffs, NJ. All rights reserved. “LG” is a registered trademark of LG Corp.
Page 29

User Manual
Advanced Functions
Depending on the Single Zone AC that you have, you can control
additional features of the unit through the Smart AC app. These
features are located via the Detail area on each mode screen.
The Detail area allows you to:
• Turn purication operation
on/off (not available in some
Single Zone models)
• Adjust air ow (swing)
• Set lter renewal date
• Set sleep timer
• Monitor the remaining lter
percentage
Purify Mode
1
Depending on your indoor
unit’s model type, you can
turn the purification mode of
the unit on or off manually,
using the app (1).
If this function is not available on your unit, the Purify ON/OFF
buttons will be grayed out and you will not be able to use them.
Due to our policy of continuous product innovation, some specications may change without notication.
©LG Electronics U.S.A., Inc., Englewood Cliffs, NJ. All rights reserved. “LG” is a registered trademark of LG Corp.
29
Page 30

LG Smart AC
Air Flow (Swing Direction)
You can set the up/down
and left/right swing directions of the louver using
the Air Flow screen.
1. From any of the mode
screens, tap Detail.
2. From the Detail
screen, tap Air Flow.
3. From the Air Flow
screen, tap either Jet
or Saving button to
place the Air Flow into
those modes.
• Refer to your indoor
unit owner’s manual
for specic denitions of these two modes of operation.
4. From the Air Flow screen, tap the up and down arrows to the
right of the Swing directions to adjust direction.
• If you want the louvers to swing back and forth automatically,
tap the up and down arrows until “Auto Swing” is displayed
(as shown in the screen shot above).
5. Tap Apply to commit changes.
30
Due to our policy of continuous product innovation, some specications may change without notication.
©LG Electronics U.S.A., Inc., Englewood Cliffs, NJ. All rights reserved. “LG” is a registered trademark of LG Corp.
Page 31

User Manual
Setting the Timer/Sleep
The unit can be placed into a
countdown mode which will then
activate the Sleep Mode. Additionally, this screen allows you
to set the timer which allows you
to start and stop air conditioner
activity.
1. From any of the mode
screens, tap Detail.
2. From the Detail screen, tap
Timer.
To Set Sleep Countdown:
• Slide the button to the right of
the Sleep area of the screen
to ON.
• Scroll the amount of time to countdown to Sleep Mode. You
can set it up to 7 hours in
advance.
• Tap Apply.
To Set Timer Countdown:
• Slide the button to the right of
the Off and/or On area of the
screen to ON.
• Use the scrolls to set the hour
and minutes to be counted
down (rounded to 10 minute
intervals).
• Tap Apply.
• You cannot place the Sleep count-
down timer and the Off and/or On timers
in the ON position at the same time. An error message will display to the
bottom of the screen as shown.
• Timer only sets the amount of time (as a count down, not as a time of day
that is being set) before Sleep Mode activation.
Due to our policy of continuous product innovation, some specications may change without notication.
©LG Electronics U.S.A., Inc., Englewood Cliffs, NJ. All rights reserved. “LG” is a registered trademark of LG Corp.
31
Page 32

LG Smart AC
Filter Usage and Stats
The app can monitor filter usage by showing the percentage
remaining before you need to clean the filter. You can also set the
filter renewal date from this area of the app. The app will alert you
when it is time to clean the filter.
Filter Usage - Monitoring
The app will give a visual percentage detail as to the remainder
of usage left on the existing filter, along with remaining hours of
available usage.
1. From any of the mode
screens, tap Detail.
2. From the Detail screen, tap
Filter Usage.
32
Due to our policy of continuous product innovation, some specications may change without notication.
©LG Electronics U.S.A., Inc., Englewood Cliffs, NJ. All rights reserved. “LG” is a registered trademark of LG Corp.
Page 33

User Manual
Filter Usage - Monitoring - Continued
At the Filter Usage screen, you
can see the Renewal date (1)
and percentage of lter remain-
1
ing (2) as well as, the Used and
Remaining time (as hrs) before
the lter needs to be cleaned (3).
3. Tap OK to close the screen
2
when done.
• You will be returned to the
mode screen.
3
Setting Filter Renewal Date
You can set a reminder date that will alert you when it is time to
clean your filter. Follow your unit owner’s manual for suggested
maintenance cycles (i.e., monthly or quarterly). To set up a
renewal date follow the steps below.
1. From any of the mode
screens, tap Detail.
Due to our policy of continuous product innovation, some specications may change without notication.
©LG Electronics U.S.A., Inc., Englewood Cliffs, NJ. All rights reserved. “LG” is a registered trademark of LG Corp.
33
Page 34

LG Smart AC
Setting Filter Renewal Date - Continued
2. From the Detail screen, tap
Filter Usage.
3. From the Filter Usage
screen, tap the date
window to the right of
“Renewal date” (see 1 on
previous page).
4. At the Filter renewal date screen, use the Year/Month/Day
scrolls to choose the date that you want to renew/clean the
filter.
5. Tap OK when done.
• The Filter Usage screen will display and will re-fresh the “Re-
newal date” window (see 1 on previous page.)
34
Due to our policy of continuous product innovation, some specications may change without notication.
©LG Electronics U.S.A., Inc., Englewood Cliffs, NJ. All rights reserved. “LG” is a registered trademark of LG Corp.
Page 35

User Manual
Additional Settings
The Setting screen of the Smart AC app provides additional setting
choices that can be made by the user. This area allows for the
following additional functionality:
• Registration of an air conditioner unit.
• Set temperature unit display (°F or °C).
• Sign in or log out of account by the user.
• A list of all users associated to the main (Master) account).
• Deactivation of the account.
• A user guide (which is an online website) and user manual
(which is a PDF document).
• Displays the current software version installed on your smart-
phone (not shown on screen below).
• Displays the wireless module version (not shown on screen below).
• Displays the open
source license (not
shown on screen below).
Due to our policy of continuous product innovation, some specications may change without notication.
©LG Electronics U.S.A., Inc., Englewood Cliffs, NJ. All rights reserved. “LG” is a registered trademark of LG Corp.
35
Page 36

LG Smart AC
General Settings
Registering an Air Conditioner
1. From the Setting display page, under General, tap Air Conditioner registration.
2. Follow the prompts to register your air conditioner.
• Refer back to “LG Smart AC Registration” on page 11 for
more information
Changing the Temperature Unit Display
From the Settings page, tap the Temperature Display to change
temperature display units between °F and °C.
Account Settings
This area of the page allows you to do the following:
• Login to your account.
• Sign out of your account (allowing a sign in on another device
for example).
• Manage your registered users, through your Master account
setup.
• Deactivate your account.
To login to your account:
1. Tap Sign in.
2. Sign into your account in the usual manner.
36
Due to our policy of continuous product innovation, some specications may change without notication.
©LG Electronics U.S.A., Inc., Englewood Cliffs, NJ. All rights reserved. “LG” is a registered trademark of LG Corp.
Page 37

User Manual
Account Settings - Continued
Adding/deleting a user to the account (registering):
Additional users can be added to your account, so that they in turn
can access controls through the Smart AC app. Each user must
go through online email verification and registration before you
can add them to your user account. New user account registra-
tion is available at “LG Smart AC
Registration” on page 11 of
this manual.
1. From the Setting screen, tap
User list.
2. At the User list screen, enter
the new user’s email account.
3. Tap Register.
• If the user has been veried,
their account email will
then appear on the User list
screen.
4. Delete: Tap the box
to the left of the user
account name. A checkmark
will appear.
• Tap Delete.
Due to our policy of continuous product innovation, some specications may change without notication.
©LG Electronics U.S.A., Inc., Englewood Cliffs, NJ. All rights reserved. “LG” is a registered trademark of LG Corp.
37
Page 38

LG Smart AC
Account Settings - Continued
To deactivate the account:
1. From the Setting screen, tap Deactivate Account.
2. If you are trying to delete the Master account, a prompt will appear confirming that you want to delete the account.
• You will need to follow prompts to transfer the Master “rights”
to another account holder before you can proceed.
3. Tap OK to continue with the deletion.
Help
The Setting screen provides users
with two forms of available guidance.
Through a dedicated website for
LG Smart AC Help and through the
activation of a User Manual that is
loaded as a PDF document.
• Tap Help Guide to launch the
dedicated website.
• Tap Help Manual to open the
PDF manual.
38
Due to our policy of continuous product innovation, some specications may change without notication.
©LG Electronics U.S.A., Inc., Englewood Cliffs, NJ. All rights reserved. “LG” is a registered trademark of LG Corp.
Page 39

User Manual
Account Settings - Continued
About
The Setting screen gives additional information regarding the
software version, wireless module version and open source licens-
ing. Simply tap any of these choices for further information about
the app.
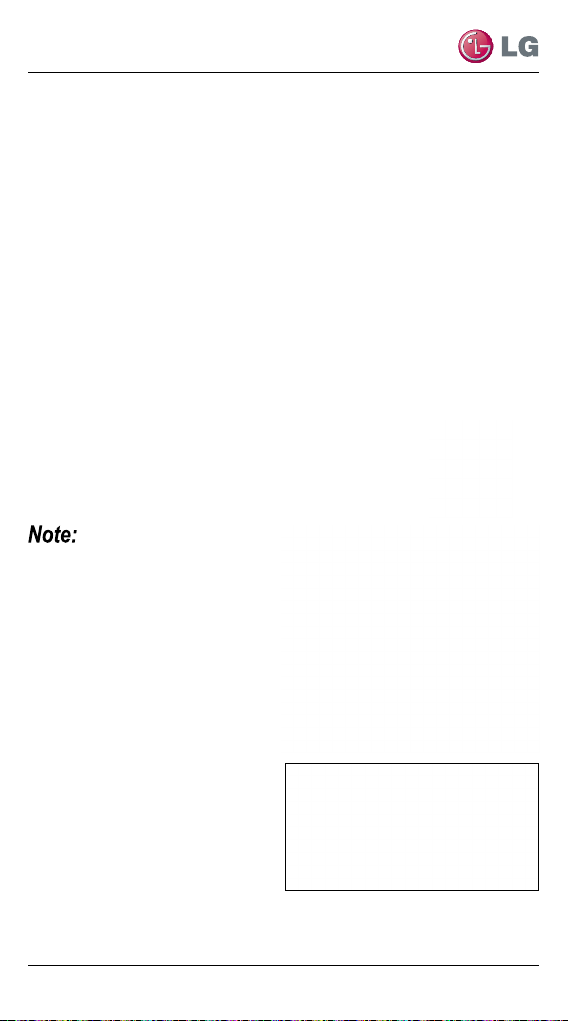
If you would like to get the
source code of GPL, LGPL,
MPL, and others which are
developed with open source
license and installed in this
product, please visit
http://opensource.lge.com.
Due to our policy of continuous product innovation, some specications may change without notication.
©LG Electronics U.S.A., Inc., Englewood Cliffs, NJ. All rights reserved. “LG” is a registered trademark of LG Corp.
39
Page 40

LG Smart AC
Troubleshooting LG Smart AC App Operation
Refer to the troubleshooting procedures below, if the LG Smart AC
app does not function as expected.
Smartphone Will Not Connect to Wireless Module
Main Function Possible Cause Solution
Cannot sign in to the
app.
Unable to sign up for
membership.
Cannot connect LG
Smart AC app to indoor
unit.
• Wireless
connection needs a
password.
• Verify and confirm
from email.
Incorrect email
address.
• Indoor unit is
turned off.
• Wireless signal is
not strong enough.
• Wireless network
which is connected
to the indoor unit is
turned off.
• Something is
wrong with the LG
Smart AC app on
the phone.
• App lost
communication
with the indoor unit
suddenly (dropped
the connection).
• Check your carrier’s
wireless network and be
sure you have access
rights.
• Check your email and
confirm the app through
the LG website.
Make sure to provide
accurate email in the
format of: email@abc.
com
• Turn the indoor unit on.
• Move to a place where
the wireless connection
is strong.
• Turn on wireless
connection.
• Turn off the wireless on
smartphone and then turn
it back on.
• Turn off smartphone and
turn back on.
• Sign into the LG Smart
AC app again to establish
communication with
indoor unit.
40
Due to our policy of continuous product innovation, some specications may change without notication.
©LG Electronics U.S.A., Inc., Englewood Cliffs, NJ. All rights reserved. “LG” is a registered trademark of LG Corp.
Page 41

User Manual
Troubleshooting - Continued
Main Function Possible Cause Solution
The indoor unit is
not connecting to the
wireless.
Smartphone device is
not registering through
the indoor unit.
Smart device is shown
connected to the
wireless but is not
operating.
Cannot delete
the registered air
conditioner.
• Wireless is turned
off.
• Internet cable is
unplugged from the
wireless connection.
• Wireless network
is situated too far
from indoor unit to
communicate.
• Wireless is turned
off.
• Internet cable is
unplugged from the
wireless connection.
• Wireless network
is situated too far
from indoor unit to
communicate.
• Membership is not
active.
• WLAN indicator
light is not
illuminating on
indoor unit.
• Password provided
to the wireless is
not correct when
registering the
device.
After signing in,
more than 2 air
conditioner names
are displayed on the
list for the same unit.
• Turn on the wireless
network.
• Plug internet cable into
the wireless connection.
• Install wireless closer to
the indoor unit.
• Turn on the wireless
network.
• Plug internet cable into
the wireless connection.
• Install wireless router
closer to the indoor unit.
• Sign up for the LG
Smart AC app through LG
website.
• Wireless is not stable
and has disconnected
communication between
smart device and indoor
unit. Re-establish
communication through
the app.
• If password is not
correctly provided,
to the wireless when
registering the device,
the wireless connection
may not operate properly.
Re-enter the correct
password.
Two or more air
conditioners names
are registered on one
account. To delete one
of the units, go to http://
sg.martthinq.com.
Due to our policy of continuous product innovation, some specications may change without notication.
©LG Electronics U.S.A., Inc., Englewood Cliffs, NJ. All rights reserved. “LG” is a registered trademark of LG Corp.
41
Page 42

Troubleshooting - Continued
Main Function Possible Cause Solution
Previously registered
account information
has disappeared.
Cannot sign up, due to
a duplication of existing
account (user ID).
Cannot control indoor
unit with app.
App closes
unexpectedly.
Check to see if
product is registered
with a new account.
LG Electronics
registration has
occurred multiple
times.
Currently another
user is controlling
the unit.
Network connection
issues. Check the
indicator.
The smartphone
app suddenly shuts
down.
If the same product is
registered under a new
account, the previous
account and information
will be deleted. The new
account supersedes the
old account information.
The membership sign
up is managed by LG
Electronics enterprise
wide. If you have signed
up previously, log in with
your account information
and then register the
product. When attempting
to sign up with the same
ID, a message stating
that the ID already exists
will pop up.
The air conditioner
control is given to the
smartphone which is
logged in first. The A/C
cannot be controlled
by multiple users at the
same time. Once the
user logs out, the A/C
becomes available for
other users.
Check the wireless
connection status of the
smartphone.
The app may shut down
once in a while due to
memory limitations of the
smartphone. Close any
unnecessary apps that
may be running in the
background before using
the LG Smart AC app to
control the indoor unit.
LG Smart AC
42
Due to our policy of continuous product innovation, some specications may change without notication.
©LG Electronics U.S.A., Inc., Englewood Cliffs, NJ. All rights reserved. “LG” is a registered trademark of LG Corp.
Page 43

User Manual
Warning Message - Troubleshooting
The following warning messages may appear on the LG Smart AC
app during use. Follow the guidelines below to troubleshoot.
Message Possible Cause Solution
Product Registration
Product is not
registered on server.
New air conditioner will
be registered.
Previously registered
information will
be deleted. Do you
want to continue?
Wi-Fi on the smart
phone is turned off.
Try again after turning
the Wi-Fi on.
Check if your product
is in Wi-Fi mode.
Wi-Fi access may not
be stable depending on
network quality.
The wireless network
setup information you
entered is incorrect or
connection to wireless
network is not stable.
Product is not
registered as yet.
Seen while
registering again
Complete product
registration.
Complete product
registration again.
from the Settings
area of the app.
Displayed while
trying to register the
Turn on wireless setting
on your smartphone.
product, however
wireless is turned off
on smartphone.
After product
searching,
connection has
failed.
• Check blinking WLAN
light on the indoor unit.
• Check if Smart AC
module wireless number
(LGE_AC-xx-xx-xx)
can be found through
smartphone.
• From the Advanced
Wi-Fi settings on the
smartphone, make sure
“Internet unavailable
- Disconnect Wi-Fi
automatically when the
Internet is unavailable” is
checked. (Note wording
may be slightly different,
depending on your
particular smartphone.)
Network failure. • Verify wireless
connection information is
correct.
• Verify wireless
connection.
Due to our policy of continuous product innovation, some specications may change without notication.
©LG Electronics U.S.A., Inc., Englewood Cliffs, NJ. All rights reserved. “LG” is a registered trademark of LG Corp.
43
Page 44

Warning Message - Troubleshooting - Continued
Message Possible Cause Solution
Network connection is
unstable.
Product registration
has failed due to
network error.
• Check network status of
smartphone and product.
• Try to register at a later
time.
• Start the registration
again from the beginning.
• The registration mode
times out after 5 minutes
automatically if not
completed. User must
restart the registration
process.
Product has connected
to the server. In order
to continue normal
operation, please resign in.
Server has
disconnected from
the product.
Message appears when
the server is no longer in
communication with the
product. Log in again to
establish communication.
Communication Issues Between Smartphone & Server
Product is not
connected to the
server.
Product is not
connected to server.
• Server connection may
take time (slow).
• Try to log in again.
• Check wireless network.
LG Smart AC
44
Due to our policy of continuous product innovation, some specications may change without notication.
©LG Electronics U.S.A., Inc., Englewood Cliffs, NJ. All rights reserved. “LG” is a registered trademark of LG Corp.
Page 45

User Manual
Warning Message - Troubleshooting - Continued
Message Possible Cause Solution
Due to a network error
or server load, the
connection is unstable.
Please try again in a
few minutes.
Network error. Check
the connection.
Session timed out due
to inactivity.
Command Fail due to
network error.
Network
environment not
stable.
Try to log in again at a
later time.
• Server connection may
take time (slow).
• Try to log in again.
• Check wireless network.
• Try to log in again at a
later time.
• Turn air conditioner off,
by powering the entire
unit down and then
powering back up. This
will recycle the unit.
• Check wireless network
connection.
• Turn air conditioner off,
by powering the entire
unit down and then
powering back up. This
will recycle the unit.
Due to our policy of continuous product innovation, some specications may change without notication.
©LG Electronics U.S.A., Inc., Englewood Cliffs, NJ. All rights reserved. “LG” is a registered trademark of LG Corp.
45
Page 46

LG Smart AC
Data Guide
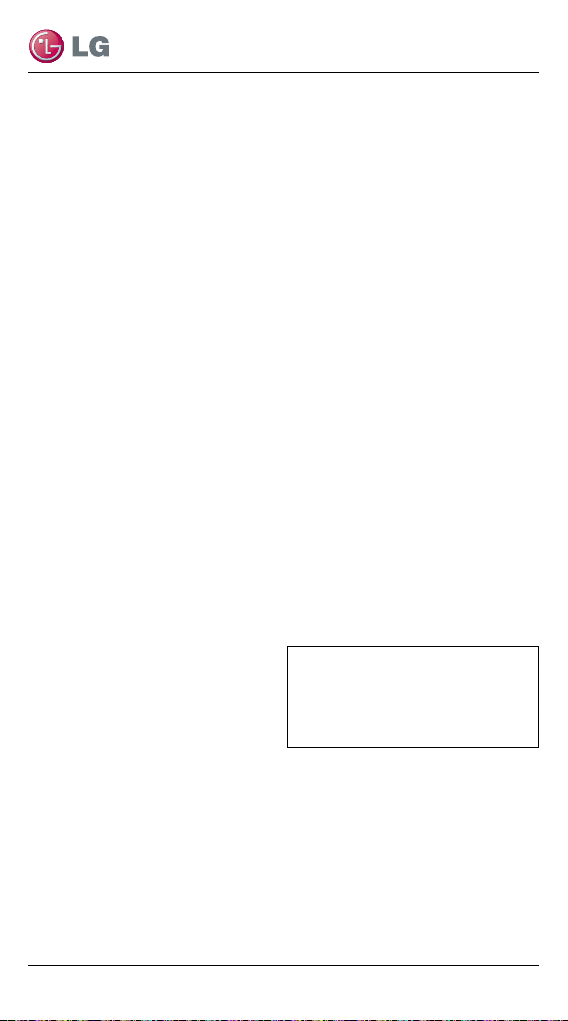
Open Source
If you would like to get the source code of GPL, LGPL, MPL, and
others which are developed with open source license and installed
in this product, please visit http://opensource.lge.com.
In addition to the source code, indications of all applicable license
contents, copyright, and no responsibility on warranty can be
downloaded.
If you request the open source code of the software that is installed
on this product by sending email to opensource@lge.com within
3 years of purchasing this product, we will provide it on CD-ROM
with a minimum cost of shipping and handling.
46
Due to our policy of continuous product innovation, some specications may change without notication.
©LG Electronics U.S.A., Inc., Englewood Cliffs, NJ. All rights reserved. “LG” is a registered trademark of LG Corp.
Page 47

User Manual
Notice
FCC (Certication)
This device complies with part 15 of the FCC rules.
Operation is subject to the following two conditions:
1. This device may not cause harmful interference, and
2. This device must accept any interference received, including interference that
may cause undesired operation.
FCC WARNING: This equipment may generate or use radio frequency energy.
Changes or modications to this equipment may cause harmful interference unless the
modications are expressly approved in the instruction manual. The user could lose the
authority to operate this equipment if an unauthorized change or modication is made.
U.S. Regulatory Wireless Notice
This product emits radio frequency energy, but the radiated output power of this device
is far below the FCC radio frequency exposure limits. Nevertheless, the device should
be used in such a manner that the potential for human contact with the antenna during
normal operation is minimized.
FCC Radiation Exposure Statement
This equipment compiles with FCC radiation exposure limits set forth for an
uncontrolled environment.
This equipment should be installed and operated with minimum distance of 8 in. (20 cm)
between the radiator and your body. This transmitter must not be co-located or operated
in conjunction with any other antenna or transmitter.
Federal Communications Commission (FCC) Statement
You are cautioned that changes or modications not expressly approved by the party
responsible for compliance could void the user’s authority to operate the equipment.
This equipment has been tested and found to comply with the limits for a class B digital
device, pursuant to part 15 of the FCC rules. These limits are designed to provide
reasonable protection against harmful interference in a residential installation. This
equipment generates, uses and can radiate radio frequency energy and, if not installed
and used in accordance with the instructions, may cause harmful interference to radio
communications. However, there is no guarantee that interference will not occur in a
particular installation. If this equipment does cause harmful interference to radio or
television reception, which can be determined by turning the equipment off and on, the
user is encouraged to try to correct the interference by one or more of the following
measures:
• Reorient or relocate the receiving antenna.
• Increase the separation between the equipment and receiver.
• Connect the equipment into an outlet on a circuit different from that to which
the receiver is connected.
• Consult the dealer or an experienced radio/TV technician for help.
Due to our policy of continuous product innovation, some specications may change without notication.
©LG Electronics U.S.A., Inc., Englewood Cliffs, NJ. All rights reserved. “LG” is a registered trademark of LG Corp.
47
Page 48

LG Smart AC
End Product Labeling
The modular transmitter must be labeled with its own FCC ID number, and, if the FCC
ID is not visible when the module is installed inside another device, then the outside of
the device into which the module is installed must also display a label referring to the
enclosed module. This exterior label can use wording such as the following: “Contains
Transmitter Module FCC ID: BEJPCRCUDT2 ” (BEJPCRCUDT3) or “Contains FCC
ID: BEJPCRCUDT2” (BEJPCRCUDT3). Any similar wording that expresses the same
meaning may be used. The Grantee may either provide such a label, an example of
which must be included in the application for equipment authorization, or, must provide
adequate instructions along with the module which explain this requirement. In the latter
case, a copy of these instructions must be included in the application for equipment
authorization.
IC (Certication)
This device complies with RSS-210 of the Industry Canada Rules.
Operation is subject to the following two conditions:
1. This device may not cause Interference, and
2. This device must accept any interference, including interference that may
cause undesired operation of the device.
IC Warning
This device complies with Industry Canada license-exempt RSS standard(s).
Operation is subject to the following two conditions:
1. This device may not cause interference, and
2. This device must accept any interference, including Interference that may
cause undesired operation of the device.
Le présent appareil est conforme aux CNR d’lndustrie Canada appllcables aux
appareils radio exempts de licence.
L’exploitation est autorisée aux deux conditions suivantes:
1. l’appareil ne doit pas produire de brouillage, et
2. l’utilisateur de l’appareil doit accepter tout brouillage radioélectrique subi,
même si le brouillage est susceptible d’en compromettre le fonctionnement.
This class B digital apparatus complies with Canadian ICES-003.
Cet appareil numérique de Ia classe B est conforms á Ia norme NMB-003 du
Canada.
IC Radiation Exposure Statement
This equipment complies with IC radiation exposure limits set forth for an
uncontrolled environment. This equipment should be installed and operated with
minimum distance of 20 cm (8 in.) between the radiator and your body.
NOTE: THE MANUFACTURER IS NOT RESPONSIBLE FOR ANY
RADIO OR TV INTERFERENCE CAUSED BY UNAUTHORIZED
MODIFICATIONS TO THIS EQUIPMENT. SUCH MODIFICATIONS COULD VOID THE USER’S AUTHORITY TO OPERATE
THE EQUIPMENT.
48
Due to our policy of continuous product innovation, some specications may change without notication.
©LG Electronics U.S.A., Inc., Englewood Cliffs, NJ. All rights reserved. “LG” is a registered trademark of LG Corp.
Page 49

User Manual
This page intentionally left blank.
Due to our policy of continuous product innovation, some specications may change without notication.
©LG Electronics U.S.A., Inc., Englewood Cliffs, NJ. All rights reserved. “LG” is a registered trademark of LG Corp.
49
Page 50

LG Electronics Commercial Products Support
Follow the prompts for commercial A/C products.
LG Electronics U.S.A., Inc.
Commercial Air Conditioning Division
11405 Old Roswell Road
Alpharetta, Georgia 30009
www.lghvac.com
1-888-865-3026 USA
UM-SmartAC-All-06-14
 Loading...