

LMV1631SW
LMV1631ST
MFL37074006
www.lg.com

TABLE OF CONTENTS
TABLE OF CONTENTS ..........................................2
SAFETY...................................................................3
Important Safety Instructions ................................3
Precautions To Avoid Possible Exposure To
Excessive Microwave Energy ...............................4
INFORMATION........................................................5
Location of Model Number....................................5
Oven Specifications ..............................................5
Electrical Rating ....................................................5
Electrical Requirements ........................................5
Grounding Instructions..........................................5
Microwave Oven Features ....................................6
Oven Control Panel...............................................7
OPERATION............................................................9
LEARN ABOUT YOUR MICROWAVE OVEN......9
Clock ..................................................................9
Vent Fan.............................................................9
Light On/Off ........................................................9
Child Lock...........................................................9
Custom Set........................................................10
Energy Saving ...................................................10
Add 30 Sec ........................................................10
Custom Cook.....................................................10
More / Less ........................................................11
Microwave Power Levels ...................................11
Multi Stage Cooking ...........................................11
Cooking Guide for Lower Power Levels.............12
Soften...................................................................15
Melt......................................................................15
Soften Table........................................................16
Melt Table............................................................16
Auto Defrost.........................................................17
Time Defrost........................................................17
Defrosting Tips....................................................18
Metal Rack..........................................................18
COOKING...................................................................19
GETTING THE BEST COOKING RESULTS ..........19
FISH & SHELLFISH ................................................19
APPETIZERS / SAUCES / SOUPS.........................20
MEAT.......................................................................20
POULTRY................................................................22
PASTA AND RICE...................................................23
MAINTENANCE....................................................... 24
CARE AND CLEANING
Metal Rack ......................................................... 24
Cleaning the Grease Filter .................................24
Charcoal Filter Replacement .............................24
Cooktop/Night Light Replacement ..................... 25
Oven Light Replacement ................................... 25
QUESTIONS AND ANSWERS............................. 25
MICROWAVE UTENSIL GUIDE........................... 26
BEFORE CALLING FOR SERVICE........................ 27
WARRANTY ............................................................ 29
....................................... 24
SENSOR OPERATING INSTRUCTIONS ............13
Sensor Cooking Guide.......................................13
Sensor Popcorn.................................................13
Sensor Pizza......................................................14
Sensor Cook ......................................................
Sensor Potato....................................................
Sensor Vegetable..............................................14
Sensor Reheat ..................................................15
14
14
- 2 -

SAFETY
IMPORTANT SAFETY INSTRUCTIONS
The safety instructions below will tell you how to use your oven and avoid harm to yourself or
damage to your oven.
• When cleaning the door and the surfaces that
WARNING - To reduce the risk of
w
burns, electric shock, fire, injury to persons, or
exposure to excessive microwave energy.
• Read all the instructions before using your
oven.
touch the door, use only mild, non-abrasive
soaps or detergents and a sponge or soft cloth.
• Do not tamper with the built-in safety switches
on the oven door. The oven has several built-in
safety switches to make sure the power is off when
the door is open.
• Do not allow children to use this oven without
close supervision.
• Read and follow the specific
PRECAUTIONS TO
AVOID POSSIBLE
EXPOSURE TO
EXCESSIVE
MICROWAVE ENERGY
found on page 4.
• Use the microwave oven only for its intended use as
described in its manual. Do not use corrosive
chemicals or vapors, in the microwave oven. This
type of oven is specifically designed to heat, cook or
dry food. It is not designed for industrial or
laboratory use.
• Do not use or store this appliance outdoors.
Do not use this product near water -for example,
near a kitchen sink, in a wet basement, or near a
swimming pool, and the like.
• Do not use the cavity for storage purposes.
Do not leave paper products, cooking utensils, or
food in the cavity when not in use.
• Clean the ventilating hood frequently.
Do not allow grease to accumulate on the hood
or the filters.
•
When flaming foods under the hood, turn the fan on.
• Suitable for use above both gas and electric
cooking equipment 36 inches wide or less.
• Use care when cleaning the vent hood filters.
Corrosive cleaning agents such as lye-based oven
cleaners, may damage the filters.
• If your oven is dropped or damaged, have it
thoroughly checked by a qualified service technician
before using it again.
• To avoid a fire hazard:
- Do not severely overcook food. Severely
overcooked foods can starts a fire in the oven.
Watch the oven carefully, especially if you have
paper, plastic, or other combustibles in the oven.
- Do not store combustible items (bread,
cookies, etc.) in the oven, because if lightning
strikes the power lines, it may cause the oven to
turn on.
- Do not use wire twist-ties in the oven. Be sure
to remove them before placing the item in the
oven.
• If a fire should start:
- Keep the oven door closed.
- Turn the oven off.
- Disconnect the power cord or shut off the
power at the fuse or circuit breaker panel.
• To avoid electric shock:
- This appliance must be grounded. Connect it
only to a properly grounded outlet. See the
electrical grounding instructions on page 5.
- Do not operate this appliance if it has a
damaged cord or plug, if it is not working
properly or if it has been damaged or dropped.
- Do not immerse the electrical cord or plug in
water.
- Keep the cord away from heated surfaces.
- This appliance should be serviced only by
qualified service personnel.
• Install or locate the microwave oven only in
accordance with the provided installation
instructions.
• Do not mount oven a sink.
• Do not let cord hang over edge of table or counter.
- 3 -

SAFETY
• To avoid improperly cooking some foods.
- Do not heat any types of baby bottles or baby
food. Uneven heating may occur and possibly
cause personal injury.
- Do not heat small-necked containers, such as
syrup bottles.
- Do not deep-fat fry in your microwave oven.
- Do not attempt home canning in your
microwave oven.
- Do not heat the following items in the
microwave oven: whole eggs in the shell; water
with oil or fat; sealed containers or closed glass
jars. These items may explode.
• Do not use this oven for commercial purposes.
It is made for household use only.
• Do not cover or block any openings in the oven.
• Do not run the oven empty, without food in it.
- Do not allow the gray film on special microwave-
cooking packages to touch the oven floor. Put the
package on a microwavable dish.
SAVE THESE INSTRUCTIONS
- Do not cook anything directly on the oven floor.
Use a microwavable dish.
- Keep a browning dish at least 3/16 inch above
floor. Carefully read and follow the instructions for
the browning dish. If you use a browning dish
incorrectly, you could damage the oven floor.
• Preserve the metal rack:
- Remove the metal rack from the oven when you
are not using it.
- Do not use the oven empty with the metal rack in
it.
- The metal rack may get hot while cooking. Use
pot holders to remove it after cooking.
- Do not use foil or metal containers on the metal
rack.
• This appliance should be serviced only by qualified
service personnel. Contact nearest authorized
service facility for examination, repair or adjustment.
PRECAUTIONS TO AVOID POSSIBLE
EXPOSURE TO EXCESSIVE
MICROWAVE ENERGY...
• Do not attempt to operate this oven with the door open, since open-door operation can result in
harmful exposure to microwave energy. It is important not to defeat or tamper with the safety
interlock.
• Do not operate the oven if it is damaged. It is particularly important that the oven door close
properly and that there is no damage to the:
- door (bent)
- hinges and latches (broken or loosened)
- door seals and sealing surfaces.
• Do not place any object between the oven front face and the door, or allow soil or cleaner
residue to accumulate on sealing surfaces.
• The oven should not be adjusted or repaired by anyone except properly qualified service
personnel.
- 4 -
INFORMATION
Please read this owner’s manual. It will tell you how
to use all the fine features of this microwave oven.
LOCATION OF
MODEL NUMBER
To request service information or replacement parts,
the service center will require the complete model
number of your microwave oven. The number is on the
left side of control panel as shown in the illustration
below.
MODEL NUMBER LABEL
OVEN
SPECIFICATIONS
Output Power 1,000W (IEC 60705 Standard)
Outer Dimensions 29-15/16” x 16-7/16” x 16-15/16”
Cavity Volume 1.6 Cu.ft
Net Weight 52 lbs.
GROUNDING
INSTRUCTIONS
This appliance must be grounded. If an electrical
short circuit occurs, grounding reduces the risk of
electric shock by providing an escape wire for the
electric current. The cord for this appliance has a
grounding wire with a grounding plug. Put the plug into
an outlet that is properly installed and grounded.
w
WARNING
grouning plug improperly, you risk electric shock.
Ask a qualified electrician if you do not understand the
grounding instructions or if you wonder whether the
appliance is properly grounded.
Because this appliance fits under the cabinet, it has a
short power-supply cord. See the separate Installation
Instructions for directions on properly placing the cord.
Keep the electrical power cord dry and do not pinch or
crush it in any way.
If it is necessary to use an extension cord, use only a
3-wire extension cord that has a 3-blade grounding
plug, and a 3-slot receptacle that will accept the plug
on the appliance. The marked rating of the extension
cord shall be equal to or greater than the electrical
rating of the appliance.
- If you use the
ELECTRICAL RATING
* Electrical Rating of the Oven:120V AC 60Hz
* 13 Amps / 1500 Watts ( MWO + Cooktop Lamp +
Ventilation Fan)
ELECTRICAL
REQUIREMENTS
The oven is designed to operate on a Standard
120V/60Hz household outlet. Be sure the circuit is at
least 15A or 20A and the microwave oven is the only
appliance on the circuit. It is not designed for 50Hz
or any circuit other than a 120V/60Hz circuit.
Ensure proper ground
exists before use
For a permanently connected appliance:
This appliance must be connected to a grounded,
metallic, permanent wiring system, or an equipment
grounding conductor should be run with the circuit
conductors and connected to the equipment grounding
terminal or lead on the appliance.
- 5 -
INFORMATION
MICROWAVE OVEN FEATURES
WARNING:
w
Do not operate the oven when empty or without the glass tray. It is best to
leave a glass water in the oven when not in use. The water will saf!ly absorb
all microwave energy, if the oven is accidentally started.
- 6 -
OVEN CONTROL PANEL
1
INFORMATION
2
3
4
5
6
7
8
9
10
11
12
START
ENTER
14
15
16
17
18
19
20
21
22
23
24
13
25
- 7 -

INFORMATION
1. DISPLAY.
indicators to tell you time of day, cooking time
settings and cooking functions selected.
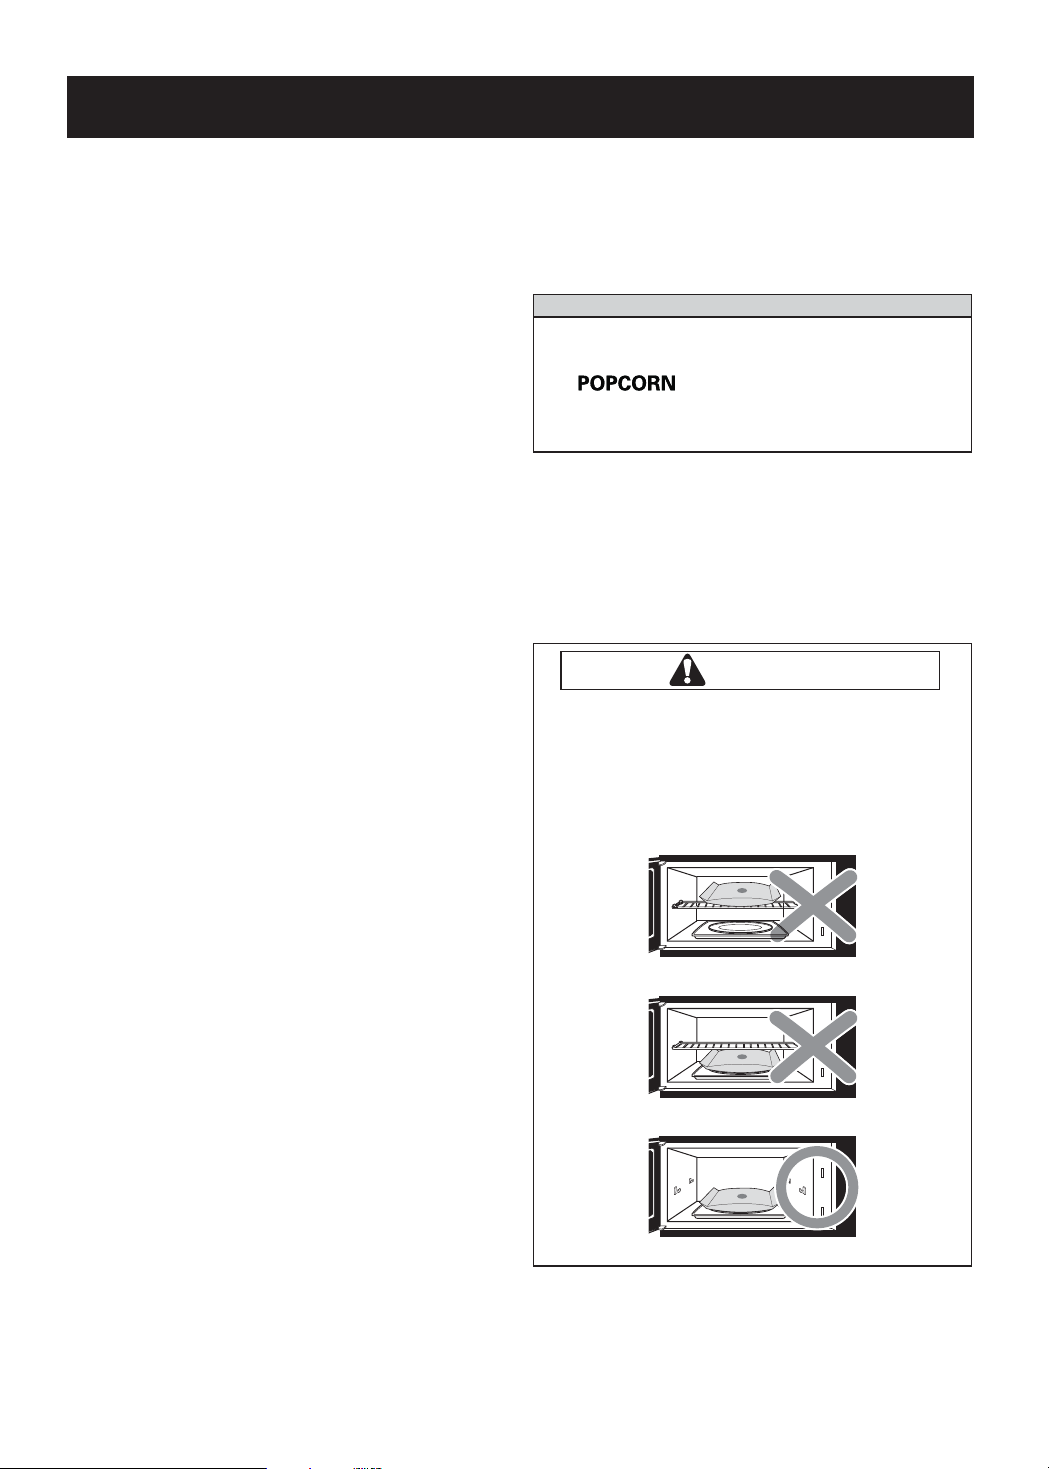
2. POPCORN. Touch this pad when popping popcorn
in your microwave oven. The oven’s sensor will tell
the oven how long to cook depending on the amount
of humidity it detects from the popcorn.
3. PIZZA. Touch this pad to cook pizza without
selecting cooking times and power levels.
4. POTATO. Touch this pad to cook potatoes. The
ovens sensor will tell the oven how long to cook
depending on the amount of humidity it detects from
the potato.
5. VEGETABLE. Touch this pad to reheat vegetables.
The oven’s sensor will tell the oven how long to cook
depending on the amount of humidity it detects from
the vegetables.
6. SOFTEN. Touch this pad to soften butter, ice cream,
cream cheese, frozen juice.
7. MELT. Touch this pad to melt butter or margarine,
chocolate, cheese, marshmallow.
8. CUSTOM COOK. Touch this pad to recall one
cooking instruction previously programmed into
memory.
9. CUSTOM SET. Touch this pad to change the
oven’s default settings for sound, clock, display
speed and defrost weight.
10. NUMBER. Touch number pads to enter cooking
time, power level, quantities or weights.
11. Less. Touch this pad to subtract ten seconds
of cooking time each time you press it.
12. CLOCK.7RXFKWKLVSDGWRHQWHUWKHWLPHRIGD\
13. LIGHT ON/OFF. Touch this pad to turn the
cooktop/countertop light on or off.
The Display includes a clock and
14. COOK. Touch this pad to cook frozen entree,
casserole, and rice. The oven’s sensor will tell the
oven how long to cook depending on the amount of
humidity it detects from the popcorn.
15. REHEAT. Touch this pad to reheat casserole, dinner
plate, and soup/sauce. The oven’s sensor will tell the
oven how long to cook depending on the amount of
humidity it detects from the popcorn.
16. TIME DEFROST. Touch this pad to set a defrost time.
17. AUTO DEFROST. Touch this pad followed by number
pads to thaw frozen meat by weight.
18.
POWER LEVEL. 7RXFKWKLVSDGWRVHOHFWDFRRNLQJ
SRZHUOHYHO
19. TIME. Touch this pad followed by number pads to set
a cooking time.
20. START/ENTER. Touch this pad to start a function.
If you open the door after oven begins to cook,
retouch START/ENTER.
21. STOP/CLEAR. Touch this pad to stop the oven
or clear all entries.
22. ENERGY SAVING. Touch this pad to save energy.
23. MORE. Touch this pad to add ten seconds of
cooking time each time you press it.
24. ADD 30 SEC. Touch this pad to add 30 seconds of
cooking time each time you press it.
25. VENT HI/LOW/OFF. Touch this pad to turn the
Vent on or off.
-
- 8 -
OPERATION
LEARN ABOUT YOUR
MICROWAVE OVEN
This section discusses the concepts behind microwave
cooking and introduces you to the basics you need to
know to operate your microwave oven. Please read this
information before using your oven.
CAUTION
To avoid risk of personal injury or property
damage, do not run the oven empty.
To avoid risk of personal injury or property
damage, do not use stoneware, large sheets of
aluminum foil, metal utensils, or metal trimmed
utensils in the oven. Keep aluminum foil at least
1 inch from the oven wall metal rack and other
pieces of foil.
CLOCK
When the oven is first plugged into a power outlet, the
"TOUCH CLOCK TO SET TIME OF DAY" prompt will
flash several times. If the time of day is not set, ":" will
show on disply until you touch "CLOCK".
Example: To set the clock for 8:00 am
1. Touch CLOCK.
8 0 0
2. Enter the time by using the
number keys.
VENT FAN
The fan moves steam and other vapors from the cooking
surface. There are speeds.
Touch Vent HI/LOW/OFF once for High fan
times to turn the fan off.
NOTE: If the temperature gets too hot around the
microwave oven, the fan in the vent hood will
automatically turn on at the LOW setting to cool the
oven. It may stay on up to an hour to cool the oven.
When this occurs, you can not turn the fan off
manually.
speed, twice for Low fan speed, or a three
LIGHT ON/OFF
Touch LIGHT ON/OFF.
Once to turn the li ht ,
Twice to turn the light off.
hig hg
CHILD LOCK
Use this safety feature to lock the control panel when you
are cleaing the oven, or so that children cannot use the
oven unsupervised.
The Child Lock feature is also useful when cleaning the
control panel. Child Lock prevents accidental
programming when wiping the control panel.
Example: To set the child lock.
1. Touch STOP/CLEAR.
3. Touch START/ENTER
1
4. Press 1 for AM, 2 for PM.
5. Touch START/ENTER.
Example: To cancel the child lock.
- 9 -
2. Touch and hold
STOP/CLEAR
"LOCKED" appears
(approximately 4 seconds).
1. Touch and hold
STOP/CLEAR
"LOCKED" disappears
(approximately 4 seconds)
until
until
OPERATION
CUSTOM SET
You can change the default values for beep sound,
clock, display speed and defrost weight.
See following chart for more information.
NUMBER
1
2
3
4
Example: To change defrost weight mode.
CUSTOM
SET
Sound ON/OFF
control
Clock ON/OFF
control
Scroll speed
control
Defrost weight
mode select
(from lbs to kg)
1. Touch STOP/CLEAR.
NUMBER
1
2
1
2
1
2
3
1
2
RESULT
Sound ON
Sound OFF
Clock ON
Clock OFF
Slow speed
Normal speed
Fast speed
Lbs
Kg
ADD 30 SEC
A time-saving pad, this simplified control lets you
quickly set and start microwave cooking without the
need to touch START/ENTER.
Example: To set ADD 30 SEC for 2 minutes.
Touch ADD 30 SEC 4 times.
The oven begins cooking and
display shows time counting
down.
CUSTOM COOK
CUSTOM COOK lets you to recall one cooking
instruction previously placed in memory and begin
cooking quickly.
Example: To memorize for 2 minutes.
1. Touch STOP/CLEAR.
2. Touch CUSTOM COOK.
3. Enter the cook time.
2. Touch CUSTOM SET.
3. Touch number 4.
4. Touch number 2.
E feature saves energy by turning off
the display. The display will also turn off when the unit
is not active for 5 minutes.
1. Touch STOP/CLEAR.
2. Touch ENERGY SAVING
to turn the display off.
3. Touch ENERGY SAVING
to turn the display on.
4. Touch START/ENTER.
Example: To recall the memory.
1. Touch STOP/CLEAR.
2. Touch CUSTOM COOK.
3. Touch START/ENTER.
When the cook time is over,
you will hear four beeps and
COOK END will display.
- 10 -
OPERATION
MORE / LESS
By using the MORE or LESS Keys, all of the
pre-programmed cook and time cook and etc. can be
adjusted to cook food for a longer or shorter time.
Pressing MORE will add 10 seconds of the cooking
time each time you press it. Pressing LESS will
subtract 10 seconds of cooking time each time you
press it.
COOKING AT HIGH COOK POWER
Example: To cook food for 8 minutes 30 seconds.
1. Touch STOP/CLEAR.
2. Enter the cook time.
3. Touch START/ENTER.
When the cook time is over,
you will hear four beeps and
COOK END will display.
MICROWAVE POWER LEVELS
Your microwave oven has 10 cook power levels to let you
cook or heat a wide variety of foods.
Example: To cook food for 7 minutes 30 seconds at
70% power.
1. Touch STOP/CLEAR.
Enter the cook time.
2.
3.
Touch POWER LEVEL.
4.
Enter the power level.
Touch START/ENTER.
.5.
When the cook time is over,
four beeps will sound and
COOK END will display.
See cooking guide for Lower Power Levels, page 12.
MULTI STAGE COOKING
F
or best results, some recipes call for different cook
powers during different stages of a c
program your oven to switch from one power to another
for up to 2 stages. 3 stages can be programmed
stage is the defrost cycle.
ook cycle. You can
if the first
Example: To cook food for 3 minutes at 100% power and
then 70% power for 7 minutes 30 seconds.
1. Touch STOP/CLEAR.
Enter the first cook time.
2.
Touch TIME.
3.
4.
Enter the second cook time.
5.
Touch POWER LEVEL.
Enter the power level.
6.
.
Touch START/ENTER.
7
When the cook time is over, four beeps will sound and
COOK END will display.
- 11 -
OPERATION
COOKING GUIDE FOR LOWER POWER LEVELS
The 10 power levels in addition to HIGH allow you to choose the best power level for the food you are cooking.
Below are listed all the power levels, examples of foods best cooked at each level, and the amount of microwave
power you are using.
POWER LEVEL MICROWAVE OUTPUT USE
10 High 100%
Boil water
Cook ground beef
Make candy
Cook fresh fruits and vegetables
Cook fish and poultry
Preheat browning dish
Reheat beverages
Bacon slices
%09 9
%08 8
%07 7
%06 6
%05 5
%04 4 Cook less tender cuts of meat
%03 3
%02 2
Reheat meat slices quickly
Saute onions, celery, and green pepper
All reheating
Cook scrambled eggs
Cook breads and cereal product
Cook cheese dishes, veal
Cook cakes, muffins, brownies, cupcakes
Cook pasta
Cook meats, whole poultry
Cook custard
Cook whole chicken, turkey, spare ribs, rib roast,
sirloin roast
Reheat frozen convenience foods
Thaw meat, poultry, and seafood
Cook small quantities of food
Finish cooking casserole, stew, and some sauces
Soften butter and cream cheese
Heat small amounts of food
%01 1
%0 0
Soften ice cream
Raise yeast dough
Standing time
- 12 -
OPERATION
INSTRUCTIONS
Sensor Cook allows you to cook most of your favorite
foods without selecting cooking times and power levels.
The display will indicate sensor category during the initial
sensing period. The oven automatically determines
required cooking time for each food item.
When the internal sensor detects a certain amount of
humidity coming from the food, it will tell the oven how
much longer to heat. The display will show the remaining
heating time. For best results for cooking by Sensor,
follow these recommendations:
1. Food cooked with the sensor system should be at
normal storage temperature.
2. The glass tray and the outside of the container should
be dry to assure best cooking results.
3. Foods should always be covered loosely with
microwavable plastic wrap, waxed paper, or a lid.
4. Do not open the door or touch STOP/CLEAR during
the sensing time. When sensing time is over, the oven
beeps twice and the remaining cooking time will appear
in the display window. At this time you can open the
door to stir, turn, or rearrange the food.
SENSOR COOKING GUIDE
Appropriate containers and coverings help assure good
Sensor cooking results.
1. Always use microwavable containers and cover them
with lids or vented plastic wrap.
2. Never use tight-sealing plastic covers. They can
prevent steam from escaping and cause food to
overcook.
3. Match the amount to the size of the container. Fill
containers at least half full for best results.
4. Be sure the outside of the cooking container and the
inside of the microwave oven are dry before placing
food in the oven. Beads of moisture turning into steam
can mislead the sensor.
SENSOR POPCORNSENSOR OPERATING
SENSOR POPCORN lets you pop 3.0 and 3.5 ounce
bags of commercially packaged microwave popcorn. Pop
only one package at a time. If you are using a microwave
popcorn popper, follow manufacturer’s instructions.
Example: To pop popcorn.
1. Touch POPCORN.
When the cook time is over,
four beeps will sound and
COOK END will display.
• Recommended amounts: 3.0-3.5 ozs.
• To cook a snack size bag (1.75 oz.) place the bag in the
oven. Set the oven to cook for 2 minutes at full power.
LISTEN for the popping to slow down. When the
popping slows to one pop per second, stop the oven.
Make a note of how much time it took and use that
setting in the future.
CAUTION
DO NOT leave microwave oven unattended
while popping corn.
When popping commercially packaged
popcorn, remove the rack from the oven.
Do not place the bag of microwave popcorn on
the rack or under the rack.
- 13 -
OPERATION
SENSOR PIZZA
Reheating pizza with PIZZA lets you reheat one or several slices
of pizza without selecting cooking times and power levels.
Example: To reheat 2 slices of pizza.
1. Touch STOP/CLEAR.
2. Touch PIZZA.
When the cook time is over,
you will hear four beeps and
COOK END will display.
SENSOR COOK
Using COOK lets you heat common microwaveprepared foods without needing to program times and
Cook Powers. Sensor Cook has preset Cook Power
for 3 food categories: Frozen Entree, Casserole and
Rice.
Example: To cook Rice.
1. Touch STOP/CLEAR.
SENSOR POTATO
Cooking with POTATO lets you bake one or several
potatoes without selecting cooking times and power
levels.
NOTE:
• Before baking, pierce potato with fork several times.
• After baking, let stand for 5 minutes wrapped.
Example: To cook 10 oz. potatoes.
1. Touch STOP/CLEAR.
2. Touch POTATO.
When the cook time is over,
you will hear four beeps and
COOK END will display.
SENSOR VEGETABLE
VEGETABLE has preset cook powers for 3 food
categories: Fresh, Frozen and Canned.
Example: To reheat Frozen Vegetable.
2. Touch COOK.
3. Choose food category.
Category
Frozen Entree
Casserole
Rice
When the cook time is over,
you will hear four beeps and
COOK END will display.
Touch pad
number
1
2
3
1. Touch STOP/CLEAR.
2. Touch VEGETABLE.
3. Choose food category.
Category
Fresh
Frozen
Canned
When the cook time is over,
you will hear four beeps and
COOK END will display.
Touch pad
number
1
2
3
- 14 -
OPERATION
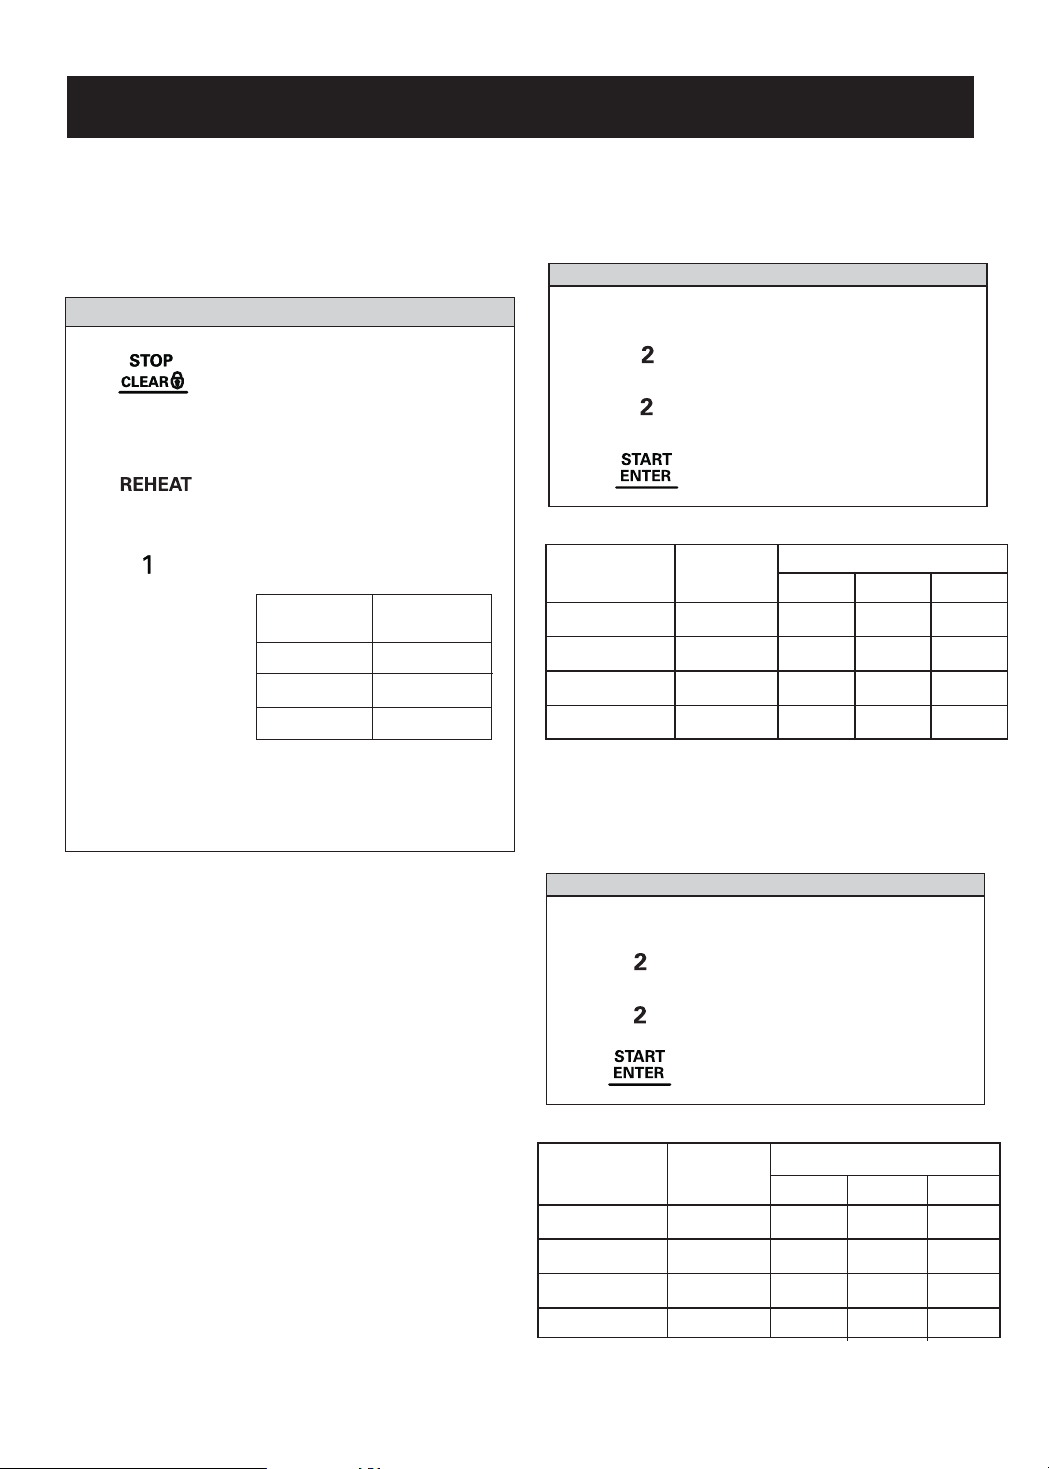
SENSOR REHEAT
REHEAT lets you heat foods without needing to
program times and Cook Powers.
REHEAT has preset Cook Powers for 3 categories:
Casserole, Dinner Plate and Soup/Sauce.
Example: To reheat Casserole.
1. Touch STOP/CLEAR.
2. Touch REHEAT.
3. Choose food category.
Category
Casserole
Dinner Plate
Soup/Sauce
Touch pad
number
1
2
3
SOFTEN
The oven uses low power to soften foods (butter, ice
cream, cream cheese, and frozen juice.) See the followin g
table
.
Example: To soften quart of ice cream.
SOFTEN
SOFTEN TABLE
Category
Butter 1 1 stick 2 sticks 3 sticks
Ice Cream
Cream Cheese
Frozen Juice
Touch pad
times
1. Touch SOFTEN.
2. Choose food category.
Touch 2 for ice cream.
3. Choose food amount.
Touch 2 for quart.
4. Touch START/ENTER.
Touch pad number
123
2
3
4
pint quart
3 oz 8 oz
6 oz 12 oz 16 oz
half
gallon
_
When the cook time is over,
you will hear four beeps and
COOK END will display.
MELT
The oven uses low power to melt foods (butter or
margarine, chocolate, marshmallows, or processed
cheese food.) See the following table.
Example: To melt 8 ozs. chocolate.
MELT
MELT TABLE
Category
Butter/Margarine
Chocolate
Cheese
Marshmallows
Touch pad
1. Touch MELT.
2. Choose food category.
Touch 2 for chocolate.
3. Choose food amount.
Touch 2 for 8 ozs.
4. Touch START/ENTER.
Touch pad number
times
1
2
3
4
1 2 3
1 stick 2 sticks
4 oz 8 oz
8 oz 16 oz
5 oz 10 oz
3 sticks
_
_
_
- 15 -

SOFTEN TABLE
OPERATION
NOITCERID YROGETAC AMOUNT
Butter
Ice Cream
Cream Cheese
Frozen
Juice
Unwrap and place in a microwave safe dish on the rack over the glass tray.
Butter will be at room temperature and ready for use in recipe.
Olace in a microwave safe dish on the rack over the glass tray.
Ice cream will be soft enough to make scooping easier.
Unwrap and place in a microwave safe dish on the rack over the glass tray.
Cream cheese will be at room temperature and ready for use in recipe.
Remove top.
Place in oven.
Frozen juice will be soft enough to mix easily with water.
MELT TABLE
Butter or
Margarine
Chocolate
Unwrap and place in a microwave safe dish on the rack over the glass tray.
No need to cover butter.
Stir at the end of cooking to complete melting.
Chocolate chips or squares of baking chocolate may be used.
Unwrap squares and place in a microwave safe dish on the rack over the
glass tray. Stir at the end of cycle to complete melting.
1, 2, or 3 sticks
Pint, Quart, Half gallon
3 or 8 ozs.
6, 12, or 16 ozs.
NOITCERID YROGETAC AMOUNT
1, 2, or 3 sticks
4 or 8 ozs.
Cheese
Marshmallows
Use processed cheese food only. Cut into cubes.
Place in a single layer in a microwave safe dish on the rack over the
glass tray. Stir at the end of cooking to complete melting.
Large or miniature marshmallows may be used.
Olace in a microwave safe dish on the rack over the glass tray.
Stir at the end of cycle to complete melting.
- 16 -
8 or 16 ozs.
5 or 10 ozs.

OPERATION
AUTO DEFROST
Four defrost choices are preset in the oven. The defrost
feature provides you with the best defrosting method for
frozen foods, because the oven automatically sets the
defrosting times for each food item according to the
weight you enter. For added convenience, the AUTO
DEFROST includes a built-in tone mechanism that reminds
you to check, turn over, separate, or rearrange the food
during the defrost cycle. Four different defrosting options
are provided.
1. Meat
2. Poultry
3. Fish
4. Bread
After touching ATUO DEFROST once, select the food
category. Available weight ranges for Meat, Poultry, and
Fish are 0.1 to 6.0 lbs. The available weight range for
Bread is 0.1 to 1.0 lb.
Example : To defrost 1.2 lbs of meat.
1. Touch AUTO DEFROST.
2. Choose food category.
3. Enter the weight.
• Place foods in a shallow glass baking dish or a on a
microwave roasting rack to catch drippings.
• Foods should still be somewhat icy in the center when
removed from the oven.AT
DEFROST TABLE
Category Food
Meat
0.1 to 6.0 lbs
0.1
(
kg to 4.0 kg)
Poultry
0.1 to 6.0 lbs
0.1
(
kg to 4.0 kg)
Fish
0.1 to 6.0 lbs
0.1
(
kg to 4.0 kg)
Bread
0.1 to 1.0 lb
1
0.
kg to .0 kg)
(
BEEF
Ground beef, Round steak, Cubes for stew,
Tenderloin steak, Pot roast, Rib roast,
Rump roast, Chuck roast,
Hamburger patty.
LAMB
Chops (1-inch thick), Rolled roast
PORK
Chops (1/2-inch thick), Hot dogs, Spareribs,
Country-style ribs. Rolled roast, Sausage.
POULTRY
Whole (under 4 lbs), Cut up, Breasts
(boneless)
CORNISH HENS
Whole
TURKEY
Breast (under 6 lbs)
FISH
Fillets, Whole Steaks
SHELLFISH
Crab meat, Lobster tails, Shrimp, Scallops
MUFFINS
ROLL CAKE
5
4. Touch START/ENTER.
NOTE: After you touch START/ENTER, the display
counts down the defrost time. The oven will beep once
during the Defrost cycle. At this time, open the door and
turn, separate, or rearrange the food as needed. Remove
any portions that have thawed, then return frozen portions
to the oven and touch START/ENTER to resume the
defrost cycle. The oven will not stop during the BEEP
unless the door is opened.
For best results:
• Remove fish, shellfish, meat, and poultry from its original
closed paper or plastic package (wrapper). Otherwise,
the wrap will hold steam and juice close to the foods,
which can cause the outer surface of the foods to cook.
• Form the meat into the shape of a doughnut before
freezing. When defrosting, scrape off thawed meat when
the beep sounds and continue defrosting.
TIME DEFROST
This feature allows you to choose the time you want to
defrost.
Example: To defrost for 2 minutes.
1. Touch TIME DEFROST.
2. Enter the defrosting time you
want.
3. Touch START/ENTER.
(Defrost starts)
When the defrost time is over, four beeps will sound and
COOK END will display.
- 17 -

OPERATION
DEFROSTING TIPS
• When using Auto Defrost, the weight to be entered
is the net weight in pounds and tenths of pounds
(the weight of the food minus the container).
• Before starting, make sure you have removed any
of the metal twist-ties which often come with frozen
food bags, and replace them with strings or elastic
bands.
• Open containers such as cartons before they are
placed in the oven.
• Always slit or pierce plastic pouches or packaging.
• If food is foil wrapped, remove foil and place it in a
suitable container.
• Slit the skins, if any, of frozen food such as
sausage.
• Bend plastic pouches of food to ensure even
defrosting.
• Always underestimate defrosting time. If defrosted
food is still icy in the center, return it to the
microwave oven for more defrosting.
• The length of defrosting time varies according to
how solidly the food is frozen.
• The shape of the package affects how quickly food
will defrost. Shallow packages will defrost more
quickly than a deep block.
• As food begins to defrost, separate the pieces.
Separated pieces defrost more easily.
• Use small pieces of aluminum foil to shield parts
of food such as chicken wings, leg tips, fish tails, or
areas that start to get warm. Make sure the foil does
not touch the sides, top, or bottom of the oven. The
foil can damage the oven lining.
• For better results, let food stand after defrosting.
(For more information on standing time, see the
“Microwave Cooking Tips” section.)
• Turn over food during defrosting or standing time.
Break apart and remove food as required.
METAL RACK
CAUTION
To avoid risk of property damage:
Do not use rack to pop popcorn.
Rack must be on the four plastic supports
when used.
Use the rack only when cooking food on rack
position.
Do not cook with rack on floor of the oven.
The metal rack gives you extra space when cooking in
more than one container at the same time.
To use rack:
1. Place rack securely in the four plastic supports.
• Rack MUST NOT touch metal walls or back of
microwave oven.
2. Place equal amounts of food both ABOVE AND
BELOW rack.
• Amount of food must be approximately the same to
balance out cooking energy.
- 18 -

COOKING
GETTING THE BEST COOKING
RESULTS
To get the best results from your microwave oven, read
and follow the guidelines below.
• Storage Temperature: Foods taken from the freezer
or refrigerator take longer to cook than the same
foods at room temperature. The time for recipes in
this book is based on the normal storage temperature
of the food.
• Size: Small pieces of food cook faster than large
ones, pieces similar in size and shape cook more
evenly. For even cooking, reduce the power when
cooking large pieces of food.
• Natural Moisture: Very moist foods cook more
evenly because microwave energy is attracted to
water molecules.
• Stir foods such as casseroles and vegetables from
the outside to the center to distribute the heat evenly
and speed cooking. Constant stirring is not
necessary.
• Turn over foods like pork chops, baking potatoes,
roasts, or whole cauliflower halfway through the
cooking time to expose all sides equally to microwave
energy.
• Place delicate areas of foods, such as asparagus
tips, toward the center of the dish.
• Arrange unevenly shaped foods, such as chicken
pieces or salmon steaks, with the thicker, meatier
parts toward the outside of the dish.
• Shield, with Small pieces of aluminum foil, parts of
food that may cook quickly, such as wing tips and leg
ends of poultry.
• Let It Stand: After you remove the food from the
microwave, cover food with foil or casserole lid and let
it stand to finish cooking in the center and avoid
overcooking the outer edges. The length of standing
time depends on the density and surface area of the
food.
• Wrapping in waxed paper or paper towel:
Sandwiches and many other foods containing
prebaked bread should be wrapped prior to
microwaving to prevent drying out.
Fish & Shellfish
Cooking Fish and Shellfish: General Directions
• Prepare the fish for cooking.
- Completely defrost the fish or shellfish.
- Arrange unevenly shaped pieces with thicker parts
toward the outside of the dish. Arrange shellfish in a
single layer for even cooking.
- The type of cover you use depends on how you
cook. Poached fish needs a microwavable lid or
vented plastic wrap.
- Baked fish, coated fish, or fish in sauce needs to be
covered lightly with waxed paper to keep the coating
crisp and sauce from getting watery.
- Always set the shortest cooking time. Fish is done
when it turns opaque and the thickest part begins to
flake. Shellfish is done when the shell turns from
pink to red and the flesh is opaque and firm.
• The Fish and Shellfish Cooking Table below provides
specific directions with Power Level and Cooking
Time settings for most types of fish and shellfish.
Fish And Shellfish Cooking Table
Fish fillets
Fish steaks
Whole fish
Scallops
Shrimp, shelled
POWER
LEVEL
HI
HI
7
HI
HI
COOKING TIME DIRECTIONSFISH
3
1/2-41/2 minutes
4
1/2-51/2 minutes
4
1/2-6 minutes
3
1/2-5 minutes
3
1/2-5 minutes
Arrange fish in a single layer with thickest portion toward
outside edge of 11/2 quart microwavable baking dish.
Brush with melted butter and season, if desired. Cook
covered with vented plastic wrap. Let stand covered 2
minutes. If you are cooking more than 1 lb. of fish, turn
the fish halfway through cooking.
Arrange in a single layer. Prepare as directed above,
except stir instead of turning the shellfish.
- 19 -

COOKING
Appetizers / Sauces / Soups
Cooking Appetizers: Tips and
Techniques
Recommended
• Crisp crackers, such as melba toast, shredded wheat
and crisp rye crackers are best for microwave use.
Wait until party time to add the spreads. Place a
paper towel under the crackers while they cook in
the microwave oven to absorb extra moisture.
• Arrange individual appetizers in a circle for even
cooking.
• Stir dips to distribute heat and shorten cooking time.
Cooking Sauces: Tips and Techniques
• Use a microwavable casserole or glass measuring
cup that is at least 2 or 3 times the volume of the
sauce.
• Sauces made with cornstarch thicken more rapidly
than those made with flour.
• Cook sauces made with cornstarch or flour uncovered
so you may stir them 2 or 3 times during cooking for a
smooth consistency.
• To adapt a conventional sauce or gravy recipe,
reduce the amount of liquid slightly.
Meat
Cooking Meat: General Directions
• Prepare the meat for cooking.
- Defrost completely.
- Trim off excess fat to avoid splattering.
- Place the meat, fat side down, on a microwavable
rack in a microwavable dish.
- Use oven cooking bag for less tender cuts of meat.
- Arrange the meat so that thicker portions are toward
the outside of the dish.
- Cover the meat with waxed paper to prevent
splattering.
• Tend the meat as it cooks.
- Drain juices as they accumulate to reduce
splattering and keep from overcooking the bottom of
the meat.
- Shield thin or bony portions with strips of foil to
prevent overcooking.
NOTE: Keep the foil at least 1 inch from the oven
walls, and do not cover more than one-third of the meat
with foil at any one time.
• Let the meat stand covered with foil 10-15 minutes
after you remove it from the oven. The internal
temperature of the meat may rise from 5-10°F during
standing time.
Cooking Soups: Tips and Techniques
• Cook soups in a microwavable dish which holds
double the volume of the recipe ingredients to prevent
boil-over, especially if you use cream or milk in the
soup.
• Generally, cover microwaved soups with VENTED
plastic wrap or a microwavable lid.
• Cover foods to retain moisture. Uncover foods to
retain crispness.
• Avoid overcooking by using the minimum suggested
time. Add more time, if necessary, only after checking
the food.
• Stirring occasionally will help blend flavors, distribute
heat evenly, and may even shorten the cooking time.
• When converting a conventional soup recipe to cook
in the microwave, reduce the liquid, salt, and strong
seasonings.
Not Recommended
• Appetizers with a crisp coating or puff pastry are best
done in a conventional oven with dry heat.
• Breaded products can be warmed in the microwave
oven but will not come out crisp.
The Meat Cooking Table on the next page provides
detailed directions, Power Level, and Cooking Time
settings for most cuts of meat.
- 20 -

Meat Cooking Table
COOKING
Beef
Hamburgers,
Fresh or
defrosted
(4 oz. each)
1 patty
2 patties
4 patties
Sirloin tip roast
(3-4 lbs.)
Lamb
Lamb roast,
rolled
boneless
(3-4 lbs.)
Pork
Bacon slices
2 slices
4 slices
6 slices
10slices
Chops
(5-7 oz. each)
2 chops
4 chops
POWER
LEVEL
HI
5
5
HI
3
COOKING TIME DIRECTIONSMEAT
1/2 minutes
1-1
1
1/2-2 minutes
2
1/2-31/2 minutes
8-10 minutes
per pound
RARE(135°F)
11-13 minutes
per pound
MEDIUM(155°F)
11-12 minutes
per pound
RARE(135°F)
12-13 minutes
per pound
MEDIUM(145°F)
13-14 minutes
per pound
WELL(155°F)
1
1/2-2 minutes
2-3 minutes
4-5 minutes
7-8 minutes
18-20 minutes
per pound
15-17 minutes
per pound
Form patties with depression in center of each.
Place on microwavable roast rack. Brush with browning
agent, if desired. Cover with waxed paper.
Turn over halfway through cooking.
Let stand covered 1 minute.
Place roast fat side down on microwavable roasting rack.
Add desired seasonings and cover with waxed paper.
Turn meat over halfway through cooking and shield if
necessary.
Remove roast from microwave oven when desired
temperature is reached. Let stand covered with foil 15
minutes.(Temperature may rise about 10°F).
Place roast fat side down on microwavable roasting rack.
Brush lamb with marinade or desired seasonings such
as rosemary, thyme or marjoram. Cover with waxed
paper.
Turn roast over after 15 minutes, and again after 30
minutes. Shield if necessary.
Remove roast from microwave when desired
temperature is reached. Let stand covered with foil 15
minutes (Temperature may rise about 10°F).
Place bacon slices on microwavable roasting rack.
Cover with paper towels.
After cooking, let stand 1 minute.
Place chops in microwavable baking dish.
Add desired seasonings and cover with vented plastic
wrap. Cook until no longer pink or until internal
temperature reaches 170°F. Turn chops over halfway
through cooking.
Let stand covered 5 minutes.
(Temperature may rise about 10°F).
Loin Roast,
rolled, boneless
(3
1/2- 4 1/2 lbs.)
Sausage links,
Fresh or
Frozen,
defrosted
(1-2 oz. each)
2 links
4 links
6 links
10 links
(8 oz. pkg.)
HI
3
25-27 minutes
per pound
(165°F)
Place roast in cooking bag in microwavable dish.
Add seasonings and browning agent if desired. Close
bag loosely with microwavable closure or string. After
cooking, let stand in bag 15 minutes. (Temperature may
rise about 10°F.) Internal temperature of pork should
reach 170°F before serving.
45-60 seconds
1-1
1/2 minutes
1
1/2-2 minutes
1
3/4-2 minutes
Pierce links and place on microwavable roasting rack.
Cover with waxed paper or paper towel.
Turn over halfway through cooking.
After cooking, let stand covered 1 minute.
- 21 -

COOKING
Poultry
Cooking Poultry: General Directions
• Prepare the poultry for cooking.
- Defrost completely.
- Arrange poultry pieces with thicker pieces at the
outside edge of the baking dish. When cooking legs,
arrange them like the spokes of a wheel.
- Cover the baking dish with waxed paper to reduce
splattering.
- Use a browning agent or cook with a sauce to give a
browned appearance.
• Tend the poultry as it cooks.
- Drain and discard juices as they accumulate.
- Shield thin or bony pieces with small strips of
aluminum foil to prevent overcooking. Keep foil at
least 1 inch from the oven walls and other pieces of
foil.
Poultry Cooking Table
• The poultry is done when it is no longer pink and the
juices run clear. When done, the temperature in the
thigh meat should be 180-185°F.
• Let the poultry stand after cooking covered with foil for
10 minutes.
The Poultry Cooking Table below provides detailed
directions, Power Level, and Cooking Time settings for
most cuts and types of poultry.
Chicken pieces
(2
1/2-3 lbs).
Chicken whole
1/2 lbs)
(3-3
Cornish hens
whole
1/2
(1-1 lbs.
each)
POWER
LEVEL
HI
HI
HI
COOKING TIME DIRECTIONSPOULTRY
1/2-51/2 minutes
4
per lb
12-13 minutes
per lb
6-7 minutes
per lb
Wash pieces, shake the water off, and go on with cooking.
Place pieces in a single layer in a microwavable baking
dish with thicker pieces to the outside. Brush with butter
or browning agent and seasonings if desired. Cover with
waxed paper. Cook until no longer pink and juices run
clear. Let stand covered 5 minutes.
Wash pieces, shake the water off, and go on with cooking.
Place breast side down on a microwavable roasting rack.
Brush with butter, or browning agent and seasoning if
desired. Cover with waxed paper. Cook 1/3 of estimated
time. Turn breast side up, brush with butter, or browning
agent. Replace waxed paper. Cook 1/3 of estimated time
again. Shield if necessary. Cook remaining 1/3 of
estimated time or until no longer pink and juices run
clear. Let stand covered with foil 10 minutes. (The
temperature may rise about 10°F.) The temperature in
the high should be 180°F-185°F when the poultry is
done.
Wash, shake the water off, and go on with cooking. Tie
wings to body of hen and the legs to tail. Place hens
breast side down on microwavable rack. Cover with
waxed paper. Turn breast side up halfway through
cooking. Shield bone ends of drumsticks with foil.
Remove and discard drippings. Brush with butter or
browning agent and seasonings if desired. Cook until no
longer pink and juices run clear. Remove hens from
microwave when they reach desired temperature. Let
stand covered with foil 5 minutes.
(Temperature may rise about 10°F). Temperature in
breast should be 170°F before serving.
- 22 -

COOKING
Pasta And Rice
Microwave cooking and conventional cooking of pasta,
rice, and cereal require about the same amount of time,
but the microwave is a more convenient method
because you can cook and serve in the same dish.
Cooking Pasta and Rice: Tips and Techniques
• If you are planning to use rice or pasta in a casserole,
undercook it so it is still firm.
• Allow for standing time with rice, but not for pasta.
Pasta Cooking Table
There is no stirring needed and leftover pasta tastes
just like fresh cooked when reheated in the microwave
oven.
• The Pasta and Rice Cooking Tables below provide
specific directions, with Power Level and Cooking
Time settings for most common types of pasta and
rice.
Spaghetti
4 cups water.
Add 8 oz. spaghetti.
Macaroni
3 cups water.
Add 2 cups macaroni.
Lasagna noodles
4 cups water.
Add 8 oz. lasagna noodles.
Egg noodles
6 cups water.
Add 4 cups noodles.
Rice Cooking Table
Long grain
2
1/4 cups water.
Add 1 cup rice.
Brown
2
1/2 cups water.
Add 1 cup rice.
Long grain and
wild rice mix
2
1/3 cups water.
Add 6 oz. pkg.
POWER
LEVEL
HI
5
HI
5
HI
5
HI
5
POWER
LEVEL
HI
3
HI
5
Hi
3
COOKING TIME DIRECTIONSTYPE OF PASTA
9 to 10 minutes
7
1/2 to 81/2 minutes
6 to 7 minutes
5
1/2 to 61/2 minutes
7 to 8 minutes
11 to 12
5
1/2 minutes
8 to 10 minutes
1/2 to 61/2 minutes
COOKING TIME DIRECTIONSTYPE OF RICE
3
1/2 to 41/2 minutes
18 minutes
4
1/2 to 51/2 minutes
28 minutes
4 to 5 minutes
28 minutes
Combine hot tap water and salt, if desired. Use a
2-quart microwavable baking dish and cover with
vented plastic wrap for spaghetti and lasagna
noodles. Use microwavable lid or vented plastic
wrap for macaroni and egg noodles.
Cook as directed in chart or until water boils.
Stir in pasta; cook covered as directed in chart
or until tender.Drain in a colander.
Combine hot tap water and salt, if desired, in 2
quart microwavable casserole. Cover with
microwavable lid or vented plastic wrap. Cook as
directed in chart or until water boils.Stir in rice
and any seasonings.
Cook covered as directed in chart or until water is
absorbed and rice is tender.
Let stand covered 5 to 10 minutes. Fluff with fork.
Quick cooking
1 cup water.
Add 1 cup rice.
HI
2 to 3 minutes
Cook water until it boils. Stir rice into boiling water
and let stand, covered 5 to 10 minutes or until water
is absorbed and rice is tender. Fluff with fork.
- 23 -

MAINTENANCE
ĸ
ķ
ĸ
ķ
CARE AND CLEANING
For best performance and safety, keep the oven clean
inside and outside. Take special care to keep the inner
door panel and the oven front frame free of food or
grease build-up.
Never use rough powder or pads. Wipe the
microwave oven inside and out, including the hood
bottom cover, with a soft cloth and a warm(not hot)
mild detergent solution. Then rinse and wipe dry. Use a
chrome cleaner and polish on chrome, metal and
aluminum surfaces. Wipe spatters immediately with a
wet paper towel, especially after cooking chicken or
bacon. Clean your oven weekly or more often, if
needed.
METAL RACK
Wash the metal rack with a mild soap and a soft or
nylon scrub brush.Dry completely.
Do not use abrasive scrubbers or cleaners to clean
rack.
CLEANING THE GREASE FILTERS
The grease filters should be removed and cleaned
often, at least once a month.
1.
To remove grease filters, slide each
filter to the side, then pull filters downward.
The filter will drop out.
3. To reinstall the filters, slide it into the side slot, then
push up and forward to lock.
ĸ
NOTE: Do not operate the hood without the filters in
place.
CHARCOAL FILTER REPLACEMENT
If your oven is vented inside, the charcoal filter should
be replaced every 6 to 12 months, and more often if
necessary. The charcoal filter cannot be cleaned.
To order a new charcoal filter, contact the Service
Center.
1. Remove the two vent grille mounting screws.
(2 "$#'8*! screws)
2. Tip the grille forward, then lift it out
ĸ
2. Soak grease filters in hot water and a mild
detergent. Rinse well and shake to dry. Do not use
ammonia or place in a dishwasher. The
aluminum will darken.
3. Open the door.
4. Push the hook and remove old filter.
Hook
5. Slide a new charcoal filter into place and close the door.
The filter should rest at the angle shown and set the clock.
6. Slide the bottom of the vent cover into place. Push
the top until it snaps into place. Replace the mounting
screws. Turn the power back on at the main power
supply and set the clock.
- 24 -

MAINTENANCE
COOKTOP/NIGHT LIGHT REPLACEMENT
1, Unplug oven or turn off power at the main power
supply.
2. Remove the bulb cover mounting screws.
3. Replace bulb with 30 watt appliance bulb.
4. Replace bulb cover, and mount screw.
5. Turn the power back on at the main power supply.
OVEN LIGHT REPLACEMENT
1. Unplug oven or turn off power at the main power
supply.
2. Remove the vent cover mounting screws. (2 "$#'8*!
screws)
3. Tip the cover forward, then lift out to remove.
QUESTIONS AND ANSWERS
Q. Can I use a rack in my microwave oven so that I
may reheat or cook in two levels at a time?
A. Only use the rack that is supplied with your
microwave oven. Use of any other rack can result in
poor cooking performance and/or arcing and may
damage your oven.
Q. Can I use either metal or aluminum pans in my
microwave oven?
A. Usable metal includes aluminum foil for shielding
(use small, flat pieces), and shallow foil trays (if tray
is 3/4 inch deep and filled with food to absorb
microwave energy). Never allow metal to touch
walls or door.
Q. Sometimes the door of my microwave oven
appears wavy. Is this normal?
A. This appearance is normal and does not affect the
operation of your oven.
Q. What are the humming noises that I hear when
my microwave oven is operating?
A. You hear the sound of the transformer when the
magnetron tube cycles on and off.
Q. Why does the dish become hot when I
microwave food in it? I thought that this should
not happen.
A. As the food becomes hot it will conduct the heat to
the dish. Use hot pads to remove food after
cooking.
4. Lift up the bulb holder.
5. Replace bulb with a 30 watt appliance bulb.
6. Replace the bulb holder.
7. Slide the top of the vent cover into place. Push the
bottom until it snaps into place. Replace the
mounting screws. Turn the power back on at the
main power supply.
Q. What does “standing time” mean?
A. ”Standing time” means that food should be taken
out of the oven and covered for additional time after
cooking. This process allows the cooking to finish,
saves energy and frees the oven for other purpose.
Q. Can I pop popcorn in my microwave oven? How
do I get the best results?
A. Yes. Pop packaged microwave popcorn following
manufacturer’s guidelines or use the
preprogrammed Popcorn pad.
Do not use regular paper bags. Use the “listening
test” by stopping the oven as soon as the popping
slows to a “pop” every one or two seconds. Do not
try to repop unpopped kernels. You can also use
special microwave poppers. When using a popper,
be sure to follow manufacturer’s directions. Do not
pop popcorn in glass utensils.
Q. Why does steam come out of the air exhaust
vent?
A. Steam is normally produced during cooking. The
microwave oven has been designed to vent this
steam out the top vent.
- 25 -

MAINTENANCE
You may microwave in many more utensils than you can use on the stove or in a conventional oven, because
microwaves penetrate them safely still cooking the food.
Below are listed the utensils you can safely cook with and those you must avoid. To test whether you can safely
with a utensil not on the lists below, do the following:
1. Place the utensil empty in the microwave oven.
2. Measure 1 cup of water in a glass measuring cup and place in the oven beside the utensil.
3. Microwave on HI Power for 1 minute.
4. If the utensil is warm to the touch at the end of this time, you should not use it for microwave cooking.
MICROWAVE UTENSIL GUIDE
USE
OVENPROOF GLASS (treated for high
intensity heat):
utility dishes, loaf dishes, pie plates,
cake plates, liquid measuring cups,
casseroles and bowls without metallic
trim.
CHINA:
bowls, cups, serving plates and platters
without metallic trim.
PLASTIC:
Plastic wrap (as a cover)-- lay the plastic
wrap loosely over the dish and press it to
the sides.
Vent plastic wrap by turning back one
edge slightly to allow excess steam to
escape. The dish should be deep
enough so that the plastic wrap will not
touch the food. As the food heats it may
melt the plastic wrap wherever the wrap
touches the food.
Use plastic dishes, cups,
semirigid freezer containers and plastic
bags only for short cooking time. Use
these with care because the plastic
may soften from the heat of the food.
DO NOT USE
METAL UTENSILS:
Metal shields the food from microwave energy and produces
uneven cooking. Also avoid metal skewers, thermometers or foil
trays.Metal utensils can cause arcing, which can damage your
microwave oven.
METAL DECORATION:
Metal-trimmed or metal-banded dinnerware, casserole dishes,
etc. The metal trim interferes with normal cooking and may
damage the oven.
ALUMINUM FOIL:
Avoid large sheets of aluminum foil because they hinder cooking
and may cause harmful arcing. Use small pieces of foil to shield
poultry legs and wings. Keep ALL aluminum foil at least 1 inch
from the side walls and door of the oven.
WOOD:
Wooden bowls and boards will dry out and may split or crack
when you use them in the microwave oven. Baskets react in the
same way.
TIGHTLY COVERED UTENSILS:
Be sure to leave openings for steam to escape from covered
utensils. Pierce plastic pouches of vegetables or other food items
before cooking. Tightly closed pouches could explode.
PAPER:
Paper towels, waxed paper, paper
napkins and paper plates with no
metallic trim or design. Look for the
manufacturer's label for use in the
microwave oven.
BROWN PAPER:
Avoid using brown paper bags.
They absorb too much heat and could burn.
FLAWED OR CHIPPED UTENSILS:
Any utensil that is cracked, flawed or chipped may break in the
oven.
METAL TWIST TIES:
Remove metal twist ties from plastic or paper bags.
They become hot and could cause a fire.
- 26 -

BEFORE CALLING FOR SERVICE
Check the following list to be sure a service call is really necessary. A quick reference of this manual as well as
reviewing additional information on items to check, may prevent an unneeded service call.
If nothing on the oven operates:
• check for a blown circuit fuse or a tripped main circuit
breaker.
• check if oven is properly connected to electric circuit
in house.
• check that controls are set properly.
If the oven interior light does not works:
• the light bulb is loose or defective.
If oven will not cook:
• check that control panel was programmed correctly.
• check that door is firmly closed.
• check that Start Pad was touched.
• check that probe was inserted correctly into
receptacle.
• check that timer wasn’t started instead of a cook
function.
If oven takes longer than normal to cook or cooks
too rapidly:
• be sure the Power Level is programmed properly.
If the time of day clock does not always keep
correct time:
• check that the power cord is fully inserted into the
outlet receptacle.
• be sure the oven is the only appliance on the
electrical circuit.
If food cooks unevenly:
• be sure food is evenly shaped.
• be sure food is completely defrosted before cooking.
• check placement of aluminum strips used to prevent
overcooking.
If food is undercooked:
• check recipe to be sure all directions (amount, time, &
power levels) were correctly followed.
• be sure microwave oven is on a separate circuit.
• be sure food is completely defrosted before cooking.
If food is overcooked:
• check recipe to be sure all directions (amount, power
level, time, size of dish) were followed.
If arcing (sparks) occur:
• be sure microwavable dishes were used.
• be sure wire twist ties weren’t used.
• be sure oven wasn’t operated when empty.
• make sure metal rack (if used) is properly, installed on
4 supports.
If the Display shows a time counting down but the
oven is not cooking:
• check that door is firmly closed.
• check that Timer wasn’t started instead of a cooking
function.
- 27 -

BEFORE CALLING FOR SERVICE
You can often correct operating problems yourself. If your microwave oven fails to work properly, locate the
operating problem in the chart below and try the solutions marked for each problem.
If the microwave oven still does not work properly, contact the nearest Service center. Service Centers are fully
equipped to handle your service requirements.
PROBLEM SOLUTION
Oven will not start Is power cord plugged in?
Is door closed?
Cooking time not set.
Temperature not set or probe not plugged in.
Arcing or Sparking Use approved cookware only.
Properly position temperature probe.
Do not operate with oven empty.
Time of day incorrect Reset time of day.
Probe Light Flashes Is temperature probe properly plugged in?
Unevenly Cooked Foods
Overcooked Foods Properly position temperature probe.
Undercooked Foods
Improper Defrosting Use approved cookware only.
Oven Lamp does net Light Is power cord plugged in?
Use approved cookware only.
Turn or stir food.
Completely defrost food.
Use correct time. / Power level setting.
Use correct temp setting.
Use approved cookware only.
Properly position temperature probe.
Completely defrost food.
Use correct time. / Power level setting.
Use correct temp setting.
Check see that oven ventilation ports are not restricted.
Turn or stir food.
Use correct time. / Power level setting.
Is door closed?
Cooking time not set.
Is light bulb burned out?
- 28 -

- 29 -


MANUEL DE L’UTILISATEUR
FOUR À MICRO-ONDES
LISEZ ATTENTIVEMENT CE MANUEL
AVANT DE METTRE L'APPAREIL EN MARCHE.
LMV1631SW
LMV1631ST
MFL37074006
www.lg.com

TABLE DES MATIÈRES
TABLE DES MATIÈRES.....................................................2
MESURES DE PRÉVENTION............................................3
Mesures de prévention importantes.........................3
Quelques précautions à prendre pour éviter une
exposition dangereuse aux micro-ondes..................4
RENSEIGNEMENTS IMPORTANTS
RELATIFS À VOTRE FOUR ..............................................5
Emplacement du numéro de modèle........................5
Spécifications du four.................................................5
Tension assignée.......................................................5
Exigences en électricité .............................................5
Instructions relatives à la mise à la
terre électrique............................................................5
Caractéristiques du four à micro-ondes....................6
Panneau des commandes du four............................7
FONCTIONNEMENT...........................................................9
Le four à micro-ondes ....................................................9
Horloge .........................................................................9
Ventilateur.....................................................................9
Éclairage de la table de cuisson ..................................9
Verrouillage pour les enfants........................................9
Set sur mesure.............................................................10
D'economie d'energie. .................................................10
Minute additionnelle......................................................10
Cuisson sur mesure......................................................10
Plus/Moins.....................................................................11
Niveaux de puissance du four à micro-ondes.............11
Cuisson par étapes.......................................................11
Guide de cuisson pour les niveaux de
puissance inférieurs .....................................................12
Instructions de cuisson avec capteur...........................13
Guide de cuisson avec capteur ....................................13
Maïs à éclater avec capteur .........................................13
Pizza avec capteur........................................................14
Cuisson avec capteur..........................................14
Pommes de terre avec capteur...........................14
Légumes avec capteur........................................14
Réchauffage avec capteur.................................. 15
Amollissement.....................................................15
Fusion................................................................. 15
Tableau d'amollissement ................................... 16
Tableau de fusion............................................... 16
Décongélation automatique................................ 17
Décongélation minutée....................................... 17
Conseils pour la décongélation........................... 18
Grille métallique.................................................. 18
CUISSON ..................................................................... 19
Pour obtenir les meilleurs résultats de cuisson ......... 19
Poissons et crustacés/mollusques ............................ 19
Amuse-gueule/sauces/soupes .................................. 20
Viandes ..................................................................... 20
Volaille ...................................................................... 22
Pâtes et riz ................................................................ 23
ENTRETIEN......................................................................... 24
ENTRETIEN ET NETTOYAGE................................ 24
La grille de métal................................................... 24
Nettoyer les filtres pour la graisse........................ 24
Remplacement du filtre au charbon..................... 24
Remplacement de la lumière/
veilleuse de la hotte..............................................
Remplacement de l’ampoule de la cavité
interne du four....................................................... 25
QUESTIONS ET RÉPONSES....................................... 25
GUIDE DES PLATS À L’ÉPREUVE
DES MICRO-ONDES..................................................... 26
AVANT DE PLACER UN APPEL DE SERVICE .............. 27
GARANTIE........................................................................... 29
25
- 2 -

MESURES DE PRÉVENTION
MESURES DE PRÉVENTION IMPORTANTES
Les mesures de prévention ci-dessous vous indiqueront
comment utiliser votre four et comment ne pas vous
blesser ni endomager l’appareil.
w
AVERTISSEMENT - Afin de
réduire les risques de brûlure, choc électrique, incendie,
blessure corporelle et pour éviter toute exposition aux
micro-ondes.
• Lire toutes les instructions avant d’utiliser votre
four.
• Ne laissez pas les enfants utiliser ce four sans
supervision.
• Veuillez lire la section
“PRÉCAUTIONS À
PRENDRE POUR ÉVITER
UNE EXPOSITION
DANGEREUSE AUX
MICRO-ONDES”
à la page 4.
• N’utilisez le four que pour son usage prescrit dans ce
guide d’utilisation. N’utilisez pas de produits
chimiques corrosifs dans le four à micro-ondes. Ce four
a été spécifiquement conçu pour réchauffer, cuire ou
sécher les aliments. Il n’a pas été conçu pour l’usage
industriel ni de laboratoire.
• N’utilisez ni n’entreposez pas cet appareil à
l’extérieur. N’utilisez pas cet appareil près des sources
d’humidité - par exemple, près d’un évier de cuisine,
dans un sous-sol humide ni près d’une piscine.
• Ne vous servez pas de la cavité interne du four en tant
qu’espace de rangement. Ne laissez pas de papiers,
cartons, ustensiles de cuisson ni de nourriture dans la
cavité lorsque vous n’utilisez pas le four.
• Nettoyez régulièrement la hotte du ventilateur. Ne
laissez pas la graisse s’accumuler sur la hotte ni sur les
filtres.
• Lorsque vous flambez les aliments sous la hotte,
ouvrez le ventilateur.
• Ce four a été conçu pour fonctionner au-dessus des
cuisinières/plaques de cuisson à gaz ou électriques,
mesurant 36 po. de large ou moins.
• Nettoyez les filtres de la hotte du ventilateur avec soin.
Des agents de nettoyage corrosifs tels que des
nettoyeurs à base de lessive peuvent endommager les
filtres.
• Lorsque vous nettoyez la porte et les surfaces qui
la touchent, n’utilisez qu’un savon doux et non
abrasif ou des détergents doux et une éponge.
• Ne trafiquez pas les commutateurs de sûreté
intégrés dans la porte du four. Le four possède
plusieurs commutateurs de sûreté servant à mettre
l’appareil hors circuit lorsque la porte est ouverte.
• Si votre four a été échappé ou endommagé,
apportez-le chez un technicien qualifié avant de le
réutiliser.
• Afin d’éviter tout risque d’incendie:
- Ne cuisez pas trop les aliments. Les aliments trop
cuits peuvent déclencher un incendie dans un four.
Surveillez le four de près, surtout si vous y mettez du
papier, plastique ou tout autre matériau combustible.
- N’entreposez pas des items combustibles (pain,
biscuits, etc.) dans le four, car si les éclairs frappent
les lignes de tension, le four pourrait se mettre
automatiquement en marche.
- N’utilisez pas d’attaches de métal dans le four.
Enlevez-les avant de placer l’aliment dans le four.
• Si un incendie devait se déclarer:
- Gardez la porte du four fermée.
- Mettez le four hors tension.
- Débranchez la fiche de la prise de courant ou
coupez le courant dans la boîte du disjoncteur ou
des fusibles.
• Afin d’éviter tout choc électrique:
- Cet appareil doit être mis à la terre. Ne le
raccordez qu’à une prise de courant mise à la terre de
façon adéquate. Référez-vous aux instructions de
mise à la terre à la page 5.
- Ne faites pas fonctionner l’appareil si le cordon
d’alimentation est endommagé, ni si celui-ci ne
fonctionne pas normalement ou s’il a été endommagé
ou échappé.
- N’immergez pas le fil d’alimentation ni la fiche
dans l’eau.
- Éloignez le fil d’alimentation des sources de
chaleur.
- Cet appareil ne doit être réparé que par un technicien
qualifié.
• N’installez ce four que si vous respectez les instructions
d’installation incluses.
• N’installez pas ce four au-dessus d’un évier.
• Ne laissez pas le cordon d’alimentation pendre sur le
rebord du comptoir ou de la table.
- 3 -

MESURES DE PRÉVENTION
• Pour éviter de cuire certains types d’aliments de la
mauvaise façon.
- Ne réchauffez pas les biberons ni tout type
d’aliments pour bébés. Un réchauffage inégal peut
causer des blessures graves à l’enfant.
- Ne réchauffez pas les bouteilles dont l’ouverture
est petite, telles que les bouteilles de syrop.
- Ne faites pas de friture dans le four à microondes.
- Ne faites pas vos conserves maison dans votre
four à micro-ondes.
- Ne cuisez pas les aliments suivants: oeufs entiers
dans leur coquille; de l’eau qui contient de l’huile ou du
gras; des contenants scellés ou des pots en verre
fermés. Ces items peuvent exploser.
• N’utilisez pas ce four à des fins commerciales ni
industrielles. Il a été conçu à des fins domestiques
seulement.
• Ne recouvrez ni n’obstruez pas les ouvertures de ce
four à micro-ondes.
• Ne faites pas fonctionner le four à vide, sans qu’il n’y ait
de nourriture à l’intérieur.
- Ne laissez pas la pellicule grise de certains
emballages pour les fours à micro-ondes toucher à la
cavité interne du four. Placez l’emballage dans un plat
pour fours à micro-ondes.
• Ne cuisez pas des aliments directement sur la surface
du four, sous l’assiette de verre. Servez-vous d’un plat
à l’épreuve des micro-ondes.
- Si vous utilisez un plat brunisseur, élevez-le d’au
moins 3/16ième po. au-dessus du plancher du four.
Veuillez lire et suivre attentivement les instructions du
plat brunisseur. Si vous utilisez mal le plat brunisseur,
vous pourriez endommager le fond du four.
• Préservez la grille de métal:
- Enlevez la grille de métal du four lorsque vous ne
l’utilisez pas.
- N’utilisez pas la grille de métal lorsque le four est
vide.
- La grille de métal peut devenir très chaude en cours
de cuisson. Servez-vous de mitaines à four pour la
retirer après la cuisson.
- N’utilisez pas de papier d’aluminium ni de contenants
de métal sur la grille de métal.
• Cet appareil ne doit être réparé que par un technicien
qualifié. Pour tout appel de service, estimation ou
ajustement, entrez en communication avec le centre de
service le plus près de chez vous.
CONSERVEZ CES INSTRUCTIONS
QUELQUES PRÉCAUTIONS À PRENDRE
POUR ÉVITER UNE EXPOSITION
DANGEREUSE AUX MICRO-ONDES.
• N’essayez pas de faire fonctionner ce four en laissant la porte ouverte car si vous réussissez à
l’utiliser avec la porte ouverte, vous risquez de vous exposer aux micro-ondes Il est crucial de ne pas tenter
de déjouer ni d’altérer les systèmes sécuritaires de verrouillage de l’appareil.
• Ne faites pas fonctionner le four s’il est endommagé. Il est surtout important de vérifier si la porte du
four se referme adéquatement et s’il n’y a pas de dommage aux pièces suivantes :
- la porte (tordue).
- les charnières et les loquets (brisés ou lâches).
- les joints d’étanchéité des portes.
• Ne placez pas d’objets entre la devanture du four et la porte; de plus, évitez de laisser les résidus de
détergents ni la poussière s’accumuler sur les joints d’étanchéité.
• Le four ne doit pas être manipulé, ajusté ni réparé par personne d’autre qu’un technicien qualifié.
- 4 -

RENSEIGNEMENTS IMPORTANTS RELATIFS À VOTRE FOUR
Nous vous prions de lire attentivement ce guide
d’utilisation. Il vous aidera à profiter de toutes les
caractéristiques de ce four.
EMPLACEMENT DU
NUMÉRO DE
MODÈLE
Pour vous procurer des renseignements sur le service ou
les pièces de remplacement, LG Electronics CANADA aura
besoin du numéro de modèle de votre four à micro-ondes.
L’étiquette du numéro de modèle est située à l’avant du four
à micro-ondes.
ÉTIQUETTE DU NUMÉRO DE MODÉLE
INSTRUCTIONS
RELATIVES À LA
MISE À LA TERRE
ÉLECTRIQUE
Vous devez effectuer la mise à la terre de cet appareil.
S’il devait survenir un court-circuit, la mise à la terre réduit
les risques de choc électrique en procurant au courant une
route alternative. Cet appareil est muni d’un fil adéquat et
d’une fiche dont l’une des broches sert à la mise à la terre.
La fiche doit être branchée dans une prise bien installée et
possédant la mise à la terre.
w
MISE EN GARDE - Une
mauvaise utilisation de la prise avec broche de
mise à la terre pourrait présenter un risque de
choc électrique.
Référez-vous à un électricien qualifié si vous ne comprenez
pas toutes les instructions se rapportant à la mise à la terre
ou si vous croyez que l’appareil n’est pas mis à la terre de
façon adéquate. Puisque cet appareil s’installe sous les
armoires, nous vous fournissons un cordon d’alimentation
court. Référez-vous aux instructions d’installation séparées
pour les directives sur le placement adéquat du cordon.
Gardez le cordon d’alimentation au sec et ne le pincez pas
d’aucune manière.
SPÉCIFICATIONS
DU FOUR
Capacité de puissance 1000W (Standard IEC 60705)
Dimensions extérieures 29-15/16 po. x 16-7/16 po. x
16-15/16 po.
Volume de la cavité 1.6 pi. cu.
Poids net 52 lbs
TENSION ASSIGNÉE
• Tension assignée du four: 120V CA 60 Hz
• 13 ampères/1500 watts
(Micro-ondes + lampe de hotte + ventilateur)
EXIGENCES EN
ÉLECTRICITÉ
Ce four a été conçu pour fonctionner sur une prise de
courant domestique standard de 120V/60Hz. Assurez-vous
que le circuit soit d’au moins 15A/20A et que le four à
micro-ondes soit le seul appareil sur le circuit. Cet appareil
n’a pas été conçu pour fonctionner sur une tension de 50Hz
ou tout autre circuit que 120V/60 Hz.
- 5 -
Si vous devez utiliser un cordon d’extension, n’utilisez qu’un
cordon à 3 fils avec broche de mise à la terre, que vous
insérerez dans une prise de courant à trois fentes pouvant
recevoir le cordon de l’appareil. La tension assignéa du
cordon d’extension devra être égale ou supérieure à celle
de l’appareil.
Vérifiez la présence d'une mise à
la terre adéquate avant de brancher
votre appareil.
Raccord permanent de l’appareil:
Si vous optez pour un raccord permanent, cet appareil doit
être branché à un système de filage en métal permanent et
mis à la terre, ou à un conducteur avec prise de terre,
parallèle aux conducteurs du circuit et raccordé aux bornes
de mise à la terre du four.

RENSEIGNEMENTS IMPORTANTS RELATIFS À VOTRE FOUR
CARACTÉRISTIQUES DU FOUR À MICRO-ONDES
Plague des numéros
de modéle et de série
Guide de cuisson
Fenêtre avec
blindage de métal
Poignée de la porte
Table tournante
Grillage d'aération
Systéme de verrouillage
Sécuritaire de la porte
AVERTISSEMENT:
w
Filtre contre
les graisses
Lumiére de cuisinière/Comptoir
Panneau des
commandes
Ne faites pas fonctionner le four à vide ou sans le plateau en verre. Il est
préférable de laisser un verre d'eau dans le four lorsqu'il n'est pas utilisé.
L'eau absorbera en sécurité toute l'énergie micro-ondes, si le four est mis
.
en marche accidentellement.
- 6 -

RENSEIGNEMENTS IMPORTANTS RELATIFS À VOTRE FOUR
PANNEAU DES COMMANDES DU FOUR
1
10
11
12
2
3
4
5
6
7
8
9
START
ENTER
14
15
16
17
18
19
20
21
22
23
24
13
25
- 7 -

RENSEIGNEMENTS IMPORTANTS RELATIFS À VOTRE FOUR
1. AFFICHAGE "DISPLAY": L’affichage contient une
horloge et des voyants qui vous indiqueront l’heure de
la journée, les réglages de la durée de cuisson et les
fonctions de cuisson sélectionnées.
2. MAÏS SOUFFLÉ“POPCORN”: Appuyez sur cette
touche lorsque vous faites éclater du maïs dans votre
fourà micro-ondes. Le capteur révèlera au four la
durée de la cuisson selon le taux d’humidité qu’il
détecte du maïs soufflé.
3. PIZZA: Appuyez sur cette touche lorsque vous fait
escuire une pizza, sans choisir une durée de cuisson ni
un niveau de puissance.
4. POMME DE TERRE “POTATO”:
touche pour cuire des pommes de terre. Le capte
urrévèlera au four la durée de la cuisson selon le taux
d’humidité qu’il détecte de chaque pomme de terre.
5. LÉGUMES “VEGETABLE”: Appuyez sur cette
touche pour réchauffer les légumes. Le capteur
révèlera au four la durée de la cuisson selon le taux
d’humidité qu’il détecte des légumes.
6. Ramollir "Soften": Appuyez sur cette touche pour
ramollir du beurre, de la crème glacée, du fromage
à la crème ou du jus congelé.
7. Fondre "Melt": Appuyez sur cette touche pour faire
fondre du beurre ou de la margarine, du chocolat,
du fromage ou des guimauves.
8. TEMPS CUISSON “TIME COOK”: Appuyez sur cette
touche afin de régler la durée de ra cuisson.
9. SET SUR MESURE “CUSTOM SET”: Cette touche
sertà changer les réglages pré-ajustés par défaut
dans le four, tels que ceux du son, de l’horloge, de la
vitesse de l’affichage et du poids de la décongélation.
10. TOUCHES NUMÉRIQUES "NUMBER": Servezvous
de ces numéros pour entrer la durée de cuisson,
le niveau de puissance, les quantités ou les poids.
11. MOINS "LESS": Appuyez sur LESS et
voussoustrairez 10 secondes du temps de cuisson.
12. HORLOGE "CLOCK": &HWWHWRXFKHVHUWjHQWUHU
O¶KHXUHGXMRXU
13. ÉCLAIRAGE "LIGHT": Appuyez sur cette touche afin
d’allumer/éteindre la lumière de la cuisinière/comptoir.
Appuyez sur cette
13. ÉCLAIRAGE "LIGHT": Appuyez sur cette touche afin
d’allumer/éteindre la lumière de la cuisinière/comptoir.
14. CUISSON “COOK”: Appuyez sur cette touche pour
cuire les plats congelés, les plats cuisinés et le riz. Le
capteur révèlera au four la durée de la cuisson selon le
taux d’humidité qu’il détecte de la nourriture.
15. RÉCHAUFFAGE AUTOMATIQUE “REHEAT”:
Apuyez sur cette touche afin de réchauffer des plats
cuisinés, des assiettes de souper et les soupes/sauces.
Le capteur révèlera au four la durée de la cuisson selon
le taux d’humidité qu’il détecte de la nourriture.
16. DÉCONGÉLATION MINUTÉE "TIME DEFROST":
Appuyez sur cette touche pour régler un temps
de décongélation.
17. DÉCONGÉLATION AUTOMATIQUE "AUTO
DEFROST": Viandes, volailles, poissons.
Choisissez le type de nourriture en appuyant
sur la touche appropriée et décongelez les
aliments par le poids.
18. PUISSANCE "POWER LEVEL": $SSX\H]VXU
FHWWHWRXFKHDILQGHFKRLVLUXQQLYHDXGHSXLVVDQFH
19. Temps "Time": Appuyez sur cette touche, puis sur les
touches numériques pour régler le temps de cuisson.
20. DÉMARRER/ENTRER "START/ENTER" :
Appuyez sur cette touche pour démarrer une
fonction. Sivous ouvrez la porte après le début
de la cuisson, appuyez à nouveau sur START/ENTER.
21. ARRÊT/ANNULATION "STOP/CLEAR": Cette
touche sert à arrêter le four ou annuler toutes.
les entrées de données.
22. D'ECONOMIE D'ENERGIE "ENERGY SAVING":
Appuyez sur cette touche pour économiser l'énergie.
23. PLUS "MORE": Appuyez sur MORE et vous
ajouterez 10 secondes à la durée de la cuissn.
24. MINUTE ADDITIONNELLE "ADD 30 SEC":
Appuyez sur cette touche pour commander
une opération de cuisson d’une minute au
niveau de puissance de 100%.
25. VENTILATEUR HAUT/BAS/ARRÊT "VENT
HI/LOW/OFF": Appuyer sur cette touche
pour commander la mise en marche ou
l’arrêt du ventilateur.
- 8 -

FONCTIONNEMENT
LE FOUR À MICRO-ONDES
On décrit dans cette section les principes de
fonctionnement du four à micro-ondes ainsi que les
connaissances de base qui vous permettront de l’utiliser.
Lire ces informations avant d’utiliser le four.
A7(1TION
Pour éviter tout risque de dommages matériels ou de
blessures corporelles, ne pas faire fonctionner le four sans
avoir placé un aliment dans la cavité.
Pour éviter tout risque de dommages matériels ou de
blessures corporelles, ne pas placer dans le four des
articles comme les suivants : vaisselle ou ustensile en
grès, feuille d’aluminium, ustensile métallique ou ustensile
avec garniture métallique. Garder le papier d'aluminium à
au moins 1 po (2,54 cm) de la paroi du four, de la grille
métallique ou d'autres morceaux d'aluminium.
HORLOGE
Lorsque le four est branché à une prise de courant la première
fois, le message « TOUCH CLOCK TO SET TIME OF DAY »
(veuillez régler l'heure) clignote plusieurs fois sur l'afficheur.
Si l'heure n'est pas réglée, « : » clignotera sur l'afficheur
jusqu'à ce que « CLOCK » (HORLOGE) soit appuyé.
Exemple : Pour régler l’horloge sur 8 h 00.
1. Appuyer sur la touche
CLOCK.
8 0 0
1
2. Entrer l’heure exacte à l’aide
des touches numériques.
Appuyer sur la touche
3.
START/ ENTER.
4. Appuyer sur 1 pour AM/matin
et sur 2 pour PM/soir.
VENTILATEUR
Le ventilateur permet d’évacuer la vapeur d’eau et
d’autres vapeurs émises par les aliments sur la table de
cuisson. Il possède vitesses.
Appuyez sur la touche
VENT HI / LOW / OFF une fois pour
la vitesse de ventilation High
(élevée), deux fois pour la vitesse
de ventilation Low (basse) ou trois
fois pour arrêter la ventilation.
REMARQUE: si la température devient trop chaude autour
du four à micro-ondes, le ventilateur de la hotte se mettra
automatiquement en marche, au réglage FAIBLE, afin
d’aérer le four. Il peut fonctionner pendant une heure afin
de refroidir le four. Lorsque ceci se produit, vous ne
pouvez fermer le ventilateur manuellement.
ÉCLAIRAGE DE LA TABLE DE
CUISSON
Appuyer une fois sur LIGHT ON/OFF
pour commander.
Une fois pour un éclairage .
Deux fois pour un éclairage doux.
élev
é
VERROUILLAGE POUR LES ENFANTS
Utiliser cette fonction de sécurité pour verrouiller le
panneau de contrôle lorsque vous nettoyez le four ou afin
d'empêcher les enfants d'utiliser le four sans supervision.
La fonction de verrouillage est également utile lorsqu’on
doit nettoyer le panneau de contrôle; ceci empêche
l’entrée accidentelle de commandes durant le nettoyage.
Exemple : Verrouillage du panneau de contrôle.
1. Appuyer sur STOP/CLEAR.
5. Appuyer sur la touche
START/ ENTER.
- 9 -
STOP/CLEAR
Tenez
2.
enfoncé jusqu'à ce que «
LOCKED » (VERROUILLÉ)
s'affiche (environ 4 secondes).
Exemple : Déverrouillage du panneau de contrôle.
1. Maintenir la pression sur
STOP/CLEAR
de 4 secondes. LOCKED
(VERROUILLÉ) disparaît de
l’afficheur et l’appareil émet 2
signaux sonores.
pendant plus

FONCTIONNEMENT
SET SUR MESURE
Vous pouvez changer les valeurs par défaut de la sonorité
du bip, l’horloge, la vitesse de l’affichage et le poids de la
décongélation.
Consultez le tableau suivant pour plus de renseignements.
NUMÉRO
Par exemple: changer le mode de décongélation
SET SUR MESURE
Commande ACTIF/
1
INACTIF du son
Commande
2
INACTIF de l'horloge
Commande de
3 2 Vitesse normale
vitesse de défilement
Sélection du mode de 1 Lbs
4 décongélation
automatique 2 Kg
ACTIF/
NUMÉRO
RÉSULTAT
1 Son activé
2 Son désactivé
1 Horloge activée
Horloge désactivée
2
1 Vitesse lente
3 Vitesse rapide
par le poids (de lbs à kg).
1. Appuyez sur STOP/CLEAR.
MINUTE ADDITIONNELLE
Cette touche vous permet d’économiser du temps en réglant
et en mettant en marche rapidement votre four à micro-ondes,
sans avoir à appuyer sur la touche START/ENTER.
Par exemple: si vous désirez programmer une
cuisson simplifiée pendant deux minutes.
Appuyez quatre fois sur la
touche de mise en marche
simplifiée ADD 30 SEC.
Le four débute sa cuisson et le
compte à rebours apparaît à
l’affichage.
CUISSON SUR MESURE
La cuission sur mesure vous permet de rappeler une
instruction de cuisson prélablement programmée dans la
mémoire et de commencer immédiatement l’étape de
cuisson.
Par exemple: programmer pendant deux minutes.
1. Appuyez sur STOP/CLEAR.
2. Appuyez sur CUSTOM COOK.
2. Appuyez sur
3. Appuyez sur le numéro 4.
4. Appuyez sur le nu
CUSTOM SET.
méro 2.
D'ECONOMIE D'ENERGIE
La fonction « ENERGY SAVING » D'ECONOMIE
D'ENERGIE pourraéconomiser d'énergie en
éteignant l'écran.L'affichage s'éteint également
lorsque l'appareil n'est pas actif pendant 5 minutes.
1. Appuyez sur STOP/CLEAR.
2. Appuyez sur ENERGY SAVING
à éteindre l'affichage.
3. Appuyez sur ENERGY SAVING
pour éteindre l'affichage sur.
3. Entrez la durée de la cuisson.
4. Appuyez sur
START/ENTER.
Par exemple: rappeler la mémoire.
1. Appuyez sur STOP/CLEAR.
2. Appuyez sur
3. Appuyez sur START/ENTER.
Lorsque la durée de cuisson sera
terminée, vous entendrez quatre
bips et les lettres COOK END
apparaîtront à l’affichage.
CUSTOM COOK.
- 10 -

FONCTIONNEMENT
PLUS / MOINS
En utilisant les touches MORE ou LESS, vous pouvez
ajuster tous les pré-programmes cuisson et de cuisson par
minuterie pour augmenter ou diminuer la durée de la
cuisson.
Appuyez sur MORE et vous ajouterez 10 secondes à la
durée de la cuisson, appuyez sur LESS et vous soustrairez
10 secondes du temps de cuisson.
CUISSON À PUISSANCE ÉLEVÉE
Par exemple: cuire des aliments pendant 8
minutes, 30 secondes.
1. Appuyez sur STOP/CLEAR.
2. Entrez la durée de la cuisson.
3. Appuyez sur START/ENTER.
Lorsque la cuisson sera
terminée, vous entendrez
quatre bips et les lettres COOK
END apparaîtront à l’écran.
CUISSON PAR ÉTAPES
Afin d'obtenir les meilleurs résultats, certaines recettes
exigent différents niveaux de puissance à différences
étapes de la cuisson. Il est possible de programmer le
four pour passer d'un niveau à un autre en deux étapes.
Trois étapes sont possibles si la première est le cycle de
décongélation.
Exemple : Cuisson d’un mets pendant 3 minutes à une
puissance de 100 %, puis durant 7 minutes
30 secondes à une puissance de 70 %.
1. Appuyez sur STOP/CLEAR.
2.
Entrer la durée de cuisson
pour la première période.
3.
Appuyer sur la touche TIME.
4.
Entrer la durée de cuisson
pour la seconde période.
5.
Appuyer sur la touche
POWER LEVEL.
Entrer le niveau de
puissance pour la seconde
6.
période.
.
Appuyer sur START/ENTER.
7
NIVEAUX DE PUISSANCE DU
FOUR À MICRO-ONDES
Le four à micro-ondes est doté de 10 niveaux de cuisson
afin de permettre à l'utilisateur de faire cuir ou chauffer
différents types d'aliments.
Exemple : Cuisson d'un mets pendant 7 miuntes 30
secondes à une puissance de 70%.
1. Appuyez sur STOP/CLEAR.
Entrer la durée de cuisson.
2.
Appuyer sur la touche
3.
POWER LEVEL.
4.
Entrer le niveau de puissance.
5.
Appuyer sur START/ENTER.
Lorsque la durée de cuisson
est écoulée, l’appareil émet 4
signaux sonores et affiche
COOK END.
Voir le guide de cuisson pour les niveaux de puissance
infrieurs à la page 12.
Lorsque la durée de cuisson est écoulée, l’appareil
émet 4 signaux sonores et affiche COOK END.
- 11 -

FONCTIONNEMENT
GUIDE DE CUISSON POUR LES NIVEAUX DE PUISSANCE INFÉRIEURS
L’appareil offre un choix de 10 niveaux de puissance de chauffage en plus de la puissance HIGH (ÉLEVÉE); on
peut ainsi choisir le niveau de puissance le plus approprié pour l’aliment à cuire. Le tableau ci-dessous permet de
choisir le niveau de puissance approprié pour divers aliments.
NIVEAU DE PUISSANCE
PUISSANCE DU FOUR UTILISATION
10 100 %
(Puissance élevée)
9 90 %
●
Ébullition d’eau.
●
Cuisson de boeuf haché.
●
Préparation de bonbons/confiserie.
●
Cuisson de légumes et fruits frais.
●
Cuisson de poisson ou volaille.
●
Préchauffage d’un plat de brunissage.
●
Réchauffage de boissons.
●
Tranches de bacon.
●
Réchauffage rapide de tranches de viande.
●
Cuisson d’oignons, de céleri et poivrons verts (sautés).
8 80 %
7 70 %
6 60 %
5 50 %
●
Réchauffage.
●
Cuisson d’oeufs brouillés.
●
Cuisson de pains et de produits de céréales.
●
Cuisson de mets à base de fromage, veau.
●
Cuisson de gâteaux, muffins, carrés au chocolat, petits gâteaux, etc.
●
Cuisson de pâtes.
●
Cuisson de viande, volaille entière.
●
Cuisson de crèmes pâtissières.
●
Cuisson de poulet entier, dinde, côtes de porc, rôti de
côtes, rôti de longe.
●
4 40 %
3 30 %
2 20 %
1 10 %
Toute cuisson de morceaux de viande moins tendres.
●
Réchauffage de mets préparé surgelé.
●
Décongélation de viande, volaille et produits de la mer.
●
Cuisson d’une petite quantité d’aliments.
●
Fin de cuisson pour mets en cocotte, ragoûts et certaines sauces.
●
Amollissement de beurre et fromage à la crème.
●
Chauffage d’une petite quantité d’aliments.
●
Amollissement de crème glacée.
●
Levée de pâte à pain (avec levure).
0 0 %
●
Temps de repos.
- 12 -

FONCTIONNEMENT
INSTRUCTIONS DE CUISSON
AVEC CAPTEUR
La fonction de cuisson avec capteur permet de
commander la cuisson de la plupart de vos mets favoris
sans devoir sélectionner une durée de cuisson et une
puissance de chauffage. L’appareil affiche la catégorie
d'aliment durant la période de détection initiale. Le four à
micro-ondes détermine automatiquement la durée de
cuisson nécessaire pour chaque mets ou aliment.
Lorsque le capteur interne détecte une certaine quantité
d’humidité émise par l’aliment, il détermine et affiche la
durée de cuisson restante. Observer les
recommandations suivantes pour obtenir les meilleurs
résultats pour une cuisson avec capteur :
1. Les aliments cuits avec le système de capteur doivent
se trouver à une température de conservation normale.
2. Veiller à ce que le plateau en verre et la surface
extérieure du récipient soient secs pour obtenir les
meilleurs résultats de cuisson.
3. Recouvrir les aliments avec un couvercle, du papier
paraffiné ou une feuille de plastique (pour four à microondes) en laissant une ouverture.
4. Ne pas ouvrir la porte du four ni appuyer sur la touche
STOP/CLEAR durant la période de détection. Lorsque
la période de détection est écoulée, le four émet 2
signaux sonores, et la durée de cuisson restante
apparaît sur l’afficheur. À partir de ce moment, on peut
ouvrir la porte du four pour remuer ou retourner les
aliments ou pour modifier leur répartition.
GUIDE DE CUISSON AVEC
CAPTEUR
Pour obtenir les meilleurs résultats lors d’une cuisson
avec capteur, employer les récipients et couvercles
appropriés avec les aliments.
1. Toujours utiliser un récipient pour four à micro-ondes et
recouvrir avec un couvercle ou une pellicule de
plastique en laissant une petite ouverture.
2. Ne jamais placer un couvercle ou pellicule de plastique
étanche sur un récipient; ceci empêche l’évacuation de
la vapeur et peut provoquer une cuisson excessive.
3. Adapter la quantité de nourriture à la taille du récipient.
Pour obtenir les meilleurs résultats, remplir un récipient
à 50 % ou plus.
4. Avant de placer les aliments dans le four, vérifier que
les surfaces internes du four et les surfaces externes
du récipient sont sèches. La transformation en vapeur
des gouttes d'humidité peut provoquer une détection
incorrecte par le capteur.
MAÏS À ÉCLATER AVEC CAPTEUR
Cette fonction permet de faire éclater au four à microondes les grains de maïs des sachets commerciaux de
3,0 et 3,5 ozs. (85 et 99 g). Faites éclater un seul sachet à
la fois. Dans le cas de l’emploi d’un éclateur de maïs pour
four à micro-ondes, observer les instructions du fabricant.
Exemple : Pour faire éclater du maïs.
1. Appuyer sur la touche
POPCORN. Lorsque la
durée de chauffage est
écoulée, l’appareil émet 4
signaux sonores et affiche
COOK END.
• Quantité recommandée : 3,0 à 3,5 oz (85 à 99 g).
• Pour faire cuire un sac de taille collation [1,75 oz (50 g)],
placer le sac dans le four. Régler le four pour cuire
pendant 2 minutes à pleine puissance. ÉCOUTER si le
bruit de l'éclatement ralentit. Lorsque l'éclatement ralentit
à un éclat par seconde, arrêter le four. Noter le temps
requis pour la cuisson et utiliser ce réglage à l'avenir.
A7(1TION
NE PAS laisser le four à micro-ondes sans
surveillance durant une opération d’éclatement
de maïs.
Lors de l'éclatement du maïs en sachet
commercial, retirer la grille du four; ne pas
placer le sachet de maïs à éclater sur ou sous
la grille.
- 13 -

FONCTIONNEMENT
PIZZA AVEC CAPTEUR
La fonction “PIZZA” vous permet de réchauffer une ou
plusieurs pointes de pizza sans devoir entrer des temps de
cuisson ni des niveaux de puissance.
Par exemple: réchauffer deux pointes de pizza.
1. Appuyez sur STOP/CLEAR.
2. Appuyez sur PIZZA.
Lorsque la durée de la cuisson
sera terminée, vous entendrez
quatre bips et les lettres COOK
END apparaîtront à l’écran.
CUISSON AVEC CAPTEUR
La fonction de cuisson vous permet de cuire des aliments
prêts pour le four à micro-ondes sans devoir entrer des
temps de cuisson ni des niveaux de puissance. La
CUISSON PAR CAPTEUR possède trois catégories
d’aliments: Mets congelés, Plats cuisinés et le Riz.
Par exemple: cuire du riz
1. Appuyez sur STOP/CLEAR.
POMMES DE TERRE
AVEC CAPTEUR
La fonction “POTATO” vous permet de cuire une ou
plusieurs pommes de terre sans devoir entrer des temps de
cuisson ni des niveaux de puissance.
REMARQUE:
• Avant de cuire les pommes de terre, percez-les à
plusieurs endroits avec une fourchette.
• Après la cuisson, laissez-les reposer pendant 5 minutes.
Par exemple: cuire 10 onces pommes de terre.
1. Appuyez sur STOP/CLEAR.
2. Appuyez sur POTATO.
Lorsque la durée de la cuisson sera
terminée, vous entendrez quatre
bips et les lettres COOK END
apparaîtront à l’écran.
LÉGUMES AVEC CAPTEUR
La fonction “VEGETABLE” possède 3 catégories
d’aliments: frais (fresh), congelés (frozen) et en boîte
(canned).
Par exemple: réchauffer des légumes congelés.
2. Appuyez sur COOK.
3. Choisissez la catégorie de
nourriture.
Catégorie
Entrée Congelés 1
Casserole 2
Riz 3
Lorsque la durée de la cuisson sera
terminée, vous entendrez quatre
bips et les lettres COOK END
apparaîtront à l’écran.
Touche du clavier
numérique
1. Appuyez sur STOP/CLEAR.
2. Appuyez sur VEGETABLE.
3. Choisissez la catégorie de
nourriture.
Catégorie
Fra
is 1
Congelés 2
En Boîte 3
Lorsque la durée de la cuisson
sera terminée, vous entendrez
quatre bips et les lettres COOK
END apparaîtront à l’écran.
Touche du clavier
numérique
- 14 -

FONCTIONNEMENT
RÉCHAUFFAGE AVEC CAPTEUR
La fonction de RÉCHAUFFAGE vous permet de réchauffer
des aliments sans devoir entrer de temps de cuisson ni de
niveaux de puissance.
Le RÉCHAUFFAGE possède 3 catégories d’aliments:
Plats cuisinés, Assiettes de souper et Soupes/sauces.
Par exemple: réchauffer un plat cuisiné.
1. Appuyez sur STOP/CLEAR.
2. Appuyez sur REHEAT.
3. Choisissez la catégorie d’aliments
désirée.
Catégorie
Casserole 1
Assiette 2
Soupe/Sauce
Lorsque la durée de cuisson sera
terminée, vous entendrez quatre
bips et les lettres COOK END
apparaîtront à l’affichage.
Touche du clavier
numérique
3
TABLEAU D'AMOLLISSEMENT*
Nombre
Catégorie
Beurre
Glace
Fromage Crémeux
Jus Surgelé
* 1 ozs. = 28 g ou 30 mL;
1 pinte = 0,95 L; 1 chopine = 0,5 L
d’appuis
sur la touche
1
2
3
4
1
/2 gal = 1,9 L;
Numéro de touche
1 2 3
1 morceau
Pinte
3 onces
6 onces
2 morceaux
Quart
8 onces
12 onces
3 morceaux
Demi
gallon
16 onces
FUSION
Le four utilise une puissance basse pour la fusion
d'aliments (comme le beurre ou la margarine, le chocolat,
les guimauves ou les préparations à partir de fromage
fondu). Voir le tableau suivant.
Exemple : Fusion de 8 ozs. (227 g) de chocolat.
MELT
1. Appuyer sur la touche MELT.
2. Choisir la catégorie d'aliment.
Appuyer sur la touche 2 pour
« chocolat ».
3. Choisir la quantité. Appuyer
sur 2 pour 8 ozs. (227 g).
_
AMOLLISSEMENT
Le four utilise une puissance basse pour amollir les
aliments comme le beurre, la crème glacée, le fromage à
la crème et les jus congelé. Voir le tableau suivant.
Exemple : Amollissement de 1 pinte (0,95 L) de crème glacée.
SOFTEN
1. Appuyer sur la touche
SOFTEN.
2. Choisir la catégorie d'aliment.
Appuyer sur la touche 2 pour
« crème glacée ».
3. Choisir la quantité. Appuyer
sur la touche 2 pour 1 pinte
(0,95 L).
4. Appuyer sur START/ENTER.
TABLEAU DE FUSION*
Catégorie
Beurre/Margarine
Chocolat
Fromage
Guimauve
* 1 ozs. = 28 g ou 30 mL
- 15 -
4. Appuyer sur START/ENTER.
Nombre
d’appuis
sur la touche
1
2
3
4
Numéro de touche
1 2 3
1 morceau
4 onces
8 onces
5 onces
2 morceaux
8 onces
16 onces
10 onces
3 morceaux
_
_
_

FONCTIONNEMENT
TABLEAU D'AMOLLISSEMENT
CATÉGORIE DIRECTIVES QUANTITÉ
Beurre
Crème glacée
Fromage
Crème
Jus Congelé
Le sortir de son emballage et le placer dans un récipient pour four à micro-ondes.
Le beurre sera à la température ambiante et prêt à être utilisé dans une recette.
Placer le contenant au four.
La crème glacée sera assez molle pour pouvoir s'en servir facilement.
L'enlever de son emballage et le placer dans un récipient pour four à micro-ondes.
Le fromage à la crème sera à la température ambiante et prêt à être utilisé dans
une recette.
Enlever le dessus.
Le placer dans le four.
Le jus congelé sera assez mou pour être facilement mélangé avec de l'eau.
1, 2 ou 3 bâtonnet(s)
1 chopine, pinte ou 1/2 gal
(1/2 L, 0,95 L, 1,9 L)
3 ou 8 ozs.
(85 g ou 227 g)
6, 12 ou 16 ozs.
(180, 355 ou 475 mL)
TABLEAU DE FUSION
CATÉGORIE DIRECTIVES QUANTITÉ
Beurre ou
Margarine
Chocolat
Le sortir de son emballage et le placer dans un récipient pour four à micro-ondes.
Il n'est pas nécessaire de recouvrir le beurre.
Remuer à la fin de la cuisson pour parfaire la fonte.
On peut utiliser des pépites de chocolat ou des carrés de chocolat à cuire.
Sortir les carrés de leur emballage et les placer dans un récipient pour four à microondes. Remuer à la fin de la cuisson pour parfaire la fonte.
1, 2 ou 3 bâtonnet(s)
4 ou 8 ozs.
(113 ou 227 g)
Fromage
Guimauves
Utiliser des préparations à base de fromage fondu seulement. Les découper
en cubes.
Les placer en une seule couche dans un récipient pour four à micro-ondes.
Remuer à la fin de la cuisson pour parfaire la fonte.
On peut utiliser des guimauves ordinaires ou miniatures. Les placer dans un
récipient pour four à micro-ondes.
Remuer à la fin de la cuisson pour parfaire la fonte.
- 16 -
8 ou 16 ozs.
(227 ou 454 g)
5 ou 10 ozs.
(142 ou 284 g)

FONCTIONNEMENT
DÉCONGÉLATION AUTOMATIQUE
Quatre choix de décongélation sont préprogrammés dans
le four. La fonction décongélation offre la meilleure
méthode de décongélation des aliments surgelés, le four
choisissant automatiquement les durées nécessaires
selon chaque aliment, en fonction du poids entré. De plus,
la fonction de DÉCONGÉLATION AUTOMATIQUE
comprend un mécanisme de signalisation incorporé qui
rappelle à l'utilisateur de vérifier, de retourner, de séparer
ou de redisposer la nourriture pendant le cycle de
décongélation. Quatre options sont disponibles :
1. VIANDE
2. VOLAILLE
3. POISSON
4. PAIN
Après avoir appuyé une fois sur la touche AUTO DEFROST,
sélectionner la catégorie d'aliment. Les gammes de poids
vont de 0,1 à 6,0 lb (45 g à 2,7 kg) pour la viande, la
volaille et le poisson, et de 0,1 à 1 lb (45 à 454 g) pour le
pain.
Exemple : Décongélation de 1,2 lb (0,5 kg) de viande.
1. Appuyer sur la touche
AUTO DEFROST.
2. Choisir la catégorie d'aliment.
3. Entrer le poids.
4. Appuyer sur START/ENTER.
REMARQUE : Après avoir appuyé sur START/ENTER,
l'afficheur décompte la durée de décongélation. Le four
émettra un signal sonore durant le cycle de
décongélation. À ce moment, ouvrir la porte et tourner,
séparer ou redisposer l'aliment au besoin. Retirer toutes
les portions qui ont décongelé, puis remettre les portions
encore congelées dans le four et appuyer sur le bouton
START/ENTER pour poursuivre le cycle de
décongélation. Le four ne s'arrêtera pas pendant
l'émission du signal sonore, à moins que la porte ne
soit ouverte.
Pour de meilleurs résultats :
• Retirer le poisson, les mollusques/crustacés, la viande
et la volaille de leur emballage plastique ou papier fermé
d'origine. Sinon, l'emballage retient la vapeur et les jus
près de l'aliment, ce qui peut entraîner la cuisson de la
surface extérieure de l'aliment.
• Façonner la viande en forme de beignes avant de la
congeler. Lors de la décongélation, enlever la viande
déjà décongelée sur l'extérieur lorsque le signal sonore
retentit, et continuer la décongélation.
• Placer l'aliment dans un plat de cuisson en verre peu
profond ou sur une grille de rôtissage aux micro-ondes,
afin de récolter les jus.
• L'aliment comportera encore des parties congelées au
centre, lorsqu'il sera retiré du four.
TABLEAU DE DÉCONGÉLATION
Catégorie Aliment
VIANDE
0,1 à 6,0 lb
k
(
g à
0,1
VOLAILLE
0,1 à 6,0 lb
k
(
g à
0,1
POISSON
0,1 à 6,0 lb
k
(
g à
0,1
PAIN
0,1 à 1,0 lb
k
(
g à
0,1
BŒUF
Bœuf haché, bifteck de ronde, cubes de viande
à ragoût, bifteck de filet, boeuf braisé, rôti de
kg)
,0
4
côtes, rôti de croupe roulé, rôti de palette,
galette de hamburger.
AGNEAU
Côtelettes (1 po/2,5 cm d'épaisseur), rôti roulé.
PORC
Côtelettes (1/2 po/1,2 cm), hot dogs, côtes levées,
côtes à la paysanne, rôti roulé, saucisses.
VOLAILLE
Poulet entier (moins de 4 lb/1,8 kg), viande de
poitrine coupée (sans os).
kg)
,
0
4
POULET DE CORNOUAILLES
Entier.
DINDE
Poitrine (moins de 6 lb/4,0 kg).
POISSON
Filets, darnes, entiers.
CRUSTACÉS/MOLLUSQUES
kg)
,
0
4
Chair de crabe, queues de homard, crevettes, pétoncles.
MUFFINS
GÂTEAU ROULÉ
kg)
0
,
5
DÉCONGÉLATION MINUTÉE
Cette fonction permet à l’utilisateur de choisir la durée de
décongélation désirée.
Exemple : Période de décongélation de 2 minutes.
1. Appuyer sur TIME DEFROST.
2. Entrer la durée de
décongélation désirée.
3. Appuyer sur START/ENTER.
(La période de décongélation
débute).
Lorsque la durée de décongélation est écoulée, l’appareil
émet 4 signaux sonores et affiche COOK END (FIN DE
CUISSON).
- 17 -

FONCTIONNEMENT
CONSEILS POUR LA
DÉCONGÉLATION
• Lorsque vous utilisez la fonction de décongélation
automatique, le poids que vous devez entrer est le
poids net en livres et en dixièmes de livre (le poids
de l'aliment, moins celui du contenant).
• Avant de commencer, vérifiez si vous avez enlevé
toutes les attaches métalliques des sacs d'aliments
congelés et remplacez-les par des ficelles ou des
élastiques.
• Ouvrez les contenants comme les boîtes en carton
avant de les placer dans le four.
• Faites toujours une entaille dans les pochettes ou
les emballages en plastique.
• Si les aliments sont emballés dans du papier
d'aluminium, enlevez le papier d'aluminium et placez
les aliments dans un contenant approprié.
• S'il y a lieu, faites une entaille dans la peau des
aliments congelés, comme des saucisses.
• Pliez les pochettes en plastique qui renferment les
aliments pour assurer une décongélation uniforme.
• Sous-estimez toujours le temps de décongélation.
Si les aliments décongelés sont encore gelés au
centre, remettez-les dans le four à micro-ondes pour
poursuivre la décongélation.
• Le temps de décongélation varie selon le degré de
congélation des aliments.
• La forme de l'emballage influe sur la rapidité de la
décongélation des aliments. Les emballages peu
profonds seront décongelés plus rapidement qu'un
bloc épais.
• Lorsque les aliments commencent à décongeler,
séparez les morceaux. Les morceaux séparés se
décongèlent plus facilement.
• Utilisez de petits morceaux de papier d'aluminium
pour protéger les parties des aliments comme les
ailes de poulet, les extrémités des cuisses de poulet,
les queues de poisson ou les parties qui
commencent à devenir chaudes. Assurez-vous que
le papier d'aluminium ne touche pas les côtés, le
haut ou le fond du four. Le papier d'aluminium peut
endommager le revêtement intérieur du four.
• Pour obtenir de meilleurs résultats, laissez les
aliments reposer après la décongélation. (Pour de
plus amples renseignements sur le temps de repos,
consultez la section « Conseils pour la cuisson au
four à micro-ondes ».)
• Retournez les aliments pendant la décongélation ou
le temps de repos. Séparez et retirez les aliments,
au besoin.
GRILLE MÉTALLIQUE
A7(1TION
Pour éviter un risque de dommages matériels :
Ne pas utiliser la grille pour éclater le maïs.
Lors de l’utilisation, la grille doit toujours
reposer sur les 4 supports de plastique.
Utiliser la grille uniquement pour faire cuire à
cette position.
Ne pas effectuer une cuisson alors que la grille
repose sur le fond du four.
La grille métallique offre un espace supplémentaire lors
de la cuisson de plusieurs aliments en même temps.
Utilisation de la grille :
1. Placer la grille en bon appui sur les 4 supports de
plastique.
• Il NE FAUT PAS que la grille touche les parois
métalliques ou la paroi arrière de la cavité du four.
2. Placer des quantités égales d’aliments AU-DESSUS et
EN-DESSOUS de la grille.
• Il faut que les quantités d’aliments soient
approximativement identiques, pour une bonne
répartition de l’énergie absorbée.
- 18 -

CUISSON
POUR OBTENIR LES MEILLEURS
RÉSULTATS DE CUISSON
Lire et observer les directives ci-dessous pour obtenir les
meilleurs résultats lors de l’utilisation du four à micro-ondes.
• Température initiale : Il faut plus de temps pour cuire un
aliment qui sort du réfrigérateur ou du congélateur que s’il
était à la température ambiante.
Les durées de cuisson indiquées dans ce manuel sont
celles qui correspondent à des aliments qui se trouvent à
la température de conservation normale.
• Taille : Les morceaux d’aliment de petite taille cuisent
plus rapidement que les morceaux de plus grosse taille;
des morceaux de taille et de forme similaire cuisent plus
uniformément. Pour une cuisson uniforme, réduire la
puissance pour la cuisson d’aliments en morceaux de
grande taille.
• Humidité naturelle : Un aliment qui contient beaucoup
d’eau cuit plus uniformément, parce que les molécules
d’eau absorbent l’énergie des micro-ondes.
• Remuer les aliments comme mets en sauce et légumes,
depuis l’extérieur vers le centre du récipient, pour répartir
uniformément la chaleur; ceci accélère la cuisson. Il n’est
pas nécessaire de remuer constamment.
• Retourner les aliments comme côtelettes de porc,
pommes de terre, rôti ou chou-fleur entier, à mi-cuisson,
pour exposer uniformément toutes les faces à l’énergie
des micro-ondes.
• Orienter vers le centre du plat les parties délicates des
aliments (pointes d’asperges, par exemple).
• Orienter vers l’extérieur du plat les parties épaisses des
morceaux non uniformes (morceaux de poulet, darnes de
saumon).
• Protéger avec des petits morceaux de feuille d’aluminium
les parties d’un aliment qui peuvent cuire plus rapidement,
comme extrémité d’aile et extrémité de pilon de volaille.
• Période d’attente : Après avoir retiré le plat du four à
micro-ondes, recouvrir avec un couvercle ou une feuille
de plastique et laisser reposer; la cuisson se poursuit vers
le centre durant cette période d’attente, sans risque de
cuisson excessive des parties externes. La durée de la
période d’attente dépendra de la densité de l’aliment et de
la surface exposée.
• Enveloppement dans du papier paraffiné ou dans un
essuie-tout : Pour éviter un assèchement, on devrait
envelopper avant le réchauffage aux micro-ondes les
sandwichs et de nombreux autres aliments contenant du
pain précuit.
POISSONS ET CRUSTACÉS/MOLLUSQUES
Cuisson des poissons et crustacés/mollusques : directives générales
• Préparation du poisson pour la cuisson :
- Décongeler complètement.
- Orienter vers l'extérieur du plat les parties épaisses des
morceaux non uniformes. Répartir les crustacés et les
mollusques en une seule couche pour obtenir une
cuisson uniforme.
- Le type d’article de couverture à utiliser dépend de la
méthode de cuisson. Pour un poisson poché, utiliser un
récipient recouvert d’un couvercle ou d’un film de
plastique (avec évent) compatible avec les micro-ondes.
- Pour poisson au four, poisson pané ou poisson en sauce
: recouvrir avec une feuille de papier paraffiné pour éviter
la dilution par l’eau.
- Toujours sélectionner la durée de cuisson la plus courte.
Le poisson est cuit lorsque sa chair devient opaque et
qu’il est possible de séparer les couches de chair de la
partie la plus épaisse. Un crustacé est cuit lorsque la
couleur de sa carapace passe de rose à rouge et que sa
chair est opaque et ferme.
• Le tableau de cuisson ci-dessous présente des directives
spécifiques, avec durée de cuisson et puissance de
chauffage, pour la plupart des poissons et crustacés.
TABLEAU DE CUISSON POUR POISSONS ET CRUSTACÉS/MOLLUSQUES
POISSONS/
CRUSTACÉS
Filets de
poisson
Darnes de
poisson
Poisson entier
Pétoncles
Crevettes,
décortiquées
NIVEAU DE PUISSANCE DURÉE DE CUISSON DIRECTIVES
HI
(puissance élevée)
HI
7
HI
HI
31/2
1
4
4
3
31/2
/2
1
/2
1
/2
- 41/2
minutes
- 51/2
minutes
- 6 minutes
- 5 minutes
- 5 minutes
Répartir en une seule couche; placer la partie la plus
épaisse vers le bord externe d’un ustensile de 1,5 pinte
(1,5 litre) pour four à micro-ondes. Badigeonner avec du
beurre fondu et assaisonner au goût. Recouvrir avec une
feuille de plastique (avec évent). Après la cuisson, ajouter
une période d’attente de 2 minutes sous couvert. Pour la
cuisson d’une quantité de plus de 1 lb (0,45 kg), retourner
le poisson à mi-cuisson.
Répartir en une seule couche. Préparer selon les
instructions ci-dessus, mais remuer au lieu de retourner.
- 19 -

CUISSON
AMUSE-GUEULE/SAUCES/SOUPES
Cuisson des amuse-gueule : Conseils
et techniques
Recommandations :
• Les biscuits croustillants (toast melba, biscuits de blé en
filaments ou de seigle) conviennent le mieux pour
l’utilisation au four à micro-ondes. Attendre que les invités
soient présents avant d’ajouter les garnitures. Placer un
papier essuie-tout sous les biscuits pendant la cuisson
dans le four à micro-ondes pour l’absorption de l’excès
d’humidité.
• Répartir en cercle pour une cuisson uniforme.
• Remuer les trempettes pour répartir la chaleur et minimiser
la durée de cuisson.
Cuisson de sauces : Conseils et techniques
• Utiliser un ustensile pour four à micro-ondes, ou une tasse
à mesurer en verre dont le volume est 2 à 3 fois le volume
de la sauce.
• Une sauce à base de fécule de maïs épaissit plus
rapidement qu’une sauce préparée à base de farine.
• Cuire une sauce à base de fécule de maïs ou de farine
dans un récipient non couvert, pour pouvoir la remuer 2 ou
3 fois durant la période de cuisson, pour éviter la formation
de grumeaux.
• Pour adapter une recette de sauce classique, réduire
légèrement la quantité de liquide.
VIANDES
Cuisson des viandes :
Directives générales
• Préparation de la viande pour la cuisson :
- Décongeler complètement.
- Enlever l’excès de graisse pour éviter la formation
d’éclaboussures.
- Placer la pièce de viande sur une grille dans un récipient
pour four à micro-ondes, côté gras vers le bas.
- Utiliser un sachet de cuisson au four pour une pièce de
viande moins tendre.
- Orienter les morceaux de telle manière que les parties
épaisses soient vers l’extérieur du plat.
- Recouvrir avec du papier paraffiné qui retiendra les
éclaboussures.
• Surveiller la pièce de viande durant la cuisson.
- Drainer le jus à mesure qu'il apparaît pour minimiser les
projections et pour éviter une cuisson excessive de la
partie inférieure de la pièce de viande.
- Protéger avec de la feuille d'aluminium les parties minces
ou osseuses, pour éviter une cuisson excessive.
REMARQUE : Maintenir un espace de 1 po (2,5 cm) ou plus
entre les morceaux d'aluminium et les parois du four, et ne
jamais recouvrir plus de 1/3 du mets avec de la feuille
d'aluminium.
Cuisson des soupes : Conseils et techniques
• Pour éviter un débordement, particulièrement si la soupe
contient de la crème ou du lait, utiliser un récipient pour four
à micro-ondes dont le volume est le double de celui des
ingrédients de la recette.
• D'une manière générale, recouvrir avec un couvercle ou
une feuille de plastique (avec ÉVENT).
• Recouvrir pour retenir l’humidité. Ne pas recouvrir lorsqu’on
souhaite préserver l’aspect croustillant.
• Sélectionner la durée de cuisson minimum suggérée, pour
éviter un excès de cuisson. Augmenter la durée de cuisson
seulement après avoir évalué l’avancement de la cuisson
des aliments.
• Remuer occasionnellement pour répartir uniformément les
saveurs et la chaleur; ceci réduit également la durée de
cuisson nécessaire.
Lors de la conversion d’une recette de soupe conventionnelle
•
pour la cuisson au four à micro-ondes, réduire les quantités
de liquide, sel et épices fortes. Erreurs à éviter :
• Il est préférable d’employer la chaleur sèche d’un four
conventionnel pour les amuse-gueule croustillants ou
pâtisseries de pâte feuilletée.
• On peut réchauffer des produits panés au four à microondes, mais la panure ne sera pas croustillante.
- 20 -
• Après avoir retiré le plat du four, ajouter une période
d'attente de 10 à 15 minutes (le mets étant recouvert d'une
feuille d'aluminium). La température interne pourra encore
augmenter de 5 à 10 °F (3 à 5 °C) durant la période
d'attente.
Le tableau de cuisson (page suivante) présente des
directives spécifiques, avec durée de cuisson et puissance
de chauffage, pour la plupart des pièces de viande.

CUISSON
TABLEAU DE CUISSON DES VIANDES
VIANDE
NIVEAU DE DURÉE DE
PUISSANCE CUISSON DIRECTIVES
BOEUF
Hamburgers,
(puissance
frais ou décongelés
(4 oz /113 g chacun)
1 steakette
2 steakettes
4 steakettes
Rôti – pointe de
surlonge
(3 à 4 lb/1,4 à 1,8 kg)
AGNEAU
Rôti roulé, sans os
(3 à 4 lb/1,4 à 1,8 kg)
PORC
Tranches de bacon
2 tranches
4 tranches
6 tranches
10 tranches
Côtelettes (5 à 7 oz/
142 à 198 g, chacune)
2 côtelettes
4 côtelettes
Rôti de longe roulé,
sans os (3
4
1
1
/2
/2
lb/1,6 à 2,0 kg)
à
Saucisses, fraîches
ou surgelées,
décongelées
(1 à 2 oz/28 à 57 g
chacune)
2 saucisses
4 saucisses
6 saucisses
10 saucisses
HI
élevée)
5
5
HI
3
3
HI
1
2
1 - 1
1
1
/2
/2
1
/2
minutes
- 2 minutes
- 31/2
minutes
Former une dépression au centre de chaque steakette. Placer sur une
grille de rôtissage aux micro-ondes. Badigeonner avec un agent de
brunissage (le cas échéant). Recouvrir avec du papier paraffiné.
Retourner à mi-cuisson.
Ajouter une période d’attente d'1 minute, sous couvert.
8 - 10 minutes par lb
(0,45 kg)
SAIGNANT (135 °F/57 °C)
11 - 13 minutes par lb
(0,45 kg)
À POINT (155 °F/68 °C)
Placer le rôti sur une grille de rôtissage aux micro-ondes (côté gras vers
le bas). Assaisonner au goût et recouvrir avec du papier paraffiné.
Retourner la pièce de viande à mi-cuisson; si nécessaire, protéger les
parties qui s’échauffent plus rapidement. Retirer le rôti du four à microondes lorsque la température désirée est atteinte. Ajouter une période
d’attente de 15 minutes, le mets étant recouvert d'une feuille
d’aluminium (la température pourra augmenter d’environ 10 °F/5 °C).
11 - 12 minutes par lb
(0,45 kg)
SAIGNANT (135 °F/57 °C)
12 - 13 minutes par lb
(0,45 kg)
À POINT (145 °F/62 °C)
13 - 14 minutes par lb
(0,45 kg)
BIEN CUIT (155 °F/68 °C)
1
1
/2
- 2 minutes
2 - 3 minutes
4 - 5 minutes
7 - 8 minutes
Placer le rôti sur une grille de rôtissage aux micro-ondes (côté gras vers
le bas). Badigeonner avec la marinade ou assaisonner au goût
(romarin, thym, marjolaine). Recouvrir avec du papier paraffiné.
Retourner le rôti après 15 minutes de cuisson, puis de nouveau après
30 minutes de cuisson. Si nécessaire, protéger les parties qui
s’échauffent rapidement. Retirer le rôti du four à micro-ondes lorsque la
température désirée est atteinte. Ajouter une période d’attente de
15 minutes, le mets étant recouvert d'une feuille d’aluminium (la
température pourra augmenter d’environ 10 °F/5 °C).
Placer les tranches de bacon sur une grille de rôtissage aux microondes.
Recouvrir avec du papier essuie-tout.
Placer le plat de rôtissage pour micro-ondes sur la grille métallique du
four. Ajouter une période d’attente de 1 minute après la cuisson.
18 - 20 minutes par lb
(0,45 kg)
15 - 17 minutes par lb
(0,45 kg)
Placer les côtelettes dans un plat pour cuisson aux micro-ondes.
Assaisonner au goût et recouvrir avec une feuille de plastique (avec
évent). Cuire jusqu’à ce que la teinte rose disparaisse ou que la
température interne atteigne 170 °F (77 °C). Retourner les côtelettes à
mi-cuisson.
Ajouter une période d’attente de 5 minutes. (La température pourra
augmenter d’environ 10 °F/5 °C.)
25 - 27 minutes par lb
(0,45 kg)
(165 °F/74 °C)
Placer le rôti dans un sachet de cuisson, dans un ustensile pour four à
micro-ondes.
Assaisonner au goût et ajouter éventuellement un agent de brunissage.
Fermer le sac sans serrer. Ajouter une période d’attente de 15 minutes
dans le sachet après la cuisson (la température pourra augmenter
d’environ 10 °F/5 °C). La viande de porc doit atteindre une température
de 170 °F (77 °C) pour être servie.
45 - 60 secondes
1
1 - 1
/2
minutes
1
1
/2
- 2 minutes
3
1
/4
- 2 minutes
Percer la peau des saucisses avant de les placer sur une grille de
rôtissage aux micro-ondes. Recouvrir avec du papier paraffiné ou du
papier essuie-tout. Retourner à mi-cuisson. Après la cuisson, ajouter
une période d’attente d'1 minute, sous couvert.
- 21 -

CUISSON
VOLAILLE
Cuisson de volaille : Directives générales
• Préparation d’une volaille pour la cuisson :
- Décongeler complètement.
- Répartir les morceaux de volaille en plaçant les parties
épaisses vers l’extérieur du plat de cuisson. Pour la
cuisson de pattes, répartir les pattes comme les rayons
d’une roue.
- Recouvrir le plat de cuisson avec du papier paraffiné qui
retiendra les éclaboussures.
- Pour obtenir une apparence de brunissage, utiliser un
agent de brunissage, ou cuire avec une sauce.
• Surveiller le mets durant la cuisson.
- Retirer et jeter le jus qui s’accumule.
- Protéger les parties minces ou osseuses avec de la feuille
d’aluminium, pour éviter une cuisson excessive. Veiller à
ne pas approcher les morceaux de feuille d’aluminium à
TABLEAU DE CUISSON DE VOLAILLE
moins de 1 po (2,5 cm) des parois du four et d’autres
morceaux de feuille d’aluminium.
• La viande de volaille est cuite lorsque sa teinte n’est plus
rose et que le jus qui s’écoule est limpide. Après la cuisson,
la température de la viande au niveau des cuisses devrait
être de 180 à 185 °F (82 à 85 °C).
• Après la cuisson, ajouter une période d’attente de 10
minutes, sous une feuille d’aluminium.
Le tableau de cuisson ci-dessous présente des directives
spécifiques, avec durée de cuisson et puissance de
chauffage, pour la plupart des pièces de volaille.
VOLAILLE
Morceaux de poulet
1
(2
/2
à 3 lb/1,1 à
1,4 kg)
Poulet entier
1
/2
lb/1,4 à
(3 à 3
1,6 kg)
Poulets de
Cornouailles entiers
1
(1 à 1
/2
lb/0,45 à
0,7 kg, chacun)
PUISSANCE CUISSON DIRECTIVES
NIVEAU DE DURÉE DE
HI
(puissance
élevée)
HI
HI
1
/2
- 51/2
4
12 - 13 minutes
minutes
par lb (0,45 kg)
par lb (0,45 kg)
6 - 7 minutes
par lb (0,45 kg)
Avant la cuisson, rincer les morceaux et bien les égoutter. Placer les
morceaux en une seule couche dans un plat pour cuisson aux microondes; orienter les parties épaisses vers l’extérieur. Badigeonner avec
du beurre ou un agent de brunissage et assaisonner au goût. Recouvrir
avec du papier paraffiné. Poursuivre la cuisson jusqu’à ce que la chair
ne soit plus rose et que le jus qui s’écoule soit limpide. Ajouter une
période d’attente de 5 minutes, sous couvert.
Avant la cuisson, rincer à l’eau et bien égoutter. Placer l’oiseau sur une
grille de rôtissage aux micro-ondes, poitrine vers le bas. Badigeonner
avec du beurre ou un agent de brunissage et assaisonner au goût.
Recouvrir avec du papier paraffiné. Exécuter la cuisson pendant 1/3 de
la durée estimée. Retourner l’oiseau, poitrine vers le haut; badigeonner
avec du beurre ou un agent de brunissage. Recouvrir avec du papier
paraffiné. Poursuivre la cuisson durant 1/3 de la durée estimée. Si
nécessaire, protéger les parties qui cuisent plus rapidement. Poursuivre
la cuisson durant le 1/3 restant de la durée estimée, ou jusqu’à ce que la
chair ne soit plus rose et que le jus qui s’écoule soit limpide. Ajouter une
période d’attente de 10 minutes, sous une feuille d’aluminium (la
température pourra augmenter d’environ 10 °F/5 °C). En fin de cuisson,
la température dans une cuisse devrait atteindre 180 à 185 °F (82 à 85 °C).
Avant la cuisson, rincer à l’eau et bien égoutter. Attacher les ailes contre
le corps, et les pattes avec la queue. Placer les poulets sur une grille
pour cuisson à micro-ondes, poitrine vers le bas. Recouvrir avec du
papier paraffiné. Retourner les poulets, poitrine vers le haut, vers la micuisson. Protéger avec de la feuille d’aluminium les extrémités osseuses
des pilons. Enlever/jeter le jus qui s’écoule. Badigeonner avec du beurre
ou un agent de brunissage et assaisonner au goût. Poursuivre la
cuisson jusqu’à ce que la chair ne soit plus rose et que le jus qui
s’écoule soit limpide. Retirer les poulets du four lorsque la température
désirée est atteinte. Ajouter une période d’attente de 5 minutes, sous
une feuille d’aluminium (la température pourra augmenter d’environ
10 °F/5 °C). Les poitrines des poulets devraient atteindre une
température de 170 °F (77 °C) pour être servies.
- 22 -

CUISSON
PÂTES ET RIZ
La durée de cuisson nécessaire pour la cuisson de pâtes,
riz ou céréales est approximativement identique pour la
cuisson aux micro-ondes et pour la cuisson
conventionnelle, mais la cuisson au four à micro-ondes
est beaucoup plus pratique parce qu’on peut utiliser le
même plat pour la cuisson et le service. Il n’y a pas
besoin de remuer et le goût d’un reste de pâtes réchauffé
aux micro-ondes est tout aussi bon.
TABLEAU DE CUISSON DES PÂTES
NIVEAU DE DURÉE DE
PÂTES
Spaghettis
4 tasses (946 mL) d’eau
Ajouter 8 oz (227 g)
de spaghettis
Macaronis
3 tasses (710 mL) d’eau
Ajouter 2 tasses (473 mL)
de macaronis
Lasagnes
4 tasses (946 mL) d’eau
Ajouter 8 oz (227 g)
de lasagnes
Nouilles aux oeufs
6 tasses (1,4 L) d’eau
Ajouter 4 tasses (946 mL)
de nouilles
PUISSANCE CUISSON DIRECTIVES
Le cas échéant, ajouter la quantité de sel désirée à l’eau chaude du robinet.
HI (élevée)
5
HI
5
HI
5
HI
5
9 - 10 minutes
71/2 - 81/2 minutes
6 - 7 minutes
51/2 - 61/2 minutes
7 - 8 minutes
11 - 121/2 minutes
8 - 10 minutes
51/2 - 61/2 minutes
Utiliser un ustensile de 2 pintes (2 litres) pour cuisson au four à micro-ondes;
recouvrir avec une feuille de plastique (avec évent) pour les spaghettis et les
lasagnes. Utiliser un couvercle ou une feuille de plastique (avec évent) pour
micro-ondes, pour les macaronis et les nouilles aux oeufs.
Effectuer la cuisson selon les indications du tableau, ou jusqu’à l’ébullition de
l’eau.
Remuer les pâtes; effectuer la cuisson selon les indications du tableau, ou
jusqu’à ce que les pâtes soient tendres.
Égoutter dans une passoire.
Cuisson de pâtes ou riz : Conseils et techniques
• Lors de la cuisson d’une quantité de riz ou de
pâtes qu’on utilisera dans un mets en sauce,
sélectionner une durée de cuisson inférieure à la
durée minimum, pour que le produit demeure
ferme.
• Prévoir une période d’attente pour le riz, mais pas
pour les pâtes.
• Les tableaux ci-dessous présentent des directives
spécifiques, avec durée de cuisson et puissance
de chauffage, pour la plupart des mets à base de
pâtes et de riz.
TABLEAU DE CUISSON DU RIZ
NIVEAU DE DURÉE DE
RIZ
Grains longs
1
2
/4
tasses (533 mL) d’eau
Ajouter 1 tasse (237 mL) de riz
Riz brun
1
2
/2
tasses (593 mL) d’eau
Ajouter 1 tasse (237 mL) de riz
Mélange riz à grains
longs/riz sauvage
1
2
/3
tasses (552 mL) d’eau
Ajouter 1 paquet de
6 oz (170 g)
Riz à cuisson rapide
1 tasse (237 mL) d’eau
Ajouter 1 tasse (237 mL) de riz
PUISSANCE CUISSON DIRECTIVES
HI
3
HI
3
HI
3
HI
5 - 7 minutes
19 minutes
41/2 - 51/2 minutes
28 minutes
4 - 5 minutes
24 minutes
2 - 3 minutes
Le cas échéant, combiner le sel nécessaire avec l’eau chaude du
robinet, dans un récipient de 2 pintes (2 litres) pour cuisson aux
micro-ondes.
Recouvrir avec un couvercle ou une feuille de plastique (avec évent)
pour micro-ondes.
Effectuer la cuisson selon les indications du tableau ou jusqu’à
l’ébullition de l’eau.
Introduire le riz en remuant, et tout assaisonnement.
Cuire dans le récipient couvert selon les indications du tableau ou
jusqu’à ce que l’eau ait été absorbée et que le riz soit tendre.
Ajouter une période d’attente de 5 à 10 minutes dans le récipient
couvert.
Remuer avec une fourchette pour décoller les grains.
Faire chauffer l’eau jusqu’à l’ébullition.
Introduire le riz dans l’eau bouillante en remuant, et laisser reposer
5 à 10 minutes dans le récipient couvert ou jusqu’à ce que l’eau soit
absorbée et que le riz soit tendre. Remuer avec une fourchette.
- 23 -

ENTRETIEN
ĸ
ķ
ĸ
ķ
ENTRETIEN ET NETTOYAGE
Maintenez la cavité interne et la surface extérieure propres
afin de conserver au four à micro-ondes sa performance
initiale et ce, en toute sécurité. Faites particulièrement
attention de ne pas laisser la nourriture ni la graisse
s’accumuler sur le hublot de la porte interne ni sur le cadre
avant du four.
N’utilisez jamais de poudres ni de tampons à récurer.
Essuyez l’intérieur et l’extérieur du four à micro-ondes, ainsi
que le couvercle de la hotte, situé sous le four, à l’aide
d’une solution de nettoyage tiède (et non chaude) et peu
concentrée, ainsi qu’un chiffon doux. Ensuite, rinsez et
essuyez. Servez-vous d’un nettoyeur et d’un poli pour le
chrome afin de nettoyer les surfaces de métal, chrome et
aluminium. Essuyez immédiatement les éclaboussures
avec un essuie-tout, surtout après avoir cuit du poulet ou du
bacon. Nettoyez votre four une fois par semaine ou plus si
nécessaire.
LA GRILLE DE MÉTAL
Utilisez une solution de nettoyage douce pour nettoyer la
grille et frottez-la avec un tampon à récurer en nylon.
Asséchez-la complètement.
N’utilisez pas de tampons de récurage ni de solvants (de
type aérosol) abrasifs.
NETTOYER LES FILTRES POUR LA
GRAISSE
Retirez les filtres à mailles de
fer pour la graisse situés sur le
couvercle de la hotte, sous le
four: lavez-les dans l’évier au
moins une fois par mois.
1. Pour retirer les filtres à
graisse,faites glisser chacun
d’eux sur le côté, puis tirez
les filtres vers le bas. Le filtre
tombe alors.
2. Faites tremper les filtres
dans l’eau chaude et une
solution de nettoyage douce.
Rincez et secouez pour les
assécher. N’utilisez pas
d’ammoniaque pour
nettoyer un filtre à mailles
d’aluminium et ne le lavez
pas au lave-vaisselle.
L’aluminium ternira.
ĸ
3. Pour réinstaller les filtres,
glissez-les dans leur emplacement
sur le côté, puis poussez-les
vers le haut et vers l’avant
pour les verrouiller.
REMARQUE : ne faites pas fonctionner la hotte sans
que les filtres ne soient en place.
REMPLACEMENT DU FILTRE AU
CHARBON
Si votre four est ventilé vers l’intérieur, vous devriez
remplacer le filtre au charbon à tous les 6 à 12 mois, même
plus souvent si nécessaire. Le filtre au charbon ne peut
être nettoyé.
1. Retirez les deux vis de montage de la grille de ventilation
(les deux vis du milieu).
2. Penchez la grille vers l’avant, puis retirez-la à l’extérieur.
3. Retirez le vieux filtre.
Hook
4. Mettez un nouveau filtre en place. Le filtre devrait être
appuyé selon l’angle illustré ci-dessous.
5. Glissez le fond du couvercle de ventilation en place.
Poussez sur le dessus jusqu’à ce qu’il soit solidement en
place. Vissez les vis de montage. Remettez la tension
de la source d’alimentation principale en circuit.
- 24 -

ENTRETIEN
REMPLACEMENT DE LA
LUMIÈRE/VEILLEUSE DE LA HOTTE
1. Débranchez l’alimentation à partir du panneau électrique
ou débranchez le cordon d’alimentation.
2. Retirez les vis du couvercle de la lumière de la hotte.
3. Dévissez l’ampoule (ou les ampoules) brûlée(s) et
remplacez-la (les) avec une (des) ampoule(s) de 30
watts.
4. Replacez le couvercle de la lumière de la hotte.
5. Remettez l’alimentation en circuit.
REMPLACEMENT DE L’AMPOULE DE LA
CAVITÉ INTERNE DU FOUR
1. Débranchez l’alimentation à partir du panneau électrique
ou débranchez le cordon d’alimentation.
2. Dévissez les vis de montage du couvercle de ventilation
(les deux vis du milieu).
3. Penchez le couvercle vers l’avant, puis sortez-le en le
soulevant.
4. Soulevez le support de l’ampoule.
5. Remplacez avec une ampoule pour appareils
électroménagers de 30 ou 40 watts.
6. Replacez le support de l’ampoule et vissez la vis de
montage.
7. Glissez le dessus du couvercle de ventilation en place.
Poussez-le par le fond jusqu’à ce qu’il soit fixé en
position. Vissez les vis de montage. Remettez
l’alimentation en circuit à la source.
QUESTIONS ET RÉPONSES
Q. Puis-je utiliser une grille pour réchauffer ou cuire sur
deux niveaux à la fois dans mon four à micro-ondes?
R. N’utilisez que la grille fournie avec votre four à micro-ondes.
L’utilisation de toute autre grille pourrait diminuer la
performance de la cuisson et même produire un amorçage
d’arc (étincelles), ce qui endommagerait votre four.
Q. Puis-je utiliser des plats de métal ou d’aluminium dans
mon four à micro-ondes?
A. Le seul métal que l’on puisse utiliser parcimonieusement dans
le four est le papier d’aluminium; on s’en sert pour protéger
(n’utilisez que des petits morceaux plats). On peut aussi se
servir de plats d’aluminium peu profonds (leur profondeur ne
doit pas excéder 3/4 po. et ils doivent être remplis de nourriture
afin d’absorber l’énergie des micro-ondes). Ne laissez jamais
le métal toucher à la cavité interne ni à la porte du four.
Q. Parfois la porte du four semble ondulée; est-ce normal?
A. Cette impression est normale et n’affecte en rien le
fonctionnement du four.
Q. Quels sont les bourdonnements que j’entends pendant
que mon four fonctionne?
A. Vous entendez le bruit du transformateur lorsque le tube
magnétron change de cycle.
Q. Pourquoi mon assiette devient-elle chaude lorsque je fais
cuire de la nourriture dedans? Je croyais que cela n’était
pas censé se produire.
A. Tandis que la nourriture devient chaude, elle transmet sa
chaleur à l’assiette. Utilisez simplement des mitaines à four
pour retirer la nourriture après la cuisson.
Q. Que signifie le “temps de repos”?
A. Le “temps de repos” signifie qu’après la cuisson, la nourriture
doit être sortie et recouverte pendant un certain temps, ce qui
permet de terminer la cuisson. Ceci économise l’électricité et
libère le four pour une autre utilisation.
Q. Est-ce que je peux faire éclater du maïs soufflé dans mon
four à micro-ondes? Comment puis-je obtenir les
meilleurs résultats?
A. Oui. Utilisez des emballages commerciaux de maïs à éclater
et suivez les directives du fabricant ou servez-vous de la
touche programmée “POPCORN”. N’utilisez pas de sacs de
papier ordinaires. Faites le “test de l’écoute” et arrêtez le four
dès que l’éclatement des grains est à toutes les une ou deux
secondes. N’essayez pas de faire éclater les grains qui n’ont
pas éclaté la première fois. Vous pouvez également utiliser
des contenants conçus spécialement pour faire éclater les
grains de maïs. Si vous optez pour cette solution, assurezvous de bien suivre les directives du fabricant du contenant.
Ne faites pas éclater du maïs dans des plats en verre.
Q. Pourquoi y a-t-il de la vapeur qui sort du conduit
d’évacuation de l’air?
A. Il est normal que la cuisson produise de la vapeur. Votre four à
micro-ondes a été conçu pour laisser s’échapper la vapeur par
le conduit de ventilation supérieur.
- 25 -

ENTRETIEN
Vous pouvez utiliser d’avantage de plats dans votre four à micro-ondes que sur une cuisinière ou dans un four conventionnel
car les micro-ondes les pénètrent en toute sécurité, tout en cuisant les aliments.
Voici une liste des plats dont vous pouvez vous servir sans danger et ceux que vous devez éviter. Afin de vérifier si un plat qui
ne se trouve pas dans la liste ci-dessous peut être utilisé en toute sécurité, faites ce qui suit :
1. Déposez le plat vide dans le four à micro-ondes.
2. Mettez 1 tasse d’eau dans une tasse à mesurer en pyrex et placez-la à côté du plat, dans le four.
3. Mettez le four en marche à la puissance maximale (HI) pendant 1 minute.
4. Si, une fois la minute écoulée, vous touchez au plat et qu’il est tiède, cela signifie que vous ne devriez pas l’cuisson au
micro-ondes car il absorbe trop les micro-ondes.
GUIDE DES PLATS À L’ÉPREUVE DES MICRO-ONDES
À UTILISER À NE PAS UTILISER
LE VERRE À L’ÉPREUVE DES MICROONDES : (traité pour des chaleurs
intenses) : plats de service fonctionnels,
assiettes à pain, assiettes à tarte et à
gâteau, tasses à mesurer le liquide,
cocottes et bols qui ne possèdent pas de
rebords métalliques.
LA PORCELAINE :
bols, tasses, assiettes de service et plats
ne comportant pas de rebords métalliques.
LE PLASTIQUE :
les pellicules de plastique (servant à
recouvrir) - déposez la pellicule sur le plat
sans serrer et faites-la adhérer au plat.
Laissez la vapeur s’échapper en retournant
légèrement un coin. Le plat devrait être
suffisamment creux afin que la pellicule ne
touche pas à la nourriture. En chauffant , il
se peut que la pellicule fonde là où elle
touche aux aliments. N’utilisez que des
plats et tasses de plastique ainsi que des
contenants semi-rigides pour le
congélateur et des sacs de plastique pour
une période de cuisson brève. Utilisez
ces plats parcimonieusement car la
chaleur des aliments peut amollir le
plastique.
LE PAPIER :
les essuie-tout, le papier ciré, les serviettes
et assiettes en papier ne comportant pas
de rebord ni de dessin en métal.
Recherchez l’étiquette du fabricant pour
vous assurer qu’ils sont à l’épreuve des
micro-ondes.
LES PLATS DE MÉTAL :
le métal isole la nourriture des micro-ondes, ce qui produit une cuisson
inégale. Évitez d’utiliser des broches de métal, thermomètres ou
plateaux d’aluminium. Les plats de métal peuvent provoquer un
amorçage d’arc et endommager votre four à micro-ondes.
LES DÉCORATIONS DE MÉTAL :
toutes les assiettes et plats de cuisson avec rebords de métal. La
bordure métallique altère la cuisson et peut endommager le four.
LE PAPIER D’ALUMINIUM :
évitez d’utiliser de grandes feuilles d’aluminium car elles empêchent la
cuisson et peuvent même causer un amorçage d’arc dangereux.
Servez-vous de petits morceaux d’aluminium afin de protéger les
cuisses et les ailes du poulet. Assurez-vous de tenir TOUT papier
d’aluminium à une distance minimale d’un pouce des parois internes et
de la porte du four.
LE BOIS :
les bols et les planches de bois sécheront et peuvent craquer
lorsqu’utilisés au four à micro-ondes. Les paniers réagissent de la
même façon.
LES PLATS REFERMÉS :
laissez toujours une ouverture afin de laisser la vapeur s’échapper.
Percez les sacs de plastique des légumes avant de procéder à la
cuisson. Les plats fermés peuvent exploser.
LE PAPIER BRUN :
évitez d’utiliser des sacs de papier brun car ils absorbent trop de
chaleur et pourraient brûler.
PLATS FÊLÉS OU ÉBRÉCHÉS :
les plats craqués, fêlés ou ébréchés peuvent briser à l’intérieur du four.
ATTACHES AVEC FIL DE MÉTAL:
retirez ce type d’attaches des sacs en plastique ou en papier car ils
deviennent très chauds et peuvent être la cause d’un incendie.
- 26 -

AVANT DE PLACER UN APPEL DE SERVICE
Consultez la liste suivante afin de vérifier si vous avez
vraiment besoin de faire appel à un technicien. Avant de
placer un appel de service, référez-vous à votre guide
d’utilisation, en particulier aux sections concernant votre
problème particulier.
Aucune des fonctions du four à micro-ondes ne se
mettent en marche:
• Vérifiez s’il n’y a pas un fusible sauté ou un disjoncteur
hors circuit.
• Vérifiez si le four est bien branché à la source d’électricité
de la maison.
• Vérifiez si les commandes sont bien ajustées.
Si l’ampoule interne ne s’allume pas:
• L’ampoule n’est pas bien vissée ou elle est défectueuse.
Si le four ne cuit pas:
• Vérifiez si le panneau des commandes a été bien
programmé.
• Vérifiez si la porte est bien fermée.
• Assurez-vous d’avoir appuyé sur la touche de départ
“START/ENTER”.
• Assurez-vous que la sonde thermique a été correctement
insérée dans la douille.
• Assurez-vous de ne pas avoir parti la minuterie au lieu
d’une fonction de cuisson.
Si le four prend trop de temps (ou pas assez) à cuire:
• Vérifiez si vous avez choisi la bonne intensité de
puissance.
Si l’horloge ne garde pas bien son heure:
• Vérifiez si la fiche d’alimentation est bien enfoncée dans la
prise de courant.
• Assurez-vous que le four est le seul appareil électrique sur
le circuit.
Si la cuisson des aliments est inégale:
• Assurez-vous de disposer les aliments de façon uniforme.
• Les aliments étaient-ils complètement décongelés avant la
cuisson?
• Vérifiez le placement des morceaux d’aluminium utilisés
pour empêcher certaines parties de trop cuire.
Si les aliments ne sont pas assez cuits:
• Vérifiez la recette pour voir si vous avez bien suivi toutes
les instructions (quantités, durées & niveaux de
puissance).
• Assurez-vous que le four soit sur un circuit électrique
indépendant.
• Les aliments étaient-ils complètement décongelés avant la
cuisson?
Les aliments sont trop cuits:
• Vérifiez la recette pour voir si vous avez bien suivi toutes
les instructions (quantités, durées, dimensions des plats &
niveaux de puissance).
S’il se produit un amorçage d’arc (étincelles):
• Assurez-vous d’utiliser des plats de cuisson conçus pour
la cuisson au micro-ondes.
• N’utilisez jamais d’attaches avec fil de métal.
• Ne faites jamais fonctionner le four quand il est vide.
• Si vous cuisez avec la grille de métal, assurez-vous de
bien l’utiliser et qu’elle soit installée sur ses quatre
supports.
Si l’affichage indique que la minuterie effectue son
compte à rebours mais le four ne cuit pas:
• Assurez-vous que la porte soit bien fermée.
• Vérifiez si vous n’avez pas activé la minuterie à la place
d’une fonction de cuisson.
- 27 -

AVANT DE PLACER UN APPEL DE SERVICE
Vous pouvez fréquemment régler le problème vous-même. Si votre four à micro-ondes ne fonctionne pas adéquatement,
identifiez la nature du problème en vous référant à la liste ci-dessous et appliquez les solutions indiquées.
Si votre four à micro-ondes ne donne pas encore son plein rendement, contactez le centre de service autorisé de le plus près
de chez-vous; nos techniciens peuvent faire face à toute situation.
PROBLÈME SOLUTION
Le four à micro-onde ne se met pas Le fil d’alimentation est-il branché?
en marche La porte est-elle fermée?
Le minutage de la cuisson n’est pas sélectionné.
La température n’est pas réglée ou la sonde n’est pas branchée.
Amorçage d’arc (étincelles) Utilisez des plats de cuisson conçus pour la cuisson au micro-ondes.
La sonde n’est pas insérée au bon endroit.
Ne faites pas fonctionner le four lorsqu’il est vide.
Heure du jour incorrecte Reprogrammez la bonne heure.
Le voyant lumineux de la La sonde n’est pas branchée correctement?
sonde clignote
Cuisson inégale des aliments Utilisez les plats de cuisson recommandés.
Retournez ou brassez les aliments.
Les aliments n’étaient pas complètement décongelés.
Aliments trop cuits La sonde n’est pas insérée au bon endroit.
Le niveau de puissance et le minutage de la cuisson n’étaient pas réglés
correctement.
Le réglage thermométrique de cuisson n’est pas le bon.
Aliments pas assez cuits Utilisez les plats de cuisson recommandés.
La sonde n’est pas insérée au bon endroit.
Les aliments n’étaient pas complètement décongelés.
Le niveau de puissance et le minutage de la cuisson n’étaient pas
réglés correctement.
Le réglage thermométrique de cuisson n’est pas le bon.
Les ouvertures de ventilation sont obstruées.
Décongelation incorrecte Utilisez les plats de cuisson recommandés.
Retournez ou brassez les aliments.
Le niveau de puissance et le minutage de la cuisson n’étaient pas
réglés correctement.
La lumière du four ne s’allume pas Le cordon d’alimentation est-il branché?
La porte est-elle fermée?
Le minutage est-il sélectionné
L’ampoule est-elle brûlée?
- 28 -

- 29 -

 Loading...