

LG LKAEH098 INSTALLATION MANUAL
1
ENGLISH ESPAÑOL
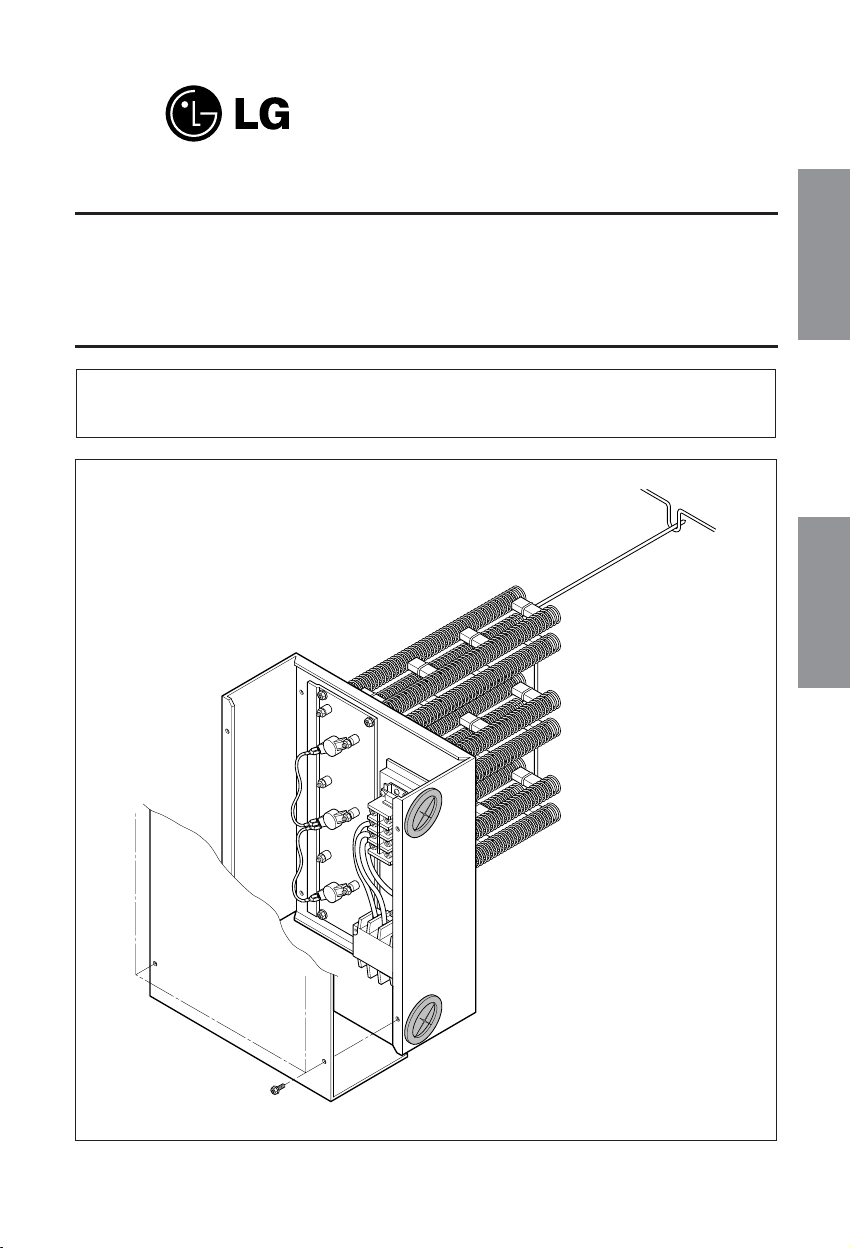
ELECTRIC HEATERS
INSTALLATION INSTRUCTIONS
Models: LKAEH098, LKAEH188, LKAEH368, LKAEH368L
• Please read this instruction sheet completely before installing the product.
• Installation work must be performed in accordance with national wiring standards by authorized
personnel only.
P/No.: 3828A30038F
2
Table 1 Accessory Heaters Electrical Data
Ton
6.25/7.5RT
8.5/10/12.5RT
15/17.5RT
20/25RT
Heater
Model No.
Heater
KW Rating
Control
Stages
26.0/27.2
37.5/39.5
60.5/64.5
42.0/43.2
53.5/55.5
76.5/80.5
79.4/95.3
100.2/120.3
108.6/130.4
380-415/50/3
380-415/50/3
380-415/50/3
380-415/50/3
380-415/50/3
380-415/50/3
380-415/50/3
380-415/50/3
380-415/50/3
LKAEH098
LKAEH188
LKAEH368
LKAEH098
LKAEH188
LKAEH368
LKAEH188
LKAEH368
LKAEH368L
7.5/9.0
15.1/18.0
30.2/36.0
7.5/9.0
15.1/18.0
30.2/36.0
15.1/18.0
30.2/36.0
30.2/36.0
1
1
2
1
1
2
1
2
2
60/60
60/60
80/80
60/60
70/70
100/100
125/125
150/150
150/150
60/60
60/60
80/80
60/60
70/70
100/100
125/125
150/150
150/150
31.0/32.2
42.5/44.5
65.5/69.5
47.0/48.2
58.5/60.5
81.5/85.5
85.4/101.3
106.2/126.3
114.6/136.4
60/60
60/60
80/80
60/60
80/80
100/100
125/125
150/150
150/150
60/60
60/60
80/80
60/60
80/80
100/100
125/125
150/150
150/150
Heater
Rated Volts
Standard indoor fan motor
M.C.A M.C.AM.F.S M.F.SM.C.B M.C.B
Oversized indoor motor
Note: Heater KW ratings are at 380/415V for 380/415V unit.
M.C.A; Minimum Circuit Ampere
M.F.S; Maximum Fuse Size
M.C.B; Maximum Circuit Breaker
* HACR type Circuit Breaker per NEC.
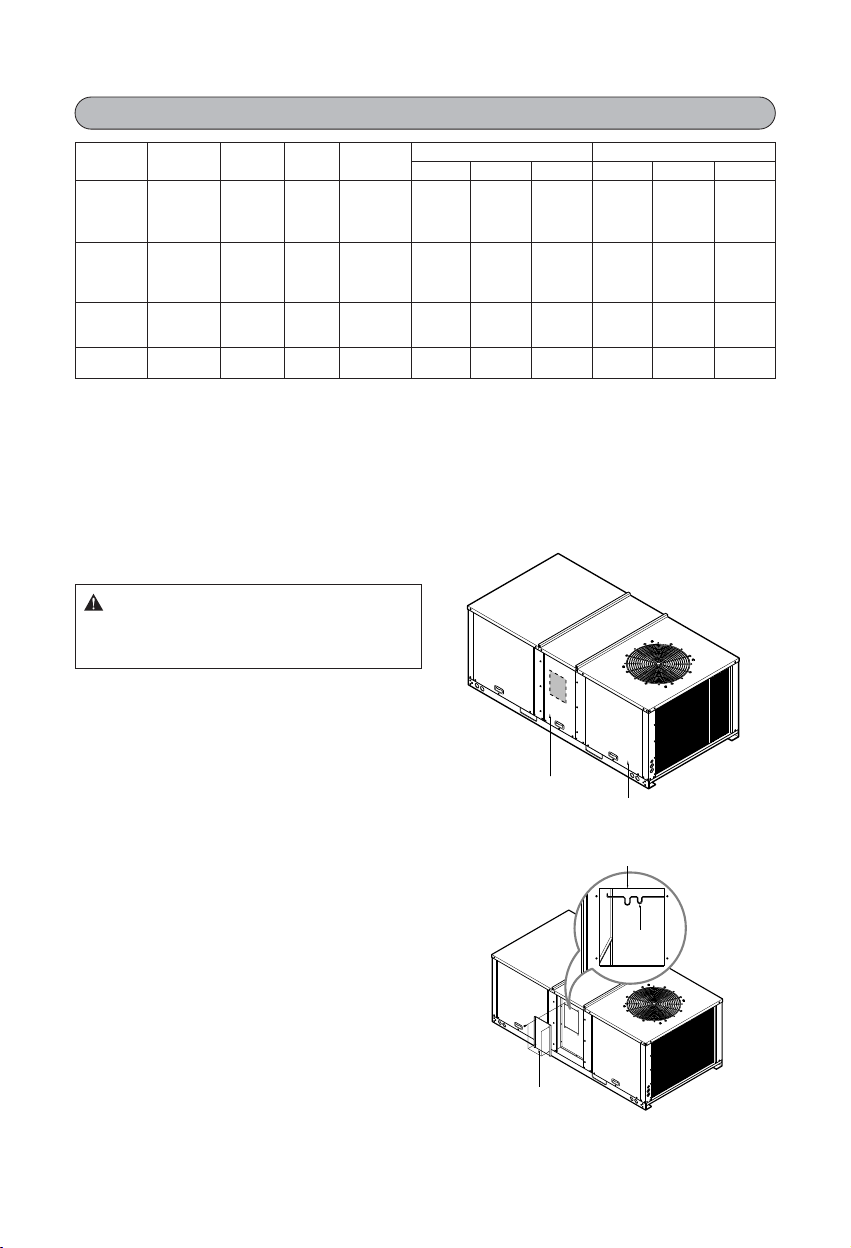
Installation
1. Loosen the screw that secures heater
compartment access panel. Lift up, pull
towards you and slide it down to remove.
2. Remove four(4) screws from block off panel
to expose heater cavity and heaterʼs back
support bracket. Save screws for installing
heater later.(See Figure 2.)
Heater Access Panel
Compressor Access Panel
Figure 1
Figure 2
: Open and lock unit disconnect
switch before installing this accessory to prevent
injury or death due to electrical shock or contact
with moving parts.
WARNING
Support
Bracket
Block off panel
Heater Cavity
 Loading...