

LG LHD427B Owner’s Manual

OWNER’S MANUAL
DVD Home
Theater
System
Please read this manual carefully before operating
your set and retain it for future reference.
MODEL
LHD427B (LHD427B, S47S3-S, S47S3-W)
*mfl00000000*
www.lg.com
Getting Started2
Safety Information
1
Getting Started
CAUTION: TO REDUCE THE RISK OF ELECTRIC
SHOCK DO NOT REMOVE COVER (OR BACK)
NO USER-SERVICEABLE PARTS INSIDE REFER
SERVICING TO QUALIFIED SERVICE PERSONNEL.
WARNING: TO PREVENT FIRE OR ELECTRIC SHOCK
HAZARD, DO NOT EXPOSE THIS PRODUCT TO RAIN
OR MOISTURE.
CAUTION: The apparatus should not be exposed to
water (dripping or splashing) and no objects lled
with liquids, such as vases, should be placed on the
apparatus.
WARNING: Do not install this equipment in a
conned space such as a book case or similar unit.
CAUTION: Do not use high voltage products around
this product. (ex. Electrical swatter) This product may
malfunction due to electrical shock.
CAUTION: Do not block any ventilation openings.
Install in accordance with the manufacturer’s
instructions.
Slots and openings in the cabinet are provided
for ventilation and to ensure reliable operation of
the product and to protect it from over heating.
The openings shall be never be blocked by placing
the product on a bed, sofa, rug or other similar
surface. This product shall not be placed in a builtin installation such as a bookcase or rack unless
proper ventilation is provided or the manufacturer’s
instruction has been adhered to.
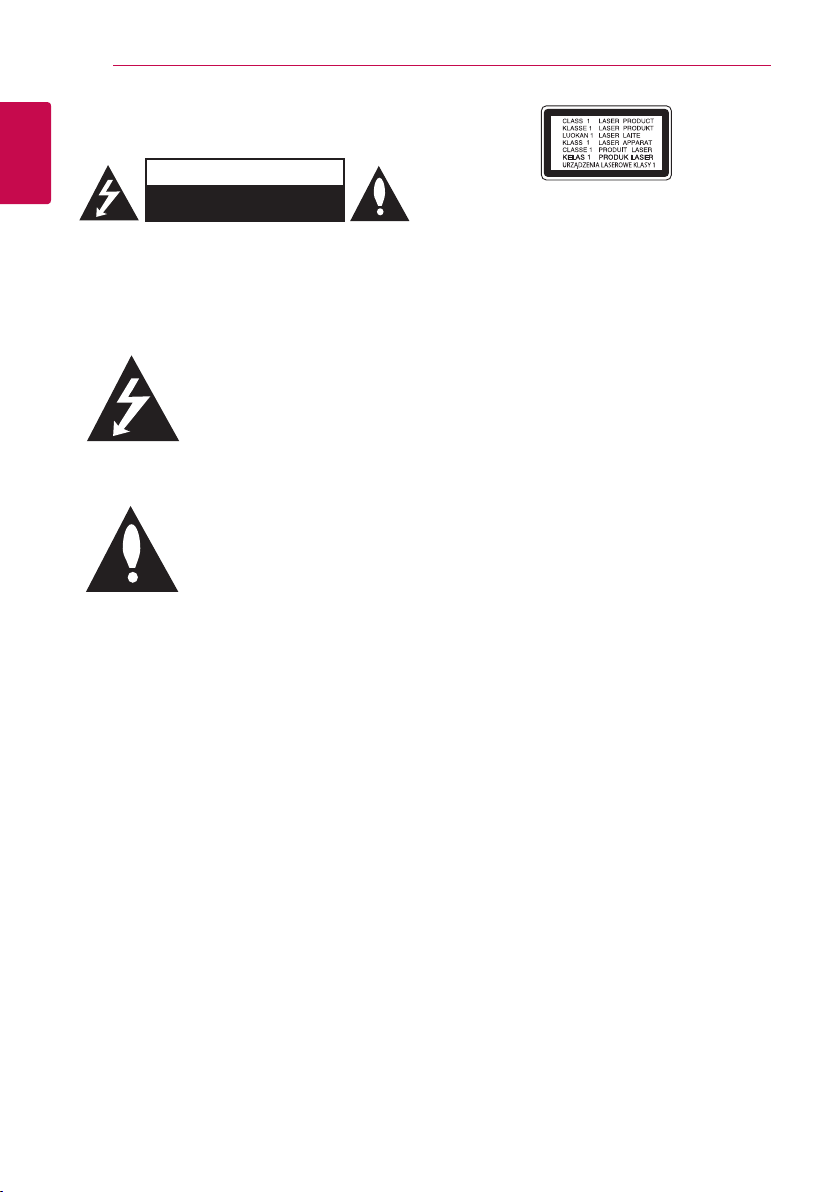
CAUTION
RISK OF ELECTRIC SHOCK
DO NOT OPEN
This lightning ash with arrowhead
symbol within an equilateral triangle
is intended to alert the user to the
presence of uninsulated dangerous
voltage within the product’s
enclosure that may be of sufcient
magnitude to constitute a risk of
electric shock to persons.
The exclamation point within an
equilateral triangle is intended
to alert the user to the presence
of important operating and
maintenance (servicing)
instructions in the literature
accompanying the product.
CAUTION: This product employs a Laser System.
To ensure proper use of this product, please read
this owner’s manual carefully and retain it for future
reference. Shall the unit require maintenance, contact
an authorized service center.
Use of controls, adjustments or the performance of
procedures other than those specied herein may
result in hazardous radiation exposure.
To prevent direct exposure to laser beam, do not try
to open the enclosure.
CAUTION concerning the Power Cord
Most appliances recommend they be placed upon a
dedicated circuit;
That is, a single outlet circuit which powers only
that appliance and has no additional outlets or
branch circuits. Check the specication page of this
owner’s manual to be certain. Do not overload wall
outlets. Overloaded wall outlets, loose or damaged
wall outlets, extension cords, frayed power cords, or
damaged or cracked wire insulation are dangerous.
Any of these conditions could result in electric
shock or re. Periodically examine the cord of your
appliance, and if its appearance indicates damage
or deterioration, unplug it, discontinue use of the
appliance, and have the cord replaced with an exact
replacement part by an authorized service center.
Protect the power cord from physical or mechanical
abuse, such as being twisted, kinked, pinched, closed
in a door, or walked upon. Pay particular attention to
plugs, wall outlets, and the point where the cord exits
the appliance. The Power Plug is the disconnecting
device. In case of an emergency, the Power Plug must
remain readily accessible.
This device is equipped with a portable battery or
accumulator.
Safety way to remove the battery or the battery
from the equipment: Remove the old battery or
battery pack, follow the steps in reverse order than
the assembly. To prevent contamination of the
environment and bring on possible threat to human
and animal health, the old battery or the battery
put it in the appropriate container at designated
collection points. Do not dispose of batteries or
battery together with other waste. It is recommended
that you use local, free reimbursement systems
batteries and accumulators. The battery shall not be
exposed to excessive heat such as sunshine, re or
the like.
NOTICE: For safety marking information including
product identication and supply ratings, please refer
to the main label on the bottom or the other surface
of the product.
Caution: No naked ame sources, such as lighted
candles, should be placed on the apparatus.
Symbols
~ Refers to alternating current(AC).
Refers to direct current(DC).
0
Refers to class II equipment.
Getting Started 3
1
Getting Started
Refers to stand-by.
1
Refers to “ON” (power).
!
Refers to dangerous voltage.

Table of Contents4
Table of Contents
1 Getting Started
2 Safety Information
6 Unique Features
6 – Portable In
6 – USB Direct Recording
6 – Full HD up-scaling
6 – Bluetooth®
7 Introduction
7 – Playable Discs
7 – About the “7” Symbol Display
7 – Symbols Used in this Manual
7 – Regional Codes
8 Playable file Requirement
9 Remote control
10 Front panel
11 Rear panel
2 Connecting
12 Attaching the speakers to the unit
13 Positioning the system
14 Connections to Your TV
14 – HDMI Out Connection
15 – Video Connection
16 – Resolution Setting
16 Video Output Resolution
16 Optional Equipment Connection
16 – AUX (L/R) INPUT Connection
17 – PORT. IN (Portable Input) Connection
17 – Listening to music from your portable player
or external device
17 – USB Connection
18 Antenna Connection
3 System Setting
19 Adjust the setup settings
19 – OSD Initial language settings - Optional
19 – To display and exit the Setup menu
20 – Language
20 – Display
21 – Audio
22 – Lock (Parental Control)
4 Operating
23 Using the Home Menu
23 Basic Operations
24 Other Operations
24 – Displaying Disc Information on-screen
24 – To display the DVD Menu
24 – To display the DVD title
24 – 1.5 times speed playback
24 – Screen Saver
24 – Starting play from selected time
24 – Resume playback
25 – Changing subtitle code page
25 – Marked Playback
26 – Viewing a PHOTO file
27 – Sleep Timer Setting
27 – Dimmer
27 – Turn off the sound temporarily
27 – Last Scene Memory
27 – Power Resume - Optional
27 – System Select - Optional
27 – Adjust the speaker level settings
27 – VOCAL FADER
27 – Auto power down
27 – How to disconnect the wireless network
connection or the wireless device.
28 Radio Operations
28 – Listening to the radio
28 – Presetting the Radio Stations
28 – Deleting all the saved stations
28 – Deleting a saved station
28 – Improving poor FM reception
29 Sound adjustment
29 – Setting the surround mode
29 – Setting the USER EQ
30 Advanced Operations
30 – Recording to USB
31 Using a Bluetooth wireless technology
31 – Listening to music of a Bluetooth device
33 Auto function change
34 AUTO POWER On

5 Troubleshooting
35 Troubleshooting
Table of Contents 5
6 Appendix
36 Maintenance
36 – Handling the Unit
36 – Notes on Discs
37 Area Code List
38 Language code List
39 Trademarks and Licenses
40 Specifications
1
2
3
4
5
6

Getting Started6
Unique Features
Portable In
1
Getting Started
Listen to music from your portable device. (MP3,
Notebook, etc.)
USB Direct Recording
Records music from CD to your USB device.
Full HD up-scaling
Views Full HD picture quality with simple setup.
Bluetooth®
Listens to music stored on your bluetooth device.
Getting Started 7
Introduction
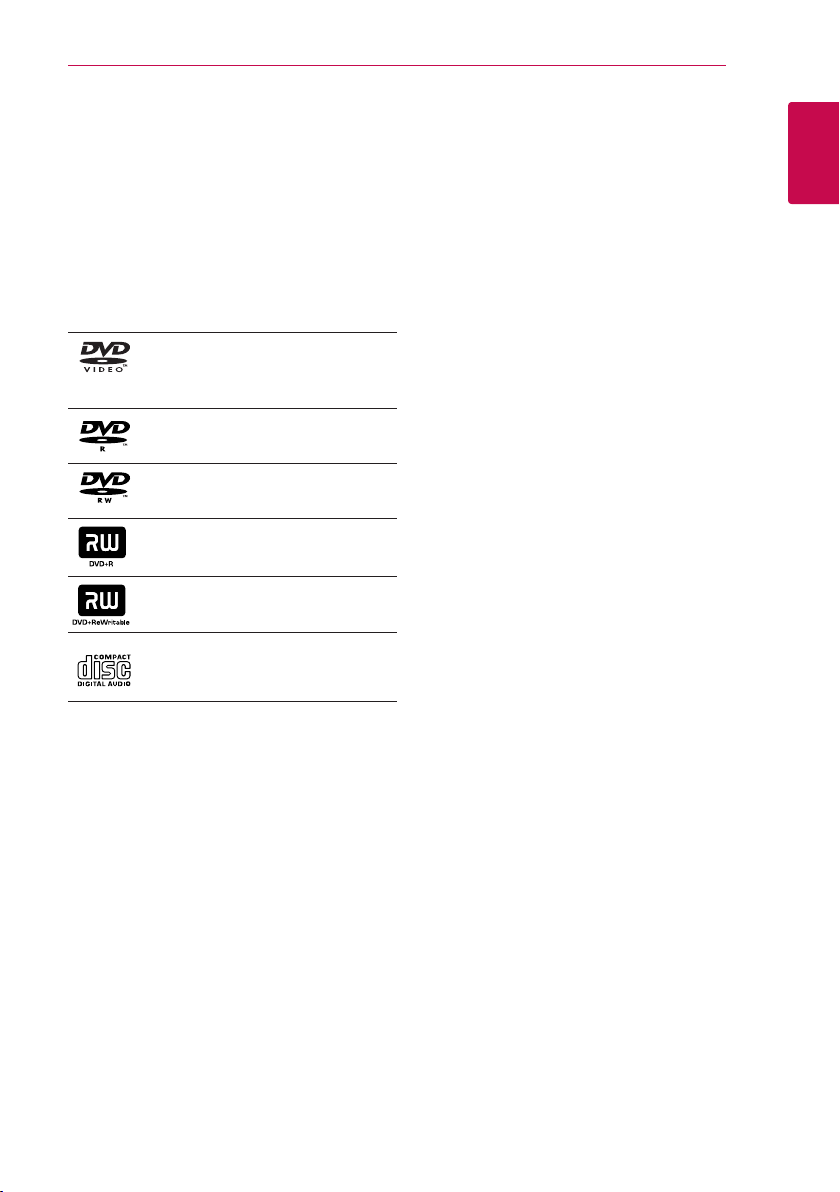
Playable Discs
This unit plays DVD±R/RW and CD-R/RW that
contains audio titles, MP3, WMA and/or JPEG les.
Some DVD±RW/DVD±R or CD-RW/CD-R cannot
be played on this unit due to the recording quality or
physical condition of the disc, or the characteristics of
the recording device and authoring software.
DVD-VIDEO (8 cm/12 cm disc)
Discs such as movies that can be
purchased or rented.
DVD±R (8 cm/12 cm disc)
Video mode and nalized only.
DVD-RW (8 cm/12 cm disc)
Video mode and nalized only.
DVD+R: Video mode only
Supports the double layer disc also.
DVD+RW (8 cm/12 cm disc)
Video mode and nalized only.
Audio CD: Music CDs or CD-R/CDRW in music CD format that can be
purchased.
About the “7” Symbol Display
“7” may appear on your TV display during operation
and indicates that the function explained in this
owner’s manual is not available on that specic
media.
Symbols Used in this Manual
r
t
y
u
i
Note
,
Indicates special notes and operating features.
Tip
,
Indicates tip and hints for making the task easier.
Caution
>
Indicates cautions for preventing possible damages
from abuse.
DVD-Video, DVD±R/RW in Video
mode or VR mode and nalized
Audio CDs
Video les contained in the USB/
Disc
Audio les contained in the USB/
Disc
Photo les contained in the USB/
Disc
Regional Codes
This unit has a regional code printed on the rear of
the unit. This unit can play only DVD discs labeled
same as the rear of the unit or “ALL”.
yMost DVD discs have a globe with one or more
numbers in it clearly visible on the cover. This
number must match your unit’s regional code or
the disc cannot play.
yIf you try to play a DVD with a different regional
code from your unit, the message “Check Regional
Code” appears on the TV screen.
1
Getting Started

Getting Started8
Playable file Requirement
1
Getting Started
Music file requirement
MP3/ WMA le compatibility with this unit is limited
as follows :
ySampling frequency : within 32 to 48 kHz (MP3),
within 32 to 48 kHz (WMA)
yBit rate : within 32 to 320 kbps (MP3),
40 to 192 kbps (WMA)
ySupport Version : v2, v7, v8, v9
yMaximum les : Under 999
yFile extensions : “.mp3”/ “.wma”
yCD-ROM le format : ISO9660/ JOLIET
yWe recommend that you use Easy-CD Creator,
which creates an ISO9660 le system.
yYou have to set the disc format option to
[Mastered] in order to make the discs compatible
with the LG players when formatting rewritable
discs. When setting the option to Live File System,
you cannot use it on LG players.(Mastered/ Live
File System : Disc format system for Windows
Vista)
The DTS is not supported. In case of DTS audio
format, audio is not output.
Photo file requirement
Photo le compatibility with this unit is limited as
follows :
yMax pixel in width : 2760 x 2048 pixel
yMaximum les : Under 999
ySome discs may not operate due to a different
recording format or the condition of disc.
yFile extensions: “.jpg”
yCD-ROM le format : ISO9660/ JOLIET
Video file requirement
Video le compatibility with this unit is limited as
follows:
yAvailable resolution: within 720 x 576 (W x H)
pixels.
yThe le name of the Video subtitle should be
entered within 45 characters.
yIf there is impossible code to express in the Video
le, it may be displayed as “ _ “ mark on the display.
yFrame rate : less than 30 fps.
yIf the video and audio structure of recorded les is
not interleaved, either video or audio is outputted.
yPlayable Video le : “.avi”, “.mpg”, “.mpeg”
yPlayable Subtitle format : SubRip (*.srt/ *.txt),
SAMI (*.smi), SubStation Alpha (*.ssa/ *.txt),
MicroDVD (*.sub/ *.txt), SubViewer 2.0 (*.sub/
*.txt), Vobsub (*.sub)
yPlayable Codec format :
“Xvid”, “MPEG-2”
yPlayable Audio format : “AC3”, “PCM”, “MP3”,
“WMA”,
ySampling frequency : within 32 to 48 kHz (MP3),
within 32 to 48 kHz (WMA)
yBit rate : within 32 to 320 kbps (MP3), 40 to 192
kbps (WMA)
yFor Discs formatted in Live le system, you can not
it on this unit.
yIf the name of movie le is different from that of
the subtitle le, during playback of a Video le,
subtitle may not be display.
yIf you play a Xvid le differ from Xvid spec, it may
not operate normally.
yIf you play GMC video le which is more than
1-warp point, video playback screen will not
smooth.

Remote control
Getting Started 9
Replacement of battery
Remove the battery cover on the
rear of the remote control, and
insert the battery with 4 and 5
matched correctly.
• • • • • • • • •a • • • • • • •
(Standby/On) : Switches the
1
unit ON or OFF.
(Open/Close) : Opens and closes
B
the disc tray.
FUNCTION : Selects the
P
function and input source.
SLEEP : Sets the System to turn
off automatically at a specied
time. (Dimmer : The display window
will be darken by half.)
MARKER : Marks play list.
(Home) : Displays the [Home
n
Menu].
• • • • • • • • •b • • • • • • •
INFO/DISPLAY : Accesses On-
m
Screen Display.
DISC MENU : Accesses the menu
on a DVD disc.
W/S/A/D
right) : Used to navigate on-screen
displays.
PRESET (
programmed of Radio.
TUNING +/- : Tunes in the desired
radio station.
ENTER : Acknowledges menu
b
selection.
Presetting the radio stations.
RETURN : Moves backwards
x
in the menu or exits the setup
menu.
TITLE: If the current DVD title has
a menu, the title menu appears
on the screen. Otherwise, the disc
menu may not appear.
• • • • • • • • •c • • • • • • •
(Stop) : Stops playback.
Z
(Play) MONO/STEREO : Starts
d
playback. Selects Mono/ Stereo.
(Pause/Step) : Pauses playback.
M
C/V
next or previous chapter / track /
le.
c/v
backward or forward.
(up/ down/ left/
) : Selects
W/S
(Skip) : Goes to the
(Scan) : Searches
• • • • • • • • •d • • • • • • •
SPEAKER LEVEL : Sets the sound
level of desired speaker.
SOUND EFFECT : Selects a sound
effect mode.
VOL -/+ (Volume) : Adjusts speaker
volume.
(Mute) : Mutes the sound.
REC : USB Direct Recording.
X
0-9 numerical buttons : Selects
numbered options in a menu.
REPEAT : Selects a play
h
mode. (Repeat/ Random)
CLEAR : Removes a number when
setting the password.
• • • • • • • • •e • • • • • • •
TV Control buttons : Controls the
TV. (LG TV only)
- You can control the sound
level, input source, and power
switching of LG TVs as well. Hold
(TV) and press PR/CH (
1
) button repeatedly until the
S
TV turns on or off.
: This button is not available.
?
MIC VOL -/+ (Microphone Volume)
: Adjusts microphone volume.
ECHO VOL -/+ (Volume) : Adjusts
echo volume.
VOCAL FADER: You can enjoy the
function as karaoke, by reducing
singer vocal of music in the various
source.
W/
1
Getting Started
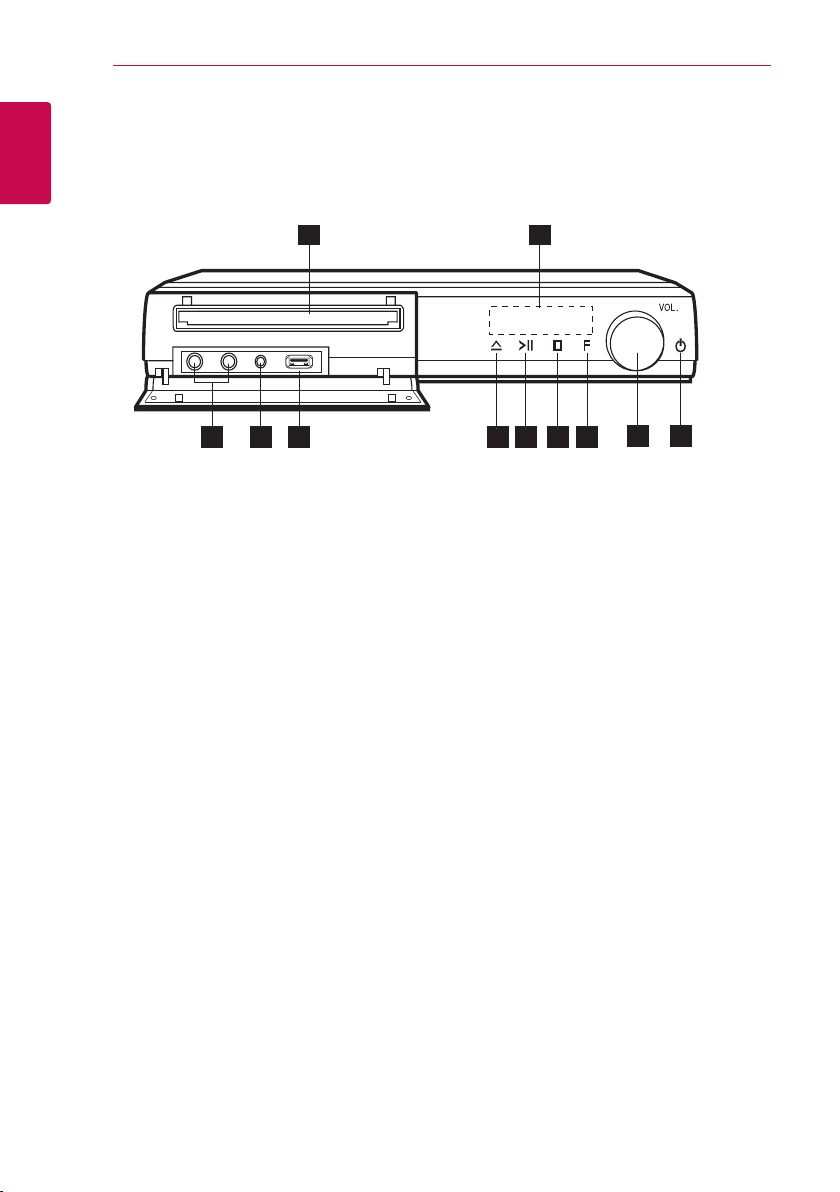
Front panel
1
Getting Started
Getting Started10
1 2
11
3 4 5 6 7 8
10
9
Disc Tray
a
Display window
b
Shows the current status of the unit.
Microphone jacks 1/2
c
PORT. IN
d
Connects to a portable player with audio
outputs.
USB Port
e
Connects a USB device.
(OPEN/CLOSE)
f R
Opens or closes the disc tray.
(PLAY/PAUSE)
g T
Starts playback.
Pauses playback temporarily, press again to exit
pause mode.
(STOP)
h I
Stops playback.
F (FUNCTION)
i
Changes the input source or function.
VOL. (Volume)
j
Adjusts speaker volume.
(Power On / Off )
k 1
Switches the unit ON or OFF.
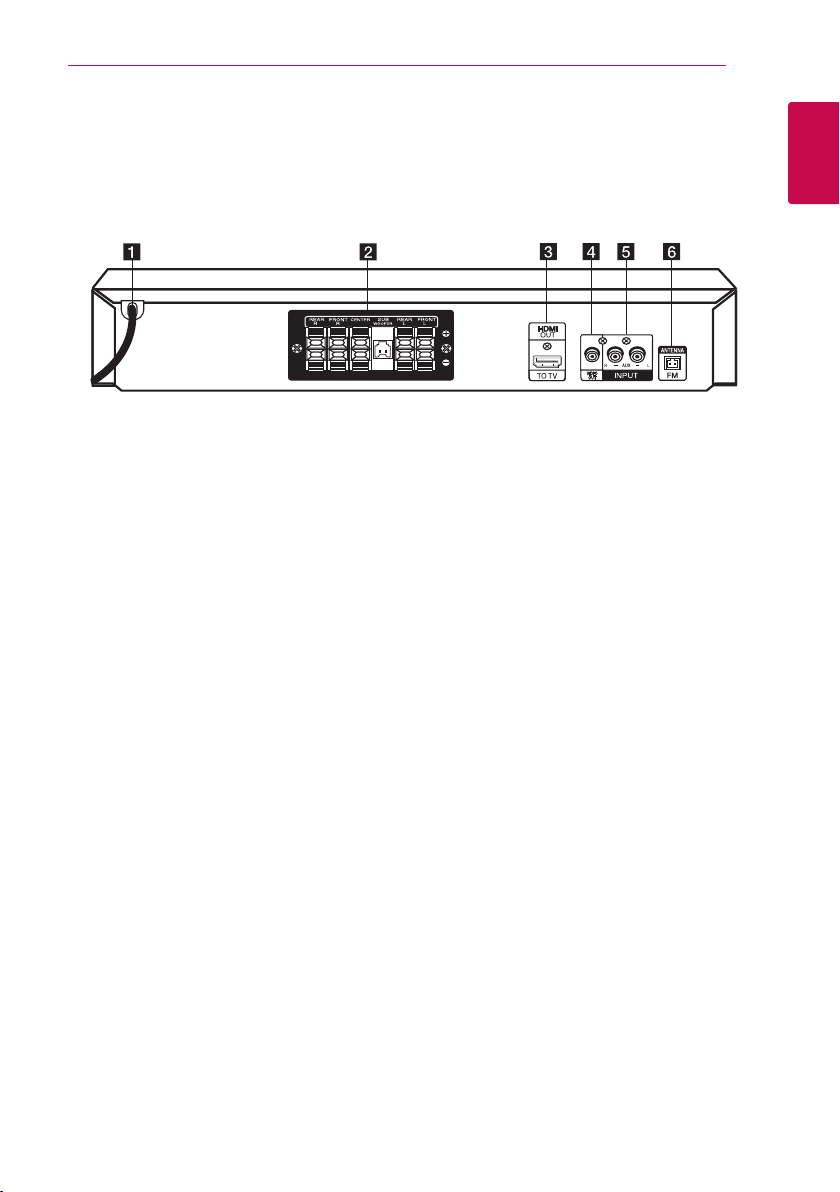
Rear panel
Getting Started 11
1
Getting Started
Power cord
a
Speaker connectors
b
Connects the speaker cables.
HDMI OUT
c
Connects to TV with HDMI inputs.
(Interface for digital audio and video)
VIDEO OUT
d
Connects to a TV with video inputs.
AUX (L/R) INPUT
e
Connects to an external source with 2 channel
audio outputs.
ANTENNA
f
FM- Connects the FM wired antenna
Connecting12
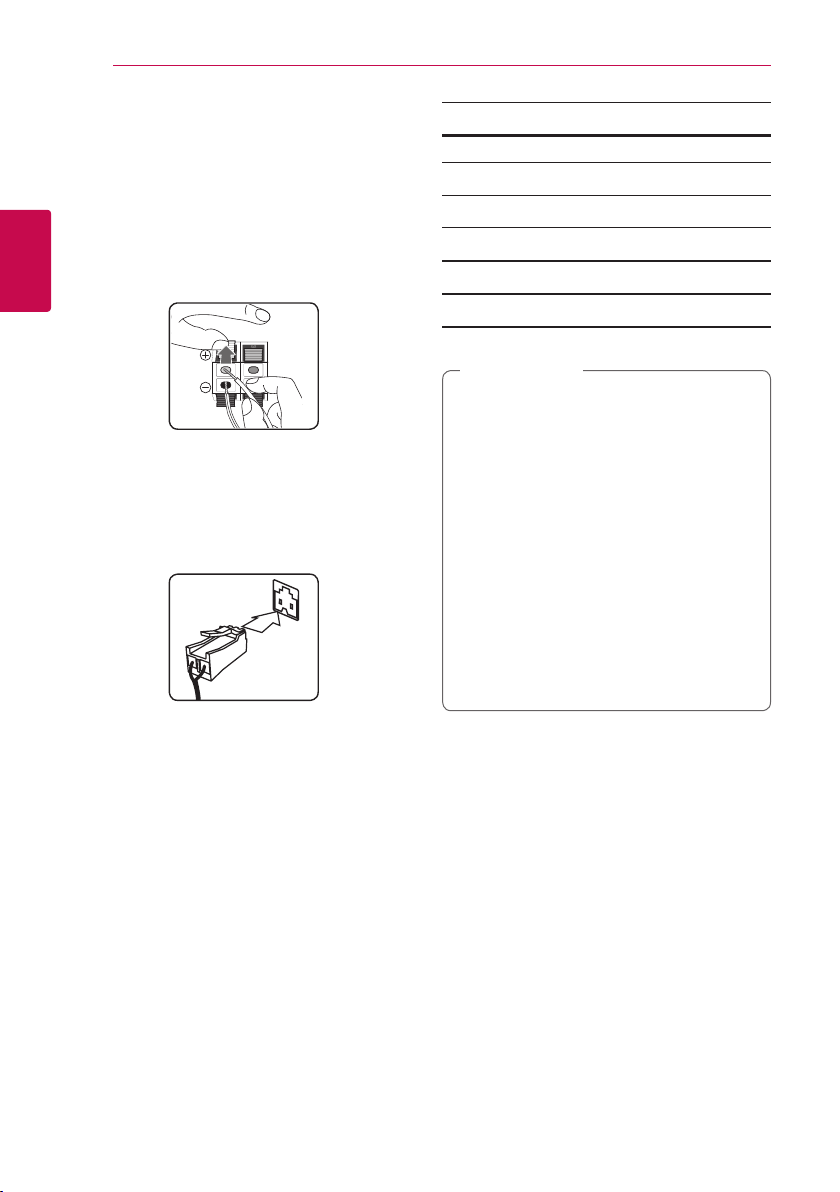
Attaching the speakers to the unit
1. To connect the cable to the unit, press each
plastic finger pad to open the connection
terminals on the unit. Insert the wire and release
the finger pad.
2
Connecting
Connect the black of each wire to the terminals
marked - (minus) and the other end to the
terminals marked + (plus).
Connect a woofer cord to the player. When
connecting a woofer cord to the player, insert
the connector until it clicks.
Color Speaker Position
Grey (R.R/L) Rear Rear right
Blue (R.R/L) Rear Rear left
Green (C) Center Center
Orange Sub woofer Any front position
Red (F.R/L) Front Front right
White (F.R/L) Front Front left
Caution
>
yBe careful to make sure children do not put
their hands or any objects into the *speaker
duct.
*Speaker duct : A hole for plentiful bass
sound on speaker cabinet (enclosure).
yPlace the center speaker at a safe distance
from the child’s reach. Otherwise it may result
in the speaker falling down and causing
personal injury and/or property damage.
yThe speakers contain magnet parts, so color
irregularity may occur on the TV screen or PC
monitor screen. Please use the speakers far
away from either TV screen or PC monitor.
yBefore using the subwoofer, remove the
protective vinyl.
Connecting 13
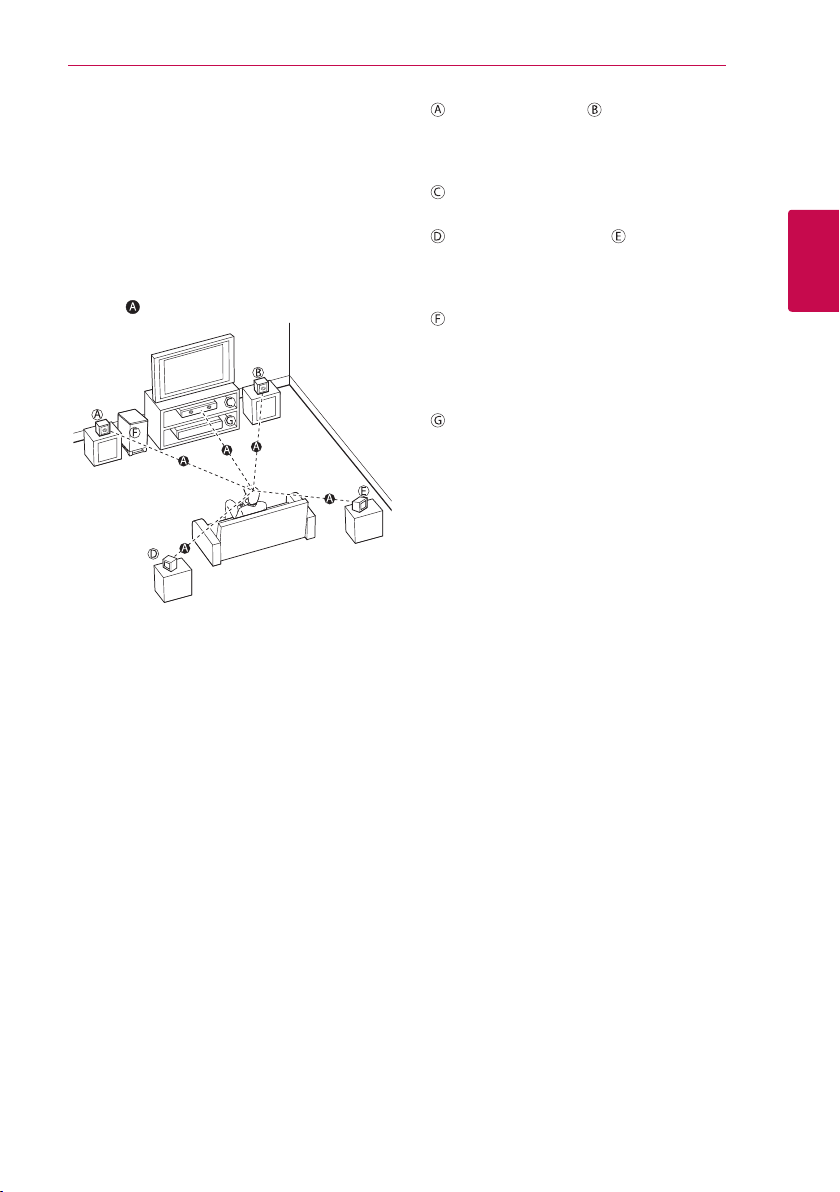
Positioning the system
The following illustration shows an example of
positioning the system. Note that the illustrations
in these instructions differ from the actual unit for
explanation purposes.
For the best possible surround sound, all the speakers
other than the subwoofer should be placed at the
same distance from the listening
position ( ).
Front left speaker (L)/ Front right speaker (R):
Place the front speakers to the sides of the
monitor or screen and as ush with the screen
surface as possible.
Center speaker: Place the center speaker above or
below the monitor or screen.
Surround left speaker (L)/ Surround right
speaker (R):
Place these speakers behind your listening
position, facing slightly inwards.
Subwoofer: The position of the subwoofer is not
so critical, because low bass sounds are not highly
directional. But it is better to place the subwoofer
near the front speakers. Turn it slightly toward the
center of the room to reduce the wall reections.
Unit
2
Connecting
 Loading...