

Page 1
USER GUIDE
LG-H860
ENGLISH
MFL69564101 (1.0) www.lg.com
Page 2

Disposal of your old appliance (as per e-waste
Rules)
1. When this crossed out wheeled bin symbol is depicted on the
product and its operator’s manual, it means the product is
covered by the e-waste Management and Handling Rules, 2011
and are meant to be recycled, dismantled, refurbished or disposed
of f.
2. Dos
a. The product is required to be handed over only to the
authorized recycler for disposal.
b. Keep the product in isolated area, after it becomes non-
functional/unrepairable so as to prevent its accidental
breakage.
Don’t
a. The product should not be opened by the user himself/herself,
but only by authorized service personnel.
b. The product is not meant for re-sale to any unauthorized
agencies/scrap dealer/kabariwalah.
c. The product is not meant for mixing into household waste
stream.
d. Do not keep any replaced spare part(s) from the product in
exposed area.
3. Any disposal through unauthorized agencies/person will attract
action under Environment (Protection) Act 1986.
4. This product is complied with the requirement of Hazardous
Substances as specified under Rule 13 (1) & (2) of the E-Waste
(Management & Handling) Rules, 2011.
5. To locate a nearest collection centre or call for pick-up (limited
area only) for disposal of this appliance, please contact Toll Free
No. 1800-180-9999 for details. All collection centre and pick up
facilities are done by third parties with LG Electronics India Pvt.
Ltd. Merely as a facilitator. For more detailed information, please
visit :
http://www.lge.com/in
.
Page 3

ENGLISH
About this user guide
Thank you for choosing this LG product. Please carefully read this user
guide before using the device for the first time to ensure safe and proper
use.
• Always use genuine LG accessories. The supplied items are designed
only for this device and may not be compatible with other devices.
• This device is not suitable for people who have a visual impairment
due to the touchscreen keyboard.
• Descriptions are based on the device default settings.
• Default apps on the device are subject to updates, and support for
these apps may be withdrawn without prior notice. If you have any
questions about an app provided with the device, please contact a LG
Service Centre. For user-installed apps, please contact the relevant
service provider.
• Modifying the device’s operating system or installing software from
unofficial sources may damage the device and lead to data corruption
or data loss. Such actions will violate your LG licence agreement and
void your warranty.
• Some content and illustrations may differ from your device, depending
on the area, service provider, software version, or OS version, and are
subject to change without prior notice.
• Software, audio, wallpaper, images, and other media supplied with
your device are licenced for limited use. If you extract and use these
materials for commercial or other purposes, you may be infringing
copyright laws. As a user, you are fully responsible for the illegal use
of media.
• Additional charges may incur for data services, such as messaging,
uploading,downloading, auto-syncing and location services. To void
additional charges, select a data plan suitable to your needs. Contact
your service provider to obtain additional details.
1
Page 4
Instructional notices
WARNING: Situations that could cause injury to the user and third
CAUTION: Situations that may cause minor injury or damage to the
NOTE: Notices or additional information.
parties.
device.
2About this user guide
Page 5

Table of contents
5 Guidelines for safe and efficient use
01
Custom-designed
Features
13 Modular Type
13 Always On Display
14 Daylight mode
15 135° Wide-angle lens
15 Dual cameras
16 Pop-out Picture
16 Steady recording
17 Smart Bulletin
17 Smart Notice
19 Smart Doctor
20 Quick Share
21 Quick Help
21 QuickRemote
23 QuickMemo+
25 QSlide
26 LG Health
27 Do not disturb
27 Ringtone ID
28 Fingerprint recognition
31 Content sharing
33 Dual Play
02
Basic Functions
35 Product components and
accessories
36 Parts overview
38 Turning on or off the power
39 Installing the SIM card
41 Inserting the memory card
42 Removing the memory card
42 Battery
47 Touch screen
49 Home screen
57 Screen lock
60 Device encryption
61 Memory card encryption
62 Taking screenshots
63 Entering text
3
Page 6

03
04
Useful Apps
70 Installing and uninstalling
apps
71 Recently uninstalled apps
71 Phone
75 Messaging
76 Camera
89 Gallery
92 Calculator
92 Weather
92 Downloads
93 Clock
94 Voice Recorder
95 Music
96 Email
97 Contacts
99 Calendar
100 File Manager
101 Tasks
101 Evernote
101 Cell Broadcast
101 FM Radio
102 LG Backup
103 RemoteCall Service
103 SmartWorld
105 Menu Map
108 Google apps
Phone Settings
111 Settings
111 Networks
124 Sound & notification
125 Display
126 General
05
Appendix
136 LG Language Settings
136 LG Bridge
137 Phone software update
139 FAQ
142 Anti-Theft Guide
143 More information
4Table of contents
Page 7

Guidelines for safe and efficient
use
Please read these simple guidelines. Not following these guidelines may be
dangerous or illegal.
Should a fault occur, a software tool is built into your device that will gather a
fault log. This tool gathers only data specific to the fault, such as signal strength,
cell ID position in sudden call drop and applications loaded. The log is used only to
help determine the cause of the fault. These logs are encrypted and can only be
accessed by an authorised LG Repair centre should you need to return your device
for repair.
Exposure to radio frequency energy
Radio wave exposure and Specific Absorption Rate (SAR) information.
This mobile phone model LG-H860 has been designed to comply with applicable
safety requirements for exposure to radio waves. These requirements are based
on scientific guidelines that include safety margins designed to assure the safety
of all persons, regardless of age and health.
• The radio wave exposure guidelines employ a unit of measurement known
as the Specific Absorption Rate, or SAR. Tests for SAR are conducted using
standardised methods with the phone transmitting at its highest certified
power level in all used frequency bands.
• While there may be differences between the SAR levels of various LG phone
models, they are all designed to meet the relevant guidelines for exposure to
radio waves.
• The SAR limit recommended by the International Commission on Non-Ionizing
Radiation Protection (ICNIRP) is 2 W/kg averaged over 10 g of tissue.
• The highest SAR value for this model phone tested for use at the ear is
1.400 W/kg (1g) and when worn on the body is 0.682 W/Kg (1g) at 15 mm,
which is 100% compliant with Indian Standards and Safe.
5
Page 8

• This device meets RF exposure guidelines when used either in the normal use
position against the ear or when positioned at least 15 mm away from the
body. When a carry case, belt clip or holder is used for body-worn operation,
it should not contain metal and should position the product at least 15 mm
away from your body. In order to transmit data files or messages, this device
requires a quality connection to the network. In some cases, transmission of
data files or messages may be delayed until such a connection is available.
Ensure the above separation distance instructions are followed until the
transmission is completed.
Product care and maintenance
• Always use genuine LG batteries, chargers and accessories approved for use
with this particular device model. The use of any other types may void any
approval or warranty applying to the device and may be dangerous.
• Some contents and illustrations may differ from your device without prior
notice.
• Do not disassemble this unit. Take it to a qualified service technician when
repair work is required.
• Repairs under warranty, at LG’s discretion, may include replacement parts
or boards that are either new or reconditioned, provided that they have
functionality equal to that of the parts being replaced.
• Keep away from electrical appliances such as TVs, radios and personal
computers.
• The unit should be kept away from heat sources such as radiators or cookers.
• Do not drop.
• Do not subject this unit to mechanical vibration or shock.
• Switch off the phone in any area where you are required to by special
regulations. For example, do not use your phone in hospitals as it may affect
sensitive medical equipment.
• Do not handle the phone with wet hands while it is being charged. It may cause
an electric shock and can seriously damage your phone.
• Do not charge a handset near flammable material as the handset can become
hot and create a fire hazard.
• Use a dry cloth to clean the exterior of the unit (do not use solvents such as
benzene, thinner or alcohol).
6Guidelines for safe and efficient use
Page 9

• Do not charge the phone when it is on soft furnishings.
• The phone should be charged in a well ventilated area.
• Do not subject this unit to excessive smoke or dust.
• Do not keep the phone next to credit cards or transport tickets; it can affect
the information on the magnetic strips.
• Do not tap the screen with a sharp object as it may damage the phone.
• Do not expose the phone to liquid or moisture.
• Use accessories like earphones cautiously. Do not touch the antenna
unnecessarily.
• Do not use, touch or attempt to remove or fix broken, chipped or cracked glass.
Damage to the glass display due to abuse or misuse is not covered under the
warranty.
• Your phone is an electronic device that generates heat during normal
operation. Extremely prolonged, direct skin contact in the absence of adequate
ventilation may result in discomfort or minor burns. Therefore, use care when
handling your phone during or immediately after operation.
• If your phone gets wet, immediately unplug it to dry off completely. Do not
attempt to accelerate the drying process with an external heating source, such
as an oven, microwave or hair dryer.
• The liquid in your wet phone, changes the colour of the product label inside
your phone. Damage to your device as a result of exposure to liquid is not
covered under your warranty.
Efficient phone operation
Electronics devices
All mobile phones may receive interference, which could affect performance.
• Do not use your mobile phone near medical equipment without requesting
permission. Avoid placing the phone over pacemakers, for example, in your
breast pocket.
• Some hearing aids might be disturbed by mobile phones.
• Minor interference may affect TVs, radios, PCs etc.
• Useyourphoneintemperaturesbetween0ºCand35ºC,ifpossible.Exposing
your phone to extremely low or high temperatures may result in damage,
malfunction, or even explosion.
7Guidelines for safe and efficient use
Page 10

Precautions
• Use a wireless hands-free system (headphone, headset) with a low power
Bluetooth emitter.
• Keep your calls short or send text message (SMS) instead. This advice applies
especially to children, adolescents and pregnant women.
• Use the cell phone in good quality network signal.
• People having active medical implants should preferably keep the cell phone at
least 15 cm away from the implant.
Road safety
Check the laws and regulations on the use of mobile phones in the area when you
drive.
• Do not use a hand-held phone while driving.
• Give full attention to driving.
• Pull off the road and park before making or answering a call if driving
conditions so require.
• RF energy may affect some electronic systems in your vehicle such as car
stereos and safety equipment.
• When your vehicle is equipped with an air bag, do not obstruct with installed
or portable wireless equipment. It can cause the air bag to fail or cause serious
injury due to improper performance.
• If you are listening to music whilst out and about, please ensure that the
volume is at a reasonable level so that you are aware of your surroundings. This
is of particular importance when near roads.
8Guidelines for safe and efficient use
Page 11

Avoid damage to your hearing
To prevent possible hearing damage, do not listen at high volume
levels for long periods.
Damage to your hearing can occur if you are exposed to loud sound for long
periods of time. We therefore recommend that you do not turn on or off the
handset close to your ear. We also recommend that music and call volumes are set
to a reasonable level.
• When using headphones, turn the volume down if you cannot hear the people
speaking near you, or if the person sitting next to you can hear what you are
listening to.
• Excessive sound pressure from earphones and headphones can cause
hearing loss.
Glass Parts
Some parts of your mobile device are made of glass. This glass could break if your
mobile device is dropped on a hard surface or receives a substantial impact. If the
glass breaks, do not touch or attempt to remove it. Stop using your mobile device
until the glass is replaced by an authorised service provider.
Blasting area
Do not use the phone where blasting is in progress. Observe restrictions and
follow any regulations or rules.
Potentially explosive atmospheres
• Do not use your phone at a refueling point.
• Do not use near fuel or chemicals.
• Do not transport or store flammable gas, liquid or explosives in the same
compartment of your vehicle as your mobile phone or accessories.
9Guidelines for safe and efficient use
Page 12

In aircraft
Wireless devices can cause interference in aircraft.
• Turn your mobile phone off before boarding any aircraft.
• Do not use it on the ground without permission from the crew.
Children
Keep the phone in a safe place out of the reach of small children. It includes small
parts which may cause a choking hazard if detached.
Emergency calls
Emergency calls may not be available on all mobile networks. Therefore you should
never depend solely on your phone for emergency calls. Check with your local
service provider.
Battery information and care
• You do not need to completely discharge the battery before recharging. Unlike
other battery systems, there is no memory effect that could compromise the
battery’s performance.
• Use only LG batteries and chargers. LG chargers are designed to maximise the
battery life.
• Do not disassemble or short-circuit the battery.
• Keep the metal contacts of the battery clean.
• Replace the battery when it no longer provides acceptable performance. The
battery pack may be recharged hundreds of times before it needs replacing.
• Recharge the battery if it has not been used for a long time to maximise
usability.
• Do not expose the battery charger to direct sunlight or use it in high humidity,
such as in the bathroom.
• Do not leave the battery in hot or cold places, as this may deteriorate battery
performance.
10Guidelines for safe and efficient use
Page 13

• Risk of explosion if battery is replaced by an incorrect type. Dispose of used
batteries according to the instructions.
• If you need to replace the battery, take it to the nearest authorised LG
Electronics service point or dealer for assistance.
• Always unplug the charger from the wall socket after the phone is fully
charged to save unnecessary power consumption of the charger.
• Actual battery life will depend on network configuration, product settings,
usage patterns, battery and environmental conditions.
• Make sure that no sharp-edged items such as animal’s teeth or nails, come into
contact with the battery. This could cause a fire.
11Guidelines for safe and efficient use
Page 14

01
Custom-designed Features
Page 15
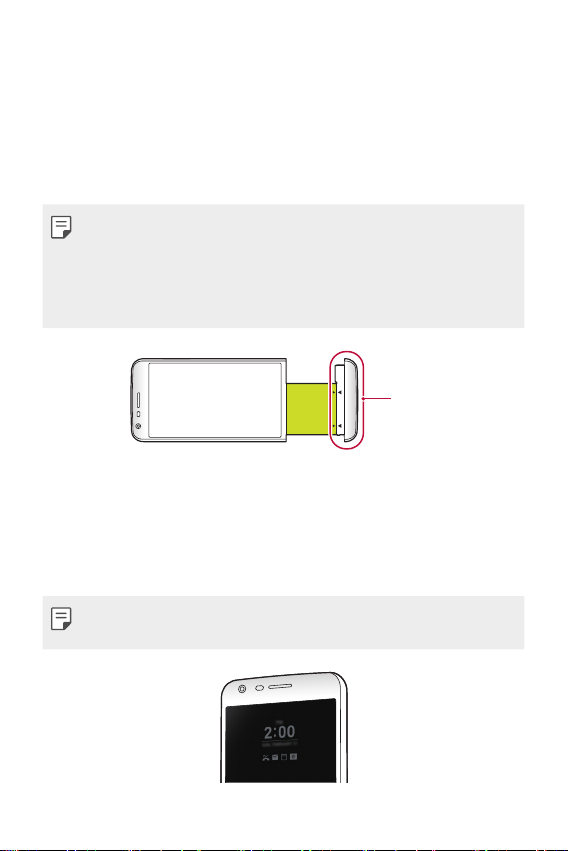
Modular Type
You can use the modular functionality provided by your device to use
various features provided by various accessories.
Remove the module from the module slot of the device. Then you can
just replace the battery, or you can install another accessory into the
module slot to use the specific features provided by the accessory.
• See
Removing the battery
• Available accessories, which are called LG Friends, are optional.
• To purchase optional accessories, contact an LG Customer Service
Centre.
• Available accessories may vary depending on the area or service provider.
and
Installing the battery
for details.
Module
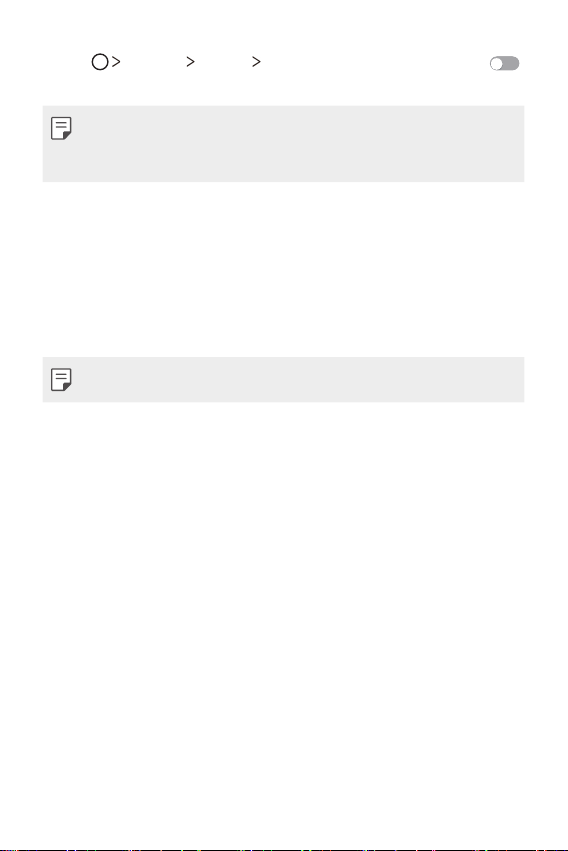
Always On Display
You can display the date, time, signature or other information on the screen
even when the main screen is turned off. Always On Display is a useful
feature in order to check the time frequently and display your own signature.
• The battery may drain faster when you use Always On display. Turn off
this feature to use the battery longer.
Custom-designed Features 13
Page 16
Tap Settings Display Always-on display and then drag
1
to activate it.
• This feature may be turned on when you purchase the device.
• The default setting may vary depending on the area and service
provider.
Tap Set what to show and select items to display on the turned-off
2
screen.
• Time: Always display the current time, even if the screen is turned
of f.
• Signature: Display your signature in place of the current time on
the turned-off screen. Use the Set signature option to enter a
signature and change the font.
• Make sure to check the signature not to exceed the input field.
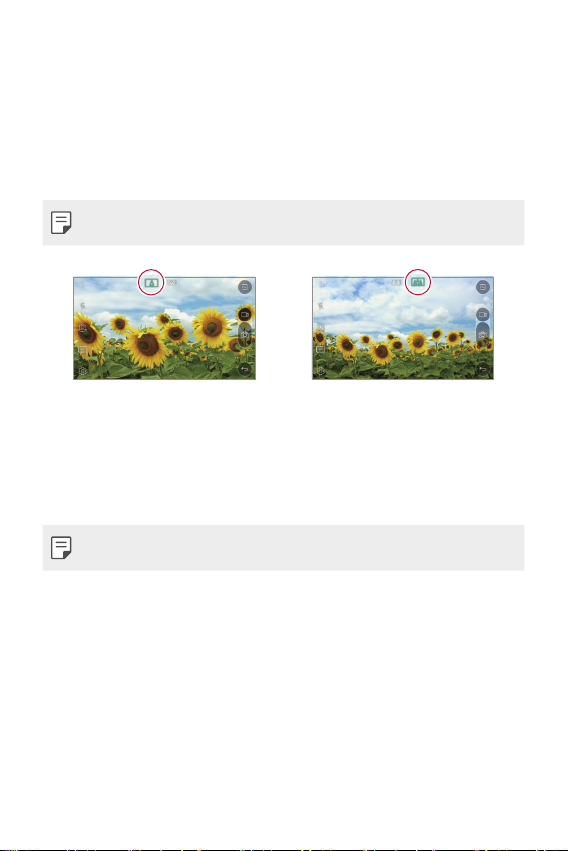
Daylight mode
You can use the enhanced IPS Quantum Display feature to view the
screen clearly in outdoor daylight when the sun shines bright.
Custom-designed Features 14
Page 17
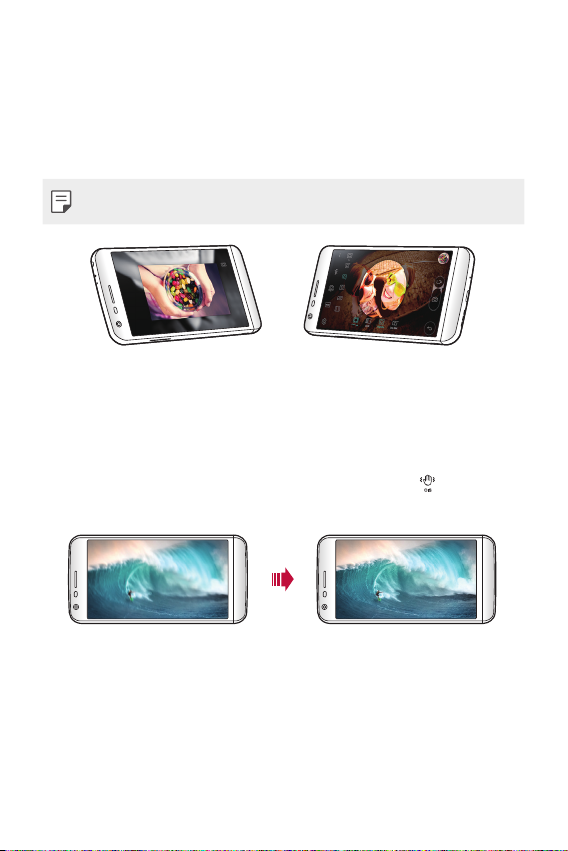
135º Wide-angle lens
You can use the wide-angle lens to take photos of a range that is wider
than the actual field of vision. This feature is useful when you take a
photo or record a video of a landscape or a wide area from a narrow area.
You can capture a sprawling skyline, a packed stadium concert, an entire
beach, and all that your eyes can see, and more.
• See
Switch to dual camera
for details.
Dual cameras
You can use the dual cameras on the back of the device to take a variety
of photos and videos of from a tight close-up scene to a vast scene.
Simply pinch or spread your fingers on the screen.
• See
Switch to dual camera
for details.
Custom-designed Features 15
Page 18
Pop-out Picture
You can make your photo as if in a frame: you can take both a normal
and wide-angle photo at the same time. Make your photo popping and
standing out against these four background frame effects: Fisheye, B&W,
Vignette, and Lens blur.
• See
Pop-out Picture
for details.
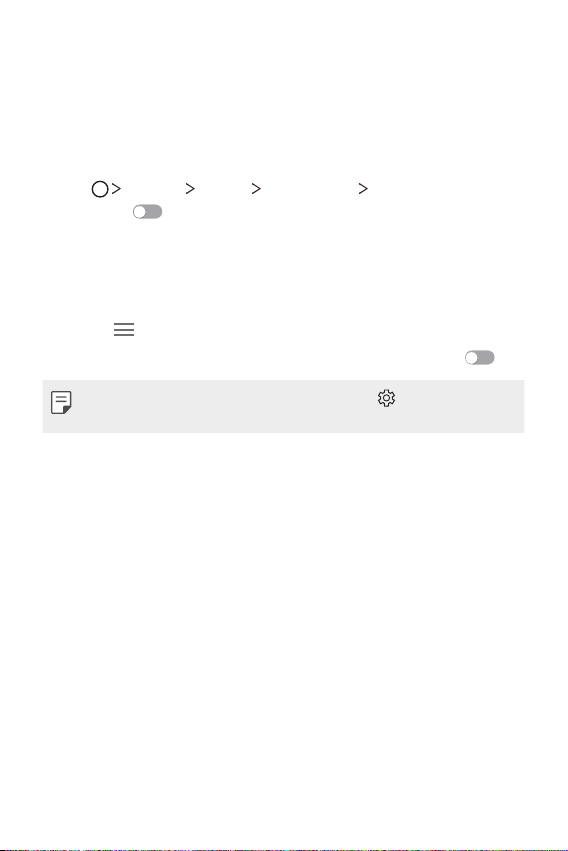
Steady recording
You can use the steady recording feature to minimise extreme motion
blur when you take a photo or record a video. This feature automatically
stabilises your photo or video while you are in motion. Tap to activate
this feature.
Custom-designed Features 16
Page 19
Smart Bulletin
You can add a Home screen that collects and displays useful information
for you.
View main news from Smart Bulletin at a glance. You do not need to add
an additional widget or run an app.
Tap Settings Display Home screen Smart Bulletin and
1
then drag to activate it.
• The Smart Bulletin can be found on the left-most canvas of the
Home screen.
Configure Smart Bulletin by using the available menu items.
2
• To rearrange menu items displayed on the Smart Bulletin, tap and
hold , then drag up or down.
• To display or hide a menu item on the Smart Bulletin, drag .
• To change the Smart Bulletin configuration, tap on the Smart
Bulletin.
Smart Notice
You can use Smart Notice to get useful information that matches your
time and location. This widget analyzes your environment and daily usage
patterns to provide information that is useful at a specific time and
location.
Use Smart Notice as:
• Automatic reminders to add frequently used unsaved numbers to
contacts.
• Automatic reminders to make a call to a number you did not call back
after sending a reject message.
• Automatic reminders of the birthday of a contact saved in the
calendar and the contact list.
Custom-designed Features 17
Page 20
• Automatic reminders to clean up temporary files, downloaded files,
and apps that have not been used for a specific period of time.
• Automatic reminders to customise device settings according to the
pattern and place you are using the device.
• Automatic reminders to save power when battery consumption is
high.
Starting Smart Notice
You can add the Smart Notice widget when it is not added by default or is
deleted from the Home screen. Take the following steps to add the widget:
On the Home screen, tap and hold on an empty space, then tap
1
Widgets.
Tap and hold Smart Notice, then drag it to another position on the
2
Home screen.
• The Smart Notice widget appears on the Home screen, and its
automatic reminder functions start along with an overview of them.
• Tap on the widget screen to change Smart Notice settings
according to your preferences or to select the items on which you
want Smart Notice to provide automatic reminders.
• The Smart Notice feature may be turned on when you purchase the
device.
• The default setting may vary depending on the area or the service
provider.
Custom-designed Features 18
Page 21
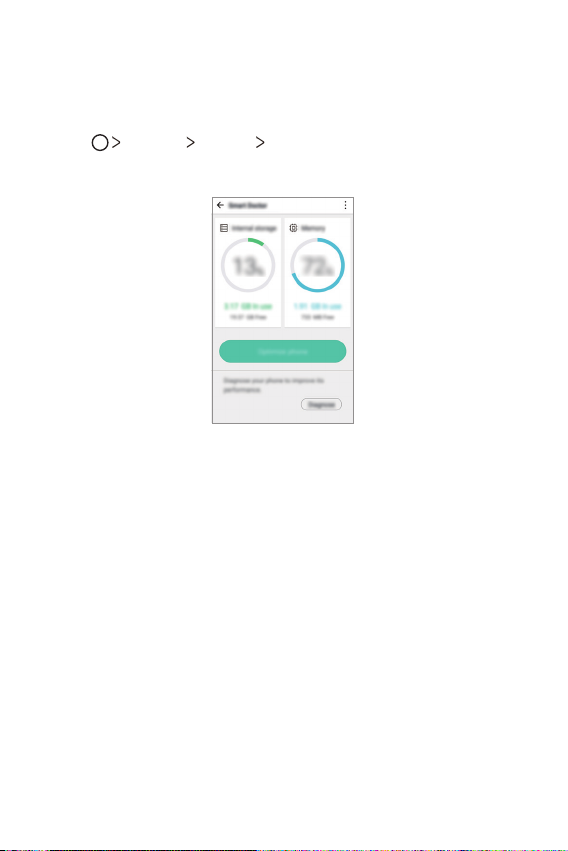
Smart Doctor
You can use Smart Doctor to diagnose the device’s condition and
optimise it.
Tap Settings General Smart Doctor.
1
Use desired functions.
2
• Optimize phone: Close currently unused apps and clean up
temporary files to improve device performance.
• Diagnose: Analyse the battery, mobile data, apps, network status,
and use patterns to view device management information.
Custom-designed Features 19
Page 22
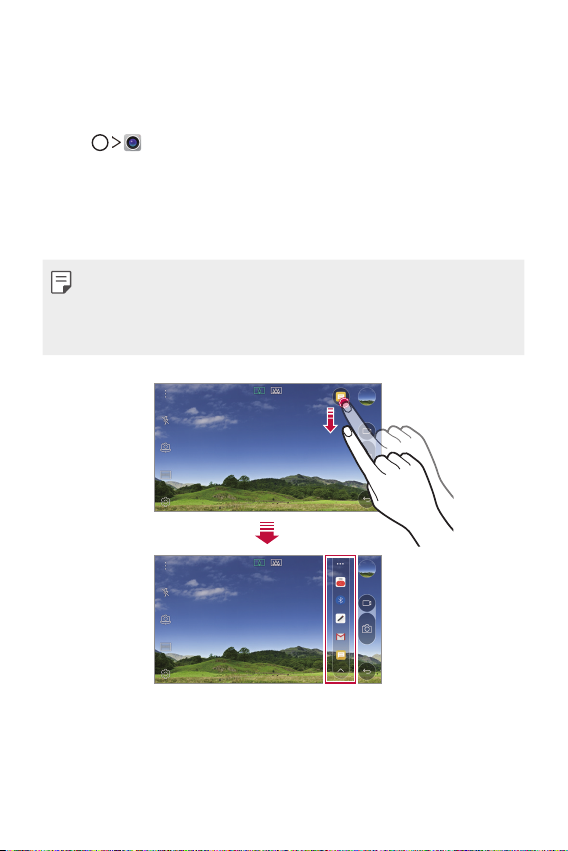
Quick Share
You can share a photo or video to the app you want immediately after
taking them.
Tap , then take a photo or record a video.
1
Drag the Quick Share icon that appears after taking a picture or
2
recording a video, and select an app to share it.
Alternatively, tap and hold the Preview icon that appears after taking
a picture or recording a video, and drag it to the Quick Share icon.
• The app displayed by the Quick Share icon may vary, depending on the
type and frequency of access of the apps installed on the device.
• You can use this feature only when you take a picture or record a video
in the Auto mode. See
Auto mode
for details.
Custom-designed Features 20
Page 23
Quick Help
You can view the main features of the device, frequently asked questions
or user guide. By entering keywords about the difficulties in using
with the device after you buy it or any other queries, you can view
useful information including answers to frequently asked questions or
instructions in the user guide.
Tap Quick Help.
1
Enter inquiries in the search box to search for information.
2
• This feature is periodically updated according to the user's feedback.
• Available menu items may vary depending on the area or service
provider.
QuickRemote
QuickRemote overview
You can control many electronic devices in different locations by using
your device as a remote control.
• This feature uses infrared (IR) signals and operates very similar to a
remote control. When using QuickRemote, keep the IR sensor at the
top right of the device uncovered.
• This feature may vary or may not be supported, depending on the area,
service provider, or device manufacturer.
Custom-designed Features 21
Page 24
Registering a device for remote control
You can register a device you want to control remotely with your device.
Tap LG QuickRemote.
1
Tap to specify locations where you want to use the remote
2
control.
Tap and select the type and manufacturer of the device you want
3
to remotely control.
Follow the on-screen instructions to make sure that the
4
QuickRemote feature works properly on the device.
Creating a universal remote control
When the device you want to control with your device does not exist
in the list, you can create a customised universal remote control by
arranging your frequently used buttons according to your preferences.
Tap LG QuickRemote.
1
Tap to specify locations where you want to use the remote
2
control.
Tap Universal remote.
3
Enter a remote control name and tap OK.
4
Tap and hold the button you want, then drag it to the position you
5
want.
Tap NEXT.
6
Follow the on-screen instructions to register the buttons, then tap
7
SAVE.
Custom-designed Features 22
Page 25
QuickMemo+
QuickMemo+ overview
You can make creative notes by using a variety options on this advanced
feature of notepad, such as image management and screenshots, which
are not supported by the conventional notepad.
Creating a note
Tap QuickMemo+.
1
Tap to create a note.
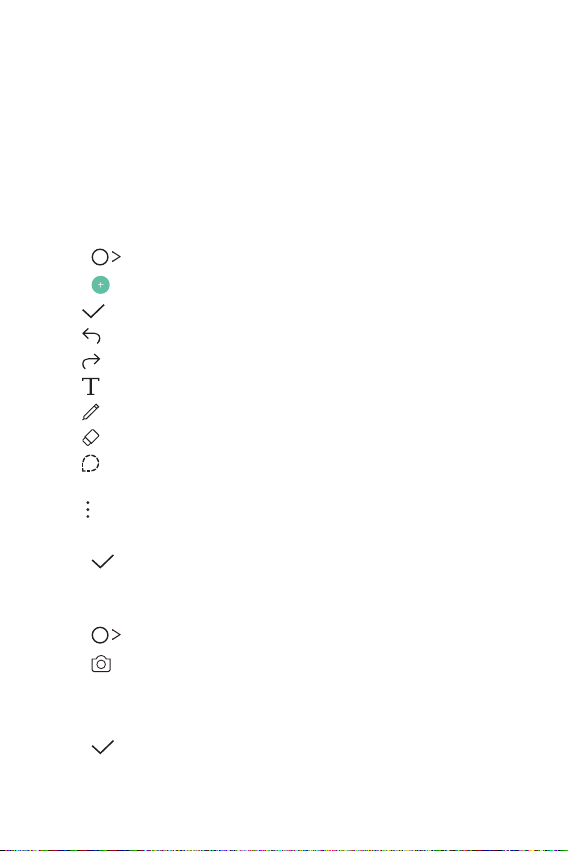
2
• : Save a note.
• : Undo the last action.
• : Redo the last action you undid.
• : Enter a note by using the keypad.
• : Write notes by hand.
• : Erase handwritten notes.
• : Zoom in or out, rotate or erase the parts of a handwritten
note.
• : Access additional options, including sharing and locking notes,
changing the note pad style and inserting content.
Tap to save the note.
3
Writing notes on a photo
Tap QuickMemo+.
1
Tap to take a photo, then tap OK.
2
• The photo is automatically attached into the notepad.
Freely write notes on the photo.
3
Tap to save the note.
4
Custom-designed Features 23
Page 26

Writing notes on a screenshot
While viewing the screen you want to capture, drag the status bar
1
downwards and then tap Capture+
• The screenshot appears as the notepad background theme. Memo
tools appear at the top of the screen.
Take notes on the captured screen.
2
• To crop and save a portion of the screen, tap and specify a
portion with the crop tool.
• To attach a screenshot to the notepad, tap .
Tap and save the notes to the location you want.
3
• Saved notes can be viewed in either QuickMemo+ or Gallery.
• To save notes in the same location all the time, select the Use as
default app checkbox and select an app.
.
Managing folders
You can view notes grouped by the type of the notes.
Tap QuickMemo+.
1
At the top of the screen, tap and select a menu item:
2
• All memos: View all notes saved in QuickMemo+.
• My memos: View notes created by QuickMemo+.
• Photo memos: View notes created by .
• Capture+: View notes created by Capture+.
• New category: Add categories.
• : Rearrange, add or delete categories. To change the name of a
category, tap the category.
• Some folders do not appear when launching QuickMemo+ for the first
time. Disabled folders are enabled and appear when they contain at
least one related note.
Custom-designed Features 24
Page 27
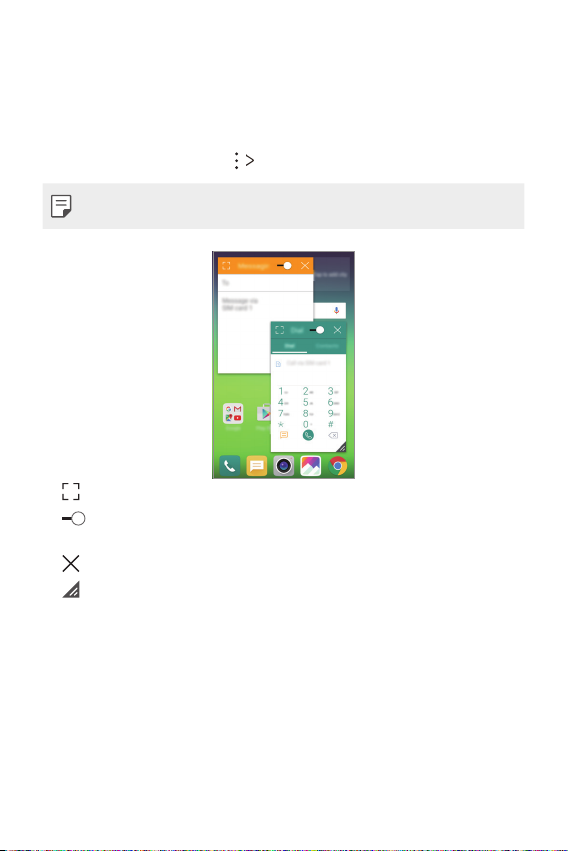
QSlide
You can start apps by using QSlide to use them while other apps are
running. For example, use the calculator or calendar when a video is
playing.
When an app is running, tap QSlide.
• This feature may not be supported by some apps.
• : Turn off the QSlide mode to switch to full-screen mode.
• : Adjust the opacity of the QSlide window. If the QSlide window is
transparent, it will not respond to touch inputs.
• : Close the QSlide window.
• : Adjust the size of the QSlide window.
Custom-designed Features 25
Page 28
LG Health
LG Health overview
You can manage your health and maintain good exercise habits by
keeping track of the exercises you do.
Getting started with LG Health
You can configure LG Health when launching the app for the first time or
after initialising it.
Tap LG Health.
1
Follow the on-screen instructions to complete configuration.
2
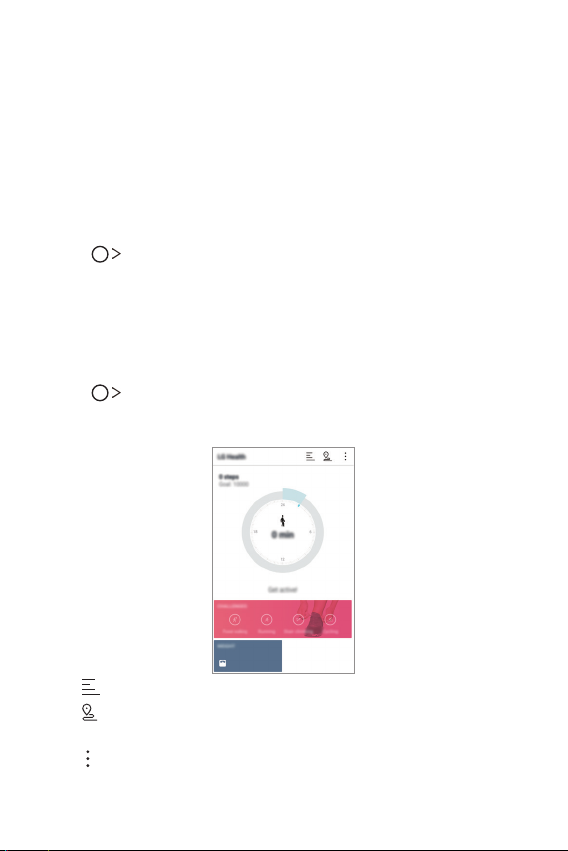
Using LG Health
You can view main information on LG Health and manage the amount of
physical exercise and health information.
Tap LG Health.
1
Do the following:
2
• : View your exercise log on the day you want to check.
• : Begin tracking an exercise. The route and amount of your
physical exercise are recorded for each exercise type.
• : Set your daily exercise goals including calories and steps, or set
various LG Health settings.
Custom-designed Features 26
Page 29

• Health-related information provided by LG Health is designed for user
convenience and cannot be used for purposes of disease prevention,
treatment, diagnosis or other medical issues.
• LG Health may vary or may not be available, depending on the country
and service provider. LG Health functions that are available and apps
that can be added to LG Health may vary, depending on the country.
This is due to differing laws and regulations.
Do not disturb
You can limit or mute notifications to avoid disturbances for a specific
period of time.
Tap Settings Sound & notification Do not disturb and then
1
drag to activate it.
Tap Sounds and vibrations and select the mode you want:
2
• Priority only:
apps. Even when Priority only is turned on, alarms still sound.
• Total silence: Disable both the sound and vibration.
Receive sound or vibrate notifications for the selected
Ringtone ID
You can set the device so that it plays an automatically composed ringtone
for each incoming call from the selected contacts. This function is useful
because you can know who are calling you by only hearing the ringtone.
Tap Settings Sound & notification Ringtone ID and then
1
drag to activate it.
Tap Compose ringtones for and select the desired option.
2
• The default ringtone plays for incoming calls from contacts except for
the selected contact.
Custom-designed Features 27
Page 30
Fingerprint recognition
Fingerprint recognition overview
Register your fingerprint on your device first before using the fingerprint
recognition function.
You can use the fingerprint recognition function in the following cases:
• To unlock the screen
• To view the locked content in Gallery or QuickMemo+
When confirming a purchase or signing in to an app, identify yourself by
simply touching the fingerprint sensor.
• Your fingerprint never changes for your whole life, and everyone has a
unique fingerprint. Therefore, your fingerprint can be used by the device
for user identification. Very similar fingerprints from different users
may be recognised by the fingerprint sensor as the same fingerprint.
To enhance the device security, set the screen lock to a pattern, PIN or
password.
• If your fingerprint is unrecognised or if you forget the backup PIN,
bring your device to the nearest LG Customer Service Centre and both
register a fingerprint and create a new backup PIN.
Precautions for fingerprint recognition
Fingerprint recognition accuracy may decrease. To maximise recognition
accuracy, check the following before using the device.
• The device's Power/Lock key has a fingerprint sensor. Ensure that the
Power/Lock key is not damaged by a metallic object, such as coin or
key.
• When water, dust or other foreign substance are on the Power/Lock
key or your finger, the fingerprint registration or recognition may
not work. Clean and dry your finger before having the fingerprint
recognised.
Custom-designed Features 28
Page 31

• A fingerprint may not be recognised properly if the surface of your
finger has a scar or is not smooth due to being soaked in water.
• If you bend your finger or use the fingertip only, your fingerprint
may not be recognised. Make sure that your finger covers the entire
surface of the Power/Lock key.
• Scan only one finger for each registration. Scanning more than one
finger may affect fingerprint registration and recognition.
• The device may generate static electricity if the surrounding air is dry.
If the surrounding air is dry, avoid scanning fingerprints, or touch a
metallic object such as a coin or key before scanning fingerprints to
remove static electricity.
Registering fingerprints
You can register and save your fingerprint on the device to use
fingerprint identification.
Tap Settings General Fingerprints & security
1
Fingerprints.
• To use this feature, make sure that screen lock is set. If a screen lock
is not set, set the screen lock. See
details.
Locate the Power/Lock key on the back of the device and gently put
2
your finger on it to register the fingerprint.
• Gently press the Power/Lock key so that the sensor can recognise your
fingerprint. If you press the Power/Lock key with an excessive force, the
screen lock function may start or the screen may be turned off.
• Ensure that your fingertip covers the entire surface of the sensor of
the Power/Lock key.
Configuring screen lock settings
for
Custom-designed Features 29
Page 32

Follow the on-screen instructions.
3
• Repeat scanning the fingerprint by moving your finger little by little
until the fingerprint registers.
When the fingerprint registration is done, tap OK.
4
• Tap ADD MORE to register another fingerprint. If you register
only one fingerprint and the corresponding finger is not in a good
condition, the fingerprint recognition may not work well. As the
preventive measure against this kind of situation, register multiple
fingerprints.
Managing fingerprints
You can edit or delete registered fingerprints.
Tap Settings General Fingerprints & security
1
Fingerprints.
Unlock according to the specified lock method.
2
From the fingerprint list, tap a fingerprint to rename it. To delete it,
3
tap .
Custom-designed Features 30
Page 33

Unlocking the screen with a fingerprint
You can unlock the screen or view the locked content by using your
fingerprint. Activate the desired function:
Tap Settings General Fingerprints & security
1
Fingerprints.
Unlock according to the specified lock method.
2
On the fingerprint settings screen, activate the desired function:
3
• Screen lock: Unlock the screen with a fingerprint.
• Content lock: Unlock content with a fingerprint. To do this, make
sure that the content lock is set.
Content sharing
Playing content from another device
You can play photos, videos or musics saved on the device from a TV.
Connect the TV and device to the same Wi-Fi network.
1
Select a file from the Gallery or Music app and tap Play content.
2
Select the TV you want to connect to.
3
• To use Chromecast, update Google Play to the latest version.
Custom-designed Features 31
Page 34

Sending or receiving files
You can send or receive files saved on your device to another LG device
or tablet.
Tap Settings Networks Share & connect File sharing
SmartShare Beam and drag to activate it.
• Make sure that your device is connected to the same wireless network
as the file transfer target device.
• Make sure that File sharing is activated on both the device and the
target device.
Sending files to another device
Select a file and tap SmartShare Beam.
1
Alternatively, tap from the file list and select files then tap SHARE
SmartShare Beam.
Select a device from the list of nearby devices that support
2
SmartShare Beam.
• The file is sent to the device.
Using nearby devices
You can view and play multimedia files saved on devices that are located
near your device.
From the Gallery or Music app, select Nearby devices.
1
Select a device from the device list.
2
• If the desired device is not seen on the device list, check that DLNA
is turned on, then tap Search nearby devices.
Play content saved on the selected device.
3
Custom-designed Features 32
Page 35

Viewing content from your cloud
You can directly view the content saved on your cloud account, without
downloading it to your device.
From the Gallery, Music or File Manager app, select Cloud.
1
Select a cloud account and sign in.
2
Save or play content in your cloud.
3
Dual Play
You can display your device screen on a connected display device and use
different apps from the device.
Use a DisplayPort-HDMI cable or use a Miracast for either of the
connections.
• This feature is not available for some content.
Custom-designed Features 33
Page 36

02
Basic Functions
Page 37

Product components and accessories
Make sure that none of the following items are missing:
• Device
• Battery
• Ejection pin
• Stereo headset
• The items described above may be optional.
• The items supplied with the device and any available accessories may
vary depending on the area and service provider.
• Always use genuine LG Electronics accessories. Using accessories made
by other manufacturers may affect your device's call performance or
cause malfunctions. This may not be covered by LG's repair service.
• If any of these basic items are missing, contact the dealer from which
you purchased your device.
• To purchase additional basic items, contact the LG Customer Service
Centre.
• To purchase optional items, contact the LG Customer Service Centre
for available dealers.
• Some items in the product box are subject to change without notice.
• The appearance and specifications of your device are subject to change
without notice.
• USB cable
• Charger
• Quick Start Guide
Basic Functions 35
Page 38

Parts overview
IR sensor
Microphone
Rear camera lens (General)
Microphone
Front camera lens
Proximity/Ambient light
Volume keys (+/-)
Module eject key
RGB sensor
Laser detection
auto-focus
Power/Lock key
(Fingerprint sensor)
Earpiece
sensor
Module
Stereo headset jack
LED indicator
Touch screen
SIM/Memory card tray
Charger/USB cable port
Flash
Rear camera lens
(Wide-angle)
NFC antenna (built in)
Speaker
Basic Functions 36
Page 39

• Proximity/Ambient light sensor
- Proximity sensor: During a call, the proximity sensor turns off the
screen and disables touch functionality when the device is in close
proximity to the human body. It turns the screen back on and
enables touch functionality when the device is outside a specific
range.
- Ambient light sensor: The ambient light sensor analyses the ambient
light intensity when the auto-brightness control mode is turned on.
• Laser detection auto-focus
- Detects the distance from the camera to your subject for automatic
focusing.
- Quickly focuses on closer or farther objects when you use the rear
camera to take photos.
• Volume keys
- Adjust the Volume for ringtones, calls or notifications.
- Gently press a Volume key to take a photo. To take continuous shots
of photos, press and hold the Volume key.
- Press the Volume Down (-) key twice to launch the Camera app
when the screen is locked or turned off. Press the Volume Up (+)
key twice to launch Capture+.
• Power/Lock key (Fingerprint sensor)
- Briefly press the key when you want to turn the screen on or off.
- Press and hold the key when you want to select a power control
option.
- Gently put your finger on the key when you want to unlock the
screen with your fingerprint.
Basic Functions 37
Page 40

• Some functions may be restricted for access, depending on the device
specifications.
• An NFC antenna is built into the back of the device. Do not damage the
NFC antenna.
• Do not put heavy objects on the device or sit on it. Failure to do so may
damage the touch screen feature.
• Screen-protective film or accessories may interfere with the proximity
sensor.
• If your device is wet or is being used in a humid place, the touch sensor
or buttons may not function properly.
Turning on or off the power
Turning on the power
When the power is turned off, press and hold the Power/Lock key.
• When the device is turned on for the first time, initial configuration
takes place. The first booting time for the smart phone may be longer
than usual.
Turning off the power
Press and hold the Power/Lock key, then select Power off.
Power control options
Tap and hold the Power/Lock key, then select an option.
• Power off: Turn off the device.
• Power off and restart: Restart the device.
• Turn on Airplane mode: Block telecommunication-related functions,
including making phone calls, messaging and browsing the Internet.
Other functions remain available.
Basic Functions 38
Page 41

Installing the SIM card
Properly use the SIM (Subscriber Identity Module) card provided by your
service provider.
Insert the ejection pin into the hole on the card tray.
1
Pull out the card tray.
2
Put the SIM card on the card tray with the gold-coloured contacts
3
facing downwards.
Put the primary SIM card on the SIM card tray 1 and the secondary
SIM card on the SIM card tray 2.
• The SIM card tray 2 also serves as the memory card tray. However, you
cannot put both the SIM card and the memory card (optional) at the
same time.
Basic Functions 39
Page 42

1
2
Insert the card tray back into the slot.
4
• Of several types of SIM cards, only the Nano-SIM cards work with the
device.
• For problem-free performance, it is recommended to use the phone
with the correct type of SIM card. Always use a factory-made SIM card
supplied by the operator.
Precautions when using SIM card
• Do not lose your SIM card. LG is not responsible for damage and other
issues caused by loss or transfer of a SIM card.
• Be careful not to damage the SIM card when you insert or remove it.
Basic Functions 40
Page 43

Inserting the memory card
The device supports up to a 2 TB microSD. Some memory cards may
not be compatible with your device, depending on the memory card
manufacturer and type.
• Some memory cards may not be fully compatible with the device. If you
use an incompatible card, it may damage the device or the memory
card, or corrupt the data stored in it.
Insert the ejection pin into the hole on the card tray.
1
Pull out the card tray.
2
Put the memory card on the card tray with the gold-coloured
3
contacts facing downwards.
Memory card
SIM card
Insert the card tray back into the slot.
4
• The memory card is an optional item.
• Frequent writing and erasing data may shorten the lifespan of memory
cards.
Basic Functions 41
Page 44

Removing the memory card
Unmount the memory card before removing it for safety.
Tap Settings General Storage & USB .
1
Insert the ejection pin into the hole on the card tray.
2
Pull out the card tray and remove the memory card.
3
• Do not remove the memory card while the device is transferring or
accessing information. This may cause data to be lost or corrupted, or
may damage the memory card or the device. LG is not responsible for
losses that result from the abuse or improper use of memory cards,
including the loss of data.
Battery
Removing the battery
• Turn off the device before removing the battery. Failure to do so may
damage the device.
Press the module eject key to partly eject the module from the device.
1
Module
Module eject key
Basic Functions 42
Page 45

Grab the middle of the ejected module and pull it out from the device.
2
Hold the battery and module with both hands and separate them
3
from one another in the direction of the arrow.
• Do not bend the battery when removing it. The plastic cap on the
battery may be damaged.
Installing the battery
• Device specifications may vary depending on the area or service
provider. To purchase additional batteries or compatible optional items,
contact an LG Customer Service Centre for support.
• Be sure to use authentic accessories provided by LG Electronics. Using
third-party accessories may damage the device or cause malfunctions.
Basic Functions 43
Page 46

Align the indicated arrows correctly and insert the battery into the
1
module according to the order indicated in the image.
2
1
Grab the lower part of the module as shown in the figure below, then
2
gently slide the module into the device until they are tightly fastened.
• Never press the module eject key when inserting the module into the
device.
Precautions when using the module
• When inserting the battery into the device, make sure that the
battery is attached to the module. Inserting the battery without the
module attached may damage the device.
• When replacing the battery, take extra care to ensure that no foreign
substance or water enters the device.
• Do not put the device in a hot and humid location when the battery
module is removed.
Basic Functions 44
Page 47

• Ensure that the inside of the device does not contact a metallic object
or water and does not get damaged.
• Leaving the device with the module separated for an extended period
of time may deform the device or damage the metallic contacts. This
may result in device malfunction.
• Never separate the module from the device without pressing the
module eject key. This may damage the device.
• Never remove the module when the device is in use.
• If a gap occurs between the module and device while you are using
the device, firmly insert the module into the device.
• If you insert a module that is not compatible with your service
provider, for example, a module bought from other service provider or
in an area that is not covered by your service provider, your device may
not operate normally.
• Be careful not to hurt your fingers when inserting or removing the module.
• Make sure to insert the battery and module correctly. If you insert
them incorrectly, the device may not operate properly or may get
damaged.
• Failure to follow the instructions in the user guide may damage the device.
Charging the battery
Before using the device, fully charge the battery.
Connect one end of the charging cable to the charger, insert the other
end of the cable into the cable port, and then plug the charger into a
power socket.
Basic Functions 45
Page 48

• Make sure to use the USB cable provided as a basic accessory.
• Make sure to use an LG-approved charger, battery and charging cable.
Charging the battery with a third-party charger may cause the battery
to explode or may damage the device.
• Using the device when it is charging may cause electric shock. To use
the device, stop charging.
• This device is supplied with the battery inserted. When using the device
for the first time, check the battery level and fully charge the battery
before using the device if necessary.
• Remove the charger from the power socket after the device is fully
charged. This prevents unnecessary power consumption.
• Another way to charge the battery is by connecting a USB cable
between the device and a desktop or laptop computer. This may take a
longer time than charging the battery in the common way.
• Do not charge the battery by using a USB hub that is unable to
maintain the rated voltage. Charging may fail or unintentionally stop.
Using the battery efficiently
Battery lifespan may decrease if you keep many apps and functions
running simultaneously and continuously.
Cancel background operations to increase battery life.
To minimise battery consumption, follow these tips:
• Turn off the Bluetooth® or Wi-Fi network function when not using
them.
• Set the screen timeout to as short a time as possible.
• Minimise the screen brightness.
• Set a screen lock when the device is not used.
• To use a downloaded app, check the battery level.
Basic Functions 46
Page 49

Touch screen
You can familiarise yourself with how to control your device by using
touch screen gestures.
Tapping
Lightly tap with your fingertip to select or run an app or option.
Tapping and holding
Tap and hold for several seconds to run a hidden function.
Double-tapping
Tap twice quickly to zoom in or out on a web page or map.
Basic Functions 47
Page 50

Swiping
Tap and hold an item, such as an app or widget, then swipe it to another
location. You can use this gesture to move an item.
Flicking
Gently tap and hold on the screen, then flick left or right to quickly move
to another panel.
Pinching and spreading
Pinch two fingers to zoom out such as on a photo or map. To zoom in,
spread your fingers apart.
Basic Functions 48
Page 51

• Do not expose the touch screen to excessive physical shock. You might
damage the touch sensor.
• A touch screen failure may occur if you use the device near a magnetic,
metallic or conductive material.
• If you use the device under bright lights, such as direct sunlight, the
screen may not be visible, depending on your position. Use the device
in a shady location or a location with an ambient light that is not too
bright and bright enough to read books.
• Do not press the screen with excessive force.
• Gently tap with your fingertip on the option you want.
• Touch control may not work properly if you tap while wearing a glove or
by using the tip of your fingernail.
• Touch control may not work properly if the screen is moist or wet.
• The touch screen may not function properly if a screen-protective
film or accessory purchased from a common online or offline store is
attached to the device.
Home screen
Home screen overview
The Home screen is the starting point for accessing various functions
and apps on your device. Tap on any screen to directly go to the Home
screen.
You can manage all apps and widgets on the Home screen. Swipe the
screen left or right to view all installed apps at a glance.
To search for an app, use Google search.
Basic Functions 49
Page 52

Home screen layout
Status bar
You can view all apps and organise widgets and folders on the Home
screen.
Widget
Folder
Page icon
Quick access area
Home touch buttons
• The Home screen may vary, depending on the service provider or
software version.
• Status bar: View status icons, the time and the battery level.
• Widget: Add widgets to the Home screen to quickly access necessary
information without bothering to run apps one by one.
• Folder: Create folders to group apps by your preferences.
• Page icon: View the total number of Home screen canvases and the
currently displayed canvas which is highlighted.
• Quick access area: Fix main apps at the bottom of the screen so that
they can be accessed from any Home screen canvas.
Basic Functions 50
Page 53

• Home touch buttons
- : Return to the previous screen. Close the keypad or pop-up
windows.
- : Tap to go to the Home screen. To launch Google, tap and hold.
- :
View a list of recently used apps or run an app from the list. Use
the Clear all option to delete all recently used apps. In some apps,
tapping and holding the button will access additional options.
- : Choose which SIM card you are going to use. Tap and hold to
configure the Dual SIM card settings.
Editing Home touch buttons
You can rearrange Home touch buttons or add frequently used functions
to Home touch buttons.
Tap Settings Display Home touch buttons Button
combination and customise settings.
• Several functions, including QSlide, the notifications panel or
Capture+, are provided. A maximum of five items can be added.
Basic Functions 51
Page 54

Status icons
When there is a notification for an unread message, calendar event or
alarm, the status bar displays the corresponding notification icon. Check
your device's status by viewing notification icons displayed on the status
bar.
• : No signal
• : Data is being transmitted over the network
• : Alarm is set
• : Vibrate mode is on
• : Bluetooth is on
• : Connected to a computer via USB
• : Battery level
• : Flight mode is on
• : Missed calls
• : Wi-Fi is on
• : Mute mode is on
• : GPS is on
• : Hotspot is on
• : No SIM card
• Some of these icons may appear differently or may not appear at all,
depending on the device's status. Refer to the icons according to the
actual environment in which you are using the device.
• Displayed icons may vary, depending on the area or service provider.
Basic Functions 52
Page 55

Notifications panel
Access the Settings app.
Permit receipt of files from
You can open the notifications panel by dragging the status bar
downwards.
Use quick access icons in the notifications panel to easily and quickly turn
a function on or off.
Drag left or right on the list of quick access icons to select the function
icon you want.
• If you tap and hold the icon, the settings screen for the corresponding
function appears.
Select a user.
View quick access icons.
Adjust the brightness.
Select a device to share
the phone screen.
View notifications.
Notification panel settings
You can select items to display on the notification panel.
Tap on the notification panel.
• To rearrange quick access icons, tap and hold an icon, then drag it to
another position.
• Select icons you want to display on the list.
nearby devices.
Delete notifications.
Basic Functions 53
Page 56

Switching the screen orientation
You can set the screen orientation to automatically switch, according to
the device's orientation.
On the notification panel, tap Rotation from the quick access icon list.
Alternatively, tap Settings Display and activate Auto-rotate
screen.
Editing the Home screen
On the Home screen, tap and hold on an empty space, then start the
desired function.
• To rearrange the Home screen canvases, tap and hold on a canvas,
then drag it to another location.
• To add widgets to the Home screen, tap Widgets and drag a widget
to the Home screen.
• To change Home screen settings, tap Home screen settings and
customise options. See
• To view or reinstall the uninstalled apps, tap Uninstalled apps. See
Recently uninstalled apps
Home screen settings
for details.
for details.
Basic Functions 54
Page 57

Viewing the background theme
You can view only the background image by hiding apps and widgets on
the Home screen.
Spread two fingers apart while holding down on the Home screen.
• To return to the original screen which displays apps and widgets, pinch
your fingers on the Home screen or tap .
Moving apps on the Home screen
On the Home screen, tap and hold an app, then drag it to another
location.
• To keep frequently used apps at the bottom of the Home screen, tap
and hold an app, then drag it to the quick access area at the bottom.
• To remove an icon from the quick access area, drag the icon to the
Home screen.
Basic Functions 55
Page 58

Using folders from the Home screen
Creating folders
On the Home screen, tap and hold an app, then drag it over another app.
• A new folder is created and the apps are added to the folder.
Editing folders
On the Home screen, tap a folder and then run the desired function.
• To edit the folder name and colour, tap the folder name.
• To remove an app from the folder, tap and hold the app and drag it to
outside the folder. If the removed app is the only one app that existed
in the folder, the folder is removed automatically.
Home screen settings
You can customise Home screen settings.
Tap Settings Display Home screen.
1
Customise settings:
2
• Select Home: Select a Home screen mode.
• Wallpaper: Change the Home screen background theme.
• Screen swipe effect: Select an effect to apply when the Home
screen canvas switches.
• Theme: Select the screen theme to apply.
• Sort apps by: Set how apps are sorted on the Home screen.
• Grid: Change the app arrangement mode for the Home screen.
• Hide apps: Select or deselect apps to hide from the Home screen.
• Smart Bulletin: Use the Home screen to view information
customised to your needs.
Basic Functions 56
Page 59

Screen lock
Screen lock overview
Your device's screen turns off and locks itself if you press the Power/Lock
key. This also happens after the device is left idle for a specified period of
time.
If you press the Power/Lock key when a screen lock is not set, the Home
screen appears immediately.
To ensure security and prevent unwanted access to your device, set a
screen lock.
• Screen lock prevents unnecessary touch input on the device screen and
reduces battery consumption. We recommend that you activate the
screen lock while not using the device.
Configuring screen lock settings
There are several options available for configuring the screen lock
settings.
Tap Settings Display Lock screen Select screen lock and
1
then select the method you prefer.
Customise lock settings:
2
• None: Deactivate the screen lock function.
• Swipe: Slide on the screen to unlock the screen.
• Knock Code: Tap the spaces of the screen in accordance with a
pattern to unlock the screen.
• Pattern: Draw a pattern to unlock the screen.
• PIN: Enter a numeric password to unlock the screen.
• Password: Enter an alphanumeric password to unlock the screen.
Basic Functions 57
Page 60

• To set screen lock using a pattern, first create a Google account or
backup PIN. If you enter an incorrect pattern more than a specified
number of times consecutively, you can unlock the screen by using your
backup PIN or Google account.
• If a screen lock is set using a PIN or password and you enter an
incorrect PIN or password more than a specified number of times,
password entry is blocked for 30 seconds.
Lock screen settings
You can customise the following lock screen settings.
Tap Settings Display Lock screen.
1
Customise settings:
2
• Select screen lock: Select a screen lock method.
• Smart Lock: Select trusted items so that if one of them occurs, the
device is automatically unlocked.
• Screen swipe effect: Set screen transition effects to apply when
the screen is unlocked. This option appears when the screen lock
method is set to Swipe.
• Wallpaper: Change the lock screen background image.
• Shortcuts: Add an app shortcut and directly access the app from
the lock screen by dragging the app outside the large circle. This
option appears if the screen lock method is set to Swipe.
• Weather animation: Display weather animations for the current
location on the lock screen.
• Contact info for lost phone: Display emergency contact
information on the lock screen.
• Lock timer: Set the amount of idle time after which the device
automatically locks.
• Power key instantly locks: Instantly lock the screen when the
Power/Lock key is pressed.
Basic Functions 58
Page 61

• Available setting items may vary, depending on the selected screen lock
method.
KnockON
You can turn the screen on or off by double-tapping the screen.
• This option is available only on the Home screen provided by LG. It may
not function properly on a custom launcher or on the Home screen
installed by the user.
• When tapping the screen, use your fingertip. Do not use a fingernail.
• To use the KnockON feature, make sure that the proximity/light sensor
is not blocked by a sticker or any other foreign substance.
Turning on the screen
Double-tap the middle of the screen.
• Tapping the top or bottom of the screen may decrease the recognition
rate.
Turning off the screen
Double-tap on an empty space on the Home screen.
Alternatively, double-tap an empty space on the status bar.
Knock Code
You can unlock the screen by creating your own Knock Code. When the
screen is locked, you can directly access the Home screen by tapping the
screen in a specified sequence.
• You can use your Knock Code, together with the KnockOn feature.
• If you enter an incorrect Knock Code more than a specified number
of times consecutively, unlock by using your backup PIN or Google
account.
• Make sure to use your fingertip when tapping the screen.
Basic Functions 59
Page 62

Creating a Knock Code
Tap Settings Display Lock screen Select screen lock
1
Knock Code.
Tap the squares in a pattern of your choice to create a Knock Code
2
and tap NEXT.
Input the created Knock Code again for verification, then tap
3
CONFIRM.
Set a backup PIN to use when the Knock Code is forgotten.
4
Unlocking the screen with a Knock Code
Unlock the screen by inputting the Knock Code you have created.
Input your Knock Code on the touch screen when the screen is turned
of f.
• It is also possible to enter a Knock Code when the lock screen is
turned on.
Device encryption
Encrypting your device
By default, data is encrypted before saving on the device to protect
the data. It is possible to read, write and copy data even when device
encryption is set. You can set the device with the lock settings so that it
displays a user identification prompt when it is turned on.
Basic Functions 60
Page 63

Precautions for device encryption
You can use the mobile phone lock on the lock screen to increase your
device's protection level.
• If the mobile phone lock is turned on and an incorrect password
is entered more than a specified number of times, the device will
automatically initialise.
• If you forget your decryption password, you must initialise the device to
use it again. Initialisation will delete all data saved before initialisation.
• Encryption takes place when the device boots for the first time after a
factory reset. Stopping encryption before it is complete may damage
data. For example, do not remove or insert the battery while encryption
is in progress. Wait until the process is complete.
Memory card encryption
You can encrypt and protect data saved on the memory card. The
encrypted data in the memory card cannot be accessed from another
device.
Tap Settings General Fingerprints & security Encrypt SD
1
card storage.
Read the on-screen overview of memory card encryption and then
2
tap CONTINUE to continue.
Select an option and tap ENCRYPT NOW:
3
• New data encryption: Encrypt only data that is saved on the
memory card after encryption.
• Full encryption: Encrypt all the data currently saved on the
memory card.
• Exclude media files: Encrypt all files, except for media files such as
music, photos and videos.
Basic Functions 61
Page 64

• To encrypt the memory card, make sure that a screen lock is set using
a PIN or password.
• Once memory card encryption starts, some functions are not available.
• If the device is turned off while encryption is underway, the encryption
process will fail, and some data may be damaged. Therefore, be sure to
check whether the battery level is sufficient before starting encryption.
• Encrypted files are accessible only from the device where the files were
encrypted.
• The encrypted memory card cannot be used on another LG device. To
use the encrypted memory card on another mobile device, initialise the
card.
• You can activate memory card encryption even when no memory card
is installed into the device. Any memory card that is installed after
encryption will automatically be encrypted.
Taking screenshots
You can take screenshots of the current screen you are viewing.
Via a shortcut
Press and hold the Power/Lock key and the Volume Down (-) key at the
same time for at least two seconds.
• Screenshots can be viewed from the Screenshots folder in the Gallery.
Via Capture+
On the screen where you want to take a screenshot, drag the status bar
downwards, then tap Capture+.
• When the screen is turned off or locked, you can access Capture+
by pressing the Volume Up (+) key twice. First, tap Settings
General and then turn on Shortcut key.
• See
Writing notes on a screenshot
Basic Functions 62
for details.
Page 65

Entering text
Using Smart keyboard
You can use Smart keyboard to enter and edit text.
With Smart keyboard, you can view text as you type without bothering
to alternate between the screen and a conventional keyboard. This allows
you to easily find and correct errors when typing.
Moving the cursor
With Smart keyboard, you can move the cursor to the exact position you want.
When typing text, tap and hold on the space bar and then drag left or
right until the cursor moves to the position you want in the text.
• This option is available only on the QWERTY keyboard.
Basic Functions 63
Page 66

Suggesting words
Smart keyboard automatically analyses your usage patterns to suggest
frequently used words as you type. The longer you use your device, the
more precise the suggestions are.
Enter text, then tap a suggested word or gently drag the left or right side
of the space bar upwards.
• The selected word is automatically entered. You do not need to
manually type every letter of the word.
Changing the QWERTY keyboard layout
You can add, delete or rearrange keys on the bottom row of the keyboard.
Tap Settings General Language & keyboard LG Keyboard
1
Keyboard height and layout QWERTY keyboard layout.
Alternatively, tap on the keyboard and tap Keyboard height and
layout QWERTY keyboard layout.
Tap a key on the bottom row, then drag it to another position.
2
Basic Functions 64
Page 67

• This option is available on the QWERTY, QWERTZ and AZERTY
keyboards.
• This function may not be supported for some languages.
Customising the keyboard height
You can customise the keyboard height to maximise hand comfort when
typing.
Tap Settings General Language & keyboard LG Keyboard
1
Keyboard height and layout Keyboard height.
Alternatively, tap on the keyboard and tap Keyboard height and
layout Keyboard height.
Adjust the keyboard height.
2
Selecting a landscape keyboard mode
You can select a landscape keyboard mode from several choices.
Tap Settings General Language & keyboard LG Keyboard
1
Keyboard height and layout Keyboard type in landscape.
Alternatively, tap on the keyboard and tap Keyboard height and
layout Keyboard type in landscape.
Select a keyboard mode.
2
Basic Functions 65
Page 68

Splitting the keyboard
You can split the keyboard in half and place each piece on either side of
the screen when the screen is in landscape mode.
Tap Settings General Language & keyboard LG Keyboard
Keyboard height and layout Split keyboard.
Alternatively, tap on the keyboard and tap Keyboard height and
layout Split keyboard.
• Rotate the device to landscape mode to split the keyboard to both
sides. To merge or split the keyboard, pinch together or spread apart
your fingers on the keyboard.
One-handed operation mode
You can move the keyboard to one side of the screen so that you can use
the keyboard with one hand.
Tap Settings General Language & keyboard LG Keyboard
1
Keyboard height and layout One-handed operation.
Alternatively, tap on the keyboard and tap Keyboard height and
layout One-handed operation.
Press the arrow displayed next to the keyboard to move the keyboard
2
in the direction you want.
Basic Functions 66
Page 69

Entering text by using voice
On the keyboard, tap and hold and then select .
• To maximise the voice command recognition, speak clearly with the
correct pronunciation and accent.
• To enter text with your voice, make sure that your device is connected
to a network.
• To select the language for voice recognition, tap Languages on
the voice recognition screen.
• This function may be not supported, or the supported languages may
differ depending on the service area.
Changing the keyboard
You can change the input language and the keyboard type for each
language.
Tap Settings General Language & keyboard LG Keyboard
1
Select languages.
Select a language and customise the keyboard type.
2
Copy and Paste
You can cut or copy text from an app, and then paste the text into the
same app. Or, you can run other apps and paste the text into them.
Tap and hold around the text you want to copy or cut.
1
Drag / to specify the area to copy or cut.
2
Select either CUT or COPY.
3
• Cut or copied text is automatically added to the clipboard.
Tap and hold the text input window, then select PASTE.
4
• If there is no item that has been copied or cut, the PASTE option will
not appear.
Basic Functions 67
Page 70

Clipboard
If you copy or cut an image or text, it is automatically saved to the
clipboard and can be pasted to any space at any time.
On the keyboard, tap and hold and select .
1
Alternatively, tap and hold the text input window, then select CLIP
TRAY.
Select and paste an item from the clipboard.
2
• A maximum of 20 items can be saved to the clipboard.
• Tap to lock saved items in order not to delete them, even when
the maximum quantity is exceeded. A maximum of ten items can
be locked. To delete locked items, unlock them first.
• Tap to delete the items saved to the clipboard.
• The clipboard may not be supported by some apps downloaded by the
user.
Basic Functions 68
Page 71

03
Useful Apps
Page 72

Installing and uninstalling apps
Installing apps
Access an app store to search and download apps.
• You can use SmartWorld, Play Store or the app store provided by
your service provider.
• Some app stores may require you to create an account and sign in.
• Some apps may charge fees.
• If you use mobile data, you may be charged for data usage, depending
on your pricing plan.
• SmartWorld may not be supported depending on the area or service
provider.
Uninstalling apps
Uninstall apps that you no longer use from your device.
• Some apps cannot be uninstalled by users.
Uninstalling with the tap and hold gesture
On the Home screen, tap and hold the app to uninstall, then drag it over
Uninstall at the top of the screen.
• If apps were uninstalled within 24 hours from now, you can reinstall
them. See
Recently uninstalled apps
for details.
Uninstalling by using the settings menu
Tap Settings General Apps, select an app, then tap Uninstall.
Uninstalling apps from the app store
To uninstall an app, access the app store from which you download the
app and uninstall it.
Useful Apps 70
Page 73

Recently uninstalled apps
You can view the uninstalled apps on the Home screen. You can also
reinstall apps which were uninstalled within 24 hours from now.
Tap Recently uninstalled apps.
1
Activate the desired function:
2
• Reinstall: Reinstall the selected app.
• : Remove the uninstalled apps permanently from the device.
• Uninstalled apps are automatically removed from the device 24 hours
after they were uninstalled. If you want to reinstall the uninstalled apps,
you must download them again from the app store.
• This feature is activated on the default Home screen only. If you
uninstall apps while using the EasyHome screen or other launcher, they
are immediately and permanently removed from the device.
Phone
Voice call
Make a phone call by using one of the available methods, such as
manually entering a phone number or making a call from the contact list
or the list of recent calls.
Making a call from the keypad
Tap Dial.
1
Make a call by using a method of your choice:
2
• Enter a phone number and tap .
• Tap and hold a speed-dial number.
• Search for a contact by tapping the initial letter of a contact name
in the contact list, and then tap .
Useful Apps 71
Page 74

• To enter "+" when making an international call, tap and hold number 0.
• See
Adding contacts to the speed dial list
phone numbers to the speed dial list.
for details on how to add
Making a call from the contact list
Tap Contacts.
1
From the contact list, select a contact and tap .
2
Answering a call
To answer a call, drag to the outside of the circle on the incoming call
screen.
• When the stereo headset is connected, you can make calls by using
the call/end button on the headset.
• To end a call simply by pressing the Power/Lock key, tap Settings
Networks Call Common Answer and end calls, then turn on
End calls with the Power key.
Rejecting a call
To reject an incoming call, drag to the outside of the circle on the
incoming call screen.
• To send a rejection message, drag the rejection message to the
outside of the circle.
• To add or edit a rejection message, tap Settings Networks
Call Common Decline and reject calls Decline with message.
• When a call is coming in, press the Volume Down (-) or Power/Lock
key to mute ringtone or vibration, or to hold the call.
Viewing missed calls
If there is a missed call, the status bar at the top of the screen displays
.
To view missed call details, drag the status bar downwards. Alternatively,
tap Call logs.
Useful Apps 72
Page 75

Functions accessible during a call
During a call, you can access a variety of functions by tapping on-screen
buttons:
• Contacts: View the contact list during a call.
• End: End a call.
• Dialpad: Display or hide the dial pad.
• Speaker: Turn on the speakerphone function.
• Mute: Mute your voice so that your voice cannot be heard by the
other party.
• Bluetooth: Switch the call to a Bluetooth device that is paired and
connected.
• : Access many call options.
• Available settings items may vary depending on the area or service
provider.
Making a three-way calling
You can make a call to another contact during a call.
During a call, tap Add call.
1
Enter a phone number and tap .
2
• The two calls are displayed on the screen at the same time, and the
first call is put on hold.
To switch to another call, tap another number on the screen.
3
To start a conference call, tap .
• You may be charged a fee for each call. Consult with your service
provider for more information.
Useful Apps 73
Page 76

Viewing call records
To view recent call records, tap Call logs. Then, you can use the
following functions:
• To view detailed call records, select a contact. To make a call to the
selected contact, tap .
• To delete call records, tap Delete.
• The displayed call duration may differ from the call charge. Consult with
your service provider for more information.
Configuring call options
You can configure various call options.
Tap Dial or Call logs.
1
Tap Call settings and then configure the options to suit your
2
preferences.
Useful Apps 74
Page 77

Messaging
Sending a message
You can create and send messages to your selected contacts or all of
your contacts using the Messaging app.
• Sending messages abroad may incur additional charges. Consult with
your service provider for more information.
Tap .
1
Tap .
2
Specify a recipient and create a message.
3
• To attach files, tap .
• To access optional menu items, tap .
Tap Send to send the message.
4
Reading a message
You can view exchanged messages organised by contact.
Tap .
1
Select a contact from the message list.
2
Configuring messaging settings
You can change messaging settings to suit your preferences.
Tap .
1
Tap Settings from the message list.
2
Useful Apps 75
Page 78

Camera
Starting the camera
You can take a photo or record a video to keep the memorable moments.
Tap .
• Before taking a photo, wipe the camera lens with a microfibre cloth. If
your finger touches the camera lens, you may get blurry photos.
• If the battery level is lower than 5%, charge the battery before using
the camera.
• Images included in this user guide may be different from the actual
device.
• Photos and videos can be viewed or edited from Gallery. See
overview
for details.
Changing the camera mode
You can select a camera mode that suits your shooting environment to
take a photo or record a video easily and conveniently.
On the camera screen, tap and select the desired mode.
Gallery
Useful Apps 76
Page 79

Switching between cameras
You can switch between the front and rear cameras to suit your shooting
environment.
On the camera screen, tap or drag the screen either up or down or
left or right to switch between the front and rear cameras.
• Use the front camera to take selfies. See
Taking selfies
for details.
Switch to dual camera
You can use the dual (second) camera on the back to take photos by
using either the general or wide-angle lens.
Tap / to switch the general and wide-angle camera.
Zoom in or out
You can use zoom in or out on the camera screen while taking a picture
or recording a video.
On the camera screen, pinch or spread two fingers to zoom in or out.
• Then the wide-angle camera and general camera on the back of the
device are automatically switched to take a photo or record a video.
Useful Apps 77
Page 80

Simple mode
Switch between
camera and general
You can take photos by simply tapping the screen.
On the camera screen, tap .
1
Frame your subject and then tap on the screen.
2
Auto mode
You can take photos or record videos by selecting a variety of shooting
modes and options.
On the camera screen, tap .
1
To take a photo, tap . Or to record a video, tap .
2
Select a camera
mode.
Turn the flash on
or off.
Switch between
front and rear
cameras.
Select a shooting
mode.
Change camera
options.
the wide-angle
camera.
Start the Gallery.
Record videos.
Take photos.
Back to the
previous screen.
Taking a photo
Select a shooting mode, and tap the subject to focus the camera on.
1
Tap to take a photo.
2
Alternatively, press a volume key.
• When the screen is turned off or locked, start the camera by pressing
the Volume Down (-) key twice. To activate this function, tap
Settings General and turn on Shortcut key. To take photos
immediately after the camera is started by the Volume Down (-) key,
activate the Quick shot feature.
Useful Apps 78
Page 81

Recording a video
Select a shooting mode, and tap the subject to focus the camera on.
1
Tap .
2
• To take a photo while recording a video, tap .
• To pause the video recording, tap . To resume the video recording,
tap .
Tap to end the video recording.
3
Pop-out Picture
You can take a photo or record a video by using both the general and
wide-angle lens of the dual camera at the back of the device to shoot the
scenes as if they were put in the frame. The scenes shown in the small,
front screen are shot by using the general camera, and the scenes shown
in the large, background screen are shot by using the wide-angle lens.
Change the front screen to a different shape or apply various effects to
take a sensuous photo or video.
In the Auto mode, tap MODE .
1
Tap and select the desired layout.
2
Select effects:
3
• : Apply a convex lens effect to the area captured by the wide-
angle camera.
• :
Apply greyscale to the area captured by the wide-angle camera.
• :
Darken the edges of the area captured by the wide-angle camera.
• : Blur the area captured by the wide-angle camera.
Tap to take a photo. To record a video, tap .
4
Useful Apps 79
Page 82

Multi-view
You can take multiple photos or videos in the form of a collage by
using the front and rear cameras. Photos and videos can be saved with
different layouts.
In the Auto mode, tap MODE .
1
Tap and select a layout.
2
Tap to take photos, according to the on-screen instructions. To
3
record a video, tap .
• Tap to record a short video clip.
• To switch between front and rear (general or wide-angle) cameras,
drag up or down, or left or right.
• To take continuous shots of photos or videos at specific intervals,
tap and hold or .
• Tap / to take pictures or record videos simultaneously or
sequentially.
Useful Apps 80
Page 83

Snap
Select Multi-view
You can record short videos clips and assemble them into a 60-second short film.
On the camera screen, tap MODE .
1
Tap .
2
• Tap the icon once to record a three-second video clip. Tap and
hold the icon to create a longer video clip (maximum length: one
minute).
layout.
Preview the
selected clip.
Delete the
selected clip.
Save the video.
Delete all the clips.
Play all the clips.
Tap SAVE.
3
Timeline.
Panorama
You can create a panoramic photo by moving the camera in one direction
to photograph and stitch continuous shots of for a wide view.
In the Auto mode, tap MODE .
1
Tap and then slowly move the camera in one direction.
2
• Move the device by following the direction of the arrow in the guideline.
Tap to end shooting.
3
Useful Apps 81
Page 84

Slow-motion Video
You can create an entertaining video by changing the moving speeds
of subjects in your video. This feature allows you to record a video at a
faster rate of speed and then play it at the normal speed so that the
video appears to be slowed down.
In the Auto mode, tap MODE .
1
Tap and record a video.
2
Tap to end the video recording.
3
Time-lapse
You can take a sequence of frames at set intervals to record changes
that take place slowly over time, such as cloud movements, celestial
motions, traffic, and more.
In the Auto mode, tap MODE .
1
Tap and record a video.
2
• To adjust the video playback rate, tap .
Tap to end the video recording.
3
• While recording a time-lapse video, voices are not recorded.
Useful Apps 82
Page 85

Burst shot
You can take continuous shots of photos to create moving pictures.
In the Auto mode, tap and hold .
• Continuous shots are taken at a fast speed while is held down.
• Up to thirty (30) continuous photos can be taken.
Connecting with LG friends cameras
You can connect the device to another camera to view photos or videos
saved on the camera.
• This function is available when using multi-view or snap.
• The LG Friends cameras that can be connected with the device are
optional accessories. Consult with LG Customer Service Centre for
purchasing.
• This function may not be supported or some options may differ,
depending on the area or service provider.
Customising camera options
You can customise a variety of camera options to suit your preferences.
In the Auto mode, tap .
• Available options vary depending on the selected camera (front or rear
camera) and the selected shooting mode.
Useful Apps 83
Page 86

Select an aspect ratio for photos or quality for videos.
Obtain photos or videos in vivid colours, and get compensated
effects even when they are taken against the light. These
functions are provided by the high dynamic range (HDR)
technology equipped in the camera of the device.
Apply film effects to photos.
Set the timer to automatically take photos after a specified period
of time.
Take photos with voice commands.
(Available choices: cheese, smile, whisky, kimchi, LG)
Reduce motion blur when taking a photo or recording a video:
• : Record a video stably when you are moving or walking.
/
• : Use to reduce little blur while taking a photo or recording a
video.
Display guide grids so that you can take photos or record videos
based on the horizontal and vertical reference lines.
Set the locations where you want to save photos and videos.
These options appear when an external memory card is inserted.
/
• : Save to the internal storage.
• : Save to the external memory card.
Customise auto-shooting settings. These options appear when
using the front camera.
/
• : Shoot using the Gesture Shot feature.
• : Shoot when the camera detects a face.
Choose whether to use Gesture View to view the taken photo
immediately after taking a photo. These options appear when
using the front camera.
/
• : Turn on Gesture View.
• : Turn off Gesture View.
Flip images. These options appear when using the front camera.
• : Do not flip the image.
/
• : Flip the image horizontally.
Useful Apps 84
Page 87

Applying film effects
You can apply filters of various colours to photos.
In the Auto mode or Manual mode, tap .
1
Select the desired film effect.
2
Manual mode
You can create photos featuring professional touch by using a variety
of advanced features. Adjust the white balance, focus, brightness, ISO,
shutter speed and other options.
On the camera screen, tap .
1
Customise shooting options.
2
Select file format.
Adjust white
balance.
Adjust focus.
Adjust brightness.
Tap to take the photo.
3
Useful Apps 85
Adjust exposure
level.
Adjust shutter
speed.
Adjust ISO speed.
Page 88

Saving in RAW file format
You can compensate the images of photos by saving them in the
RAW file format. While taking a photo, a DNG file is created along
with the JPEG file. The DNG file is a file format that saves data in an
uncompressed high resolution format.
In Manual mode, tap to turn on .
• If you take photos when is displayed, the images are saved as
JPEG and DNG files. Gallery shows only JPEG files and displays on
photos.
• If you delete photos from Gallery, the DNG files are also deleted. If
you delete photos from a computer or File Manager, you can delete
the JPEG and DNG files separately.
• Saving a photo in the RAW format takes up more space because the
file contains a larger data.
Taking selfies
You can use the front camera to view your face on the screen and take
selfies.
• When using the front camera, you can change in camera options how
selfies are taken. See
Customising camera options
for details.
Useful Apps 86
Page 89

Gesture shot
You can take selfies by using gestures.
Show your palm to the front camera and then clench your fist.
• In three seconds, a photo is taken.
• To use this function, make sure that is selected in camera options.
• An alternative way to take gesture shots is to clench your fist and then
open it towards the front camera.
• Make sure that your palm and fist are within the reference line so that
the camera can detect them.
• Access to some functions may be restricted during multi-view shooting.
Interval shot
You can take continuous selfies.
While using the front camera, tap and hold . Alternatively, show your
palm to the camera, then clench your fist twice quickly.
• Four photos are taken at three second interval.
Useful Apps 87
Page 90

Taking auto-selfies
You can use the face detection feature to take selfies easily and
conveniently. You can set the device so that, when you look at the screen,
the front camera detects your face and takes a selfie automatically.
• When the front camera detects your face, the frame turns white.
Then if you stop moving, the frame turns blue and the front camera
takes a photo.
• Tap , then tap until appears to activate the auto-selfie
function.
Gesture view
After taking a selfie with the front camera, you can preview the selfie
immediately by placing the screen close to your face.
Useful Apps 88
Page 91

• To use this function, make sure that is selected in camera options.
• Only one preview is available each time a photo is taken.
• If you rotate the device while in preview screen, the screen switches to
camera mode.
Gallery
Gallery overview
You can view and manage photos and videos saved on your device.
Tap .
1
• Saved photos and videos are displayed by the folder.
Tap a folder and select a file.
2
• View the selected file in full-screen mode.
• Swipe left or right on the displayed photo or video screen to view
the previous or next file.
• Some file formats may not be supported, depending on the installed
software.
• Some files may not be opened due to encoding.
• Files that exceed the size limit may cause an error.
Useful Apps 89
Page 92

Viewing photos
Access additional
Back to the
Open with QSlide.
previous screen.
Add or delete
favourites.
Editing photos
While viewing a photo, tap .
1
Use a variety of effects and tools to edit the photo.
2
Tap to apply changes.
3
Tap SAVE to save changes.
4
• The changes are overwritten to the original file.
• To save the edited photo as another file, tap Save copy.
Playing a video
Add or delete
favourites.
Adjust the sound
volume.
Rewind the video.
options.
Delete images.
Share images.
Start the camera.
Edit images.
Access additional
options.
Edit the video.
Lock or unlock the
screen.
Fast-forward the
video.
Pause or play the
video.
Useful Apps 90
Page 93

• To adjust the sound volume, drag the right side of the video screen up
Automatically
or down.
• To adjust the screen brightness, drag the left side of the video screen
up or down.
Editing videos
While viewing a video, tap .
1
Use a variety of effects and edit tools to edit the video.
2
create a 15-sec
video clip.
Apply effects.
Select a section to
change the play
speed.
Adjust the video
duration.
Tap SAVE to save changes.
3
Deleting files
You can delete files by using one of the following options:
• Tap and hold a file from the file list, then tap Delete.
• Tap from the file list, then select files.
Sharing files
You can share files by using one of the following options:
• While viewing a photo or video, tap to share the file by using the
method you want.
• Tap from the file list to select files and share them using the
method you want.
Useful Apps 91
Page 94

Calculator
You can use two types of calculators: the simple calculator and the
scientific calculator.
Tap Tools Calculator.
1
Use the keypad to make a calculation.
2
• To use the scientific calculator, tap Scientific calculator.
• To view calculation history, tap Calculation history.
Weather
You can view the weather information for a particular area.
Tap Tools Weather.
1
Tap and add the city you want.
2
• On the detailed weather screen, tap / , or swipe the screen left
or right to view the weather for other cities.
Downloads
You can view, delete or share files downloaded via the Internet or apps.
Tap Tools Downloads.
Useful Apps 92
Page 95

Clock
Alarm
You can set an alarm to trigger it at a specified time.
Tap Tools Clock Alarm.
1
Tap to add a new alarm.
2
Configure the alarm settings and tap SAVE.
3
• If you select a previously set alarm, you can edit the alarm.
• To delete an alarm, tap at the top of the screen. Alternatively, tap
and hold the alarm.
World clock
You can view the current time in cities around the world.
Tap Tools Clock World clock.
1
Tap and add a city.
2
Timer
You can set the timer to trigger an alarm after a specified period of time.
Tap Tools Clock Timer.
1
Set the time and tap Start.
2
• To suspend the timer, tap Stop. To resume the timer, tap Resume.
• To reset the timer settings, tap Reset.
Tap Stop to stop the timer alarm.
3
Useful Apps 93
Page 96

Stopwatch
You can use the stopwatch to record a lap time.
Tap Tools Clock Stopwatch.
1
Tap Start to initiate the stopwatch.
2
• To record a lap time, tap Lap.
Tap Stop to suspend the stopwatch.
3
• To resume the stopwatch, tap Resume.
• To delete all the stopwatch records, tap Reset.
Voice Recorder
You can record and save your voice or others' voices from important
events. Recorded voice files can be played back or shared.
Tap Tools Voice Recorder.
1
Tap .
2
• To pause recording, tap .
Tap to end recording.
3
• The file is saved automatically and the pre-listen screen appears.
Tap to play the recorded voice.
4
• To save the location details of recording, tap Location.
• To tag a current event information on the recording, tap Event. Then
select the event you want.
• If you tap , recorded voice files appear. You can play a recorded voice
file from the list.
Useful Apps 94
Page 97

Music
Back to the previous
Switch to the playlist.
You can play and manage music files saved on your device.
Tap LG Music.
1
Select a category.
2
Select a music file.
3
screen.
Add or delete favourites.
Play in random order.
Adjust the sound volume.
Tap to play from the
beginning of the
current file /
Double-tap to play the
previous file /
Tap and hold to rewind.
• Some file formats may not be supported, depending on the installed
software.
• Files that exceed the size limit may cause an error.
• Music files may be protected by international copyright owners or
copyright laws. You may have to obtain legal permission before copying
a music file. To download or copy a music file, first check the copyright
law for the relevant country.
• This model supports Hi-Fi audio playback. Hi-Fi audio files display the
Hi-Fi icon.
Access additional options.
Search for music files.
Select a repeat mode.
Set sound effects.
Tap to play the next file /
Tap and hold to fast
forward.
Pause or play.
Useful Apps 95
Page 98

E-mail overview
You can register an email account to your device and then you can check
and send emails from your device.
• If you use mobile data, you may be charged for data usage fee
depending on your pricing plan. Consult with your service provider for
more information.
Registering email accounts
When you use the email app for the first time, register your email
account.
Tap LG Email.
1
Select an email service provider.
2
Enter your email address and password and then tap NEXT to
3
register your account
• To manually register an email account or to register email accounts
not found in the list, tap MANUAL SETUP.
Managing email accounts
To view or edit your email account settings, tap Settings.
• To add an account, tap Add account.
• To delete an account, tap Remove account.
Opening another email account
If several email accounts are registered and you want to view another
account, tap and select another one from the account list.
Useful Apps 96
Page 99

Checking email
Tap and select a mail box.
1
Select an email from the email list.
2
• The email message appears.
Sending email
Tap .
1
Enter the email address of a recipient.
2
Enter a subject and message.
3
• To attach files, tap .
• To access optional menu items, tap .
Tap to send the email.
4
Contacts
Contacts overview
You can save and manage contacts.
Tap LG Contacts.
Adding contacts
Adding new contacts
On the contact list screen, tap .
1
Enter contact details and tap SAVE.
2
Useful Apps 97
Page 100

Importing contacts
You can import contacts from another storage device.
On the contact list screen, tap More Manage contacts
1
Import.
Select the source and target locations of the contact you want to
2
import, and then tap OK.
Select contacts and tap IMPORT.
3
Adding contacts to the speed dial list
On the contact list screen, tap Speed dial.
1
Tap Add contact from a speed-dial number.
2
Select a contact.
3
Searching for contacts
You can search for contacts by using one of the following options:
• On the contact list screen, enter a contact name in the search box.
• Scroll the contact list up or down.
• From the index of the contact list screen, tap the initial letter of a
contact.
Contacts list
Editing contacts
On the contact list screen, select a contact.
1
On the contact detail screen, tap and edit details.
2
Tap SAVE to save changes.
3
Deleting contacts
On the contact list screen, tap and hold a contact.
1
Tap Delete contact.
2
Useful Apps 98
 Loading...