How it Works
Log In / Sign Up
Buy Points
How it Works
FAQ
Contact Us
Questions and Suggestions
Users
LG
Loading...
L
LCS300ANS
2
LCS300AR
12
LCS300ARS
LCS310URP1A
2
LCS310URP5
2
LCS311UR
10
LCS320UB
12
LCS321UB
2
LCS321UBP1A
2
LCS325UB
2
LCS327UB1
2
LCS500U
3
LCS500UN
8
LCS500UNH
2
LCS500UNS
2
LCS500UR
14
LCS500URP
LCS500URS
LCS510IR
14
LCS510IRP1
2
LCS510UR
9
LCS520IP
10
LCS700B
LCS700BN
11
LCS700BNH
2
LCS700BR
15
LCS700BRS
2
LCS710BR
10
LCS710DAB
5
LCS720BO
6
LCS726BO1
2
LCS726BO2
3
LCS726BO3
LCS726BO4
3
LCSC1513ST
2
LCSP1110ST
3
LCU240CP
6
LCU3100R-DP
LCU340CP
5
LCU380CP
LCU5300R
LCU5300R-BN
2
LCU5300R-BP
4
LCU5500R-BP
2
LCV1100R-DN
LCV1100R-DP
2
LCV5100-BN
LCV5100-BP
2
LCV5300-BN
LCV5300-BP
2
LCV5300R-BN
3
LCV5300R-BP
4
LCV5500-BN
LCV5500-BP
3
LCV800
LCV800R
3
LCV900B
4
LCW003
2
LCW004
LCW-005
2
LCW006
LCW007
LCW010
LCW05 VWE5
LCWW
LCX K277
2
LCZ2850-DN
2
LCZ2850-DP
2
LCZ3750
LCZ3750-DN
LCZ3750-DP
LD
LD-05AW2
LD-10
LD-10D
LD-10D2
LD-10MP
LD-10MPS
LD-1204M
LD-1204M1
4
LD-1204W
LD-1204W1
2
LD-12AS1
LD-12AT7
LD-12AW2
2
LD-12AW5
LD-12BS6
LD-12B series
LD-1403W
2
LD-1403W1
2
LD-1415M
2
LD-1415M1
LD-1415T1
2
LD-1415W1
LD-1416T
2
LD-1419B2
LD-1419C2
LD-1419D2
LD-1419L2
LD-1419M2
Loading...
Loading...
Nothing found
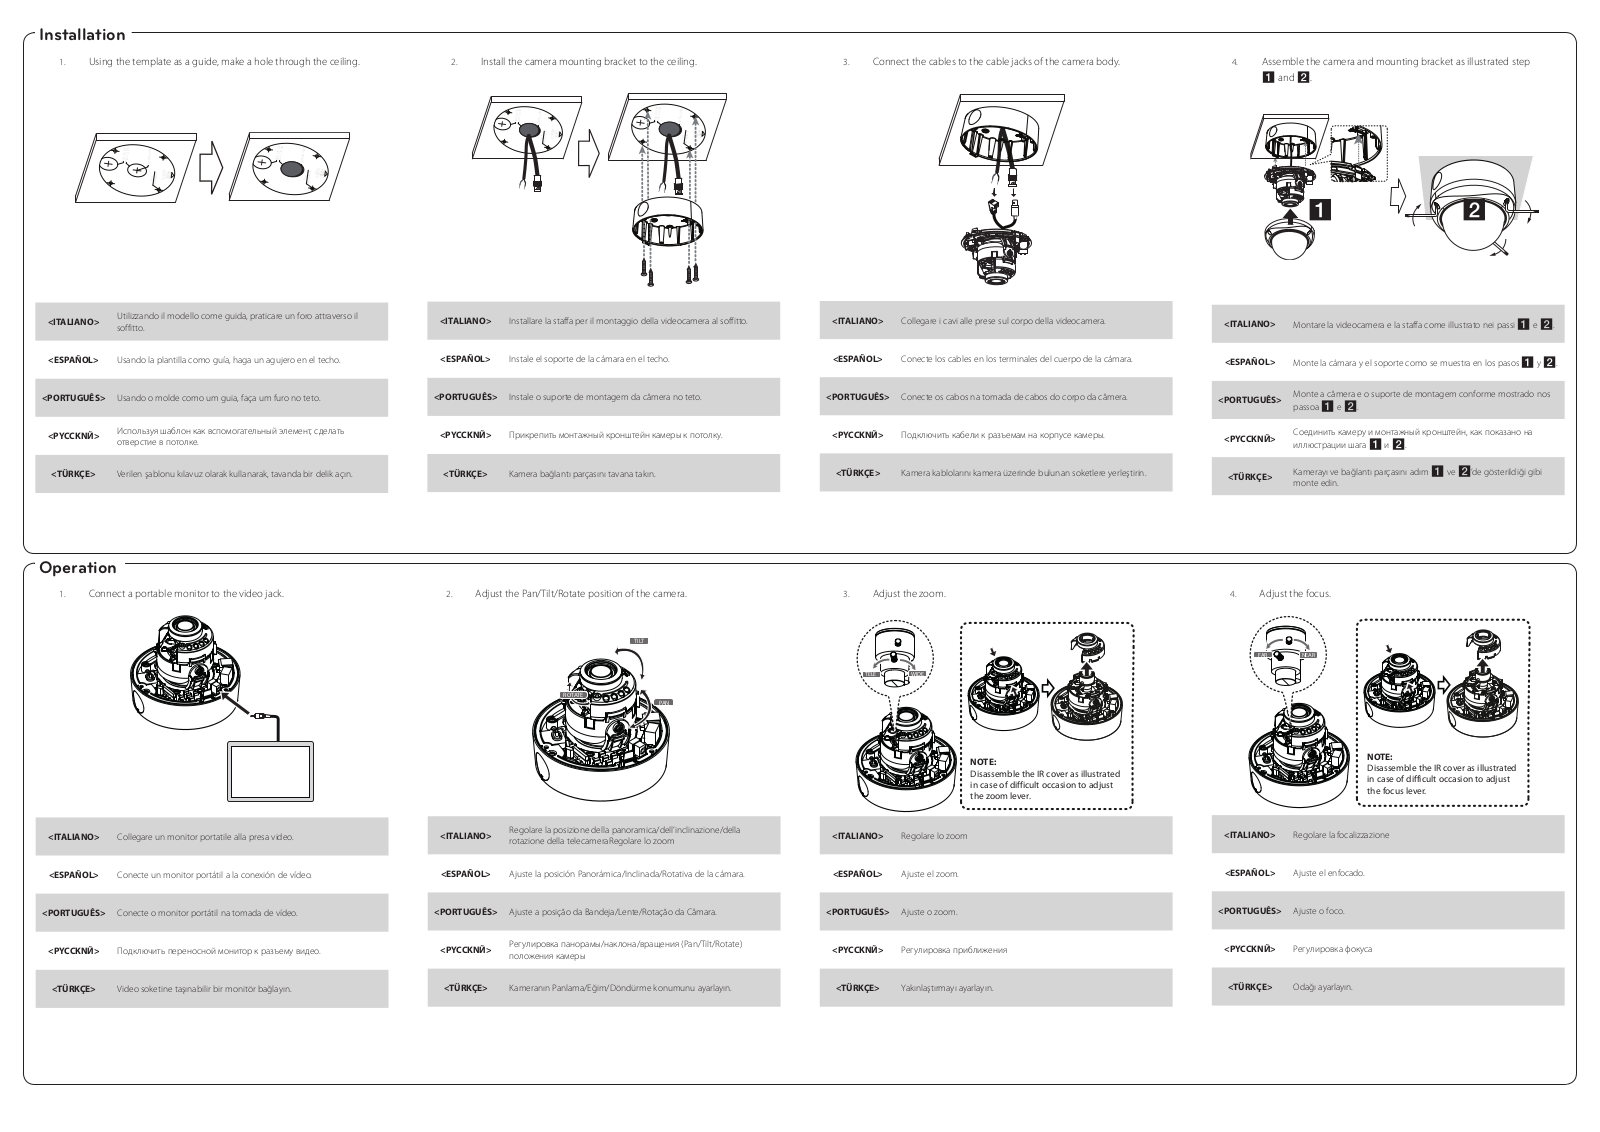
LCV5300R-BN
Owner's Manual
2 pgs
7.6 Mb
0
Owner's Manual
2 pgs
7.62 Mb
0
User's Guide
2 pgs
7.83 Mb
0
Table of contents
Loading...
LG LCV5300R-BN User's Guide
...
LG User's Guide
Download
Specifications and Main Features
Frequently Asked Questions
User Manual
Download
Loading...
+
hidden pages
Unhide
You need points to download manuals.
1 point = 1 manual.
You can buy points or you can get point for every manual you upload.
Buy points
Upload your manuals
 Loading...