

Page 1

DoCoMo W-CDMA, GSM/GPRS system
Thank you for purchasing the “FOMA L601i”.
Before or during use of the FOMA L601i, make sure that you read this manual and the separate manuals such as for the battery pack
thoroughly so that you can use the FOMA L601i correctly. If you feel any inconvenience in reading the manual, contact the DoCoMo
Information Center listed on the back page of this manual.
The FOMA L601i is designed to be your close partner. Treat it carefully at all times to ensure long-term performance.
Before using your FOMA phone
Because the FOMA phones use radio waves, they cannot be used in places where radio waves do not reach, such as inside tunnels,
underground, or in buildings; or the outside where radio waves are weak or out of the FOMA service area. They may not be used in the
high-rise buildings even when the antennas are unobstructed. You may also experience interruption of calls even when using without
moving while the radio waves are strong enough for the three antennas to appear on the display.
Use the FOMA phone carefully to avoid disturbing other people when in public, or in crowded or quiet places.
Since the FOMA phones use radio waves as the medium of telecommunication, calls may be tapped by the third party. However, the WCDMA and GSM/GPRS systems automatically support tapping prevention, so your conversation will be incomprehensible to the third party.
The FOMA phones change your voice into digital signals and send them to the other party. In places where the radio waves are weak, the
digital signals may not be converted correctly, and in such a case, the voice heard may sound different from the actual original voice.
It is recommended that you make separate notes of the information stored in the FOMA phone and keep such notes in a safe place.
DoCoMo cannot be held responsible in any way for the loss of data stored in the phone.
The user hereby agrees that the user shall be solely responsible for the result of the use of SSL. Neither DoCoMo nor the certifier as listed
herein makes any representation and warranty as for the security in the use of SSL. In the event that the user shall sustain damage or loss
due to the use of SSL, neither DoCoMo nor the certifier shall be responsible for any such damage or loss.
Certifier: VeriSign Japan K.K. Betrusted Japan Co., Ltd. GeoTrust Japan, inc.
This FOMA phone can be used only via the FOMA network or Roaming service area by DoCoMo.
For those who use the FOMA phone for the first time
If this is the first time for you to use the FOMA phone, read this manual in the order as described below. Then you will get acquainted with the
outline of preparing and operating procedures for using your FOMA phone.
1. Attach and then charge the battery pack. > P37, P39
2. Turn the power to the FOMA phone ON, initialize, and confirm your phone number. > P43
3. Check the buttons on the FOMA phone for their roles. > P28
4. Confirm the meanings of icons that appear on the display. > P31
5. Learn how to operate the menus. > P34
6. Get well acquainted how to make and receive calls. > P46, P52
Note that “FOMA L601i” is referred to as “FOMA phone” in this manual.
The functions which use a miniSD memory card are described in this manual; however, you need to obtain a miniSD memory
card separately to make these functions available. See page 166 for the miniSD memory card.
It is prohibited to copy all or part of this manual without permission.
The instructions contained in this manual may be changed without notice.
Page 2
How to Read/Refer to This Manual
How to Read/Refer to This Manual
The search methods and page structure of this manual are described here. Screen displays and illustrations
described in this manual are for reference. The actual ones might differ.
How to Refer to This Manual
By the following search methods, you can find pages where your desired functions and explanations are described:
Tabs on Cover ] Cover
Search from the tabs printed on the cover.
Index ] P306
Search from keywords when you know the names of
functions or services.
Contents ] P4
Search from the contents that categorize functions.
Features ] P6
Search from Features when you want to use specific functions of FOMA L601i such as new functions and useful
functions.
Menu List ] P224
Search from list for menus of FOMA L601i.
Quick Manual ] P316
Quick Manual gives you a clear, brief description about fundamental functions. You can take it with you when you
go outing.
a Overseas Use
] See the next page for more details.
See “Overseas use” (P213) for how to use your FOMA phone outside Japan.
1
Page 3
How to Read/Refer to This Manual
Contents / Precautions
Confirming before use
Making Calls /
Receiving Calls
Making /
iving Video-phone Calls
Phonebook
Sound / Display
Settings
Safety settings
Multimedia
(Camera)
i-mode
Mail
i-appli
Data box
Adjusting the Ring Volume ....................68
Adjusting the Effect Tone Volume .........68
Selecting a Ring Tone ............................68
Selecting a Effect Tone..........................69
Setting a Vibrator ...................................70
Activating the Manner Mode .................70
Setting the Ringing Operation for
Incoming Mail .........................................71
Setting the Ringing Time........................72
Setting Sub Display................................73
Setting Fonts of Dial Characters ...........74
Setting Menu Display .............................75
Setting Backlight ....................................75
Setting Color Scheme ............................75
Sound /
Display
1 Ring volume
2 Effect tone volume
3 Select ringtone
4 Select effect tone
5 Vibration settings
6 Manner settings
7 Mail ring duration
Select
Sound
On the Stand-by display,
C
[Menu]
]
or “Sound”
To display the Sound menu
1 Main display
2 Sub display
3 Font
4 Menu style
5 Backlight
6 Color scheme
Select
Display
On the Standby display,
C
[Menu]
]
or “Display”
To display the Display menu
..125
..134
, 130
132,
..135
, 130
, 132
, 132
..126
..126
, 130
, 130
Folder list (Meody)..................150
Folder list (Moving/i-motion) ...150
Mail list (Received)..................129
Mail list (Sent).........................135
Mail list (Unsent).....................137
Software list ...........................149
Sound .........................................68
Effect tone volume ...................68
Mail ring on/off .........................72
Manner mode ..........................70
Ring volume.............................68
Ringing time.............................72
Selecting a effect tone .............69
Selecting a ring tone ................68
a From the Tabs on the Cover
Search for the functions and explanations in the order of the Cover > First page of Chapter > Description page.
a From the Index
2
Search from the index when you know the names of functions or services.
Page 4
How to Read/Refer to This Manual
Titl
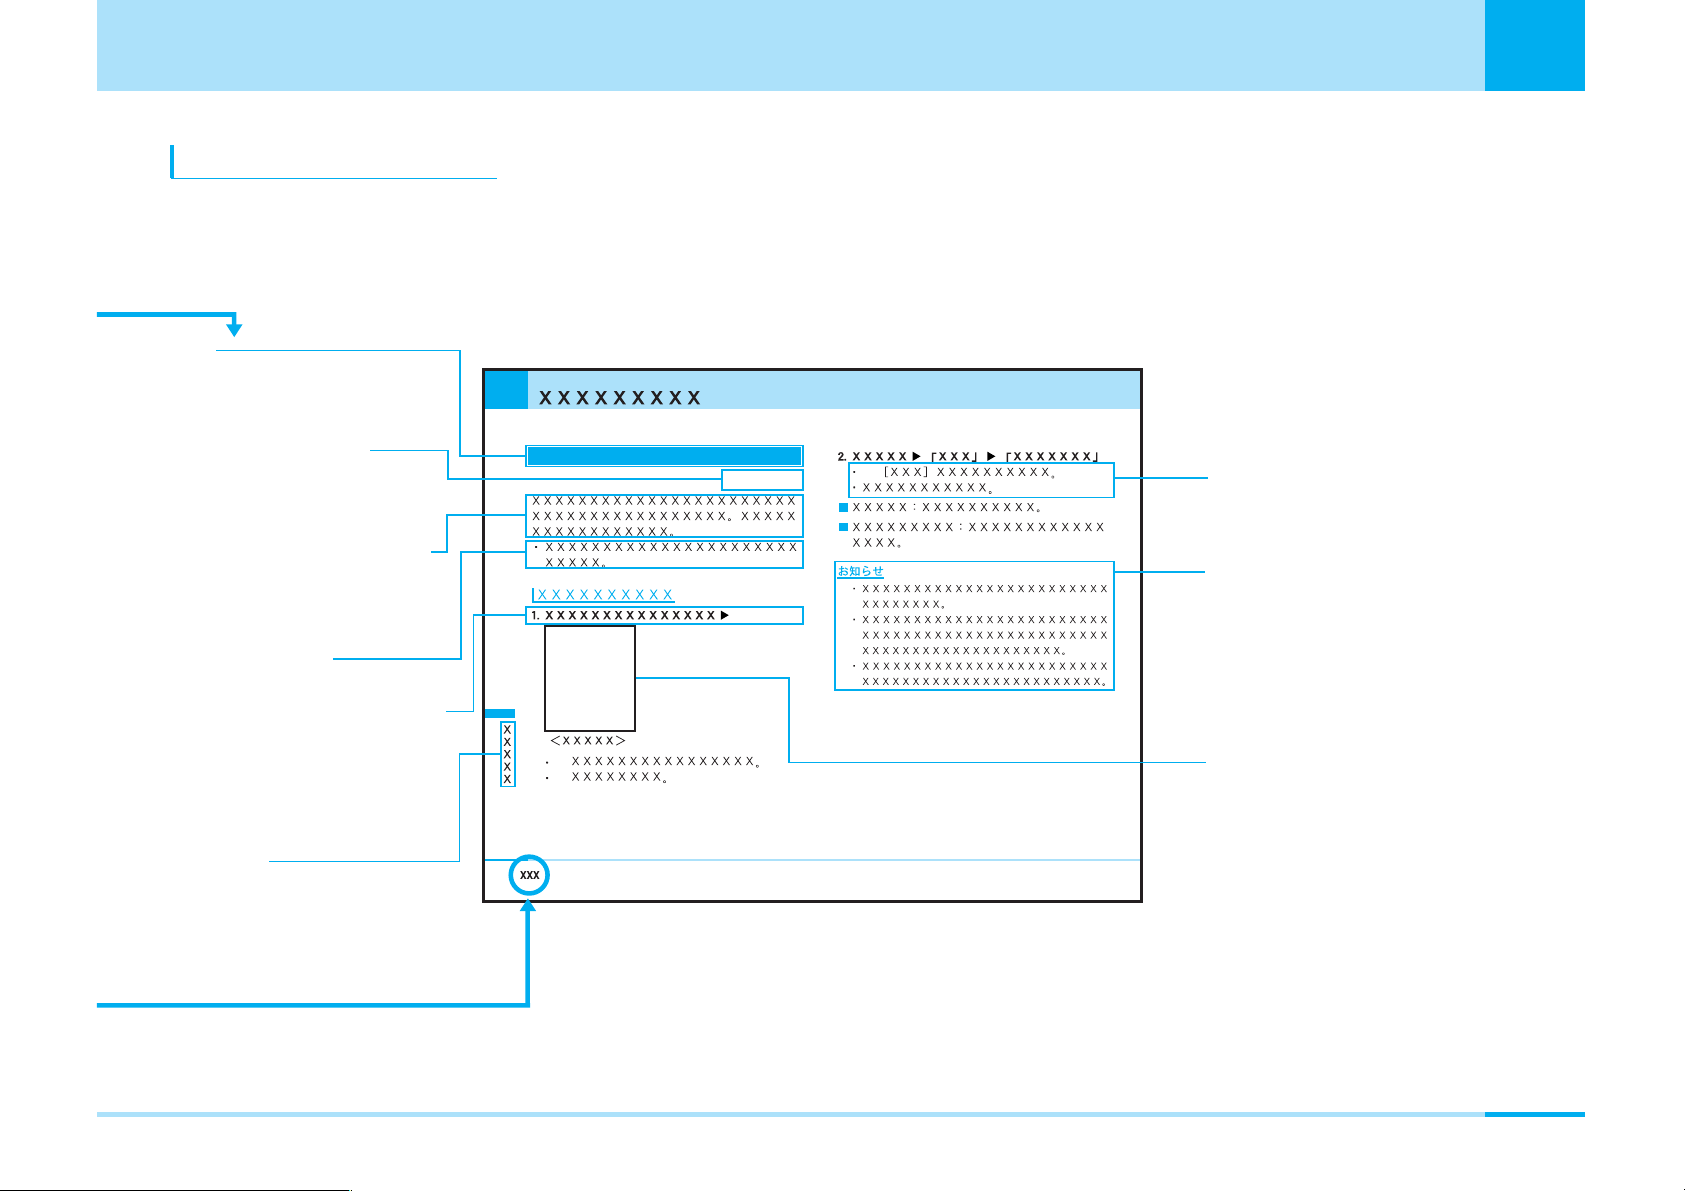
How to use this manual
In this manual, operations of your FOMA phone are explained in the structure as shown below:
• Screen displays and illustrations described in this manual are for reference. The actual ones might differ.
e
Shows the title
Shortcut operation
Shows button operation
from the Stand-by display.
Description of functions
Provides detailed
explanation of each
function.
Supplementary
description of functions
Description of operations
Provides the operation
number and operation
method. > P34
Index tab
Shows the chapter title.
These titles are described
in the tabs on the cover.
How to enter the menu
I
M
C#1
C
I
✽ The above page is a sample.
Supplementary
description of functions
Information
Gives necessary
information, notes,
and supplementary
explanation.
Screen
Shows the screen
displayed in the
process of or after
an operation.
3
Page 5
Contents/Precautions
Contents/Precautions
Contents
Before using your FOMA phone....................... Rear side of Front Cover
For those who use the FOMA phone
for the first time ........................................... Rear Side of Front Cover
How to Read/Refer to This Manual ...................................................... 1
Contents ............................................................................................. 4
Features of FOMA L601i...................................................................... 6
Making Full Use of FOMA L601i!.......................................................... 8
Safety Precautions (Always follow the safety precautions.)................. 10
Notes on Handling............................................................................. 20
Intellectual Property Rights ................................................................ 23
Accessories and Main Options .......................................................... 25
Confirming before use......................................... 27
• Phone Parts and Functions • Display • Menu Operations
• How to Use the Soft Keys • Main Side Button Operations
• Using the UIM (FOMA Card) • Attaching/Removing the Battery Pack
• Charging the FOMA Phone • Turning Power ON
• Turning Power OFF • Clock/Time
• Using Caller ID Notification Service • Own Number
Making Calls/Receiving Calls.............................. 45
• Making Calls • Receiving Calls • Using Public mode (power off)
Making/Receiving Video-phone Calls ................ 51
• About Video-phone • Making Video-phone Calls
• Receiving Video-phone Calls
• Changing Settings for Video-phone Calls
Phonebook........................................................... 57
• Adding to Phonebook • Searching for Phonebook Entries
• Checking the Number of Saved Phonebook Entries
• Setting Phonebook • Setting Groups
• Displaying Own Number
Sound/Display ..................................................... 67
• Adjusting the Ring Volume • Adjusting the Effect Tone Volume
• Setting a Ring Tone • Setting an Effect Tone
• Setting a Vibrator • Activating the Manner Mode
• Setting Ringing Operations for Incoming Mail
• Setting Ringing Time • Setting Main Screen
• Setting Sub Display • Setting Fonts of Dial Characters
• Setting Menu Style • Setting Backlight
• Setting color Scheme
Settings ................................................................ 77
• Call/Answer • Call Feature • Video Phone • Date & Time
• Network (for overseas use) • Changing a Host from i-mode
• Security •
• Others Settings
Safety settings ..................................................... 95
• Passwords
• Preventing the Phone from Activating the Operation of Function
• Other Safety Settings
Multimedia (Camera) ........................................... 99
• Notes for when using the camera • Using the Camera
• Taking Still Images • Shooting Moving Images
i-mode ................................................................ 109
• i-mode Menu • What is i-mode? • Displaying the iMenu display
• Displaying Sites from Bookmark • Displaying Screen memo
• Displaying Last URL • Displaying Internet Web Pages
• Displaying MessageR/F
• Checking Whether Center Holds MessageR/F
• Setting Functions of i-mode • Displaying Sites
• How to See/Use Sites • Using My Menu
• Changing i-mode Password
*You need to obtain a miniSD memory card separately to use the functions related to the miniSD memory card. > P166
4
Page 6

Contents/Precautions
Mail..................................................................... 127
• Mail Menu • i-mode Mail • Displaying Mail in Inbox
• Displaying Mail in Outbox • Displaying Mail in Unsent message
• Composing Mail • Checking New i-mode mail and Message
• Receiving Selected Mail • Checking whether Center Holds SMS
• Changing Mail Settings
i-appli ................................................................. 147
• What is i-appli • Downloading i-appli from Sites • Starting i-appli
Data box............................................................. 153
• Introduction of Data box • Displaying/Managing/Editing Images
• Playing back/Managing/Editing Moving Images/i-motion
• Playing back/Managing/Editing Melody
• Caution on Use of the miniSD Memory Card
• Inserting/removing miniSD memory card
• Playing back/Editing Data on the miniSD Memory Card
• Playing back i-motion (including of music file) downloaded by other
devices in FOMA phone
Tools................................................................... 171
• Using Alarm • Setting the Custom Menu
• Using the Infrared Exchange Function • Using Calculator
• Using Unit Converter • Using World Time • Using Stop Watch
• Using the miniSD Memory Card
Stationery........................................................... 181
• Using Schedule • Using Memo
• Using Date Search • Using Date Counter
• Using Caller ID Notification Service
• Using Caller ID Request Service • Using Set Arrival Act
• Selecting Arrival Call Act • Registering Additional Services
• Registering Additional Guidance • Using English Guidance
• Using Service Dialing Number • Using Call Barring
Data Transmission............................................. 199
• Data Transmission Available from the FOMA phone • Before Use
• Glossary of Data Transmission Terms
• Preparation Flow for Data Transmission • AT command
Entering Characters........................................... 205
• Entering Characters • List of Character Assignment of Dial Buttons
Overseas Use..................................................... 213
• Network Settings • International Roaming Service
• Using the FOMA Phone Overseas
Appendix............................................................ 223
• Menu list • Pre-installed data • List of Terms
• Symbol/Special Character List • Pictograph and Emoticon List
• Common Phrase List • Kuten Code List • List of city in World time
• Multiaccess Combination Patterns
• Multitask Combination Patterns
• Service Available with FOMA Phones
• Introduction of Data Link • Troubleshooting
• Error Messages • Introduction of Options and Related Equipment
• Warranty and Maintenance Services
• Specific Absorption Rate of the Mobile Phone
• Export/Re-export regulations of Japan and USA
Contents/Precautions
Network Service ................................................ 189
• Available Network Services • Using Voice Mail
• Using Call Waiting Service • Using Call Forwarding Service
• Using Nuisance Call Barring Service
Index/Quick Manual .......................................... 305
• Index • Quick Manual
5
Page 7
Contents/Precautions
Contents/Precautions
Features of FOMA L601i
FOMA (Freedom Of Mobile multimedia Access) is the name of the DoCoMo service based on the W-CDMA format,
authorized as one of the world’s standards for third-generation mobile telecommunication systems (IMT-2000).
i-mode Function
Viewing sites > P120
This is on-line service to view the information via
connecting the site or homepage by operating the button
simply.
i-mode mail>P139
You can compose and send i-mode mail. Also, you can
attach images, moving images and melodies for sending.
i-motion > P125
You can obtain images and music from sites or Internet
web pages.
i-motion Mail > P139, P140
You can attach moving images shot by the camera or imotion movies obtained from sites or Internet web pages to
i-mode mail for sending.
i-appli > P148
You can download and use a variety of i-appli software
programs from sites.
Main Futures
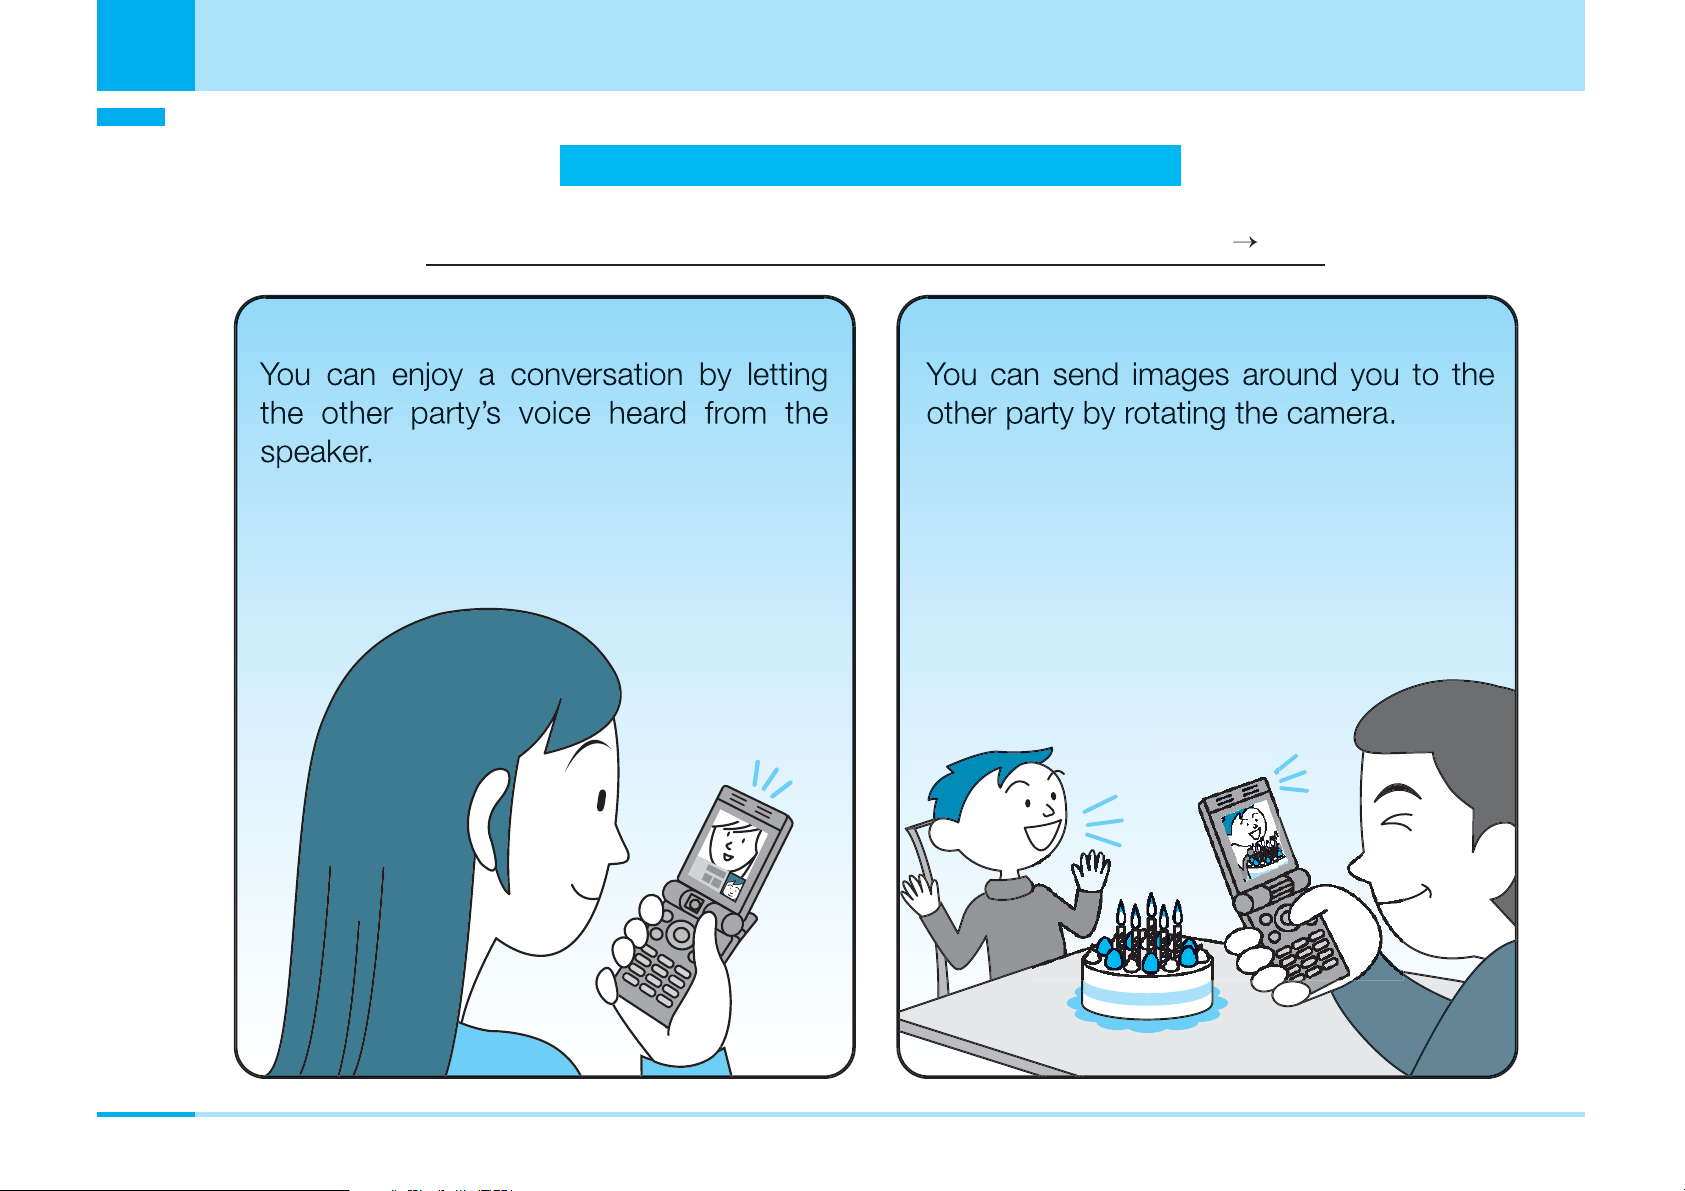
Video-phone > P52
You can have a conversation with the other party seeing
the face each other. You can also let the other party’s
voice heard from the speaker or the other party see the
landscape around you by rotating the camera.
Whole Range of Network Services
Voice Mail (Charged) > P190
Call Forwarding Service (Free) > P193
Call Waiting Service (Charged) > P192
SMS (Short Messages) (Monthly fee Free)
> P141
For example, you can download and enjoy a variety of
games.
*You need to obtain a miniSD memory card separately to use the functions related to the miniSD memory card. > P166
6
Page 8

International Roaming > P214
You can make/receive voice/video-phone calls, perform
i-mode communication, exchange i-mode mail and SMS
messages and perform data transmission with a
personal computer connected to your FOMA phone
abroad with the same phone number. Moreover,
subscribers of the Voice Mail or Call Forwarding Service
can use the network services.
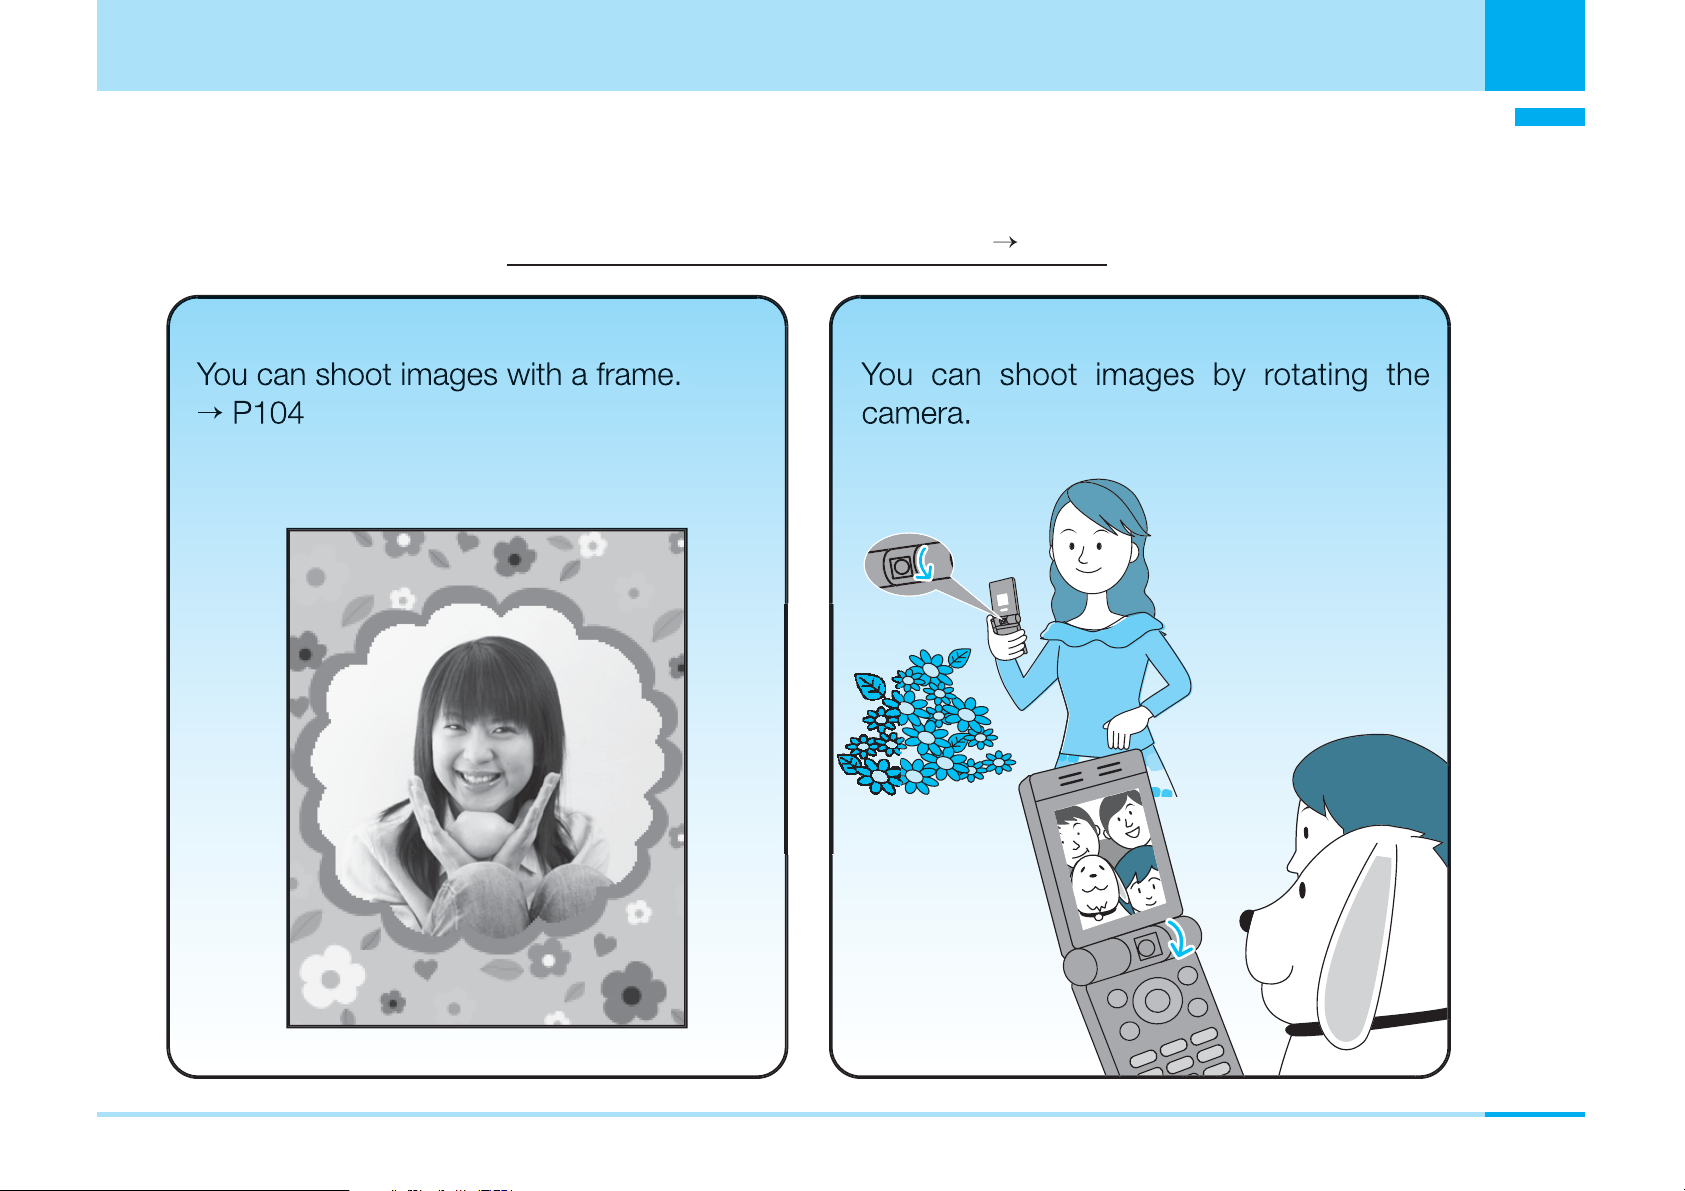
Camera Functions > P101, P106
You can shoot still images and moving images using the
rotatable camera (1,300,000 effective pixels and 1,300,000
recording pixels). You can shoot not only a person or
landscape but also yourself by rotating the camera.
You can use various functions such as adjusting images,
zooming images, special effects when you shoot images.
Compatible with miniSD Memory Card>P166, P179
You can save still images/moving images shot by the
camera or video camera of the L601i phone and melodies
by using a miniSD memory card (option). Saved data can
easily be exchanged between the L601i phone and a
personal computer. You can save the i-motion or music file
composed by external device in miniSD memory, and then
play them in FOMA phone. (You might not play the files if
the condition to play doesn't meet.)
Contents/Precautions
Contents/Precautions
Using the Infrared Exchange>P174
You can exchange the data with FOMA handset via
Infrared.
To display a character in phonebook>P58
In a phonebook, you can set the image and the character
for each entry. You can make your own character by
changing “Face”, “Hair”, “Tops”, “Bottoms”, “Accessory”
and “Scenery”.
Useful Functions for Overseas Use
Unit converter > P176
You can convert a value of currency, surface, length,
weight, temperature, volume or velocity from one unit
to another. You can use Unit converter in confirming a
price converted into yen when you shop overseas.
World time>P178
You can check the date and time of 58 cities in the
world. Also, a world map is displayed so that you can
confirm the locations of cities and the national flags. You
can use Global Clock in confirming the date and time
and the location of your next destination on a trip.
Dual clock display>P73
You can display the time of two cities on the Stand-by
display at the same time. For example, you can view the
time difference by setting the city of a stay place.
7
Page 9
Contents/Precautions
Making Full Use of FOMA L600i!
52
Contents/Precautions
"Video-phone", communication seeing the face each other.
P
8
Page 10
Contents/Precautions
00
Contents/Precautions
Simple and Easy Camera Function
P1
9
Page 11

Contents/Precautions
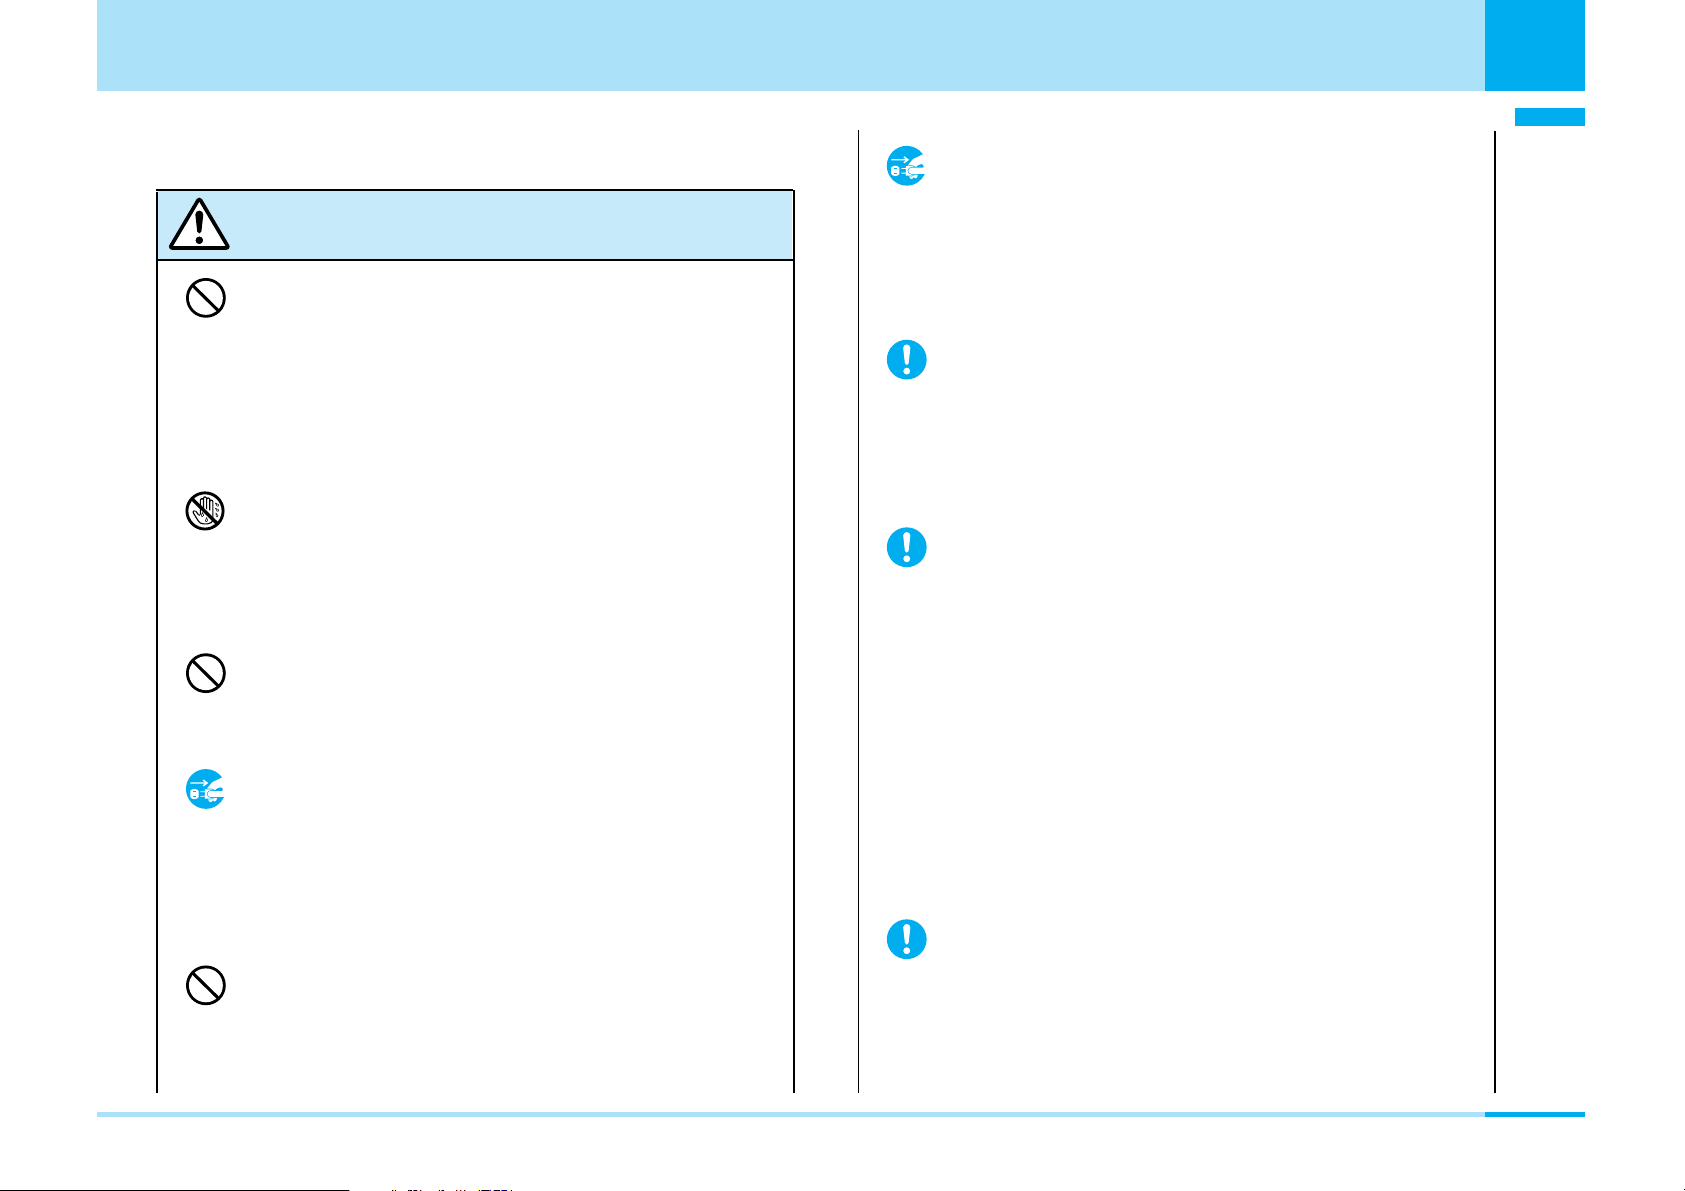
Don’t
Do not
disassemble
No wet
hands
Avoid
water
Pull the power
plug out
Do
Contents/Precautions
Safety Precautions
(Always follow the safety precautions.)
a The following symbols show specific directions:
a Before using the FOMA phone, read these
safety precautions carefully so that you can use
it correctly. After reading the precautions, keep
them in a safe place for later reference.
a Be sure to observe these safety precautions
because they are designed to protect you or
those around you from causing injury and to
avoid unnecessary damage to the property.
a The symbols below indicate the levels of danger
or damage that can be caused if the particular
precautions are not observed.
This symbol indicates that incorrect
Danger
Warning
Caution
handling will almost certainly cause
death or serious injury.
This symbol indicates that incorrect
handling poses a risk of causing
death or serious injury.
This symbol indicates that incorrect
handling poses a risk of causing
injury or damage to the product or
property.
Denotes things not to do (Prohibition)
Denotes not to disassemble.
Denotes not to touch with wet hands.
Denotes not to use where it could get wet.
Denotes mandatory instructions (matters that
must be complied with).
Denotes to pull the power plug out of the
outlet.
a “Safety Precautions” are divided into the
following six sections:
General precautions for FOMA phone, batteries,
adapters/chargers, and UIM ............................... P11
Precautions for FOMA phone ............................. P13
Precautions for batteries ..................................... P15
Precautions for adapters/chargers ...................... P17
Precautions for UIM ............................................ P18
Notes on using near electronic
medical equipment.............................................. P19
10
Page 12
General precautions for FOMA
phone, batteries, adapters/chargers,
and UIM
Danger
Use only the batteries and adapters /
chargers approved by DoCoMo for the
Do
FOMA phone.
Contents/Precautions
Do not use or leave the FOMA phone or
Don’t
accessories in places where it is exposed
to direct sunlight, or in extremely high
temperatures such as inside a car in the
summer heat.
Otherwise, the devices may deform or malfunction,
battery may leak, overheat, burst, or catch fire, or
performance and longevity may deteriorate. Also, part
of the case might be heated, causing bare skin burns.
Contents/Precautions
Do not
disassemble
If you use any type of battery, adapter or charger
other than the specified one, the FOMA phone,
battery or other devices may leak, overheat, burst,
catch fire, or get damaged.
Battery Pack L01 FOMA AC Adapter 01
FOMA AC Adapter 01 for both overseas and
domestic usage FOMA DC Adapter 01
• For other specified products, contact a handling
counter such as a DoCoMo shop.
Do not disassemble, modify or solder the
FOMA phone or accessories.
Accidents such as fire, injury, electric shock, or
malfunction may result. The battery may leak,
overheat, bust or catch fire.
Do not let the FOMA phone or accessories
Avoid
water
get wet.
If liquids such as water or pet urine get onto them,
overheating, electric shock, fire, malfunction, injuries
or others may result. Pay attention to the place of use
of the way of handling.
Warning
Do not use near places such as gas
Don’t
stations where there is danger of fire or
explosion.
If used in dusty places or where there are flammable
gases such as propane or gasoline, explosions or fire
may result.
Next Page
11
Page 13
Contents/Precautions
Contents/Precautions
Warning
Do not place the batteries, the FOMA
Don’t
Don’t
Don’t
phone, adapters/chargers, or UIM in
microwave ovens or high-pressure
containers.
The battery may leak, overheat, burst, or catch fire.
The FOMA phone or the adapter/charger may
overheat, smoke, or catch fire, or its circuit parts may
burst.
Do not throw the FOMA phone or
accessories, or subject them to severe
shocks.
The battery may leak, overheat, burst, catch fire, or
cause damage to the equipment.
Be careful not to let electroconductive
materials (metal pieces, pencil leads, etc.)
contact with the charging terminal or
external connecting terminals. Also, make
sure that those are not entered into the
inside of the FOMA phone.
Short-circuit could cause catching fire or malfunction
of the FOMA phone.
If the FOMA phone or accessories begins
to emit an odor, overheat, discolor, deform,
Do
etc., while being used, charged, or stored,
take the countermeasures as follows;
1. Pull the power plug off the outlet or socket.
2. Shut down the power to the FOMA phone.
3. Remove the battery pack from the FOMA phone.
If you use the devices with these symptoms not
handled, they may overheat, burst, or catch fire, or
the battery may leak.
Caution
If children use the FOMA phone or
accessories, a guardian should explain the
Do
safety precautions and correct operations.
The guardian should also make sure that
the instructions are followed during use.
Otherwise, injury may result.
Do not place the FOMA phone or
Don’t
Don’t
accessories on unstable locations such as
wobbly tables or slanted locations.
The FOMA phone or accessories may fall, resulting in
injury or malfunction.
Keep out of the reach of babies and
infants.
Do
Accidental swallowing or injury may result.
Do not store in humid or dusty places, or in
high temperature environments.
Malfunction may result.
12
Page 14
Contents/Precautions
Caution
Temperature of the FOMA phone, battery
pack or adapter /charger may rise if charging
Do
the battery, shooting moving images, playing
back or using the video phone, i-mode or iappli repeatedly or continuously for a long
time.
Prolonged direct contact with a high temperature
part may cause redness, itching, rash, etc. on
skin depending on your physical conditions or
predisposition.
Be careful especially when using the FOMA
phone connected to the adapter / charger
continuously for a long time.
Precautions for FOMA phone
You may be punished for using the FOMA
phone in airplanes, which is prohibited by law.
Turn off the FOMA phone when near high-
precision electronic devices or devices
Do
using weak electronic signals.
The FOMA phone may possibly cause these devices
to malfunction.
Electronic devices that may be affected:
Hearing aids, implanted cardiac pacemakers,
implanted defibrillators, other medical electronic
devices, fire alarms, automatic doors and other
automatically controlled devices.
If you are using an implanted cardiac pacemaker,
implanted defibrillator or any other electronic
medical device, consult the manufacturer or
retailer of the device for advice regarding possible
effects from the radio waves.
Contents/Precautions
Warning
Turn off the FOMA phone in places where
use is prohibited such as in airplanes and
Do
hospitals.
Otherwise, electronic devices and electronic medical
appliances may be adversely affected. If the Auto
Power ON function is set, deactivate the setting, then
turn the power off.
For use inside medical facilities, make sure that you
comply with their regulations.
If you have any implanted electronic
Don’t
medical equipment, do not place your
FOMA phone in a chest pocket or inner
pocket.
If the FOMA phone is positioned close to electronic
medical equipment, it may cause that equipment to
malfunction.
Next Page
13
Page 15

Contents/Precautions
Contents/Precautions
Warning
For those with weak heart conditions, the
vibrator and ring volume must be adjusted
Do
carefully.
Those functions may cause an effect on the heart.
Do not operate the FOMA phone while
Don’t
driving a vehicle.
Operating a mobile phone during driving has been
prohibited since November 1, 2004 according to the
revised Road Traffic Law. During driving, make sure
that you activate Public mode (power off) or the Voice
Mail Service.
Do not shine the light close to eyes.
Don’t
Doing so can damage eyesight. Also, accidents such
as injury might occur if someone is startled or
dazzled by the light.
Do not put the FOMA phone in the place
Don’t
where it could be affected by an expanded
airbag, etc., on the dashboard.
If the airbag expands, the FOMA phone could hit you
and others, causing accidents such as injury and the
FOMA phone could become damaged.
If thunder starts to rumble while you are
using the FOMA phone outdoors, turn the
Do
power off, and move to a safe place.
Do not directly point the infrared data port
Don’t
at someone’s eyes during transmission.
His/Her eyes may possibly be affected. Other
infrared devices may operate erroneously if the
infrared data port is pointed at them during
transmission.
When talking on the speaker phone, be
sure to keep the FOMA phone away from
Do
your ear.
Otherwise, your hearing could be impaired.
*You need to obtain a miniSD memory card separately to use the functions related to the miniSD memory card. > P166
14
Otherwise, you could be struck by lightning or suffer
an electric shock.
Caution
Do not swing the FOMA phone by its strap.
Don’t
The FOMA phone may hit you or persons around
you, and accident such as injury or malfunction may
result.
Page 16
Contents/Precautions
Caution
Itching, rash or eczema may be caused
depending on your physical conditions or
Do
predisposition. If an abnormality occurs,
stop using the FOMA phone immediately,
and then seek medical attention.
Metals are used for the following parts:
Where it is used Material
Navigation Button
Around the camera
Earpiece/Speaker and
their surrounding
Do not allow liquids such as water, or
Don’t
foreign materials such as metal pieces or
flammable materials to get into the UIM
insertion slit or miniSD memory card slot of
the FOMA phone.
Fire, electric shock or malfunction may occur.
Electronic devices in some types of cars
can be affected by use of the FOMA phone.
Do
For safety’s sake, do not use the FOMA phone inside
such cars.
Do not place magnetic cards or similar
Don’t
objects near the FOMA phone or between
phone parts.
Aluminum (coated)
Chrome plating
Information on magnetic cards such as cash cards,
credit cards, telephone cards and floppy disks may
be deleted.
Be careful not to let your finger or the strap
get caught when you open and close the
Do
FOMA phone.
Accidents such as injury or malfunction may result.
Precautions for batteries
a Check the description on the label of the
battery pack for the type of battery.
Description Type
Li-ion Lithium-ion battery
(Li-polymer) (Lithium-polymer battery)
Danger
If the battery fluid gets into your eyes, do not
rub them. Flush your eyes with clean water
Do
and get medical attention immediately.
Otherwise, the loss of eyesight may result.
Do not throw the battery into fire.
Don’t
The battery may leak, overheat, burst or catch fire.
Contents/Precautions
Next Page
15
Page 17
Contents/Precautions
Contents/Precautions
Danger
Do not let any metal such as a wire contact
Don’t
the terminal. Also, do not carry or store the
battery together with a metal necklace.
The battery may leak, overheat, burst or catch fire.
Do not pierce it with nails, hit it with a
Don’t
hammer, or step on it.
The battery may leak, overheat, burst or catch fire.
Do not use excessive force to attach the
Don’t
battery to the FOMA phone when you
cannot attach it successfully. Also, check
that the battery is the right way round
when you attach it.
The battery may leak, overheat, burst or catch fire.
Warning
If the battery fluid comes in contact with
skin or clothes, immediately stop using,
Do
then wash affected areas thoroughly with
clean water.
If charging is not completed at the end of
the specified charging time, stop charging.
Do
Otherwise, the battery may leak, overheat, burst or
catch fire.
If it leaks or emits an odor, immediately
stop using the battery and keep it away
Do
from fire.
The battery fluid, being flammable, may catch fire and
cause an explosion.
Caution
An exhausted battery should not be
Don’t
disposed of with other waste.
The battery may catch fire or destroy the environment.
After insulating the battery terminals with tape, bring
them to a handling counter such as a DoCoMo shop
or dispose of them in accordance with local waste
disposal regulations.
16
The battery fluid is harmful to skin.
Page 18
Precautions for adapters/chargers
Warning
Never short-circuit the charging terminals
Don’t
when the adapter is plugged into the
power outlet or cigarette lighter socket.
Also, never touch the charging terminals
with fingers or other bare skin.
If liquids such as water get in the charger,
Pull the power
plug out
unplug the power cord immediately from
the outlet or cigarette lighter socket.
Liquid inside the charger may cause electric shock,
smoke, or fire.
When plugging the AC adapter into the
power outlet, firmly plug it in, taking care
Do
not to contact with metal straps or the like.
Contents/Precautions
Contents/Precautions
Fire, malfunction, electric shock or injury may result.
Do not touch the power cord of the
No wet
hands
adapter/charger, or power outlet with wet
hands.
Electric shock or injury may result.
Do not use the AC adapter in steamy
Don’t
places such as a bathroom.
Electric shock may occur.
When the adapter/charger is not to be
Pull the power
plug out
used for a long period of time, unplug the
power cord from the outlet.
Otherwise, electric shock, fire, or malfunction may
result.
Do not use a damaged adapter/charger
Don’t
cord or power cord.
Electric shock, overheating or fire may result.
Otherwise, electric shock, short-circuit or fire may
result.
Use the adapter/charger at the specified
VAC.
Do
Otherwise, fire or malfunction may result. When
using the FOMA phones overseas, use FOMA AC
Adapter 01 for both overseas and domestic usage.
AC adapter: 100 VAC
FOMA AC Adapter for both overseas and domestic
usage: 100 to 240 VAC
(Connect only to home AC outlet)
DC adapter: 12/24 VDC
(For negative (-) grounded vehicles only)
If a fuse of the DC adapter has blown,
replace it with a specified fuse.
Do
Otherwise, catching fire or malfunction may result.
For the specified fuse, see the user’s manual.
Next Page
17
Page 19
Contents/Precautions
Contents/Precautions
Warning
The DC adapter is for use only in a negative
Don’t
(-) grounded vehicle. Do not use them in a
positive (+) grounded vehicle.
Always hold the plug when pulling the
adapter/charger out of the power outlet or
Do
socket.
If you pull the plug out by the cord, the cord may be
damaged, which could result in electric shock or fire.
Fire may result.
Keep the power plugs dust-free.
Do
Otherwise, fire may result.
Place the charger on a stable location
Don’t
during charging. Do not cover or wrap the
charger in cloth or bedding.
The FOMA phone may become separated, or the
charger may overheat, leading to fire or malfunction.
If it starts to thunder, do not touch the
Don’t
FOMA phone and adapter/charger.
You might be struck by lighting or suffer an electric
shock.
Caution
Before cleaning, pull the plug out of the
Pull the power
plug out
power outlet or cigarette lighter socket.
Otherwise, electric shock may result.
Do not place heavy objects on the
Don’t
adapter/charger cord and power cord.
Electric shock or fire may result.
Precautions for UIM
Caution
Be careful when removing the UIM (IC
portion).
Do
Your hand or finger may be injured.
18
Page 20

Contents/Precautions
Notes on using near electronic medical
equipment
a The description below meets “Guidelines on the
Use of Radio-communication Equipment such as
Cellular Telephones – Safeguards for Electronic
Medical Equipment” by the Electromagnetic
Compatibility Conference Japan.
Warning
Turn off the phone in crowded areas such as
inside trains during rush hour, as someone
Do
with an implanted cardiac pacemaker or
implanted defibrillator may be near you.
Operation of an implanted cardiac pacemaker or
implanted defibrillator can be affected by radio waves.
Comply with the following in hospitals or
health care facilities:
Do
• Do not carry the FOMA phone into operating
rooms, intensive care units (ICU) or coronary care
units (CCU).
• Turn off the FOMA phone in hospital wards.
• If there is any electronic medical equipment near
you, turn off the FOMA phone even when in a
location such as a lobby.
• Comply with any regulations of hospital and health
care facilities instructing you not to use or carry in a
mobile phone.
• If the Auto Power On function is set, deactivate the
setting, then turn the power off.
If you use an implanted cardiac pacemaker
or implanted defibrillator, use the mobile
Do
phone 22cm or more away from an
implanted cardiac pacemaker or implanted
defibrillator.
Operation of an implanted cardiac pacemaker or
implanted defibrillator can be affected by radio waves.
Patients using electronic medical equipment
other than implanted cardiac pacemakers
Do
or implanted defibrillators (outside medical
establishments for treatment at home, etc.)
should check the influence of radio waves
upon the equipment by consulting its
manufacturer.
Operation of electronic medical equipment can be
affected by radio waves.
Contents/Precautions
19
Page 21

Contents/Precautions
Contents/Precautions
Notes on Handling
General notes
a Do not let the equipment get wet.
The FOMA phone, battery and adapter/charger, UIM
(FOMA card) are not waterproofed. Do not use them in
environments, which are high in humidity such as in
bathrooms, and do not allow them to get wet from rain.
Furthermore, if carrying them against your body, the
internal parts may become corroded if exposed to body
perspiration.
If the parts are found to have been damaged due to
exposure to the liquids, any repairs will not be covered by
warranty, or repairs may not be possible.
This may be repaired at a cost if repairs are possible.
a Use a dry soft cloth to clean the equipment.
• The screen of the FOMA phone sometimes has a
special coating so that it is easier to see. If you rub it
roughly with a dry cloth, it might be scratched. Take
care of the way of handling, and use only a dry, soft
cloth such as used for cleaning glasses.
When the FOMA phone is left with water drops or stains
on the display, smear might be generated or its coating
might be peeled off.
• Do not use alcohol, thinner, benzene, detergent or other
solvents for cleaning, otherwise the printing may be
removed or discoloration may result.
a Occasionally clean the connecting terminals of
the equipment using a dry cotton swab.
If the connector terminal becomes soiled, the connection
might deteriorate so that the power goes off or the battery
does not charge fully. Wipe the connector terminal with a
dry cloth or cotton swab.
a Do not place the FOMA phone near an air
conditioner outlet.
Condensation may form due to rapid changes in
temperature, and this may corrode internal parts and
cause malfunction.
a Do not place the FOMA phone in places where
it may be subjected to excessive pressure.
Do not place the FOMA phone in a bag along with many
other articles or in a trouser pocket, because this can
damage the LCD display and internal circuitry.
Malfunctions caused by such damage are not covered by
the warranty.
a Do carefully read each instruction manual
attached to the battery or adapter/charger.
Notes on handling the FOMA phone
a Avoid using in extremely high or low
temperatures.
The FOMA phone should be used within a temperature
range of -20 °C to 60°C and a humidity up to 85%.
20
Page 22

a The FOMA phone, if operated near ordinary
phones, televisions or radios that are in use,
may affect them. You should operate your
FOMA phone as far away from such equipment
as possible.
a It is recommended that you make separate
notes of the information stored in the FOMA
phone and keep such notes in a safe place.
We take no responsibility for any loss of the stored data
items.
a Do not sit with the FOMA phone in your
trousers or skirts pocket. Do not place the
FOMA phone under heavy objects in a bag.
Malfunction may result.
a Make sure that nothing, such as a strap, gets
caught between the parts of the FOMA phone
when you close it.
Otherwise, malfunction or breakage may result.
a The FOMA phone becomes warm during use or
charging but this is not an abnormality. Use the
FOMA phone as it is.
Contents/Precautions
Contents/Precautions
Notes on handling batteries
a Batteries have a limited life.
If the usable time of your FOMA phone is extremely short
even when the battery is fully charged, replace the battery.
Make sure that you only buy the specified battery.
a Charge the battery in a place with an ambient
temperature of 0°C to +40°C.
a Make sure that the battery is charged when
you use the FOMA phone for the first time or
have not used it for a long period of time.
a The usable time of the battery varies depending
on the usage environment or its remaining life.
a Store the batteries in a well ventilated place out
of direct sunlight.
When you do not use the battery for a lengthy period of
time, remove it from the FOMA phone with the battery
power completely drained, and store it in the plastic bag
wrapping the battery pack.
Notes on handling chargers and adapters
a Do not leave the FOMA phone with a camera
pointing direct to the sunlight.
Pixels may be discolored or burns may result.
a Charge the battery in a place with an ambient
temperature of 0°C to 40°C.
a Charge the battery where:
• There is excessive humidity, vibration, and dust.
• There are no ordinary phones, television sets or radios
nearby.
Next Page
21
Page 23

Contents/Precautions
Contents/Precautions
a During charging, the adapter or charger may
become warm. This is not an abnormality, so
continue charging.
a Do not use the DC Adapter for charging the
battery when the car engine is not running.
The car battery could go flat.
a When using the power outlet having the
disengaging prevention mechanism, observe
the instructions given in that instruction manual.
a Do not give a strong shock. Also, do not
deform the charging terminal.
Malfunction may result.
a It is recommended that you make separate
notes of the information stored on the UIM and
keep such notes in a safe place.
We take no responsibility for any loss of the stored data
items.
a For the environmental protection, bring any
unneeded UIMs to a handling counter such as
a DoCoMo shop.
a Avoid using in extremely high or low
temperatures.
a Do not damage, carelessly touch, or short-
circuit the IC.
Data might be lost or damage to the IC could result.
Notes on handling the UIM
a Never use more force than necessary when
detaching the UIM.
a Do not use unnecessary force when inserting it
into the phone.
a The UIM may become warm during use, but
this is not a sign of a malfunction. Continue
using it as it is.
a The warranty does not cover damage caused
by inserting the UIM into some other types of
IC card reader/writer.
a Always keep the IC portion clean.
a Use a dry soft cloth to clean the equipment.
22
a Do not drop the UIM or subject it to strong
impacts.
Malfunction may result.
a Do not bend the UIM or place heavy objects on
it.
Malfunction may result.
Notes on handling the Camera
You may be imposed punishment according to the
law and rule (such as nuisance prevention ordinance)
if you use the FOMA phone to give a remarkable
nuisance and misdeed to the public.
Page 24
Contents/Precautions
Please respect the privacy of individuals around you when
taking and sending photos using camera-equipped mobile
phones.
Intellectual Property Rights
Copyrights and Rights of Portrait
You have no right to copy, modify, or distribute the contents
of which a third party holds the copyright such as text,
images, music, or software downloaded from web pages on
the Internet, or images shot by the cameras of this product
without permission from the copyright holder except for when
the copy or quote is for personal use that is allowed by the
Copyright Law.
Note that it may be prohibited to shoot or record live
performances or exhibitions even for personal use. Make sure
that you refrain from taking portraits of other persons and
distributing such portraits over the Internet without consent,
as this violates portrait rights.
Trademarks
• “FOMA”, “mova”, “i-mode”, “i-appli”, “i-motion”, “i-motion
Mail”, “MessageF”, “i-melody”, “mopera”, “mopera U”,
“WORLD CALL”, “WORLD WING”, “Deco-mail” “Public
mode”, “My DoCoMo” and the logos of “FOMA”, “i-mode”,
and “i-appli” are trademarks or registered trademarks of
NTT DoCoMo, Inc.
• “Multitask” is a trademark of the NEC Corporation.
• “Catch phone” (Call Waiting Service) is a registered
trademark of Nippon Telegraph and Telephone
Corporation.
• Java and Java related trademarks and logos are
trademarks or registered trademarks of Sun Microsystems,
Inc. in the United States and other countries.
• miniSD
TM
is a trademark of SD Association.
• NetFront and are trademarks
or registered trademarks of ACCESS Co.,Ltd. In Japan and
other countries.
• Microsoft, MS, and Windows are registered trademarks or
trademarks of Microsoft Corporation in the United States
and other countries.
• Windows XP is abbreviation of Microsoft
Professional operating system or Microsoft
®
Windows®XP
®
Windows®XP
Home Edition operating system.
• Windows 2000 is Microsoft
®
Windows®2000 Professional
operating system.
• Windows Me is abbreviation of Microsoft
®
Windows
®
Millennium Edition operating system.
• Windows 98 is abbreviation of Microsoft
®
Windows®98
operating system.
• Windows 98SE is abbreviation of Microsoft
®
Windows®98
operating system SECOND EDITION.
• Sometimes transcribed like Windows XP, 2000, Me, 98SE,
98.
Contents/Precautions
23
Page 25

Contents/Precautions
Contents/Precautions
• Other company names and product names described in
the text are trademarks or registered trademarks of those
companies.
Others
• This product contains NetFront v3.0 for FOMA Internet
browser software of ACCESS Co., Ltd.
NetFront v3.0 is a product of ACCESS Co., Ltd.
Copyright© 1996-2006 ACCESS Co., Ltd.
• Some part of the software in this product contains modules
developed by Independent JPEG Group.
• Adobe and Acrobat Reader are trademarks or registered
trademarks of Adobe systems Incorporated in the US and
other countries.
• This product is licensed under the MPEG-4 patent portfolio
license for the personal and non-commercial use of a
consumer to
– encode video in compliance with the MPEG-4 Visual
Standard (“MPEG-4 Video”) and/or
– decode MPEG-4 Video that was encoded by a consumer
engaged in a personal and non-commercial activity
and/or was obtained from a licensed video provider. No
license is granted or implied for any other use.
Additional information may be obtained from MPEG LA, LLC.
• Licensed by QUALCOMM Incorporated under one or more
of the following United States Patents and/or their
counterparts in other nations:
4,901,307 5,490,165 5,056,109 5,504,773 5,101,501
5,506,865 5,109,390 5,511,073 5,228,054 5,535,239
5,267,261 5,544,196 5,267,262 5,568,483 5,337,338
5,600,754 5,414,796 5,657,420 5,416,797 5,659,569
5,710,784 5,778,338
24
Page 26
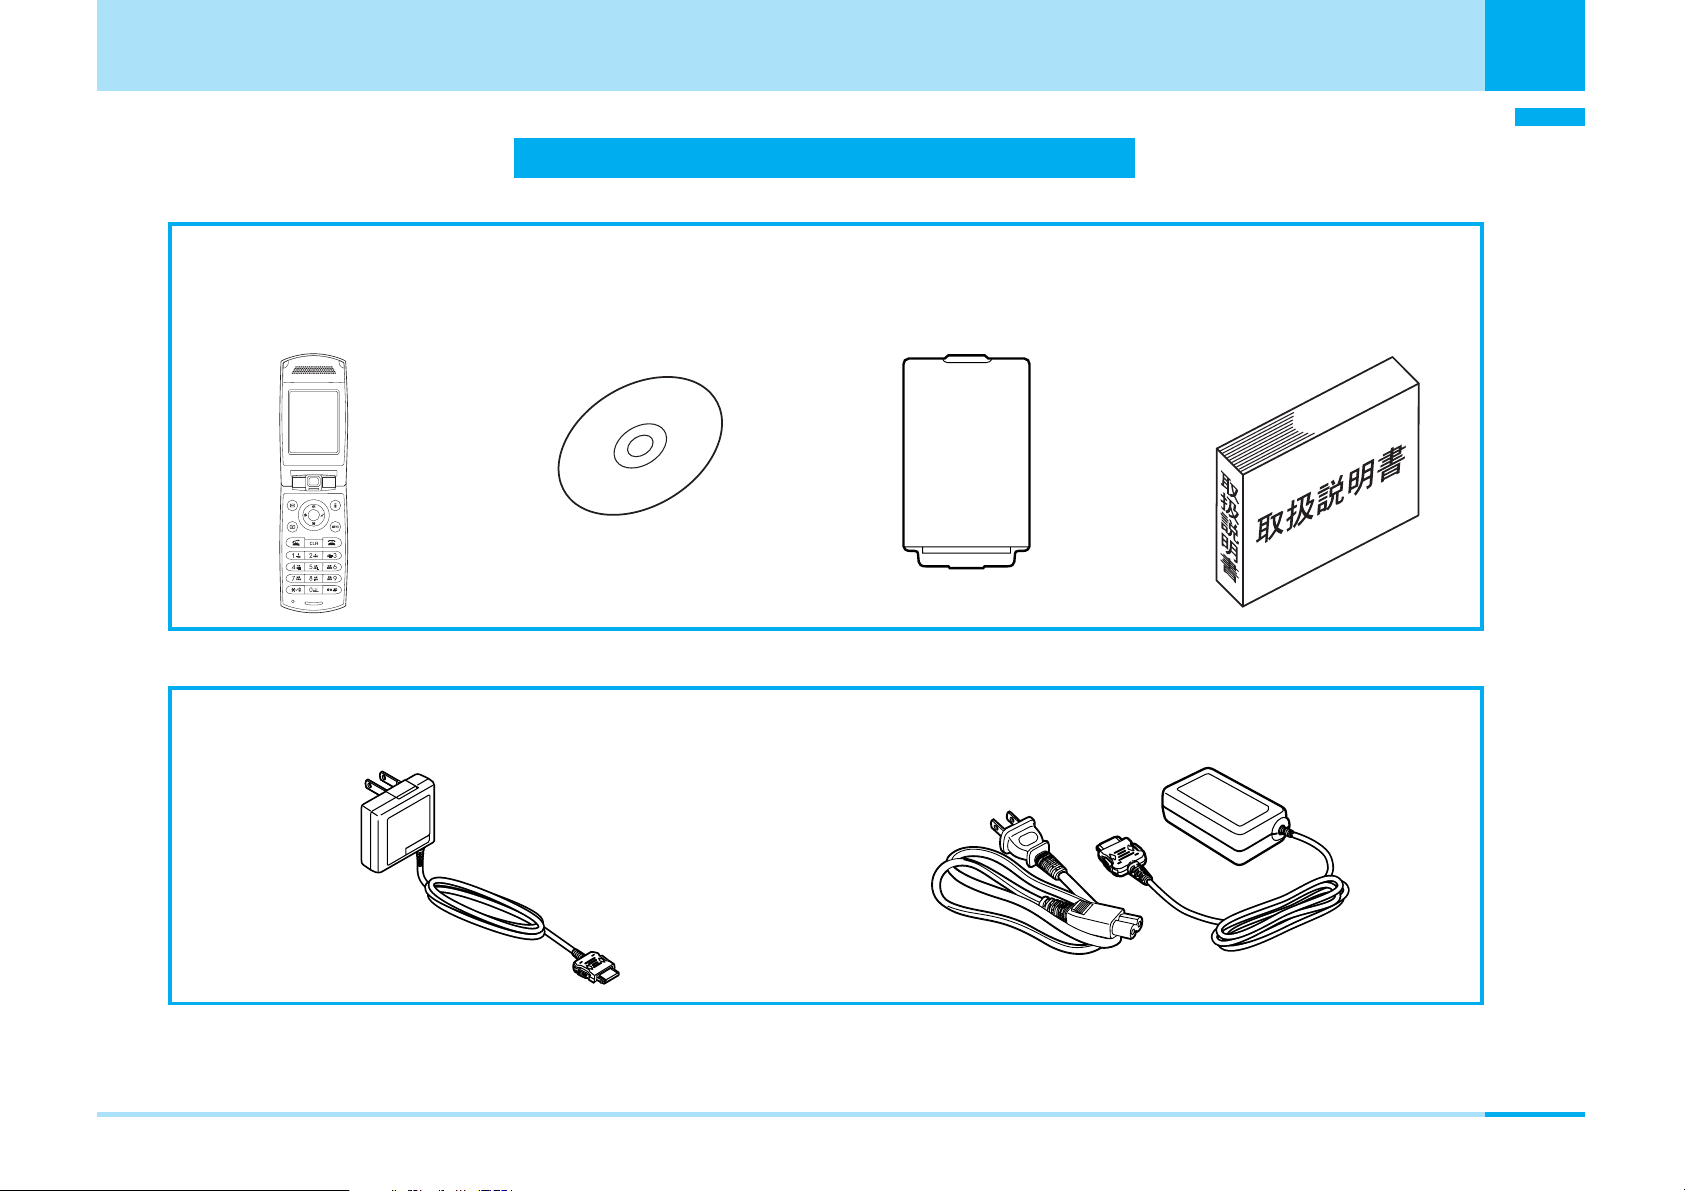
<Accessories>
Contents/Precautions
Contents/Precautions
Accessories and Main Options
• L601i Handset
(with Warranty and
Rear Cover L01)
<Main Options>
• FOMA AC Adapter 01
Compatible with standard
• CD-ROM for L601i
• Battery Pack L01
• Instruction manual
•
Quick Manual
included (P316)
• FOMA AC Adapter for Abroad 01
(With Warranty card and Instruction Manual)
Other Options > P297
25
Page 27

Page 28

Phone Parts and Functions .................. 28
Display ................................................... 31
Menu Operations................................... 34
How to Use the Soft Keys..................... 34
Main Side Button Operations ............... 35
Using the UIM (FOMA Card) ................. 36
Attaching/Removing the
Battery Pack .......................................... 37
Confirming before use
Charging the FOMA Phone................... 39
Turning Power ON................................. 43
Turning Power OFF ............................... 43
Clock/Time ............................................ 43
Using Caller ID Notification Service ..... 43
Own Number.......................................... 43
27
Page 29
Confirming before use
Ç)égópëOÇÃämîF
Confirming before use
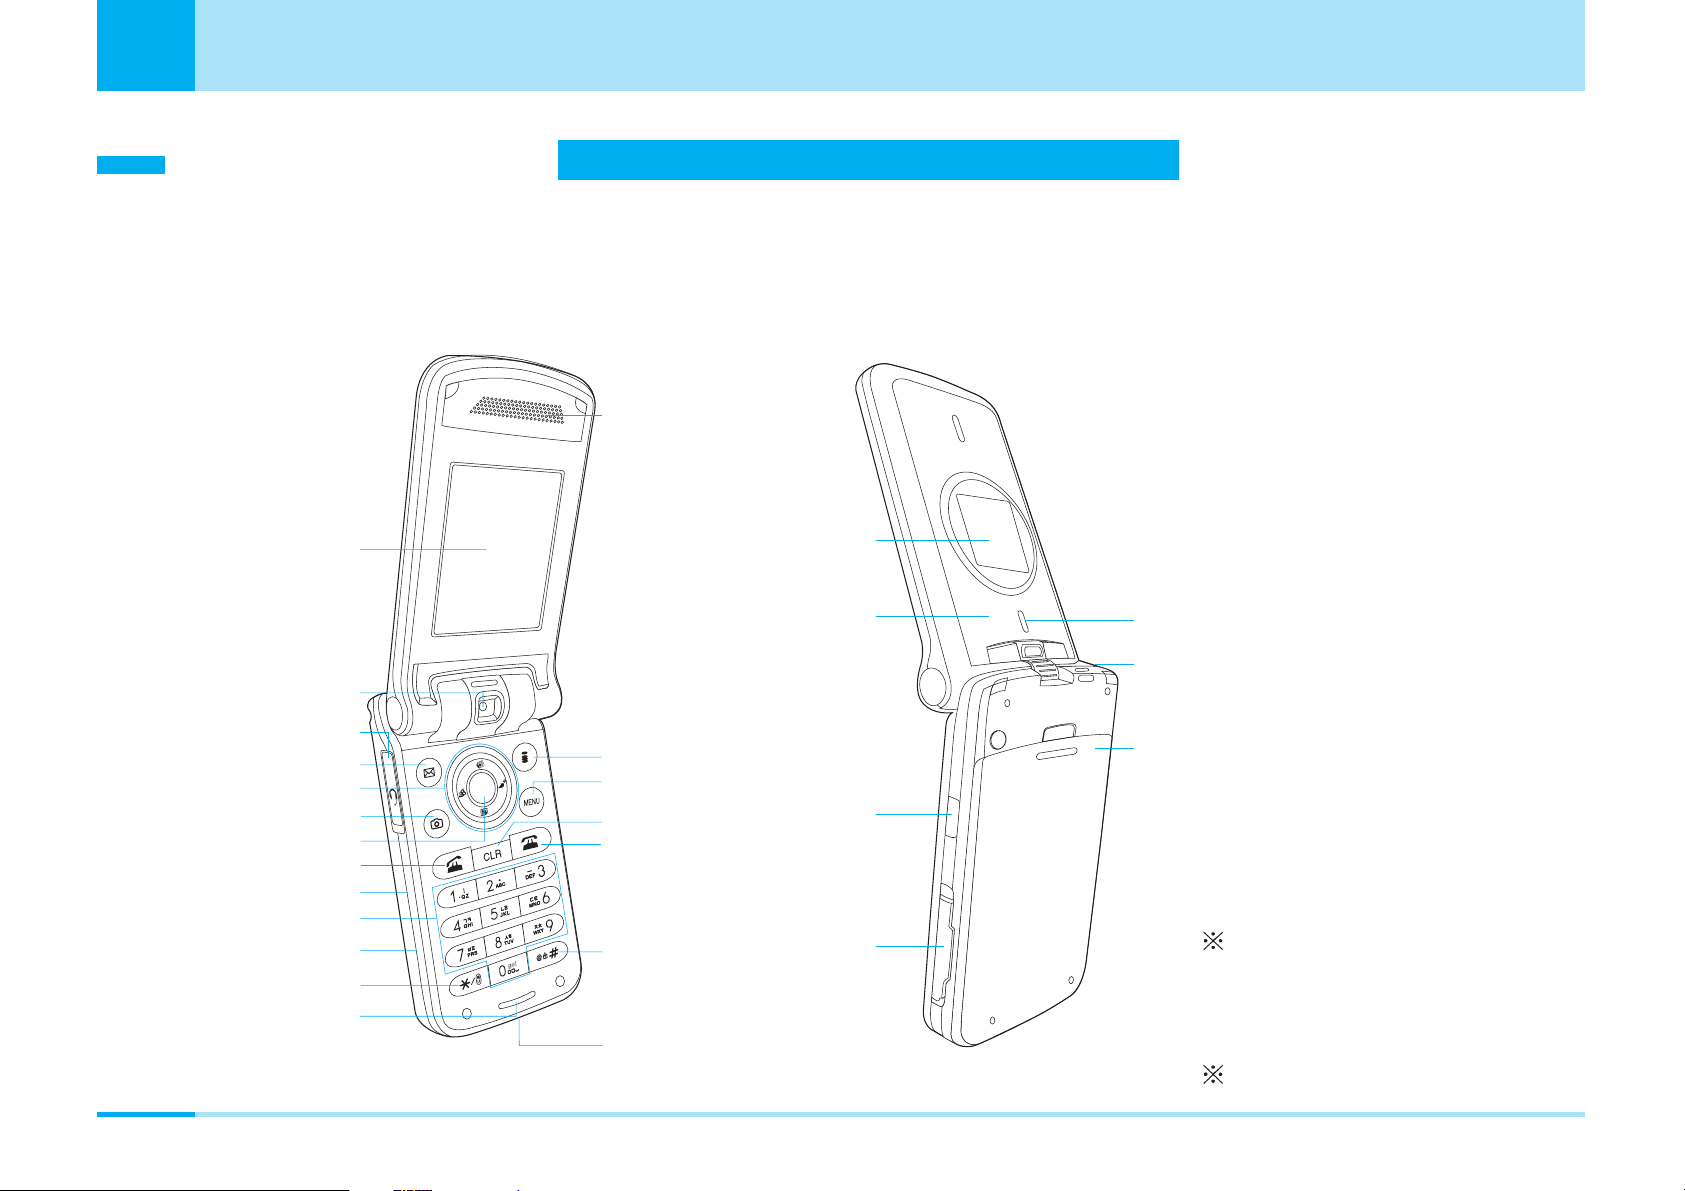
Phone Parts and Functions
The Name and function of each part of the FOMA phone are as follows.
• This manual describes operation of each button using an illustration of the button.
1
2
3
4
5
6
7
8
9
!
"
#
$
%
&
(
)
~
+
,
-
/
<
=
.
:
;
Dimensions (H x W x D):
Approx. 89 x 47 x 25 mm
When closed excluding a
projection part
Weight:
Approx. 120g
With battery attached
28
Page 30
Confirming before use
1 Earpiece/Speaker
Sounds for incoming calls and alarm.
Also, you hear the other party’s voice through this
speaker when using the speaker phone.
: When you use speakerphone, you should not close the ear.
2 Main display > P31
3 Camera
For shooting still images and moving images, and for
sending images on a video-phone call. Rotate the
camera to take a shot.
> P52, P101, P106
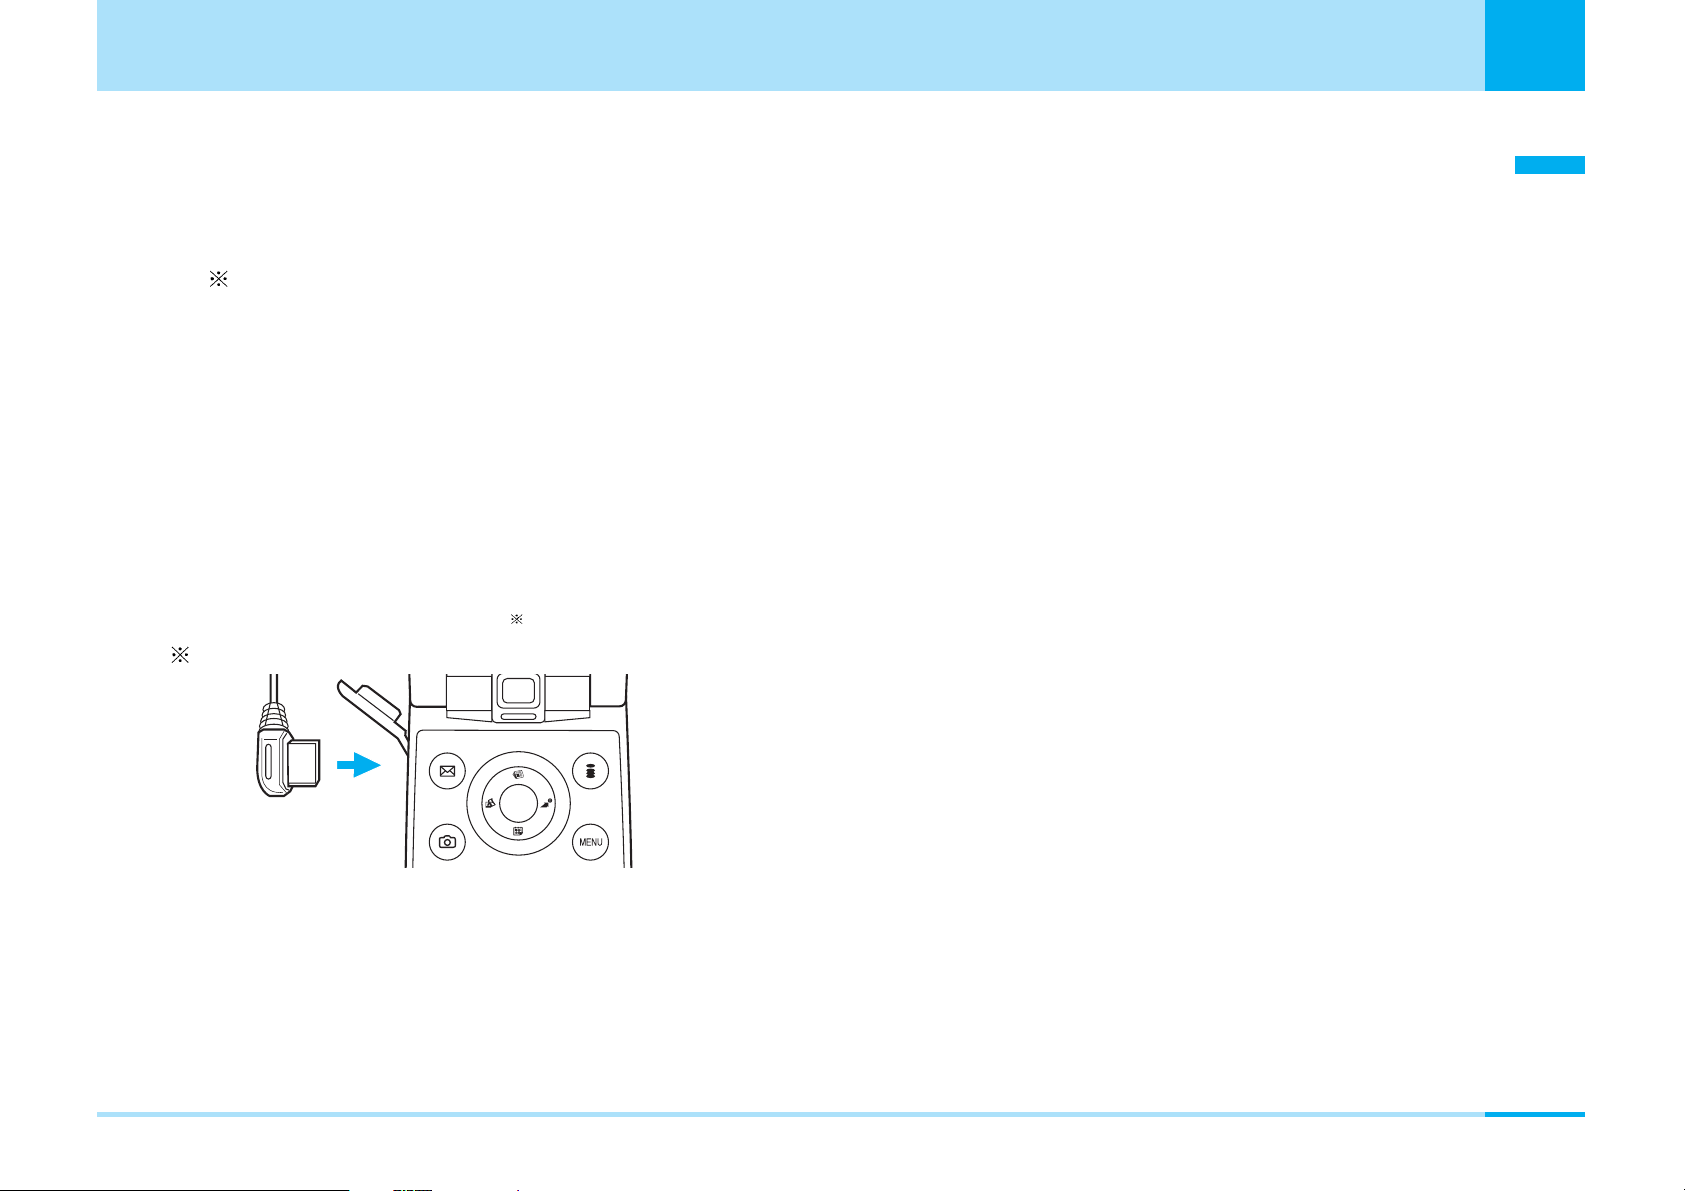
4 Earphone/Microphone terminal
For connecting a Flat-plug Earphone/Microphone Set
with Switch (option) ,etc. Do not forcibly pull the
earphone/microphone cover
: You can rotate it forward or inward in the status of opening.
.
6 KNavigation button
For selecting an item and scrolling the display.
The following operations can be performed from the
Stand-by display:
UUp button : The phonebook list screen appears.
> P60
DDown button : The custom menu screen appears.
> P173
LLeft button : Received call screen appears.
> P78
RRight button : Redialed call screen appears.
> P79
7 TVideo-phone button
Press to make/receive video-phone calls. > P52, P54
Press on the Stand-by display to view the other party that
you made the latest call.
Press to switch modes, etc. in entering mode
(Pictograph/Symbol/Emoticon).
Confirming before use
5 MMail button
Press from the Stand-by display to bring up the Mail
menu. > P128
Press from the Stand-by display for two seconds to
receive i-mode mail. > P117, P143
8 CMenu/Select button
Press on the Stand-by display to bring up the Main
menu.
An operation displayed in the soft key area can be
executed.
9 AStart button
Press to make/receive voice calls. > P46, P48
Press on the Stand-by display to view the other party
that you made the latest call.
Switch between full-pitch and half-pitch while
characters are entered.
>
P34
>
P34
Next Page
29
Page 31

Confirming before use
Ç)égópëOÇÃämîF
! FEVolume buttons
Confirming before use
For adjusting the volume > P35
" Dial button
#GCamera button
Press from the Stand-by display to start up a camera.
> P101
$ *
Press to enter “
and lower case while characters are entered.
% Microphone
For speaking to the other party.
For recording sound when shooting moving images by
the camera.
& Ii-mode button
Press from the Stand-by display to bring up the imode menu. > P110
Press for two seconds from the Stand-by display to
bring up software list screen. > P149
Press from the entering character mode to switch the
mode (Hiragana/Katakana/English/ Number)
An operation displayed in the soft key area can be
executed. > P34
(asterisk) button
” and to switch between upper case
Also, press to clear entered text.
~ PPower/End button
Press to turn the power on. Press and hold for at least
2 seconds to turn the power off. > P43
Press to end calls and end functions.
+ #(Sharp)/ Manner Mode button
Press and hold for at least one second from the
Stand-by display to activate/deactivate the Manner
Mode. > P70
Also, press to enter “#” and to start a new line while
characters are entered.
, Connector terminal
For connecting adapters and cables.
- Sub display > P32
. Light
Press to light up for shooting by the camera.
/ Antenna
Do not cover the antenna with your hands, etc. to use
the phone in better conditions.
: Strap hole
; Rear cover
( NMultitask button
Press to bring up the Task Manager.
Press and hold for at least one second to bring up the
New Task screen.
) QClear button
Press to return to the previous operation.
*You need to obtain a miniSD memory card separately to use the functions related to the miniSD memory card. > P166
30
> P269
< Infrared data port
Point this port to the other device for infrared
exchange. > P174
= miniSD memory card slot
Open the cover to insert a miniSD memory card.
> P167
Page 32

Confirming before use
Display
Main Display
1 23456 789!" #
$%&()
1 ~ : Shows the level of the received radio waves.
: Out of service area.
2 : Displayed during a voice call.
: Displayed during a video-phone call.
: Displayed during a voice call using the speaker phone.
3 (Blinks): while i-mode is activated.
(Blinks): during i-mode transmission.
: Displayed during trying dialup connection.
: Displayed during dialup connection.
: Displayed while an SSL-enabled page is displayed or
obtained.
4 : Displayed while “All Call Rejection” is activated.
Confirming before use
5 : Displayed while a function (Task) is activated.
6 (White): Displayed when the i-mode Center holds mail.
(Pink): Displayed when the box for i-mode mail at the imode Center is full.
(White): Displayed when the i-mode Center holds a
MessageR (Request).
(Pink): Displayed when the box for MessagesR.
(Request) at the i-mode Center is full.
(White): Displayed when the i-mode center holds a
MessageF (Free).
(Pink): Displayed when the box for MessagesR/F at the
i-mode Center is full.
(White): Displayed when the i-mode Center holds mail,
a messageR (Request) and a messageF (Free).
(Pink): Displayed when the boxes for i-mode mail,
MessagesR (Request) and MessagesF (Free) at the imode Center are full.
7 (White): Displayed when unread mail exists.
(White): Displayed when an unread SMS message exists.
(White): Displayed when unread mail and SMS
message exist.
(Pink): Displayed when the inbox is full.
: Displayed when the area for SMS messages in the
UIM (FOMA card) is full.
Next Page
31
Page 33

Confirming before use
Ç)égópëOÇÃämîF
8 (White): Displayed when a Voice Mail message exists.
Confirming before use
(Pink): Displayed when the box for Voice Mail
messages is full.
9 (White): Displayed when an unread MessageR
(Request) exists.
(Pink): Displayed when the box for MessagesR
(Request) is full.
! : Displayed when an unread MessagesF (Free) exists.
(Pink): Displayed when the box for MessagesF (Free) is
full.
" : Displayed when i-appli is being started.
: Displayed when i-appli auto start failed.
# ~ : Shows the battery level.
$ (Pink): Displayed during Manner mode.
(Blue): Displayed during Original manner mode.
% : Displayed when the ringtone for incoming voice
: Displayed when a vibration and a ringtone do not
activate.
& : Displayed while an alarm is set.
: Displayed when today’s schedule exists.
: Displayed when an alarm is set and today’s
schedule exists.
( : Displayed while a miniSD memory card is inserted.
) :Displayed when an error occurs on the UIM (FOMA
card).
Sub Display
123456
call or video-phone call sounds, not activating a
vibration.
: Displayed the vibration for incoming call is
activated to “Pattern 1” or “Pattern 2” the alarm is
mute when incoming voice call or video-phone
call, and the vibration operated being linked with a
melody.
: Displayed when a vibration and a ringtone sounds
at the same time.
*You need to obtain a miniSD memory card separately to use the functions related to the miniSD memory card. > P166
32
1
2 : Displayed during a voice call.
~
: Displayed during a video-phone call.
: Shows the level of the received radio waves.
: Out of service area.
Page 34

Confirming before use
: Displayed while using the speaker phone.
: Displayed during trying dialup connection.
: Displayed during dialup connection.
3 : Displayed while “All Call Rejection” is activated.
4 (White): Displayed when the i-mode Center holds mail,
MessageR/F, an unread mail, SMS, MessageR/F, or
the message in answering machine exists.
(Pink): Displayed when the box for mail, MessageR/F
at the i-mode Center Mail, SMS, MessageR/F, or the
message in answering machine is full in inbox or
FOMA card (UIM card).
5 : Displayed when an alarm is set.
: Displayed when today’s schedule exists.
: Displayed when an alarm is set and today’s
schedule exists.
6 ~ : Show the battery level.
Missed call/ New received E-mail
When closing the flip of FOMA handset, “X Missed call” or
“X Message” is displayed.
(Thu)(Thu)
1 Missed call
1 Message
(Thu)(Thu)
<Missed call> <New message>
• When you open the flip on displaying “X Missed call”,
you can view the time or phone number in main display.
You can view the call history by pressing C. If you
press I [Close], “X Missed call” will not be displayed
anymore.
• When you open the flip on displaying “X Message”, the
pop up message on the subdisplay will be disappeared
after confirming the screen.
Confirming before use
Subdisplay
The various information such as clock, icons are displayed
as follow.
Alarm 1
12 : 34
<Clock> <Alarm> <Incoming call>
NTT DoCoMo
Information
• After closing the FOMA phone, the contents of sub display will
be slided to other place.
33
Page 35

Confirming before use
Mail Menu i-mode
Ç)égópëOÇÃämîF
Menu Operations
Confirming before use
Example: How to set the “Stand-by display” of the “Main
display”.
a Selecting a function by K
1. On the Stand-by display, C [Menu] ] Enlarge
by using K ] C ] Highlight “Main display” by
using H ] Move the cursor to “Stand-by display”
by using H ] C
Display
Select
KC HC HC
a Selecting a function by pressing the key
corresponding to the menu number
Display
1 Main display
2 Sub display
3 Font
4 Menu style
5 Backlight
6 Color scheme
Select
1 Stand-by display
2 Incoming call
3 Outgoing call
Display
Select
How to Use the Soft Keys
To execute an operation displayed in the soft key area on
the Main display, press the corresponding button as
below.
01/01[Sun]
Mail Menu i-mode
Mail Menu i-mode
Soft key area
1. On the Stand-by display, C [Menu] ] Enlarge
by using K ] C ]
Display
Select
1]1
Display
1 Main display
2 Sub display
3 Font
4 Menu style
5 Backlight
6 Color scheme
Select
1 Stand-by display
2 Incoming call
3 Outgoing call
KC 1 1
34
Display
Select
Information
• (Navigation icon) that indicates the directions in which you
can scroll and select items using K is also displayed in the
soft key area.
• Items displayed in the soft key area vary depending on the
display.
Page 36

Confirming before use
Main Side Button Operations
a Major operations that can be performed by pressing
FE/G with the FOMA phone closed
FOMA phone operation
Switch the display light of
the sub display to ON/OFF
Reject an incoming call
Adjust the volume of a ring
tone for incoming call
Stop the alarm
In stand-by (OFF > ON) ] F/G
In stand-by (ON > OFF) ]
Incoming call ] Press G for two
seconds
Incoming call ] F
While an alarm / schedule alarm is
sounding ] PressEfor two
seconds
How to operate
E
E
a Main operations that can be executed by pressing
FE/G with the FOMA phone opened
FOMA phone operation
Adjust the button tone
volume
Adjust the volume
Adjust the volume for
moving image/melody
playback
Scroll the List display by
page
• The cursor is moved on
some displays.
Switch the Monthly
Schedule displays by month
Start the camera
Zoom
Play back/pause moving
images/a melody
During standby ] F
During a voice call/video-phone
call ] F
While moving images/a melody is
played back ] F
While each List display is
displayed ] F
While the Monthly Schedule
display is displayed ] F
During standby ] Press G
While the Still Image/Moving
Image Finder display is displayed
] F
When moving images/a melody is
paused ] G(Play back)
While moving images/a melody is
played back ] G(Pause)
How to operate
E
E
E
E
E
E
Confirming before use
35
Page 37

Confirming before use
Ç)égópëOÇÃämîF
Using the UIM (FOMA Card)
Confirming before use
Your phone number and contracted contents for the
service, etc. are recorded in the UIM. You need to insert it
into the FOMA phone to make/receive calls or perform
transmission.
Refer to the UIM manual for details of how to use it.
Inserting/Removing UIM (FOMA Card)
Insert/remove the UIM after you remove the rear cover
and battery pack and turn off the power of the FOMA
phone beforehand (P38).
• Remove the AC adapter and options beforehand.
Inserting
1. Insert the UIM with its IC-side facing downwards
in the direction of the arrow underneath the guide.
Guide
Notch
Removing
1. While pressing the stopper from the above, slide
the UIM in the direction of the arrow to remove it.
36
Stopper
Page 38

Confirming before use
Information
• When inserting or removing the FOMA card, close the flip, and
then put it on your hand. Take care not to accidentally torch or
scratch the IC.
About Password of UIM
You can set two passwords, PIN1 and PIN2, for a UIM.
> P96
UIM Restriction Functions
The UIM has a restriction function to protect your data and
files.
If you obtain the following types of data and files with the
UIM inserted, restrictions are automatically imposed to
disable them when the UIM is not inserted or when
another UIM is inserted.
• Images/melodies/i-motion/i-appli obtained from sites
and Internet web pages
• Files attached to i-mode mail messages and
MessagesR/F
Differences of UIM
There are two types of UIM, the green UIM and the blue
UIM. There are differences in specifications of the following
functions between those UIMs:
Function
Number of digits of the phone
book that can be stored in the
UIM phonebook
WORLD WING Can be used Cannot be used
Service dialing Can be used Cannot be used
UIM (Green)
Up to 26 digits
UIM (Blue)
Up to 20 digits
Attaching/Removing the Battery Pack
Make sure that you attach the dedicated battery pack L01
for FOMA L601i to use it.
Confirming before use
37
Page 39

Confirming before use
Ç)égópëOÇÃämîF
Confirming before use
Attaching
1. While pressing the rear cover in the direction of the
arrow 1, slide it in the direction of the arrow 2.
2. Insert the battery pack in the direction of the arrow
1
with the label facing upwards and 2push it in the
direction of the arrow.
3. Slide the rear cover in the direction of the arrow
until it clicks to attach it in place.
Removing
1. While pressing the rear cover in the direction of the
arrow of 1, slide it in the direction of the arrow 2
to remove it.
38
Page 40

Confirming before use
2. Take the projection of the battery pack to lift it up
in the direction of the arrow.
Projection
Information
• Attach/ remove the battery pack with the FOMA phone closed
and held in your hand after you turn off the power. In addition,
If you attach/ remove the battery pack forcibly, it may damage
the charging connector of battery.
• Take care not to attach or remove the rear cover. Note that if
the rear cover is forcibly, the slot of rear cover can be damaged.
• For details about the battery, see the manual for Battery Pack L01.
1. Open the cover
of the external connector terminal
of the FOMA phone.
: You can rotate it forward or inward in the status of
opening.
2. While pressing the release buttons on both sides
of the connector of the AC adapter, connect it
horizontally to the FOMA phone with the arrowsengraved side facing upwards in the direction of
the arrow.
Release button
Confirming before use
Charging the FOMA Phone
Charging
Connect exclusive AC Adapter (option) to charge the
battery after attaching the battery pack to the FOMA
phone (P38). You need FOMA AC Adapter 01 for both
overseas and domestic usage (option) separately when
using the FOMA phone overseas.
3. Insert the AC adapter’s plug into a power socket.
AC100V
Next Page
39
Page 41

Confirming before use
Ç)égópëOÇÃämîF
Confirming before use
• If you start to charge the battery, the charging start
tone will sound.
• When the battery is charged with the FOMA phone
turned on, the battery level icon ( ) is displayed.
After charging, the alarm sound for ending the
charging will ring, and then animation is disappeared.
• If you charge the FOMA phone with the power off, the
animation for the battery level is displayed. When
charging finishes, the charging end tone sounds and
the animation ends.
• When switching on the phone by charger, the following
message appears depending on battery level. When
"Charging" or "Charging done", the animation or mark
of battery is displayed at the same time.
- In case the battery is empty: “Please wait” > “Low
battery Please wait” > “Charging” > “Battery
charged”
- In case the battery is low: “Please wait” >
“Charging” > “Battery charged”
• If the battery level becomes less than 10% during a videophone call, connecting the AC adapter may not charge the
battery fully, and the power may go off.
• Refer to the instruction manuals for FOMA AC Adapter 01
(option) and FOMA AC Adapter 01 for both overseas and
domestic usage (option) for details.
• When switching on the phone by charger, the stand-by screen
will be returned with displaying power on animation if you press
power key for at least one second in a screen of charging.
Removing the AC Adapter
After charging completes, disconnect the AC adapter from
the FOMA phone.
1. Disconnect the connector's plug from the power
socket.
2. While pressing the release buttons on both sides
of the connector, remove it horizontally from the
FOMA phone in the direction of the arrow.
Information
• When you use the FOMA phone for the first time, the battery
pack is not fully charged. Fully charge the battery before using it.
• When you attach the AC adapter to the FOMA phone, do not
use unnecessary force. The FOMA phone and the connector
may be damaged.
• Do not remove the battery pack and the UIM during charging.
• If the battery cannot be charged correctly, turn off the power
once, remove the battery pack, and then reattach it to charge
the battery again.
40
Release button
Page 42

Confirming before use
3. Close the cover of the external connector terminal
of the FOMA phone.
Checking the Battery Level
You can check an estimate of the battery level by the
Battery Level display.
• The Battery Level display indicates just an estimate of
the battery level.
<Main display > <Sub display>
When You Need to Charge the Battery
If the battery is completely flat, a message appears,
flickers, and the battery alarm sounds. If you press
battery alarm will be stopped with disappearing the message.
Information
•
If you set “Manner mode” or “Original manner mode” of battery
alarm, the alert tone does not ring.
C
, the
Precautions on the Battery Pack
Use the FOMA phone’s dedicated Battery Pack to get the
most out of the your FOMA phone.
a Battery life
• Batteries are consumables. The usage time of all
chargeable batteries shortens slightly each time they
are charged. The battery’s life is considered to be
exhausted when the usage time of the battery after
charging is about half the time it was at purchase.
(The life of the battery is about one year. However, it
might be shorter if used very frequently.)
For environmental protection, bring the exhausted
battery to an NTT DoCoMo, dealer, or recycle shop.
a Do not charge for long periods of time (several days)
with the FOMA phone turned on.
• Do not leave the FOMA phone power on for long
periods of time while charging. Otherwise, when
charging finishes, the FOMA phone will attempt to
receive power from the battery so that when you
actually use the FOMA phone, you will be able to do
so for just a short amount of time before the battery
alarm sounds. If this happens, charge the battery
correctly. When charging the battery again, first
disconnect the FOMA phone from the AC adapter
and then set it again.
Li-ion
Confirming before use
Next Page
41
Page 43

Confirming before use
Ç)égópëOÇÃämîF
a Estimated usage time for battery
Confirming before use
The usable time of the battery varies depending on the
usage environment or its remaining life.
Network
FOMA / 3G
GSM/GPRS
• Continuous talk time is the estimated time when radio
waves can be sent and received normally.
• Continuous stand-by time is the estimated time you
can use the FOMA phone in motion when it is closed
and can receive radio waves normally. The standby
time could be about half of this estimate depending
on the battery level, function settings, other ambient
conditions such as temperature, the status of radio
waves in the area (weak or no radio waves, for
instance) and the status of the network of the country
in which you stay. The continuous standby time will
be shorter if you don't insert the UIM (FOMA card).
When you use i-mode communications, the
talk/transmission time and standby time will be
shorter. Further, even if you do not make calls or
execute i-mode transmission, the talk/transmission
time and standby time will be shorter if you compose
i-mode mail, start up a downloaded i-appli.
Stand-by time
Static : about 550 hrs
Dynamic : about 450 hrs
Static : about 500hrs Voice call: 350 minutes
Continuous talk time
Voice call : about 200 min
Video call : about 150 min
• The continuous standby time for standstill is the
average number of hours you can use the FOMA
phone in standstill status when it is closed and can
receive radio waves normally.
• The continuous standby time for in motion is the
average number of hours you can use the FOMA
phone in the combined status of ”standstill”, “moving”
and “out of service area” when it is closed, in an area
where it can receive radio waves normally.
• The talk/transmission time and standby time will also
be shorter than the above-mentioned estimates when
you execute data transmission or multi-access or
when you use the camera or the light.
a Estimated time for charging battery
FOMA AC Adapter 01 Approx. 180 minutes
• The estimated charging time is for when the FOMA
phone is off and the battery is being charged from
empty. The charging time will be longer if you charge
the battery with the power turned on.
a Other precautions
• The battery does not have to be empty before you
charge it.
• Do not use any other adapter than the specified one.
It may shorten the life of the battery.
• Make sure the battery is charged when you have not
used the FOMA phone for a long period of time
because the life of the battery becomes shorter.
42
Page 44

Confirming before use
Turning Power ON
• Before you turn on the power, make sure that the UIM is
inserted and that the battery is fully charged.
1. Press P
• After the Wake-up display is displayed, the Stand-by
display appears.
Information
When charging, you need to press and hold P for at least 2
•
seconds.
If “PIN code request” (P90) is set to “ON”, you need to enter
•
your PIN1 code.
If “All lock” (P90) is set to “Power on”, you need to enter your
•
terminal security code.
Turning Power OFF
1. Press and hold P for at least two seconds
• The Exit display appears and the power is off.
Clock/Time
Confirming before use
You can set the date and time and daylight saving time.
See “Setting Date & Time” (P86) for details of how to set
them up.
Using Caller ID Notification Service
The Caller ID Notification Service enables you to notify the
other party of your phone number when you make a call.
See “Using Caller ID Notification Service” (P194) for details
of how to set it up.
Own Number
You can display your phone number recorded in the UIM.
1. On the Stand-by display, C ] 0
• See “Displaying Own Number” (P65) for details of
how to change the settings on the Own Number
display.
Information
The time to turn off the FOMA phone will be longer. Depending
•
on the status of network, the lead time can be different. During
switching off the power, do not repeat to power on/off.
43
Page 45

Page 46

Making Calls ...........................................46
Receiving Calls.......................................48
Using Public mode (power off) ..............49
Making Calls/
Receiving Calls
45
Page 47

Making Calls/Receiving Calls
Making Calls
1. Enter the other party’s phone number
Making Calls/Receiving Calls
Menu Save Search
<Enter Phone Number>
• Q
• C
• I
:
The last digit is cleared. To clear all digits,
press and hold it for at least one second.
[Save]:
You can add new phone number to
phonebook. This function is activated by step 2 on
page 58.
[Search]: You can search for the phone number in
phonebook. See the contents after step 3 on page 60.
• Press and hold Q for at least two second: You
can switch ON/OFF the speaker phone.
• I[Hold]/[Unmark]
: You can put a call on hold or
release hold.
: Unavailable unless you are the Call waiting service subscriber.
3. P to end the call after talking.
Information
• If you press
Enter Phone Number screen, you can make a call directly
matching the the number saved in memory.
• When the Flat-plug Earphone/Microphone Set with Switch
(option) is attached, you can only talk on the Earphone /
Microphone regardless that the speaker phone is ON/OFF.
• When the call is disconnected, the alert sound sounds from a
receiver.
after entering the number from 0 to 9 in the
A
Using the Submenus of the Enter Phone
Number Display
2. A
]
Start talking when the other party answers
EpDpNp!Ubsp
Menu Save
<Talking>
46
Talking
The other party's name
The other party's phone number
Call duration
The other party's picture
Ŧ1: In case of the other party you don't
register the information in phonebook,
“Unregistered” will be displayed when
receiving or making a call.
Ŧ2: The picture will be displayed when
you register the picture in phonebook.
Ŧ1
Ŧ2
1. From the Enter Phone Number screen (see left),
M[Menu]
]
Select from the following submenu
items
Notify caller ID
Set whether to notify your phone number per call.
– Not notify : “#31#” is added in front of the phone
number entered, but the phone number is not notified.
– Notify : “ 31#” is added in front of the phone
number entered, and the phone number is notified.
– Cancel : The added “#31#” or “ 31#” is deleted.
Page 48

Making Calls/Receiving Calls
Select prefix
The number saved in “Setting the Prefix” (P83) is
added in front of the phone number entered.
International call
The international access code saved in “International dial
setting” (P84) is added in front of the phone number
entered.
Save
You can save the entered phone number into the
Phonebook. Go to step 2 on page 58 of "Adding to
Phonebook".
Search phonebook
You can search for the phone number in phonebook. After
searching, Go to step 3 on page 60 of " Searching for
Phonebook Entries".
Information
•
You can make a call after inputting “#31#”(Not notify) or “
31#” (Notify) in front of phone number.
Hold
1
/Cancel held call
1
You can put/release the call on hold.
Mute
2
/Unmute
2
Making Calls/Receiving Calls
You can mute/unmute the voice transmitted to the other
party.
1: Available for Call Waiting Service subscribers only.
To use this service, go to “Using Call Waiting Service” (P192).
2: Not displayed during call is held.
Making a Call From the Dialed/Received Call Record
1. From the Stand-by display, L/R/A/T
Select a record ]
A
Information
•
See “Using the Submenu of the Received Calls display” (P78) for
submenus.
]
Making a Call from the Phonebook
Using the Submenus of the Talking screen
1. From the Talking screen (P46), M[Menu]]Select
from the following submenu items
New call
You can put the current call on make and hold a call
to another party.
End active call
You can hang up the call.
1
1. From the Stand-by display, L/R/A/T
Select the other party you want to call]A
Information
• To switch the phonebook list to display between the FOMA
phone and UIM, select M [Menu] > “Display switch” >
“Display data” on the phonebook list screen.
International Calls
You can make an international call easily using the
DoCoMo international call service “WORLD CALL”.
Next page
]
47
Page 49

Making Calls/Receiving Calls
When you have signed up for FOMA service, you have
contracted to use “WORLD CALL” (except those who
have applied not to use it).
Making Calls/Receiving Calls
a How to make calls
009130 > 010 > Country code > Area code >
Destination phone number > A
• This service is not available with billing plans.
• Application/monthly fee for WORLD CALL is free of
charge.
• The WORLD CALL charges are added to your monthly
FOMA bill.
• Contact “DoCoMo Information Center” on the back
page of this manual for inquiries about WORLD CALL.
• If the other party uses a specific 3G mobile phone
overseas, you can make an “International Video-phone
Call” by dialing out using T after following the dialing
method described above.
– See DoCoMo web page for the information about
connectable countries and telecommunications carriers.
– Images sent from the other party may blur on your
FOMA phone or you may not be able to connect,
depending on the other party’s phone used for the
international video-phone.
Making an International Call Easily
• Confirm that the “Setting Prefix Dial” (P83) is set to
“AUTO” and “009130010” (WORLD CALL) is set for
“IDD prefix code” in “IDD prefix setting”.
1. On the Stand-by display, press and hold 0 for at
least one second to enter “+”
2. Enter Country code > Area code > Destination
phone number
]
A(T)
3. Pto end the call after talking
Adjusting the Volume
1. Press FE during a call
Information
• The changed volume is held even after ending the call.
Receiving Calls
1. When you receive a call,
Calling
DoCoMo Taro
Menu Silent
<Ringing screen>
The other party's name
The other party's phone number
The other party's image
Ŧ1: In case the other party you don't
register the information in
phonebook, "Unregistered" will
be displayed.
Ŧ2: The image will be displayed when
you register the picture in phonebook.
• I[Silent]: You can set to no sound for incoming call.
• A: You can put the call on hold.
2. P to end the call after talking
• When the call is disconnected, the alert sound
sounds from a receiver.
A
Ŧ1
Ŧ2
48
Page 50

Making Calls/Receiving Calls
When you didn't get a call
[Thu]
1 Missed call
DoCoMo Taro
OK Close
The name is not registered in
phonebook cannot be displayed.
• C [OK] : You can view the list of received call.
• I [Close] : You can close the screen for missed call.
Using the Submenu of the Ringing Display
1. From the Ringing screen (P48), M[Menu]] Select
from the following submenu items
Voice mail
The Call is connected to the Voice Mail Service
Center.
Call rejection
The call is disconnected without answering it.
Call forwarding
The call is forwarded to the phone number registered.
1: If you use voice mail service menu, you should register this
service in operator. For details, see “Using voice mail
service” (P190).
2: If you use call forwarding menu, you should register this
service in operator. For details, please refer to the “Using
Call Forwarding Service” (P193).
1
2
Using Public mode (power off)
Public mode is an auto-answer service that lays stress on
manners in public spaces. Once you activate Public mode
(power off), the guidance is played back telling that you
cannot take the call as you are currently in a place
(in hospital, airplane, or in around priority seat in a train)
where use is prohibited. Then the call is disconnected.
• This FOMA phone does not support Public mode
(Driving mode).
1.
*25251]A
• Public mode (power off) is set. (Nothing is changed in
the Stand-by display.)
• After setting Public mode (power off) and turning off
the power, the guidance “The person you are calling
is currently in an area where use is prohibited. Please
try again later.” is played back for incoming calls.
a To release Public mode (power off)
*25250 ] A
a To check Public mode (power off) for the setting,
*25259 ] A
When Public mode (power off) is activated
When incoming a voice call, the guidance is played back
to the caller telling that
you are currently in an area where use is prohibited,
and then the call is disconnected. When incoming a videophone call, the video- guidance is played back to the
caller, and then the call is disconnected.
Making Calls/Receiving Calls
Next Page
49
Page 51

Making Calls/Receiving Calls
• This setting is continued until you release the setting by
Making Calls/Receiving Calls
dialing “
released.
25250”. If you just switch on, this setting is not
• The Public mode (power off) guidance is played back
even when you are out-of-service area or out-of-reach of
radio waves.
Activating between network services and Public
mode (power off)
If you use Public mode (power off) and Network service at
the same time, the operation will be activated as follow.
Depending on the setting or calling, the network service
can be preferred, so the activation of Public mode (power
off) or the record of missed call may not be displayed.
a Voice Mail Service
Response to Incoming Voice calls
Plays back the Public mode
(power off) guidance to caller, and
then the call is connected to the
Voice mail Service Center.
1
Response to Incoming Video-phone calls
Does not play back the video
guidance to caller, and the call is
connected without connecting to
the Voice Mail Service Center.
a Call Forwarding Service
Response to Incoming Voice calls
Plays back the Public mode
(power off) guidance to caller, and
then the call is connected to the
Voice mail Service Center.1The
guidance depends one setting of
Call Forwarding Service.
Response to Incoming Video-phone calls
Does not play back the video
guidance for Public mode, and the
call is forwarded to the forwarding
destination.2If the destination
does not support video-phone call,
the call is disconnected.
a Nuisance Call Blocking Service
Response to Incoming Voice calls
For the call from the phone
number registered to be rejected,
plays back the Call Rejection
guidance, and then the call is
disconnected.
3
Response to Incoming Video-phone calls
For the call from the phone
number registered to be rejected,
plays back the Call Rejection
guidance, and then the call is
disconnected.
3
a Caller ID Display Request
Response to Incoming Voice calls
• For the caller without a caller ID,
plays back the Caller ID Request
guidance, and then the call is
disconnected.
• For the caller with a caller ID,
plays back the Public mode
(power off) guidance, and then
the call is disconnected.
1: If the ring time for protecting a house or call forwarding is
set to “0 second”, the caller does not hear the Public
mode (power off) guidance, and the call is not recorded in
call history.
2: If the ring time for a call forwarding is set to “0 second”,
the call is not recorded in call history.
3: The call is not recorded in the history of received calls.
Response to Incoming Video-phone calls
• For the caller without a caller ID,
plays back the video guidance
for Caller ID Request, and then
the call is disconnected.
• For the caller with a caller ID,
plays back the video guidance for
Public mode (power off), and
then the call is disconnected.
50
Page 52

About Video-phone ................................52
Making Video-phone Calls.....................52
Receiving Video-phone Calls.................54
Changing Settings for
Video-phone Calls..................................55
Making/Receiving
Video-phone Calls
51
Page 53

Making/Receiving Video-phone Calls
About Video-phone
When both you and the other party use DoCoMo videophones, you can talk seeing each other.
• DoCoMo video-phones conform to 3G – 324M
Making/Receiving Video-phone Calls
standardized by the international standard 3GPP
You cannot connect to the video-phone that uses a
different format.
1 : 3GPP (3rd Generation Partnership Project) is the regional
standards organization for developing common technical
specifications for third-generation mobile
telecommunications systems (IMT–2000).
2 : 3G–324M is the international standard for the third
generation of mobile video-phones.
• The video-phone call is activated by the speed of
64kbps.
Making Video-phone Calls
1. Enter the other party’s phone number
• The Enter Phone Number screen (P46) is displayed.
2. T ] Start talking when the other party answers
The other party's image
The volume during a call
Call duration
Own image
Menu Image Hold
<Talking Display>
Mark
Description
Speaker phone ON/OFF
2
1
.
• The voice of the other party is heard from the
/
speaker when starting the call.
• Press and hold Q for at least two seconds: You
can switch ON/OFF the speaker phone.
• C[Image]/[Camera]: You can switch between
Substitute image and your photo image for sending
to the other party.
• I[Hold]/[Cancel]: You can put the call on hold or
release hold.
3. Press P to end the call after talking
Information
• See “International Calls” (P48) for how to make international
calls.
•When the Flat-plug Earphone/Microphone Set with Switch
(option) is attached, you can only talk on the Earphone/
Microphone regardless of whether the speaker phone is
ON/OFF.
• You can listen to the voice through speakerphone in spite of
the status of manner mode.
Zooming
Using the Submenu of the Enter Phone
Number screen
See “Using the Submenus of the Enter Phone Number
screen” (P46) of voice calls for the submenus available.
52
Page 54

Making/Receiving Video-phone Calls
Using the Submenus of the Talking screen
Setting item/Setting at purchase > P241
1. From the Talking screen (P52), M [Menu] ] Select
from the following submenu items
End call
The call is disconnected.
Hold
You can put the call on hold. You can cancel the
function by pressing I [Cancel].
Substitute image/Camera image
You can switch to the Substitute image for sending to
the other party. > P85
Camera settings
You can set the camera of video phone call. You can
select the icon by pressing J. After setting, press
I [Close].
– Zoom : The camera image is zoomed. (x1/x2)
– Brightness : You can change the brightness of
photo images.
– Night mode : You can set it up when using the
camera in a dark place.
Video-phone settings
You can set the display of video phone call. After
setting, press I [Done]. > P84
– Display setting : You can set the display method
for the Talking screen.
• Both…: The other party’s image and your image
are displayed.
• Other…: Only the other party’s image is displayed.
• Me…: Only your image is displayed.
– Sub screen : If you select “Both” of “video-phone
settings”, you can set the image which displayed
each screen.
• Me…: Only your image is displayed.
• Other…: Only the other party's image is displayed.
– Display light: You can set the lighting method of
the backlight on the Talking screen.
Always on : Always lights during a call.
•
Terminal setting : Follows the settings on the
•
“Main screen” of the “Backlight”. > P75
Sending image quality
You can set the quality of images to be sent to the
other party.
– Normal : Sends images in standard quality and
motion speed.
– Prefer motion quality : Sends images laying stress
on motion speed. Prefer motion quality is effective
for moving images.
– Prefer image quality : Sends images laying stress
on image quality. Prefer image quality is effective if
there is little motion.
Making/Receiving Video-phone Calls
53
Page 55

Making/Receiving Video-phone Calls
Making a Video-phone call from the
Dialed/Received Call Record
1. On the Stand-by display, L/R/A/T ] Select
Making/Receiving Video-phone Calls
a history ] T
Information
• See “Using the Submenu of the Received Call Record Screen”
(P78) for the submenu.
Making a Video-phone Call from the
Phonebook
1. On the Stand-by display U, or Search for
phonebook entries (P60) ] Select a party to call ]
T
Information
• To switch the phonebook to display between the FOMA
phone and UIM, select M [Menu] > “Display switch” >
Receiving Video-phone Calls
1. When you receive a call, T/
Calling video-phone
DoCoMo Taro
Menu Image
<Ringing Display>
The other party's name
The other party's phone number
The other party's image
Ŧ1: In case the other party you don't
register the information in
phonebook, “Unregistered” will
be displayed.
Ŧ2: The image will be displayed when
you register the picture in
phonebook.
• C[Substitute]: You can receive a call. The substitute
image will be sent to the other party.
• P: You can put the call on hold. The holding
image will be sent to the other party. If you press C,
you can answer the call.
2. P to end the call after talking
A
Ŧ1
Ŧ2
“Display data” on the phonebook list screen.
Adjusting the Volume
1. Press H/FE during a call.
Information
• The changed volume is held even after ending the call.
54
Information
•When inserting the switch of the Flat-plug Earphone /
Microphone set with Switch (option), you can connect a call
by earphone regardless of Speakerphone ON/OFF.
• You can listen to the voice through speakerphone on manner
mode.
Page 56

• If you answer a video-phone call by pressing the switch of the
Flat-plug Earphone/ Microphone set with Switch (option) when
closing the flip, the image on hold will be sent.
Making/Receiving Video-phone Calls
Using the Submenus of the Ringing screen
See “Using the Submenus of the Ringing screen” (P49) of
voice calls for the submenus available. Note that “Voice
mail” is not displayed for video-phone calls.
Changing Settings for Video-phone Calls
]]
C
You can set the operation and display for video-phone
calls. See “Setting Operation and Display for Video-phone
Calls” (P84) and “Selecting an Image for Video-phone
Calls” (P85) for details of the settings.
3
Making/Receiving Video-phone Calls
55
Page 57

Page 58

Phonebook
Phonebook
Phonebook
1 Add to phonebook
2 Search phonebook
3 No. of phonebook
4 Phonebook settings
5 Group settings
6 Own number
Adding to Phonebook ............................58
Searching for Phonebook Entries..........60
Checking the Number of Saved
Phonebook Entries.................................63
Setting Phonebook.................................63
Setting Groups .......................................64
Displaying Own Number ........................65
Select
To display the Phonebook menu
Select
On the Stand-by display,
C[Menu] ] or “Phonebook”
57
Page 59

Phonebook
Adding to Phonebook
]]
C
Two types of phonebooks are available, the phonebook
saved in the handset of the FOMA phone and the
phonebook saved in UIM.
Phonebook
1. From the Phonebook menu (P57), “Add to
phonebook”
Add to phonebook
Handset
Name
Reading
Number1
Mail addr1
No group
Select Save
<Saving Phonebook Entries>
2. Select an item to save
(Handset) / (FOMA card (UIM))
Select a storage location of the Phonebook (Handset
/ UIM).
(Name)
Enter a name. Unless you enter a name, the
Phonebook entry cannot be saved.
(Reading)
Enter reading of the name. Automatically inserted if
you enter “Name”.
1
(Number 1 ~ 5)
1
Enter a phone number. If you press M[Icon] after
entering, you can set a mark other than .
(Mail addr 1 – 3)
1 3
Enter a mail address. If you press M[Icon] after
entering, you can set a mark other than .
Group (Handset)/ (Group
(FOMA card (UIM))
Select a group to save.
(Image)
2
Select an image to be displayed when you receive a
call and display Phonebook.
– No image : No image is set.
– Character: You can set the character. Select the
part (Face, Hair, Tops, Bottoms, Acc., Scenery) by
pressing H, and then select the item by pressing
J. After setting, press C.
– Select picture : You can select from images saved
in “My picture” of “Data box”. > P154
– Take picture: You can start a camera. Go to step 2
on page 102 of “Taking Still Images”. The size of
image 80x96 cannot be rotated.
(Set ringtone)
2
You can set a ring tone for when you receive a voice /
video-phone call from registered caller.
– Data box : You can select from melodies saved in
“Melody” of “Data box”. >P164
– Terminal setting : Go to the settings of “Select ring
tone”. >P68
58
Page 60

Phonebook
(Set mail ringtone)
2
You can set a ring tone for when you receive mail
from registered sender.
– Data box: You can select from melodies saved in
“Melody” of “Data box”. > P164
– Terminal setting: Follows the settings of
“ringtone”. >P68
(URL)
2
You enter an URL.
(Postal code)
2
You can enter a postal code.
(Home addr)
2
You can enter a home address.
(Company name)
2
You can enter a company name.
(Job title)
2
You can enter a job title.
(Company addr)
2
You can enter a company address.
(Memo)
2
You can enter a memo.
3. After storing, I[Save] ] Enter a memory number
(0-499) ] C
Saving in UIM
1. From the Saving Phonebook Entries screen (P58),
select the (Handset) field ]Select using J
2. Enter required items
• See Step2 (P58) of “Adding to Phonebook” for details
of the items.
3. I[Save]
Information
• For phone numbers of the Phonebook saved in Memory No
0 – 9 (one saved in “Number1”), if you press 0~9 and
then press A (T) from the Stand-by display, you can make
a voice (video-phone) call.
• 500 Phonebook entries can be saved in the FOMA phone and
50 Phonebook entries can be saved in the UIM. Note that the
number of savable entries may be fewer depending on the
saved contents. > P63
Phonebook
1 : Only one entry is saved if the storage location for the
Phonebook is set to “FOMA card (UIM)”.
2 : Not displayed if the storage location for the Phonebook is set
to “FOMA card (UIM)”.
3 : You register “Phone number XXXX” or “Phone number
XXXX@docomo.ne.jp” (XXXX: Security code) when you add the
mail address including of security code of four digits.
59
Page 61

Phonebook
Searching for Phonebook Entries
C
You can display the Phonebook in the FOMA phone
handset / UIM specifying a search method.
Phonebook
1. From the Phonebook menu (P57), “Search
phonebook”
• I[UIM]/[Hndset]: You can switch Phonebook
Search screens between the FOMA phone handset
and the UIM.
2. Select the following search method
Show all data
Press the buttons 1~0 corresponding to the
50 Japanese syllables (corresponding to Columns) for
searching. If you press *, you can search for
Other item. You can switch tab of the 50 syllabary by
pressing J
Group search
You can specify a group for searching. (Group 1~30
(FOMA Handset)/ 1~10 (FOMA card)). After searching,
you can switch groups by pressing J
Reading search
You can search by entering some of the characters
contained in the reading of the name.
Memory No. search
You can search by entering a memory number (0-499).
You can switch tab of the syllabary by pressing J.
.
]]
.
2
Phone No. search
You can search by entering part of the phone
number.
Domain search
You can search by specifying a domain. You can
switch domains byJ.
• To use specifying domain, see “Creating a domain
list” (P64).
: Not selectable on the Phonebook Search display of UIM.
3. The Phonebook List meeting the search method is
displayed.
഼ Ȝȥ
DoCoMo Ichiro
DoCoMo Jiro
DoCoMo Saburo
DoCoMo Taro
• The above is an example of the
screen after carrying out “Show all
data” search.
<Phonebook List>
• A/T : You can make a voice call or video-phone
call to the selected phone number saved in
phonebook.
• I[Mail]
: You can compose i-mode mail to
selected mail address saved in phonebook. Go to
step 3 on page 139 of "Composing i-mode mail ".
: If the selected mail address is not registered in
phonebook, you cannot use this function.
60
Page 62

Phonebook
4. Select the desired Phonebook
002 DoCoMo Ichiro
Menu
]
C
<Detailed Phonebook>
• A/T : You can make a voice call or video-phone
call to the phone number saved in phonebook.
• C[Call] : You can make a call to selected phone
number.
• C[Mail] : You can compose i-mode mail to selected
mail address saved in phonebook. Go to step 3 on
page 139 of “Composing i-mode mail”.
• C[Connect] : You can connect the homepage of
selected URL.
phonebook list screen. Go to step 2 on page 65 of
“Using the Submenus of the Group Settings screen”.
– Input char chg: You can switch entry modes for
the Character Entry column displayed at the top of
the phonebook list screen after “Reading search”.
– Return to input: You can return without “Input
character change”.
– Create domain list: You can create a new domain
list from the Phone List display after “Domain search”.
Go to step 2 on page 64 of “Creating a Domain List”.
Mail/URL
2
– Compose mail: The mail address saved in the
selected Phonebook is entered into the destination.
Go to step 3 on page 139 of “Composing i-mode
mail message”.
– Compose SMS: The phone number saved in the
selected Phonebook is entered into the destination. Go
to step 3 on page 141 of “Creating SMS”.
– Connect to URL: Connected to the web page with
the URL saved in the selected Phonebook.
Phonebook
Using the Submenus of the Phone List
display
Setting item/Setting at purchase > P241
1.From the Phonebook List screen (P60), M[Menu]
]
Select from the following submenu items
Search ctgry menu
–
Handset4/UIM5Group settings :
search”, you can set the each displayed group in the
1
After “Group
Add new
You can create a new phonebook. Go to step 2 on page
58 of “Adding to Phonebook” for items to be saved.
Edit
You can edit the selected Phonebook. Go to step 2 on
Page 58 of “Adding to Phonebook” for items to be saved.
Send Ir data
3
You can send the Phonebook selected through
infrared ray communication. For Infrared exchange,
see "Using the Infrared Exchange" (P174).
Next Page
61
Page 63

Phonebook
Copy
– Copy to UIM
selected to the UIM.
– Select copy to UIM
Phonebooks selected to the UIM. If you press M,
Phonebook
you can select all data. After selecting, press
I[Done].
– Copy to handset
selected to the handset of the FOMA phone.
– Select copy to handset
Phonebooks selected to the handset of the FOMA
phone. If you press M, you can select all data. After
selecting, press I[Done].
Search by
You can select another search method to display a
phonebook. For the searching method, Go to step 2 on
page 60 of “Searching for Phonebook Entries”.
Delete
– Delete: You can delete the Phonebook selected.
– Delete selected: You can delete the multiple
Phonebooks selected. If you press M, you can
select all data. After selecting, press I[Done].
– Delete all: You can delete Phonebook
(Handset/UIM) to display. After deleting all data, the
display goes back to Stand-by mode.
Display switch
– Display image
phonebook list, you can set whether to display the
image or not. > P64
4
: You can copy the Phonebook
4
: You can copy multiple
5
: You can copy the Phonebook
5
: You can copy multiple
3
: If an image is registered in
– Display data: You can switch Phonebooks
between the handset of the FOMA phone and the
UIM to display. >P63
1: You can user phonebook list by Group search except for “No
group”, “Reading search”, “Phone No. search” and “Domain
search”. You may not be able to select it depending on the
search method or storage status of the Phonebook selected.
2: You cannot select it if no phone number/mail address/URL is
stored in the Phonebook selected.
3: Not selected in Phonebook for UIM.
4: Displayed on the Phonebook of the handset.
5: Displayed on the Phonebook of the UIM.
Information
• During a call, you cannot activate ‘Copy’ and ‘Send Ir data’
menu.
Using the Submenus of the Detailed
Phonebook Display
1.
From the Detailed Phonebook screen (P61), M[Menu]
] Select from the following submenu items
Mail/URL
– Compose mail: The mail address saved in the
phonebook displayed is entered into the Address.
Go to step 3 (P139) of “Composing i-mode mail
message”.
1
62
Page 64

Phonebook
– Compose SMS: The phone number saved in the
phonebook displayed is entered into the Address. Go
to step 3 (P141) of “Composing SMS”.
– Connect to URL: Connected to the homepage of
the URL saved in the Phonebook displayed.
Edit
You can edit the phonebook. Go to step 2 on page
58 of “Adding to Phonebook”.
Send Ir data
2
You can send the phonebook entry on display by
infrared. For details, please refer to “Using the Infrared
Exchange Function” (P174).
Copy to UIM
3
You can copy the phonebook entry to the FOMA card
(UIM).
Copy to handet
4
You can copy the phonebook entry to the FOMA handset.
Delete
You can delete the phonebook entry.
1: You cannot select it if no phone number/mail address/URL is
stored in the Phonebook selected.
2: Not selected in Phonebook for UIM.
3: Displayed during displaying the Phonebook of the handset of
the FOMA phone.
4: Displayed during displaying the Phonebook of the UIM.
Information
• During a call, you cannot activate “Copy” and “Send Ir data”
menu.
Checking the Number of Saved
Phonebook Entries
]]
C
3
You can check the number of phonebook entries saved in
the handset of the FOMA phone and in the UIM as well as
the number of phonebook entries available.
1.
From the Phonebook menu (P57), “No. of phonebook”
Information
• Actual savable number of phonebook may be fewer depending
on the contents saved in Phonebook of the UIM.
Setting Phonebook
Setting Display Data
]]
C
You can set whether to display the phonebook of the
handset of the FOMA phone or the phonebook of the UIM
when displaying a phonebook.
Setting item/Setting at purchase > P231
1. From the Phonebook menu (P57), “Phonebook
settings”]“Display data” ]“Handset only”/“UIM
only”
41
Phonebook
63
Page 65

Phonebook
Creating a Domain List
]]
C
You can store domains to be used when doing “Domain
Search” (P60).
Phonebook
Setting item/Setting at purchase > P231
1. From the Phonebook menu (P57), “Phonebook
settings”]“Create domain list”
• I[Disp.]
: You cannot use this menu when you select no input screen.
• M[Delete] : You can delete the domain saved.
: You cannot use this menu when you select “@docomo.ne.jp”
or no input screen.
2. Select the domain list field ]C
C
]
: You can view all domain registered in a list.
]Enter a domain
Selecting a Search Method
C43
You can set the search method for when you pressUon
the Stand-by display and bring up the phonebook search
display.
Setting item/Setting at purchase > P231
1. From the Phonebook menu (P57), “Phonebook
settings”
]
“Search by” ]Select a search method
42
Information
• If the “Display data” (See left) is set to “UIM only”, you cannot
select “Memory No. search”.
Displaying Images
]]
C
You can set whether to display the image set when
selecting a phonebook with “ (image setting)” set (P58)
on the phonebook list screen.
Setting item/Setting at purchase > P231
1. From the Phonebook menu (P57), “Phonebook
settings”
]
“Display image” ]“ON”/“OFF”
44
Setting Groups
]]
C
You can save the group name for Group of the
phonebook. You can also set a ring tone for each group.
1. From the Phonebook menu (P57), “Group settings”
•Group settings display appears.
• I[UIM]/[Handset]: You can switch the Group settings
displays between the FOMA phone (handset) and the
UIM.
5
•Go to step 2 on page 60 of “Searching the
Phonebook Entries” for the search method.
64
Page 66

Phonebook
2. Select the group to set
following item to register
]
C]Select the
]
After setting, press
I[Finish]
Group name
You can save the name of the group.
Ringtone
You can set a ring tone for when a call comes in.
– Data box: You can select from the melodies stored
in “Melodies” of “ Data box”. >P164
– Terminal setting: Follows the settings of
“ringtone”. >P68
Mail ringtone
You can set a ring tone for when mail comes in.
– Data box: You can select from the melodies saved
in “Melody” of “Data box”. >P164
– Terminal setting: Follows the settings of “Select
ringtone”. >P68
Using the Submenus of the Group Settings
Screen
1. From the Group Settings screen (P64), M [Menu]
]
Select from the following submenu items
Reset
You can reset the settings of the group selected.
Move
You can change the order of the group selected.
Edit
You can edit the group selected. Go to step 2 (See
left) of “Setting Groups”.
Reset all
You can reset the settings and order of all groups.
1: You cannot use this menu when the selected group is not edited.
2: You cannot use this menu in FOMA card group setting screen.
3: You cannot use this menu when not moving or editing a group.
1
2
3
Phonebook
: Not displayed on the Group setting display of the UIM.
Information
• You cannot set to “No group”.
Displaying Own Number
]]
C
You can display your phone number recorded in the UIM.
1. From the Phonebook menu (P57), “Own number”
• The Own number screen appears.
Information
You can also check your own number by pressing
•
the Stand-by display.
C0
Next Page
6
from
65
Page 67

Phonebook
Displaying Details of Own Number
1. From the Own number screen, C
your terminal security code
]
• The Detail screen appears.
• A/T: You can make a voice/ video-phone call by
Phonebook
the number registered in. (not own number)
• C[Call]
: You can make a voice call by the selected
phone number.
: You cannot use your own number.
• C[Mail]: You can compose i-mode mail to selected
mail address.
• C[Connect]: You can connect the homepage of
selected URL.
Using the Submenu of the Detail display
1. From the Detail display (See above), M
Select from the following submenu items
Mail/URL
– Compose mail: The mail address registered in my
number will be entered to destination. Go to step 3
on page 139 of “Composing Mail”.
– Compose SMS2: The phone number registered in
my number will be entered to destination. Go to step
3 on page 141 of “Compose SMS”.
– Connect to URL: You can connect the homepage
of URL registered in my number.
1
[Detail]]Enter
C
[Menu]
]
Edit
You can store your own information. For adding
method, Go to step 2 on page 58 of “Adding to
Phonebook”. However, your number registered in
“ ”cannot be edited.
Send Ir data
3
You can send your own number through infrared ray
transmission. For details related to infrared exchange,
go to “Using the Infrared Exchange Function” on P174.
Reset
4
You can reset the edited own number information to
its default.
1: You cannot use this menu if the phone number/ mail/ URL are
not registered.
2: You cannot use the menu despite you operate the number
registered in own number.
3: You cannot use this menu during a call.
4: You cannot use this menu when the own number information is
not edited.
66
Page 68

Sound/
Sound
Display
Adjusting the Ring Volume ....................68
Adjusting the Effect Tone Volume .........68
Setting a Ring Tone................................68
Setting an Effect Tone ...........................69
Setting a Vibrator ...................................70
Activating the Manner Mode .................70
Display
1 Ring volume
2 Effect tone volume
3 Select ringtone
4 Select effect tone
5 Vibration settings
6 Manner settings
7 Mail ring duration
Select
To display the Sound menu
1 Main display
2 Sub display
3 Font
4 Menu style
5 Backlight
6 Color scheme
On the Stand-by display,
[Menu]
C
To display the Display menu
]
On the Standby display,
C
[Menu]
]
Select
or “Sound”
or “Display”
Setting Ringing Operations for
Incoming Mail ........................................72
Setting Ringing Time..............................72
Setting Main Screen...............................72
Setting Sub Display................................74
Setting Fonts of Dial Characters ...........75
Setting Menu Style .................................75
Setting Backlight ....................................75
Setting color Scheme.............................76
67
Page 69

Sound/Display
Adjusting the Ring Volume
C
Setting items/Setting at purchase > P234
1. From the Sound menu (P67), “Ring volume” ]
Select from the following adjustment items ]
Sound/Display
After setting,I [Done]
Voice call
You can adjust the ring tone volume for voice calls.
Video-phone
You can adjust the ring tone volume for video-phone
calls.
Mail tone
You can adjust the ring tone volume for mail.
MessageR tone
You can adjust the ring tone volume for MessageR.
MessageF tone
You can adjust the ring tone volume for MessageF.
SMS tone
You can adjust the ring tone volume for SMS.
]]
1
Adjusting the Effect Tone Volume
]]
C
Setting items/Setting at purchase > P234
1. From the Sound menu (P67), “Effect tone volume”
] Select from the following adjustment items ]
After setting,I [Done]
Key tone
You can adjust the key pad sound volume.
Power ON/OFF
You can adjust the tone volume for when turning the
FOMA phone on or off.
Flip tone
You can adjust the tone volume for when opening or
closing the FOMA phone.
Feedback tone
You can adjust the tone volume for when a popup is
displayed.
2
Setting a Ring Tone
Information
•When you receive mail, mssage R/F, or SMS on opening the
flip, the alarm sound will be fixed to level 1 regardless of each
setting “Ring volume”. However, if you set level 0 of ring tone,
the alarm does not sound.
*You need to obtain a miniSD memory card separately to use the functions related to the miniSD memory card. > P166
68
You can set the ring tone for voice call, video-phone call
or mail. You cannot set some melodies for ring tones such
MP4 file. But, you can set the SMF or MFi file as a ring
tone.
]]
C
3
Page 70

Sound/Display
• You cannot set the melody saved in miniSD memory card.
•
For the melody registered at purchase, see “List of
melody” (P251).
Setting items/Setting at purchase > P234
1. From the Sound menu (P67), “Select ringtone” ]
Select from the following adjustment items ]
After setting, I[Done]
• Select from the melodies stored in “Melody” in “Data
box” respectively. >P164
Voice call
You can select a ring tone for voice calls.
Video-phone
You can select a ring tone for video-phone calls.
Mail tone
You can select a ring tone for mail.
MessageR tone
You can select a ring tone for messageR.
MessageF tone
You can select a ring tone for messageF.
SMS tone
You can select a ring tone for SMS.
2 Ringtone set for a group of the FOMA phone’s phonebook
> Set group (P64)
3 Ringtone volume/Video call ring tone/Mail, Messsage ring
tone > Select the ring tone (P68)
• The sound setting of voice mail will be applied as the setting
value of SMS.
Setting an Effect Tone
]]
C
Setting items/Setting at purchase > P234, P235
1. From the Sound menu (P67), “Select effect tone” ]
Select from the following adjustment items ] After
setting, I[Done]
Key tone
You can set whether to emit an effect tone for when
you touch the buttons.
Power ON/OFF
You can set whether to emit an effect tone for when
you switch ON or OFF the FOMA phone.
4
Sound/Display
Information
• If you have set a ring tone depending on the voice call/ video
phone call/ Mail, the ring tone is preferred. The priority order is
as follows:
1 Ringtone set in the FOMA phone’s phonebook > Set the
phonebook (P58)
Flip tone
You can set whether to emit an effect tone for when
you open or close the FOMA phone.
Feedback tone
You can set whether to emit an effect tone for when a
popup is displayed.
69
Page 71

Sound/Display
Setting a Vibrator
]]
C
Setting items/Setting at purchase > P235
1. From the Sound menu (P67), Vibration settings ]
Select from the following setting items ] After
Sound/Display
setting, I[Done]
Incoming call
You can select a vibration pattern for when a voice
call or a video-phone call comes in.
– Pattern1 (Vibration only): This activates the
vibration to pattern 1. Regardless of ring tone, the
tone for incoming call does not sound.
– Pattern2 (Vibration only): This activates the
vibration to pattern 2. Regardless of ring tone, the
tone for incoming call does not sound.
– melody + vibration: The vibration and the melody
for incoming call are activated at the same time.
– OFF: The vibration is not activated in FOMA phone.
Message
You can set a vibration pattern for when mail,
messageR/F or SMS comes in.
– Pattern 1(Vibration only): This activates the
vibration to pattern 1. Regardless of ring tone, the
tone for incoming call does not sound.
5
– Pattern 2(Vibration only): This activates the
vibration to pattern 2. Regardless of ringtone, the
tone for incoming call does not sound.
– melody + vibration: The vibration and the melody
for incoming call are activated at the same time.
– OFF: The vibration is not activated in FOMA phone.
Activating the Manner Mode
You can set whether to mute the ring tone, key pad sound
and any other sound from the speaker to avoid annoying
people around you. If the manner mode is activated, an
incoming call or alarm, etc. is notified with vibrator.
• You can change the activation on setting manner mode
to “Original manner mode”. > P71
1. From the Stand-by display, press and hold # for
at least two seconds
•
The handset of the FOMA phone vibrates displaying
(blue/in the Original manner mode) or (pink/in
the Manner mode).
• You can cancel it by pressing# for at least two
seconds with the Manner mode activated.
70
Page 72

Sound/Display
Changing Manner Modes
]]
C
You can change operations in the Manner mode.
Setting at purchase > P235
1. From the Sound menu (P67), “Manner settings” ]
Select from the following setting items
Manner mode
You can set the Manner mode.
Original manner mode
You can customize operations in the Manner mode.
After setting, press I [Done].
– Incoming call sound: You can set whether to
make the ring tone sound when a voice call or
video-phone call comes in.
– Incoming call vib.: You can set whether to vibrate
the phone when a voice call or video-phone call
comes in.
– Message sound: You can set whether to make the
ring tone sound when mail, messageR/F or SMS
comes in.
– Message vibration: You can set whether to vibrate
the phone when mail, messageR/F or SMS comes
in.
6
– Key tone: You can set whether to make the key
operation sound when you do key operations.
– Flip tone: You can set whether to make an effect
tone sound when you open or close the FOMA
phone.
– Low battery tone: You can set whether to make a
battery alarm tone sound when the battery is flat.
Sound/Display
Information
• The following sounds are emitted even when the manner
mode is activated.
– The shutter tone on shooting still and moving image. > P104
– The alert tone for disconnecting a call. > P46, P48
– The alert tone to reconnect > P82
– The alert tone for the quality of calling > P83
• If you try to play the melody, moving image or i-motion on
manner mode, the confirmation screen appears and you can
select whether to play with sounds.
71
Page 73

Sound/Display
Setting Ringing Operations for Incoming Mail
]]
C
You can set whether to make the ring tone sound when
mail or SMS comes in. You can also set ringing duration
and cycle of rings.
Setting items/Setting at purchase > P235
Sound/Display
1. From the Sound menu (P67), “Mail ring duration” ]
Select from the following setting items ] After
setting, I[Done]
Mail ring ON/OFF
You can set whether to make the ring tone sound
when mail comes in. If you select “ON”, you can set
the ringing duration or cycle of ringing.
Mail ring duration
You can set ringing time and number of rings for the
ringing tone.
– Time: After select Sec. section by pressing D, you
can enter duration of ringing.
– Cycle: After select Cycle section by pressing D,
you can enter the number of cycle.
7
Setting Ringing Time
]]
C
You can specify the mute time in seconds before ringing
starts when a voice call or video-phone call which is not
registered in phonebook comes in. This function is effective
as a countermeasure for nuisance calls such as one ring
phone scam.
Setting items/Setting at purchase > P235
1. From the Sound menu (P67), Select “Set mute
seconds” ] Enter ring time. ] I [Done]
Information
• If the voice call or video-phone call which are not registered in
phonebook disconnects within the setting ringing time, they are
not recorded in received call list.
8
Setting Main Screen
You can set the display for stand-by display or
Incoming/outgoing screen as Main display.
You can set the maximum of the image size of 1280 x
1024 and the file size of 500 KB on the Stand-by display.
Depending on the image, some cannot be set properly.
• You cannot set the image in miniSD memory card.
• When the image saved in stand-by mode, making and
receiving a call at purchase, please refer to “Pre-installed
data” (P248)
*You need to obtain a miniSD memory card separately to use the functions related to the miniSD memory card. > P166
72
Page 74

Sound/Display
Setting the Stand-by Display
]]
C
You can set wallpapers and clock displays for the Standby display.
Setting items/Setting at purchase > P235, P236
1. From the Display Menu (P67), “Main display” ]
“Stand-by display” ] Select from the following
setting items ] After setting, I [Done]
Clock type
You can set the display format of the clock in Standby mode. If you set it to “Dual clock”, you can view
the time of two cities at the same time.
Wallpaper
1
You can set wallpaper to be displayed on the Standby display.
• Select an image saved on “My picture” of “Data
box”. > P154
Clock font color
2
You can set the clock font color of the clock display.
Clock1
3
The city name (Tokyo) is displayed. This is a city name
of clock displayed in Stand-by screen. You cannot
change the city name in this mode.
Clock2
3
If you set “Dual clock”, this menu is displayed. You
can set the clock of another city.
11
1: If “Clock type” is set to “Theme1”, “Theme2”, “Theme 3”.
“Theme 4”, this menu is not displayed.
2: If “Clock type” is set to “Small digital”, this menu is displayed.
3: If “Clock type” is set to “Dual clock”, this menu is displayed.
Information
• If you press M [View], you can confirm the display set.
• If you want to change from “Tokyo” to the other city, go to
“Using World time” (P178).
Setting the Display for Incoming Calls
]]
C
12
You can set the image displayed when you receive an
incoming call.
Setting items/Setting at purchase > P236
1. From the Display Menu (P67), “Main display” ]
“Incoming call”
•
Select from the images saved on “My picture” of “Data
box”.
>
P154
Setting Display for Outgoing Calls
]]
C
You can set the image displayed when you make a call.
Setting items/Setting at purchase > P236
1. From the Display Menu ] “Main display” ]
“Outgoing call” (P67)
13
Sound/Display
73
Page 75

Sound/Display
•
Select from the images saved on “My picture” of “Data
box”.
>
P154
Setting Sub Display
You can set images of the stand-by display for Sub
display and displays for incoming and outgoing calls. You
Sound/Display
can set the maximum of the image size of 1280 x 1024
and the file size of 500 KB on the stand-by display.
Depending on the image, some cannot be set properly.
• You can set the image in miniSD memory card as a
wallpaper when making/ receiving a call.
• When the image saved in stand-by mode, making and
receiving a call at purchase, see “Pre-installed data at
purchase” (P248)
Setting Stand-by Display
Wallpaper
You can set the wallpaper to be displayed on the
Stand-by display.
•
Select from the images saved on “My picture” of “Data
box”.>P154
Clock font color
You can set the font color of the clock display.
: If “Clock type” is set to “Small digital”, this menu is displayed.
Information
• You can view the screen after setting by pressing M [View].
Setting Display for Incoming Calls
]]
C
You can set the image to be displayed when you receive a
call.
22
]]
C
You can set wallpapers and clock displays on the Standby display.
Setting items/Setting at purchase > P236
1. From the Display Menu (P67), “Sub display” ]
“Stand-by display” ] Select from the following
setting items ] After setting, I[Done]
Clock type
You can set the display format for the clock.
*You need to obtain a miniSD memory card separately to use the functions related to the miniSD memory card. > P166
74
21
Setting items/Setting at purchase > P236
1. From Display Menu (P67), “Sub display” ]
“Incoming call”
•
Select from the images saved on “My picture” of “Data
box”.
>
P154
Page 76

Sound/Display
Setting the Display for Outgoing Calls
]]
C
You can change the image to be displayed when you
make a call.
Setting items/Setting at purchase > P236
1. From Display Menu, “Sub display” ] “Outgoing
call” (P67)
•
Select from the images saved on “My picture” of “Data
box”.
>
P154
23
Setting Fonts of Dial Characters
]]
C
You can set the sizes and colors of the dial fonts
displayed when you make a call, etc.
Setting items/Setting at purchase > P236
1. From the Display Menu (P67), “Font” ] Select from
the following setting items ] After setting,
I[Done].
3
Setting Menu Style
]]
C
You can set the style of the Menu Style that appears when
pressing C [Menu] on the Stand-by display.
Setting items/Setting at purchase > P236
1. From the Display Menu (P67), “Menu style” ]
“Grid”/“List” ] I[Done]
4
Setting Backlight
]]
C
You can set the lighting duration of the Main screen, Sub
display or buttons.
Setting items/Setting at purchase > P236, P237
1. From the Display Menu (P67), “Backlight” ] Select
from the following setting items =>After setting,
I[Done].
Main display
Set the lighting duration of the Main screen.
5
Sound/Display
Dial font size
Select a size of dial fonts.
Dial font color
Select a color of dial fonts.
Sub display
Set the lighting duration of the Sub display.
Keypad
Set the lighting duration of the buttons.
75
Page 77

Sound/Display
Setting color Scheme
]]
C
You can set the color scheme of the Main screen.
Setting items/Setting at purchase > P237
1. From the Display Menu (P67), “Color scheme” ]
Sound/Display
Select the color scheme you want to set ] I
[Done].
Information
• If you press C [View], you can view the screen after setting.
6
76
Page 78

Settings
Settings
Select
Settings
1 Call/ Answer
2 Call feature
3 Video-phone
4 Date & Time
5 Network
6 Host selection
7 Security
Select
Call/Answer ............................................78
Call Feature ............................................82
Video Phone ...........................................84
Date & Time ............................................86
Network (for overseas use) ....................87
Changing a Host from i-mode ...............89
Security...................................................90
Language................................................91
Others Settings.......................................92
To display the Settings menu
On the Stand-by display,
C
[Menu]
]
or “Settings”
77
Page 79

Settings
Call/Answer
Checking Call History
Displaying Received Call Records
]]
C
You can view the record of received call.
1. From the Settings menu (P77), “Call/Answer” ]
Settings
“Call history” ] “Received calls”
Recv. Calls (1/26)
DoCoMo Taro
DoCoMo Taro
DoCoMo Ichiro
DoCoMo Jiro
DoCoMo Saburo
Menu View Delete
This list will be displayed when the
phone number in a list are registered
in phonebook list. You can view the
list by pressing J.
<Received Calls>
• A/T: You can make a call to the other party of
the record being recorded.
• I[Delete]: You can delete the record being selected.
2. Select a call record ]C
Recv. Calls (1/26)
111
DoCoMo Ichiro
[Date]
[Time]
[duration]
Menu Delete
<Detail>
• A/T: You can make a call to the other party in a
list.
• I[Delete]: You can delete the list of call record.
• J: You can view the call record.
Using the Submenu of the Received Calls screen/
78
Icon
Description
Received voice calls
Received video-phone calls
Rejected calls
Missed calls (Voice calls)
Missed calls (Video-phone calls)
Details screen
1. From the Received Calls screen (See left)/Detail
screen (See above), M[Menu] ] Select from the
following submenu items
View
1
You can view details of the call record selected.
Add to phonebook
2
You can register a new phonebook.
Page 80

Settings
Send mail
3
The mail address stored in the phonebook is entered
into the Address. Go to step 3 (P139) of “Composing imode mail message”.
Delete
You can delete the call record selected on display.
Delete all
1
You can delete all the call records.
Go to list
4
You can return to the screen of received call list.
1: Not selected in sub-menu of detail screen.
2: Not selected if information on the caller of the call record
selected is stored in the phonebook.
3: Not selected if information on the caller of the call record
selected is not stored in the phonebook.
4: Selected in sub-menu of detail screen.
Displaying Redial Items (Dialed Call Records)
2. Select Redial ] C
• The Details display appears.
Information
• See “Using the Submenu of Received Calls Screen”/“Using
the Submenu of the Detailed Screen” (P78) for the display
operation method and the submenus available from the Redial
display/Detail screen.
Displaying All Call Records
]]
C
113
Received and dialed call records are displayed together.
1. From the Settings menu (P77), “Call/Answer” ]
“Call history” ] “All calls”
• The All calls screen appears.
2. Select a history ] C
• The Detail screen appears.
Settings
]]
C
112
You can view dialed call records.
1. From the Settings menu (P77), “Call/Answer” ]
“Call history” ] “Redial”
• The Redial display appears.
Mark
Description
Dialed voice calls
Dialed video-phone calls
Information
• See “Using the Submenu of Received Call Records
Screen” / “Using the Submenu of the Detailed Screen”
(P78) for the display operation method and the submenus
available from the All Calls screen / Detail screen.
79
Page 81

Settings
Displaying Call Time
]]
C
You can confirm call duration for each call type. You can
confirm the following items:
• The displayed call duration is a standard. The real of call
duration can be different.
1. From the Settings menu (P77), “Call/Answer” ]
Settings
“Call duration”
• Call duration display appears.
Last call
You can confirm the last call duration.
Received calls
You can confirm the received call duration.
Redial calls
You can confirm the dialed call duration.
All calls
You can confirm the total call duration.
12
• To clear all the call durations ] M[Menu] ] “Reset
all”
Setting Earphone/Microphone Auto Answer
]]
C
You can set how to answer an incoming call with the Flatplug Earphone/Microphone Set with Switch (option)
connected.
Setting item/Setting at purchase > P237
1. From the Settings menu (P77), “Call/Answer” ]
“Auto answer” ] Select from the following setting
items > After setting, I [Done]
Auto answering
You can set the earphone/microphone auto answer to
ON/OFF.
Delayed time (0–120 SEC)
You can set the time between receiving call and
answering a call automatically.
13
Information
• If the display of call time is over “9999999:59:59”, the setting
will be back to “00:00:00”.
Resetting call duration
1. Select a call duration you want to clear on the Call
duration screen (See above) ] I [Reset] ]Enter
your terminal security code ] C ] “Yes”
80
Information
• If you use the Flat-plug Earphone/Microphone Set with Switch
(option), you can answer a voice call or video-phone call by
pressing the switch of the earphone only.
Page 82

Settings
Setting to Reject/Accept Incoming Calls
]]
C
You can set whether to reject incoming calls.
Setting item/Setting at purchase > P237
1. From the Settings menu (P77), “Call/Answer” ]
“Reject/Accept call” ] Enter your terminal
security code ] C
• The Reject/Accept call display appears.
2. Select from the following setting items
Accept
You can set whether to accept all incoming calls.
Reject on list
You can reject the incoming call from the specific
other party. You can set the party's phone number to
reject a call by pressing I [Setup] (See below).
Reject all calls
– Silent : You can disable the ringing tone for all
incoming calls.
– Disconnect call : You can reject all incoming calls.
Information
14
Setting Reject call List
1. From the Reject/Accept call display (See left),
Select “Reject on list” ] I [Setup]
• The icons of call reject on a list will be displayed.
Mark
The type of reject call is set “Silent”.
The type of reject call is set “Disconnect call”.
• M [Menu]: You can edit/delete the list set.
2. I[Add] ] Select from the following setting items
] After setting, I[Done]
Reject types
– Silent : Disables the ring tone when receiving the
call from the other party set to “Reject number”.
– Disconnect call : Rejects incoming calls when
receiving the call from the other party set to “Reject
number”.
Reject number
Enter the phone number of a caller you want to reject.
You can select a phone number from the phonebook
by pressing C [Search]. If you press
the phone number from the phonebook.
Description
, you can select
Settings
•When rejecting a call by “Reject on list” or “Reject all calls”, the
record will be remained.
: If you use M[Menu] > Edit from the reject on list. you cannot
use the function.
Next Page
81
Page 83

Settings
Setting Memory Reject Call
]]
C
You can set whether to reject calls from callers whose
phone numbers are not registered in the phonebook or
not being informed the Caller ID.
Setting item/Setting at purchase > P237
1. From the Settings menu (P77), “Call/Answer” ]
Settings
“Memory reject call” ] “ON”/“OFF”
Setting an Answer Mode
]]
C
You can set whether to answer a voice call by pressing a
button other thanA
Setting item/Setting at purchase > P237
1. From the Settings menu (P77), “Call/Answer” ]
”Answer mode” ] Select from the following
setting items
Press send key
You can answer a call by pressing A only.
15
16
Information
• This setting is not available for video phone call.
Call Feature
Setting the Reconnect Control
]]
C
You can set whether to make an alarm sound to inform
you when you are reconnected immediately after
disconnected owing to bad radio wave conditions.
Setting item/Setting at purchase > P237
1. From the Settings menu (P77), “Call feature” ]
”Reconnect alarm” ] Select from the following
setting items
High alarm
Set high alarm sounds.
Low alarm
Set Low alarm sounds.
No alarm
No sound.
21
Open flip
You can answer a call by opening the FOMA phone. If
the FOMA phone is open already, you can answer a
call by A.
Press any key
You can answer a call by pressing any key except for
M, I, FE, G.
82
Information
• The time to reconnect the network can be different depending
on the status of phone or radio. (the maximum 10 seconds)
• The duration to reconnect the network can be chargeable.
• Depending on the status of phone or radio, the alarm may not
sound, and then disconnect it.
Page 84

Settings
Setting Quality Alarm
]]
C
You can set whether to make an alarm sound to inform
you when a call is liable to be disconnected midway
because of bad radio wave conditions.
Setting item/Setting at purchase > P238
1. From the Settings menu (P77), “Call feature” ]
“Quality alarm” ] Select from the following
setting items
High alarm
Set high alarm sounds.
Low alarm
Set low alarm sounds.
No alarm
No sound.
22
Information
• This setting is not available with a video-phone call.
Setting Prefix Dial
]]
C
You can store prefix numbers such as international access
code or “#31# /
phone number to dial.
Setting item/Setting at purchase > P238
1. From the Settings menu (P77), “Call feature” ]
“Prefix dial”
• The Prefix Dial screen appears.
2. Select a PREFIX field to enter ] Enter a number ]
I[Done]
31#” and add it to the beginning of the
24
Setting International Dial
Settings
Setting Minute Reminder
]]
C
You can check the call duration by beep sound every
minute during a voice call. (Not support this function for
Video-phone call)
Setting item/Setting at purchase > P238
1. From the Settings menu (P77), “Call feature” ]
“Minute reminder” ] “ON”/“OFF”
23
Setting Auto assist
]]
C
You can set whether to automatically replace “+´” at the
beginning of a phone number with an international access
code such as “009130010” for making an international call.
Setting item/Setting at purchase > P238
1. From the Settings menu (P77), “Call feature” ]
“International dial” ] “Auto assist setting” ]
“Auto”/“OFF”
251
Next Page
83
Page 85

Settings
Setting IDD prefix
]]
C
You can set the international access code to be added to
the beginning of a phone number for making an
international call.
Setting item/Setting at purchase > P238
1. From the Settings menu (P77), “Call feature” ]
Settings
“International dial” ] “IDD prefix setting” ] Select
from the following setting items ] After setting,
I[Done]
IDD prefix name
Enter the name of an international call service.
IDD prefix code
Enter an international access code.
252
Setting Close setting
]]
C
You can set how the FOMA phone works when it is
folded.
Setting item/Setting at purchase > P238
26
Continue(Mute)
The microphone is mute during Continue (Mute) call.
This function is available for only voice call.
Information
• During video-phone call, if you close the flip, the call will be
ended regardless of this setting.
Video-Phone
You can change settings for the video-phone operation
and display.
Changing the Video-Phone Settings
]]
C
You can set how the FOMA phone works and screens
when making a video-phone call.
Setting item/Setting at purchase > P238
1. From the Settings menu (P77), “Video-phone” ]
“Video-phone settings” ] Select from the
following setting items ] After setting, I[Done]
31
1. From the Settings menu (P77), “Call feature” ]
“Close setting” ] Select from the following setting
items
End the call
The call is disconnected.
84
VoiceCall AutoSwitch
Sets (ON/ OFF) whether to redial by automatically
switching to a voice call if the other party is unable to
answer a video-phone call.
Page 86

Settings
Display setting
You can set how to display the Talking screen.
– Both : Your image and the other party’s image are
displayed.
– Other : Only the other party’s image is displayed.
– Me : Only your image is displayed.
Sub screen
You can set an image to be displayed on the sub
screen when “Display setting for video phone call” is
set to “Both”.
– Me : Your image is displayed.
– Other : The other party’s image is displayed.
Send camera image
You can set whether to send your image to the other
party. If set to “OFF”, a substitute image is sent to the
other party.
Sending img. quality
– Prefer image quality : Sends images laying stress
on image quality. Prefer image quality is effective if
there is little motion.
– Normal : Sends images in standard quality and
motion speed.
– Prefer motion quality : Sends images laying stress
on motion speed. Prefer motion speed is effective
for moving images.
Display light
– Always on : Keeps the display lit during a call.
– Terminal setting : Follows the settings of the
“Backlight” of the “Main display”. >P75
Selecting a Video-phone Image
Changing Substitutive images
]]
C
You can set a substitute image to send in place of your
own image during a video-phone call.
Setting item/Setting at purchase > P238
1. From the Settings menu (P77), “Video-phone” ]
“Image settings” ] “Substitutive image” ] Select
from the following setting items ] After setting,
I[Done]
Image
– Default Image : The image by default.
– Selected image : You can select an image other
than the default image from the “Image list”.
Image list
You can select an image for when “Image” is set to
“Selected image”. Select from images stored in “My
picture” of “Data box”. > P154
Changing Response Hold Image
]]
C
You can set an image to display when you put the call on
hold during ringing of a video-phone call.
Setting item/Setting at purchase > P238
321
322
Settings
Next Page
85
Page 87

Settings
1. From the Settings menu (P77), “Video-phone” ]
”Image settings” ] ”Response hold image”
• See “Changing Substitutive image” (P85) for the
subsequent operations.
Changing On-hold Images
]]
C
You can set an image to display when you put the call on
Settings
hold during ringing of a video-phone call.
Setting item/Setting at purchase > P238,P239
1. From the Settings menu (P77), “Video phone” ]
“Image settings” ] “On-hold image”
• See “Changing Substitutive image” (P85) for the
subsequent operations.
323
Date & Time
1. From the Settings menu (P77), Select “Date &
Time” ] “Set time” ] Select from the following
setting items ] After setting, I[Done]
Set time
Press J to select an input item (hour, minute,
second, am/pm
numbers. Press C to switch between am/pm .
Time format
You can set whether to display time in the 12-hour
format or in the 24-hour format.
Hour indication
You can set whether the alarm will sound or not after
setting (00 min). You can select the ring tone as an
alarm. If you don't want this indication, set “OFF”.
: Displayed if “Time format” is set to “12-hour”.
). Use the numeric keys to enter
Setting Date
Setting Time
]]
C
You can set the time of city which is already set “Home”
(the city at purchase: Tokyo) by “World time”. (P178)
Setting item/Setting at purchase > P239
86
41
C
You can set the date.
Setting item/Setting at purchase > P239
]]
42
Page 88

Settings
1. From the Settings menu (P77) ] Select “Date &
Time” ] “Set date” ] Select from the following
setting items ] After setting, I[Done]
Set date
Press J to select an input item (year, month, date).
Use the numeric keys to enter numbers.
Date format
You can change display formats of the date.
(DD/MM/YYYY, MM/DD/YYYY, YYYY/MM/DD)
: YYYY stands for Year, MM stands for Month, and DD stands for
Day.
Setting Daylight Saving
]]
C
You can set daylight saving time.
Setting item/Setting at purchase > P239
1. From the Settings menu (P77), “Date & Time” ]
“Daylight saving” ] “ON”/“OFF”
Information
• The country applying to the Summer time by using “World time”
(P178) is set as a home. After setting, it is displayed in Summer
time.
43
Network (for overseas use)
Selecting the Network Connection Mode
]]
C
You can select a network setting method in case
destination networks (Communication carriers) change for
overseas use, etc.
Setting item/Setting at purchase > P239
1. From the Settings menu (P77), “Network” ]
“Network selection” ] Select from the following
setting items
Auto
Automatically searches for the network for setting.
Manual
The network search display appears, allowing you to
select a network from the list displayed after search.
Information
• It may take a few minutes to find the network.
• If you set “Auto”, you can search the network automatically in the
situation as follow.
– When you switch on – Out of service area
• If you stop searching the network manually, the setting will be
changed to “Auto”.
51
Settings
87
Page 89

Settings
Setting the Network Mode
]]
C
You can set a type of network to search for when networks
are searched according to “Network selection”.
Setting item/Setting at purchase > P239
1. From the Settings menu (P77), “Network” ]
“Network mode” ] Select from the following
Settings
setting items
Auto
Searches all the networks connectable.
WCDMA only
Searches only networks supporting 3G.
GSM only
Searches only networks supporting GSM/GPRS.
Information
• You cannot exchange the data through packet service under
GSM network.
52
Registering a Network of Preferred list
]]
C
Adding Networks
If the network is searching automatically, you can add a
preferable network (communication carrier) to be
connected to.
Setting item/Setting at purchase > P239
1. From the Settings menu (P77), “Network” ]
“Preferred lists”
2. M[Menu] ] Select from the following setting
items
• I[Delete]: You can delete the network selected.
Search network
You can select from the network list stored in the
FOMA phone for adding.
Enter new network
You can enter the country code (MCC) and the
network code (MNC) for adding. After setting, press
I[Done].
53
88
Delete
You can delete the selected network.
Move up
You can move the selected network upward. The
network which is moved upward is preferred.
Page 90

Settings
Move down
You can move the selected network downward. The
network placed downward is preferred.
: If you register multiple networks, you can use this menu.
Information
• If the network is not registered, [Menu], [Delete] of soft key
area on list to register will not be displayed. To add new
network, press I [Add].
• The registered data is saved in FOMA card.
Displaying the Network Name
]]
C
You can set whether to display the name of the network
currently set on the Stand-by display.
Setting item/Setting at purchase > P239
1. From the Settings menu (P77), “Network” ]
“Network name display” ] “Display on”/“Display
off”
54
Changing a Host from i-mode
Setting / Changing the Host
]]
C
Normally, you do not need to change the setting.
You can set a host to use services of various providers
other than i-mode. If the host is changed, i-mode
becomes unavailable.
Setting item/Setting at purchase > P239
1. From the Settings menu (P77), “Host selection” ]
From the Host selection screen, I [Add] ] Enter
your terminal security code ]C ]Set the
following items ]After setting, I[Done]
• The host set is displayed on the Host selection
screen with attached to it.
Host name
Enter the name displayed on the Host selection
screen.
6
Settings
Host address
Enter the address of the host.
Access point
Enter the Access point (URL, etc.).
89
Page 91

Settings
Information
• To switch the host back to “i-Mode” or to switch to another
host, select “i-Mode”/other hosts and press C on the Host
selection screen.
• If you press M [Menu] on the Host selection screen, you can
edit / delete / display the host set. Note that you cannot edit /
delete pre-installed “i-Mode”.
• In Access point menu, you should enter IP address in PDP
Settings
type.
Security
Setting All Lock
]]
C
You can set whether to lock requiring to enter the terminal
security code to operate function. During All Lock, “All
lock” is displayed on the Stand-by display.
Setting item/Setting at purchase > P239
1. From the Settings menu (P77), “Security” ] “All
lock” ] Select from the following setting items
Power on
You can set whether to lock the FOMA phone when
you turn of the power. You need to enter your terminal
security code to set it.
71
Immediate
Sets All lock immediately. You need to enter your
terminal security code to set it.
none
You can release All lock. You need to enter your
terminal security code to release it.
Releasing All Lock
1. Press either one of 1~0 ] Enter your
terminal security code ] C
•
On the locked display, I[Emergency]: You can call
emergency information (110/118/119).
Setting PIN Code Request
]]
C
You can set to enter PIN1 code when you turn on the
power to the FOMA phone.
Setting item/Setting at purchase > P239
1. From the Settings menu (P77), “Security” ] “PIN
code request” ] “ON”/“OFF” ] Enter PIN1 code ]
C
72
90
Page 92

Settings
Changing Your Password
Changing the PIN1 code / PIN2 code
]]
C
]]
C
You can change the PIN1 code / PIN2 code. To change
the PIN1 code, you should set “PIN code request” to
“ON”. The default code is “0000”.
1. From the Settings menu (P77), “Security” ]
“Change password” ] “PIN1 code”/“PIN2 code”
Change PIN1 code
Current PIN1 code. R:3
New PIN1 code
Verify PIN1 code
The remaining time to enter
PIN is available
731 /
732
Information
• If you enter a wrong PIN code over three times, the PIN code
will be locked automatically. If you unlock the PIN code, see
“Preventing the Phone from Activating the Operation of
Function” (P97).
Changing Your Terminal Security Code
]]
C
733
You can change your terminal security code.
Setting item/Setting at purchase > P239
1. From the Settings menu (P77), “Security” ]
Change password” ] “Security code”
• For the subsequent steps, just like the steps to change
the PIN1 code / PIN2 code, enter your current terminal
security code, enter a new terminal security code and
then enter the same code again for confirmation.
Settings
<Change PIN1 code>
2. Enter the current PIN1 code/PIN2 code ] C
3. Enter a new PIN1 code/PIN2 code ] C
4. Enter the same code that you did in Step 3 again ]
C
]]
C
You can switch the languages of the FOMA phone
between Japanese and English.
Setting item/Setting at purchase > P240
1. From the Settings menu (P77), “
“
”/“English”
Next Page
8
” ]
91
Page 93

Settings
Information
• This setting is registered in FOMA phone and FOMA card
which is inserted now. If you insert other FOMA card which
registered other settings, the settings of FOMA card will be
preferred.
Others Settings
Settings
Checking the Memory Status
]]
C
You can check the usage status and available space of the
memories of the handset of the FOMA phone and the
miniSD memory card.
1. From the Settings menu (P77), “Others” ] “Memory
status” ] Select from the following items
Common memory
You can check the empty or the reseved capacity
(Standard) of the common memory in which data such
as My picture, i-motion, Melody are stored.
Reserved memory
You can check the empty or the reserved capacity of the
common memory in which data for Phonebook,
Schedule, Memo, Date counter are stored.
UIM memory
You can check the empty or the reseved capacity
(Standard) of the common memory in which data for
“Phonebook”, “SMS”.
91
miniSD
You can check the empty or reserved capacity of
miniSD memory card.
Resetting the Settings
Clearing the Memory
]]
C
You can clear all the data recorded in the handset of the
FOMA phone and the miniSD memory card.
1. From the Settings menu (P77), “Others” ] “Reset
settings” ] “Clear memory” ] Select from the
following items
• You need to enter your terminal security code for
deleting.
Handset contents
Clears all the data saved in the Data box folder of the
FOMA phone.
Handset personal info.
Clears all the personal data saved in the FOMA phone
such as phonebooks, schedule, call history and so on.
miniSD
Clears all the data saved in the minisd folder of the
miniSD memory card.
921
*You need to obtain a miniSD memory card separately to use the functions related to the miniSD memory card. > P166
92
Page 94

Settings
Initializing the Default Settings
]]
C
You can reset to all settings at purchase except for
“i-mode setting” and “Mail setting”.
1. From the Settings menu (P77), “Others” ] “Reset
settings” ] Default settings “Yes” ] Enter the
terminal security code ] Press C
Information
•When you reset the date and time, you cannot play span/
period restricted i-motion file.
922
Changing the Settings for the SMS Center
]]
C
Normally, you do not need to change the settings.
You can change the SMS centers to use.
93
Address
If “SMSC” is set to “others”, you can enter the
address of the SMS center.
Resetting the holiday
]]
C
You can reset all settings of holiday of FOMA phone to
settings at purchase.
1. From the Settings menu (P77), “Others” ] “Reset
holiday” ] “Yes”
94
Settings
Setting item/Setting at purchase > P240
1. From the Settings menu (P77), “Others” ] “SMS
center” ] “Select from the following setting items
] After setting, I[Done]
SMSC
– DoCoMo : You can use the DoCoMo SMS center.
– Others : You can use another company’s SMS
center.
93
Page 95

Page 96

Passwords ..............................................96
Preventing the Phone from
Activating the Operation of Function ....97
Other Safety Settings.............................98
Safety settings
95
Page 97

Safety settings
Passwords
For some functions of the FOMA, you need to enter
your password. In addition to the Terminal security
Code for operating respective mobile phone functions,
the Network Security Code to use network services,
and i-mode password are available. These passwords
help you utilize your FOMA phone.
Safety settings
Information for Passwords
• Do not use the easy-to-decipher figures such as
“Birthday”, “the part of phone number”, “Area code or
Room number”, “1111”, “1234” to prevent it from
being known by others. Note that you make a memo
to set the password.
• Make sure that prevent the password from being
known by others. If the password is known by third
party, NTT DoCoMo will not have any other
responsibility concerning the mischief or the mis-use of
handset.
• There is no request the client's password from NTT
DoCoMo.
• Note that if you do not remember password, you need
to bring an identification card such as a driver's
license, FOMA handset, FOMA card to a handling
counter such as a DoCoMo shop. For details, consult
"DoCoMo Information Center" described on the back
page of the manual.
Terminal security code
The terminal security code is set “0000” at purchase. You
can change the terminal security code. To change the
code, see “Changing Your Terminal Security Code” (P91).
Network Password
The Network Security Code is a four-digit number required for
using various network services and for various procedures at
the “
determined at the time of contract. The user has an ID and a
password of “My DoCoMo”
site for PC can change new network password through PC.
In addition, you can change various procedures of DoCoMo
e-site in i-mode.
For “My DoCoMo”, “DoCoMo e-site”, see the cover of this
manual.
e ” (DoCoMo e-site). The security code is
which is the integrated support
i-mode Password
The i-mode password is a four-digit password required for
registering, deleting My-menu, Messaging service, applying
for or cancelling an i-mode password. (The service provider
can supply its own password.)
The default for i-mode password is “0000”, but you can
change it. If you change the password from i-mode, see
“Changing i-mode Password” (P126).
96
Page 98

Safety settings
PIN1 code/PIN2 code
For the FOMA card, you can set the two security code,
namely the PIN1 code and PIN2 code. The default for
these security code is “0000”, but you can change these
codes as you lock. To change the codes, see “Setting
PIN Code Request” (P90), “Changing the PIN1 code /
PIN2 code” (P91).
a PIN1 Code
The PIN1 code is the four- to eight-digit code for checking
the user each time the UIM is inserted into the FOMA
phone or each time the FOMA phone is turned on so that
you can prevent the third party from using your UIM. If you
enter PIN1 code, you can receive or make a call or
activate the operation.
a PIN2 Code
The PIN2 code is the four-to eight- digit code for using the
user certificate or applying for the issue of it and executing
reset Total Cost.
Information
• If you purchase a new FOMA phone and use the existing
FOMA card with new FOMA phone, use PIN1 code and PIN2
code you have set previously.
• If you enter a wrong PIN1 code/ PIN2 code three times in
succession on the display requiring its entry, the PIN1 code/
PIN2 code is locked automatically. To unlock the code, you
need to enter PIN lock release code.
Releasing PIN lock code
Safety settings
PIN lock releasing code is a eight-digit password to
release locking PIN1 code, PIN2 code. You cannot
change it.
Information
• If you enter a wrong "PIN unlock code" 10 times in succession,
it is automatically locked. In case of this, you need to bring the
FOMA phone, UIM and an identification card such as a driver's
license to a handling counter such as a DoCoMo shop.
This FOMA phone does not have this function.
Preventing the Phone from Activating
the Operation of Function
To protect the information or data in FOMA phone, you
can activate the security function to prevent from
activating the operation or the function.
97
Page 99

Safety settings
Setting All Lock
After locking FOMA phone, if you don't enter terminal
password, you cannot activate the phone. To set this
function, see “Setting All Lock” (P90).
Setting not to display mail without
permission
You can set the security function for the Inbox, Outbox,
and Unsent of the Mail menu. To set this function, see
Safety settings
“Display” of “Mail setting” (P145).
Other Safety Settings
The FOMA phone has the following safety settings in
addition to the “Security” function:
Purpose Function/Service
To reject calls from
specified callers
To receive calls from callers
registered in the phonebook
Not to take nuisance
calls
Not to take calls from
callers not notifying caller ID
To receive necessary
mail only
Reject/Accept call
Memory reject call
Nuisance call barring
Caller ID request
Receive option
Reference
P81
P82
P194
P194
P143
Purpose
To change the mail
address
To receive/reject mail
sent from i-mode
phones only
To receive mail from
specified domains
(company) only
To reject mail from
specified senders
To reject 200th and
succeeding i-mode
messages sent from a
single i-mode phone on
the same day
To reject unsolicited Ad
mail
To reject SMS
reception
To store/check safety
information when a
disaster occurs
To stop the mail
function temporarily
To check the settings
for the mail function
Function/Service
Change mail address
Receive/Reject i-mode
mail only
Receive from specified
domain
Receive Selected
Mail/Reject Selected Mail
Selected Mail Senders
Reject unsolicited Ad
mail/Reject mail
Se/Confirm SMS
Rejection Settings
i-mode Disaster
Message Board Service
Suspend Mail
Confirm Settings
Confirm Settings
Reference
Refer to
“i-mode
User’s
Manual”
98
Page 100

Multimedia (Camera)
Select
Multimedia
Multimedia
Multimedia
1 Camera-mode
2 Movie-mode
Select
Notes for when using the camera.............100
Using the Camera ......................................101
Taking Still Images.....................................101
Shooting Moving Images...........................106
To display the Multimedia menu
On the Stand-by display,
C[Menu] ]
or “Multimedia”
99
 Loading...