

LG KT-T65E Owner’s Manual

OWNER’S MANUAL
Multi-touch
Overlay Kit
Please read this manual carefully before operating your set and retain it for future reference.
KT-T32E
KT-T43E
KT-T49E
KT-T55E
KT-T65E
KT-T75E
www.lg.com
Copyright © 2018 LG Electronics Inc. All Rights Reserved.

2
TABLE OF CONTENTS
ENGLISH
SAFETY PRECAUTIONS .............3
ASSEMBLY AND
PREPARATION ............................4
- Applicable models ....................................................... 4
- Accessories .....................................................................4
- Precaution When Using the Touch Pen ...........6
- Portrait Layout ............................................................. 7
- Assembly Instructions .............................................. 8
HOW TO ATTACH THE IR ........ 16
INSTALLATION INSTRUCTIONS .. 17
- Connecting Touch USB Cable ............................ 17
BEFORE USE ............................ 18
PRODUCT SPECIFICATIONS ... 19
- Touch Specifications ............................................... 19
- Product Specifications .......................................... 19
- OS Support Availability ......................................... 20
- Product Dimensions ............................................... 21
TROUBLESHOOTING ............... 27

3
Warning: This equipment is compliant with Class A of CISPR 32. In a residential environment this equipment may cause
radio interference.
CAUTION
• Always use genuine components to ensure safety and product performance.
• The product warranty will not cover damage or injury caused by the use of counterfeit components.
NOTE
• The accessories provided with your product may vary depending on the model or region.
• Product specifications or contents in this manual may be changed without prior notice due to upgrade of product
functions.
SAFETY PRECAUTIONS
• f you are a professional installer, please read this manual carefully before installing the product.
• If you are a professional installer, please give this manual to the user after installation and ensure that the user also
reads the manual carefully and retains it for future reference.
• After reading the manual, please keep it handy for future reference.
WARNING
• The product should be installed by a qualified professional specified by the retail store.
- Product installation by non-qualified personnel is very dangerous and may cause personal injury.
• When moving or replacing the product after installation, contact a qualified installer specified by the retail store.
- Installation or movement of the product must be carried out by a skilled professional. If an unqualified person moves
or installs the product, it may cause safety risks.
• Do not hang the power cable and signal cable on the back of the monitor when mounting the monitor to the wall.
- Damaged cables may result in fire, electric shock, or damage to the product.
- Keep the monitor upright when mounting the monitor to the wall.
• The product should be installed where its weight can be fully supported.
- If the product is installed on a weak surface, the product may fall, causing injury.
- Check the maximum allowed weight of the wall mount (total weight is 75 kg).
• Do not hang on this product. Protect it from severe impact after installation.
- The product may fall and cause injury.
• Models attached to the Multi-touch Overlay Kit cannot be installed on stands.
- The product may fall.
ENGLISH
4
ASSEMBLY AND PREPARATION
ENGLISH
Applicable models
• KT-T32E, KT-T43E, KT-T49E, KT-T55E, KT-T65E :
Applicable only for **SH7E, **SH7ED, **SM5E, **SE3E, **SL5E, **SH7DD, **SM5D, **SM5KD, **SE3D, **SE3KD,
**SM5C, **SM5KC, **SM3C, **SE3C, **SE3KC, **SM5B, **SM5KB, **SM3B, **SE3B, **SE3KB, **SL5B (except for
32SL5B).
• KT-T75E : Applicable only for 75UH5C and 75UM3C.
• Applicable models may be added.
• For details about applicable models, contact the retail store.
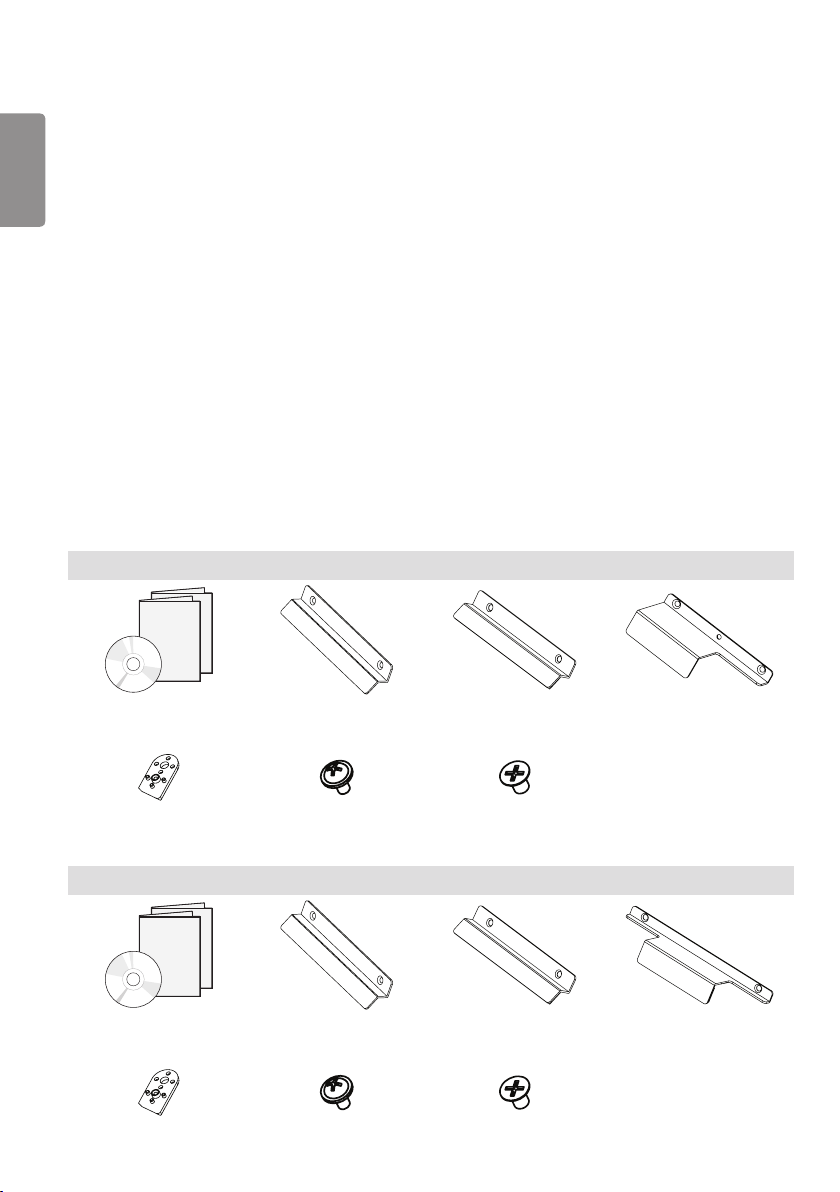
Accessories
• Check your product box for the following items. If there are any missing accessories, contact the local dealer where
you purchased your product.
• The illustrations in this manual may differ from the actual product and accessories.
• Extra screws are provided for user convenience.
KT-T32E
CD (Owner’s Manual)/
Cards
IR Bracket (1 ea) Ø3 x L6 Screw (1 ea) M4 x L6 Screw (13 ea)
CD (Owner’s Manual)/
Cards
IR Bracket (1 ea) Ø3 x L6 Screw (1 ea) M4 x L6 Screw (19 ea)
Fixer Top (2 ea) Fixer Side (2 ea) Fixer Bottom Center (1 ea)
KT-T43E / KT-T49E
Fixer Top (3 ea) Fixer Side (4 ea) Fixer Bottom Center (1 ea)
5
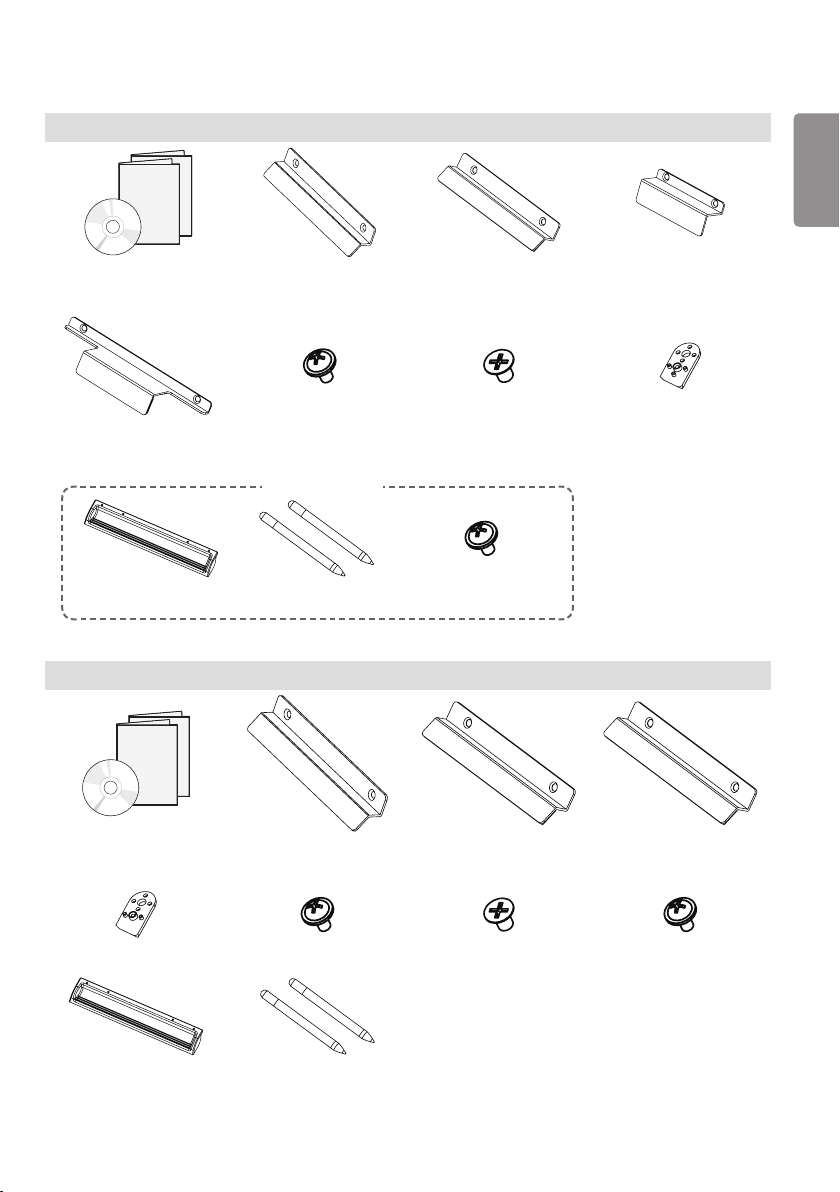
KT-T55E / KT-T65E
CD (Owner’s Manual)/
Cards
Fixer Bottom Center (1 ea) Ø3 x L6 Screw (1 ea) M4 x L6 Screw (23 ea) IR Bracket (1 ea)
Pen Tray (1 ea) Touch Pen (2 ea)
Fixer Top (3 ea) Fixer Side (4 ea) Fixer Bottom (2 ea)
KT-T65E only
M4 x L8 Screw (2 ea)
KT-T75E
ENGLISH
CD (Owner’s Manual)/
Cards
IR Bracket (1 ea) M3 x L5.5 Screw (1 ea) M4 x L6 Screw (19 ea) M4 x L8 Screw (2 ea)
Pen Tray (1 ea) Touch Pen (2 ea)
Fixer Top (3 ea) Fixer Side (4 ea) Fixer Bottom (1 ea)

6
Precaution When Using the Touch Pen
ENGLISH
(KT-T65E, KT-T75E only)
If you hold down below the guide line when using the touch pen, it may occur a break or touch error.
Guide line

7
Portrait Layout
When installing in a portrait layout, rotate the monitor counterclockwise 90 degrees (when facing the screen).
NOTE
• The Pen Tray can only be used in the landscape position.
ENGLISH
8
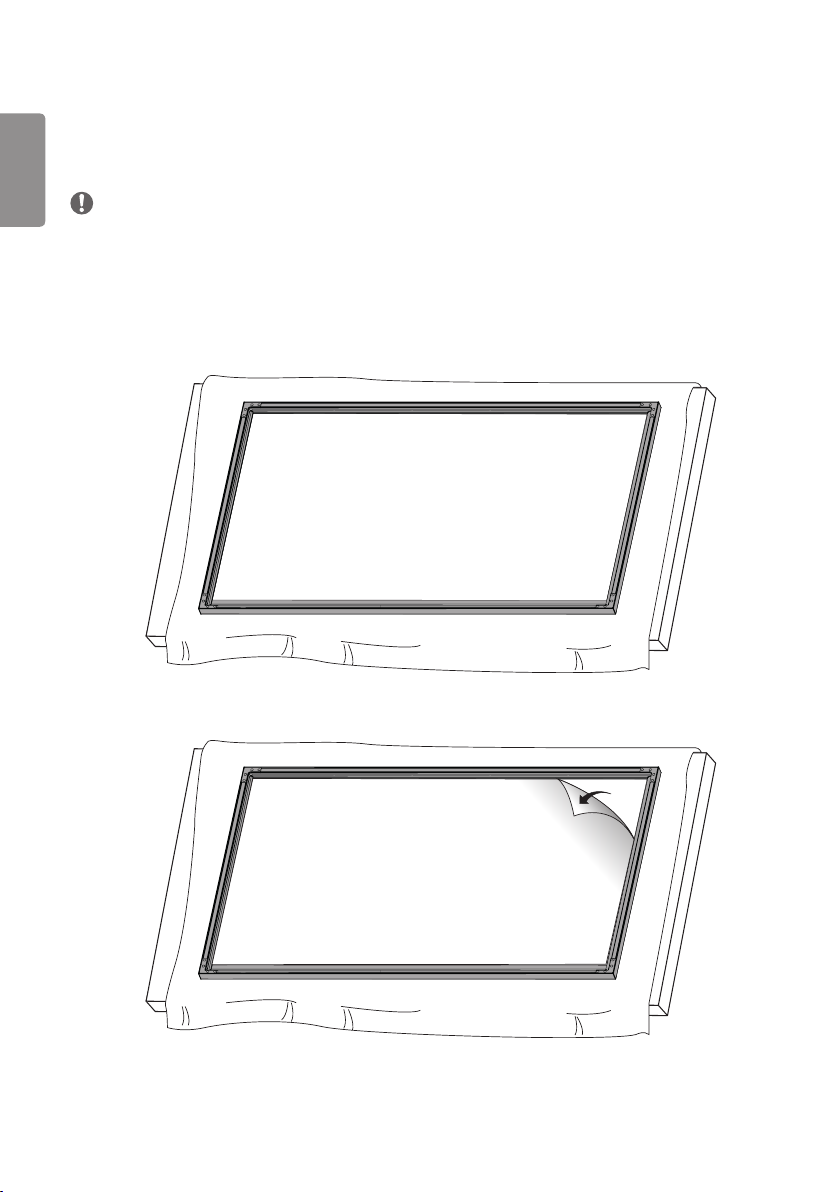
Assembly Instructions
ENGLISH
• The picture may differ from the actual product.
NOTE
• Before installing the product, if there are any water drops or foreign materials on the inner/outer side of the glass,
wipe them out with a soft cloth.
• While using the product, if there are any water drops or foreign materials on the inner/outer side of the glass, wipe
them out with a soft cloth and install it again.
• Assemble the product in a clean, uncontaminated area to prevent dust or foreign material from entering it.
1 Place a soft cloth on the table and place the Multi-touch Overlay Kit over it as illustrated.
2 Remove the internal protective film using the handle at the upper right corner of the glass as illustrated.
9
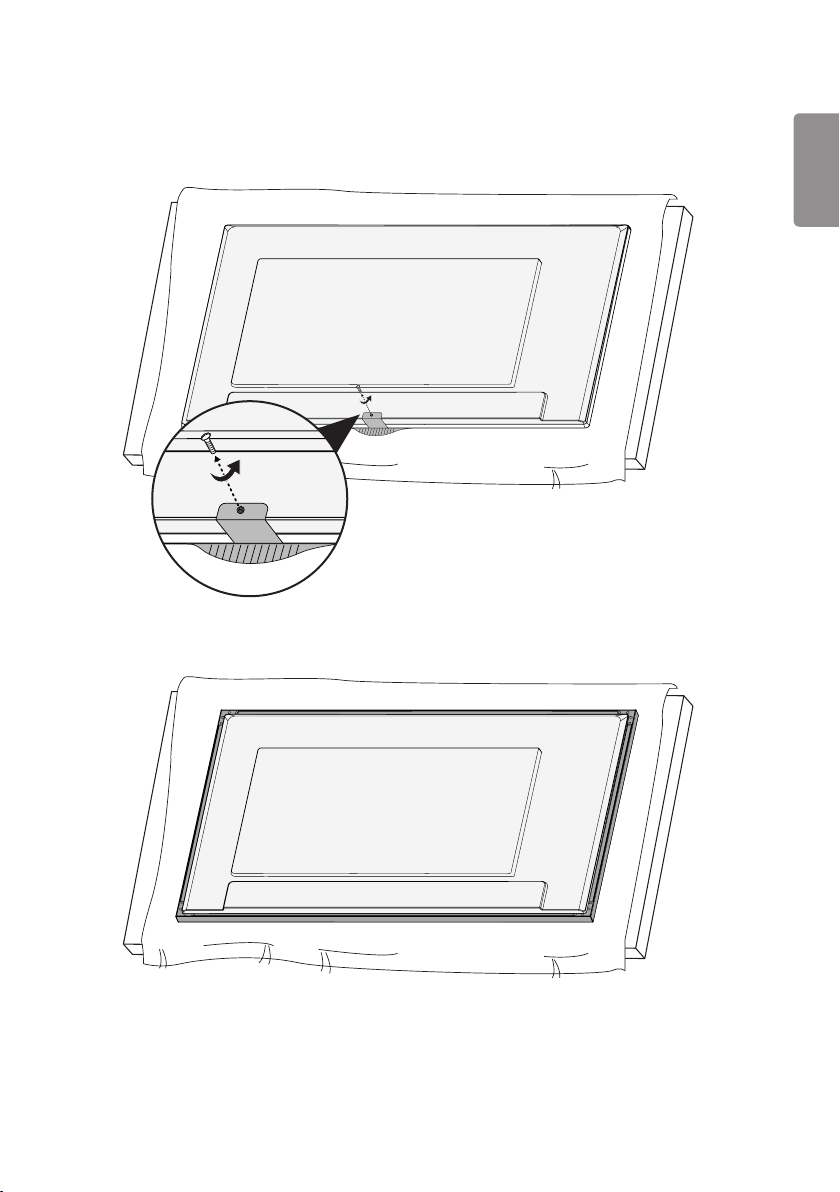
3 Place a soft cloth on another table, place the display product as shown, and remove the LG Logo Bracket.
- For models with LG Logo Brackets only.
- The image may be different according to the model.
4 Place the display product on the Multi-touch Overlay Kit as illustrated.
ENGLISH
 Loading...