

Page 1
ENGLISH
KT610
USER GUIDE
This document is the user guide for the LG KT610 3G Video Mobile Phone. All rights for
this document are reserved by LG Electronics. Copying, modifying and distributing this
document without the consent of LG Electronics are prohibited.
Disposal of your old appliance
1. When this crossed-out wheeled bin symbol is attached to a product it means the product is covered by the
opean Dir
Eur
2. All electrical and electronic products should be disposed of separately from the municipal waste stream via
designated collection facilities appointed by the government or the local authorities.
3. The correct disposal of your old appliance will help prevent potential negative consequences for the
environment and human health.
4. For more detailed information about disposal of your old appliance, please contact your city office, waste
disposal service or the shop wher
ective 2002/9
6/EC.
e y
ou pur
sed the product.
cha
Page 2

Part 15.21 statement
" Change or Modifications that are not expressly approved by the manufacturer could void
the user's authority to operate the equipment. "
Part 15.105 statement
This equipment has been tested and found to comply with the limits for a class B digital device,
pursuant to Part 15 of the FCC Rules.
These limits are designed to provide reasonable protection against harmful interference in a
residential installation.
This equipment generates uses and can radiate radio frequency energy and, if not installed and used
in accordance with the instructions, may cause harmful interference to radio communications.
However, there is no guarantee that interference will not occur in a particular installation. if this
equipment does cause harmful interference or television reception, which can be determined by
turning the equipment off and on, the user is encouraged to try to correct the interference by one or
more of the following measures:
- Reorient or relocate the receiving antenna.
- Increase the separation between the equipment and receiver.
- Connect the equipment into an outlet on a circuit different from that to
which the receiver is connected
- Consult the dealer or an experienced radio/TV technician for help.
Page 3

LIMITED WARRANTY STATEMENT
1. WHAT THIS WARRANTY COVERS:
LG offers you a limited warranty that the enclosed subscriber unit and its enclosed accessories will be
free from defects in material and workmanship, according to the following terms and conditions:
(1) The limited warranty for the product extends for ONE (1) year beginning on the data of purchase
of the product.
(2) The limited warranty extends on to the original purchaser of the product and is not assignable or
transferable to any subsequent purchaser/end user.
(3) This warranty is good only to the original purchaser of the product during the warranty period as
long as it is in the U.S., including Alaska, Hawaii, U.S. Territories and Canada.
(4) The external housing and cosmetic parts shall not be covered under these limited warranty terms.
(5) Upon request from LG, the consumer must provide information to reasonably prove the date of
purchase.
(6) The customer shall bear the cost of shipping the product to the Customer Service Department of
LG. LG shall bear the cost of shipping the product back to the consumer after the completion of
service under this limited warranty.
2. WHAT THIS WARRANTY DOES NOT COVER:
(1) Defects or damages resulting from use of the product i n other than its normal and customary
manner.
(2) Defects or damages from abnormal use, abnormal conditions, improper storage, exposure to
moisture or dampness, unauthorized modifications, unauthorized connections, unauthorized repair,
misuse, neglect, abuse, accident, alteration, improper installation, or other acts which are not the
fault of LG, including damage caused by shipping blown fuses spills of food or liquid.
(3) Breakage or damage to antennas unless caused directly by defects in material or workmanship.
(4) That the Customer Service Department at LG was net notified by consumer of the alleged defect
or malfunction of the product during the applicable limited warranty period.
(5) Products which have had the serial number removed or made illegible.
(6) The limited warranty is in lieu of all other warranties, express or implied either in fact or by
operations law, statutory or otherwise, including, but limited to any implied warranty of
marketability or fitness for a particular use.
(7) Damage resulting from use of non-LG approved accessories.
(8) All plastic surfaces and all other externally exposed parts that are scratched or damaged due to
normal customer use.
(9) Products operated outside published maximum ratings.
3
(10) Products used or obtained in a rental prog ram.
(11) Consumables (such as fuses).
3. STATE LAW RIGHTS:
No other express warranty is applicable to this product. THE DURATION OF ANY IMPLIED
WARRANTIES, INCLUDING THE IMPLIED WARRANTY OF MARKETABILITY, IS LIMITED
TO THE DURATION OF THE EXPRESS WARRANTY HEREIN. LG INFOCOMM INC. SHALL
NOT BE LIABLE FOR THE LOSS OF THE USE OF THE PRODUCT, INCONVENIENCE, LOSS
OR ANY OTHER DAMAGES, DIRECT OR CONSEQUENTIAL, RISING OUT OF THE USE OF,
OR INABILITY TO USE, THIS PRODUCT OR FOR ANY BREACH OF ANY EXPRESS OR
IMPLIED WARRANTY, INCLUDING THE IMPLIED W ARRA NTY OF MAR KETABILITY
APPLICABLE TO THIS PRODUCT. Some states do not allow the exclusive of imitation of incidental
or consequential damages or limitations on how long an implied warranty lasts; so these limitations or
exclusions may not apply to you. This warranty gives you specific legal rights and you may also have
other rights which vary from state to state.
4. HOW TO GET WARRANTY SERVICE:
To obtain warranty service, please call the following web address:
www.lgeservice.com
Page 4

8
For Your Safety
Important Information
This user guide contains important information on the use and
operation of this phone. Please read all the information
carefully for optimal performance and to prevent any damage
to or misuse of the phone. Any changes or modifications not
expressly approved in this user guide could void your warranty
for this equipment.
Before You Start
Safety Instructions
WARNING! To reduce the possibility of electric shock, do not
expose your phone to high humidity areas, such as the
bathroom, swimming pool, etc.
Always store your phone away from heat. Never store your
phone in settings that may expose it to temperatures less than
32°F or greater than 104°F, such as outside during extreme
weather conditions or in your car on a hot day. Exposure to
excessive cold or heat will result in malfunction, damage
and/or catastrophic failure.
Be careful when using your phone near other electronic
devices. RF emissions from your mobile phone may affect
nearby in adequately shielded electronic equipment. You
should consult with manufacturers of any personal medical
devices such as pacemakers and hearing aides to determine if
they are susceptible to interference from your mobile phone.
Turn off your phone in a medical facility or at a gas station.
Never place your phone in a microwave oven as this will
cause the battery to explode.
IMPORTANT! Please read the TIA SAFETY INFORMATION on
page 78 before using your phone.
Safety Information
Read these simple guidelines. Breaking the rules may be
dangerous or illegal. Further detailed information is given in this
user guide.
] Never use an unapproved battery since this could damage
the phone and/or battery and could cause the battery to
explode.
] Never place your phone in a microwave oven as it will
cause the battery to explode.
] Do not dispose of your battery by fire or with hazardous or
flammable materials.
] Make sure that no sharp-edged items come into contact
with the battery. There is a risk of this causing a fire.
] Store the battery in a place out of reach of children.
] Be careful that children do not swallow any parts such as
rubber plugs (earphone, connection parts of the phone,
etc.). This could cause asphyxiation or suffocation.
Page 5

9
For Your Safety
] Unplug the power cord and charger during lightning storms
to avoid electric shock or fire.
] When riding in a car, do not leave your phone or set up the
hands-free kit near to the air bag. If wireless equipment is
improperly installed and the air bag is activated, you may be
seriously injured.
] Do not use a hand-held phone while driving.
] Do not use the phone in areas where its use is prohibited.
(For example: aircraft).
] Do not expose the battery charger or adapter to direct
sunlight or use it in places with high humidity, such as a
bathroom.
] Never store your phone in temperatures less than- 4°F or
greater than 122°F.
] Do not use harsh chemicals (such as alcohol, benzene,
thinners, etc.) or detergents to clean your phone. There is a
risk of this causing a fire.
] Do not drop, strike, or shake your phone severely. Such
actions may harm the internal circuit boards of the phone.
] Do not use your phone in high explosive areas as the phone
may generate sparks.
] Do not damage the power cord by bending, twisting, pulling,
or heating. Do not use the plug if it is loose as it may cause
a fire or electric shock.
] Do not place any heavy items on the power cord. Do not
allow the power cord to be crimped as it may cause fire or
electric shock.
] Do not handle the phone with wet hands while it is being
charged. It may cause an electric shock or seriously
damage your phone.
] Do not disassemble the phone.
] Do not place or answer calls while charging the phone as it
may short-circuit the phone and/or cause electric shock or
fire.
] Only use the batteries, antennas, and chargers provided by
LG. The warranty will not be applied to products provided by
other suppliers.
] Only authorized personnel should service the phone and its
accessories. Faulty installation or service may result in
accidents and consequently invalidate the warranty.
] Do not hold or let the antenna come in contact with your
body during a call.
] An emergency call can be made only within a service area.
For an emergency call, make sure that you are within a
service area and that the phone is turned on.
Page 6

10
For Your Safety
FCC RF Exposure Information
WARNING! Read this information before operating the phone.
In August 1996, the Federal Communications (FCC) of he United
States, with its action in Report and Order FCC 96-326, adopted
an updated safety standard for human exposure to radio
frequency (RF) electromagnetic energy emitted by FCC
regulated transmitters. Those guidelines are consistent with
the safety standard previously set by both U.S. and
international standards bodies.
The design of this phone complies with the FCC guidelines and
these international standards.
CAUTION
Use only the supplied and approved antenna. Use of
unauthorized antennas or modifications could impair call
quality, damage the phone, void your warranty and/or result in
violation of FCC regulations. Do not use the phone with a
damaged antenna. If a damaged antenna comes into contact
with skin, a minor burn may result. Contact your local dealer
for a replacement antenna.
Body-worn Operation
This device was tested for typical body-worn operations with
the back of the phone kept 0.79 inches (2cm) between the
user’s body and the back of the phone. To comply with FCC RF
exposure requirements, a minimum separation distance of 0.79
inches(2cm) must be maintained between the user's body
and the back of the phone. Third-party belt-clips, holsters, and
similar accessories containing metallic components should not
be used. Body-worn accessories that cannot maintain 0.79
inches(2cm) separation distance between the user's body
and the back of the phone, and have not been tested for typical
body-worn operations may not comply with FCC RF exposure
limits and should be avoided.
Page 7

11
For Your Safety
Vehicle Mounted External Antenna
(optional, if available)
A minimum separation distance of 8 inches (20cm) must be
maintained between the user/bystander and the vehicle
mounted external antenna to satisfy FCC RF exposure
requirements. For more information about RF exposure, visit
the FCC website at www.fcc.gov
FCC Part 15 Class B Compliance
This device and its accessories comply with part 15 of FCC
rules. Operation is subject to the following two conditions:
(1) This device and its accessories may not cause harmful
interference, and (2) this device and its accessories must
accept any interference received, including interference that
may cause undesired operation.
Cautions for Battery
] Do not disassemble.
] Do not short-circuit.
] Do not expose to high temperature: 60°C (140°F).]
] Do not incinerate.
Battery Disposal
] Please dispose of your battery properly or bring to your
local wireless carrier for recycling.
] Do not dispose in fire or with hazardous or flammable
materials.
Adapter (Charger) Cautions
] Using the wrong battery charger could damage your phone
and void your warranty.
] The adapter or battery charger is intended for indoor use
only.
Do not expose the adapter or battery charger to direct sunlight
or use it in places with high humidity, such as the bathroom.
Page 8
Making and answering calls
Making a voice call
1. Enter the number including the full area code.
]
To delete a digit press .
To delete all digits press and hold .
2. Press to make the call.
3. When you have a call in progress, you can access the
followings by pressing the left soft key [Options].
]
Activate loudspeaker/handset:
on/off the loudspeaker to allow others nearby to
participate in the conversation, for example.
]
Call Mute:
Select this to switch the microphone
off. To switch it back on, press Unmute.
]
Conference:
Select this to create a conference
call to converse with multiple people at the same
time.
Tip
]
To add a participant to a conference call, call the
new participant, press the left soft key [Options]
and select Conference > Add to conference.
You can switch
General Functions
]
Switch to video call:
automatically make a video call to the same
number.
]
Send MMS:
other party as a multimedia message.
]
Transfer:
To connect the active and held calls
and to disconnect yourself.
]
Send DTMF:
Tip
]
While a call is in progress, you can press the
number keys to send DTMF tones. You can use
DTMF tones to communicate with voice mailboxes
and computerised telephony systems.
]
Help:
Use this option to get to know the phone
feature.
4. Press to finish the call, or close the handset.
Making a call from the call logs
1.
In standby mode, press and the latest
incoming, outgoing and missed phone numbers will
be displayed.
Ends the active call and
You can send a media file to the
To send touch tones.
General Functions
13
Page 9
General Functions
2. Select the desired number by using the up/down
General Functions
navigation keys.
3. Press to call the number.
Making a video call
You can make a video call in a 3G covered service area.
If the called user has a 3G video phone in a 3G
covered service area, the call will be established. You
can also answer a video call for video incoming call. To
make/answer a video call, do the following.
1. Input the phone number using the keypad, or select
the phone number from the calls made/received lists.
]
To correct mistakes, press briefly to delete
the last number, or press and hold to delete
all numbers.
2. If you do not want to use the speakerphone, ensure
you have the headset plugged in.
3. To start the video function, press the left soft key
[Options] and select
]
You will be notified that you will need to close
other applications to make the video call.
14
Call > Video call.
Note
]
The video call may take some time to connect.
Please be patient. The connection time will also
depend on how quickly the other party answers
the call. While the video call is connecting, you
will see your own image; after the other party has
answered, their image will be displayed on the
screen.
4. Adjust the camera position if necessary.
5. When you have a video call in progress, you can
access the followings by pressing the left soft key
[Options].
]
Enable
- Sending video: Select this to send your own
video image.
- Sending audio: Select this to unmute the
microphone so as to allow audio sending.
- Sending aud. & video: Select this to send your
video and audio.
Note
]
You can zoom your video image in or out using up
/down navigation keys.
Page 10

]
Disable
- Sending video: Select this not to send your
video image.
- Sending audio: Select this to mute the
microphone so as not to allow audio sending.
- Sending aud. & video: Select this not to send
your video and audio.
]
Activate loudspeaker/handset:
You can switch
on/off the loudspeaker to allow others nearby to
participate in the conversation, for example.
]
Video preference:
Select
Clearer detail
received video quality preference with a lower
frame rate but a good image quality. Select
Smoother video
to use a higher frame rate but
a lower image quality.
]
Send snapshot:
send it to the other party. Press
the picture and
You can take a picture and
Capture
Use video
to return to the
regular video call after sending it.
]
Share image:
Image
You can send an image in the
folder in
My stuff
.
to set
to take
]
End active call:
Select this to answer a video
call while you already have another video or
voice call in progress.
]
Open active standby:
To open the standby
mode image on the display.
]
Use secondary camera:
Select this to use the
secondary camera.
]
Change image order:
To switch the location of
the other party's and your own video or still
image on the display.
]
Switch to voice call:
Ends the video call and
automatically redial the same number for a
regular voice call.
]
Zoom in/out:
You can zoom your video image
in or out.
]
Help:
Use this option to get to know the phone
feature.
6. Press to finish the call, or close the handset.
General Functions
15
Page 11
General Functions
Making a voice/video call from
General Functions
Contacts
It is easy to call anyone whose number you have stored
in your Contacts.
1. Move the joystick to the down to access the
contacts list.
2. Scroll to the contact to make a call.
3. Press to make a voice call. Press the left soft
key and select
4. Press to finish the call.
Make video call
Making international calls
1. Press twice for the international prefix. The ‘+’
character prefixes the international access code.
2. Enter the country code, area code, and the phone
number.
3. Press .
Adjusting the volume
During a call, if you want to adjust the earpiece
volume, use on the left side of the phone.
16
to make a video call.
Answering a call
When you receive a call, the phone rings and the
flashing phone icon appears on the screen. If the caller
can be identified, the caller’s phone number (or name if
stored in your Contacts) is displayed.
1.
Press
Note
]
To reject an incoming call, press or the
right soft key twice.
]
If Anykey answer is set to On (Menu > Settings
> Phone > Call > Anykey answer), any key will
answer a call except for and
2. End the call by pressing .
Note
]
You can answer a call while using the Contacts or
other menu features.
]
When the compatible headset is connected, you
can also answer a call using the headset key, as
well as using the phone. To reject an incoming call,
press .
]
You can mute the ringtone when a call comes in
by pressing the right soft key [Silence].
to answer an incoming call.
.
Page 12
Shortcut to activate silent mode
You can activate the silent mode by pressing and
holding down after opening the phone.
Or press and select
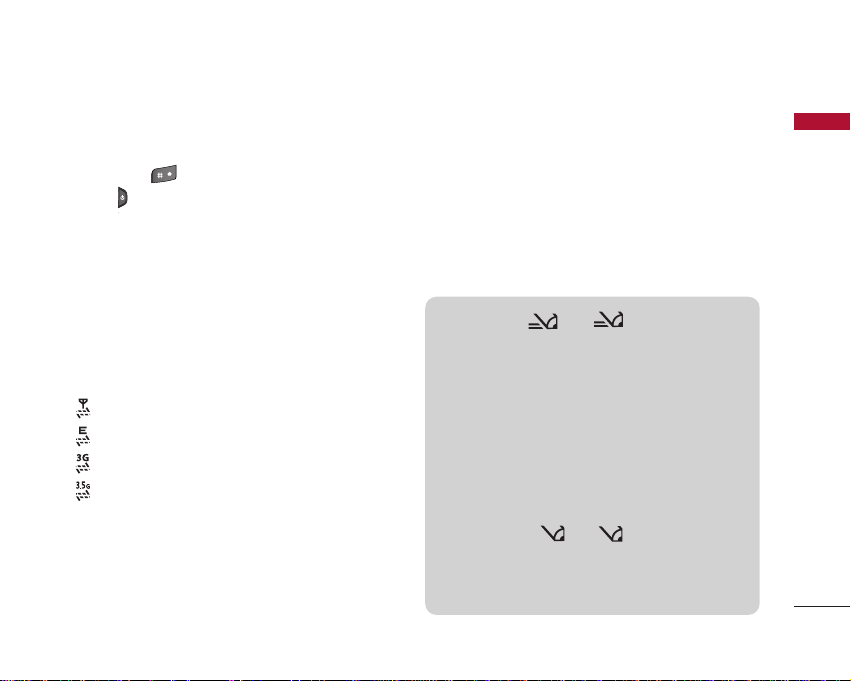
Signal strength
You can check the strength of your signal by the
signal indicator on the LCD screen of your phone.
Signal strength can vary, particularly inside buildings.
Moving close to a window may improve reception.
The following icons show which network service you
are using.
]
: 2G
]
: EGPRS
]
: 3G
]
: 3.5G(HSDPA)
Silent
.
Entering text
You can enter alphanumeric characters using the
keypad.
For example, storing names in Contacts, writing a
message, creating a personal greeting or scheduling
events in the calendar all require entering text.
The following text input methods are available with
the handset.
T9 mode
This mode lets you enter words with only one
keystroke per letter. Each key on the keypad has
more than one letter. The T9 mode automatically
compares your keystrokes with an internal
dictionary to determine the correct word, thus
requiring far fewer keystrokes than the traditional
ABC mode. This is sometimes known as predictive
text.
Abc abc
General Functions
ABC mode
This mode lets you enter letters by pressing the
key labelled with the required letter once, twice,
three or four times until the letter is displayed.
Abc abc
17
Page 13

General Functions
General Functions
123 mode (Number mode)
Type numbers using one keystroke per number.
To change to 123 mode in a text entry field, press
and hold until 123 mode is displayed.
Changing the text input mode
When you are in a field that allows characters to be
entered, you will notice the text input mode indicator
in the upper right corner of the LCD screen.
]
Press to cycle between Abc, abc,
Abc, abc.
]
Press and hold to switch between text entry
mode and number entry mode.
Using the T9 Mode
The T9 predictive text input mode allows you to enter
words easily with a minimum number of key presses. As
you press each key, the handset begins to display the
characters that it thinks you are typing based on a
built-in dictionary. As new letters are added, the word
changes to reflect the most likely candidate from the
dictionary.
18
12 3
1. When you are in the T9 predictive text input mode,
start entering a word by pressing to .
Press one key per letter.
]
The word changes as letters are typed. Ignore
what’s on the screen until the word is typed
completely.
]
If the word is still incorrect after typing
completely, press once or more to scroll
through the other word options.
Example
Press to type
Press to get
]
If the desired word is missing from the word
choices list, add it by using the ABC mode.
2. Enter the whole word before editing or deleting any
keystrokes.
3. Complete each word with a space by pressing
.
To delete letters, press . You can press and hold
down until the entire words are deleted.
Home
.
Good
.
Page 14

Using the ABC Mode
Use to to enter your text.
1. Press the key labelled with the required letter:
]
Once for the first letter.
]
Twice for the second letter.
]
And so on.
2. To insert a space, press once. To delete
letters, press .
Press and hold down to clear the display.
Refer to the following table for more information on
the characters available using the alphanumeric keys.
Key
Characters in the order display
Upper Case Lower Case
Space 0 Enter Space 0 Enter
Note
]
The characters assigned to the keys and their
order of appearance depends on the language
selected using the option Input method. The table
above provides the characters set for English
language.
General Functions
19
Page 15

General Functions
Using the 123 (Number) mode
General Functions
The 123 mode enables you to enter numbers in a
message(a telephone number, for example). Press the
keys corresponding to the required digits before
manually switching back to the appropriate text entry
mode. In the text entry mode, you can enter numbers
by long press on the corresponding keys.
Using the symbol mode
The symbol mode enables you to enter various
symbols or special characters.
1. To enter a symbol, press Edit key [ ] and
select
More symbols
shown up.
2. After selecting the desired one using navigation
keys, press .
Note
]
You can also open the symbol list by pressing
.
20
. The symbol list window is
On-screen icons
Icon Description
The device is being used in a GSM network.
The device is being used in a UMTS network
(network service).
You have or more unread messages in the Inbox
folder in Messag.
There are messages waiting to be sent in the
Outbox folder.
You have missed calls.
Shown if Ringing type is set to Silent and
Message alert tone, IM alert tone, and E-mail
alert tone are set to Off.
The device keypad is locked.
A clock alarm is active.
The second phone line is being used (network
service).
All calls to the device are diverted to another
number. lf you have two phone lines(network
service), the indicator for the first line is
and for the second .
Page 16

Icon Description
A compatible headset is connected to the
device.
The connection to a compatible headset with
Bluetooth connectivity has been lost.
A data call is active.
A GPRS or EDGE packet data connection is
available.
A GPRS or EDGE packet data connection is
active.
A GPRS or EDGE packet data connection is on
hold.
A UMTS packet data connection is available.
A UMTS packet data connection is avtive.
A UMTS packet data connection is on hold.
Bluetooth connectivity is on.
Data is being transmitted using Bluetooth
connectivity.
A USB connection is active.
General Functions
21
Page 17

Overview of Menu Functions
You can launch a menu by pressing briefly on the screen when it is in standby mode. Move to the desired
Overview of Menu Functions
application and press to open the application. From the main menu you can also open applications by directly
pressing the corresponding numeric key as follows.
22
1. Messages
New message
Inbox
My folders
Mailbox
Drafts
Sent
Outbox
Reports
2. Contacts
3. Log
Recent calls
Call duration
Packet data
Note
]
To quickly switch between several open applications, press and hold . The application-switching window
opens and displays the open applications. Scroll to an application and press .
4. My stuff
Images
Video clips
Tracks
Sound clips
Streaming links
Presentations
All files
5. Google
6. Multimedia
6.1 RealPlayer
6.2 Music player
6.3 Recorder
6.4 Camera
6.5 Flash Player
7. Organiser
7.1 Calculator
7.2 Clock
7.3 Converter
7.4 Notes
7.5 Calendar
7.6 File mgr.
7.7 Memory
8. Profiles
General
Silent
Meeting
Outdoor
Pager
Offline
9. Settings
General
Phone
Connection
Applications
Tools
.
.1 Call mailbox
.2 Speed dial
.3 Themes
.4 Actv. keys
.5 Help
.6 About
0. Connectivity
0.1 IM
0.2 Conn.mgr.
0.3 Bluetooth
0.4 USB
0.5 Sync
#. Browser
Installations
App. mgr.
Page 18

You can access the followings by pressing the left soft
key [Options] in the main menu display screen.
]
Open:
You can open an application or folder.
]
Change menu view:
You can change the look of the
display.
]
Remove:
You can uninstall an application.
Note
]
You can only remove applications you have
installed yourself.
]
Move:
You can move the application within the
menu. A tick appears beside the application. Scroll to
a new location and press the left soft key [OK].
]
Move to folder:
You can move the application from
the main menu to a folder or from a folder to the
main menu.
]
New folder:
You can create another folder to
organize applications.
]
Rename:
You can rename the application.
]
Download Applications:
You can download
applications from the web.
]
Memory details:
You can view the memory
consumption of different applications and data saved
on the phone memory and memory card and check
the amount of free memory.
]
Help:
You can view the Help file for the menu.
Note
]
The phone provides with Help documents in each
menu. You can access the Help option using the
left soft key [Options].
]
Exit:
Exits the main menu and goes back to standby
mode.
Overview of Menu Functions
23
Page 19

Messages [ - 1]
New message
Messages
You can create a text message, multimedia message,
audio message or E-mail.
Press the left soft key [Options]. You can access the
followings.
Create message
You can create Text message/ Multimedia message/
Audio message/ E-mail.
Text message
1. In the Tofield, press to select recipients from
Contacts or key in a recipient mobile phone number.
Tip
]
If you key in more than one number, separate the
numbers with a semicolon. To insert a semicolon,
press and select ; using the navigation keys.
2. Move to the message field by pressing the down
navigation key.
24
3. Enter your message in the message field.
Option menus in message field
]
Add recipient:
contacts. After selecting recipients using ,
press the left soft key [OK].
]
Insert:
the phone.
]
Sending options:
settings for the message.
]
Message details:
message including subject, date, time and
recipients.
]
Writing language:
you use to write the message text.
4. Press to send the message. The messages
will automatically be saved in the Sent message
folder. If the message has not been sent, it will
remain in the Outbox with a failed status.
You can add recipients from your
You can insert a text template saved on
You can change the delivery
Brief information on the
You can change the language
Note
]
To save the message without sending it, press the
right soft key [Close] and select Save to Drafts.
Page 20

Multimedia message
Multimedia messages may contain text, images and
sound and video clips. To send and receive multimedia
messages, you need to register with a multimedia
messaging service and define multimedia settings in
your phone.
To
1. In the
field, press to select recipients from
Contacts or key in a recipient mobile phone number
or an e-mail address.
Tip
]
If you key in more than one number, separate the
numbers with a semicolon. To insert a semicolon,
press and select ; using the navigation keys.
]
To switch between letter and umber mode, press
and hold . To add @ in letter mode, press
.
2. Enter a subject in the
Subject
field.
3. Enter your message in the message field.
Option menus in message field
(Note: Available options may vary.)
]
Send:
Select this to send the created message.
]
Add recipient:
You can add recipients from
your contacts. After selecting recipients using
, press the left soft key [OK].
]
Create presentation:
Select this to create a
multimedia presentation.
]
Insert object:
You can insert an image, a sound
clip, a video clip, or a template. (One sound/
video per slide)
]
Insert new:
You can take a new Image or Sound
clip or Video clip for the message. Or you can
add more slides.
]
Place text first/ Place text last:
To change the
location of text in your message.
]
Move:
Select this to change the order of slides
in your message.
]
Address fields:
You can add address or subject
fields to your message.
]
Preview:
You can preview the created message
before sending it.
Messages
25
Page 21

Messages
]
Objects:
Messages
]
]
]
]
]
]
4. Press to send the message. The messages will
automatically be saved in the Sent message folder. If
the message has not been sent, it will remain in the
Outbox with a failed status.
Note
]
To save the message without sending it, press the
right soft key [Close] and select Save to Drafts.
26
You can view and manage media files
that you included in your message.
Check contacts:
Select this to check if the
recipients contacts are right.
Sending options:
You can change the delivery
settings for the message.
Message details:
Brief information on the
message including date, time and recipients.
Writing language:
You can change the language
you use to write the message text.
Help:
Use this option to get to know the phone
feature.
Exit:
Exits the message composer.
Audio message
1. Press to record your message.
2. When you hear a sound, please start recording.
(You can record up to 2 minutes and 30 seconds.)
3. To save the sound clip, press the left soft key
[Options] and select
Save sound clip
.
Note
]
You can check what you recorded using Play
sound clip option.
]
To replace the sound clip, select Replace sound
clip > New sound clip.
]
To send a sound clip in your phone or memory
card, select Replace sound clip > From My stuff.
Scroll to the desired music track or sound clip and
press .
]
To delete the audio clip, press .
To
4. Scroll to the
field. Press to select
recipients from Contacts or key in a recipient mobile
phone number.
Page 22

Tip
]
If you key in more than one number, separate the
numbers with a semicolon. To insert a semicolon,
press and select ; using the navigation keys.
5. Press to send the message. Audio messages
are transferred in the multimedia messaging service.
E-mail
To send/receive an email, you should set up the email
account.
1. In the
To
field, press to select recipients from
Contacts or key in an e-mail address.
Tip
]
If you key in several addresses, separate them with
a semicolon. To insert a semicolon, press
and select ; using the navigation keys.
]
Insert the primary recipients in the To field and
those who only need the e-mail for reference in
the Cc field.
Subject
2. Enter a subject in the
field.
3. Enter your message in the message field.
Option menus in message field
(Note: Available options may vary.)
]
Add recipient:
You can add recipients from
your contacts. After selecting recipients using
, press the left soft key [OK].
]
Insert:
You can insert an image, a sound clip, a
video clip, a note or others or a template.
(Note: Copyright protection may prevent
sending some media files.)
]
Address fields:
You can add address or subject
fields to the e-mail. After selecting the desired
headers using and press the left soft key
[OK].
]
Attachments:
To view files attached to the
e-mail.
]
Sending options:
You can change the remote
mailbox in use and sending time of the message.
]
Writing language:
You can change the language
used to write the message.
Messages
27
Page 23

Messages
]
Help:
Messages
Use this option to get to know the phone
feature.
]
Exit:
Exits the message composer.
4. Press to send the message.
Note
]
To save the message without sending it, press the
right soft key [Close] and select Save to Drafts.
SIM messages
You can browse messages on your SIM card.
Cell broadcast
With the cell broadcast service (CBS), you can receive
informative messages from your service provider on
various topics, such as weather or traffic conditions in
a particular region.
To receive cell broadcast messages, you need to turn
on cell broadcast reception.
Press the left soft key [Options] and select
Set the
Reception On
28
.
Settings
In the Cell broadcast topic list, the followings are
available by pressing the left soft key [Options].
]
Open:
To view messages related to the selected
topic.
]
Subscribe:
Select this to receive messages related
to the topic.
]
Hotmark:
You can set important topics as hot
topic. In standby mode, you are notified when you
receive a message related to a hot topic.
]
Topic:
You can Add manually, Edit, Delete, Delete all
topics.
]
Settings
-
Reception:
You can turn on/off the reception of
CBS messages.
-
Language:
You can select the language of
received messages.
-
Topic detection:
You can set the phone to
detect and display new cell broadcast topics.
.
Page 24

Service commands
You can send service commands such as activation
requests for network services, to your service provider.
After keying in a command and press .
Settings
You can define or edit settings for different message
types. For further information, please refer to the Help
menu on the phone.
Inbox
You can browse, open and manage received text,
multimedia and other messages.
1. Scroll to a new message and press .
2. Using the left soft key [Options], the followings are
available. (Note: Available options may vary)
]
Create message:
message.
You can create and send a new
]
Reply:
You can reply to the message.
]
Sort by:
You can arrange your received
messages according to sender, type or other info.
]
Move to folder:
another folder. After selecting the desired folder,
press the left soft key [OK].
]
Mark/Unmark:
moving or deleting, for example.
To delete a message, press .
To call the sender of the message, press .
You can save the message in
To mark several messages for
Note
]
You can view other folders in Messages by using
the left/right navigation keys.
My folders
You can view messages or message templates saved in
your own folders.
Messages
29
Page 25

Messages
Mailbox
Messages
You must register for an e-mail service and set up a
mailbox to receive/send emails.
Contact your service provider for correct settings.
In the e-mail list, the followings are available by
pressing the left soft key [Options].
(Note: Available options may vary)
]
30
Create message:
message.
]
Connect:
can view your e-mails online. To return to off-line
mode, select
]
Retrieve e-mail:
you need to first retrieve them from your remote
mailbox.
New:
To retrieve messages you have not
previously retrieved or read online.
Selected:
retrieve.
You can create and send a new
Connects to your remote mailbox and you
Disconnect
To select the messages you wish to
.
To view e-mail messages off-line,
All:
To retrieve all messages not previously
retrieved.
]
Delete:
Deletes the e-mail. The messages will be
also deleted from your remote mailbox the next time
you connect to it. To cancel the deletion, select
Restore
.
]
Sort by:
You can arrange your messages according
to sender, subject or other info.
]
E-mail settings:
To edit e-mail settings.
Drafts
You can view, edit and send messages you have created
but not yet sent.
1. Press to view or edit a message.
2. To send a message, press .
3. To delete a message, scroll to it and press .
You can delete multiple messages. After scrolling to
each message, press the left soft key [Options] and
Mark/Unmark
select
you have marked the desired messages, press .
to put a tick next to it. Once
Page 26

Sent
Your last 20 sent messages are automatically saved in
the
Sent
folder.
The following options are available using the left soft
key. (Note: Available options may vary)
]
Sort by:
You can arrange your sent messages.
]
Move to folder:
You can save a sent message in a
different folder. Scroll to the desired folder and press
the left soft key [OK].
Tip
]
You can move multiple messages once using
Mark/Unmark option.
Outbox
You can view and manage messages waiting to be sent.
1. To cancel sending a message, use the following
options after pressing the left soft key [Options].
]
Defer sending:
]
Delete:
Postpones sending.
Deletes the message without sending it.
]
Move to Drafts:
Moves the message to
Drafts
without sending it.
2. To send a message that is suspended, failed or
scheduled for later delivery, press the left soft key
[Options] and select
Send
.
Reports
You can keep track of your text and multimedia
messages after sending. You can call a message
recipient by pressing the .
Note
]
You can receive or reject delivery reports in text
and multimedia message settings. (Open
Messages and press the left soft key [Options]
and select
Multimedia message. Set Receive report to
Yes/No.)
]
No delivery reports can be received from
messages sent to e-mail addresses.
Settings > Text messages or
Messages
31
Page 27

Contacts [ - 2]
New contact
Contacts
You can create a contact address. You can enter the
first name, last name, mobile number, telephone
number, E-mail address, a number for video call, pager
number, company name and job title of a new contact.
You can add, rename or delete contact card fields,
using
Add detail, Edit label
After filling in the fields, press the right soft key [Done].
Contacts list
You can view a contact card by pressing the .
To make a voice or video call to a contact, press .
Using the left soft key [Options], the followings are
available.
]
Open:
To view the contact card.
]
Call:
You can make a voice or video call to the
contact.
]
Create message:
contact.
]
Edit:
You can modify the contact information.
32
or
Delete detail
You can send a message to the
options.
]
Delete:
You can delete the contact information.
]
Duplicate:
You can create a copy of the contact
information.
]
Mark/Unmark:
To select multiple contacts for
adding to a group or deleting, for example.
]
Copy to SIM directory:
You can copy the contact
card to the SIM directory or your memory card or
restore the card from the memory card to the phone
memory.
]
SIM contacts
-
SIM directory:
You can view, add, edit and
delete contact info in your SIM directory.
Service numbers:
-
To use service numbers on
your SIM card for various web services, such as
telephone directories or technical troubleshooting.
Fixed dial contacts:
-
You can restrict calls from
your phone to only certain phone numbers.
]
Send business card:
You can send the contact card
to compatible devices.
Page 28

]
Contacts info:
memory consumption of
]
Synchronisation > Start:
You can view information about the
Contacts
.
You can synchronise
your Contacts with another contacts database in a
computer.
]
Synchronisation > Settings:
You can create or
edit Contacts sync settings.
]
Settings:
You can change the display order of first
and last names of your contacts.
]
Help:
Use this option to get to know the phone
feature.
]
Exit:
Exits the Contacts.
To remove a contact from the directory, press the
.
Groups
Press the right navigation key in Contact list.
You can create contact groups to send messages to a
number of people at the same time, for example.
Using the left soft key [Options], the followings are
available.
]
Open:
You can view the contact info of a group
member. You can add members to the contact group
using
Add members
]
Create message:
option.
You can send a message to the
members of a group.
]
New group:
You can add a new group. After keying
in the group name, press the right soft key [OK].
]
Delete:
Deletes the group.
]
Rename:
]
Ringtone:
You can rename the group.
You can set a special ringtone for the
group to alert whenever the group member calls.
]
Contacts info:
memory consumption of
]
Settings:
You can view information about the
Contacts
.
You can change the display order of first
and last names of your contacts.
]
Help:
Use this option to get to know the phone
feature.
]
Exit:
Exits the Contacts.
To delete a contact group, press the .
The individual contacts cards of group members remain
in the Contacts directory.
Contacts
33
Page 29

Log [ - 3]
Recent calls
Log
You can view the recently missed, received and dialed
calls.
Missed calls
Allows you to view the last 20 phone numbers from
which someone unsuccessfully tried to reach you.
Received calls
Allows you to view the last 20 phone numbers that you
have answered.
Note
]
The phone registers missed and received calls only
if the network supports these functions and the
phone is switched on within the network’s service
area.
Dialled numbers
Allows you to view the last 20 phone numbers that you
have called or tried to call.
34
Note
]
You can also view Dialled numbers in standby
mode by pressing .
You can make a call, send a message and save the
number in Contacts. You can edit the phone number
or copy the number using
can delete your missed, received, or dialled calls.
You can reset the recent calls register in
press the left soft key [Options] and select
recent calls
in the phone memory, select
. To set the time period to keep log events
Use number
Settings
option. You
Recent calls
Clear
option.
Call duration
You can view the duration of calls to and from your
phone.
Note
]
If you have subscribed to two phone lines, you can
filter the log to view call duration for only one line.
Press the left soft key [Options] and select Filter
timers and select between Line 1 or Line 2.
,
Page 30

Using the left soft key [Options], the followings are
available.
]
Clear timers:
Select this to reset the call duration
timers.
]
Settings:
You can set the time period to keep log
events in the phone memory.
]
Help:
Use this option to get to know the phone
feature.
]
Exit:
Exits the Log.
Packet data
You can check the amount of data transferred during
packet data connections.
Note
]
You may be charged for your packet data
connections according to the amount of
transferred data.
Using the left soft key [Options], the followings are
available.
]
Clear counters:
Select this to reset the packet data
counters. You may need to lock code to clear the
counter.
]
Settings:
You can set the time period to keep log
events in the phone memory.
]
Help:
Use this option to get to know the phone
feature.
]
Exit:
Exits the Log.
Viewing general log info
You can monitor communication events registered by
your phone.
Log
1. Press the right navigation key in the
2. To view detailed information about a communication
event, scroll to it and press .
Note
]
Sub-events, such as long text messages sent in
two or more linked messages, are logged as one
event.
window.
Log
35
Page 31

Log
3. Using the left soft key [Options], the followings are
Log
36
available.
]
View details:
To view detailed information about
the communication event.
]
Clear log:
]
Filter:
Delete all log contents.
You can view a single type of
communication event or communication events
with one other party. Scroll to the desired filter
and press .
]
Save to Contacts:
You can add the contact info
from a communication event to your Contacts.
]
Settings:
You can set the time period to keep
log events in the phone memory.
]
Help:
Use this option to get to know the phone
feature.
]
Exit:
Exits the Log.
Page 32

My stuff [ - 4]
You can browse media files in each folder.
Note
]
The term media file refers to images, animations,
sound and video clips, music tracks, and any other
files containing media content.
]
Copyright protections may prevent images, music
and other media files from being copied, modified,
or transferred to other devices.
Images
]
Download:
]
Send:
or Email.
]
Find:
letters of the image name. You can send an image to
compatible devices by pressing the .
]
Sort by:
their date, title, size, or format.
]
Use image
-
Set as wallpaper:
background image for the display while the phone
is in standby mode.
You can download images from the web.
You can send the image via MMS, Bluetooth
To find a particular image, key in the first
You can arrange your images according to
You can set the image as the
Add to contact:
-
You can add a thumbnail image
to a contact card.
]
Delete:
Deletes the selected image.
]
Organise
-
New folder:
You can create a folder to store
images.
-
Move to folder:
You can move the image to a
different folder. Scroll to the folder and press the
left soft key [OK].
-
Copy to memory card/ Copy to phone
mem.:
To copy the image or folder to your
memory card or phone memory.
Move to memory card/ Move to phone
-
mem.:
To move the image or folder from one
memory to another.
]
Mark/Unmark:
You can select multiple images for
sending or deleting at the same time, for example.
]
Rename:
]
View details:
You can rename the image.
You can view detailed information on
the image.
My stuff
37
Page 33

My stuff
Video clips
My stuff
]
]
]
]
]
]
38
Download:
Send:
You can download videos from the web.
You can send the video via MMS, Bluetooth
or Email.
Find:
To find a particular video, key in the first letters
of the video name. You can send a video to
compatible devices by pressing the .
Sort by:
You can arrange your videos according to
their date, title, size, or format.
Delete:
Deletes the selected video clip.
Organise
-
New folder:
You can create a folder to arrange
your videos.
Move to folder:
-
You can move the video to a
different folder. Scroll to the folder and press the
left soft key [OK].
Copy to memory card/ Copy to phone
To copy the video or folder to your
mem.:
memory card or phone memory.
Move to memory card/ Move to phone
-
mem.:
To move the video or folder from one
memory to another.
]
Mark/Unmark:
You can select multiple videos for
sending or deleting at the same time, for example.
]
Rename:
]
View details:
You can rename the video clip.
You can view detailed information on
the video clip.
Tracks
Music albums are automatically created based on the
ID3 tags attached to the music files.
You can allow or prevent the display of these albums
Show albums/ Hide albums
using
]
Download:
]
Send:
You can download music from the web.
You can send the music track via MMS,
Bluetooth or Email.
]
Find:
To find a particular music track, key in the first
letters of the track name. You can send a music track
to compatible devices by pressing the .
option.
Page 34

]
Sort by:
You can arrange your music tracks
according to their artist, title, album, genre,
composer, date, size, or format.
]
New track list:
]
Use tone
-
Set as ringing tone:
You can create a new track list.
You can set the music track
as the ringing tone for the current profile.
-
Assign to contact:
You can set the music track
as ringing tone for a contact.
]
Edit:
You can add or remove music tracks from the
track list.
]
Organise
-
Copy to memory card/ Copy to phone
To copy the music or folder to your
mem.:
memory card or phone memory.
Move to memory card/ Move to phone
To move the music or folder from one
mem.:
memory to another.
]
Show albums/ Hide albums:
You can set whether
to display the automatically created music albums or
not.
]
View details:
You can view detailed information on
the track.
]
Mark/Unmark:
You can select multiple music tracks
for sending or deleting at the same time, for
example.
]
Delete:
Deletes the selected track.
Note
]
If you delete M3U files by using New track list
option, the contained tracks are not deleted. If
you delete an item shown using the Show album
option, every track the album includes will be
deleted.
Sound clips
]
Download:
web.
]
Send:
Bluetooth or Email.
You can download sound clips from the
You can send the sound clip via MMS,
My stuff
39
Page 35

My stuff
40
]
Find:
My stuff
To find a particular sound clip, key in the first
letters of the clip name. You can send a sound clip to
]
Mark/Unmark:
You can select multiple sound clips
for sending or deleting at the same time, for example.
compatible devices or to a media file uploading
service by pressing the .
]
Sort by:
You can arrange your sound clips according
to their date, size, or other criteria.
]
Use tone
-
Set as ringing tone:
You can set the sound clip
as the ringing tone for profiles.
-
Assign to contact:
You can set the sound clip as
ringing tone for a contact.
]
Organise
-
Copy to memory card/ Copy to phone
mem.:
To copy the sound clip to your memory
card or phone memory.
Move to memory card/ Move to phone
To move the sound clip from one memory
mem.:
to another.
]
View details:
You can download info about a sound
clip protected by usage rights.
Streaming links
To use a link to play the media file, scroll to the link
and press .
Note
]
Streaming means playing music, video, or sound
clip files directly from the web, without first
downloading it to your phone.
]
Send:
You can send the link via Bluetooth.
]
Find:
To find a particular link, key in the first letters
of the link name. You can send a streaming link to
compatible devices by pressing the .
]
New link:
name and web address and press .
]
Edit:
]
Organise
-
You can create a new link. Key in the link
You can edit the link name or web address.
Copy to memory card/ Copy to phone
mem.:
To copy the link to your memory card or
phone memory.
Page 36

-
Move to memory card/ Move to phone
mem.:
To move the link from one memory to
another.
]
Mark/Unmark:
You can select multiple streaming
links for sending or deleting at the same time, for
example.
Presentations
Presentations
presentations, which combine multiple media files, such
as images and sound clips. Presentations may also be
interactive. To play a presentation scroll to it and press
side of the phone. To delete a presentation, scroll to it
and press .
]
Find:
first letters of the presentation name. You can send a
presentation to compatible devices by pressing the
]
Sort by:
according to their date, title or size.
may contain SVG -T and Flash file
. You can adjust the volume using on the left
To find a particular presentation, key in the
.
You can arrange your presentations
]
Organise
-
Copy to memory card/ Copy to phone
mem.:
To copy the presentation to your memory
card or phone memory.
-
Move to memory card/ Move to phone
mem.:
To move the presentation from one
memory to another.
]
Mark/Unmark:
You can select multiple
presentations for sending or deleting at the same
time, for example.
All files
You can view or play a media file or streaming link to a
media file by pressing .
]
Find:
To find a specific media file or link, key in the
first letters of the media file name. You can send a
media file to compatible devices by pressing the
.
]
Sort by:
You can arrange your media files according
to their date, size, or other criteria.
My stuff
41
Page 37

My stuff
]
My stuff
]
]
42
Organise
-
Copy to memory card/ Copy to phone
mem.:
To copy the file or link to your memory
card or phone memory.
-
Move to memory card/ Move to phone
mem.:
To move the file or link from one memory
to another.
Mark/Unmark:
You can select multiple files for
sending or deleting at the same time, for example.
Rename:
You can rename the file.
Note
]
Not available for links. You can rename links using
Edit option.
Page 38

Google [ - 5]
You can launch google services in this application.
Select to Start the Google Service of selected list item
Scroll to the Google Service items list and press OK.
Search
Google Mobile Web Search allows you to search for
websites that are specifically designed for mobile
phones and devices.
(This description is from
http://www.google.com/support.)
Maps
You can access maps from your mobile devices with
these options:
]
Maps for mobile:
to your mobile phone. Google Maps is an application
that gives you access to maps, directions, business
listings and satellite imagery.
-
Real-time traffic:
and estimate delays in over 30 major US
metropolitan areas.
-
Detailed directions:
or drive, your route is displayed on the map itself,
together with step-by-step directions.
Integrated search results:
locations and contact information appear all in
one place, integrated on your map.
Easily movable maps:
zoom in or out, and move in all directions so you
can orient yourself visually.
Satellite imagery:
desired location. (It's like you're there, we swear.)
You can download Google Maps
See where the congestion is,
Whether you plan to walk
Local business
Interactive maps let you
Get a bird's eye view of your
Google
43
Page 39

Google
Mail
Google
The Gmail for mobile application is a downloadable
Java application, offering the best possible Gmail
experience for supported mobile devices. To download,
visit http://gmail.com/app from your mobile browser.
44
YouTube
You can watch videos on YouTube Mobile from your
mobile device.
You may want to contact your carrier for more
information about the availability of data streaming on
your mobile device.
Note
]
Google and YouTube doesn't charge users to
access our mobile website. However, you might be
charged by your service provider for the data
used. For more information about the different
rate plans available, contact your service provider.
Page 40

Multimedia [ - 6]
RealPlayer Menu 6.1
You can play sound or video clips saved in the phone
or stream music and video clips.
Tip
]
Streaming means playing music, video, or sound
clip files directly from the web, without first
downloading it to your phone.
]
Open
-
Most recent clips:
up to 6 music or video clips you most recently
played. Scroll to the clip and press .
-
Saved clip:
or to open a stream link to a media clip.
]
Download videos:
from the web.
]
Settings:
You can change video or connection
settings.
]
About application:
application.
Select this to play one of the
Select this to play a saved video clip
You can download video clips
You can view info about the
Music player Menu 6.2
You can play music tracks.
<Key o pe rations>
Key Description
/
Left navigation key Decreases the volume.
Right navigation key Increases the volume.
Up navigation key/ Rewinds the track. (Long press)
Down navigation key/ Fast-forwards the track. (Long press)
]
Music library:
music tracks saved on your device or memory card.
]
Open ‘Now playing’:
playing set of tracks.
]
Download tracks:
the web.
Starts playing music.
Pauses/resumes playback.
Returns to the previous track.
(Short press)
Skips to the next track (Short press)
Stops playback.
You can view, play and manage all
You can view the currently
You can download music from
Multimedia
45
 Loading...