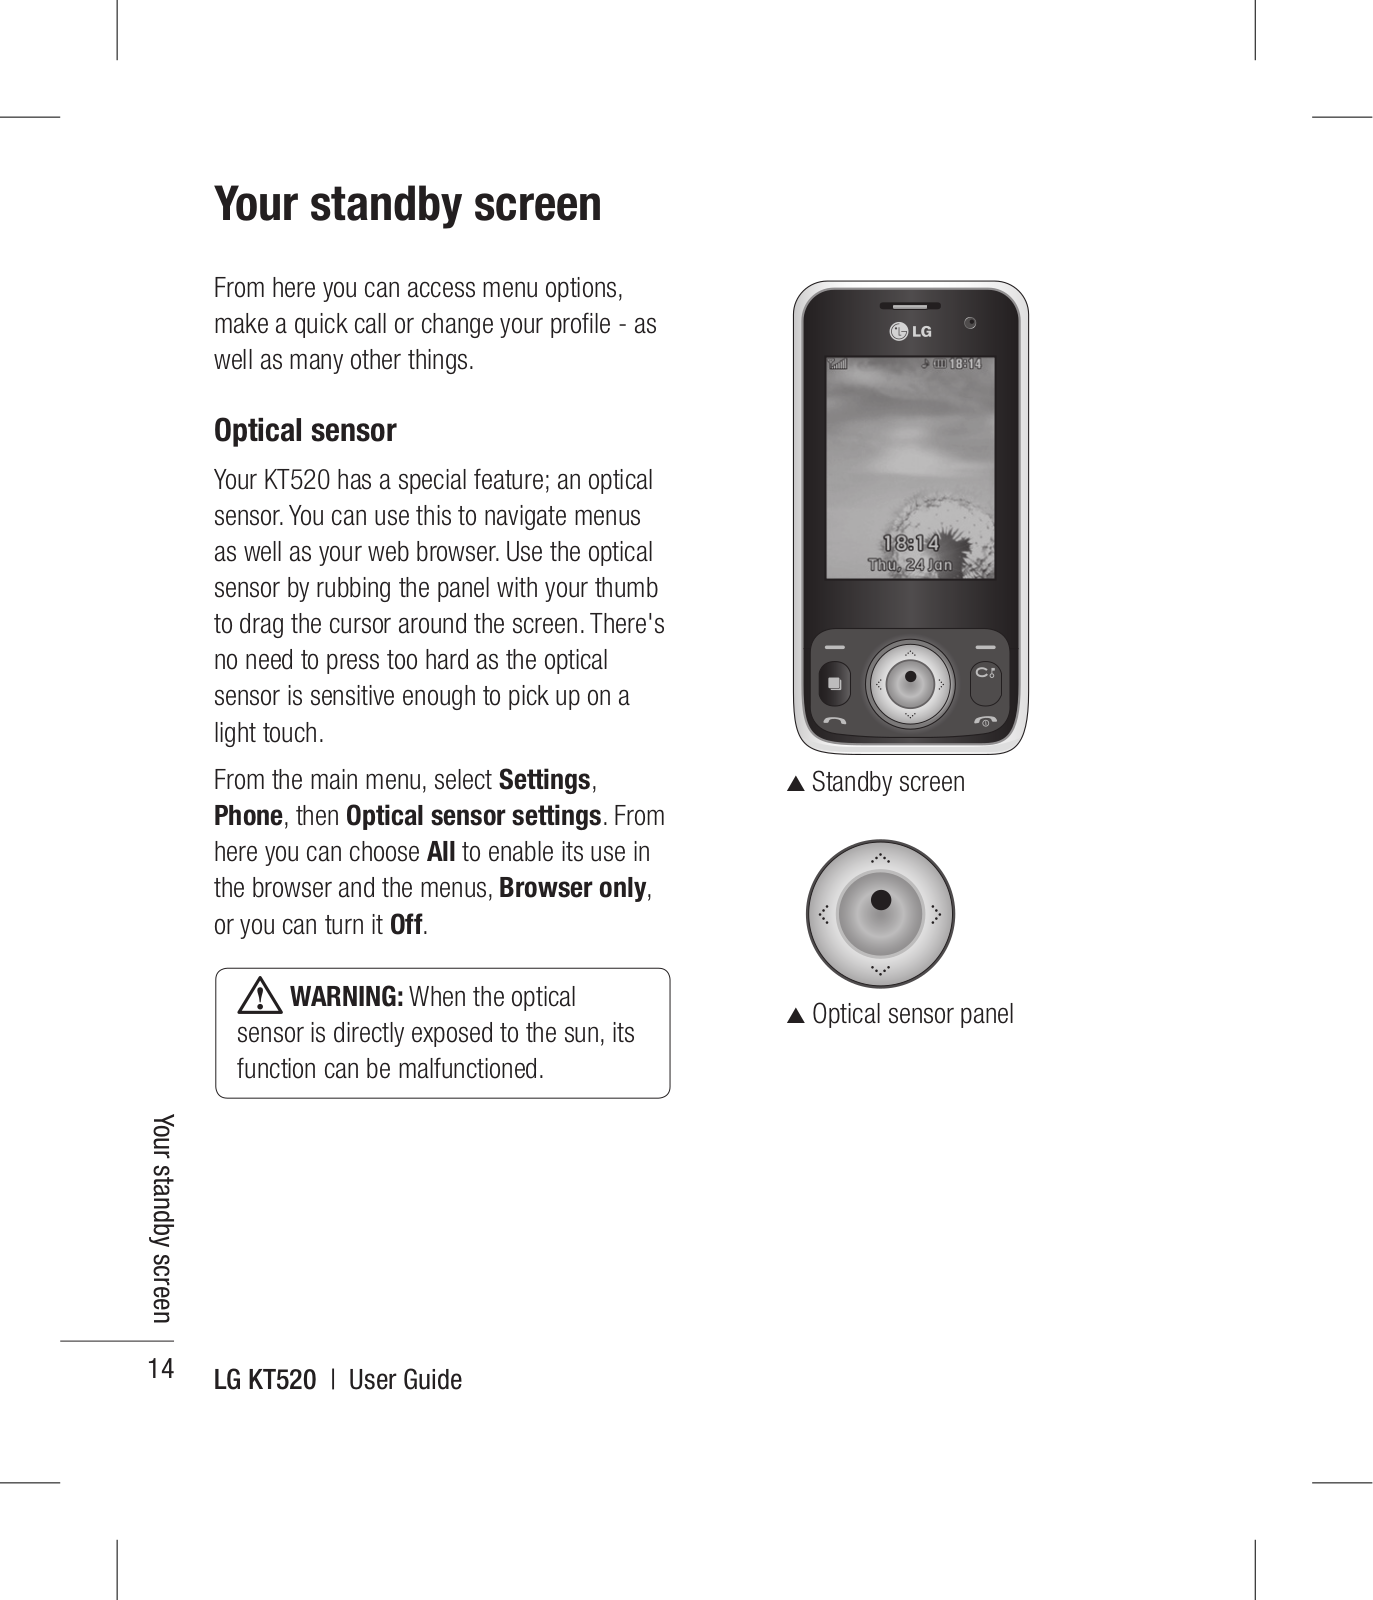
How it Works
Log In / Sign Up
Buy Points
How it Works
FAQ
Contact Us
Questions and Suggestions
Users
LG
Loading...
K
KR100-X
3
KRRH-750-THTS
KRV-335FF
KRV-375FF
KS10
3
KS1301
KS20
30
KS200
KS200s
KS360
48
KS360GO
KS365
10
KS500
13
KS500Q
KS660
11
KSC35F
KS-H0964EA1
KS-H0964JM1
KS-H096ERM0
KS-H1264EA5
KS-H126ERM0
KS-H1865EA3
KS-H1865JM3
KS-H2465EA4
KSM1506
5
KSM1506-A0P
3
KSNC0964NA8
KSNC1264NA0
2
KSNC1264NQ0
KSNC1865NA7
KSNC2465NA2
Kssjk418i
KSTK4
KSTN1009
2
KSUH1264NA0
KT-17LZ21
3
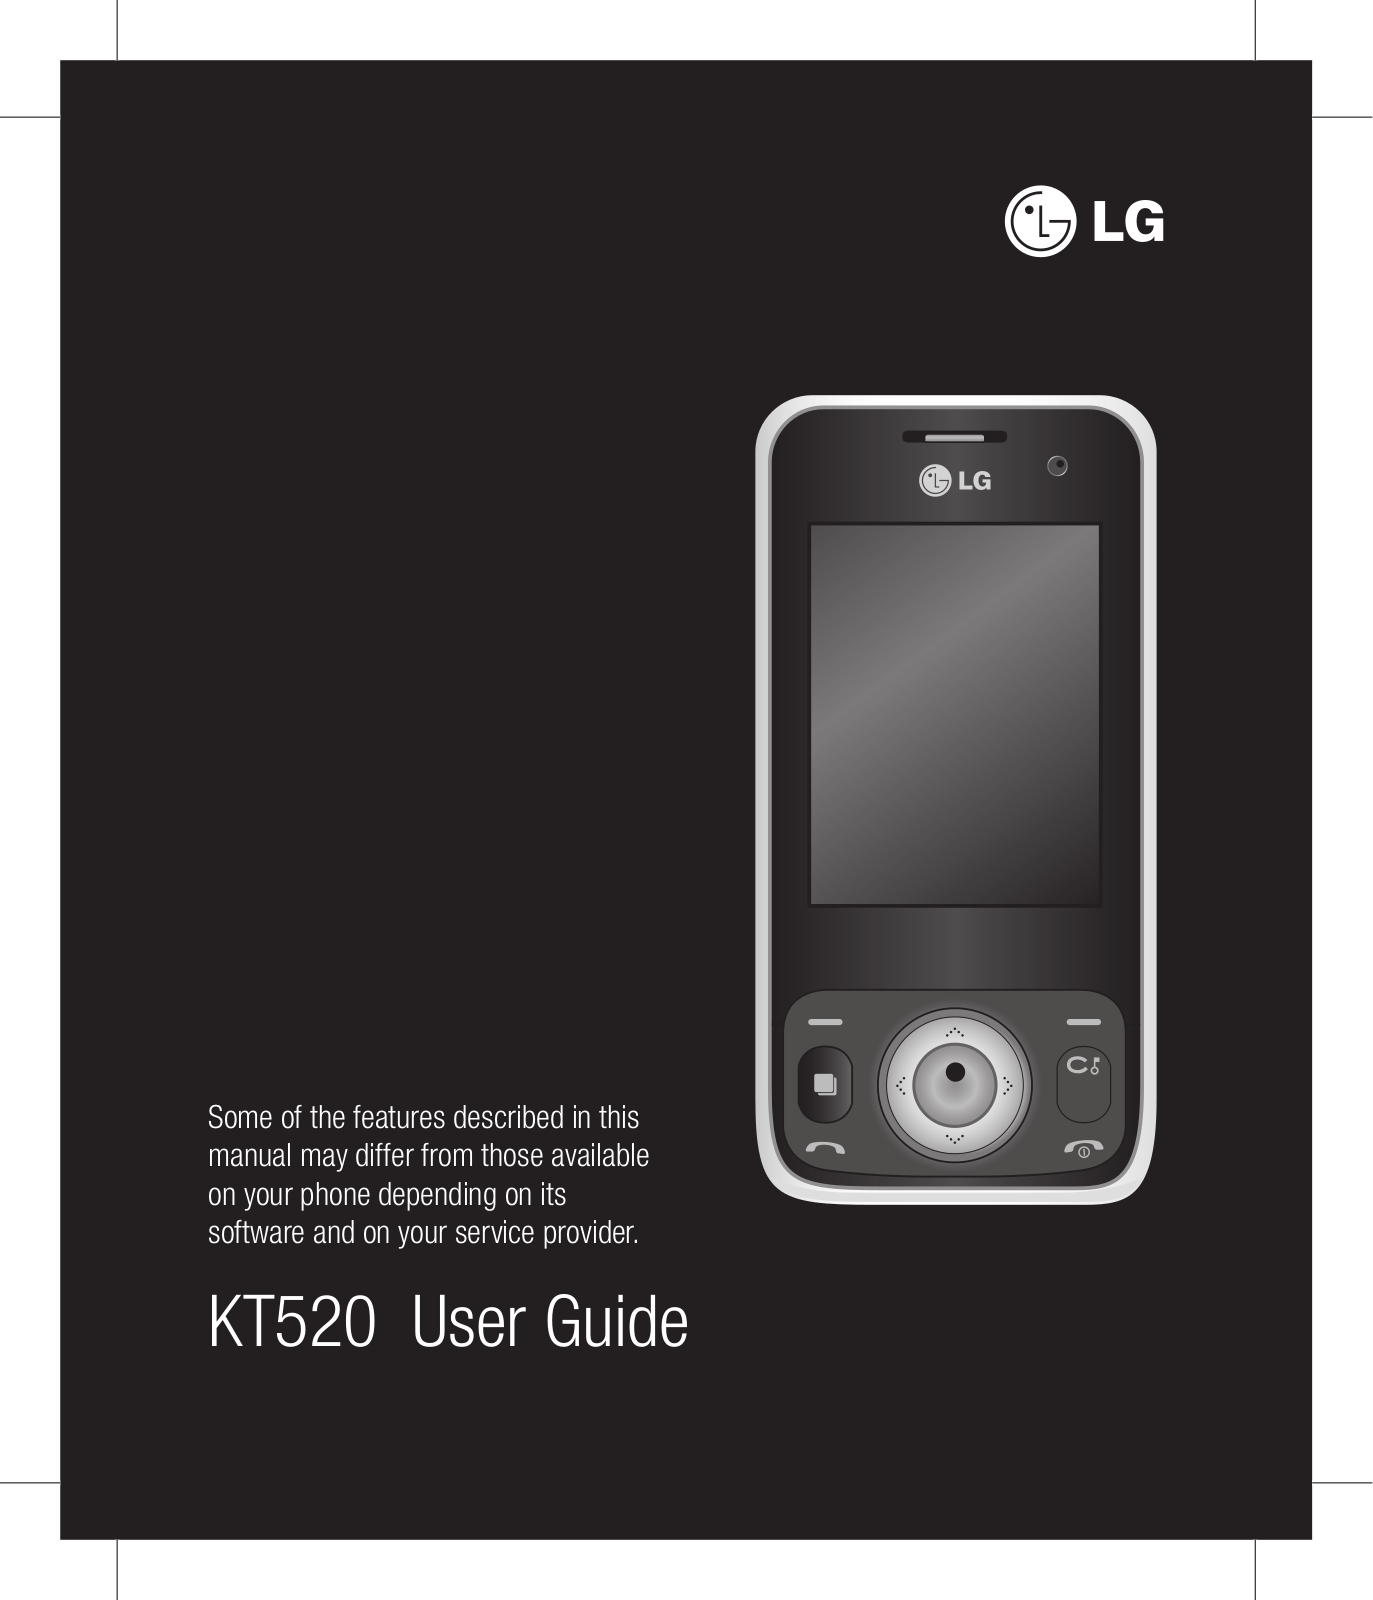
KT520
19
KT520GO
2
KT520MMBB0282002
KT525
2
KT610
19
KT615
3
KT770
KT770F
KT878
3
KTH
KT-H00
KT-OPSA
4
KT-OPSB
KT-OPSF
KT-OPSG
KT-T320
3
KT-T32E
2
KT-T430
4
KT-T490
2
KT-T550
3
KT-T650
KT-T651
4
KT-T65E
KT-T751
2
KU-0903
KU-17LZ21
KU-17WDVD
5
KU2000
KU2100
KU250
10
KU310
KU311
5
KU3700
KU380
27
KU3800
KU385
2
KU400
2
KU4000
KU4300
KU450
2
KU580
6
KU730
8
KU800
30
KU830
2
KU9000
KU9100
KU9200
KU9300
KU950
4
KU9600
KU970
6
KU990
34
KU990GO
KU990I
28
KU990IGO
KU990R
5
KV 1487MT
KV220
2
KV226
2
KV230
3
KV500
3
KV-CORE
KV-PRO
KV-ULTRA
Loading...
Loading...
Nothing found
KT520
Instruction Manual [fr]
82 pgs
1.31 Mb
0
Owner's Manual
74 pgs
1.28 Mb
0
Service Manual
232 pgs
9.26 Mb
0
User guide
274 pgs
5.02 Mb
0
User guide [cs]
146 pgs
3.32 Mb
0
User guide [el]
154 pgs
2.59 Mb
0
User guide [en,zh]
202 pgs
6.2 Mb
0
User guide [fr,en]
122 pgs
5.98 Mb
0
User guide [hu]
298 pgs
5.22 Mb
0
User guide [lt,lv,et]
210 pgs
3.81 Mb
0
User guide [ms]
202 pgs
5.25 Mb
0
User guide [nl]
146 pgs
2.74 Mb
0
User guide [pl]
82 pgs
2.32 Mb
0
User guide [pt]
74 pgs
1.54 Mb
0
User guide [tr]
2 pgs
2.59 Mb
0
User guide [uk]
154 pgs
3.25 Mb
0
User guide [zh]
66 pgs
1.79 Mb
0
User guide [zh]
138 pgs
2.72 Mb
0
Users manual
105 pgs
470.15 Kb
0
Table of contents
Loading...
LG KT520 User guide [ms]
...
LG User guide [ms]
Download
Specifications and Main Features
Frequently Asked Questions
User Manual
Download
Loading...
+
hidden pages
Unhide
You need points to download manuals.
1 point = 1 manual.
You can buy points or you can get point for every manual you upload.
Buy points
Upload your manuals
 Loading...