

LG HW350T User Manual

OWNER’S MANUAL
DLP PROJECTOR
Please read this manual carefully before operating
your set and retain it for future reference.
HW350T
P/NO : MFL66679808 (1201-REV00)
www.lg.com

LICENSES
2
LICENSES
Supported licenses may differ by model. For more information about licenses, visit
www.lg.com.
Manufactured under license from Dolby Laboratories.
“Dolby “and the double-D symbol are trademarks of Dolby
Laboratories.
ABOUT DIVX VIDEO: DivX® is a digital video format
created by DivX, LLC, a subsidiary of Rovi Corporation. .
This is an official DivX Certified® device that plays DivX
video. Visit divx.com for more information and software
tools to convert your files into DivX video.
ABOUT DIVX VIDEO-ON-DEMAND: This DivX Certified®
device must be registered in order to play purchased
DivX Video-on-Demand (VOD) movies. To obtain your
registration code, locate the DivX VOD section in your
device setup menu. Go to vod.divx.com for more
information on how to complete your registration.
“DivX Certified® to play DivX® video up to HD 1080p,
including premium content.”
“DivX®, DivX Certified® and associated logos are
trademarks of Rovi Corporation or its subsidiaries and are
used under license.”
“Covered by one or more of the following U.S. patents :
7,295,673; 7,460,668; 7,515,710; 7,519,274”
HDMI, the HDMI logo and High-Definition Multimedia
Interface are trademarks or registered trademarks of HDMI
Licensing LLC.
NOTE
Image shown may differ from your projector.
Your projector’s OSD (On Screen Display) may differ slightly from that shown
in this manual.
SAFETY INSTRUCTIONS
3
SAFETY INSTRUCTIONS
Please take note of the safety instructions to prevent any potential accident
or misuse of the projector.
Read these instructions.
Keep these instructions.
Heed all warnings.
Follow all instructions.
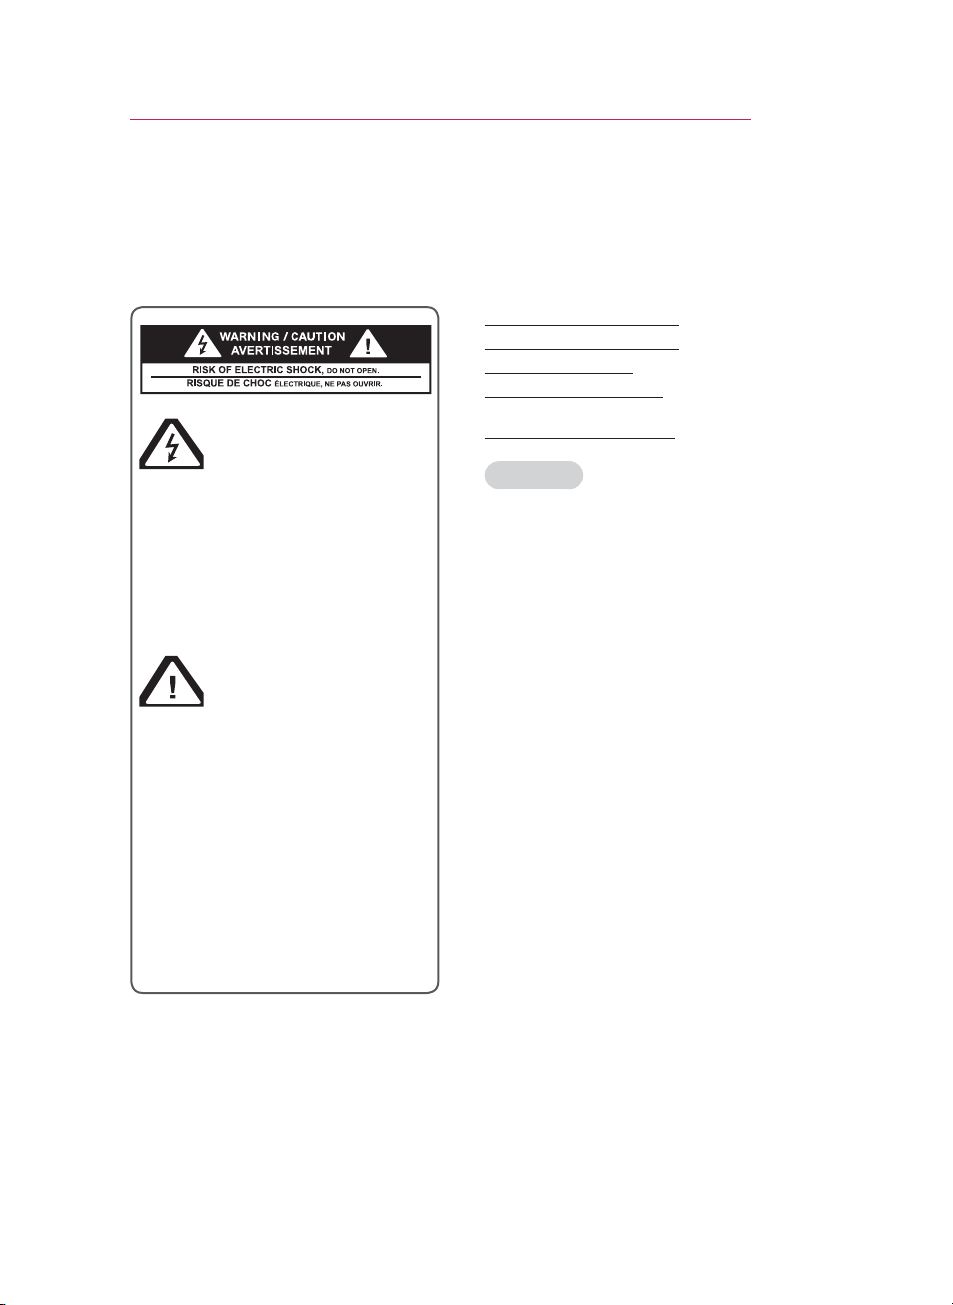
The lightning flash with
arrowhead symbol, within
an equilateral triangle,
is intended to alert the user to
the presence of uninsulated
“dangerous voltage” within the
product’s enclosure that may
be of sufficient magnitude to
constitute a risk of electric shock
to persons.
The exclamation point
within an equilateral
triangle is intended to
alert the user to the presence
of important operating and
maintenance (servicing)
instructions in the literature
accompanying the appliance.
WARNING/CAUTION
- TO REDUCE THE RISK OF FIRE
AND ELECTRIC SHOCK, DO NOT
EXPOSE THIS PRODUCT TO
RAIN OR MOISTURE.
Indoor Installation
WARNING
Do not place the Projector in direct
sunlight or near heat sources such as
radiators, fires, stove etc.
- This may cause a fire hazard.
Do not place flammable materials in,
on or near the projector.
- This may cause a fire hazard.
Do not hang on the installed projector.
- It may cause the projector to fall,
causing injury or death.
Do not block the vents of the projector
or restrict air-flow in any way.
- This would cause the internal
temperature to increase and could
cause a fire hazard or damage to the
unit.
Do not place the projector close to
sources of steam or oil such as a
humidifier.
- This may create a fire hazard or an
electric shock hazard.
Do not place the projector where it
might be exposed to excessive dust.
- This may cause a fire hazard or
damage to the unit.
Do not use the projector in a damp
place such as a bathroom where it is
likely to get wet.
- This may cause a fire or an electric
shock hazard.

SAFETY INSTRUCTIONS
4
Do not place the projector directly on a
carpet, rug or place where ventilation
is restricted.
- This would cause its internal
temperature to increase and might
create a fire hazard or damage the
unit.
Ensure good ventilation around the
projector. The distance between the
projector and the wall should be more
than 30 cm.
- An excessive increase in its internal
temperature may cause a fire hazard
or damage to the unit.
NOTES
When installing the projector on a
table, be careful not to place it near
the edge.
- The projector could fall causing injury
and damage to the projector.
use a suitable stand.
Disconnect from the power supply
and remove all connections before
moving, or cleaning.
Only use the projector on a level and
stable surface.
- It may fall and cause injury and/or
damage to the unit.
Do not drop the projector when
connecting to a external devices.
- This may cause injury and/or damage
to the unit.
Only
Power
WARNING
Earth wire should be connected.
- Ensure that you connect the earth
ground wire to prevent possible
electric shock (That is a Projector
with a three-prong grounded AC plug
must be connected to a three-prong
grounded AC outlet).
If grounding methods are not
possible, have a qualified electrician
install a separate circuit breaker.
Do not try to ground the unit by
connecting it to telephone wires,
lightening rods, or gas pipes.
The power cord should be inserted
fully into the power outlet to avoid a
fire hazard.
- This may cause a fire hazard or
damage the unit.
Do not place heavy objects on the
power cord.
- This may cause a fire or an electric
shock hazard.
Never touch the power plug with a
wet hand.
- This may cause an electric shock
hazard.
Do not plug-in too many items into
one power outlet.
- It may result in overheating of the
outlet and create a fire hazard.
Prevent dust from collecting on the
power plug pins or outlet.
- This may cause a fire hazard.

SAFETY INSTRUCTIONS
5
NOTES
Hold the plug firmly when unplugging.
If you pull the cord, it may be
damaged.
- This may cause a fire hazard.
Do not use if the power cord or the
plug is damaged or any part of the
power outlet is loose.
- This may cause a fire or an electric
shock hazard or damage to the unit.
Ensure the power cord does not come
into contact with sharp or hot objects.
- This may cause a fire or an electric
shock hazard or damage to the unit.
Place the projector where people will
not trip or tread on the power cord.
- This may cause a fire or an electric
shock hazard or damage to the unit.
Do not turn the projector On/Off by
plugging-in or unplugging the power
plug to the wall outlet. (Allow the unit
to cool before removing power.)
- It may cause mechanical failure or
could cause an electric shock.
Using
WARNING
Do not place anything containing
liquid on top of the projector such as
flowerpot, cup, cosmetics or candle.
- This may cause a fire hazard or
damage to the unit.
In case of impact shock or damage to
the projector switch it off and unplug it
from the power outlet and contact an
authorized service center.
- This may cause a fire or an electric
shock hazard or damage to the unit!
Do not allow any objects to fall into
the projector.
- This may cause an electric shock
hazard or damage to the unit!
If water is spilt into the projector
unplug it from the power supply
immediately and consult your Service
Agent.
- This may cause an electric shock
hazard or damage to the unit!
Dispose of used batteries carefully
and safely.
- In the case of a battery being
swallowed by a child please consult a
doctor immediately.
Do not remove any covers. High risk
of Electric Shock.
Don’t look directly into the lens when
the projector is in use. Eye damage
may occur.
Do not touch metal parts during or
soon after operation since the vents
will remain very hot.
If the projector is in a room that
experiences a gas leak, do not touch
the projector.
- It can cause a fire or a burn by a
spark.
Always open the lens door or remove
the lens cap when the projector is on.
Never touch this apparatus or power
cord during a thunder or lightning
storm.
- This may cause an electric shock
hazard.

SAFETY INSTRUCTIONS
6
CAUTION
It is recommend that most appliances
be placed on a dedicated circuit;
that is, a single outlet circuit which
powers only that appliance and has no
additional outlets or branch circuits.
Check the specification page of this
owner’s manual to be certain.
Do not overload wall outlets.
Overloaded wall outlets, loose or
damaged wall outlets, extension cords,
frayed power cords, or damaged or
cracked wire insulation are dangerous.
Any of these conditions could result
in electric shock or fire. Periodically
examine the cord of your appliance,
and if its appearance indicates
damage or deterioration, unplug it,
discontinue use of the appliance, and
have the cord replaced with an exact
replacement part by authorized service
personnel.
Protect the power cord from physical
or mechanical abuse, such as being
twisted, kinked, pinched, closed in a
door, or walked upon. Pay particular
attention to plugs, wall outlets, and
the point where the cord exits the
appliance.
concerning the Power Cord
NOTES
Do not place heavy objects on top of
projector.
- This may cause mechanical failure or
personal injury.
Take care not to impact the lens
particularly when moving the projector.
Do not touch the lens of the projector.
It is delicate and easily damaged.
Do not use any sharp tools on the
projector as this will damage the
casing.
In the event that an image does not
appear on the screen please switch it
off and unplug it from the power outlet
and contact your Service Agent.
- This may cause a fire or an electric
shock hazard or damage to the unit!
Do not drop the projector or allow
impact shock.
- This may cause mechanical failure or
personal injury.
Keep the proper distance from the
product.
- Your vision may be impaired if you
look at the product too closely.

SAFETY INSTRUCTIONS
7
Cleaning
WARNING
Do not use water while cleaning the
projector.
- This may cause damage to the
projector or an electric shock hazard.
In the unlikely event of smoke or a
strange smell from the projector,
switch it off, unplug it from the wall
outlet and contact your dealer or
service center.
- This may cause a fire or an electric
shock hazard or damage to the unit!
Use an air spray or soft cloth that is
moist with a neutral detergent and
water for removing dust or stains on
the projection lens.
NOTES
Contact the Service Center once a
year to clean the internal parts of the
projector.
- Accumulated dust can cause
mechanical failure.
When cleaning the plastic parts such
as projector case, unplug the power
and wipe it with a soft cloth. Do not
use cleanser, spray water or wipe
with a wet cloth. Especially, never use
cleanser (glass cleaner), automobile
or industrial shiner, abrasive or
wax, benzene, alcohol etc., which
can damage the product. Use an
air spray or soft cloth that is moist
with a neutral detergent and water
for removing dust or stains on the
projection lens.
- It can cause fire, electric shock
or product damage (deformation,
corrosion and damage).
Others
WARNING
Do not attempt to service the
projector yourself. Contact your dealer
or service center.
- This may cause damage to the
projector and could give an electric
Shock as well as invalidating the
warranty.
NOTES
Do not mix new batteries with old
batteries.
- This may cause the batteries to
overheat and leak.
Be sure to unplug if the projector is
not to be used for a long period.
- Accumulated dust may cause a fire
hazard or damage to the unit!
Only use the specified type of battery.
- This could cause damage to the
remote control.
SAFETY INSTRUCTIONS
8
ANTENNA
Outdoor Antenna Grounding
If an outdoor antenna is installed,
follow the precautions below. An
outdoor antenna system should not
be located in the vicinity of overhead
power lines or other electric light
or power circuits, or where it can
come in contact with such power
lines or circuits as death or serious
injury can occur. Be sure the antenna
system is grounded so as to provide
some protection against voltage
surges and built-up static charges.
Section 810 of the National Electrical
Code (NEC) in the U.S.A. provides
information with respect to proper
grounding of the mast and supporting
structure, grounding of the leadin wire to an antenna discharge
unit, size of grounding conductors,
location of antenna discharge unit,
connection to grounding electrodes
and requirements for the grounding
electrode.
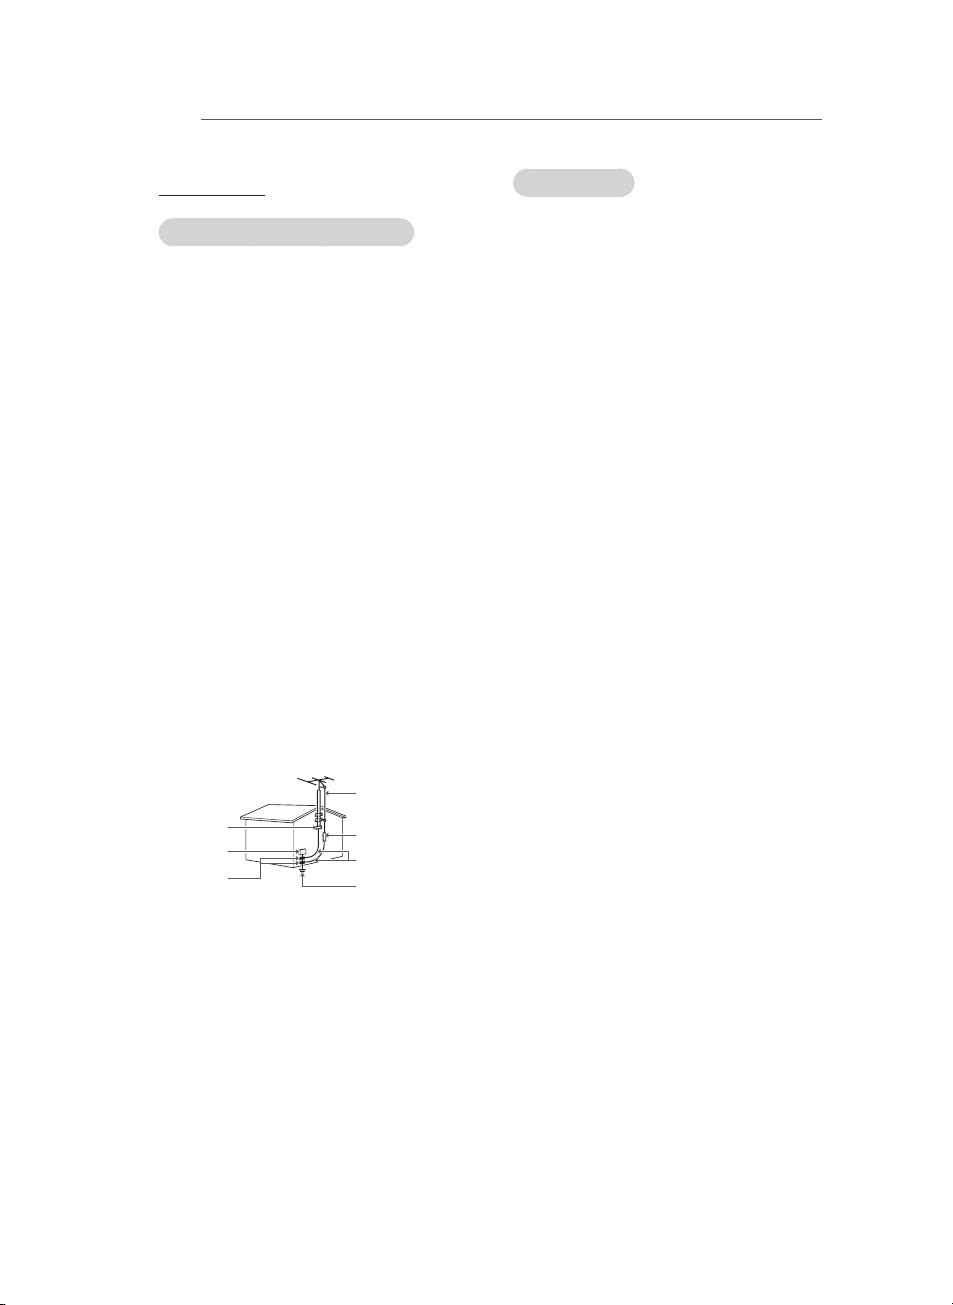
Antenna grounding according to the
National Electrical Code, ANSI/NFPA
70
Antenna Lead in Wire
Ground Clamp
Electric Service
Equipment
Ground Clamp
NEC: National Electrical Code
Antenna Discharge Unit
(NEC Section 810-20)
Grounding Conductor
(NEC Section 810-21)
Power Service
GroundingElectrode
System (NEC Art 250,
Part H)
FCC NOTICE
Warning - Class B
(b) For a Class B Digital device or
peripheral, the instructions furnished the
user shall include the following or similar
statement, placed in a prominent location
in the text of the manual:
NOTE: This equipment has been tested
and found to comply with the limits for
a Class B digital device, pursuant to
part 15 of the FCC Rules. These limits
are designed to provide reasonable
protection against harmful interference in
a residential installation. This equipment
generates, uses and can radiate radio
frequency energy and, if not installed and
used in accordance with the instructions,
may cause harmful interference to radio
communications. However, there is no
guarantee that interference will not occur
in a particular installation. If this equipment
does cause harmful interference to radio
or television reception, which can be
determined by turning the equipment off
and on, the user is encouraged to try to
correct the interference by one or more of
the following measures:
- Reorient or relocate the receiving
antenna.
- Increase the separation between the
equipment and receiver.
- Connect the equipment into an outlet on
a circuit different from that to which the
receiver is connected.
- Consult the dealer or an experienced
radio/TV technician for help.
SAFETY INSTRUCTIONS
9
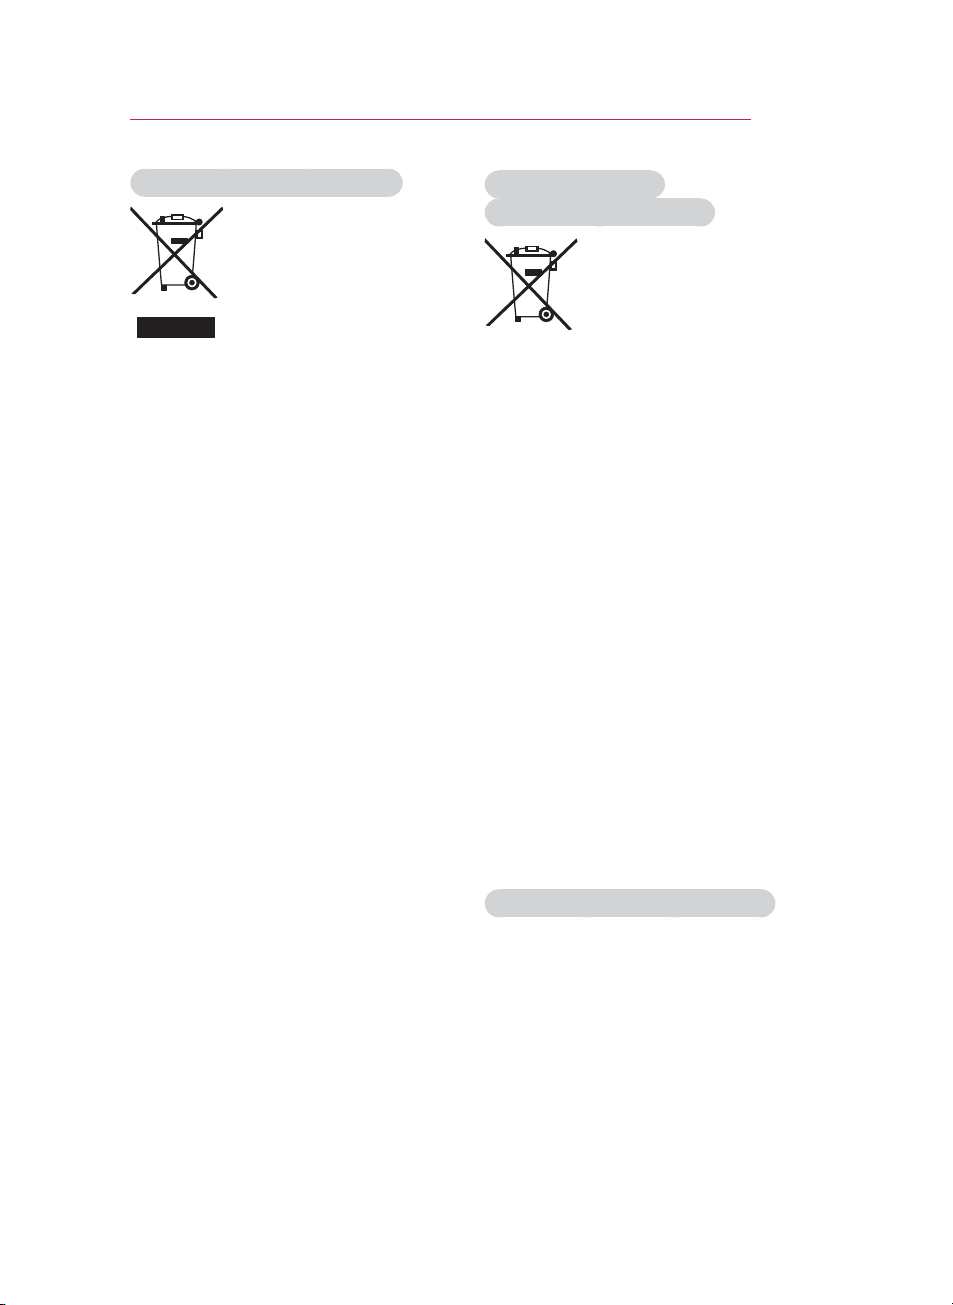
Disposal of your old appliance
1. When this crossed-out wheeled bin
symbol is attached to a product it means
the product is covered by the European
Directive 2002/96/EC.
2. All electrical and electronic products
should be disposed of separately from
the municipal waste stream through
designated collection facilities appointed
by your government or your local
authorities.
3. The correct disposal of your old appliance
will help prevent potential negative
consequences for the environment and
human health.
4. For more detailed information about
disposal of your old appliance, please
contact your city office, waste disposal
service or the shop where you purchased
the product.
Disposal of waste
batteries/accumulators
1. When this crossed-out wheeled
bin symbol is attached to batteries/
accumulators of Your product it means
they are covered by European Directive
2006/66/EC.
2. This symbol may be combined with
chemical symbols for mercury(Hg),
cadmium(Cd) or lead(Pb) if the battery
Contains more that 0.0005% of mercury,
0.002% of cadmium or 0.004% of lead.
3. All batteries/accumulators should be
disposed separately from the municipal
waste stream via designated collection
facilities appointed by the government or
the local authorities.
4. The correct disposal of Your old
batteries/accumulators will help to
prevent potential negative consequences
for the environment, animal and human
health.
5. For more detailed information about
disposal of Your old batteries/
accumulators, please contact Your city
office, waste disposal service or the shop
where You purchased the product.
For USA
NOTE TO CABLE/TV INSTALLER
This reminder is provided to call the CATV
system installer’s attention to Article 82040 of the National Electric Code (U.S.A.).
The code provides guidelines for proper
grounding and, in particular, specifies that
the cable ground shall be connected to the
grounding system of the building, as close
to the point of the cable entry as practical.

TABLE OF CONTENTS
10
TABLE OF CONTENTS
LICENSES 2
SAFETY INSTRUCTIONS 3
ASSEMBLING AND PREPAR-
ING 12
Unpacking 12
Optional Extras 13
Parts and Buttons 14
Installation 15
- Installation Precautions 15
- Basic Operation of the Projector 16
- How to Install the Projector Using
a Tripod 17
- Kensington Security System 17
REMOTE CONTROL 18
WATCHING PROJECTOR 20
Connecting to an Antenna or Cable 20
- Connecting an Antenna or Basic
Cable 20
- Connecting a Cable Box 20
Watching Projector 21
- Turning on for the First Time 21
- Focus and Position of the Screen
Image 21
- Watching Projector 21
Managing Channels 22
- Setting Up Channels 22
Using Additional Options 24
- Adjusting Aspect Ratio 24
- Using Keystone Function 25
- Using the Input List 25
- Blank Function 26
Using the Quick Menu 26
ENTERTAINMENT 27
Network Connection 27
- Connecting to
a Wireless Network 27
- Setting to a Wireless Network 28
- Tips for Network Setting 30
- Network Status 32
NETCAST 32
- Using the NETCAST 32
MY MEDIA 36
- Connecting USB Storage
Devices 36
- Connecting DLNA DMP (Digital
Living Network Alliance, Digital
Media Player) 38
- Connecting DLNA DMR (Digital
Living Network Alliance, Digital
Media Render) 42
- MOVIE LIST 43
- PHOTO LIST 49
- MUSIC LIST 51
- FILE VIEWER 53
PLAY GAME 54
CUSTOMIZING SETTINGS 55
The SETUP Menu 55
CHANNEL Settings 56
PICTURE Settings 56
SCREEN Settings 60
AUDIO Settings 61
TIME Settings 62
LOCK Settings 63
OPTION Settings 65
NETWORK Settings 66

MAKING CONNECTIONS 67
Connecting to a HD receiver, DVD, or
VCR player 68
- HDMI Connection 68
- Component Connection 68
- Composite Connection 69
Connecting to a PC 69
- RGB Connection 69
Connecting to a Headphone 70
MAINTENANCE 71
Updating the Projector Firmware 71
Cleaning the Projector 72
- Cleaning the lens 72
- Cleaning the Projector Case 72
How to Fix the Lens Cap 73
SPECIFICATIONS 74
TABLE OF CONTENTS
11
ASSEMBLING AND PREPARING
12
ASSEMBLING AND PREPARING
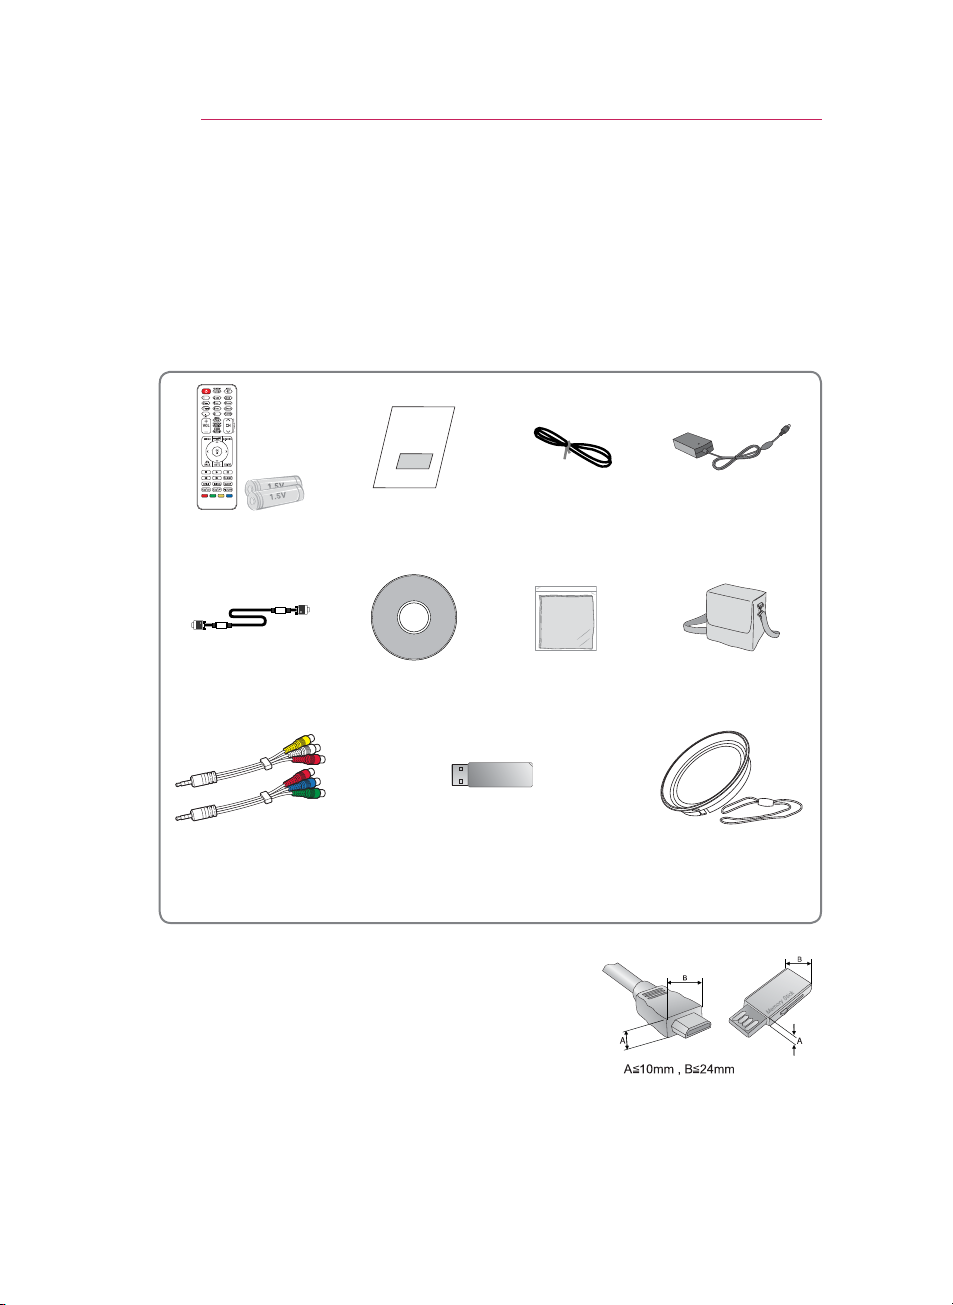
Unpacking
Check your product box for the following items. If there are any missing
accessories, contact the local dealer where you purchased your product.
The illustrations in this manual may differ from the actual product and item.
Remote Control
and Batteries (AAA)
Computer Cable
Composite/
Component Gender
cable
Note that clearance is limited between the USB and
HDMI inputs. Using devices of a non-standard size
may block other ports.
Owner’s manual Power Cord AC-DC Adapter
Nero MediaHome4
Essentials CD
Wireless LAN for Broadband/DLNA
Adaptor (AN-WF100)
Polishing Cloth Portable bag
Lens Cap and
Strap

ASSEMBLING AND PREPARING
Optional Extras
Optional extras can be changed or modified for quality improvement without any
notification.
Contact your dealer for buying these items.
Projection Screen Tripod HDMI Cable
Video Cable Audio Cable Component Cable
13
AJ-CB2 AJ-CB2+AJ-CS60
Ceiling Mounting Bracket
1 Use screw size: M4x6-M4x8
1
RF cable

ASSEMBLING AND PREPARING
DC IN
RGB IN
A/V INCOMPONENT IN
ANTENNA IN
CH
+ VOL-
14
Parts and Buttons
* The projector is manufactured using high-precision technology. You may,
however, see on the Projector screen tiny black points and/or bright points (red,
blue, or green). This can be a normal result of the manufacturing process and
does not always indicate a malfunction.
Control panel
Rear Connection panel
Speaker
Exhaustion
Direction
Focus ring
2
lens
Button Description
(POWER) Turns the projector ON/OFF.
(MENU) Displays or closes menus.
CH∧,∨ Scrolls through saved channels.
VOL -, + Adjusts the volume level.
∧,∨,<,>
ꔉ(OK)
Adjusts functions of menus.
Checks present mode and saves the change of functions.
1 High heat, keep the area near the exhaust clear.
2 Do not touch the lens when using the projector or opening the lens cap.
1
Installation
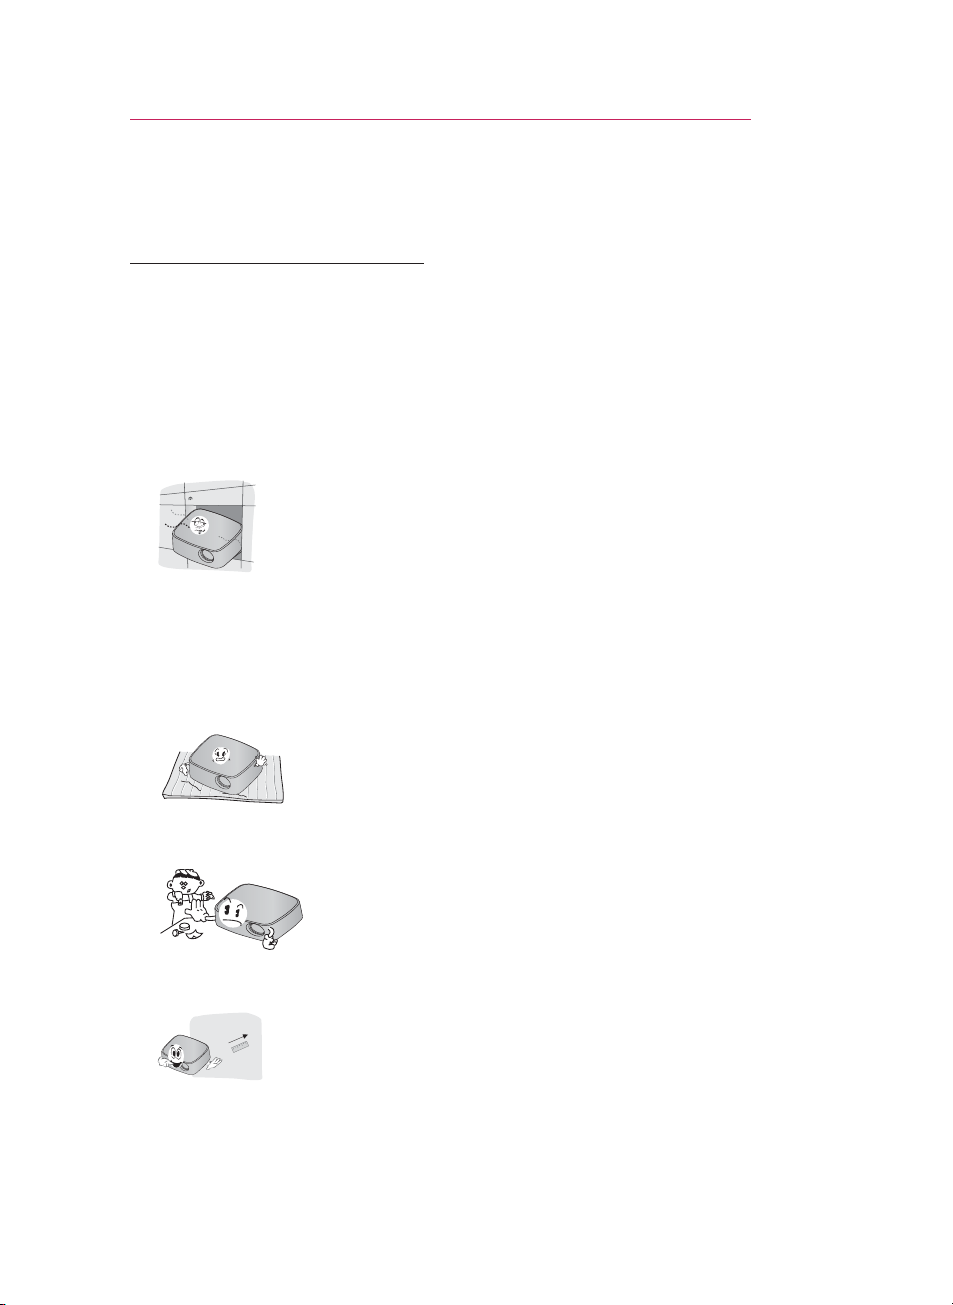
Installation Precautions
Provide proper ventilation for this
projector.
- The projector is equipped with
ventilation holes. Do not block or
place anything near these holes.
Internal heat build-up may occur,
causing picture degradation or
damage to the projector.
- Do not place the projector on
a carpet, rug or other similar
surface. It may prevent a adequate
ventilation of the projector bottom.
This product should be mounted to
a wall or ceiling only.
- Never push the projector or spill
any kind of liquid into the projector.
- Leave an adequate distance (30
cm or more) around the projector.
ASSEMBLING AND PREPARING
Place this projector in adequate
temperature and humidity
conditions.
- Install this projector only in
a location where adequate
temperature and humidity is
available. (See p.74)
Don’t place the projector where it
can be covered with excessive dust.
- This may cause overheating of the
projector.
Do not obstruct the slots and
openings of the projector. This may
cause overheating and cause a fire
hazard.
This projector is manufactured using
high-precision technology. You may,
however, see tiny black points and/
or bright points (red, blue or green)
that continuously appear on the
projector Screen. This is a normal
result of the manufacturing process
and does not indicate a malfunction.
The remote control may not
work when a lamp equipped
with electronic ballast or a threewavelength lamp is installed.
Replace those lamps with
international standard products to
use the remote control normally.
15
ASSEMBLING AND PREPARING
508
635
762
889
1016
1143
1270
1397
1524
1651
1778
1905
2032
2159
2286
2413
2540
431
538
646
754
861
969
1077
1185
1292
1400
1508
1615
1723
1831
1938
2046
2154
269
337
404
471
539
606
673
741
808
875
943
1010
1077
1145
1212
1279
1347
586
737
887
1038
1200
1342
1492
1643
1794
1947
2097
2248
2399
2552
2702
2853
3004
16
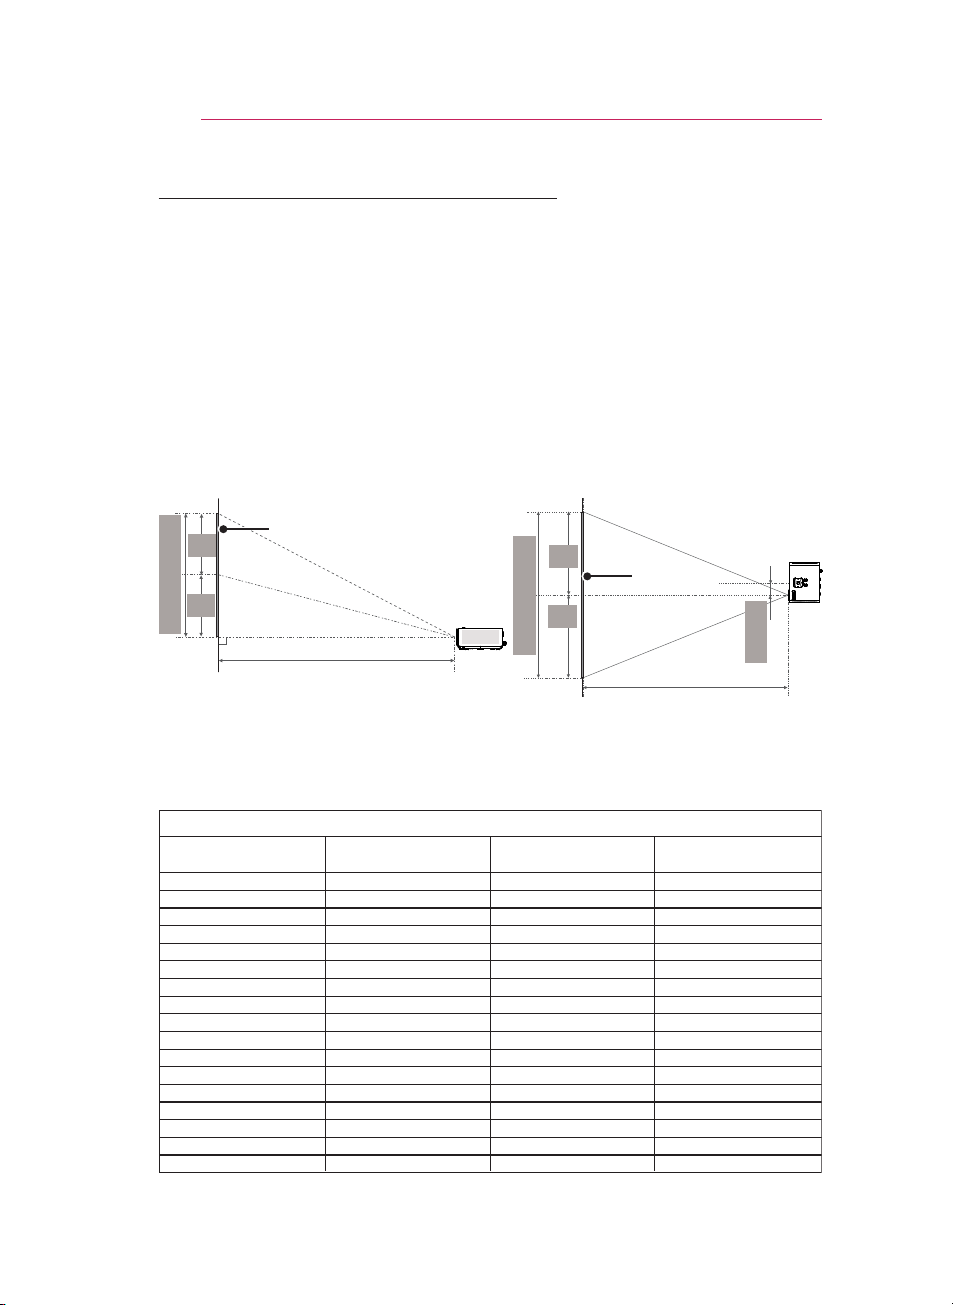
Basic Operation of the Projector
1 Place the projector on a sturdy and horizontal surface.
2 Place the projector with the desired distance from the screen. The distance
between the projector and the screen determines the actual size of the image.
3 Position the projector so that the lens is set at a right angle to the screen. If the
projector is not set at a right angle, the screen image will be crooked. Although,
slight angles can be counteracted using the Keystone adjustement. (See p.25).
4 After placing the projector in its desired location, connect the video input(s).
Then connect the power cable to the projector and the wall outlet.
Projection offset ratio: 100%
Vertical Size (X)
X/2
X/2
Screen
Horizontal Size (Y)
Y/2
Y/2
Projection distance (D)
16 : 9 Scale
Diagonal Size (mm) Horizontal Size (Y) (mm) Vertical Size (X) (mm)
Screen
51 mm
Projection distance (D)
Projection Distance (D)
(mm)
ASSEMBLING AND PREPARING
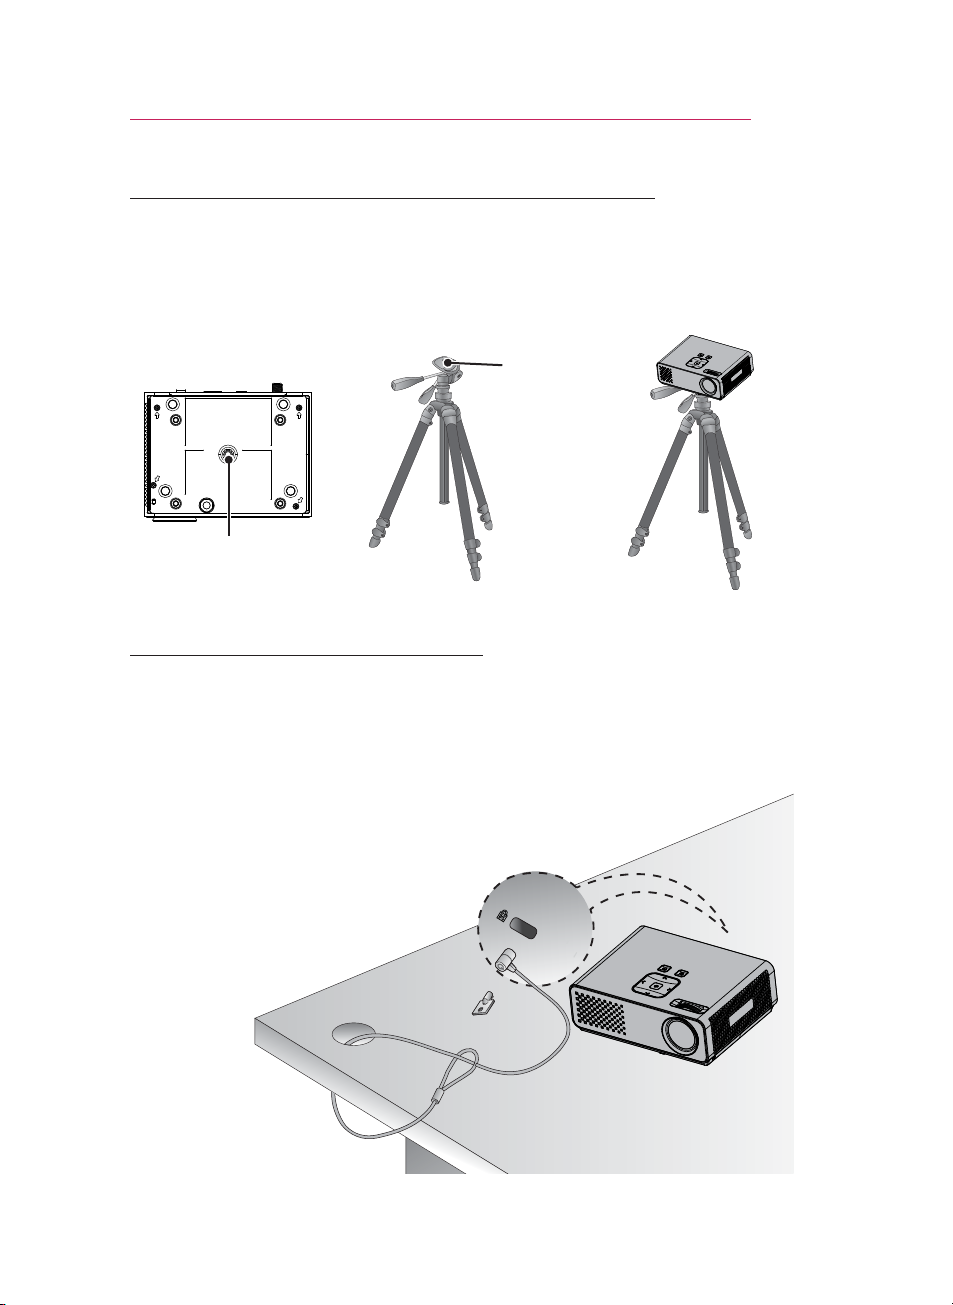
How to Install the Projector Using a Tripod
* You can install this projector using a camera tripod.
* When stabilizing the tripod, we recommend using the locking bolt of standard
size 4.5 mm or less.The maximum size allowed for the locking bolt is 5.5 mm.(If
it is longer than the maximum allowed size, it may damage the projector.)
17
Bottom side of Projector
Part connected to
the tripod
+
Tripod
Projector is
connected to
this part.
⇒
Kensington Security System
This projector has a Kensington Security System Connector on the panel.
Connect a Kensington Security System cable as below.
For detailed installation and use of the Kensington Security System, refer to the
user’s guide included with the Kensington Security System set. And for further
information, contact
Kensington company that deals with expensive electronic equipment such as
notebook PCs or projectors.
The Kensington Security System is an optional item.
http://www.kensington.com
, the internet homepage of the
REMOTE CONTROL
18
REMOTE CONTROL
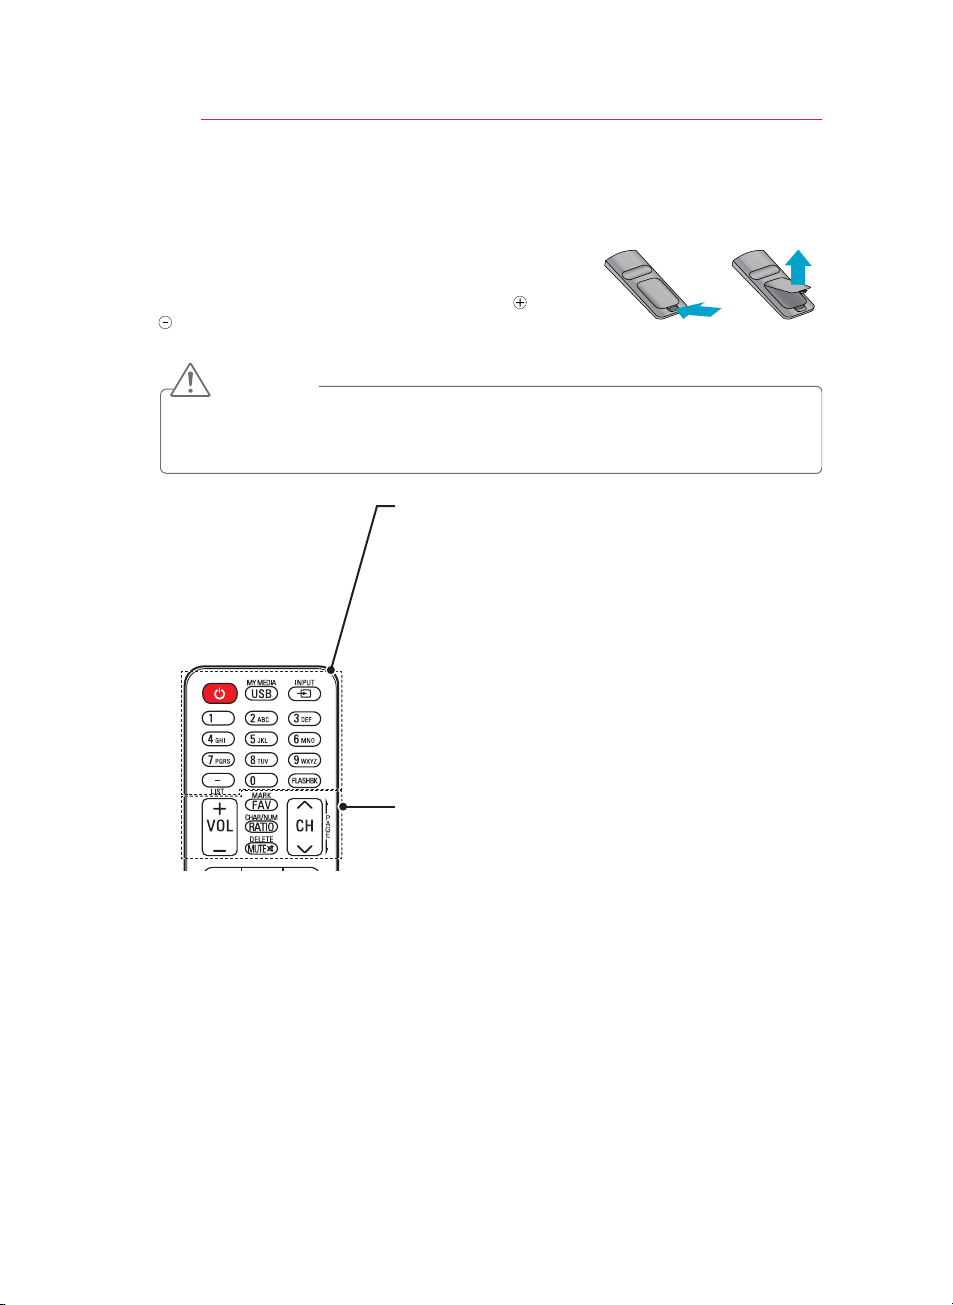
The descriptions in this manual are based on the buttons on
the remote control. Please read this manual carefully and use
the projector correctly. To replace batteries, open the battery
cover, replace batteries (1.5 V AAA) matching the
ends to the label inside the compartment, and close the
battery cover. To remove the batteries, perform the installation actions in reverse.
CAUTION
RISK OF EXPLOSION IF BATTERY IS REPLACED WITH AN INCORRECT TYPE.
DISPOSE OF USED BATTERIES AT A RECYCLING DROP-OFF LOCATION.
Do not mix old and new batteries, as this may damage the remote control.
POWER
Turns the projector on or off.
USB/MY MEDIA
Access MY MEDIA.
INPUT
Changes the input source.
Alphanumeric buttons
Enters letters and numbers.
- (Dash)
Inserts a dash between numbers such as 2-1 and 2-2.
LIST
Accesses the saved channel list.
FLASHBK
Tunes to the last channel viewed.
VOL
Adjusts the volume level.
FAV
Accesses your favorite channel list.
MARK
Selects a menu or option.
RATIO
Resizes an image.
CHAR/NUM
Switches between Letter and Number input modes.
MUTE
Mutes all sounds
DELETE
Deletes letters and numbers.
CH
Scrolls through the saved channels.
PAGE
Moves to the previous or next screen.
and
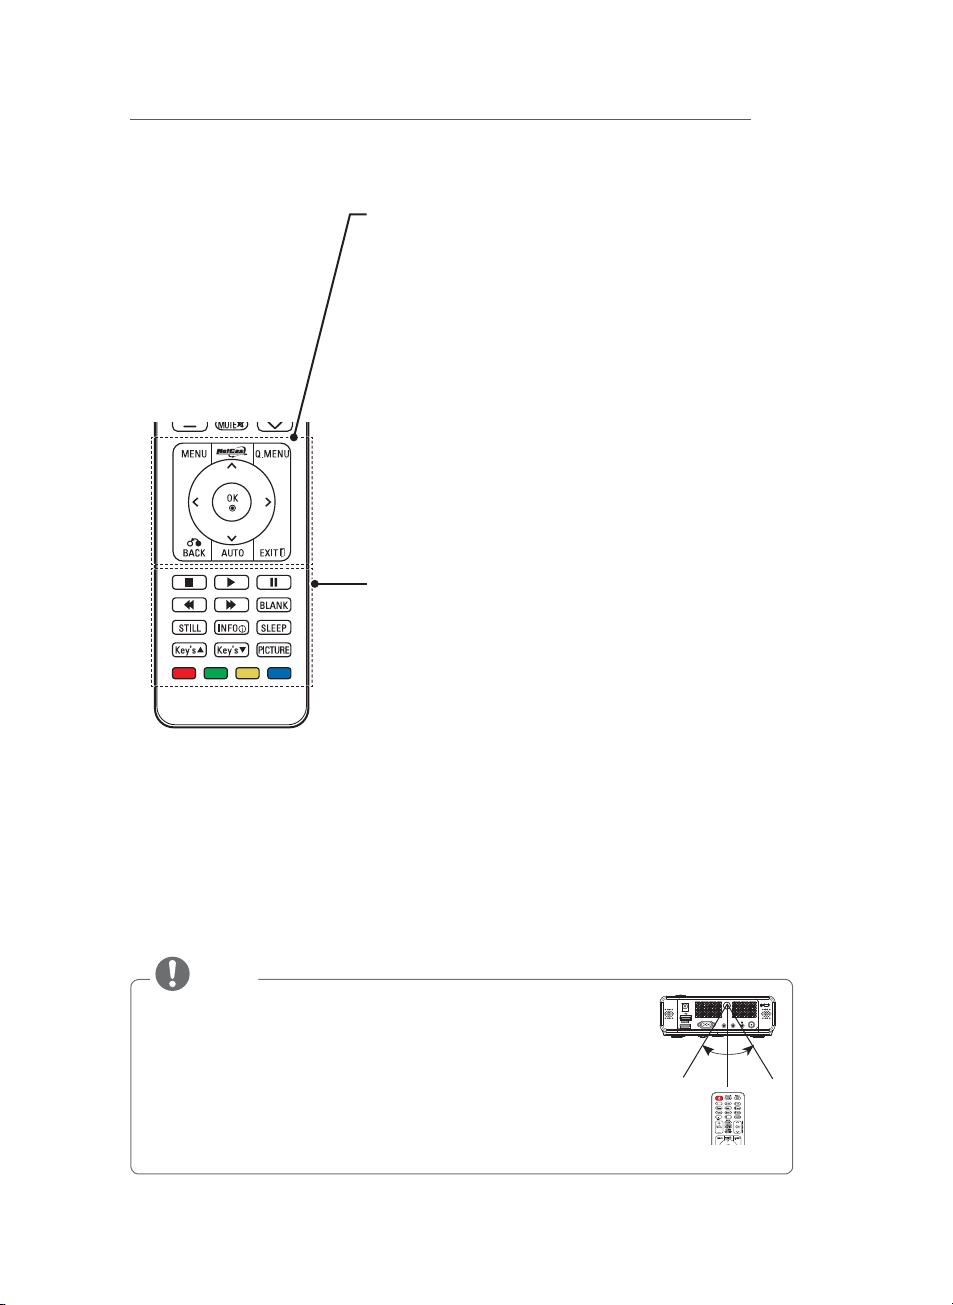
REMOTE CONTROL
MENU
Accesses the menu.
NETCAST
Select the desired NETCAST menu source.
Q.MENU
Accesses the quick menu.
Navigation buttons (up/down/left/right)
Scrolls through menus or options.
OK
Selects menus or options and confirms your input.
BACK
Returns to the previous level.
AUTO
Automatically adjusting of the PC input image.
EXIT
Clears all on-screen displays and returns to projector
viewing.
Control buttons
Controls the NETCAST or MY MEDIA.
BLANK
Turns the projector screen on or off.
STILL
Freeze the moving image.
Functions as the STILL button in any mode other than
DivX.
INFO
Views the information of the current program and screen.
SLEEP
Sets the length of time until the projector turns off.
Key's
Adjusts Keystone.
PICTURE
Change the image mode.
Color buttons
These access special functions in some menus.
19
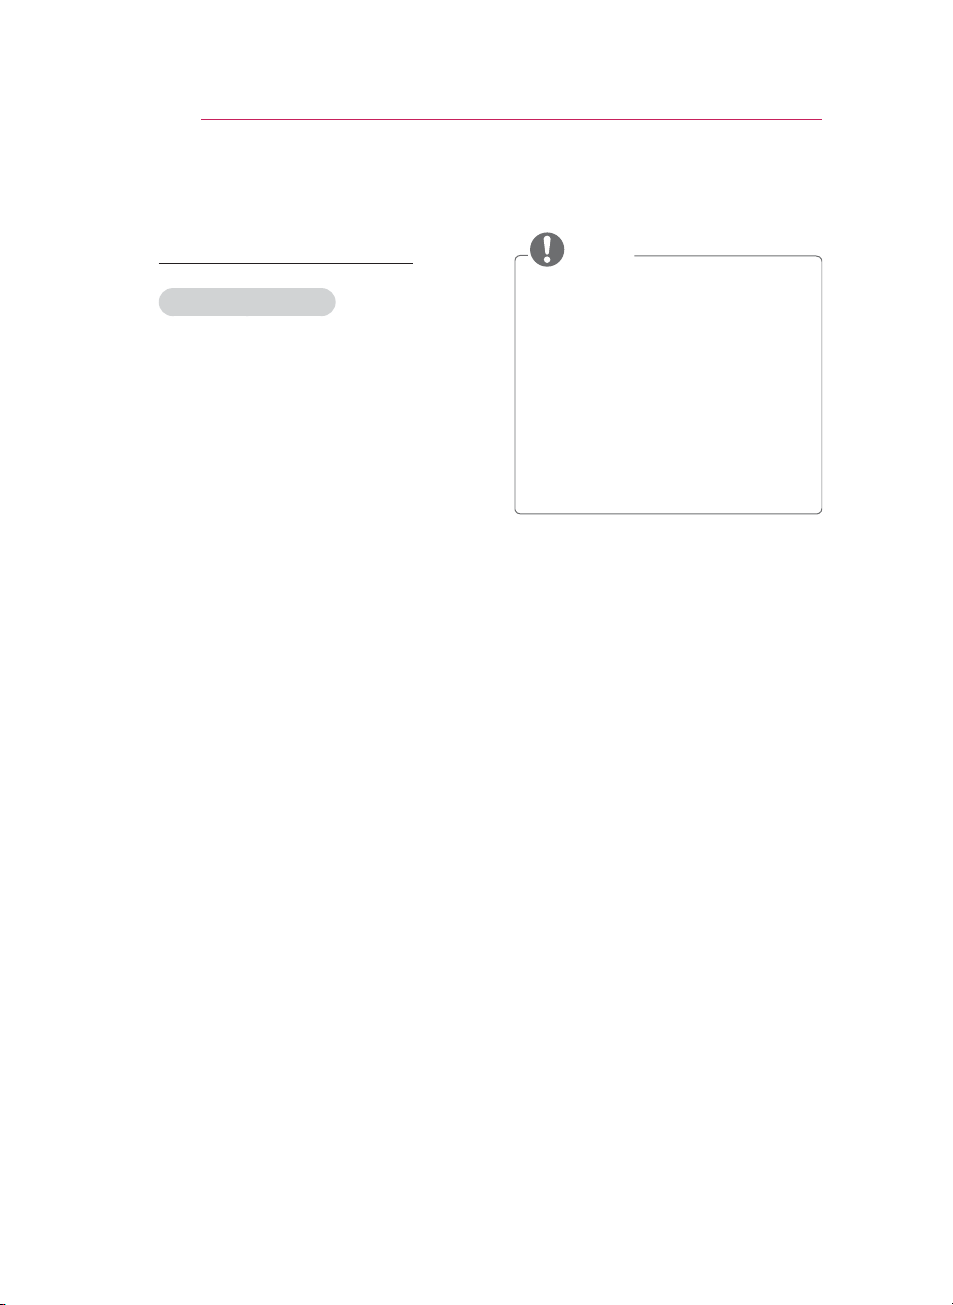
NOTE
Optimal remote range is less than 6 meters and within a 60 degree
arc of the IR receiver.
The remote range may be less when cables are connected to the
projector.
When you carry the remote control in the portable bag, make sure
that the buttons on the remote control are not pressed by the
projector, cables, documents or any other accessories in the bag.
Otherwise, it may reduce the battery life significantly.
DC IN
RGB IN
30° 30°
A/V INCOMPONENT IN
ANTENNA IN

WATCHING PROJECTOR
20
WATCHING PROJECTOR
Connecting to an
Antenna or Cable
Connect an antenna, cable, or cable
box to watch TV while referring to the
following. The illustrations may differ
from the actual items and a RF cable
is optional.
Connecting an Antenna
or Basic Cable
Connect the projector to a wall
antenna socket with an RF cable
(75 Ω).
Connecting a Cable Box
Connect the projector to a cable box
and the cable box to a wall antenna
socket with 2 RF cables (75 Ω).
NOTE
Use a signal splitter to use more
than 2 projectors.
Visit http://lgknowledgebase.com
for more information about the
antenna and cable connection.
Search for antenna.
CAUTION
Make sure not to bend the copper
wire of the RF cable.
Copper wire
Complete all connections between
devices, and then connect the
power cord to the power outlet to
prevent damage to your projector.

Watching Projector
WATCHING PROJECTOR
21
Turning on for the First
Time
1 Make sure the power cord is
connected correctly.
2 After wait for a moment, press
the POWER button on the remote
control or control panel. (The light
on the control panel will be turned
on.)
Check if the lens cap is removed
before turning on the power.
3 Follow the on-screen instructions to
customize your projector settings
according to your preferences.
Language
⬇
Time Zone
Selects a language to
display.
Selects the time zone
and daylight saving.
4 Press the INPUT button on the
remote control to select the input
signal you want.
Focus and Position of
the Screen Image
When an image appears on the
screen, check if it is in focus and fits
the screen properly.
Watching Projector
1 In Standby mode, press the
POWER to turn the projector on.
2 Press INPUT and select desired
input.
3 Control the projector using the
following buttons while you are
watching projector.
Button Description
CH∧,∨ Scrolls through saved
channels.
LIST Selects a channel on the
saved or recent watched
channel list.
0 - 9 Selects a channel by
entering numbers.
VOL -, + Adjusts the volume level.
MUTE Mutes all sounds.
Q.MENU Accesses the quick
menus. (See p.26)
FLASHBK Alternates between
the last two channels
selected.
RATIO Resizes an image.
Key's Adjusts Keystone. (See
p.25)
Focus ring
To adjust the focus of the image,
rotate the focus ring.
4 To turn the projector off, press the
POWER.
WATCHING PROJECTOR
22
Managing Channels
Setting Up Channels
Storing Channels
To store channels automatically,
1 Press MENU to access the menu.
2 Press the Navigation buttons to
scroll to CHANNEL and press OK.
3 Press the Navigation buttons to
scroll to Auto Tuning and press OK.
4 Select Start to start automatic
tuning. The projector scans
and saves available channels
automatically.
5 When you are finished, press EXIT.
To store channels manually,
1 Press MENU to access the menu.
2 Press the Navigation buttons to
scroll to CHANNEL and press OK.
3 Press the Navigation buttons to
scroll to Manual Tuning and press
OK.
4 Scroll through the channel types,
and then add or delete channels.
5 When you are finished, press EXIT.
NOTE
If the projector scans a blocked
channel, you will be prompted to
enter your password to keep the
channel scanned.
You can store up to 1000 channels.
The number of channels that you
can store differs depending on the
broadcasting signal environment.
The channels are stored in the
order of DTV, TV, Cable DTV and
Cable TV.

WATCHING PROJECTOR
23
Editing Your Channel List
1 Press MENU to access the menu.
2 Press the Navigation buttons to
scroll to CHANNEL and press OK.
3 Press the Navigation buttons to
scroll to Channel Edit and press
OK.
4 Edit channels using the following
buttons.
Channel Edit Favorite Group :
ꔉ Ch. Change
ꔂ Navigation
DTV TV Cable DTV Cable TV
3-1 5-1 7-1
ꘂ Favorite Ch.
ꘃ Page Change
A
꘩ Favorite Ch. Group
ꔅ Block/Unblock
Page 1/1
ꕉ Provious
ꔅ Add/Delete
Button Description
OK Selects the highlighted
channel to view.
∧,∨,
<,>
Scrolls through channel
types or channels.
FAV Adds a favorite channel
list.
CH Moves to the previous or
next page.
Q.MENU Changes the favorite
group.
Yellow Block or unblock a
channel.
Blue Adds or deletes a channel.
The deleted channel
displays in blue.
5 When you are finished, press EXIT.
Favorite Channel Setup
1 Press CH or Number buttons to
access to select your desired
channel.
2 Press FAV. to access the Favorite
List.
3 Press the , buttons to scrolls
through channel group.
4 Press the Yellow button.
Favorite Channel List
1 Press FAV. to access the Favorite
List.
2 Press the Navigation buttons to
scroll to a channel.and press OK.
Favorite List
◀
Group
ꔖ 3-1
ꔖ 4-1
ꔅ Ch.Reg. ꔅ Ch.Edit
Button Description
∧,∨
<,>
Scrolls through channels.
Scrolls through channel
group.
CH Moves to the previous or
next page
Yellow Register or cancel the
current channel in favorite
channel list.
Blue Go to the “CHANNEL menu
- Channel Edit”.
ꕉ Exit
ꔁ Favorite Ch. Group
A
▶
ꔉ
ꔡ
 Loading...