

LG GD350 Owner’s Manual [fa]
ﯽﺴﻴﻠﮕﻧﺍ
ENGLISH
ENGLISH
ﯽﺴﻴﻠﮕﻧﺍ
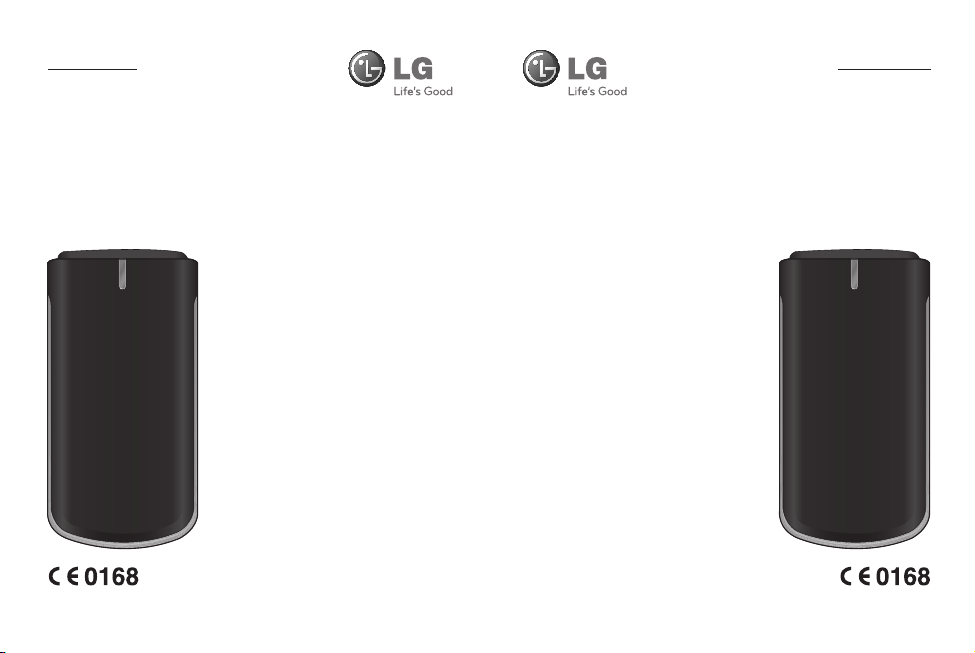
GD350
ﻦﮑﻤﻣ ﺎﻤﻨﻫﺍﺭ ﻪﭼﺮﺘﻓﺩ ﻦﻳﺍ ﺕﺎﻳﻮﺘﺤﻣ ﺯﺍ ﯽﺧﺮﺑ
ﻩﺪﻨﻫﺩ ﻪﺋﺍﺭﺍ ﺎﻳ ﯽﺷﻮﮔ ﺭﺍﺰﻓﺍ ﻡﺮﻧ ﻪﺑ ﻪﺘﺴﺑ ﺖﺳﺍ
.ﺪﻨﺷﺎﺑ ﺕﻭﺎﻔﺘﻣ ﺎﻤﺷ ﯽﺷﻮﮔ ﺎﺑ ،ﺕﺎﻣﺪﺧ
www.lg.com P/N : MMBB0366915 (1.0) W www.lg.comP/N : MMBB0366915 (1.0) W
GD350
Some of the contents in this manual
may differ from your phone
depending on the software of the
phone or your service provider.

Bluetooth QD ID B016112

—
GD350 User Guide
This guide will help you understand your new mobile phone.
It will provide you with useful explanations of features on your
phone.
Some of the contents in this manual may differ from your phone
depending on the software of the phone or your service provider.
English

Getting to know your phone
Main screen
Soft keys
Each of these
keys performs the
functions indicated
by the text on the
display immediately
above them.
OK key
Selects menu
options and
confirms actions.
Music key
Go to Music
function directly.
Call key
Dials a phone
number and answers
incoming calls.
2
Navigation keys
Use for quick
access to phone
functions.
Camera key
Go to Camera
function
directly.
End/Power key
Ends or rejects
a call. Turns the
phone on/off.
Returns to the
home screen
when you use
the menu.
Headset /
Charger /
USB Cable
connector
Volume key
Memory card slot
Installing a memory card
Lift the memory card cover
and insert a micro SD card
with the golden contact area
facing downwards. Close the
memory card cover so that it
clicks shut.
To remove the memory card,
gently push it as shown in the
diagram.
Note: A memory card is an
optional accessory.
Formatting the memory
card
From your home screen, press
Menu and select Settings.
Choose Memory Info, select
External memory and press
Format, and insert security
code.
WARNING: When you format
your memory card, all the
content will be wiped. If you do
not want to lose the data on your
memory card, back it up fi rst.
3
Installing the SIM Card and Charging the Battery
Installing the SIM Card
When you subscribe to a
cellular network, you are
provided with a SIM card
loaded with your subscription
details, such as your PIN, any
optional services available
and many others.
Important!
›
The SIM card can be easily
damaged by scratches or
bending, so be careful when
handling, inserting or removing
the card. Keep all SIM cards out
of the reach of small children.
Illustrations
1 Open battery cover
2 Remove the battery
3 Insert your SIM
4 Insert your battery
5 Close the battery cover
6 Charge your battery
12
4
WARNING: Do not remove the battery when the phone is switched
on, as this may damage the phone.
4
56
3

Menu map
1. Messaging
1.1 Create
message
1.2 Inbox
1.3 My mailbox
1.4 Drafts
1.5 Outbox
1.6 Sent items
1.7 Saved items
1.8 Emoticons
1.9 Message
settings
2. Contacts
2.1 Names
2.2 Settings
2.3 Groups
2.4 Speed dials
2.5 Service dial
numbers
2.6 Own number
2.7 My business
card
3. Call log
3.1 Call log
3.2 Missed calls
3.3 Received calls
3.4 Dialled
numbers
3.5 Call duration
3.6 Packet data
counter
3.7 Call costs
4. Settings
4.1 Profi les
4.2 Display
4.3 Date and time
4.4 Connectivity
4.5 Call
4.6 Phone
4.7 Network
4.8 Internet
profi les
4.9 Access points
4.10 Packet data
conn.
4.11 Security
4.12 Memory info.
4.13 Restore
factory
settings
5. Gallery
5.1 My memory
card
5.2 My images
5.3 My sounds
5.4 My videos
5.5 My games &
apps
5.6 Others
5

Menu map
6. Media
6.1 Camera
6.2 Video
6.3 Music
6.4 FM radio
6.5 Voice recorder
6.6 Ringtone
creator
6
7. Organiser
7.1 Alarm clock
7.2 Calendar
7.3 To-do list
7.4 Notes
7.5 Secret notes
7.6 Cash Book
7.7 BMI Calculator
7.8 Calculator
7.9 Stopwatch
7.10 Date fi nder
7.11 Converter
7.12 World time
7.13 Go to
7.14 SIM Services
7.15 Settings
8. Applications
8.1 My games &
apps
8.2 Settings
9. Web
9.1 Home
9.2 Bookmarks
9.3 Last web
address
9.4 Settings
9.5 Go to address
9.6 Saved pages
Calls
Making a call
1 Key in the number using
the keypad. To delete a
digit press CLR.
2
Press to initiate the
call.
To end the call, press .
3
TIP! To enter + when making
an international call, press and
hold 0.
TIP! To control the volume
during a call, press volume key.
Making a call from your
contacts
1 Select Names from the
home screen.
Using the keypad, enter the
2
first letter of the contact
you want to call. For
example, for Office, Press 6
three times to select the
first character, “O”.
3
Select Make call from
Options or press
initiate the call.
to
Answering and rejecting
a call
When your phone rings, press
to answer the call.
To mute your phone while it
is ringing, simply select Silent.
This is useful if you have
forgotten to change your
profile to Silent for a meeting.
Press
or select Reject to
reject the incoming call.
Using the speakerphone
During a call, you can activate
speakerphone by pressing
key and you can use the
handset in hands-free.
If the speakerphone is active,
press
key again to resume
normal handset conversation
mode.
Speed dialling
Press Menu and select Contacts,
then choose Speed dials.
You can assign a speed dial
number to a contact you call
frequently.
7

Speed dial 1 is set to your
voice mail and you can not
change it.
Viewing your call logs
Press Menu and select Call
log, then choose Call log.
You can check the call
record of missed, received,
and dialled calls only if the
network supports the Calling
Line Identification (CLI) within
the service area.
Changing the call settings
You can set the menu
relevant to a call. Press Menu,
select Settings and choose
Call.
Call divert - Choose whether
to divert your calls.
Call barring - Select when
you would like calls to be
barred.
8
Fixed dial numbers - Choose
a list of numbers that can be
called from your phone. You’ll
need your PIN2 code from
your operator. Only numbers
included in the fixed dial
list can be called from your
phone.
Call waiting - Be alerted
when you have a call waiting.
(Depends on your network
provider.)
Call reject - Select Off or On
and choose to reject all calls,
those from specific groups,
contacts, unregistered
numbers (those not in your
list of contacts) or those with
no caller ID.
Send my number - Choose
whether your number will
be displayed when you call
someone. (Depends on your
network provider.)

Auto redial - Allows you to
set the auto redial function
when a call attempt has
failed.
Answer mode - Allows you
to set the answering method.
You can choose from Press
send key, Open flip or Press
any key.
Free Call Time Tracker -
Choose whether to show your
free call time or not.
Minute minder - Determines
whether to sound a tone
when you are on the phone
as per the set time.
BT answer mode - Choose
how to answer a call when
using a Bluetooth headset.
Set Hands-free or Handset.
Save new number - Choose
Yes or No.
Contacts
Searching for a contact
1 Select Names from the
home screen.
2 Using the keypad enter the
first letter of the contact
you want to call.
3 To scroll through the
contacts and their different
numbers use the navigation
keys.
Adding a new contact
1 Press Menu and select
Contacts then choose
Names. Press Options and
Add new contact.
2 Enter the first and last name
of your new contact. You
do not have to enter both,
but you must enter one or
the other.
3 Enter the number and
select Options then choose
Save.
9

Note: If you add more
information, press Options and
choose Add detail then select
options you want.
Note: When you are storing a
contact’s e-mail address, press
key and select a symbol @
then OK.
Adding a contact to a
group
You can save your contacts
into groups, for example,
keeping your work colleagues
and family separate. There are
a number of groups including
Family, Friends, Colleague,
School and VIP already set up
on the phone.
Messaging
Your GD350 includes
functions related to SMS
(Short Message Service),
MMS (Multimedia Message
Service), e-mail as well as the
network’s service messages.
10
Sending a message
1 Press Menu, select
Messaging, and choose
Create message.
2 Choose Message to send
an SMS or MMS.
3 A new message editor will
open. The message editor
combines Text message
and Multimedia messages
into one intuitive and easy
to switch between editor.
The default setting of the
message editor is text
message.
4 Enter the phone number
or press Options and select
Send to add a contact from
the list of your contacts.
You can even add multiple
contacts by selecting Add
recipient.
Note: Message can be sent to
a group also. Edit the message
then press send and select
contact group and select the
group you want.

5 Enter your message.
6 Select Options and choose
Insert to add an Image,
Video clip, Sound clip,
Schedule, Business card,
Note, Text field, To do, or a
Text template.
7 Press Send.
TIP! You can select your
message type as SMS or MMS
when you enter a text longer
than 1 page in the message
field. If you want to change the
type of message to send, press
Menu > Messaging > Message
settings > Text message, and
choose Send long text as.
WARNING: Image, Video clip,
Sound clip, Schedule, Business
card, Text field or Subject is
added to the message editor, it
will be automatically converted
to MMS mode and you will be
charged accordingly.
Entering text
You can enter alphanumeric
characters using the phone’s
keypad. The following text
input methods are available
in the phone: T9 mode, Abc
mode and 123 mode.
Note: Some fields may allow
only one text input mode (e.g.
telephone number in address
book fields).
T9 mode
T9 mode uses a built-in
dictionary to recognise words
you’re writing based on the
key sequences you press.
Simply press the number key
associated with the letter
you want to enter, and the
dictionary will recognise the
word once all the letters are
entered.
11

Using the T9 Mode
1 When you are in the T9
predictive text input mode,
start entering a word by
pressing keys
Press one key per letter.
- If the word is still incorrect
after typing completely,
press the
more to cycle through the
other word options.
- If the desired word is
missing from the word
choices list, add it by using
the Abc mode.
2 Enter the whole word
before editing or deleting
any keystrokes.
- To delete letters, press the
CLR.
- Complete each word with
a space by pressing the
12
to .
key once or
key.
Abc mode
This mode allows you to enter
letters by pressing the key
labeled with the required
letter once, twice, three or
four times until the letter is
displayed.
123 mode
Type numbers using one
keystroke per number. You
can also add numbers while
remaining in letter modes
by pressing and holding the
desired key.
Setting up your e-mail
You can stay in touch on the
move using e-mail on your
GD350. It’s quick and simple
to set up a POP3 or IMAP4
e-mail account.
1 Press Menu, select
Messaging, and choose
Message Settings.
2 Select E-mail then E-mail
accounts.

3 Press Add and follow the
pop up instruction and
enter the information
required.
Sending an e-mail using
your new account
To send/receive an e-mail,
you should set up an e-mail
account.
1 Select Menu, select
Messaging and choose
Create message.
2 Choose E-mail and a new
e-mail will open.
3 Enter the recipient’s
address and write a subject.
4 Enter your message.
5 Press Options, select Insert
to add an Image, Video
clip, Sound clip, Business
card, Schedule or a Note.
6 Press Send and your e-mail
will be sent.
Message folders
Press Menu, select
Messaging. The folder
structure used on your GD350
is fairly self explanatory.
Create message - Allows you
to create new message.
Inbox - All the messages you
receive are placed into your
Inbox. From here you can
reply, forward and more.
My mailbox - All your e-mails
you receive are placed into
My mailbox.
Drafts - If you don’t have time
to finish writing a message,
you can save what you have
written so far in here.
Outbox - This is a temporary
storage folder used while
messages are being sent.
Sent items - Copies of all the
messages you send are kept
into your Sent items.
13

Saved Items - You can access
your Saved messages, Text
templates and Multimedia
templates.
Emoticons - A list of useful
emoticons already written for
a quick reply. You can add,
edit and delete emoticons.
You can insert the emoticon
which you preferred on
writing a message.
Message settings - Your
message settings are predefined so that you can send
messages immediately. If
you would like to change the
settings, you can do this using
the settings options.
Camera
Using the camera module
built in your phone, you
can take pictures of people.
Additionally, you can send
photos to other people and
select photos as wallpaper.
14
Taking a quick photo
1 Press Menu and select
Media. Select Camera to
open the viewfinder.
2 Holding the phone and,
point the lens towards the
subject of the photo.
3 Press
key to take a
photo.
Video camera
Shooting a quick video
1 Press Menu and select
Media, then choose Video.
2 Point the camera lens
towards the subject of the
video.
3 Press
4 REC will appear in the
5 Select Stop to stop
key to start
recording.
viewfinder and a timer will
show the length of your
video.
recording.

Music
Your GD350 has a built-in
music player so you can play all
your favourite music.
Playing a song
1 Press Menu and select
Media, then choose Music.
2 Choose All tracks then
select the song you want to
play.
3 Select
4 Select
5 Select to skip to the
6 Select Back to stop the
Note: Music is copyright
protected in inte rnational
treaties and national copyright
laws. It may be necessary to
obtain permission or licence
to reproduce or copy music. In
some countries national law
to pause the
song.
to skip to the
next song.
previous song.
music and return to the
music player menu.
prohibits private copying of
copyrighted material. Please
check the national legislation
of the applicable country
concerning the use of such
materials.
FM radio
Your GD350 has an FM radio
feature so you can tune into
your favourite stations and
listen on the move.
Note: You will need to insert
your headset in order to listen
to the radio. Insert the plug into
the headset connector in order
to listen to the radio and keep
the good radio reception.
Searching for stations
1 Press Menu and select
Media, then choose FM
radio.
2 Select Option and choose
Auto scan then select Yes.
You can also use the left
and right navigation keys to
search for stations.
15

Listening to the radio
1 Press Menu and select
Media, then choose FM
radio.
2 Select the channel number
of the station you would
like to listen to.
TIP! You can listen to the
radio via built-in speaker. Press
Options, select Listen via
speaker.
Recording the Radio
1 Press key during
listening to the radio.
2 The recording time is
displayed on your phone.
If you want to stop the
recording, press
If recording is done, the
recorded contents will be
saved in Gallery as mp3 file.
16
key.
Voice recorder
Use your Voice recorder to
record voice memos or other
sounds.
Recording your voice memo
1 Press Menu and select
Media, then choose Voice
recorder.
2 Press
3 Choose
4 Press Options and select
key to begin
recording.
key to end the
recording.
Play to listen to the
recording.
Ringtone creator
Creating your ringtone
1 Press Menu and select
Media, then choose
Ringtone creator.
2 Select the music what you
would like to use in music
lists, and then select
key.

3 Select Cut when you want
to start recoding music to
use as a Ringtone while
playing music.
4 Select Stop to stop.
5 Select Save and choose
from Original file or New
file. Then select Save.
Gallery
You can store any media files
into your phone’s memory
so that you have easy
access to all of your images,
sounds, videos, others and
games. You can also save
your files to a memory card.
The advantage of using a
memory card is that you
can free up space on your
phone’s memory. All your
multimedia files will be saved
in Gallery. Press Menu then
select Gallery to open a list
of folders.
Applications
Your GD350 comes with
preloaded games to keep
you amused when you have
time to spare. If you choose
to download any additional
games or applications they will
be saved into this folder. Press
Menu and select Applications.
Choose My games & apps.
Note: An additional cost is
incurred when connecting to
this service. Check your data
charges with your network
provider.
Organiser
Setting your alarm
(Menu > Organiser >
Alarm clock)
You can set up to 5 alarm clocks
to go off at a specified time.
17

Using the calendar
(Menu > Organiser >
Calendar)
When you enter this menu,
a calendar appears. A square
cursor is located on the current
date. You can move the cursor
to another date using the
navigation keys.
Adding an item to your to
do list (Menu > Organiser >
To-do list)
You can view, edit and add
tasks to do.
Adding a note
(Menu > Organiser > Notes)
You can register your own
notes here.
18
Secret notes
(Menu > Organiser > Secret
notes)
You can write the private
memo to protect your privacy.
You enter the security code to
use this menu.
Using cash book
(Menu > Organiser > Cash
Book)
Cash book is a simple
accounting book that is used to
record basic information about
cash receipts and payments.
It provides you an easy way of
keeping up with how much
money is coming in and what
bills are getting paid.

Calculating your BMI
(Menu > Organiser > BMI
Calculator)
BMI(Body Mass Index) is a
measure of body fat based on
height and weight.
To calculate your BMI, press
Edit and choose gender, enter
your weight and height. Then
select Done.
Using your calculator
(Menu > Organiser >
Calculator)
The calculator provides the
basic arithmetic functions:
addition, subtraction,
multiplication, division and
Scientific applications also.
Using the stopwatch
(Menu > Organiser >
Stopwatch)
This option allows you to use
the function of a stopwatch.
Date finder
(Menu > Organiser > Date
finder)
Date finder is a handy tool to
help you calculate what the
date will be after a certain
amount of days has passed.
Converting a unit
(Menu > Organiser >
Converter)
This converts many
measurements into a unit you
want.
Adding a city to your world
time (Menu > Organiser >
World time)
You can add a required city to
the list of world clock. You can
also check the current time of
major cities around the world.
19

Go to
(Menu > Organiser > Go to)
It helps you to go to the menu
you search for. You can set the
item as Go to.
SIM services
(Menu > Organiser > SIM
services)
This feature depends on SIM
and the network services.
In case the SIM card supports
SAT (i.e. SIM Application
Toolkit) services, this menu
will be the operator specific
service name stored on the
SIM card.
Web
Accessing the wap browser
You can launch the wap
browser and access the
homepage of the activated
profile on Web settings. You
can also manually enter an
URL address and access the
associated wap page.
20
1 Press Menu and select
Web.
2 To access the wap browser
homepage directly, select
Home. Alternately, select
Go to address and type in
your desired URL.
Note: An additional cost is
incurred when connecting to
this service and downloading
content. Check your data
charges with your network
provider.
Settings
Personalising your profiles
(Menu > Settings > Profiles)
You can personalise each
profile
setting. Choose the
profile you want and select
Options and choose Edit.

Using flight mode
(Menu > Settings > Profiles >
Flight mode)
Use this function to switch
the flight mode on. You will
not be able to make calls,
connect to the Internet, send
messages when flight mode is
switched on.
Changing your display
settings
(Menu > Settings > Display)
You can change the settings
for the phone display.
Changing your date & time
(Menu > Settings > Date and
time)
You can set functions relating
to the date and time.
Changing your connectivity
settings
Your connectivity settings
have already been set up by
your network operator, so you
can enjoy your new phone
from switch on. If you want
to change any settings, use
this menu. You can configure
the network setting and data
access profiles in this menu.
Press Menu and select
Settings then choose
Connectivity. Your options
are:
Bluetooth - Set up your
GD350 for Bluetooth use.
You can adapt your visibility
to other devices or search
through devices your phone
is paired with.
USB connection mode - You
can select the USB connection
mode on your phone for
several uses.
21
 Loading...