

Page 1

English
MIDI
HI-FI
Owner's
MODELS
Please
Retainitfor
read
this
future
AUDIO
SYSTEM
Manual
:
FFH-5600A/L/S/AX/AP
FE-5600E
FFH-8900A/L/S/AX/AP
FE-8900E
manual
reference.
carefully
before
operating
your
set.
P/N:
CH01
3828RCD031A
Page 2
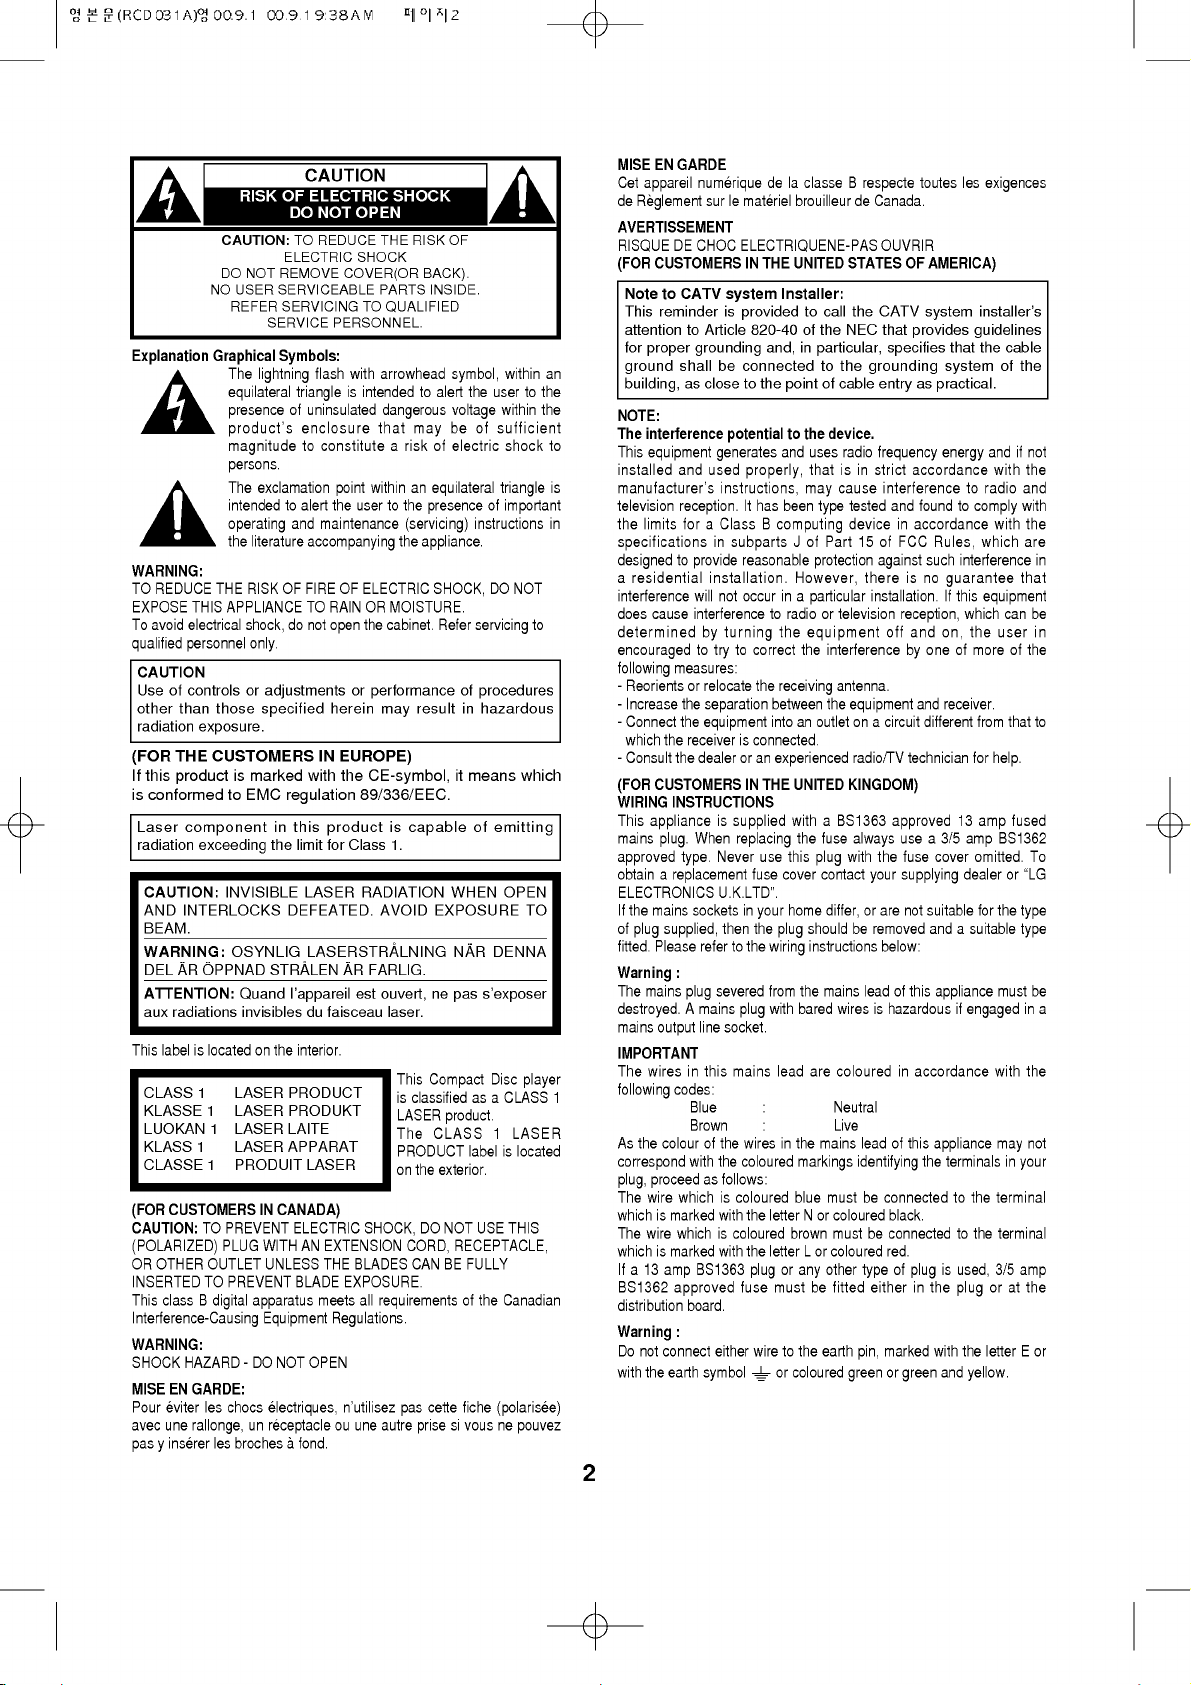
CAUTION:
DO
NOT
NO
USER
REFER
SERVICE
Explanation
Graphical
The
lightning
equilateral
presence
product's
magnitude
persons.
The
exclamation
intendedtoalert
operating
the
literature
WARNING:
TO REDUCE
EXPOSE
To
avoid
qualified
CAUTION
Useofcontrols
other
radiation
(FOR
If
this
is
conformed
Laser
radiation
CAUTION:
AND
BEAM.
WARNING:
DEL
ATTENTION:
aux
This
CLASS
KLASSE
LUOKAN
KLASS
CLASSE
(FOR
CAUTION:
(POLARIZED)
OR
INSERTED
This
Interference-Causing
WARNING:
SHOCK
MISEENGARDE:
Pour
avec
pas
THE
RISKOFFIREOFELECTRIC
THIS
APPLIANCE
electrical
shock,
personnel
than
THE
product
those
exposure.
CUSTOMERS
to
is
only.
or
marked
EMC
specified
component
exceeding
INVISIBLE
INTERLOCKS
OSYNLIG
AR
OPPNAD
Quand
radiations
labelislocatedonthe
CUSTOMERS
OTHER
class
invisiblesdufaisceau
1
LASER
1
LASER
1
LASER
1
LASER
1
PRODUIT
IN
TO
PREVENT
PLUG
WITHANEXTENSION
OUTLET
TO
PREVENT
B
apparatus
digital
Equipment
HAZARD-DO NOT
eviter
les
rallonge,
inserer
chocs
les
un
broches a
une
y
adjustmentsorperformanceofprocedures
UNLESS
electriques,
receptacle
CAUTION
TO
ELECTRIC
REMOVE
SERVICEABLE
SERVICING
Symbols:
flash
triangle
of
uninsulated
enclosure
to
and
accompanying
TO
do
not
with
regulation
in
this
the
limit
LASER
DEFEATED.
REDUCE
IN
THE
RISK
SHOCK
COVER(OR
PARTS
TO
QUALIFIED
PERSONNEL.
with
arrowhead
is
intendedtoalert
dangerous
that
within
user
to
the
the
the
cabinet.
may
CE-symbol,
89/336/EEC.
1.
RADIATION
AVOID
may
an
(servicing)
appliance.
resultinhazardous
constitutearisk of
point
the
maintenance
RAINORMOISTURE.
open
herein
EUROPE)
the
productiscapableofemitting
for
Class
LASERSTRALNING
STRALEN
CANADA)
I'appareil
interior.
PRODUCT
PRODUKT
LAITE
APPARAT
LASER
ELECTRIC
THE
BLADE
meets
AR
FARLIG.
est
ouvert,
SHOCK,
BLADES
EXPOSURE.
all
requirements
laser.
This
is
classified
LASER
The
PRODUCT
on
the
DO
CORD,
CANBEFULLY
Regulations.
OPEN
n'utilisez
ou
fond.
pas
une
autre
prise
OF
BACK).
INSIDE.
symbol,
the
voltage
beofsufficient
electric
equilateral
presence
instructions
SHOCK,
Refer
servicing
it
means
WHEN
EXPOSURE
NAR
ne
pas
s'exposer
Compact
as a
product.
CLASS
labelislocated
exterior.
NOT
USE
RECEPTACLE,
of
the
cette
fiche
si
vous
within
user
to
the
within
the
shock
triangle
of
important
DO
NOT
to
which
OPEN
TO
DENNA
Disc
player
CLASS
1
LASER
THIS
Canadian
(polarisee)
ne
pouvez
MISEENGARDE
Cet
appareil
de
Reglement
AVERTISSEMENT
RISQUE
(FOR
Note
This
attentiontoArticle
for
an
to
is
in
ground
building,
NOTE:
The
This
installed
manufacturer's
television
the
specificationsinsubparts
designed
a
residential
interference
does
determined
encouraged
following
-
Reorientsorrelocate
-
Increase
-
Connect
which
-
Consult
(FOR
WIRING
This
mains
approved
obtain
ELECTRONICS
If
the
of
plug
fitted.
Warning
The
destroyed.
mains
IMPORTANT
The
1
following
As
the
correspond
plug,
The
whichismarked
The
whichismarked
If
a
BS1362
distribution
Warning
Do
with
numerique
sur
DE
CHOC
CUSTOMERS
CATV
to
reminder
proper
grounding
shallbeconnected
as
closetothe
interference
equipment
and
reception.
limits
foraClass
to
provide
will
cause
interferencetoradioortelevision
by
to
measures:
the
separation
the
equipment
the
receiverisconnected.
the dealer
CUSTOMERS
INSTRUCTIONS
applianceissupplied
When
plug.
type.
a
replacement
mains
sockets
supplied,
Please
refertothe
:
mains
plug
A
mains
line
output
wiresinthis
codes:
Blue
Brown
colourofthe
with
as
proceed
wire
whichiscoloured
wire
whichiscoloured
13
BS1363
amp
approved
board.
:
not
connect
the
earth
symbol
delaclasse
le
materiel
ELECTRIQUENE-PAS
IN
THE
system
is
provided
820-40
and,
potential
generates
used
properly,
instructions,
It
has
B
reasonable
installation.
not
occurina
turning
to
correct
try
the
or
an
IN
THE
replacing
Never
use
fuse
U.K.LTD".
in
your
then
the
wiring
severed
from
with
plug
socket.
mains
:
:
wiresinthe
the
coloured
follows:
with
the
letter
with
the
letter
plug
fuse
either
wiretothe
B
brouilleurdeCanada.
UNITED
STATES
Installer:
to
call
of
the
NEC
in
particular,
to
the
of
cable
point
device.
to
the
and
uses
radio
that
is in
cause
may
been
computing
tested
type
deviceinaccordance
JofPart15of
protection
However,
particular
the
equipment
the
interference
antenna.
receiving
between
the
intoanoutlet
equipment
experienced
UNITED
KINGDOM)
withaBS1363
the fuse
this
with
plug
cover
contact
home
differ,
shouldberemoved
plug
instructions
the
mains
bared
wiresishazardous
lead
are
colouredinaccordance
Neutral
Live
mains
markings
blue
must
Norcoloured
brown
must
Lorcoloured
or
other
any
must
be
fitted
earth
or
coloured
greenorgreen
toutes
respecte
OUVRIR
OF
AMERICA)
the
CATV
system
that
provides
specifies
grounding
as
entry
frequency
strict
accordance
interferencetoradio
and
found
FCC
Rules,
such
against
there
is
no
installation.Ifthis
reception,
off
and
oneofmore
by
on
radio/TV
always
and
a
circuit
different
technician
approved
use
the
fuse
your
supplying
or
are
not
below:
leadofthis
leadofthis
identifying
type
pin,
the
be
connectedtothe
black.
be
connectedtothe
red.
of
plug
eitherinthe
marked
a
cover
suitable
andasuitable
appliance
appliance
with
les
exigences
installer's
guidelines
that
the
system
practical.
and
energy
to
comply
which
interference
guarantee
equipment
which
the
on,
receiver.
from
for
help.
13
amp
3/5
amp
omitted.
dealeror"LG
for
if
engaged
terminals
is
used,
or
plug
the
letter
and
yellow.
cable
of
the
if
with
with
that
can
user
of
that
fused
BS1362
the
type
type
must
with
may
in
your
terminal
terminal
3/5
amp
at
not
the
and
with
the
are
the
in
the
not
the
E
in
be
in
to
To
be
a
or
2
Page 3

IMPORTANT
SAFETY
INSTRCTIONS
FOR
CUSTOMERS
CAUTION:
?
Read
?
Save
?
Follow
audio
?
Read
instructions
operated.
?
Retain
instructions
?
Heed
in
the
?
Follow
instructions
?
Cleaning
outlet
or
aerosol
?
Attachments
recommended
they
?
Water
near
bowl,
basement;
?
Accessories
unstable
product
or
adult,
only
recommended
product.
the
mounting
manufacturer.
?
A
product
moved
and
cart
allofthese
these
instructions
all
warnings
equipment.
instructions
should
instructions
should
Warnings
operatiog
instructions
should
-
before
cleaners.
cause
may
and
Moisture
water-for
kitchen
or
cart,
may
and
with
a
Any
with
mounting
accessory
and
care.
surfaces
manufacturer's
uneven
combination
IN
THE
instructions.
and
-
be
be
-
All
instructions
be
Unplug
cleaning.
Use
-
Do
the
by
hazards.
example,
sink,
near
a
swimming
-
Do
not
stand,
fall,
causing
serious
stand,
the
by
instructions
cart
Quick
to
overturn.
UNITED
for later
instructions
All
the
read
-
The
retained
warnings
should
-
All
followed.
this
product
Do
not
a
damp
not
use
product
-
Do
near
or
laundry
place
tripod,
serious
damage
tripod,
manufactur
of
the
recommended
combination
stops,
cause
may
STATES
use.
safety
before
safety
for
future
on
the
operating
use
cloth
attachments
manufacturer
not
use
a
bath
pool;
this
bracket,
injury
to
the
bracket,
or
product
and
excessive
the
maked
and
the
and
product
be
followed.
from
liquid
for
this
tub;
and
product
or
product.
sold
should
should
should
product
on
operating
product
operating
reference.
and
use
the
wall
cleaners
cleaning.
product
wash
tub,
in
a
wet
the
like.
on an
table.
The
to
a
child
Use
or
table
with
follow
use
by
force,
and
the
and
not
the
the
?
Ventilation
provided
operation
overheating,
blocked
blocked
or
other
This
installation
is
proper
facturer's
?
Power
only
the
marking
power
dealer
intended
sources,
?
Grounding
equipped
plug(aplug
other).
one
as
to
the
way.
insert
plug.
your
not
defeat
?
Power-Cord
should
walked
against
at
plugs,
where
?
Protective
equipped
a
be
protection.
Manual
device.
sure
replacement
that
original
?
Lightning
duringalightning
unattended
unplug
antenna
to
the
-
Slots
for
of
or
covered.
by
placing
similar
product
such
ventilation
instructions
Sources
from
the
label.
supply
or
local
to
operate
refertothe
or
with
This
plug
This
the
plug
If
the
electrician
the
be
routed
on
or
them,
convenience
exit
they
Attachment
withanattachment
This
for
replacement
If
replacement
the
service
has
the
plug.
-
For
and
it
from
or
cable
product
and
ventilation
the
product
and
these
The
the
surface.
should
as
-
This
of
type
If
you
to
your
power
operating
Polarization
a
polarized
having
will
is
a
safety
fully
plug
to
replace
safety
Protection
so
pinched
paying
from
is
a
safety
play
specified
same
added
unused
the
wall
system.
due
openings
and
to
and
openings
openings
be
bookcase
provided
been
are
not
consult
company.
battery
-
on
placed
should
source
instructions.
This
product
not
a
is
have
product
power
home,
from
alternating-current
one
blade
fit
into
the
feature.
into
the
should
outlet,
still
your
of
by
-
they
items
the
Power
are
pupose
that
particular
receptacles,
the
product.
Plug
plug
feature.
or
resttingorprotective
of
the
technician
plugisrequired,
by
overload
protection
storm,
to
or
for
long
outlet
and
This
will
lightning
in
the
cabinet
ensure
to
protect
must
should
a
bed,
inabuilt-in
or
rack
or
the
followed.
be
indicated
sure
of
the
your
For
power,
product
wider
outlet
power
If
are
you
try
fail
to
obsolete
fit,
polarized
supply
not
likely
placed
attention
and
-
The
product
having
See
has
the
manufacturer
protection
for this
when
periods
disconnect
prevent
and
power-line
reliable
it
from
not
never
sofa,
rug,
unless
manu-
operated
type
product
products
or
other
may
line
than
the
only
unable
reversing
contact
outlet.
plug.
cords
to
upon
to
cords
the
point
overload
Instruction
used
as
the
product
itisleft
of
time,
damage
are
be
be
on
of
be
Do
be
or
is
be
a
the
surges.
3
Page 4

IMPORTANT
SAFETY
ELECTRIC
SERVICE
EQUIPMENT
NEC-NATIONAL
GROUND
CLAMP
ELECTRICAL
INSTRCTIONS
CODE
ANTENNA
LEAD
WIRE
IN
ANTENNA
DISCHARGE
(NEC
GROUNDING
(NEC
GROUND
POWER
ELECTRODE
(NEC
SECTION
SECTION
ART
CLAMPS
SERVICE
250,
UNIT
810-20)
CONDUCTORS
810-21)
SYSTEM
PART
GROUNDING
H)
?
Outdoor
or
the
provide
built-up
?
Article
ANSI/NFPA
proper
structure,
discharge
of
electrodes,
electrode.
?
Power
be
other
fall
an
taken
circuits
?
Overloading
cords,
can
?
Object
kind
touch
could
liquid
?
Servicing
yourselfasopeningorremoving
you
servicingtoqualified
?
Damage
from
service
a)
b)Ifliquid
cable
antenna
antenna
located
electric
into
outside
result
into this
dangerous
of
to
the
When
the
Antenna
system
some
static
810
grounding
grounding
unit,
Lines-An
such
to
keep
as
contact
or
integral
inariskoffireorelectric
and
result
any
-
dangerous
Requiring
wall
personnel
the
has
Grounding
is
connected
or
cable
system
protection
charges.
of
the
70
discharge
and
in
the
light
power
antenna
-
Do
Liquid
poroduct
inafireorelectric
kindonthe
Do
outlet
National
proviedes
of
of
size
of
grounding
unit,
requirements
outside
vicinity
or
power
linesorcircuits.
system,
from
touching
with
them
not
overload
convenience
Entry
through
voltage
not
attempt
voltage
service
Service
and
under
the
product.
the
power-supply
been
spilled,orobjects
product.
against voltage
the
of
-
points
-
Ifanoutside
to
the
product,
is
grounded
Electrical
information
mast
lead-in
connection
antenna
overhead
circuits,
extreme
might
Never
openingsasthey
to
or
other
personnel.
-
refer
following
cord
with
and
supporting
wire
toanantenna
conductors,
to
for
the
system
power
or
where
When
care
such
power
be
fatal.
wall
outlets,
receptacles,
shock.
push
objects
or
short-out
shock.
service
covers
Unplug
servicingtoqualified
or
this
may
hazards.
this
conditions:
plugisdamaged.
have
antenna
be
so
as
surges
Code,
regard
location
grounding
grounding
should
lines
it
installing
should
lines
extension
as
of
parts
Never
product
expose
Refer
product
fallen
sure
to
and
to
not
or
can
be
or
this
any
may
that
spill
all
into
If
the
c)
If
the
d)
following
those
instructions
controls
require
restore
If
the
e)
any
When
f)
performance,
?
Replacement
required,
replacement
have
Unauthorized
shock,
?
Safety
repairs
perform
in
proper
?
Wall
mounted
the
manufacturer.
?
Heat
heat
stoves,
produce
product
controls
product
way.
the
or
Check
to
safety
operating
or
Ceiling
to
-
The
sources
or
heat.
product
the
may
extensive
the
product
the
product
be
sure
parts
same
substitutions
other
this
a
wall
product
other
has
been
does
operating
that
are
as
an
improper
result
work
to
has
been
exhibitsadistinct
this
indicatesaneed
-
Parts
hazards.
-
product,
checks
such
When
the
service
specified
characteristics
Upon
to
condition.
Mounting
or
ceiling
should
as
products
exposed
not
operate
instructions.
covered
adjustment
in
damage
byaqualified
its
normal
dropped
replacement
technician
the
by
as
result
may
completion
ask
the
service
determine
-
The
as
only
be
situated
radiators,
(including
to
rain
or
normally
Adjust
the
by
and
technician
operation.
or
damaged
change
for
service.
manufacturer
the
original
in
fire,
of
service
any
technician
that
the
product
recommended
away
heat
registers,
amplifiers)
water.
only
operating
of
other
will
often
parts
has
used
parts.
electric
product
should
from
that
by
to
in
in
are
or
or
to
is
be
by
4
Page 5

OPERATING
ELEMENTS
FRONT
33
VIEW
DISC
1
12
34567
8
9
10
11
12
13141516
BACK
32
31
30
29
VOLUME
CONTROL
17
28
27
26
25
24
23
22
21
20
19
18
VIEW
OPTION
ANT
AUX
(PHONO)
SPEAKER
38
37
RL
L
R
34
35
36
FRONT
1.
MDSS(Multi
2.
POWER
3.
HI-TONE
4.
DEMO
5.
UBB
6.
CLOCK
7.
TIMER
8.
DISPLAY
9.
HEADPHONE
10.
PROGRAM/MEMORY
11.
CD
12.
DECK
13.
EQ.
14.
MODE/RIF
15.
RECORD/RECORD
16.
TUNING
VIEW
button
button
button
(Ultra
button
button
MODE
REPEAT
A(PLAYBACK)
PATTERN
DOWN/UP,
FORWARD,
17.
EQ
18.
19.
20.
21.
22.
23.
PATTERN(VACAL,
DECK
B(REC/PLAY)
MIC
socket(OPTIONAL)
MIC
volume(OPTIONAL)
DUBBING(Normal/High
PLAY
MODE/COUNTER
CD
PAUSE/COUNTER
CD
PAUSE(OPTIONAL)
Dynamic
Bass
Booster)
button
socket(PHONES)
button
button(FLAT,
button
PAUSE
CD TRACK
Sound
System)
button
button
ROCK,
button
TAPE
REWIND/FAST
SKIP/SEARCH
CLASSIC,
Speed)
RESET(OPTIONAL)
RESET
button
button
POP)
JAZZ)
buttons
button
24.
CD
SYNCRO
25.
FUNCTION
26.
VOLUME
27.
JOG
DIAL
?
PRESET
?
ADJUST
?
SKIP
28.
TUNER/BAND,
29.
CD
DOOR
30.
CD
OPEN/CLOSE
31.
DISK
SKIP
32.
CD
DIRECT
33.
REMOTE SENSOR
BACK
34.
35.
36.
37.
38.
VIEW
ANTENNA(AERIAL)
AUXILIARY/PHONO(OPTIONAL)
SPEAKER
VOLTAGE
POWER
RECORDING
SELECT
Knob
DOWN/UP
DOWN/UP(CLOCK/TIMER)
DOWN/UP(CD
CD
button
PLAY
terminal
SELECTOR(OPTIONAL)
CORD
button
button(TAPE
TRACK)
button
button
buttons(DISC
terminal
1,
INPUT
A/B,
2,
AUX)
3)
socket
5
Page 6

FUNCTION
DISPLAY
1.
CD
2.
CD
3.
CD
4.
CD
5.
CD
6.
FUNCTION,
UBB
7.
FM
8.
FM
9.
CLOCK,
FREQUENCY
10.
RIF(Radio
11.
AUTO
12.
DISC
13.
MEMORY
14.
MUTE
15.
SLEEP
29
28
27
26
25
MUSIC
SYNCHRO
PLAY/PAUSE
PROGRAM
REPEAT
display
STEREO
STEREO
TAPE
TUNING
NO.
indicator
indicator
CALENDAR
RECORDING
indicator
indicator
VOLUME
RECEIVING
indicator
COUNTER,
display
Interference
indicator
indicator
indicator
12
1234
5678
9101112
13141516
A
B
indicator
LEVEL,
Filter)
3
REC
2324
indicator
indicator
CD
indicator
4
22
indicator
MDSS,
PLAYING
5678
21
HI-TONE,
TIME,
20
16.
17.
18.
19.
20.
21.
22.
23.
24.
25.
26.
27.
28.
29.
91
VOLUME
TIMER
LEVEL
UBB
indicator
indicator
indicator
HI-TONE
PATTERN
EQ
CD
RANDOM
RECORD/RECORD
TAPE
DUBBING
(High
Speed/Normal
DECK
B
TAPE
DIRECTION
PLAY
MODE
ONLY
(USE
DECK
A
CD
MUSIC
LEVEL
indicator
TAPE
AUTO
TAPE
CALENDAR
0
1819
indicator
indicator
PLAY
indicator
entered
indicator
entered
1 1 1
17
indicator
PAUSE
Speed)
indicator
REVERSE
OVER
2
16
indicator
DECK)
indicator
13
14
15
REMOTE
1
OPTIONAL
2
3
4
OPTIONAL
CONTROL
5
6
7
8
910
1.
POWER
2.
SLEEP
3.
MUTE
4.
DECK
button
button
button
CONTROL
buttons
·DECKA=DECKASelect
·DECKB=DECKBSelect
·
RECORD/RECORD
·
FORWARD
·
BACKWARD
·STOP(
·
REWIND/FAST
5.
MDSS(Multi
6.
FUNCTION
·
TUNER(BAND)
·CD
·
TAPE
·
AUX/PHONO(OPTIONAL)
7.
PRESET
8.
CD
CONTROL
·
PLAY/PAUSE(
·
SKIP/SEARCH(
·
STOP/CLEAR
·
RANDOM
·
DISC
SKIP
·
REPEAT
·
PROGRAM
9.
VOLUME
10.
PATTERN
EQ
PLAY
)
Danamic
SELECT
buttons
button
PLAY
FORWARD(
buttons
( )
button
PAUSE(
( )
( )
Sound
buttons
)
:
OPTIONAL
System)
)
)
button
)
6
Page 7

REMOTE
CONTROL
Approx.
7m
30
Control
DISC1DSC2
DISC
3 DSC
SKIP
OPEN/CLOSE
CHANGER
16
BIT
DUAL
D/A
CONVERTER
POWER
MDSS
ON/STANDBY
R
PROCESSOR
HI-TONE
DEMO
UBB
TUNER/BAND
CD
CLOCK
DISPAYMODE
CLOCK
DOWN
PROGMEMORY
REPEAT
MODE/RIF
REC/PAUSE
PLAY
ROK
POP
PHONE
PRESET
DOWN
OPEN
TAPE
A
PLAY
CONTINUOUS
PLAY
MULTI
DYNAMIC
SOUND
VOLUME
CONTROL
UP
DOWN
DIAL
JOG
CON
MULTI
ROL
TAPE
A/B
AUX
COUINT
RESET
TUNINGUPTUNIN
HIGH-DUBBING-
NORMAL
CD
SYNC.
CD
PAUSE
VOCAL
CLASSIC JAZZ
PRESET
CLAR/SET
UP
OPEN
TAPE
B
REC/
PLAY
SHYNCRO
DUBBING
MIDI
COMPONENT
YSTEM
The
showninthe
NOTE
Strong
device
functioning
Notes
30
Your
Use
remote
and
light
of
on
remote
two
Range
control
illustration.
or
obstacles
the
stereo
the
remote
Batteries
control
"AAA(UM-4.
device
system
is
between
control.
comes
IEC
designed
the
interfere
may
R03)"
with
type
for
remote
the
control
with
batteries.
high
quality
range
the
batteries.
When
accurately
Replace
Install
battery
polarity
Do
an
When
time,
electrolyte
not
old
the
the
two
"AAA"
polarity(
might
use
ones
are
you
remove
leakage.
remote
at
maximum
worn
damage
different
with
new
not
the
out
type
types
going
batteries
control
distance
batteries
batteries,
and
the
unit.
of
one.
to
fails
with
Reversed
).
batteries
use
to
to
from
new
observing
together,
the
unit
prevent
operate
the
ones.
correct
battery
for
a
possible
unit.
or
long
CONNECTIONS
AUDIO
OUT
Connection
the
AUX
or
PHONO
Sockets
OPTION
P
H
O
N
RL
O
A
U
X
RL
Two
phono
the
back
of
example,
recorders
But
can
a
or
if
your
system
playbyconnecting
Connection
Insert
the
red
the
red
terminal
Insert
the
black
Left
sockets
the
unit
record
tape
recorders.)
the
wireofthe
marked(
wire
Speaker
marked
for
player
has
into
connecting
with
the
'PHONO
the
external
Loud
right/left
at
)
the
black
L
R
'AUX'
are
other
a
pre
amplifier,
R/L'
recordplayer.
Speakers
hand
the
backofthe
terminal
Right
Speaker
provided
units(for
sockets,
speaker
unit.
marked(
on
video
you
into
).
7
Page 8

CONNECTIONS
Antenna(aerial)
For
the
For
the
1
2
75
models
European
BAND(FM/AM)
ohms
FM
antenna(aerial)
coaxial
indoor
for
cable
Position
for
it
the
best
reception
other
and
U.K.
Connection
countries
model
AREA
FM
external
antenna(aerial)
(not
supplied)
GND
figure
figure
AM
FM
1
2
3
,
4
,
.
.
AM
loop
(aerial)...
antenna
included
IMPORTANT
FM
Antenna
Unless
antenna
FM
indoor
marked
2
3
BAND(FM/MW/LW)
radio
is
FM
(aerial)
signals
necessary,
antenna
on
the
For
MW/LW
the
loop
terminal
MW
/LW
FM
75Ω
Connection
are
simply
(aerial)
backofthe
reception,
antenna
(aerial)
marked
MW/LW
very
AREA
connect
to
connect
wire
unit.
the
weak,
no
the
to
the
MW/LW
antenna
FM
antenna(aerial)
(not
external
supplied
terminal
loop
(aerial)
external
supplied)
3
3
BAND(FM/MW/SW)
SW
4
cable
2
BAND[FM/AM(MW)]
For
AM(MW)
the
antenna
loop
marked
terminal
AM
FM
75Ω
reception,
(aerial)
AM
AREA
FM
MW
antenna
loop
MW
GND
SW
Antenna
(aerial)
FM
indoor
antenna
(aerial)
for
Position
it
reception
WIRE
WIRE
the
best
FM
MW
ANTENNA
TWISTED
LINE
FM
ANTENNA
external
antenna(aerial)
(not
supplied)
coaxial
connect
to
AREA
AM(MW)
the
FM
antenna(aerial)
(not
antenna
external
supplied)
loop
(aerial)
8
Page 9

CLOCK
SETTING
Example
1.
Press
set,
than
-
The
2.
Select
pressing
turn
(or
press
1.5
hours
TUNING
DOWN
the
a
:
Set
CLOCK
and
hold
seconds)
begin
24
hour
PRESET
JOG
the
DIAL
JOG
CONTROL
MULTI
PRESETCLEAR/SET
DOWN
to
button.(If
the
to
CLOCK
cycle
DOWN(
DIAL).
TUNING
UP
PRESET
UP
in
9:25
CLOCK
the
the
clock
button
blink.
or
12
hour
or
)
(24HR) (12HR)
or
morning
is
for
cycle
UP
( )
AM
already
more
by
button
5.
Press
6.
Set
( )
the
TUNING
DOWN
PRESETCLEAR/SET
DOWN
the
button
TUNING
DOWN
CLEAR/SET
DIAL
JOG
MULTI
minute
MULTI
PRESETCLEAR/SET
DOWN
CONTROL
(or
DIAL
JOG
TUNING
UP
ET
with
turn
CONTROL
PRESET
UP
PRESET
the
TUNING
UP
button.
AM
JOG
DOWN(
DIAL).
AM
or
UP
)
3.
Press
4.
Set
( )
the
the
button
hour
TUNING
DOWN
CLEAR/SET
MULTI
TUNING
DOWN
PRESETCLEAR/SET
DOWN
with
turn
(or
MULTI
JOG
JOG
PRESET
DIAL
DIAL
CONTROL
the
CONTROL
button.
TUNING
UP
ET
JOG
TUNING
UP
AM
DOWN(
DIAL).
7.
Press
The
or
UP
)
Information
AM
12:00
PM
12:00
AM
NOTE:
When
a
clock
TUNING
DOWN
power
the
CLEAR/SET
starts
DIAL
JOG
MULTI
CONTROL
PRESETCLEAR/SET
DOWN
on
the
=
midnight
=
noon
interruption
button.
operating.
TUNING
UP
AM
ET
time
occured
more
than
10
seconds.
PRESETCLEAR/SET
DOWN
PRESET
UP
clock
setting
is
erased,
and
"--:--"
will
flashonthe
The
display.
9
Page 10

BEFORE
OPERATING
Volume
Turn
VOLUME
or
counterclockwise
(Or
press
commander.)
Sound
MDSS(Multi
Press
Tone),
The
HI-TONE
it,
press
Toreinforce
Press
'UBB-2'
press
To
reinforce
Press
To
activate
You
impressions:
using
FLAT
ROCK
POP
VOCAL
CLASSIC
JAZZ
Adjustment
clockwise
VOLUME
Quality
dynamic
the
MDSS
bass(UBB)
&
the
MDSS
bass
UBB
repeatedly
is
scrolled
the
buttonsothat
treble
Hi-TONE.
stereo
can
choose
the
selectadesired
PATTERN
EQ
:
linear
:
more
:
less
bass,
:
an
put
:
for
orchestral
:
fill
like
the
flavor
to
decrease
+
or
increase
-
button
to
Adjustment
sound
button
and
UBB
button
frequency
bass,
emphasis
an
indicator
on
sound
between
less
jazz
of
to
surround
again.
so
the
display.
'UBB-OFF'
button.
more
treble
music
club,
harmony
response
on
the
it.
on
system)
reinforce
effect.
lights
that
the
is
6
sound
treble
the
vocal
if
effectively
and
sound
the
treble(Hi-
To
up.
'UBB-1'
To
cancel
scrolled.
fixed
mood.
mode
sound
creates
level,
remote
cancel
sound
by
or
it,
For
personal
Connect
No
MUTE
Press
this
You
can
answer
The
MUTE
MODE/RIF(Radio
To
switch
versa.
receive
STEREO
When
recorded,
used
to
which
were
DEMO
Press
this
demonstrate
To
cancel
button.
DEMO
headphone
sound
comes
button(on
button
mute
the
telephone.
indicator
from
If
the
power
stereo
off.
a
MW(AM),
the
R.I.F.(BEAT-SWITCH)
reduce
not
button
button
for
it,
press
the
During
button
and
to
your
mono
FM
unwanted
heard
the
listening
from
the
remote
mute
your
unit
in
appears
Interference
to
stereo
of
transmission
without
or
LW
before
in
power-off
functionsinthe
the
POWER
demonstration
VOLUME
to
headphone
speakers.
control)
unit.
order,
on
the
display.
Filter)
reception
interference,
broadcasting
"beat"
signals
recording.
or
power-on
display.
button
the
are
operated
for
is
button
POWER
socket.
example,
button
and
too
weak
switch
is
can
and
state
or
DEMO
button,
only.
vice
the
being
be
noise,
to
to
to
RADIO
Tuning
1.
Turn
2.
Press
desired
3.
Keep
button
"AUTO"
inastation
Tuning
1.
Turn
2.
Press
desired
3.
Press
button
station
Storing
1.
To
clear
any
1
Press
than
CLEAR
2
Press
blinked
in
Automatically
on
the
power.
TUNER/BAND
band
TUNING
appears.
depressed
appears
automatically.
in
Manually
on
the
power.
TUNER/BAND
band
appears.
TUNING
briefly
appears.
Stations
any
1.5
the
seconds
is
the
in
programme
PROGRAM/MEMORY
blinkedinthe
CLEAR/SET
the
memory.
RECEPTION
button
DOWN/UP(
for
more
in
DOWN/UP(
and
display.
the
than
display
button
repeatedly,
previously
in
TUNER
button
repeatedly
0.5
and
repeatedly
until
mode
display.
while
or
second.
the
button
unit
or
the
stored
so
CLEAR
until
tunes
until
desired
more
that
2.
To memorize
1
Press
the
2
desired
Press
)
3
Press
MEMORY
4
Press
while
5
Repeat
30
the
3.
)
in
4.
is
stations.
To memorize
number.
1
Selectadesired
2
Press
3
Selectadesired
the
DOWN/UP
appears
4
Press
before
To
recall
?
Press
button
or
press
?
You
DIAL.
the
stations
the
TUNER/BAND
waveband.
the
TUNING
buttontoselectadesired
)
the
PROGRAM/MEMORY
appears
the
PROGRAM/MEMORY
number
preset
JOG
1
step
the
to
in
selectingoradding
station.
PROGRAM/MEMORY
channel
DIAL
or
button,
and
preset
the
PROGRAM/MEMORY
the
stop
channel
presets.
and
hold
the
until
the
desired
it
repeatedly.
can
also
recall
DOWN/UP
and
is
blinked.
3
to
pressing
while
number
PRESET
preset
presets
in
order
buttontoselect
(o
button.
number
preset
be
number
the
number
memorized
the
PRESET
MEMORY
blinks.
DOWN/UP
number
by
using
button
button.
by
button
blinking.
station.
blinks.
channel
turning
()
appears
the
JOG
a
r
again
up
again
to
10
Page 11

CD
PLAYING
Basic
1.
Press
2.
Press
disc
3.
Load
Playing
Place
Playing
After
button
on
NOTICE
To
load
circleofthe
4.
Press
disc
5.
Press
button
Play
closing
played
During
A
tray
proceeds
skipped
To
stop
Press
the
To
pause
Press
button.
To
resume
To
skip
During
button.
During
Play
begins
In
the
The
next
stopped.
the
play
played
Number1disc
Operation
CD
the
the
compartment.
disc
tray
the
compartment.
the
begins
playback
which
tray
play
the
discs
play
play
stop
next
once.
FUNCTION
CD
with
(s)
one
discs
three
placing
to
rotate
3.
an
8cm(3
tray.
CD
PLAY
to
start
with
the
disc
once
only.
has
to
the
number
STOP
(
CD
PAUSE/COUNTER
play,
press
or
in
the
automatically
mode
disc
is
Press
the
disc.
1
OPEN/CLOSE
label
the
or
discs
two
on
trays
discs
two
discs,
the
disc,
in.)
OPEN/CLOSE
( )
(or
play.
the
disconleft
compartment.
no
disc
next
tray.
out
goes
CLEAR/SET)
it
again.
mode,
stop
after
PLAY
Play
to,
begins
skipped
2
Number2disc
button.
side
1
and
2.
press
trays.
put
All
is
The
in
the
press
skipping.
but
( )
and
button
up.
the
Place
it
onto
button
on
remote
side
the
skipped
indicator
display.
button.
RESET
the
(or
all
to
DISC
the
the
to
tray
discs
the
DISC
player
)
the
open
next
inner
close
control)
before
are
and
of
(or
remains
button
discs
the
SKIP
disc
the
play
the
SKIP
are
To
Press
buttons
To
Press
compartment.
the
to
NOTE:
In
open
Changing
Two
disc
This
one
play
one
to
remove
the
disconthe
rotate
the
the
case
and
discs
is
played.
operation
of
start
discs
CD
disc
of
closed
can
disc
the
play.
OPEN/CLOSE
You
back
initial
for
Discs
be
is
only
DISC
can
tray,
tray.
unit,
error
changed
not
DIRECT
button
remove
press
disc
compartment
recovery.
During
while
applicable
PLAY(
two
the
the
during
to
open
discs.
DISC
Play
other
DISC
1,2,3)
the
To
remove
SKIP
button
is
able
remaining
programmed
disc
to
play.
1.
Press
the
CD
OPEN/CLOSE
disc
compartment.
2.
Remove
The
next.
3.
Press
disc
NOTES
Do
disc
If,
television
nearby
affected
Searching
)
to
Track
Your
playbymonitoring
observing
To
search
Keep
desired
To
search
Keep
desired
the
discs
disc
placed
the
CD
compartment.
Do
not
tilt
the
tray
place
at
the
may
the
dislodge
conditions
not
duringCDplay,
is
radio,
televisionorradio.
can
locate
the
CD
back:
the
point.
forward:
the
point.
and
place
on
the
left
OPEN/CLOSE
unit
with
discs.
damage
more
than
same
time.
the
video
distorted,
move
or
this
foraParticular
a
particular
the
high-speed
counter
button
button
in
pressed
pressed
button
other
side
tray
button
discs
loaded.
Usage
the
discs.
one
compact
image
if
staticisheard
unit
further
point
the
display.
and
and
to
discs.
will
be
to
under
disc
of
a
away
Point
inatrack
cueing
release
release
open
played
close
This
these
on
nearby
from
from
during
sound
itatthe
itatthe
may
in
the
the
one
a
the
a
or
11
Page 12

CD
PLAYING
Skipping
Track
You
can
locate
To
return
the
JOG
current
the
skip
the
JOG
by
track.
DIAL
track.
the
one
tracks
DIAL
one.
previous
Press
the
the
Press
clockwise
backward
To
Press
the
one
Repeat
To
Press
press
To
Press
DISC",
play.
To
Press
"REPEAT
To
Program
button
To
Press
display
During
You
NOTICE
Random
[Operating
All
selected
one
play
the
REPEAT
the
PLAY/PAUSE
one
play
the
REPEAT
and
all
play
the
ALL
button
()
repeat
only
the
to
display
cancel
repeat
the
goes
playback
can
also
the
During
repeatedly
(REPEAT
the
During
the
programmed
all
discs.
the
tracks
disc
press
tracks
REPEAT
REPEAT
to
the
Beginning
the
beginning
to
the
beginning
button
once
one
JOG
by
step
button
DIAL
one.
button
to
return
repeatedly
continuouslytoskip
repeatedly
continuouslytoskip
Play
track
repeatedly.
button
to
disc
repeatedly.
button
twice
PLAY/PAUSE
on
all
discs
button three
and
DISC",
to
selected
desired
"REPEAT
play
out.
operate
programmed
one
track(REPEAT
ALL
DISC).
repeat
start
the
play
play,
press
play.
tracks
tracks,
button
repeat
ofanentire
it
1"
play,
is
Play
with
on
can
all
the
only
discsinthe
be
played randomly.
of
any
of
or
turn
to
the
or
or
track(s)
display
button
()
to
display
repeatedly.
the
PLAY/PAUSE
and
press
or
"REPEAT
so
that
play
during
can
you
or
1)
changed
remote
compartment
of
track
on
the
current
counter
beginning
turn
counter-
turn
clockwise
"REPEAT
to
start
"REPEAT
button
()
times
the
ALL
"REPEAT"
playback.
play
all
discs
if
disc,
to
repeat
control]
a
clockwise
tracks
forward
to
REPEAT
DISC".
you
from
a
disc.
of
1"
and
play.
1
to
start
display
in
the
select
of
play
the
To
Press
To
Press
display
or
To
When
selected
to
random
Programmed
The
up
1.
2.
3.
4.
5.
6.
To
Each
pressed
number,
To
?
?
?
To
To
NOTICE
?
?
play
the
cancel
the
skip
the
return
player
to
20
Press
stop
Press
DISC
Press
DIAL)
To
select
button
until
Press
Repeat
Press
check
time
clear
Press
stop
Turn
Press
add
1
Press
for
program
2
Select
SKIP
the
3
Press
change
1
Press
the
2
Select
SKIP
the
3
Press
The DISC
programmed
Random
all
tracks
RANDOM
random
RANDOM
out.
goes
tracksinthe
button
at
random.
to
the
beginning
play.
has
a
tracks
over
the
PROGRAM/MEMORY
mode.
one
of
SKIP
buttontoselectadisc.
the
to
select
the
6th
repeatedly
track
number
the
PROGRAM/MEMORY
2to4.
steps
the
PLAY
the
programmed
the
in
the
stop
and
a
program
the
programmed
the
PROGRAM/MEMORY
and
then
off
the
power.
the
CD
tracks
to
the
PROGRAM/MEMORY
that
the
desired
button
and
JOG
DIAL).
the
PROGRAM/MEMORY
the
programmed
the
PROGRAM/MEMORY
changed
JOG
the
button
DIAL).
the
PROGRAM/MEMORY
program
desired
and
SKIP
play.
play
on
all
discs
button
play
button
random
is
pressed,
The
of
Play
three discs
DISC
or
the
tracks.
track,
press
or
turn
"6"
is
( )
mode,
number
the
program
the
number
track
track
button
be
function
displayed
number.
memory
the
PROGRAM/MEMORY
press
OPEN/CLOSE
the
connot
to
display
so
that
the
SELECTOR
button
the
JOG
button
contents
a
contents
CLEAR
on
or
tracks
on
or
does
done
randomly
RANDOM
mode
play
the
button
current
that
in
any
the
DIAL
in
button.
to
disc
will
be
button.
of
track
the disc
[I
the disc
[ ]
not
during
number,
button.
button.
RANDOM.
in
the
next
track
functions
track
allows
order.
button
(or
the
start
only
during
play
in
buttons
turn
the
JOG
or
continuously
display.
play.
button
a
track
displayed.
button
button.
buttontosearch
button
]
button
button
operate
during
is
00.
with
DISC
(or
to
display
with
DISC
(or
during
programmed
is
of
the
or
is
turn
turn
play.
12
Page 13

AUXILIARY
1.
Switch
connected
sockets.
2.
Press
on
the
the
"AUX"
auxiliary
to
the
function
rear
FUNCTION
device
button.
i.e.
mounted
TV
AUX
or
VCR,
phono
NOTE:
You
see
can
also
RECORDING
record
from
section.
the
auxiliary
input
source,
TAPE
Playback
Preparation
You
can
1.
To
set
the
Switch
the
button.(If
select
the
2.
To
insert
cassette
Open
3.
deck
cassettes
cassette
in
Auto
Select
and
OPEN
cassette
reverse:
which
how
1st
Option
In
case
A
and
In
this
deckAandBis
PLAYBACK
use
necessary
other
cassettes:
with
side
often with
normal
only
cassette
unitonand
function:
press
deck.)
deck
A(or
position.
the
tape
that
you
decks
AorB.
sideofthe
the
of
non-autoreverse(auto
reverse
auto
the
case,
tapes.
the
press
the
button
of
both
B)
Insert
one
sidetothe
wishtohear
cassette
PLAY
MODE
deck
continuous
not
performed.
TAPE
istobe
B.
again
by
or
two
bottom
facing
button.
play
A/B
to
pushing
and
the
played
stop)
between
the
front
deck
the
4.
Playback
Start
or
button
5.
Fast
Press
control
6.
To
Press
The
Tape
Press
or
stop.
During
increases
counter
2nd
In
case
A
and
playback
(reverse
is
forward
button
for
end
playback
the
unit
Counter
the
COUNT
forward
and
decreases.
Option
of
non-autoreverse(auto
B.(Front
:
with
the
side).
not
operated
or
rewind
fast
forward
:
STOP(
stops
automatically
Reset
RESET
( )
during
side
play
PLAY
The
(reverse
in
the
:
on
the
unit
and
CLEAR/SET)
at
button
playing,
reverse
only)
button
side)
non-autoreverse
or
on
to
button.
the
endofthe
while
tape
the
tape
( )
playing,
stop)
(front
the
rewind.
deck
side)
PLAY
deck.
remote
tape.
playing
counter
the
tape
a)
b)
DECK
Front
DECK
One
All
side
Endless
side
side
A
play
B(Auto
loop
only.
Reverse)
:
Unit
reverse
B
and
automatically
endofthe
:
Unit
and
deckBand
automatically
endofthe
:
Like
timesinsuccession
in
deck
plays
sideindeck
stops
plays
reverse
B.
the
tape.
the
tape.
but
front
at
front
side
stops
at
six
or
the
in
the
13
Page 14

RECORDING
Recording
Connected
Preparation
Wind
Use
You
1.
To
Switch
etc.
2.
To
Open
Insertablank
compartment.
3.
PLAY
Select
and
4.
Recording
Press
The
5.
To
Press
you
reverse
NOTES
If
both
MODE
PLAY
6.
To
To
the
To
REC/PAUSE
NOTE
When
PLAY
direction
7.
To
Press
The
the
up
only
can
record
select
the
insert
the
cassette
MODE(OPTIONAL)
the
if
you
or
the
REC
start
recording
the
want
to
side(OPTIONAL).
:
cassette
,
.(Use
interrupt
interrupt
REC/PAUSE
continue
:
the
recording
or
flashes.
end
the
the
unit
stops
from
Equipment
to
tape
normal
tapes.
with
the function
unitonand
the
cassette
compartment
cassette
mode
play
wishtorecord
for
mode
:
REC/PAUSE
indicator
:
REC/PAUSE
record
the
sides
)
always
auto
only
recording
the
recording
button
with
the
button
pause,
of
button)
recording
STOP
(
automatically
a
the
point
deck
B
:
select
:
into
the
with
PLAY
one
both
cassette
button.
flashes.
buttonorPLAY
front
side
The
are
to
start
reverse
:
forashort
again.
recording,
one more
the
the
current
:
CLEAR/SET)
CD,
recording
only.
CD,
TUNER,
B.
cassette
MODE
cassette
sides.
or
recording
be
recorded
with
deck)
press
time.
lamp
recording
at
the
Radio
starts.
button,
side
button
for
begins.
the
front
period,
the
the
(below
button.
endofthe
the
AUX
only
(PLAY
press
or
side
tape.
CD
Synchro
The
CD
CD
and
cassette.
1.
Select the
2.
Open
OPEN/CLOSE
CD
compartment
3.
To
insert
Open
Insertablank
synchro
programmed
the
the
CD
CD
cassette
cassette
recording
function.
button,
cassette
Recording
function
titles
automatically
compartment
insert
again.
:
deck
B.
into
the
discs
cassette
dubs
with
and
a
complete
the
close
into
a
CD
the
compartment.
Rewind
4.
Auto
Select
record
cassette
NOTE
If
the
full
MODE
if
completely
5.
NOTE:
In
case
If
you
continuously,
PLAY
The
seconds
NOTES
1.
the
reverse(OPTIONAL)
the
PLAY
the
front
sides.
:
last
title
when
front
and
on
To
start
the
recording
end.
of
Auto
want
recording
CD
to
record
Press
The
the
change
button.
enters
tape
then
CD
:
If
you
only
programme
cassette
MODE,
side
hastobe
cassette
the
reverse
SYNC.
begins
Stop
deck.(OPTIONAL)
in
the
into
the
player
want
these
to
the
beginning
and
stopped
side
the
titleisrecorded
cassette
:
button.
and
stops
a
new
tape
new
recording
starts
to
record
before
if
you
or
because
recording
side.
automatically
after
tape
prior
mute
playing
the
of
only
for
one
to
mode
and
certain
CD
the
tape.
wish
to
both
the
tape
with
PLAY
again
at
tape
the
press
for
7
recording.
titles,
synchro
is
recording.
2.
If
3.
you
the
desired
turn
(or
synchro
The
function
wishtorecord
track
the
JOG
recording.
with
DIAL)
change
from
the
the
before
is
desired
commencing
not
impossible
select
track,
/
button
CD
during
recording.
14
Page 15

RECORDING
Recording
(Dubbing)
Preparation
Wind
Use
Dubbing
deck
1.
Select
2.
To
Open
Insertarecorded
that
Open
Insertablank
the
up
normal
only
only
B
(recording)
the
insert
cassettes
cassette
wishtodubtothe
you
cassette
compartment
to
recordtothe
TIMER
tape
TAPE
from
to
tapes.
functions
function.
deck
cassette
deck
cassette
and
the
front.
Tape
the
from
:
A.
B.
in
cassette
point
and
front.
the
to
Tape
recording
deck
A(playback)
the
cassette
cassette
side
that
starts.
you
side
wish
3.
To
Rewind
dub(auto
both
dubbing):
cassettes
to
the
beginning
of
the
tape.
Press
to
NOTES
The
The
4.
NOTE
You
DUBBING
The
pause
unit
To
Press
The
dubbing
end
unit
:
cannot
NORMAL
:
function
can
dubbing
the
stops
for
double
starts
does
be
dubbing
STOP
(
automatically
change
DUBBING
speed
up
automatically.
not
to
forward
:
CLEAR/SET)
the
operate
speed
for
normal
dubbing.
direction
at
the
of
and
during
dubbing.
button.
endofthe
dubbing
HIGH
only.
tape.
while
dubbing.
The
volume
hasnoeffectonthe
record
level.
Timer
With
the
reception
and
recording
at
the
time
1.
Check
2.
Press
setting
the
button
indicator
function-TUNER,
display
3.
If
you
CLEAR/SET
in
the
in
turn.
1
Press
one
PLAY:
REC:
Setting
TIMER
and
the
the
want
display
function
recording,CDplay,
from
current
for
turn.
the
the
TUNER
TUNER
TIMER
(If
more
appears
to
select
button
window.
CLEAR/SET
PLAY
auxiliary
the
CD,
play
desired.
mode.
in
of
time.
button
timer
than
in
TAPE,
the
when
and REC.
play
and
can
you
have
tape
source
1.5
the
turned
to
enter
is
already
seconds.)
display
and
AUX-flashesinthe
TUNER,
TUNER
the
'PLAY'
and
button
only
recording
the
playorplay
on
the
timer
set,
press
each
the
press
appears
'REC'
flashes
confirm
to
and
radio
off
2
Turn
the
radio
station
preset
If
the
radio
this
step
operate
it
case,
thatisreceived
3
Press
the
selected
4
Set
the
JOG
DIAL.
5
Press
hour
the
6
Set
the
JOG
DIAL.
7
Press
the
minute
Now
appears
display.
JOG
DIAL
of
numbers.
stations
is
automatically
continuously
will
be
played
before
CLEAR/SET
the
preset
hour
to
CLEAR/SET
the
to
switch
minute
the
to
CLEAR/SET
to
switch
OFF
the
switch
switch
and
to
select
previous
are
nothing
from
the
turn
button
number.
on
button
on.
The
button
on.
the
skipped
step
radio
off
by
minute
on
by
hour
a
desired
programmed
in
memory,
and
you
3
in
this
;
broadcasting
the
unit.
confirm
to
turning
turning
the
confirm
to
flashes.
the
confirm
to
flashesinthe
can
15
Page 16

TIMER
8
9
10
11
4.
To
Each
can
also
To
TIMER
To
so
Programme
same
Set the
DIAL.
Press
selected
has
Switch
The
on
the
as
way
volume
CLEAR/SET
the
volume
remains
been
selected
and
If
you
Follow
the
perfected.
the
offatthe
select
steps
'3.
If
in
system
you
explanation
If
select
you
Follow
steps
select
the
cancel
activateorcheck
cancel
that
or
time
the
select
the
check
the
buttonsothat
the
"
"
check
TIMER,
in
timer
timer
the
timetoswitch
the
time
level
level.
the
display
off.
function
time
AUX:
the
~
11
1
want
section.
CDorTAPE:
the
~
11
4
TUNER'.
the
TIMER
activating
setting
the
"
press
display
to
turn
by
turning
button
and
the
is
automatically
set.
except
select
of
the
steps
'3.
to
explanation
timer.
button
is
or
status.
timer,
press
"
lights
up
the
out.
goes
off
on.
the
confirm
to
timer
the
If
you
section.
pressed
cancel.
the
in
TIMER
in
the
JOG
switched
~
2
TUNER'.
want
You
the
the
setting
3
of
to
you
can
display.
button
4.
When
the
both
cassette
the
cassette
5.
The
timer-off
case
of
power-on
Sleep
Timer
(Operating
When
automatically
elapsed.
1.
2.
the
To
specify
Press
off,
can
see
means
that
minutes.
Each
time
before
it
turns
80...70...etc.
Select
the
To
check
turned
While
button
off.
the
briefly.
displayed
TAPE
decks
tape
function
Setting
with
only
timer
sleep
turned
the
time
SLEEP
the
SLEEP
sleep
and
the
units
the
button
offisreduced
desired
the
for
time
remaining
functionisactive
The
time
about5seconds.
time
programmed
are
fullofthe
in
deckBwillbeselected
will
be
timer
the
remote
is
used,
the
the
for
about5seconds.
off
automatically
pressed
by
to
turn
off.
time
remaining
operated
on.
specified
power
In
the
the
10
minutes.
until
press
until
by
off
the
after
until
button.
'90'
turns
is
playback,
cassette
only
control)
the
power
time
is
turned
display
time
interval
the
power
the
it
turns
tapes;
first.
you
after
i.e.
SLEEP
if
in
the
is
has
This
90
is
off
is
NOTES:
1.
When
playback,
or
deck,
2.
When
REPEAT
3.
When
play
the
ifnodiscisentered
no
cassette
the
TUNER
the
ALL
the
TAPE
mode
automatically.
AUTO
This
unit
has
cassette
desired
the
unit
functions:
an
various
radio
another(e.g.
select
functions.
reception),
the
directly,
function(cassette
following
CD
or
TAPE
is
tape
function
CD
programmed
DISC
willbeselected
time
be
programmed
selected
will
FUNCTION
auto
function select
i.e.
Ifafunctionisin
and
you
playback),
function(cassette
automatically
recorder).This
entered
will
time
in
be
operated.
to
wish
all
you
switches
the
in
playback,
applies
programmed
disc
drawer
the
cassette
the
automatically.
playback,
'
the
'
mode
SELECT
the
for
for
new
the
system
operation(e.g.
to
switch
havetodo
playback)
to
NOTE:
If
you
displayed,
3.
To
If
you
button
the
press
cancel
wish
repeatedly
SLEEP
the
the
SLEEP
the
to
button
SLEEP
sleep
stop
time
the
until
once
button
is
timer
function
10
again
while
set
again.
mode
appears,
while10is
press
the
and
sleep
the
SLEEP
then
time
press
is
displayed.
SYSTEM
1.
On
the
the
remote
unit
to
is
TUNER
CD
TAPE
2.
On
CD
control
:
PRESET
:
PLAY/PAUSE(
:
REVERSE(
PLAY
buttons.
:
DISC
DIRECT
(
DISC1,2,3)
/
buttons
button
)
and
)
PLAY
FORWARD(
buttons
)
16
Page 17

SPECIFICATIONS
SECTION
AMP
Power
Outoput
Frequency
Response
Signal-to-Noise
TUNER
FM
Tuning
Range(optional)
Intermediate
Signal-to-Noise
(Mono/Stereo,
Frequency
Response
AM(MW)
Tuning
Range(optional)
Intermediate
Frequency
Response
SW(OPTIONAL)
Tuning
Range
Intermediate
Signal-to-Noise
LW(OPTIONAL)
Tuning
Range
Intermediate
Signal-to-Noise
CASSETTE
REW
FF,
Frequency
Signal-to-Noise
Channel
Time(C-60)
Response
Separation
CD
Frequency
Signal-to-Noise
Response
GENERAL
Power
Requirements
Not
Demensions(WxHxD)
Net
Weight
MODEL
Ratio
Freqency
Ratio
98MHz)
Frequency
Freqency
Ratio(11MHz)
Frequency
Ratio(254kHz)
DECK
Ratio
Ratio
FFH-5600
50W+50W(6Ω,
dB
MHz
MHz
MHz
dB
kHz
MHz
kHz
dB
kHz
kHz
dB
sec.
dB(P/B),
dB(P/B),
dB
kg
Hz
&
87.5~108
Hz
kHz,
kHz
Hz
Hz
43dB(R/P)
43dB(R/P)
Hz
back
30~25,000
81
87.5~108
65~74
10.7
63/58
60~14,000
522~1,611
or
530~1,610
450
100~2,000
5.8~18.0
450
37
153~281
450
30
130
125~8,000
48
50
40~18,000
73
Refertothe
360x362x374mm
8.5
T.H.D
2ch,
or
530~1,720
panel
FFH-8900
T.H.D
10%)
100W+100W(6Ω,
30~25,000
81
dB
MHz
87.5~108
or
65~74
10.7
MHz
63/58
dB
60~14,000
kHz
522~1,611
or
530~1,610
450
kHz
100~2,000
5.8~18.0
450
kHz
37
dB
153~281
450
kHz
30
dB
130
sec.
125~8,000
48
dB(P/B),
50
dB(P/B),
40~18,000
73
dB
of
the
unit.
Refertothe
360x362x374mm
10.0
kg
Hz
MHz
MHz
&
Hz
kHz,
kHz
Hz
MHz
kHz
Hz
43dB(R/P)
43dB(R/P)
Hz
back
2ch,
87.5~108
530~1,720
of
panel
the
10%)
MHz
kHz
unit.
SECTION
SPEAKER
Type
Impedance
Frequency
Sound
Pressure
Rated
Input
Max.
Input
Net
Demensions(WxHxD)
Net
Weight
NOTE
:
SYSTEM
Response
Power
Power
Designs
The
working
MODEL
Level
and
specifications
life
of
this
product
FE-5600E
Bass
Reflex
2
System
6Ω 6Ω
50~20,000
87
dB/W(1m)
50W
100W
260x410x316mm
Way2Speaker
Hz
4.95kg
are
subjecttochange
is
7
years
since
without
the
date
notice
of
purchase.
Bass
System
45~20,000
87
100W
200W
260x470x316mm
6.6kg
17
Reflex
dB/W(1m)
for
improvement.
FE-8900E
3
Way3Speaker
Hz
Page 18

 Loading...