

LG FB164 Owner's Manual
P/NO : MFL62755711
User Guide
FB164 (FB164-D0P, FBS164V)
As an ENERGY STA R®Partner,
LG has determined that this
product or product models meet
the ENERGY STA R®guidelines for
energy efficiency.
ENERGY
STAR
®
is a U.S. registered mark.
iPod is a trademark of Apple Computer, Inc, registered in the U.S. and other countries.
DEUTSCH
FRANÇAIS
NEDERLANDS
SLOVENŠČINA
ITALIANO
ESPAÑOL
∂§§H¡π∫A
PORTUGUÊS
ENGLISH
English
FB164-D0P_DDEULL_ENG_5702 9/14/09 11:27 AM Page 1
2
CAUTION : TO REDUCE THE RISK OF ELECTRIC SHOCK DO NOT REMOVE
COVER (OR BACK) NO USER-SERVICEABLE PARTS INSIDE REFER SERVICING
TO QUALIFIED SERVICE PERSONNEL.
This lightning flash with arrowhead symbol within an equilateral triangle is
intended to alert the user to the presence of uninsulated dangerous voltage
within the product’s enclosure that may be of sufficient magnitude to
constitute a risk of electric shock to persons.
The exclamation point within an equilateral triangle is intended to alert the
user to the presence of important operating and maintenance (servicing)
instructions in the literature accompanying the product.
WARNING : TO PREVENT FIRE OR ELECTRIC SHOCK HAZARD, DO NOT
EXPOSE THIS PRODUCT TO RAIN OR MOISTURE.
WARNING : Do not install this equipment in a confined space such as a book case or
similar unit.
CAUTION : This product employs a Laser System.
To ensure proper use of this product, please read this owner’s manual carefully and
retain it for future reference. Shall the unit require maintenance, contact an authorized
service center.
Use of controls, adjustments or the performance of procedures other than those
specified herein may result in hazardous radiation exposure.
To prevent direct exposure to laser beam, do not try to open the enclosure. Visible
laser radiation when open. DO NOT STARE INTO BEAM.
CAUTION : The apparatus shall not be exposed to water (dripping or splashing) and
no objects filled with liquids, such as vases, shall be placed on the apparatus.
CAUTION concerning the Power Cord
Most appliances recommend they be placed upon a dedicated circuit ;
That is, a single outlet circuit which powers only that appliance and has no additional
outlets or branch circuits. Check the specification page of this owner's manual to be
certain.
Do not overload wall outlets. Overloaded wall outlets, loose or damaged wall outlets,
extension cords, frayed power cords, or damaged or cracked wire insulation are
dangerous. Any of these conditions could result in electric shock or fire. Periodically
examine the cord of your appliance, and if its appearance indicates damage or
deterioration, unplug it, discontinue use of the appliance, and have the cord replaced
with an exact replacement part by an authorized service center.
Protect the power cord from physical or mechanical abuse, such as being twisted,
kinked, pinched, closed in a door, or walked upon. Pay particular attention to plugs,
wall outlets, and the point where the cord exits the appliance.
To disconnect power from the mains, pull out the mains cord plug. When installing the
product, ensure that the plug is easily accessible.
Disposal of your old appliance
1. When this crossed-out wheeled bin symbol is attached to a product it
means the product is covered by the European Directive 2002/96/EC.
2. All electrical and electronic products should be disposed of separately from
the municipal waste stream via designated collection facilities appointed by
the government or the local authorities.
3. The correct disposal of your old appliance will help prevent potential
negative consequences for the environment and human health.
4. For more detailed information about disposal of your old appliance, please
contact your city office, waste disposal service or the shop where you
purchased the product.
This product is manufactured to comply with EMC Directive
2004/108/EC and Low Voltage Directive 2006/95/EC.
European representative :
LG Electronics Service Europe B.V.
Veluwezoom 15, 1327 AE Almere, The Netherlands
(Tel : +31-036-547-8940)
Safety Precaution
CAUTION
RISK OF ELECTRIC SHOCK
DO NOT OPEN
FB164-D0P_DDEULL_ENG_5702 9/14/09 11:27 AM Page 2
3
Welcome to your New DVD MICRO Hi-Fi SYSTEM
Contents
Setting up 4
Main Unit 5
Remote control 6
OSD initial language settings - Optional 7
Initial settings the Area Code - Optional 7
Adjusting the general settings 8-9
Setting the Clock 10
TV sound EZ setup 10
Displaying disc information 11
Playing a Disc or file 11-13
Listening to the radio 14
Listening to music from your portable player 15
Using an USB device 15
Recording to USB 16
Playing the iPod 17
Language Codes 18
Area Codes 18
Troubleshooting 19
Types of Playable Discs 20
Specifications 21
Precautions in using the touch buttons
• Use the touch buttons with clean and dry hands.
- In a humid environment, wipe out any moisture on the touch buttons
before using.
• Do not press the touch buttons hard to make it work.
- If you apply too much strength, it can damage the sensor of the
touch buttons.
•Touch the button that you want to work in order to operate the function
correctly.
• Be careful not to have any conductive material such as metallic object
on the touch buttons, and it can cause malfunctions.
FB164-D0P_DDEULL_ENG_5702 9/14/09 11:27 AM Page 3
4
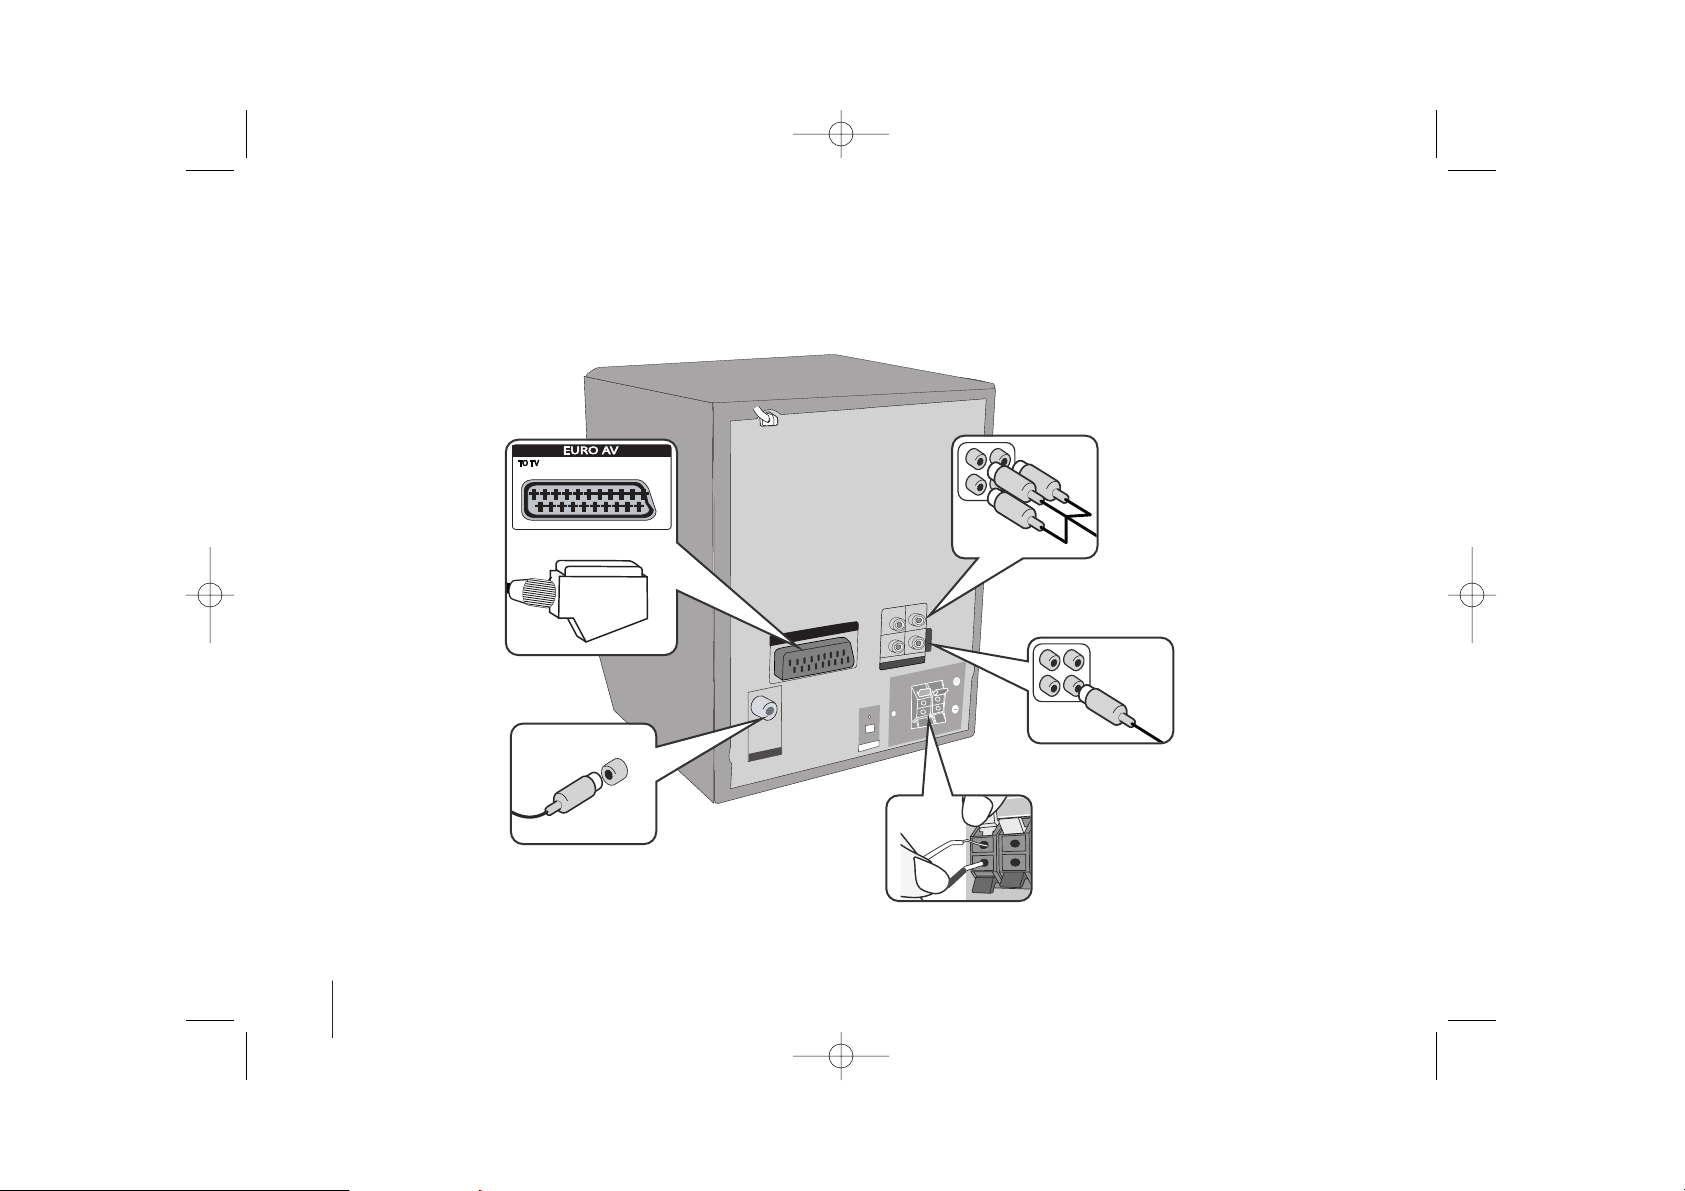
Setting up
Connecting your unit to your TV and aerials.
Component Video connection (B)
Connect the COMPONENT VIDEO
(PROGRESSIVE SCAN) OUTPUT jacks
on the unit to the corresponding input
jacks on your TV using a Y PB PR cable.
- If your TV accepts progressive format
signals, you must use this connection
and set [Progressive Scan] in [Display]
setup to [On] (See page 8).
Stretch the FM aerial.
The reception will be at its best
when the end of the aerial is
stretched to be in a straight line
and horizontal.
b Plug the unit plug into a wall socket.
EURO
AV
O
P
T
IC
A
L
I
N
ANTENNA
OUT PUT
C
O
M
P
O
M
E
N
T
COMPOMENT V
ID
EO
(
P
R
O
G
RE
S
S
IV
E SC
A
N)
VIDEO (PROGRESSIVE SCAN)
P
R
P
B
Y
MONITOR
+
SCART connection (A)
Connect the TO TV jack on
the unit and your TV using
the SCART cable.
a Connect jacks on the unit and your TV (DVD player or Digital Device etc.) using the cables.
Check the jacks of your TV and choose the A, B connection. Picture quality improves in order from A to B.
Video Out connection
(A)
Connect the VIDEO
OUTPUT(MONITOR) jack on
the unit to the corresponding
input jack on your TV using a
Video cable.
Connect the speaker cables to the player
To connect the cable to the unit, press each plastic
finger pad to open the connection terminal. Insert
the wire and release the finger pad.
Connect the black end of each wire to the
terminals marked -(minus) and the other end to the
terminals marked + (plus).
FB164-D0P_DDEULL_ENG_5702 9/14/09 11:27 AM Page 4

5
Main Unit
USB REC.
Recording to USB.
11/]]
(Power)
Turn the unit on and off.
USB Port
iPod Dock
Display Window
EQ/ DEMO
You can choose fixed sound impression.
Press DEMO in power off state to demonstrate the
function on display window. To cancel it, press 11/
]]
or DEMO again.
CLOCK
(See “Setting the Clock” )
TIMER
(See the “Using your player as an alarm clock”)
SET/ RDS
Confirms the settings.
PORTABLE IN
For connecting a portable device and listening to
sound of it through this system’s speakers.
PHONES
Headphone jack
xx
STOP
Stop
]] IIII/ iiii ]]
Scanning/ Tuning/ Searching
BB// XX
Play/ Pause
VOL +/-
Volume control
FUNC.
(Function) Selects the function.
Disc Slot
• Do not push a disc forcibly into the CD slot.
• Do not pull or push a disc while a disc is ejected.
• Press ZZagain to reinsert the disc after ejecting it.
• pick it to the CD slot with the label side toward
ZZ
Ejects or insert the disc from slot loader.
TOP
FRONT
Power Save Mode
You can set up the unit into an economic power
save mode. In power-on status, press and hold
11/]]
button for about 3 seconds.
- Nothing is displayed in the display window when
the unit is turned off.
To cancel, press
11/]]
, CLOCK, TIMER or
EQ/DEMO.
FB164-D0P_DDEULL_ENG_5702 9/14/09 11:27 AM Page 5
VOL +
VOL
-
6
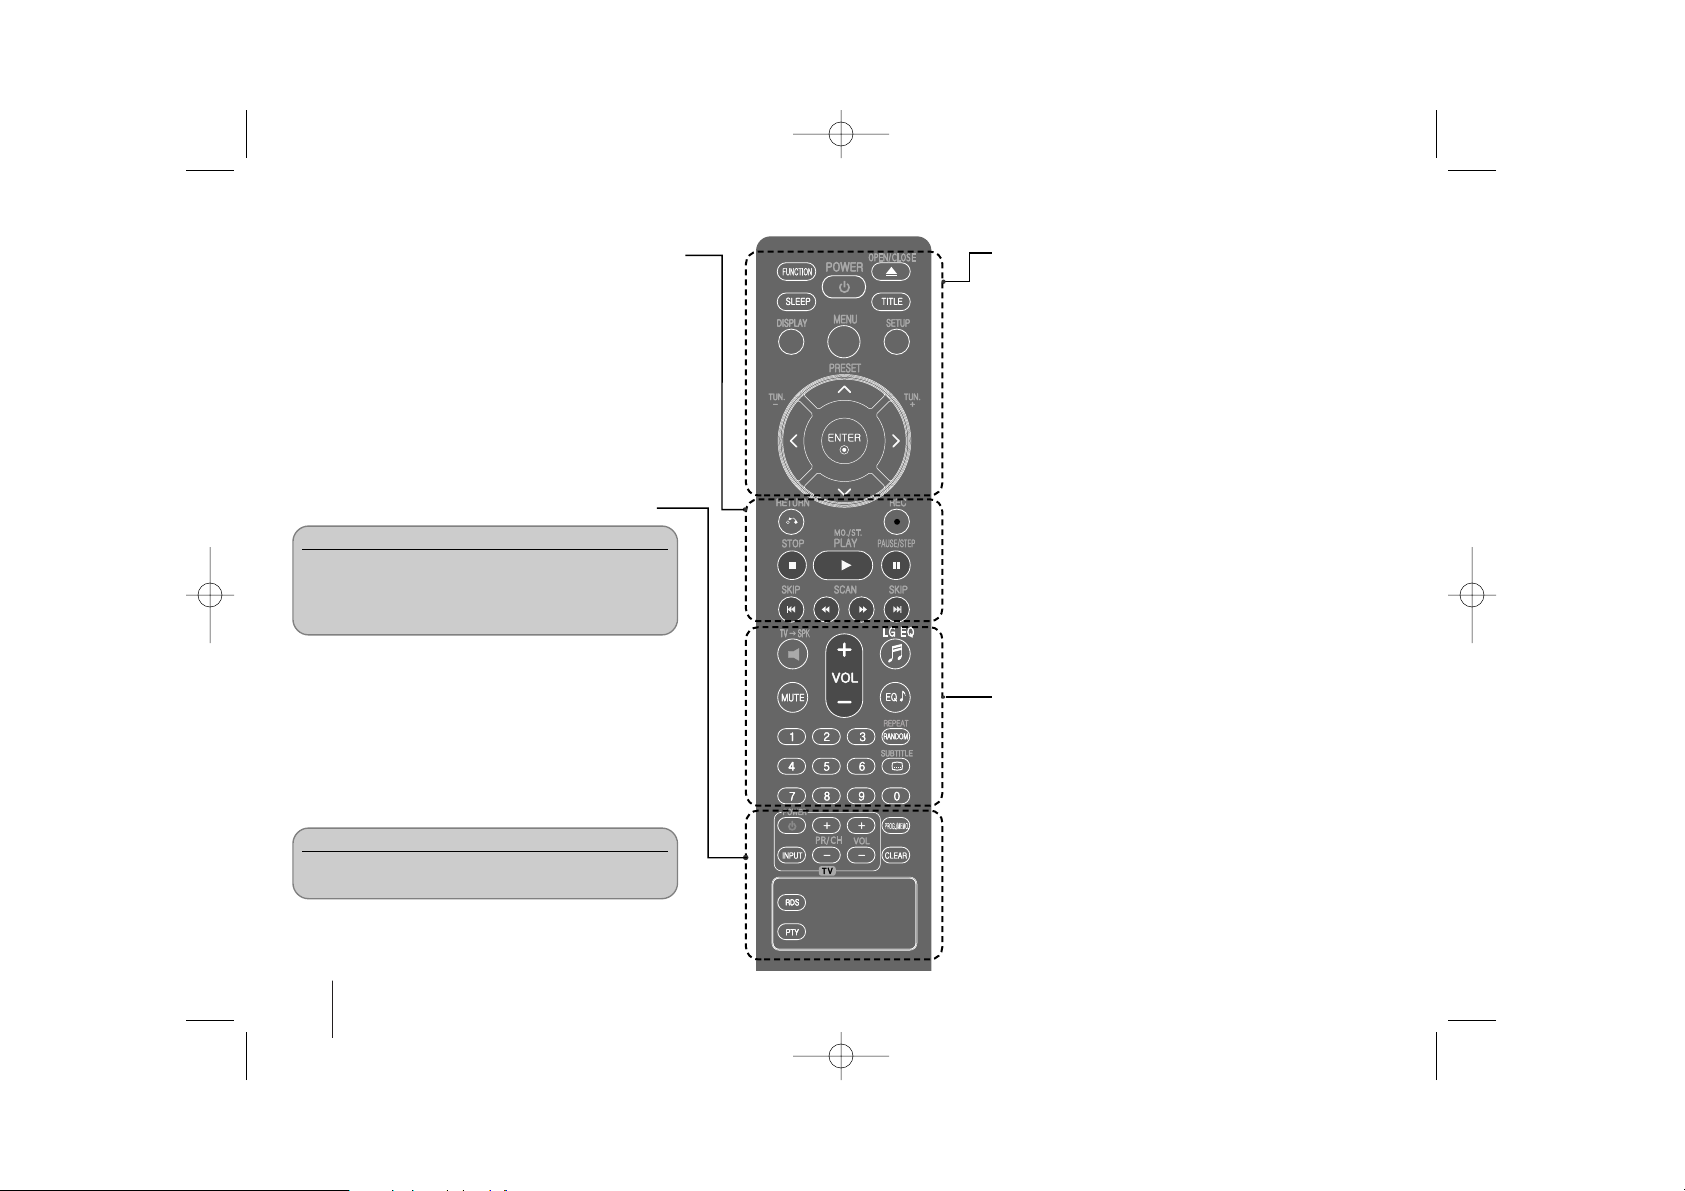
Remote control
RETURN (O) : Moving backwards in the menu or exited
the setup menu.
REC (z):USB Direct Recording
STOP (x) : Stops playback or recording.
PLAY (B), MO./ST. : Starts playback. Selects Mono/
Stereo.
PAUSE/STEP (X) : Pause playback
SKIP (./>) : Go to next or previous chapter/ track/
file.
SCAN (
bbbb//BBBB
) : Search backward or forward.
FUNCTION : Selects the function and input source.
SLEEP : You can select delay time between 10 and 180
minutes, after the player will turn off. To check the
remaining time, press SLEEP. (Dimmer : Press SLEEP
once. Dims the LED (Light-emitting diode) of front panel by
half in power-on status.)
1 POWER : Switches the unit ON or OFF.
Z OPEN/CLOSE : Opens and closes the disc Drawer.
TITLE : If the current DVD title has a menu, the title menu
appears on the screen. Otherwise, the disc menu may not
appear.
DISPLAY : Accesses On-Screen Display.
MENU : Accesses the menu on a DVD disc.
SETUP : Accesses or removes setup menu
PRESET (U u) : Selects programme of Radio.
TUN. (-/+) : Tunes in the desired radio station.
U u I i (up/ down/ left/ right ): Used to navigate onscreen
displays.
ENTER : Acknowledges menu selection.
TVttSPK : To select the AUX OPT directly.
MUTE : To mute the sound.
VOL (Volume) (+/-) : Adjusts speaker volume.
EQ/ LG EQ (Equalizer effect) : You can choose sound
impressions.
REPEAT/RANDOM : To select a play mode. (repeat/
random)
SUBTITLE : During playback, you can select a desired
subtitle language.
0-9 numerical buttons : Selects numbered options in a
menu.
TV Control buttons : Controls the TV. (LG TV only)
PROG./MEMO. : Accesses or removes Program menu.
CLEAR : Removes a track number on the Program List.
RDS : Radio Data System.
PTY : Views the various displays of the RDS.
Controlling the TV.
You can control the sound level, input source, and
power switching of LG TVs as well. Hold POWER (TV)
and press PR/CH (+/–) button repeatedly until the TV
turns on or off.
Put the battery into the remote control.
Make sure that the + (plus) and - (minus) on the
battery match those on the remote control.
FB164-D0P_DDEULL_ENG_5702 9/14/09 11:27 AM Page 6
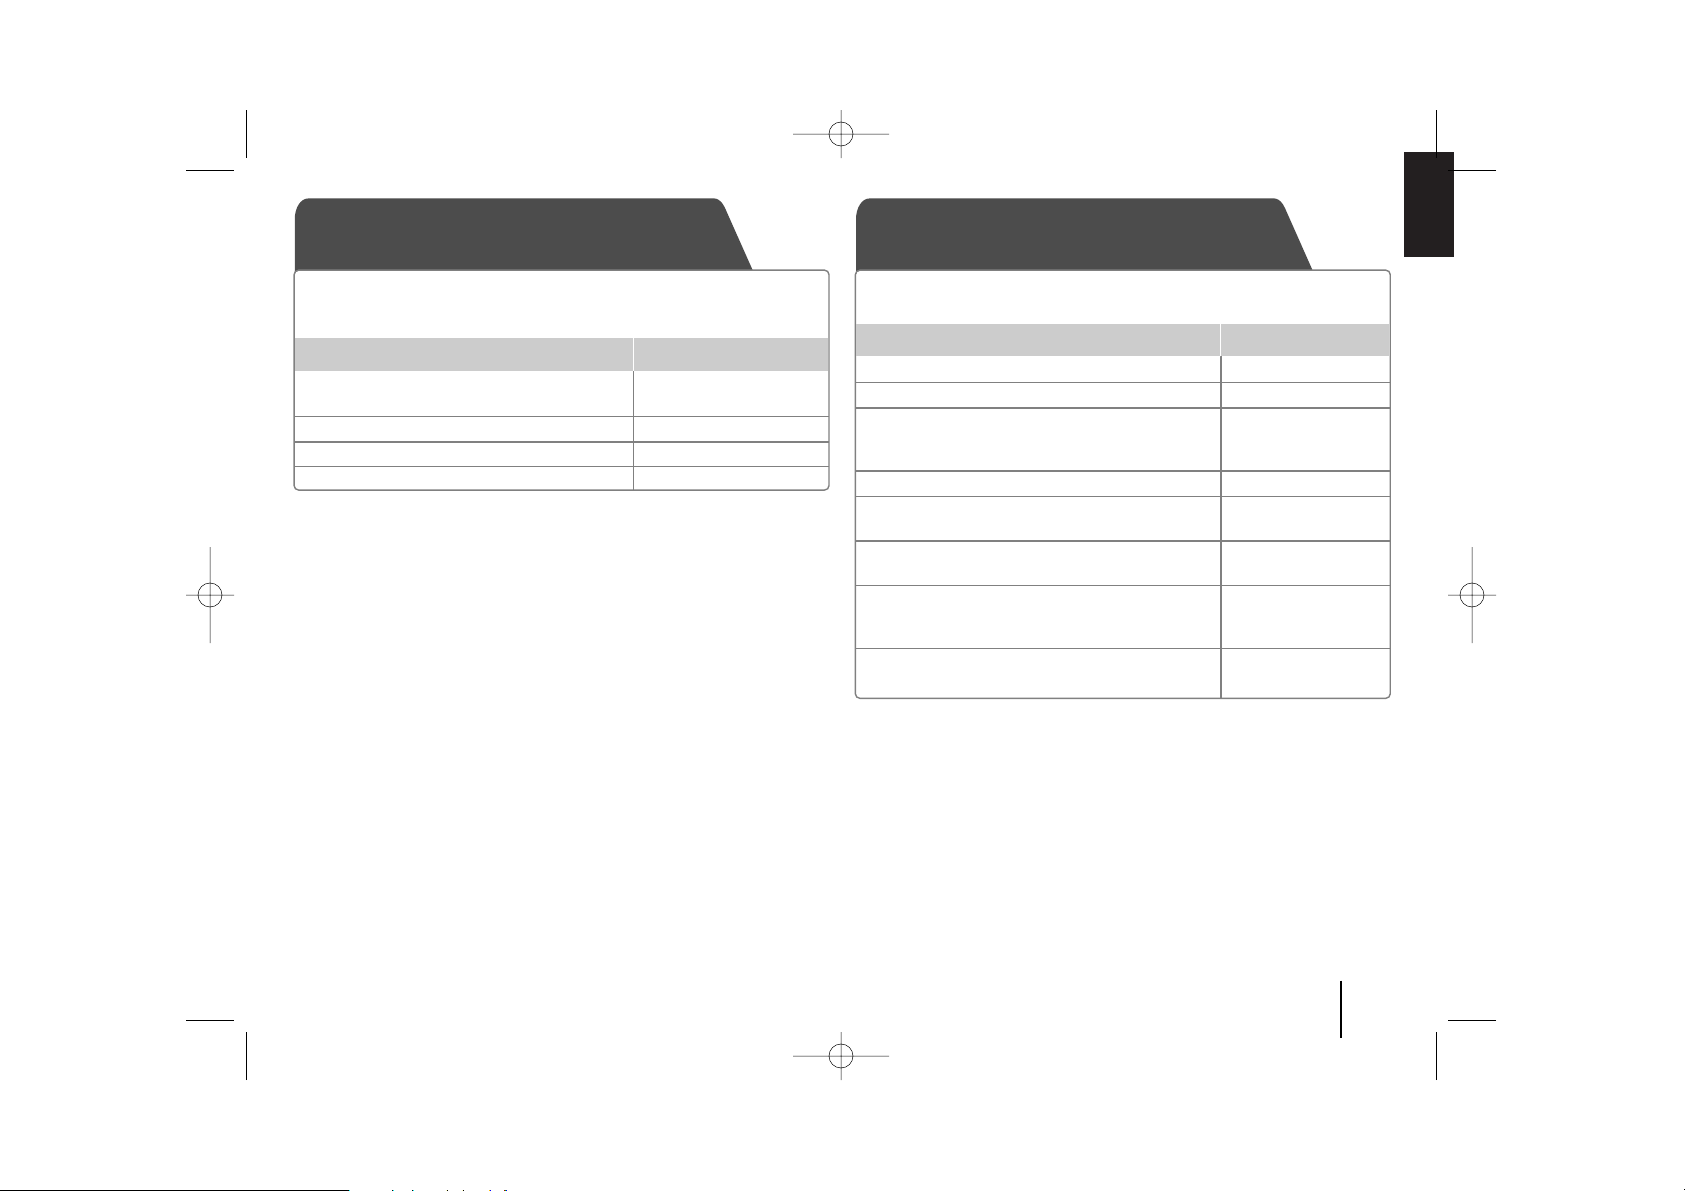
OSD initial language settings
- Optional
7
1Turn the power on POWER
The language list appears
2Select the language
II ii UU uu
3 Press ENTER
4To confirm press ENTER
During the first use of this unit, the initial language setup menu
appears on your TV screen. You must complete initial language
selection before using the unit.
ON REMOTE
Initial settings the Area Code
- Optional
1 Display setup menu SETUP
2 Select LOCK menu on the first level
UU uu
3 Move to second level
ii
The activated Area Code appears on the
second level.
4 Move to the third level
ii
5 Enter a new password Numeric (0-9)
and ENTER
6 Recheck the entered new password Numeric (0-9)
and ENTER
7 Select a code for a geographic area
UU uu II ii
After select, Rating and Password will be
activated.
8To confirm what you press ENTER
Make sure to finish setting the Area Code.
When you use this unit for the first time, you have to set the Area Code
as shown below.
ON REMOTE
FB164-D0P_DDEULL_ENG_5702 9/14/09 11:27 AM Page 7
 Loading...